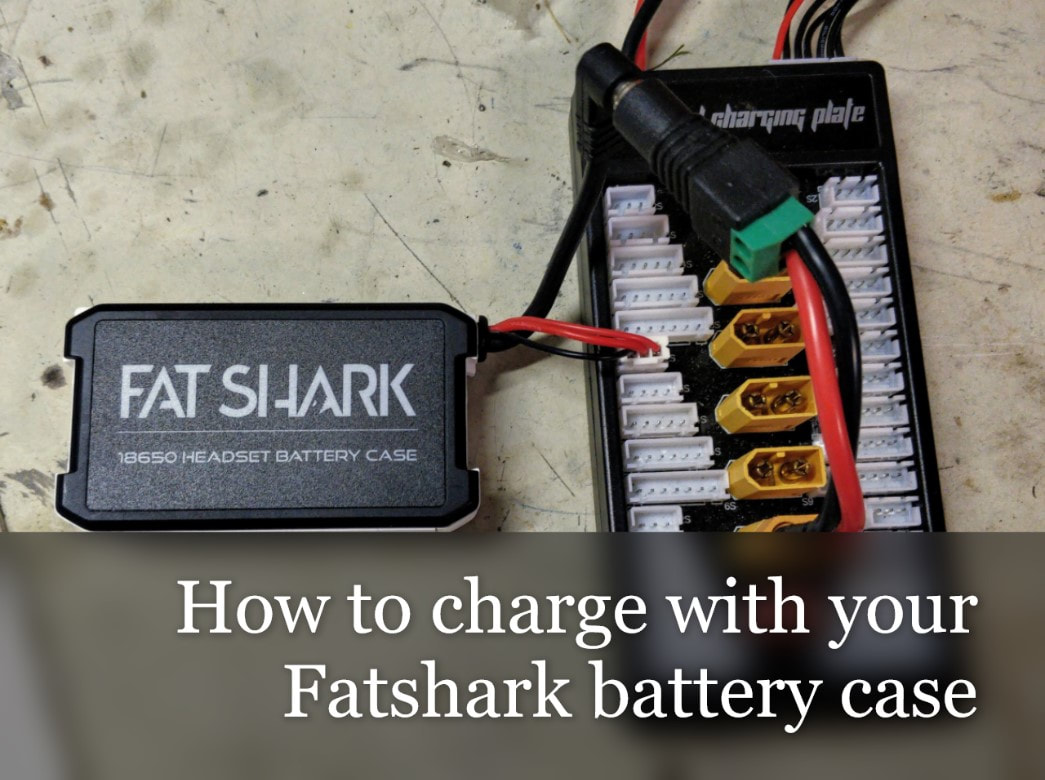
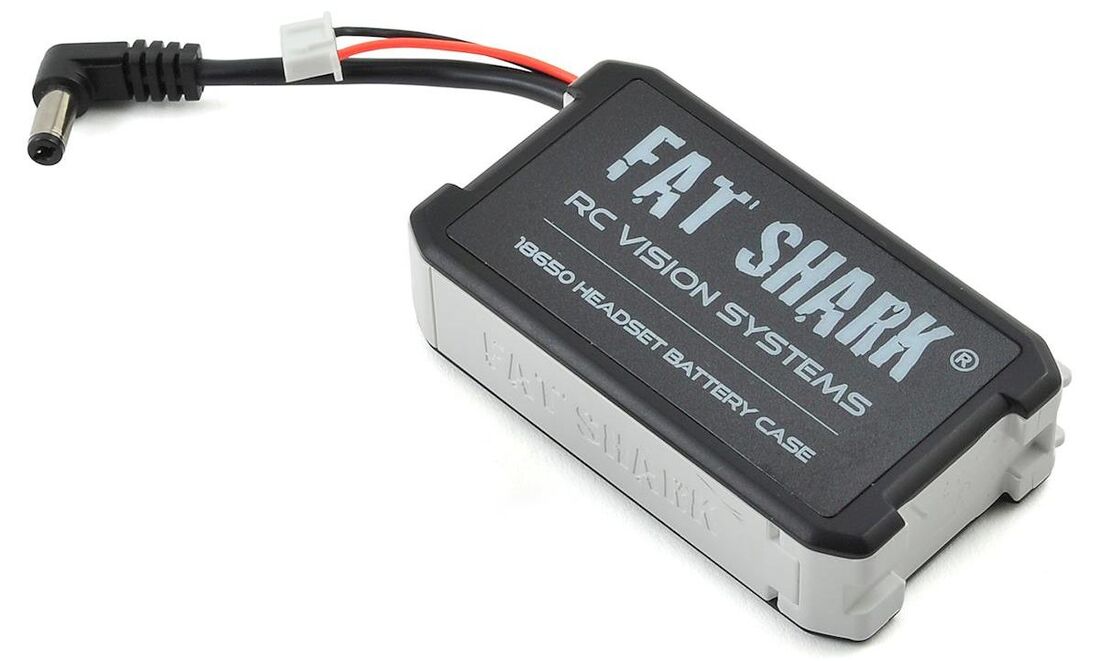
 Recently I made my biggest ever FPV purchase - the Fatshark attitude V5 FPV goggles with the new 30 degree FOV OLED screens. I'm still field testing these for a review which will follow but first I wanted to look at the battery case, more to the point, how to fix the shortcomings. 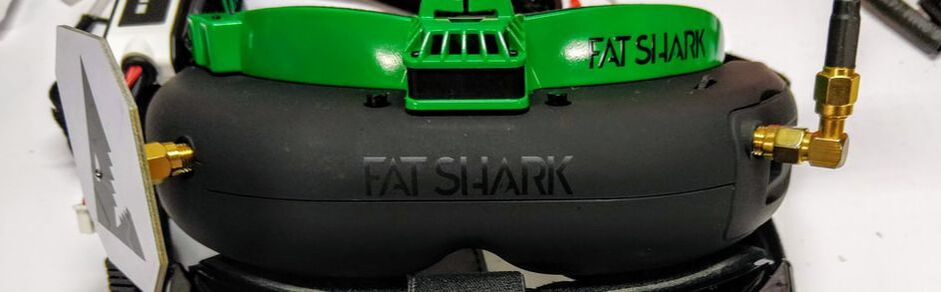
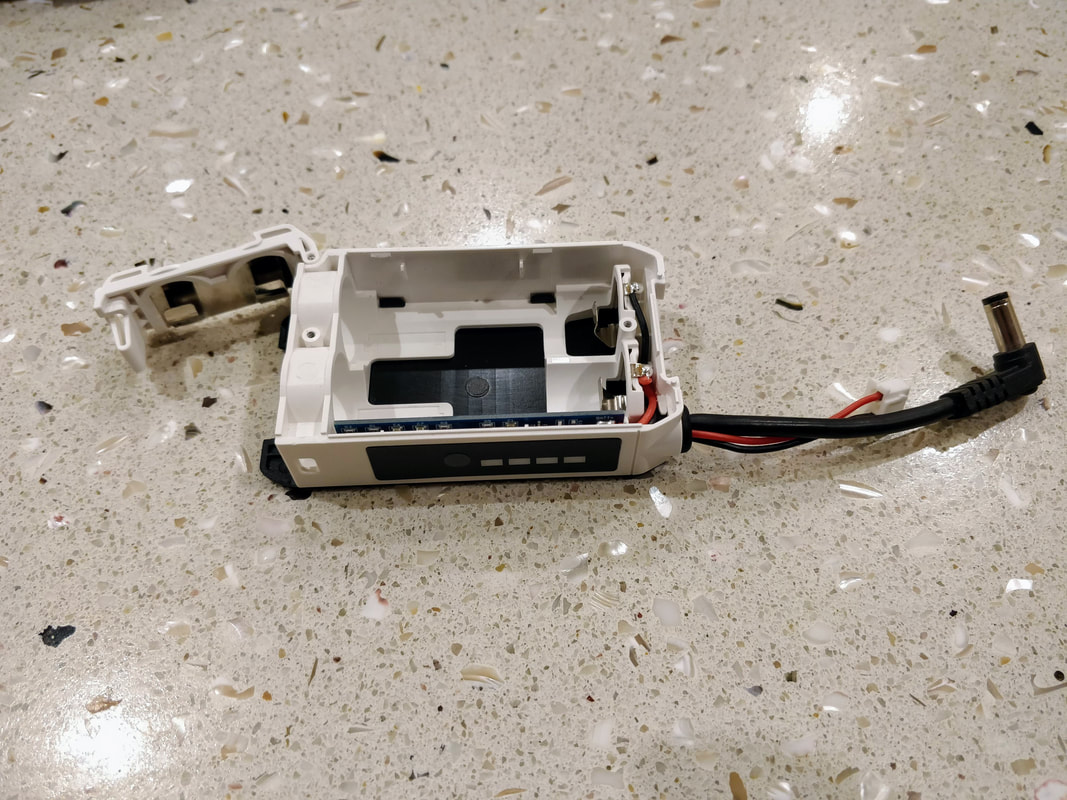
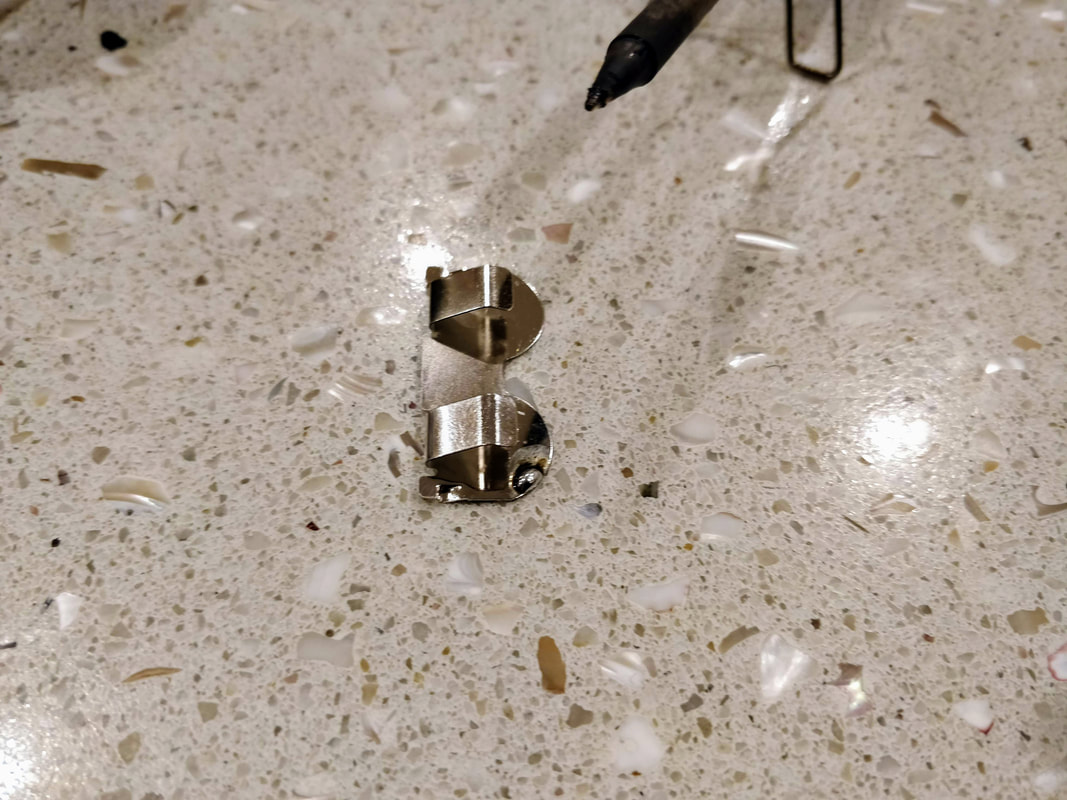
In this tutorial I rectify this issue by showing you how to safely open the case and mod it to allow for real balance charging whilst losing noe of the rest of the functionality. With this mode you do not need a special charger for 18650 cells, you can use your regular balance charger and charge your pack safely and efficiently. If you need batteries a local vape shop will probably have the best prices but if not then I used these 3000mah ones that have been rebranded. Tools needed
See below how to complete the work. This took me about 30 minutes. Most of the time was to figure out the best path for the wire and make the path for it accordingly. As always, pictures can be embiggened
4 Comments
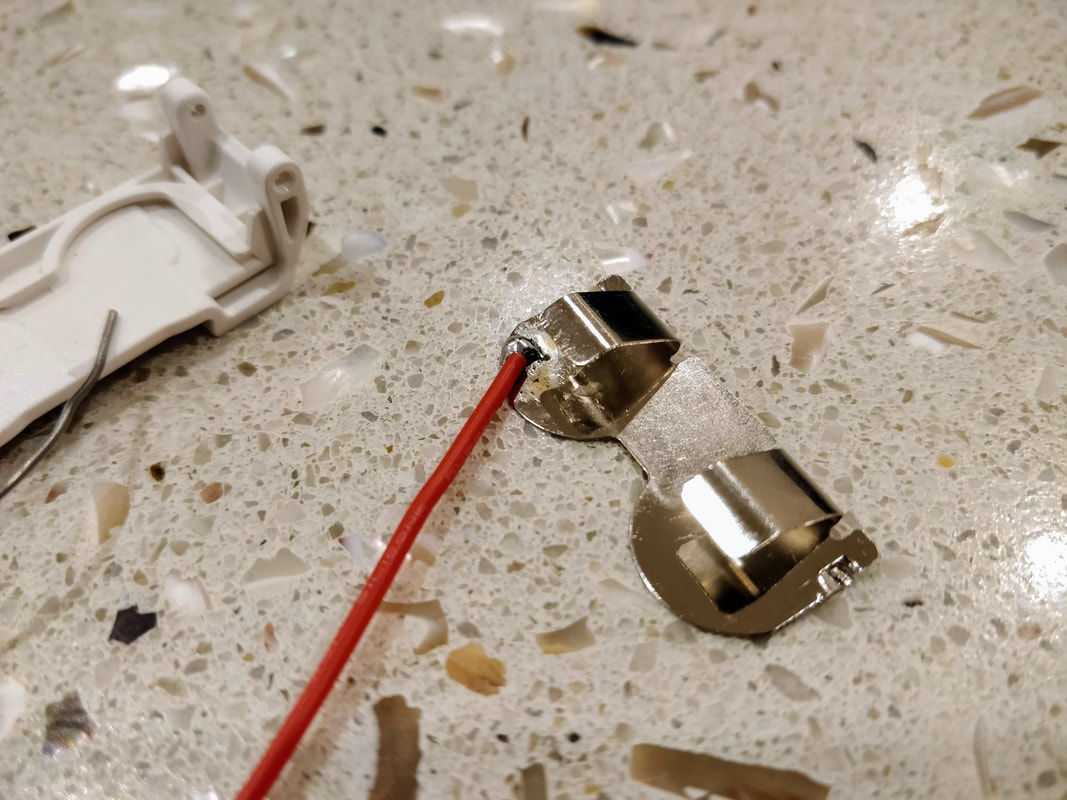
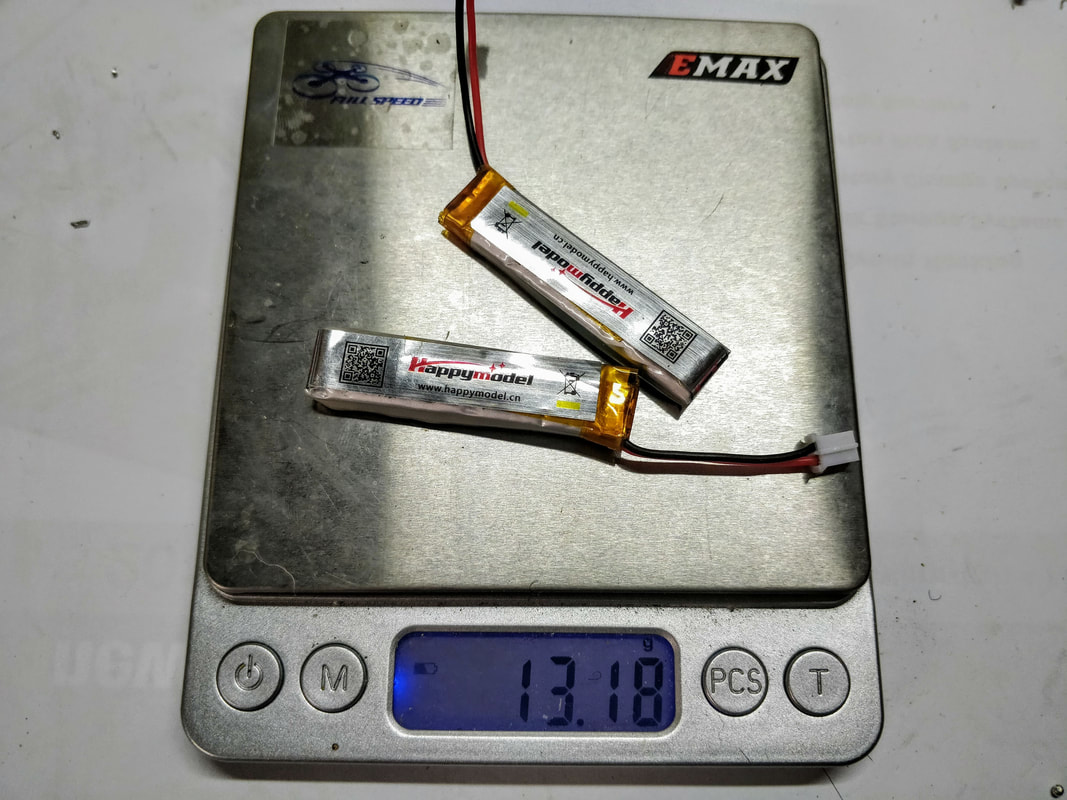
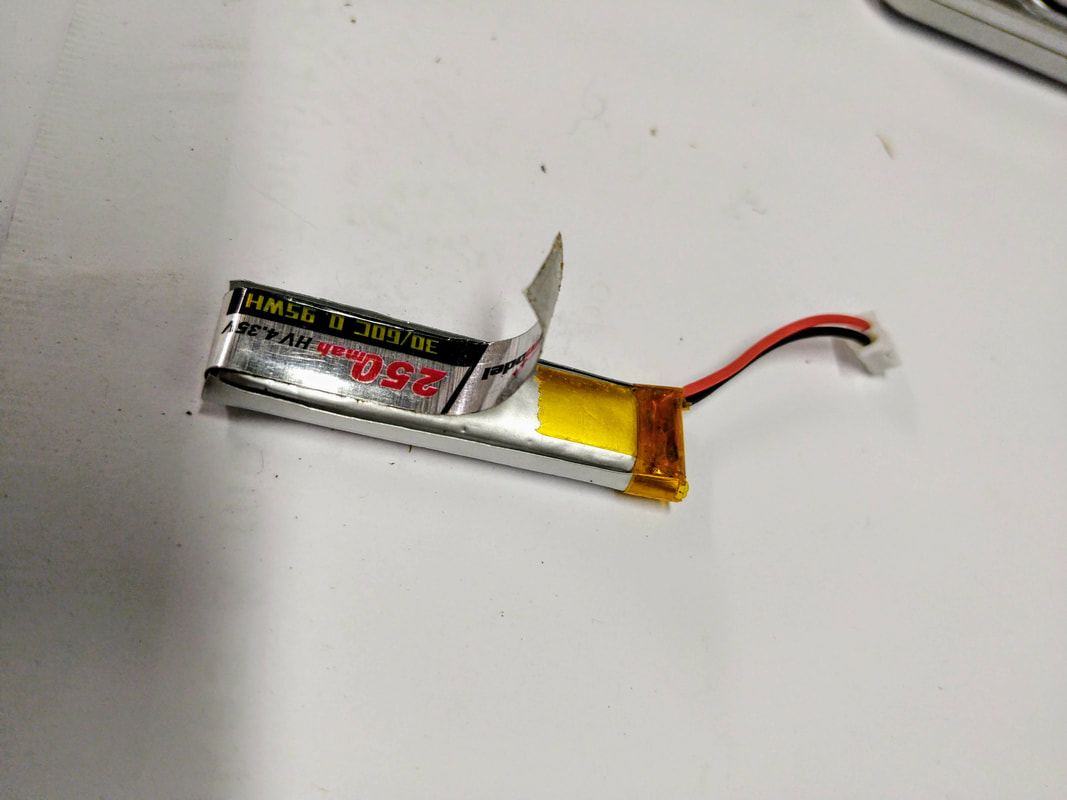
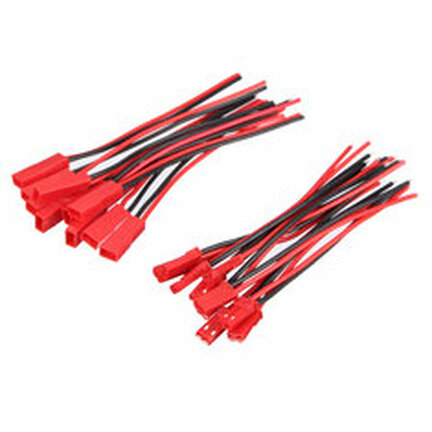
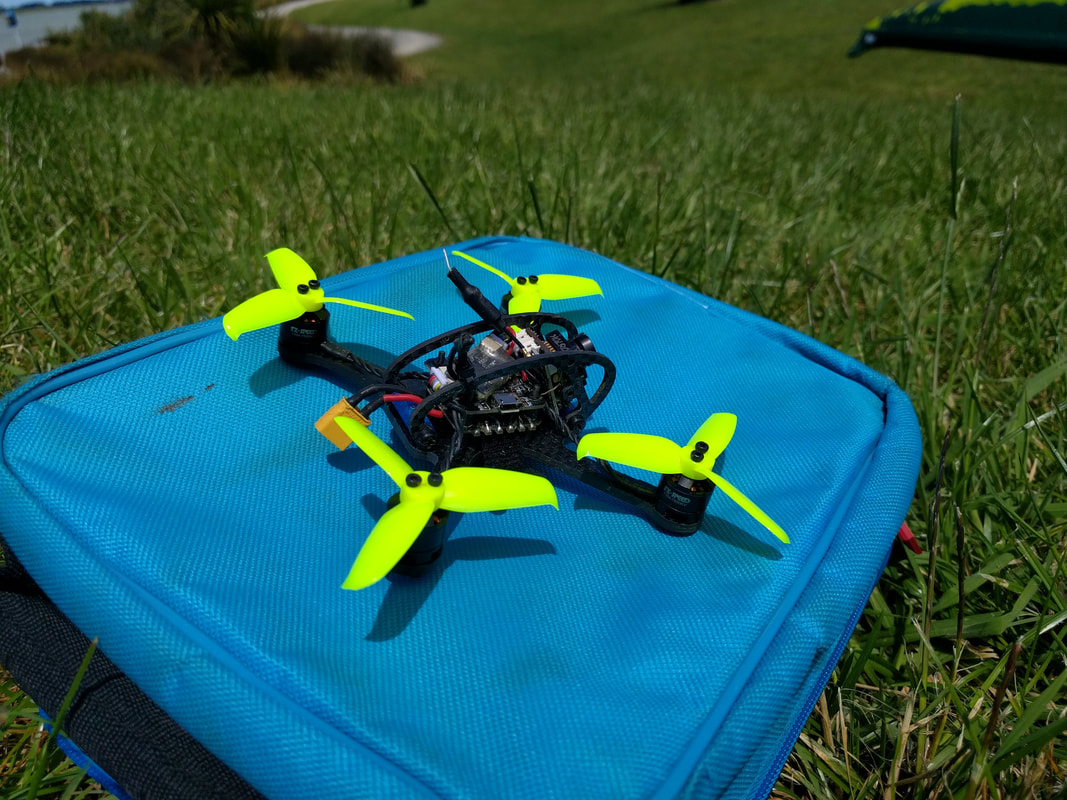
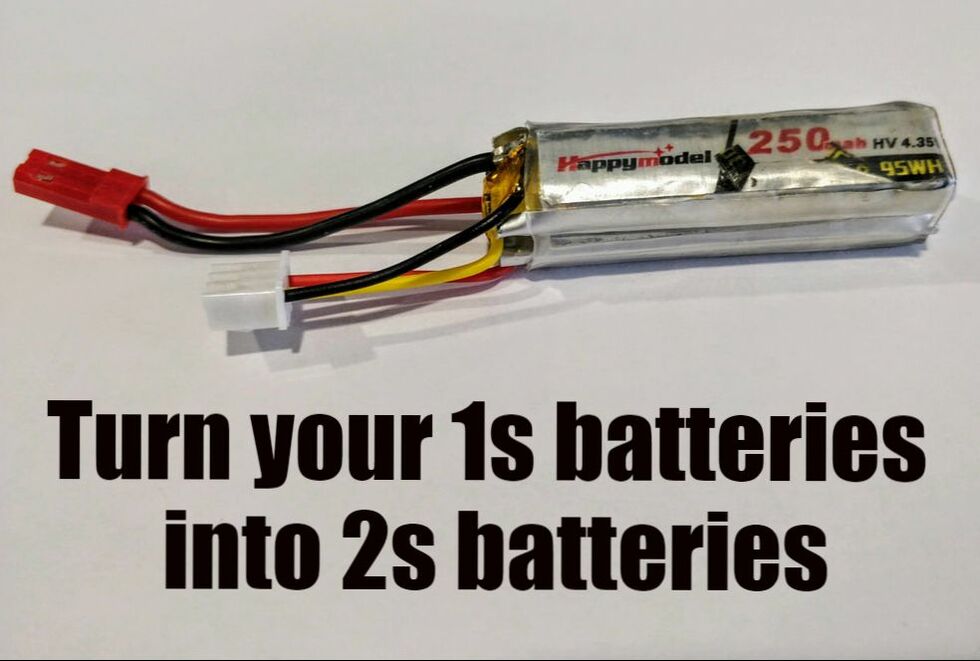 Both the Happymodel Mobula7 (review) and Eachine Trashcan (review) both come with 4 x 1s batteries that are designed to be used in series 2 at a time with a fiddly ph2.0 series connector. This introduces a lot of resistance in the power circuit and resultant voltage drop under load which shows as battery sag. It is easy to upgrade to a true 2s JST connector as I've shown in this blog or a XT30 if you'd prefer. Although 2s 300mah batteries are not expensive it does feel wasteful just leaving the old batteries to die. This article covers how to convert these or any other 1s cell into a 2s battery and is scaleable up to 6s! This is the fifth article in my series of HappyModel Mobula7 upgrades, many of which can be used for the Trashcan too. Also to come are:
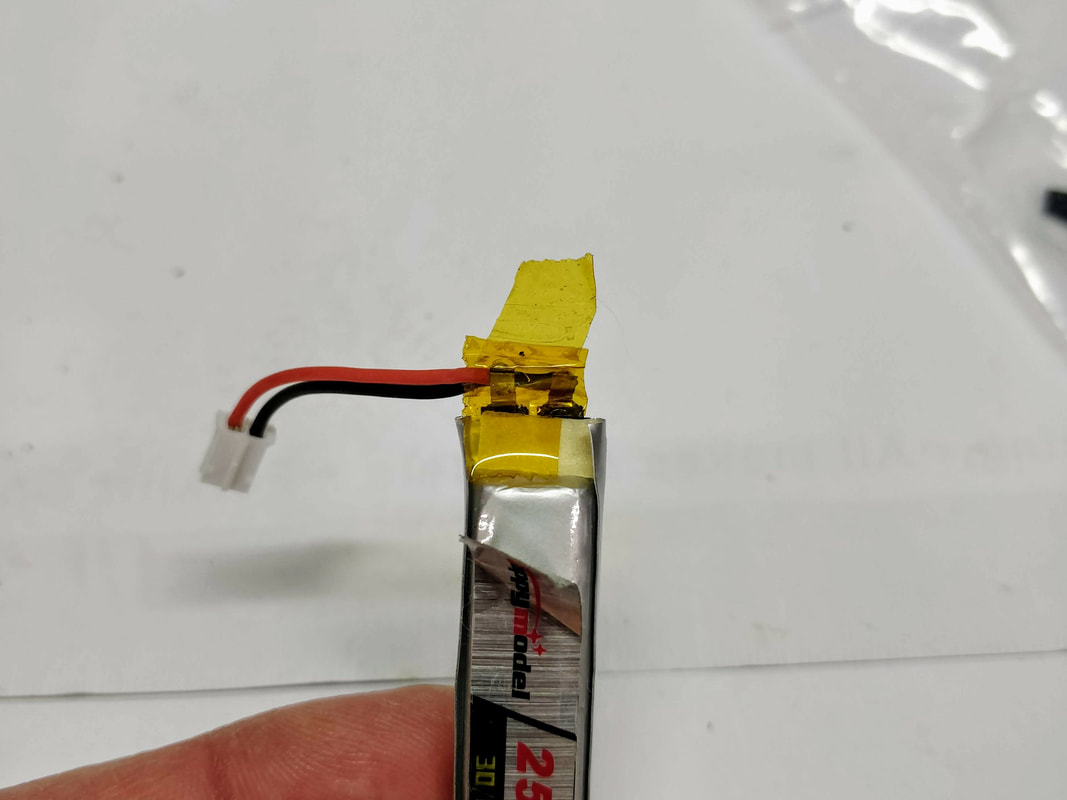
A Word of Warning Lipo batteries - even these tiny ones - have a lot of power. Anytime you modify you run the risk of rapid discharge (shorting) which generates heat and possible worse. Only do this mod if you are confident around electronics. Please wear eye protection at a minimum and work in a well lit space. Just go buy the 2s batteries if you are unsure at any point. Getting prepped As well as having a well lit area and a good soldering iron, solder and flux (see my article on budget tools here) you'll nee the following items:
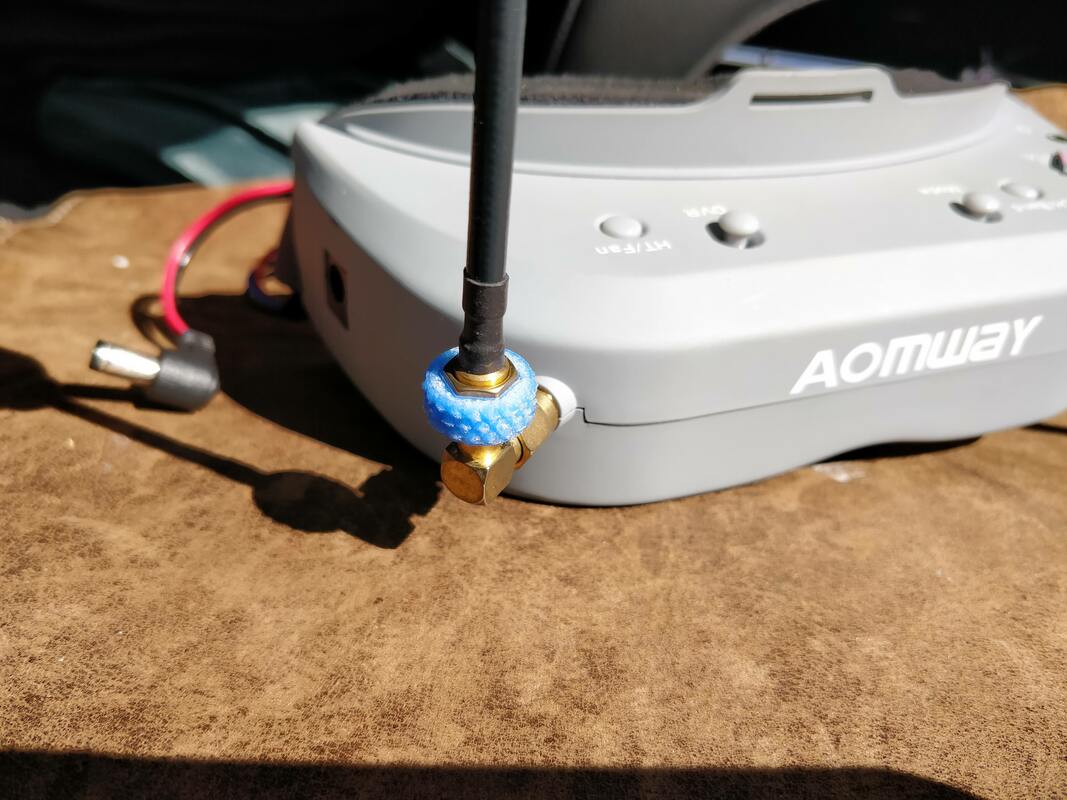
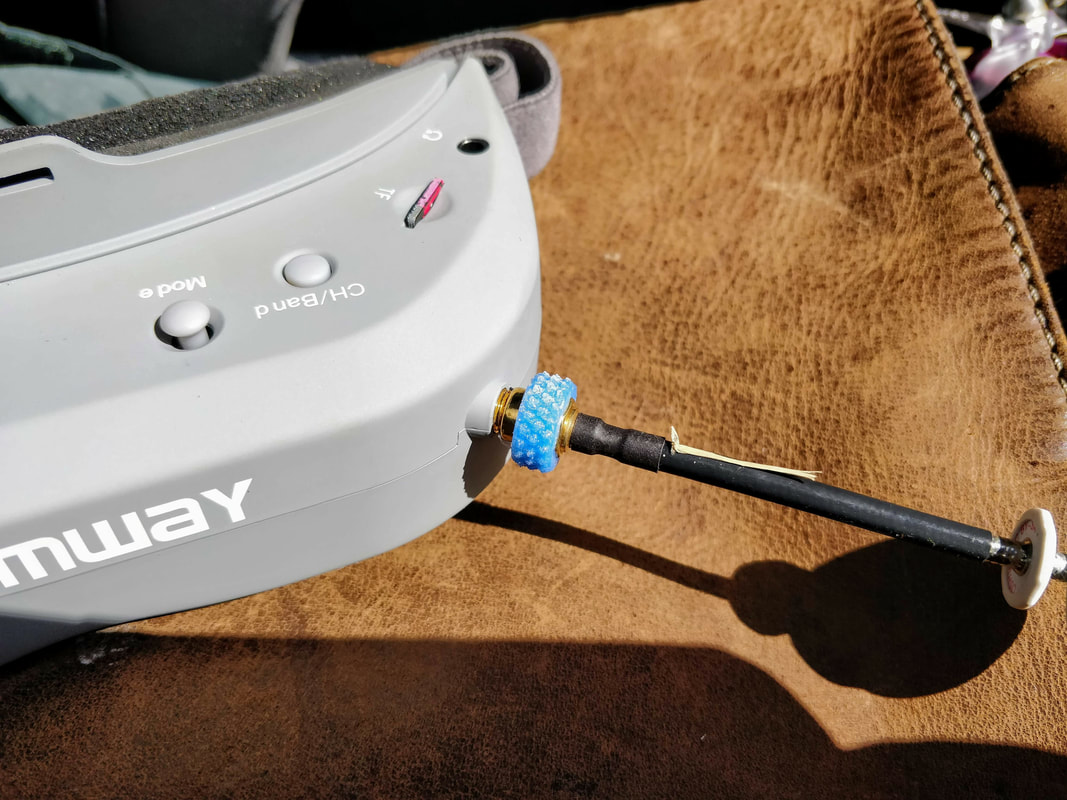
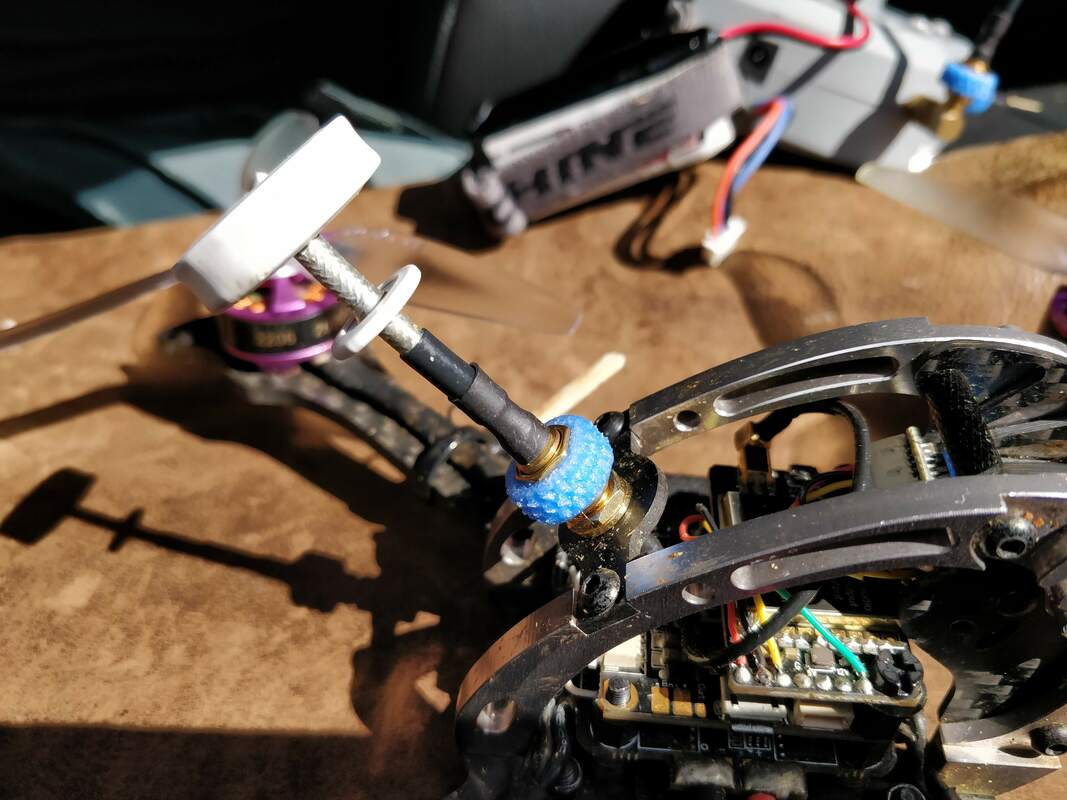
I promise I'll keep this one short. We are forever taking antennae on and off our quads and goggles as we arrive and leave our flight locations. I'm guilty of being too eager to get in the sky and not tightening my antennae correctly thereby leaving a poor connection to the active element on both the quad and goggle ends. Using a spanner is not a fix I'd recommend as it is easy to over-torque and damage the antenna or mount.
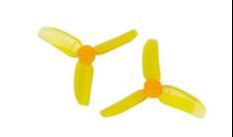
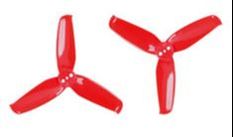
The fix here is really easy and I got the tip from my favourite VAS antennas which all include a plastic knurled grip (now I know why). Using a knurled grip that sits over the hexagonal drive on an SMA-style connecter allows you to get a better grip and more torque on tightening whilst avoiding over torquing as above. To put this another way - using these grips allows you to get the right tightness every time - good for the best connection and it will also help them coming loose in flight.  Tinyhawk fitted with the new 4-bladed props Tinyhawk fitted with the new 4-bladed props Introduction
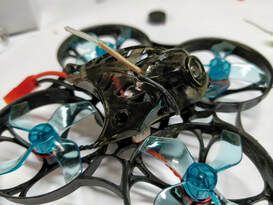
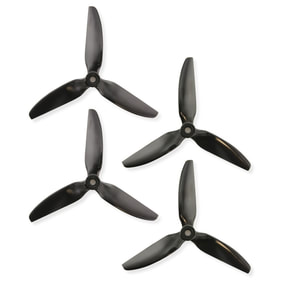
The Emax Tinyhawk is a 1s brushless whoop-style quadcopter that has steadily grown on me since I first reviewed it here. It's certainly not the fastest but is probably the most well designed ducted quad available at present. It comes stock with very good 3-bladed emax props that perform well except that lack thrust when running in reverse meaning "turtle mode" does not work. I've installed and reviewed their new 4-bladed props where turtle mode works and how they perform in general. 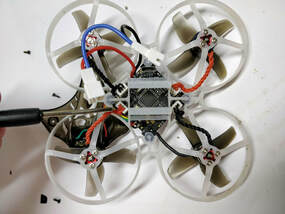 Reversing the rotation of all of your propellers (known as 'props out') is something you commonly do on larger quads to eliminate debris bring flung into your FPV camera and to push obstacles like branches clear. Obviously these don't apply when the props are gaurded like in a Mobula 7 but there is also a hypothesis out there that it can improve flight characteristics such as note on KababFPV's video here. Some of the beta fpv guys also believe it helps with yaw washout but the evidence appears inconclusive. Typically to do this correctly you need to
This is the fourth article in my series of HappyModel Mobula7 upgrades, many of which can be used for the Trashcan too. Also to come are:
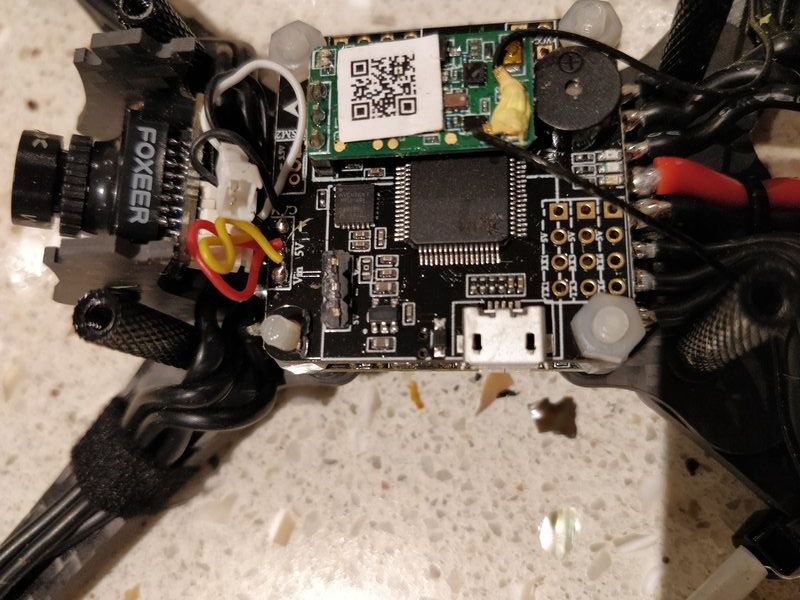
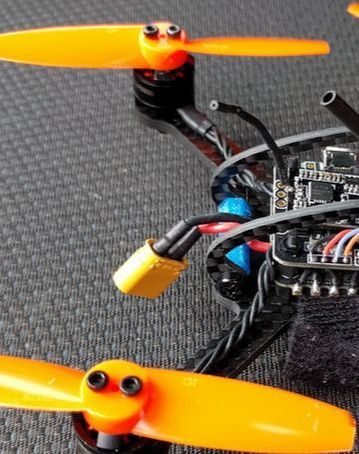
 This mobula 7 is getting more and more upgraded This mobula 7 is getting more and more upgraded Introduction The crazybee F3 and F4 series of all in one boards that are the heart of the mobula7, m7hd, eachine trashcan, snapper7, ur65, uk/us65 and even beta75pro2 are an amazing piece of technology that incorporates a flight controller, 4xBL_HeliS ESCs and a receiver. Cramming all of this on one board does mean some compromises though and the biggest one for me is the poor receiver range. This brief article will show how to get a minor improvement with zero investment. Note: this mod is relevant for all the models listed above. This is the third article in my series of HappyModel Mobula7 upgrades, many of which can be used for the Trashcan too. Also to come are:
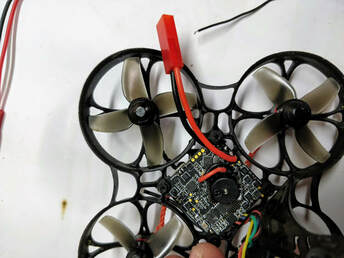 Introduction In order to run 2s, the Mobula 7 comes standard with 2 x PH2.0 connectors that allow you to run 2 x 1s batteries in series. When running in series the strength of the connection is determined by the weakest link in that circuit. The strength of connection determines the maximum current that can pass and the voltage drop that results. Although it works this system has a very low current overhead from a design perspective - 2 x budget PH2.0 connectors with the dreaded 'folded' pin and very lightweight 26AWG wire. All this adds up to a lot of voltage drop when even reasonable current is pulled - something all will be familiar with on the mobula where you see voltage drop to scary levels (6v and below) during punches even when you have a full battery. Although it recovers almost immediately it does mean you don't get access to the battery's full voltage potential. This is the second article in my series of HappyModel Mobula7 upgrades, many of which can be used for the Trashcan too. Also to come are:
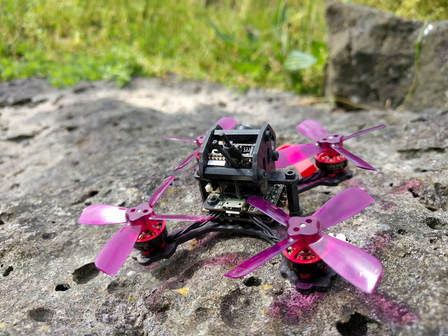
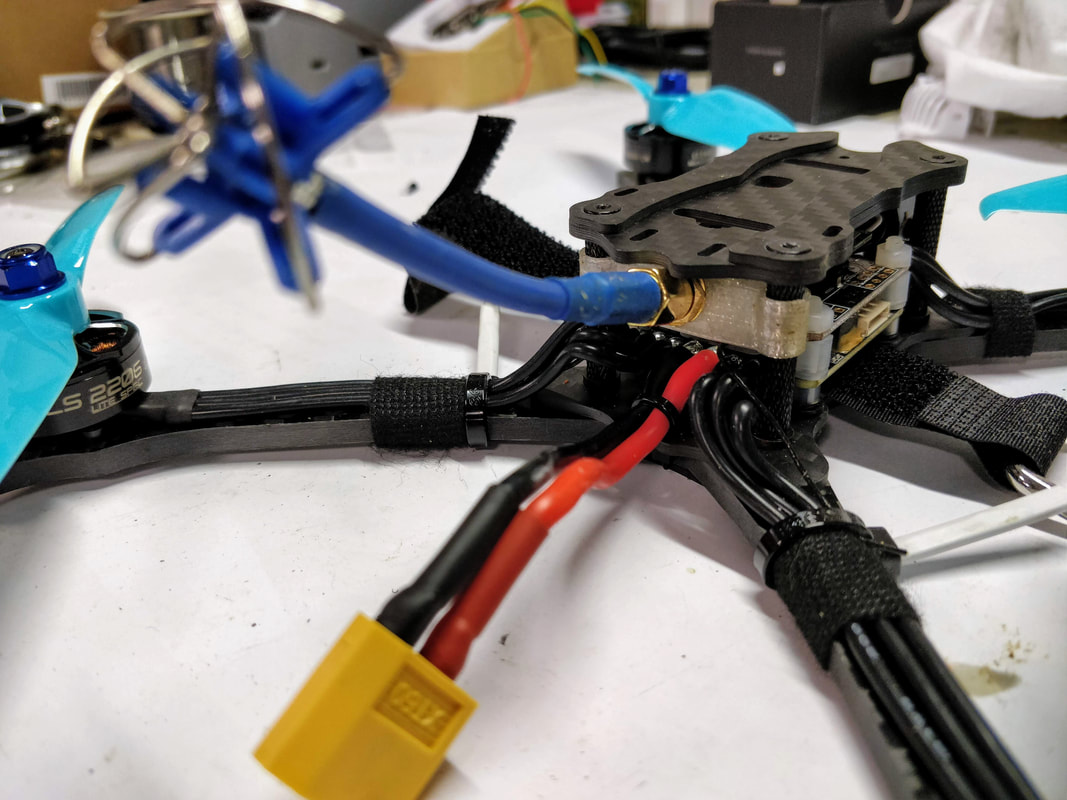
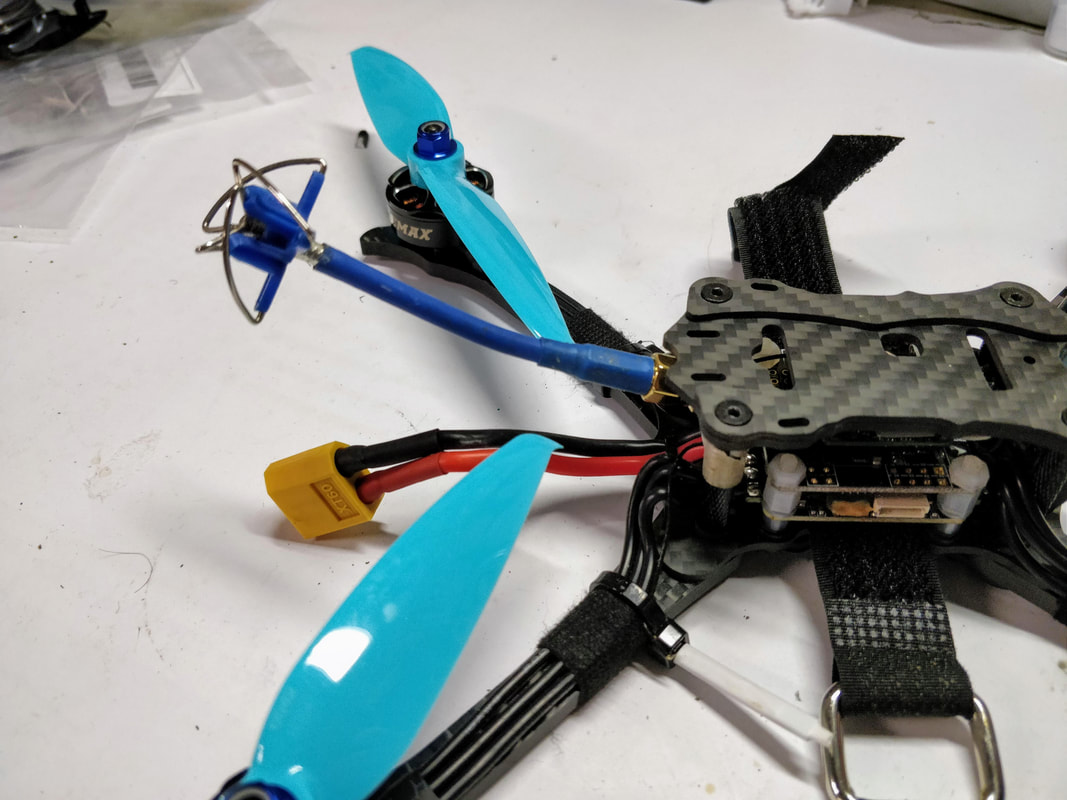
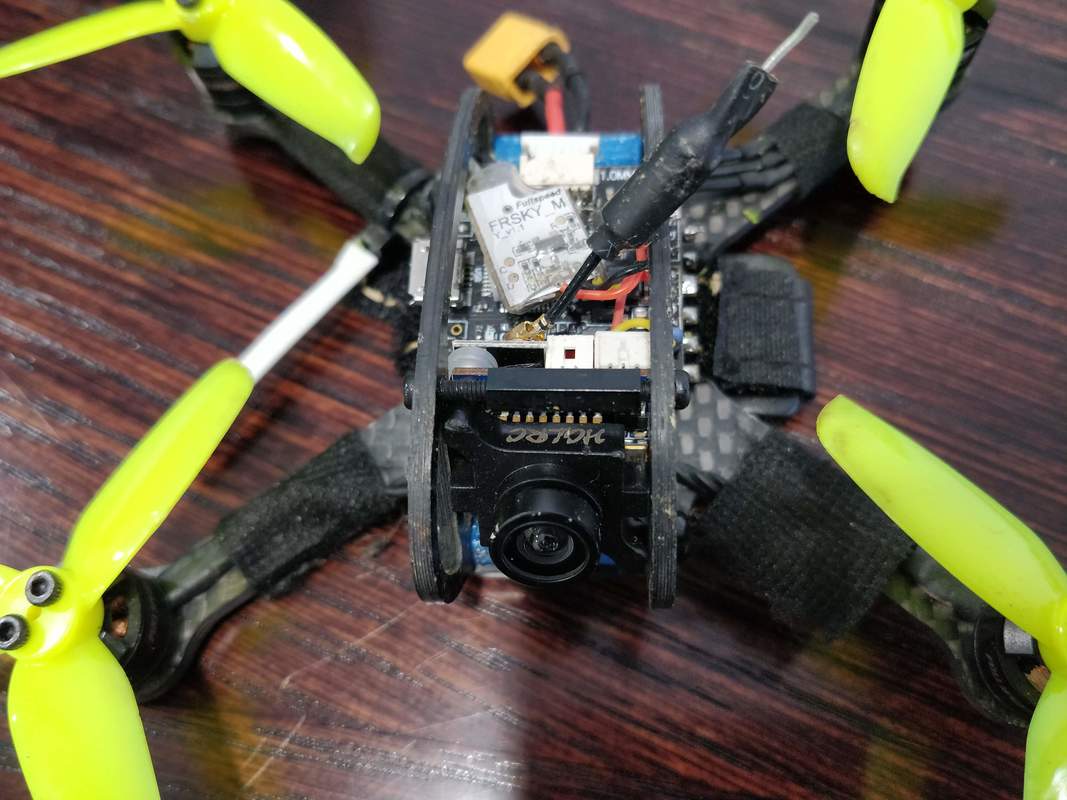
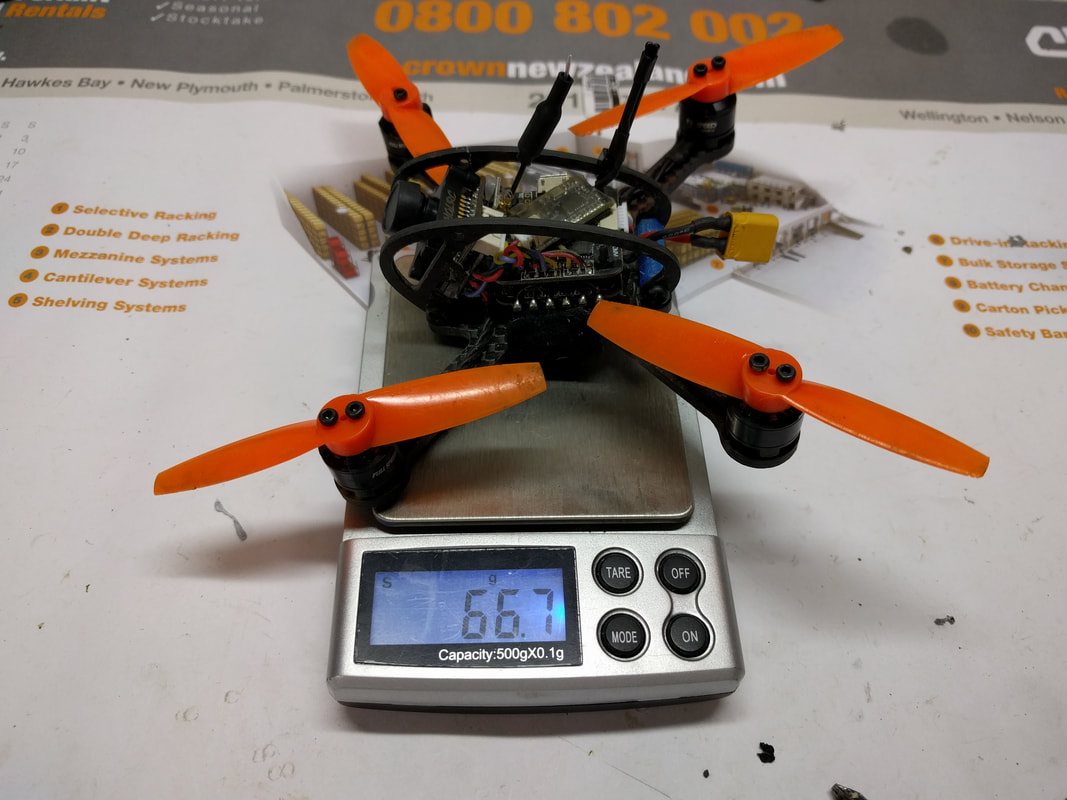
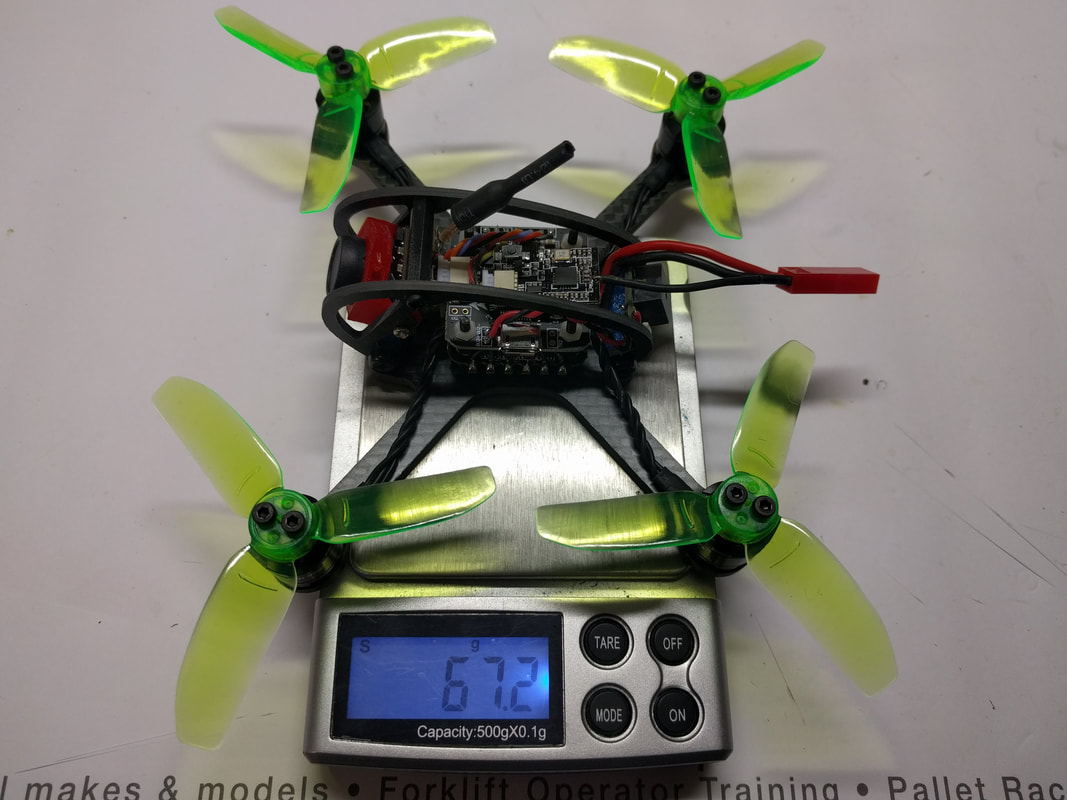
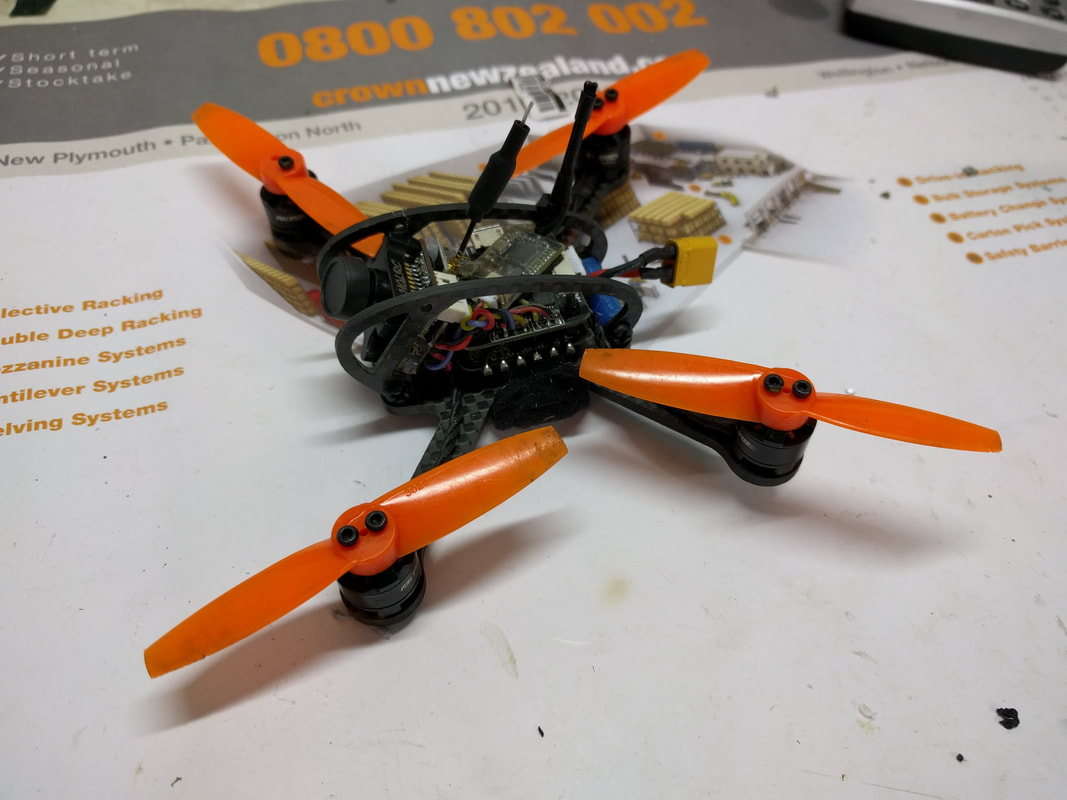
 I did a thing. After reviewing the new FullSpeed TinyLeader 2s-3s brushless whoop (review here) I learnt to fly around the heavier weight which has come about because of it's larger motors and better FPV system. I still think that 1103 motors like on the TinyLeader and Beta75x are better suited to a lightweight 2" propeller like my ultralight build here rather than the 40mm props (1.6") as we see so commonly on the brushless whoops now. I decided to put my money where my mouth is so to speak and prove it rather than just hypothesing.
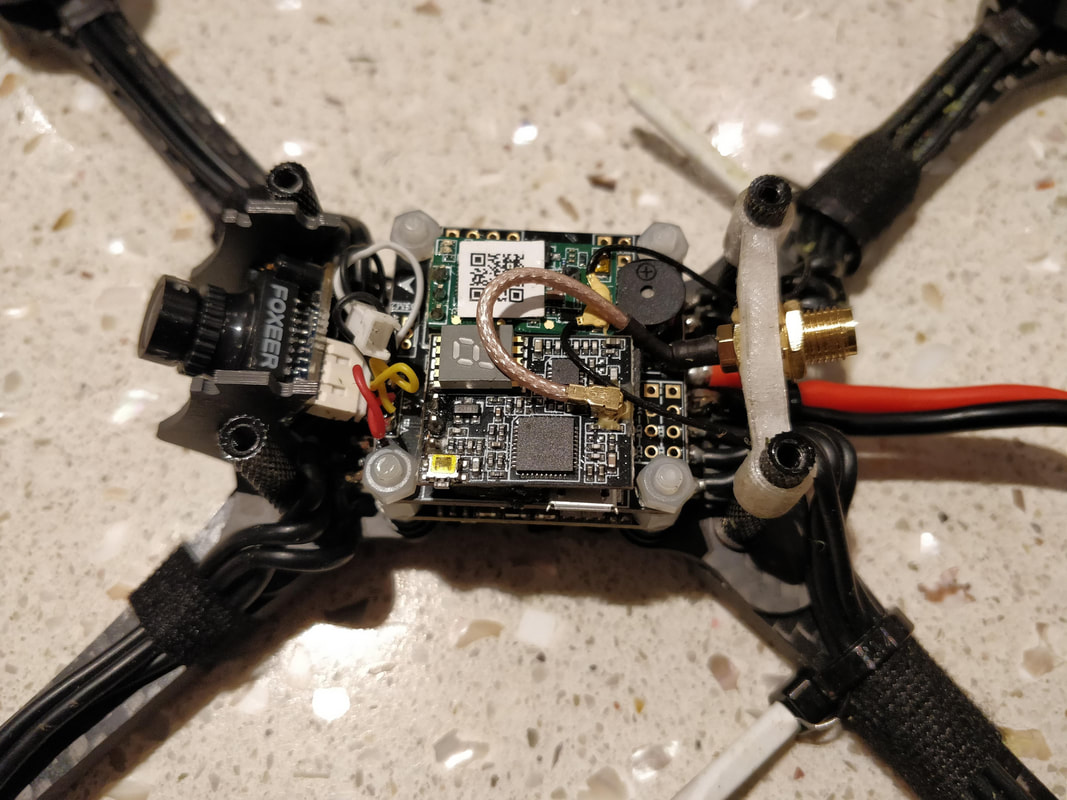
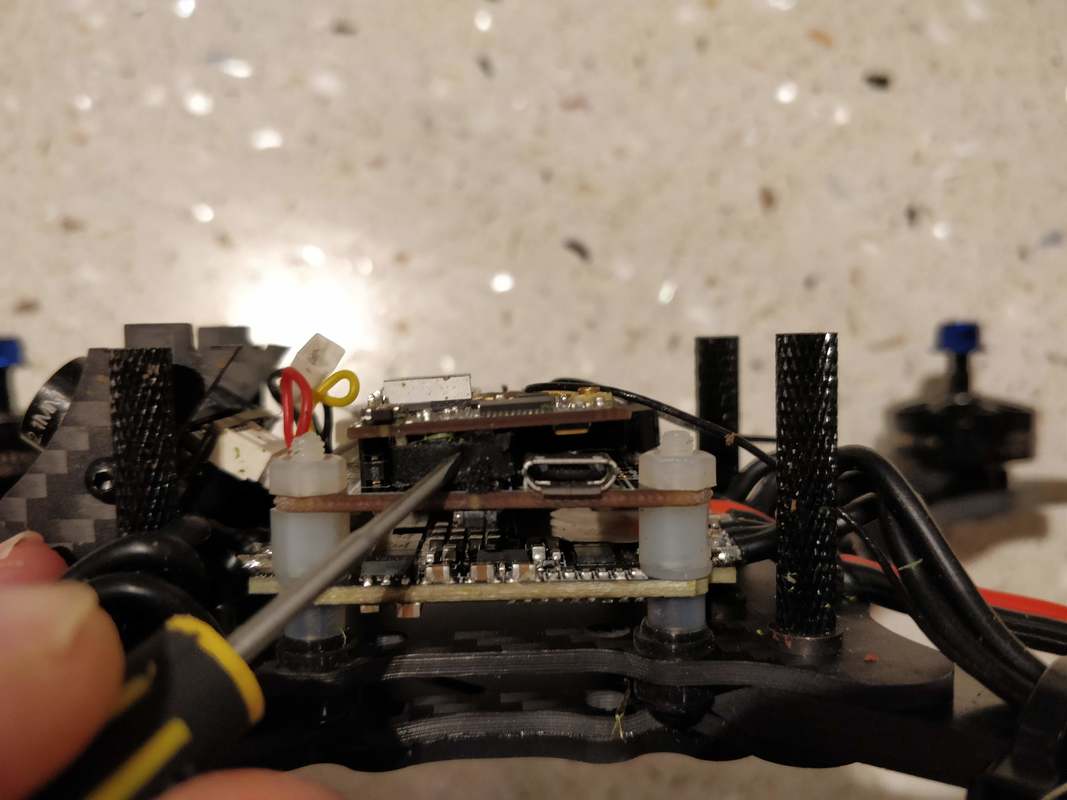
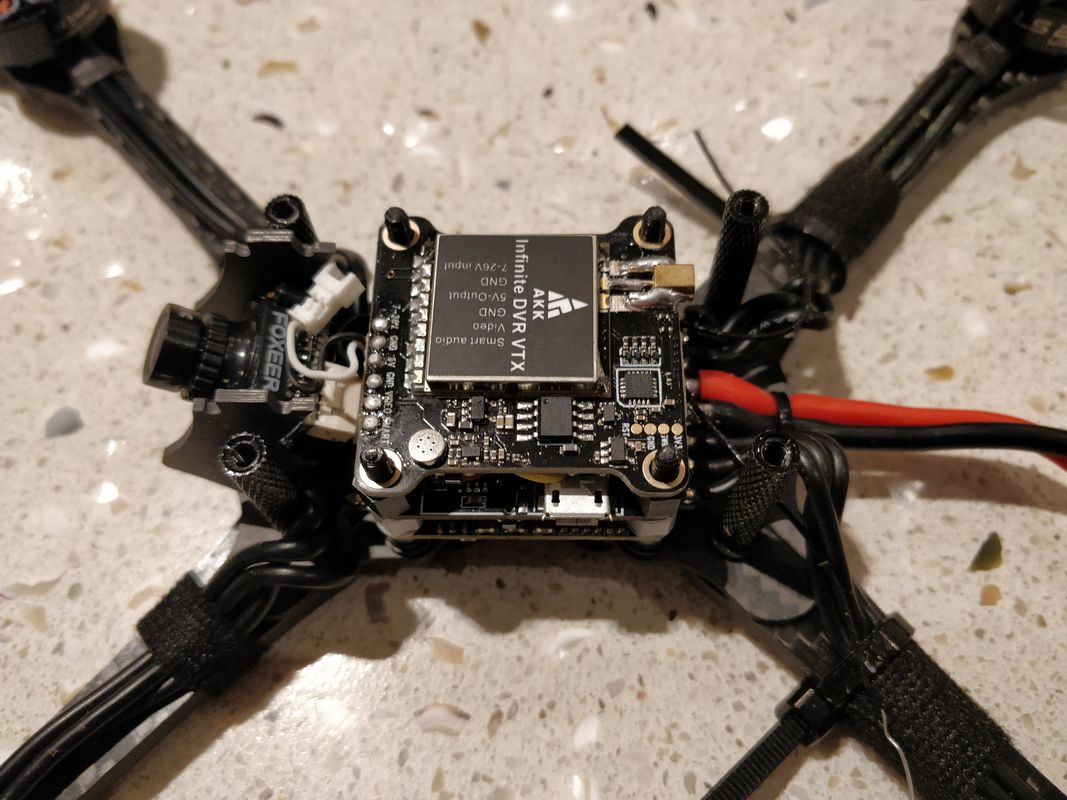 Sneak peak of the finished product Sneak peak of the finished product The Emax Hawk 5 is arguably the best bind and fly quadcopter going as I found in my initial review but can also be greatly improved with a few budget modifications as I wrote about in my blog on bang for buck improvements. I do however see a number of people complain about the stock Emax Hawk 5 vtx however mine has been functioning well. That being said, you cannot adjust setting in betaflight OSD via smart audio or tramp telemetry which is a let down on a 2018 quad. In the interest of sharing I've removed the stock VTX and replaced with one of the larger VTXs currently available (the AKK Infinite VTX/DVR) to prove it can be done. 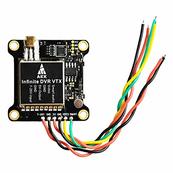 The VTX I chose for this project is the AKK Infinite which incorportates a DVR into the VTX The VTX I chose for this project is the AKK Infinite which incorportates a DVR into the VTX The VTX The VTX I chose is the AKK Infinity DVR VTX. This is very similar to the HGLRC VTX/DVR that was reviewed here. As the name suggests this is a smart audio VTX in 30.5mm VTX with a built in DVR. I chose those for 2 reasons: First it's big. If I can fit this in you can fit anything! Secondly I like the DVR for recording breakup-free footage. For me I like the nimbleness of the Hawk 5 and don't want to weigh it down with a HD Cam. Other key features of the VTX/DVR:
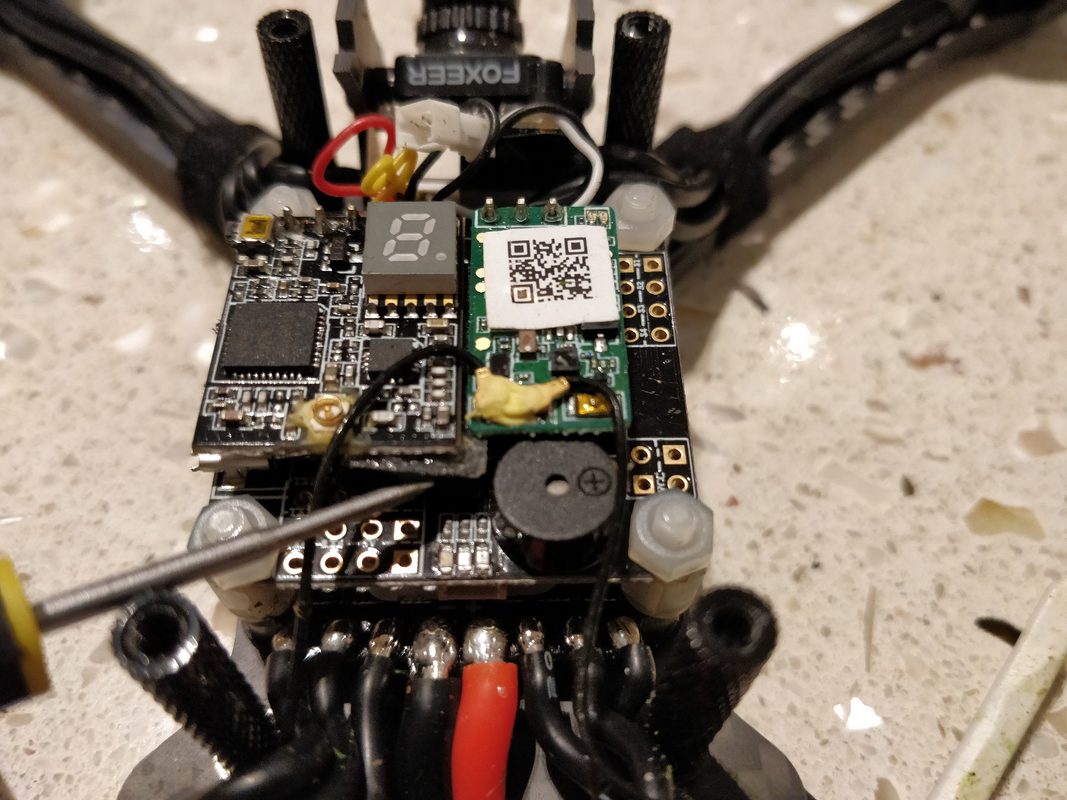
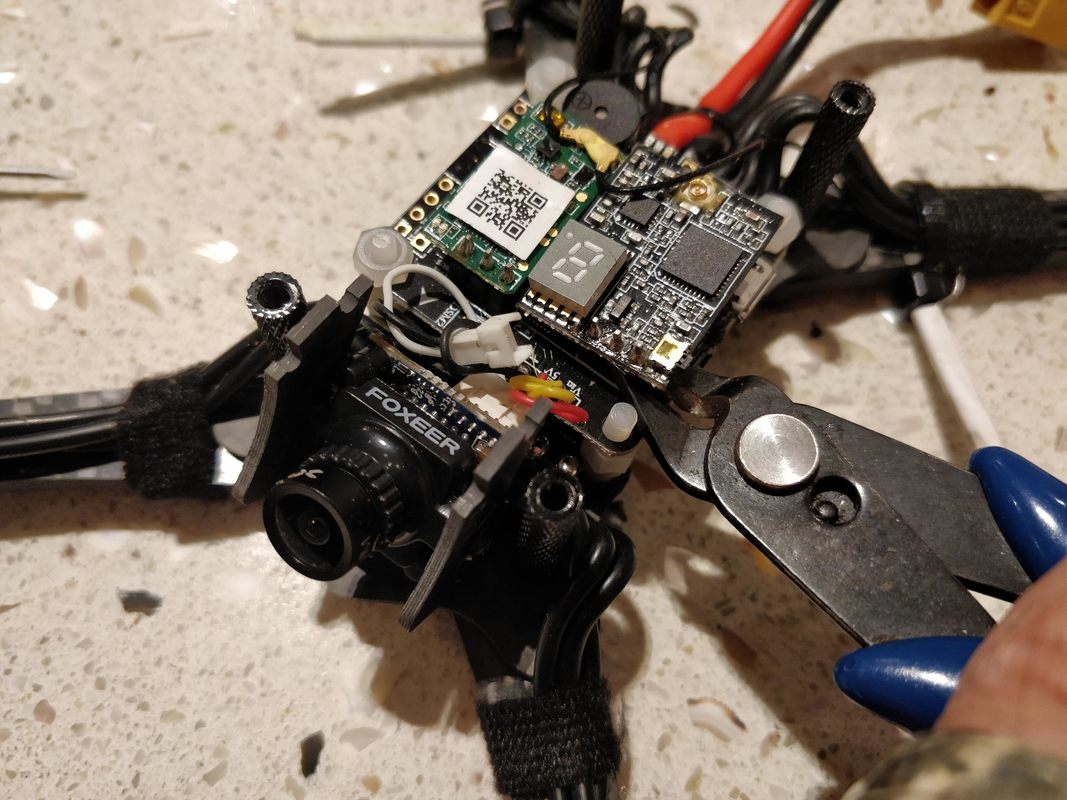
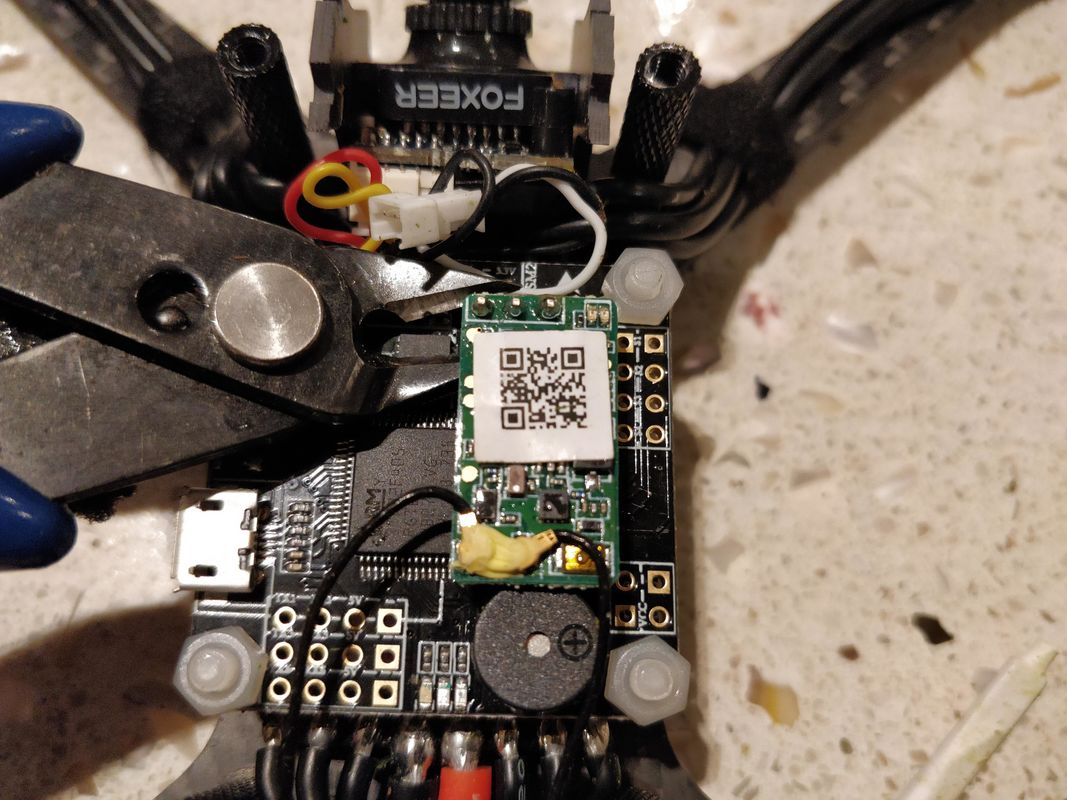
Other parts Just quickly I used the following tools and parts in the instructions below: The install Please note all the pictures below relate to the install of the AKK Infinite but install should be identical or at least nearly the same for others. I had to remove the buzzer and relocate the receiver for this VTX but depending on the size of the VTX you install you may need to do only one or neither. Follow picture left to right then down. All pictures will enlarge if you click on them.
Update! I've just finished writing an extremely detailed walkthrough about how to upgrade the VTX - full blog here 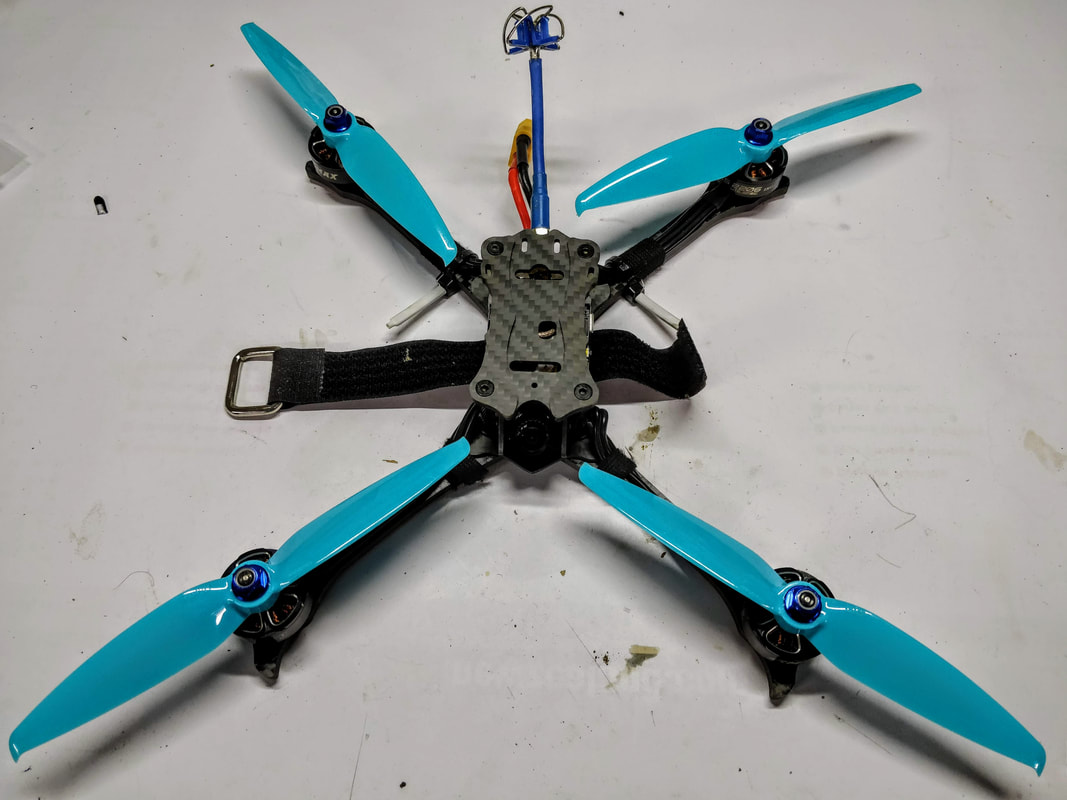 The Hawk 5 ready to fly 5" quadcopter has been out for several months now and has been a real hit for Emax - so much so that it is only widely available from a stock perspective now. I have one which I've reviewed (here) and can quite easily say it is the most well-balanced and complete bind and fly quadcopter I've come across. Gearbest and Banggood currently have this is on special for $209 and $229 respectively (check out my discount page here) My real life work means I'm always looking to improve on systems and it's no different for my quad obsession. So I've made a list of my favourite 'improvements' or probably more accurately personalisations as these are more about changing the feel of the quad to suit my taste rather than the basic operation. I'll also cover off the things I haven't touched because I've not yet thought of a better alternative. 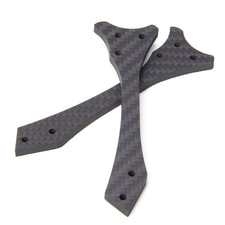 Emax Hawk 5, 6 inch arms Emax Hawk 5, 6 inch arms 6 inch arms The 6 inch arms are available as a direct uprgrade from Emax rather than a third party offering. All four can be had for less than $20 so it's fair to say Emax is looking to expand their ecosystem rather than profit of these in particular. They are very easy to fit since the frame uses captive nuts and arm retention hardware is independent to the stack mounting hardware. This means you can change the arms without pulling anything apart. Arms are sold in pairs and are presently in stock at Banggood for $8.99 per pair.  You can see the 5 inch arm overlaid on the new 6 inch ones You can see the 5 inch arm overlaid on the new 6 inch ones The new arms will push the motors out by 15mm in each direction and the good news is EMax allowed for enough slack in the motor wires so they they don't need to be extended - making the whole process VERY simple. To start I flew with 5" props on the new 6" arms and was suprised to find how much more stable it was in regular flight. I've found examples where several pilots prefer 5" props on a 6" quad for a more stable HD platform (e.g. Gapit) or for improvements to a racing rig (Serge from Piroflip noted that his son Dolma FPV runs a 6" frame with 5" props. KababFPV who works with Piroflip has suggested this is likely due to the lesser amound of turbelent air to each prop given the additional spacing. One potential down size is the additional width but in reality this is only an extra 9mm wide on either side. Theory aside I really liked the feel of stability. The next obvious advantage this gives is the ability to physically use a 6" prop. In most circumstances you'd need to revisit your motor choice (stator size and/or kV) but in this circumstance the seemingly low kV that Emax chose (2300kV) and and reasonable stator size (2206) means that it can swing a 6" prop on 4s with no issue. I chose to use the Gemfan 6042 bi-blade but have heard good things about the 6" LR Avan prop too. Since the quad is light and the 6" adds so much prop area, they have more than enough grip - much more than a 5" tri blade... feels like they stop on a dime. There are a number of good 3 blade 6" props available now from Dalprop and HQ but I feel the extra weight these add is unnecessary because it will take away from the response of the 'just big enough' 2206 motor. In the air hover is achieved on a much lower throttle as is everything else. Most flying is done at low to mid and the sense of control is strong. Full throttle draws a LOT of current: 135A on 6042 vs about 90A on the HQ 5x4.8x3. High throttle is less about more thrust and more about current draw suggesting the motor has probably hit its limit. This would be a great candidate for scaled throttle reduction in betaflight 3.4.0 onwards as per my setup guide. That being said the thrust is immense for such a light quad and actual battery life was somewhat similar to 5" props but so much more variable - it will be way more efficient than 5" at light throttle but way more inefficient at heavy throttle. For the cost of the arms and props and ease of install I'd definitely recommend giving it a try. The video below shows my first flight on 6" props, please turn the sound down. punch outs at 0:23 and 0:40.
 HQ 5 x 4.8 x 3 V1s propellers HQ 5 x 4.8 x 3 V1s propellers Changing the props I love the idea that Emax created the 5" Avan Flow around the Emax LS2206 motor on the Hawk 5 but I just don't like the feel. Don't get me wrong, I love the idea that the weight is kept close to the hub and that it is durable and well balanced but just don't like the way it delivers power. To me the HQ props feel much more familiar and I've found the 5x4.8x3 V1s with it's relatively steep pitch is a good match for the LS2206 2300kV stock on the Hawk 5. The other thing I prefer over the V1s design is efficieny. Top speed 'feels' similar but maximum current draw is only 90A on the HQ 5x4.8x3 but 110A on the Avan Flow using my best batteries. Plenty more props for me to try including the HQ 5.1x5x3 but at this stage I'm really pleased with the 5x4.8x3 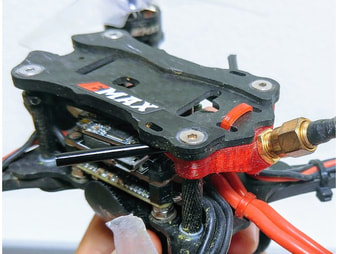 Image from Thingiverse - click to follow Image from Thingiverse - click to follow Antenna mounting I find the video transimission surprisingly good on the Hawk 5 but the antenna solution is a let down. Dipoles are fine for flying alone but the Hawk 5 one is not secure. I did the cable tie/heatshrink trick to secure but still lost it after and upside down landing anyway. I wasn't bothered though, because my race club doesn't allow dipoles as a vtx antenna because of the increased likelihood of bleed over to other channels. Emax were good enough to include a UFL to SMA cable and 2 x excellent Emax Pagoda LHCP antenna but recommend a rubbish way of mounting them with cable ties that is just not secure and risks the antenna getting caught in spinning props. The best solution in my opinion is a 3d printed one. I don't own a 3d printer but a service like 3d hubs means I can download an appropriate file from Thingiverse and have it printed and delivered to me - it was only about $5 for 2 printed mounts. Here is the design I recommend since it elegantly incporated and SMA VTX antenna mount and receiver antenna mount using forever tubes. I had a 3d printed mount from an old floss 2 frame and found the standoff spacing is identical (31mm) so have just used this for now. Here is the link for that design. It's a tidy solution that keeps the antenna safely away from the props and allows a good and for a racing quad that is commonly tilted forward fairly heavily.
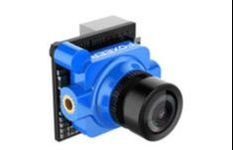
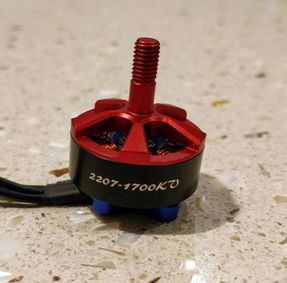 I used the HobbyCool 2207 1700kV on my 6s race build I used the HobbyCool 2207 1700kV on my 6s race build What I haven't changed: Motors. Many (including myself) questioned the choice of 2206 2300kV motors when Emax had the 2207 mid-high kV variants available. I no longer question the stator size or kV as I think both are an excellent match for this quad - the 2206 is plenty for a lightweight build and the 2300kV offers great efficiency and flexibilty as per 6" props whilst still being suprisingly powerful. The only change I would make is going to lower kV IF I decided to run 6s which this stack is apparently capable of - Conrad Miller (Furadi) is an EMax team pilot and has run 6s on a magnum stack with a 1700kV motor. If I did go for a low kV motor the standout option for price/performance in my opinion is a Brother Hobby Returner R3 2207 1700kV which is only $15 under the HobbyCool Logo. I've used these on my 6s race build (blog here) and they are super nice. 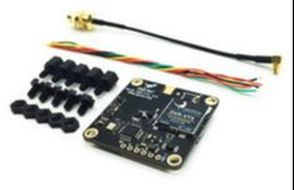 THe HGLRC AIO VTX DVR is an excellent VTX than incorporates a DVR in a single layer 30.5mm board THe HGLRC AIO VTX DVR is an excellent VTX than incorporates a DVR in a single layer 30.5mm board VTX. The included VTX is limited to 200mW and has no smart audio. Many users have reported poor performance or reliability problems although I have found signal and reliability to be just fine. If it were to die I'd probably install the AKK infinity VTX DVR combo or HGLRC AIO VTX DVR (reviewed here). The stock Hawk 5 is too light to carry an HD cam so an onboard DVR would be a satifactory backup. Given the current VTX shares a stack layer with the XM+ receiver this would need rewiring and I can't bring myself to do this on a receiver that is currently working well for me. 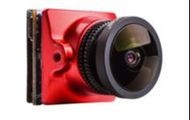 The Runcam Micro Eagle is the only camera I'd choose about the Foxeer Micro Arrow Pro The Runcam Micro Eagle is the only camera I'd choose about the Foxeer Micro Arrow Pro Camera. The Foxeer Micro Arrow Pro as on the Hawk 5 is hands down my favourite budget camera. It gives consistent performance regardless of sunny or overcast day unlike many of the new CMOS cameras. An exception to this is the Micro Eagle which is the best camera (IMO) period. It's not cheap though so I can't justify replacing the Arrow pro but this is the only camera I'd uprade to. Conclusion
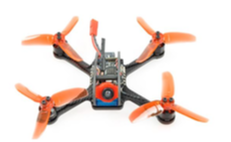
All of the mods I've included here change the feel of the quad except for the VTX antenna mount which is a MUST HAVE in my opinion. I do like the longer arms with the HQ props and this is what I've settled on but this is a feel thing more than anything else and was not expensive so, why not?! I'll only replace the cam and VTX if mine break down. If I break motors I'll replace like for like unless I change the whole fleet to 6s which is presently unlikely. Please feel free to browse the rest of my site, I now have almost 100 reviews and tips/tricks blogs as well as a regularly updated specials and discounts page. 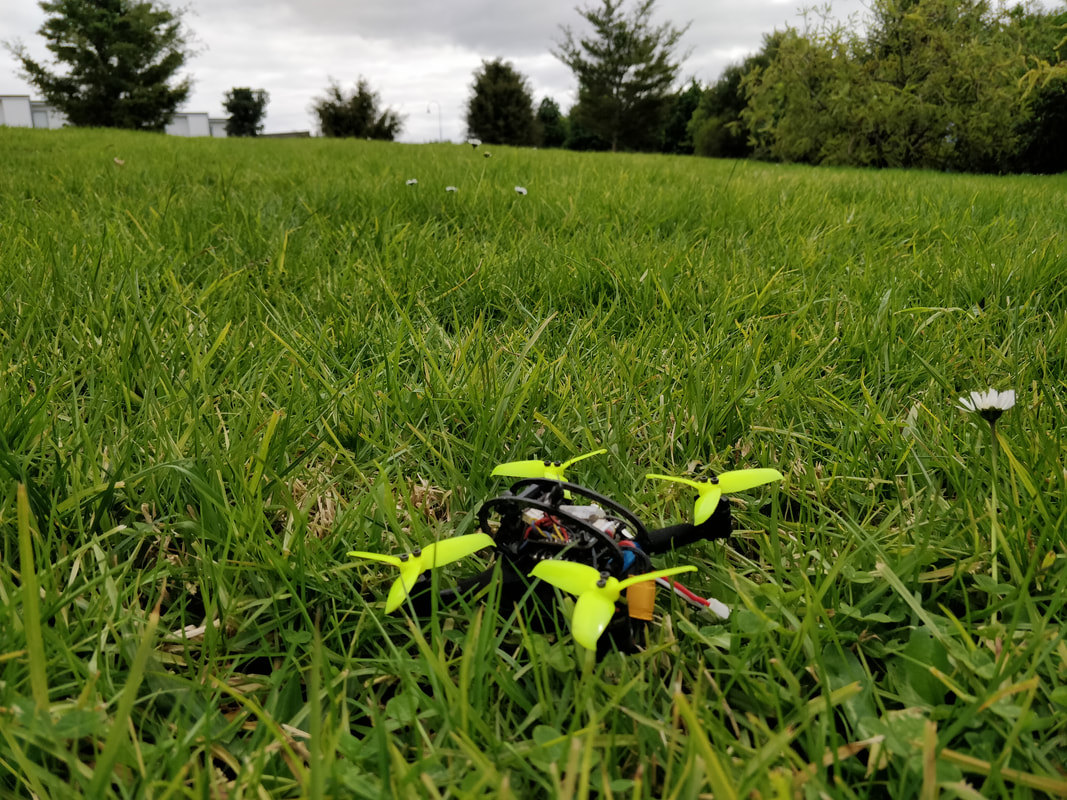 The ultimate park quad? The ultimate park quad? I've now had my FullSpeed RC Leader 120 for 1 year and have completed a bench review and flight review. After hundreds packs and many replacement props I thought it would be good to look back at what I've changed to keep this up to date and fun because at it's core, the Leader 120 is still an excellent quad and sits in a class of it's own as a ready to fly 2.5 inch quadcopter. The core of the quadcopter remains the same - original ESC, original flight controller, original 1104 7500kv motors. The bearings on the motors are a little noisy now but no detriment to flight. especially with the modern filtering available on beta and butterflight. My original review quad was kindly provided by Gearbest but is also available now from Full Speed RC's own website. Full Speed is a little more expensive but offers an excellent customisation service. Speaking of Full Speed the proprieters are pilots and test their products a lot before release - it's no accident they have good products. The Leader 120 is available at Gearbest here and FullSpeed RC here. It sells for anywhere between $100 and $130 depending on sales, discounts. So what have I changed in the last year? FPV system The Leader 120 ships with a VM2751 CMOS AIO cam and while ok for a whoop I don't think it does the Leader 120 justice given the speeds you can move at. I cannot emphasise enough how much an improvement the FPV system makes. Choose any camera you like, mine happens to have an HGLRC elf as that is what I had available at the time. Now there are many options, my personaly favourite is the Arrow Micro Pro - a 4:3 CCD cam which has an excellend image and can often be had for $20. For the VTX I personally use the Fullspeed FSD-TX200. This has proven to be an excellent long term reliable vtx that mounts easily to the back of the camera. There is no smart audio but then again you can get it for only $11. If smart audio is a must for you I'd recommend FullSpeed's new FSD-TX600 or the AKK FX3 ultimate. I've made a full article on the install here but with one recent change that has made this much more robust (see picture below).
Receiver You may have a receiver already but if not I'd recommend the Fullspeed model. They are less than $10 each and are available in DSM or FRSKY. More importantly they weigh less than 1g so help preserve the lightweight aspect of the Leader. Another thing I really like about the Fullspeed nano v2 receiver compared to the FRSKY XM is the fact that RSSI (control link strength) is enabled on aux 5 by default for immediate use in betaflight OSD. Frsky XM and XM+ receivers need to be flashed for this functionality. The Fullspeed FRSKY Nano V2 is available from Fullspeed RC, Banggood or Gearbest.
Propellers This is a personal choice. The stock 2.8" Kingkong 2840 props are fine but power hungry due to weight and pitch on 2s and almost unusable on 3s. Probably the best alround props is the Gemfan 2540 (@Bangood, @Gearbest) which offers the benefit of grip as in the stock props but at a much better efficiency with marginally more noise as reviewed here. Another option is the Gemfan 3025 twin blade (@Bangood) trimmed down as detailed here. These offer better efficieny again with but with less top speed. I got 9 minutes of flight when using a new 950mah 2s on these props... full review here.
Software Now running betaflight 3.4.0 which is release candidate at time of writing. Best features for me? Improved filters and much wider PID tuning window. I especially like the throttle limit options that are tied to rates as I think all I get between 90-100% throttle on 3s is noise with more current draw and very little increase in power. I believe my leader originally came with 3.1.7 Low pass and dynamic filtering has improved dramatically since then. Conclusion 1 year on the Leader120 is surprisingly relevant with a few minor mods. Don't forget that Fullspeed have made minor tweaks throughout the life of this quad - 20a esc upgraded to 28a, FC upgraded with better board layout, UART access and improved BEC. No one has really got a comparable lightweight 2.5" ready to fly that compares - the shift to 1105, 1106, 1107 and even 1108 motors on 2.5" have changed flight characteristics and durability for the worse. Even the Skystars Bolt 120 which looked like Heir to the throne with 4s capbility felt like a porker to fly. Enjoy this quad if you have it and upgrade at you leisure or not at all. Plenty of options on this community favourite. Parts mentioned here:
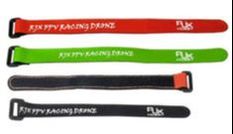
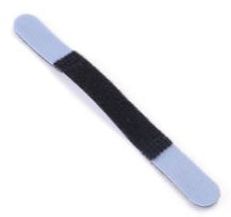
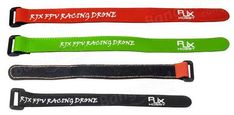
I'm yet to find a decent battery strap for a micro. So far I've been making do with the crappy velcro ones with come standard like in the picture below along with the nice silicon pads I've already reviewed. On tough crashes though I still get ejections which makes we worry about lifting a battery pad off the ESC.
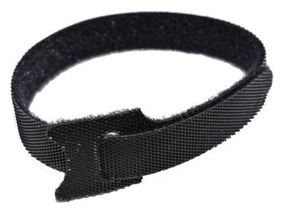
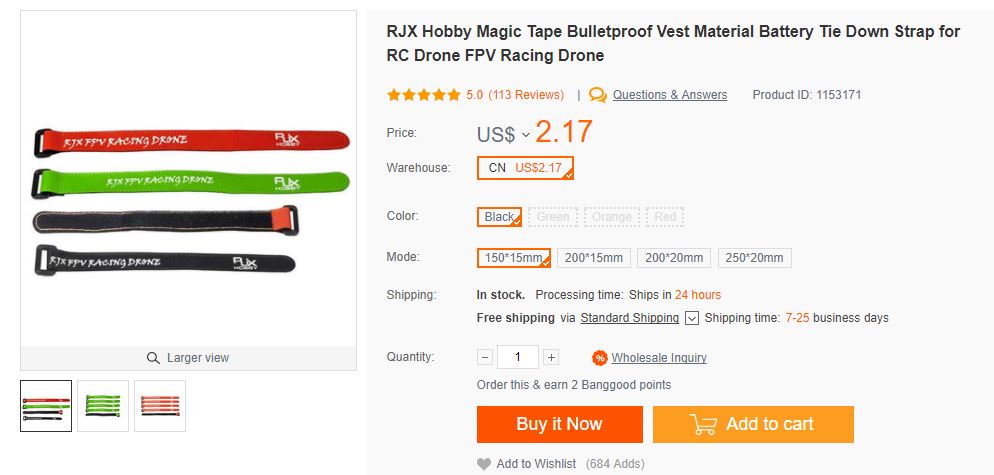
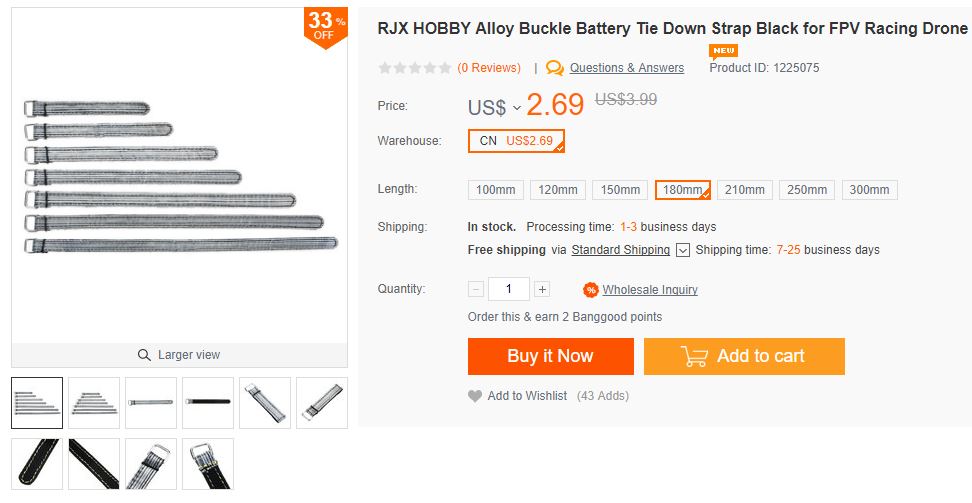
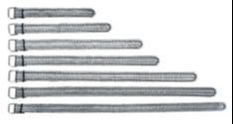
The problem with micros through is you need a skinny strap that will fit between the standoffs underneath a 20 x 20mm esc AND a plastic or metal return feed clip that really allow you to tighten the strap down. The stock one for the baby hawk works but only for very small batteries - 2s 300mah and smaller. The standard 20mm wide ones I use on my 5 inch quads and have heaps of are just too wide (and heavy). Another option is to use a rubber band like Albert Kim which is lighter but doesn't have the security of a good strap. Other than a few boutique options like the airblade UAV strap that Nick Burns has a bulk supply of, there is very little available, especially outside of the US. Thank goodness there are a range available now supplied by RJX hobby in varying material such as nylon, nylon with metal strap and Kevlar. Most importantly these are available in 15mm wide variants which is perfect for quads that are 3 inches and smaller. The best all round one I have found that is also the cheapest is the 15mm wide x 150mm long one here. This fits on both my leader 120 and Furibee X140 and will accept down to 2s 300mah and up to 4s 850mah. The nylon version is currently available for just $2.17 on Bangood. If you are one of the high-roller types you can also also get an alloy-buckled 12mm wide version for an eye-watering $2.69. There are a range of lengths available so order several or just measure first but make sure you get the 12mm or 15mm wide variants as listed here.
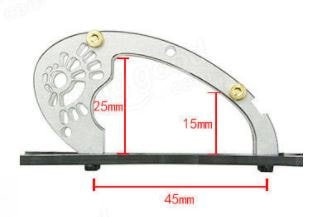
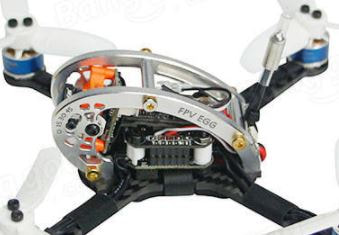
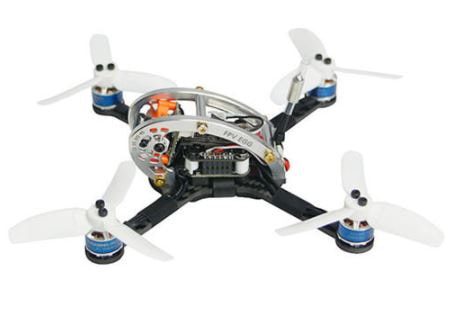
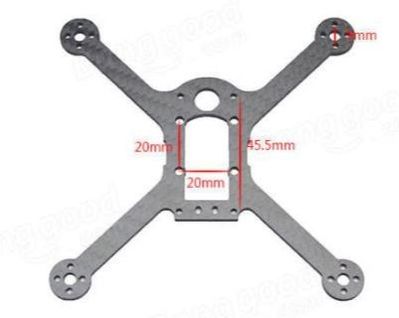
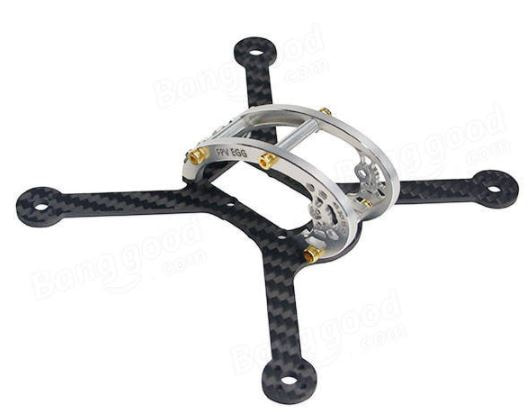
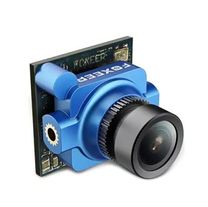
These straps won't make your quad faster or give you a better FPV feed but will give you greater peace of mind knowing that in a crash you are much less likely to eject your battery and potentially damage your sensitive electronics or even lose your battery. Get them here: 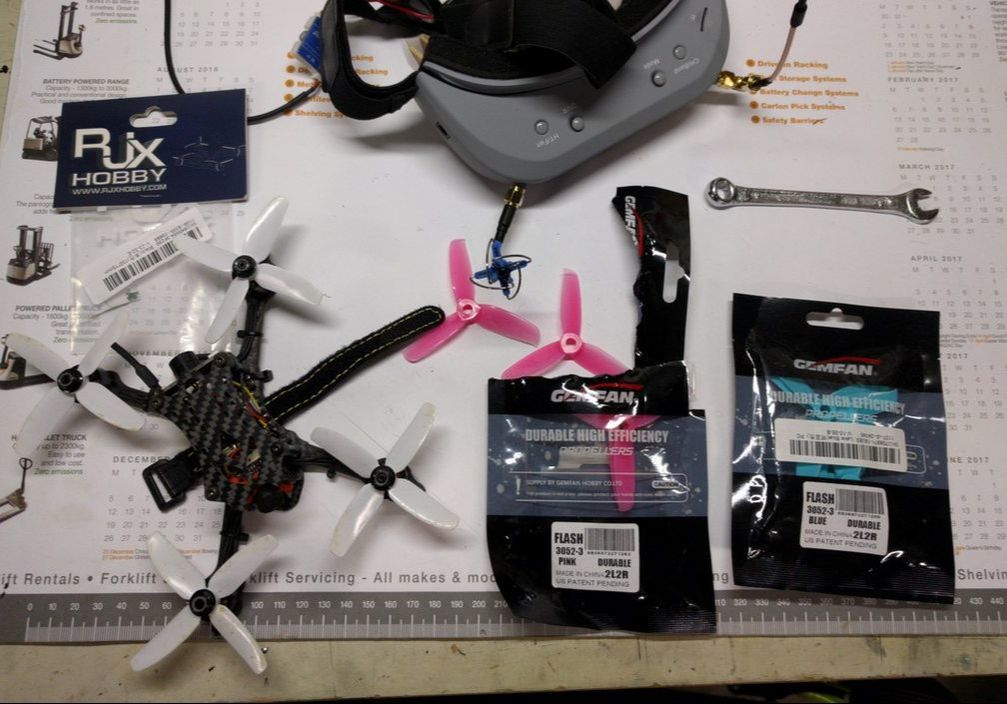 That strap tho! 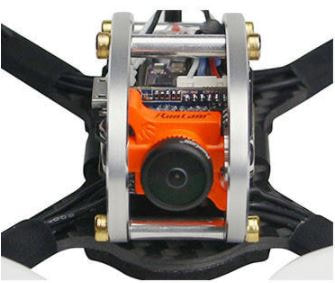 The Fly Egg 100 and 130 are 2 popular micro quads although like many other micros they have only have a cheap CMOS camera for FPV. The Swift and Arrow micros have been simply fantastic as an upgrade for micros like the leader 120 and I've covered that upgrade recently for that model. It's much harder with the fly egg series though because there is only 15mm between the sideplates of the frame where the camera sits which is too narrow for the width of 19mm micro cameras. Modding is near impossible because the frame cannot be drilled for a wider mount and it is too far for the side plates to stretch to accomodate. Now there is a new solution. King Kong have just released the FPV Egg 136 which is 4mm wider to allow for the micro swift. Although the complete frame is available for $23, I believe you can just get away with purchasing the new 136mm bottom plate only for $8.63 (less than $8 if you use the code "toysho"). This way you can recycle most of the parts from your fly egg 130 or 100. There are some caveats however.
Considering how compex the previous solutions were though, this will be a breeze or you could just take the path of getting the new frame with all the correct hardware. The good news is that since the fly egg comes with a good variable power VTX that is not piggy-backed to the CMOS, it will easy to re-use with the new camera. Also good is that the Micro Swift 2 and Foxeer Arrow 2 have a basic VBAT OSD and this will be a huge improvement to the OSD-less fly egg 100/130. I have a new 136mm bottom plate on order and will update here when I've mounted the micro swift 2. Here are the parts I've discussed in the article, click on the image to take you to the product:
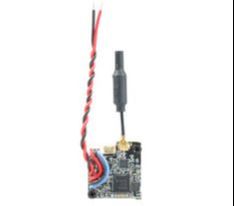
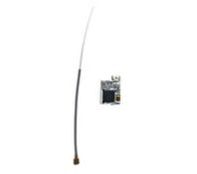
 On my lightweight x2 EYAS (updated build link here) build I use an Eachine TX01 All In One (AIO) Camera/VTX. Stock, these come with a basic Circular Polarised (CP) antenna that works well but is heavy and more importantly: not very durable. This is because the antennas are left fairly exposed on micro quads. More often now, AIO camera/VTX modules have linnear whip antennas that are much more durable, lighter and still get you about 90% of the performance of the CP antenna - much more practical in the real world for micro. Linnear whip antennas are actually a sleeved dipole where the outside sheild of the co-axial cable is grounded. The exposed centre transmitting signal is then exposed for a VERY specific length that should be tuned to 5.8GHz which in most cases is 12.9mm for a 1/4 wavelength of 5.8GHz. Albert Kim did an excellent video here and found that most whip antennas have the wrong length. Great! Easy to cut if they are too long, hard to fix if they were too short. Well the 10 spares I had were too short!! To fix this I tried the trick that my flysky FS82 and RX2a pro receivers use - a basic monopole antenna. This is a simple 28AWG wire (or any other small gauge wire) soldered directly to the signal line of the VTX with nothing on the ground pad. The wire is then cut to precisely 12.9mm, then heat shrunk over the top to relieve stress from the joint. Result:
What I see now is that the main reason for a dipole whip is to elevate the signal out of the frame where the AIO camera/vtx is enclosed. However, when the camera is mounted high like on my EYAS X2, it does not give any benefit and so the ghetto monopole antenna works just as well. Relevant parts:
Quick follow up 10 months later and this continues to work well. I've now done the conversion to 4 AIO cameras with no ill effects. I've even done this on a FullSpeed tx200 piggyback vtx (review here) that is attached to the back of a runcam swift and no longer snag and lose the dipole. A really useful mod that has stood the test of time  Problem: a standard FC/ESC stack is too tall and heavy.
A 20 mm x 20mm 4 in 1 ESC and flight controller is the backbone of most micro quadcopter builds. They are usually joined together by m2 nylon standoffs in the middle and bottom that are about 6mm tall each. This can be too high for some builds but there is an easy fix that can even include some basic softmounts. Here are the parts you'll need. They are not expensive and can be used for several builds:
To make the low profile soft mounted stack:
Voila! now you have a low profile stack that is lighter and soft-mounted. After a big crash recently I find it is much stronger too as it relies on the tension of nylon rather than shear. |
Archives
November 2020
Categories
All
 |


 RSS Feed
Thanks for visiting QuadifyRC.com Follow us on facebook below to get all the latest updates