QUADIFYRC MODS AND REVIEWS
  • RC Cars
  • Car of the Month
  • Quad Reviews
  • Quad Mods
  • COUPONS AND DISCOUNTS
  • Long Range
  • About & Contact

TIPS and TRICKS

Mobula 6 upgrade: Ultralight lowrider

14/1/2020

6 Comments

 
Picture
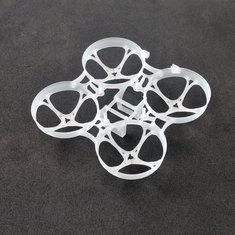
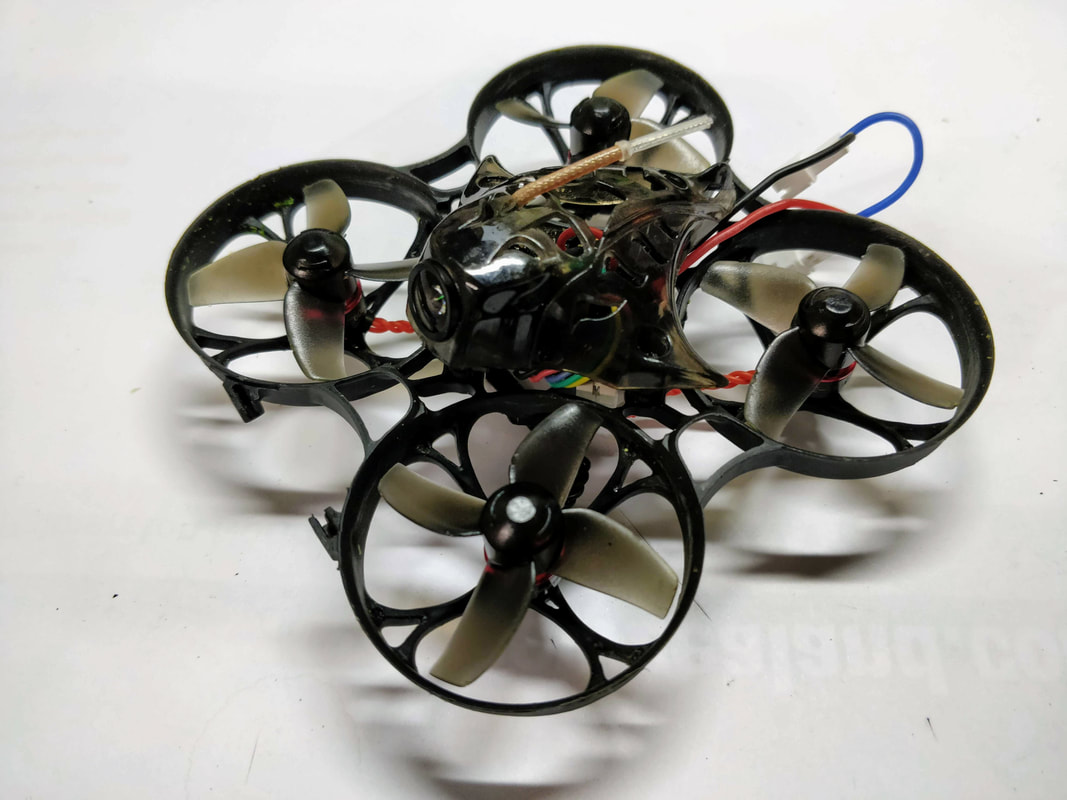
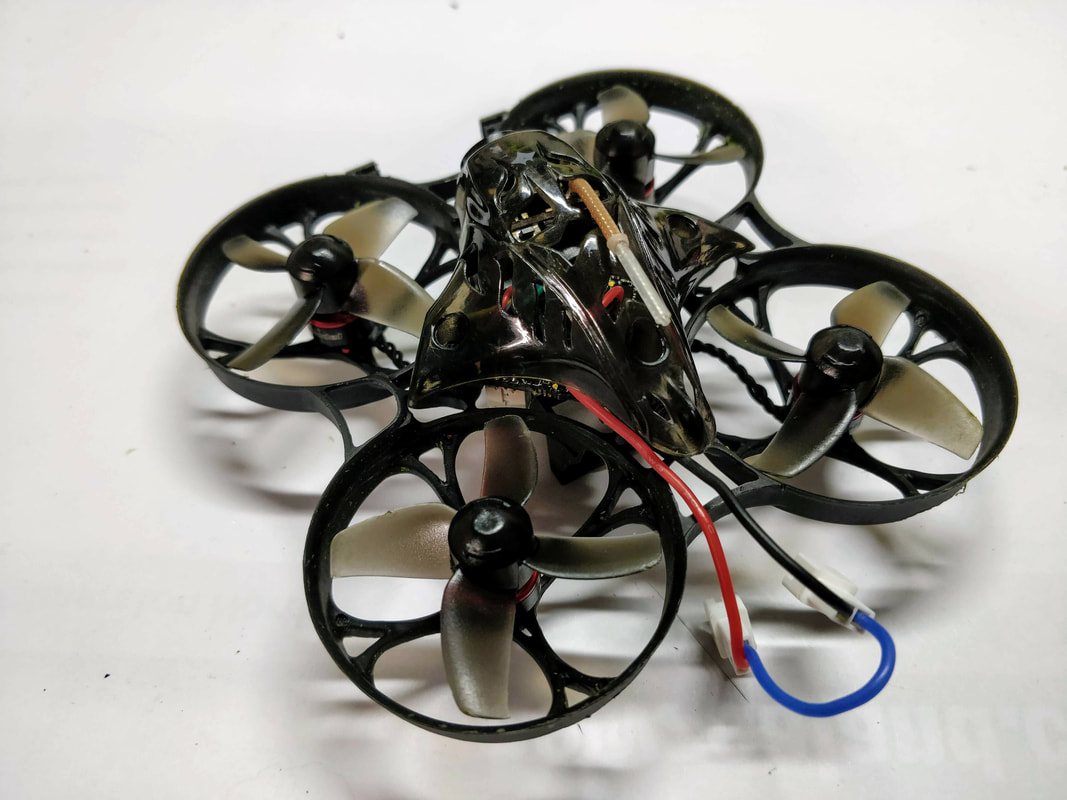
​The Happymodel Mobula 6 is proving to be one of the most popular drones of early 2020 just like the mobula 7 in 2019. What makes it so successful? It is small, light and agile and fast enough given the power source. And, with the introduction of esc firmware capable of running at 48khz, it seems to offer the flight time.

Even though it’s a great quad as is, I always like to tinker to see what can be squeezed out. In my opinion it is the super light weight of the Mobula6 that makes it so good in all the parameters above, so how to make it better? Make it EVEN lighter.
For this particular mod I've chosen to remove the canopy and replace it with a lowrider camera mount which I must credit Chaotix from the micro motor community forum with. This was a mod to mount split aio cameras to before canopies were commercially available and offered the following advantages:
  • Cheap!
  • Light
  • No ducts in view
  • Very low profile (more on the advantages of this later)
I wanted to see if these benefits were still applicable today and so far as I can tell – yes they are.
Picture
First time I did this mod was on a silverised E011C with bolclash split cam about 2 years ago. This was well used and abused and still holding up
So how is it done?
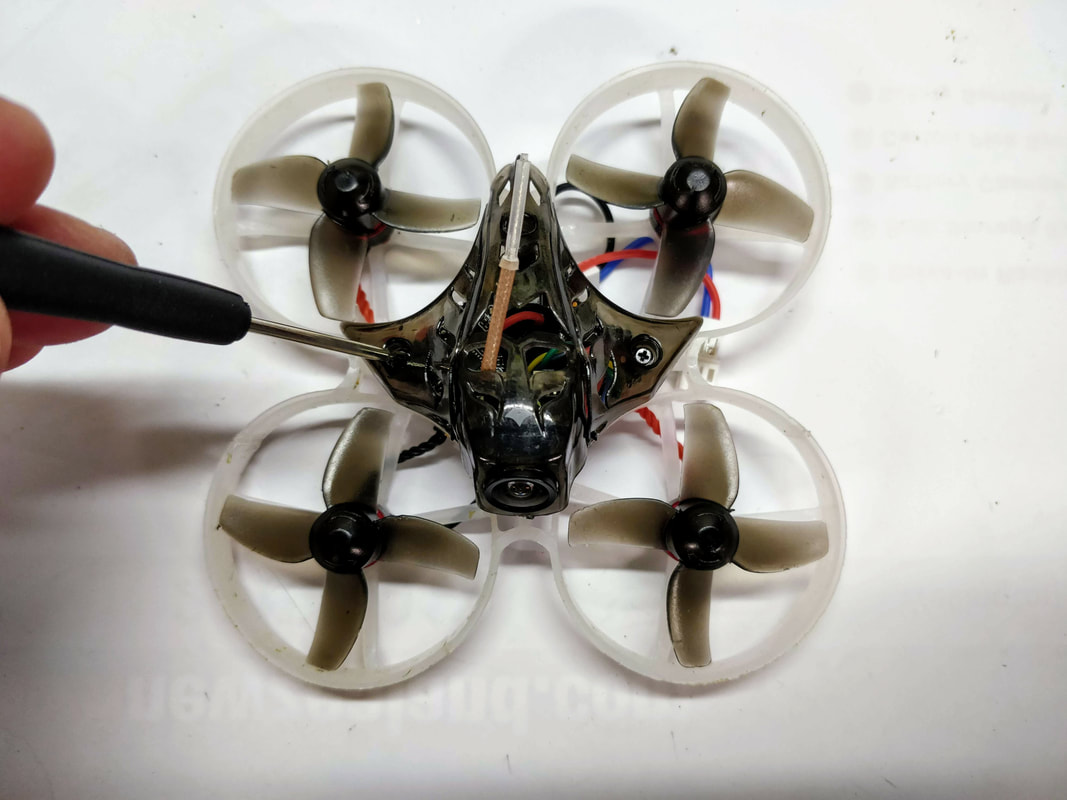
Get a pack of zip ties (like these) that are at least 80mm long and 4mm wide. The smaller the zip mechanism the better. Use a new blade on a hobby knife to cut a slit along the length as below. The lens of the camera will be wedged in this slit and tightened at an angle that suits your flying.

Read More
6 Comments

MOBULA7 UPGRADE: Betaflight 4, PIDS and Filters

17/6/2019

16 Comments

 
Picture
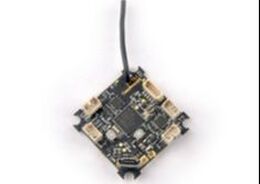
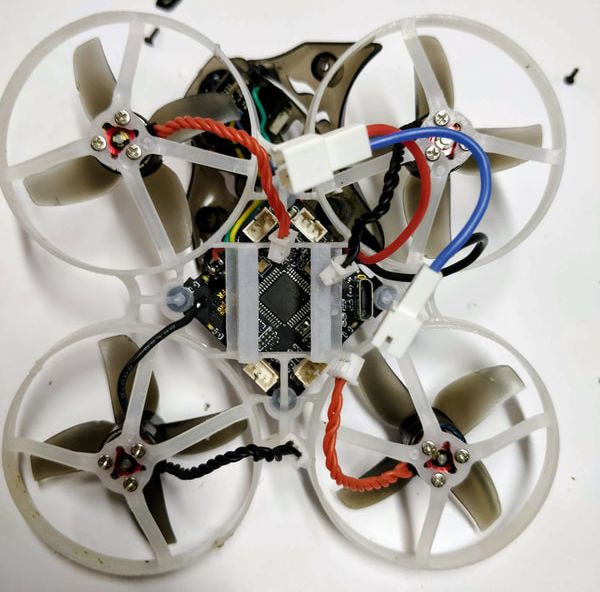
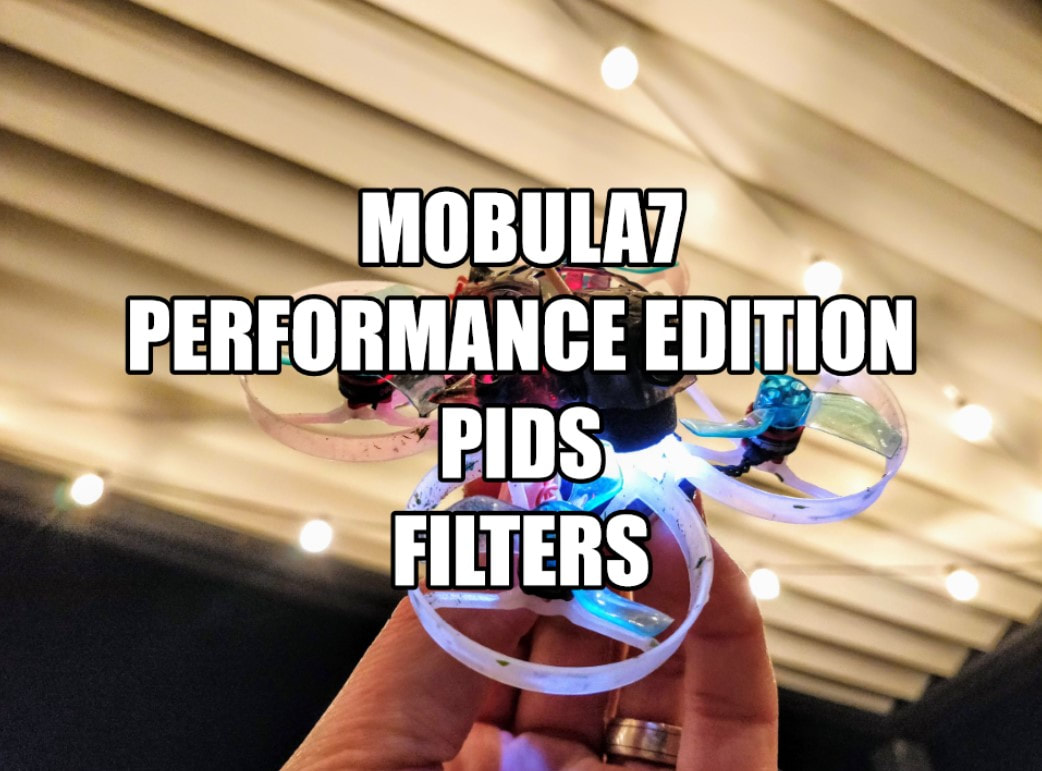
The Happymodel Mobula7 uses a F3 based flight controller and since Betaflight 3.4, these boards have not had full functionality of F4 and F7 boards due to smaller memory size for firmware storage. However in this article I will cover how to upgrade to the performance edition of Betaflight 4.04 kindly compiled by UAVTech (his in depth YouTube Channel is here). This special version adds the key performance functions at the cost of typically irrelevant features like servo control, acro trainer, camera control etc. In this article I will show you where to access this firmware and then I'll show you the filters that suit brushless whoops best as well as some good starting PIDs. 
This is the seventh and likely final article in my series of HappyModel Mobula7 upgrades, many of which can be used for the Trashcan too. Also to come are:
  • Swapping to a much more durable frame​
  • Improving the battery connector for more power
  • converting to run 'props out' 
  • Long term propeller upgrade recommendations​
  • Converting your 1s batteries into a true 2s battery
  • receiver range improvement​
All links will be updated here when completed. Many of these I've completed the work and am testing at present - it's starting to feel like a more complete little quad now. If you're looking for my review of the mobula7 including setup it can be found here
Betaflight 4 Performance edition for F3 boards
This is the final version of Betaflight you can use and I strongly recommend you use this version rather than the one on the Betaflight configurator to get full performance functionality otherwise you will miss out on features like:
  • Gyro Lowpass2
  • Launch Control (optional - OFF by default)
  • Dynamic Lowpass Filters (Dyn_LPF) (ON by default)
  • D-term Minimum (D_min) (ON by default)
  • Throttle Boost (ON by default)
  • iTerm Relax (ON by default)
  • RC Smoothing - Filter (ON by default)
  • TPA Mode - D-term ONLY option (ON by default)
Download the custom file below at the GITHUB source. SKIP THIS STEP FOR THE EACHINE TRASHCAN
For FRSKY built-in receiver
betaflight_4.0.4_crazybeef3fr_performance.hex
File Size: 679 kb
File Type: hex
Download File

For Flysky built-in receiver
betaflight_4.0.4_crazybeef3fs_performance.hex
File Size: 646 kb
File Type: hex
Download File


Read More
16 Comments

Sailfly-X Upgrade: Improving Range

10/6/2019

0 Comments

 
Picture
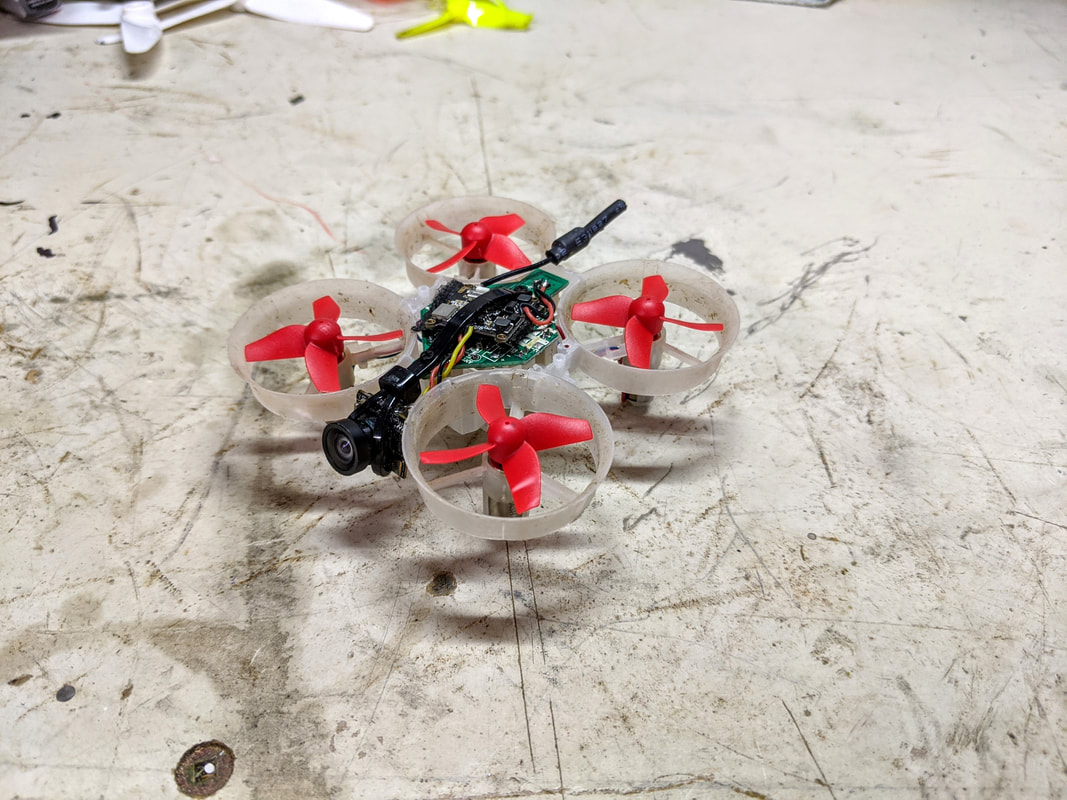
The Happymodel Sailfly X is my favourite quad I've reviewed so fat this year (review is here) but as with any product, there are shortcomings especially when is it built to a price. Like I did with the Mobula7 I'm starting a new series of articles on upgrading and customising the Sailfly-x.
Current State
Picture
The Sailfly-X is based around a Crazybee board like many other models, in this case it is the latest revision CrazybeeF4 pro V2.1. It uses a SPI-connected receiver that offers full telemmetry and D16 or D8 modes for FRSKY. There is some very cool technology here (I think SPI connected receivers will be the future) but the implementation here is not great on the key measure - range performance. In this article I'll document how to improve range from minor tweaks to full on long range and will be relevant for FRSK, Flysky and DSM
Step 1: Software only
The most simple mod to do is ensure the onboard receiver is given an armchair ride from a software standpoint. This means changing D16 to D8 mode in betaflight and turning off telemetry which has been known to lock up the flight controller. This can be done as below. 

Read More
0 Comments

So easy to improve your FPV feed - use knurled grips

5/4/2019

0 Comments

 
Picture
Picture
Picture
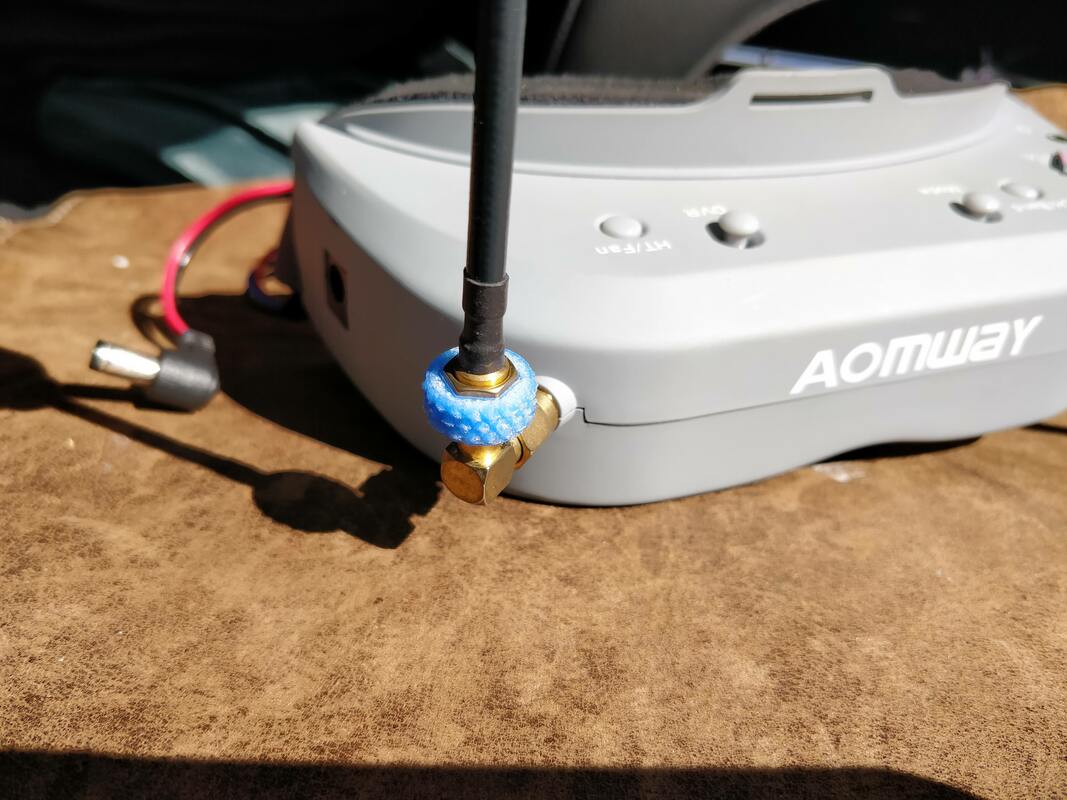
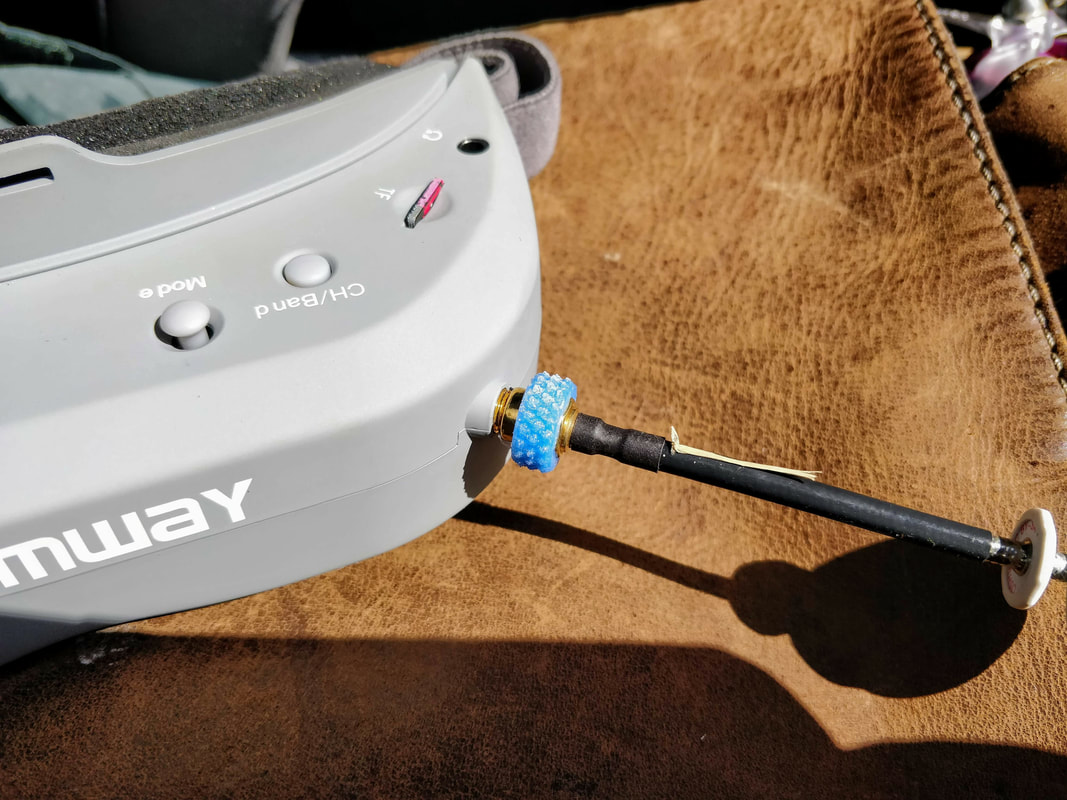
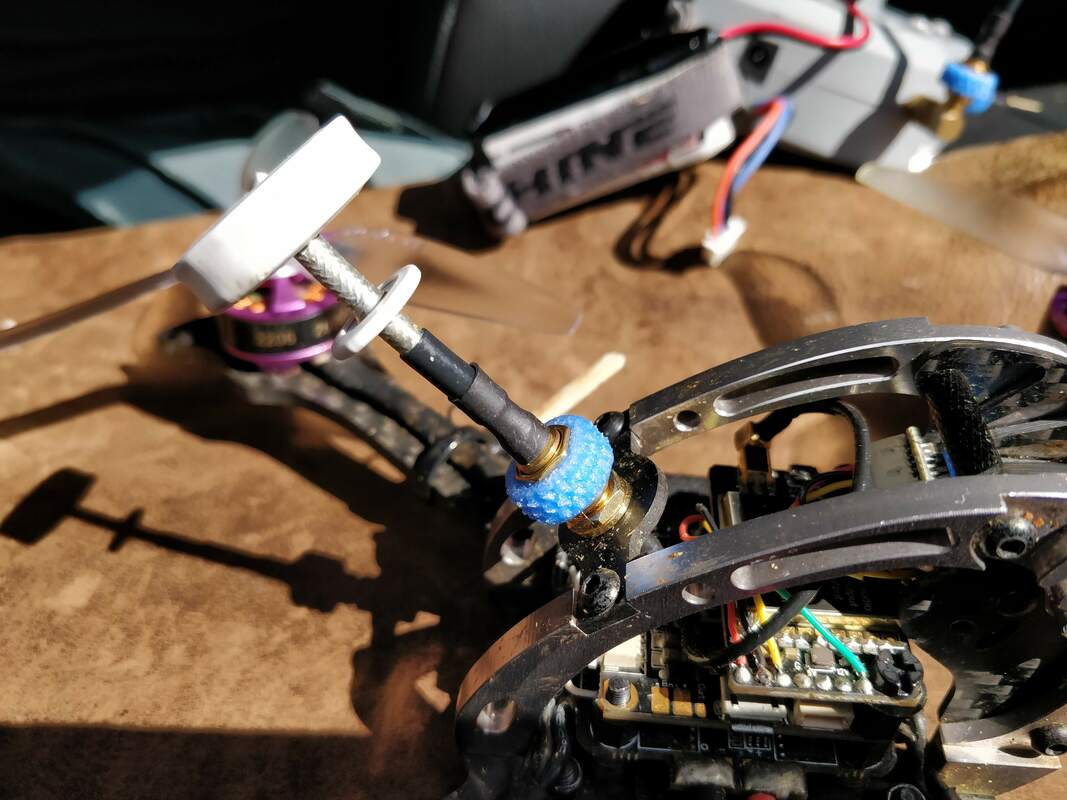
I promise I'll keep this one short. We are forever taking antennae on and off our quads and goggles as we arrive and leave our flight locations. I'm guilty of being too eager to get in the sky and not tightening my antennae correctly thereby leaving a poor connection to the active element on both the quad and goggle ends. Using a spanner is not a fix I'd recommend as it is easy to over-torque and damage the antenna or mount.

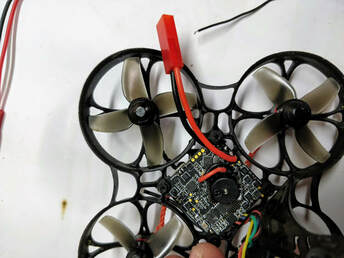
The fix here is really easy and I got the tip from my favourite VAS antennas which all include a plastic knurled grip (now I know why). Using a knurled grip that sits over the hexagonal drive on an SMA-style connecter allows you to get a better grip and more torque on tightening whilst avoiding over torquing as above. To put this another way - using these grips allows you to get the right tightness every time - good for the best connection and it will also help them coming loose in flight.

Read More
0 Comments

MOBULA7 UPGRADE: Better Range with the Onboard receiver

26/2/2019

15 Comments

 
PictureThis mobula 7 is getting more and more upgraded
Introduction
The crazybee F3 and F4 series of all in one boards that are the heart of the mobula7, m7hd, eachine trashcan, snapper7, ur65, uk/us65 and even beta75pro2 are an amazing piece of technology that incorporates a flight controller, 4xBL_HeliS ESCs and a receiver. Cramming all of this on one board does mean some compromises though and the biggest one for me is the poor receiver range. This brief article will show how to get a minor improvement with zero investment. Note: this mod is relevant for all the models listed above.

This is the third article in my series of HappyModel Mobula7 upgrades, many of which can be used for the Trashcan too. Also to come are:
  • Swapping to a much more durable frame​
  • Improving the battery connector for more power
  • tuning betaflight filters more specifically for brushless whoops, 
  • converting to run 'props out' 
  • propeller upgrades. 
  • receiver range improvement
  • modding your 1s battery to be a proper 2s
All links will be updated here when completed. Many of these I've completed the work and am testing at present - it's starting to feel like a more complete little quad now. If you're looking for my review including setup it can be found here

Read More
15 Comments

MOBULA7 UPGRADE: More power with better battery connector

5/2/2019

21 Comments

 
Picture
Introduction
In order to run 2s, the Mobula 7 comes standard with 2 x PH2.0 connectors that allow you to run 2 x 1s batteries in series. When running in series the strength of the connection is determined by the weakest link in that circuit. The strength of connection determines the maximum current that can pass and the voltage drop that results. Although it works this system has a very low current overhead from a design perspective - 2 x budget PH2.0 connectors with the dreaded 'folded' pin and very lightweight 26AWG wire. All this adds up to a lot of voltage drop when even reasonable current is pulled - something all will be familiar with on the mobula where you see voltage drop to scary levels (6v and below) during punches even when you have a full battery. Although it recovers almost immediately it does mean you don't get access to the battery's full voltage potential.

New Update: Read here how to convert your 1s batteries to a 2s battery
This is the second article in my series of HappyModel Mobula7 upgrades, many of which can be used for the Trashcan too. Also to come are:
  • Swapping to a much more durable frame​
  • tuning betaflight filters more specifically for brushless whoops, 
  • converting to run 'props out' 
  • propeller upgrades. 
  • receiver range improvement
  • modding your 1s battery to be a proper 2s
All links will be updated here when completed. Many of these I've completed the work and am testing at present - it's starting to feel like a more complete little quad now. If you're looking for my review including setup it can be found here
Picture
JST connectors are very cheap, light and perfect for this application
How to improve the situation
Now that we are through the dreaded theory we can get on to the solution. To cut to the chase I will be moving to a true 2s battery connection with a JST connector and this is why:
  • 1 x JST connector will allow much more current than 2 poor quality PH2.0 connectors
  • 20-22AWG (guage) wire has a lot less voltage drop that the 26AWGwire included
As a bonus this makes it more durable. Although I used a 20AWG in this walthrough, I'd recommend these 22AWG ones because they are much more easy to solder and manage. In order to keep you motivated I'm pleased to say this makes a significant improvement to power and reduction in battery sag, more in the conclusions at the end. 

Read More
21 Comments

Mobula7 Walkthrough Upgrade: The best Frame for your Mobula 7

28/1/2019

11 Comments

 
Picture
Picture
PictureThe Mobula7 v3 frame (same as the Eachine trashcan frame)
Introduction and why I like the Mobula7 better.
It's been a few months since I reviewed the HappyModel Mobula 7 (here) and have more recently reviewed the Eachine Trashcan here. Since reviewing the Trashcan I've been flying the Mobula 7 more and find I actually prefer it. Why? Even thought the image quality is better I can't get used to the narrow vertical field of view on the traschan's EOS2 16:9 camera and I find the 0803 motors on the trashcan draw too much power on without delivering a whole lot more speed. The Mobula7's major downside is the frame which breaks easily even though the v2 frame is an improvement and e6000 glue (as tested here) is great for repairs.

For this reason I've written an article for newcomers on how to upgrade to the V3 (trashcan) frame which completely addresses the strength issues.

This is the first article in my series of HappyModel Mobula7 upgrades, many of which can be used for the Trashcan too. Also to come are:
  • installing a better battery connector,
  • tuning betaflight filters more specifically for brushless whoops,
  • converting to run 'props out'
  • propeller upgrades.
  • receiver range improvement
  • modding your 1s battery to be a proper 2s
All links will be updated here when completed. Many of these I've completed the work and am testing at present - it's starting to feel like a more complete little quad now.
Instead of just writing about it, please see the steps below with captions. Click on the picture to embiggen
Picture
1. Remove all of the motor plugs from main wires. You can just pull the wires but I'd recommed small needle-nosed pliers to pull on the plugs instead
Picture
2. Shown here with all 4 motor wires removed.
Picture
3. Use the included Phillips head screwdriver to remove the 3 screws that secure the canopy to the frame. Don't lose them!

Read More
11 Comments

Eachine Trashcan: Improving the Beeper with software only

7/1/2019

4 Comments

 
Picture
Introduction
​Recently I've reviewed the Eachine Trashcan and in many ways it is superior to the Mobula7 as I found in my review here. One omission from the trashcan though compared to the Mobula7 is the lack of a physical beeper. On the upside though is that the trashcan (like most other brushless quads) uses Dshot as the ESC protocol meaning you can use the motors as a beeper. This is in fact immediately available on the Trashcan with some simple software changes which I will outline below.


Read More
4 Comments

    Archives

    November 2020
    July 2020
    January 2020
    December 2019
    October 2019
    September 2019
    August 2019
    July 2019
    June 2019
    May 2019
    April 2019
    March 2019
    February 2019
    January 2019
    December 2018
    November 2018
    September 2018
    August 2018
    July 2018
    June 2018
    May 2018
    February 2018
    December 2017
    November 2017
    October 2017
    September 2017

    Categories

    All
    1.9 Inch
    2 Inch
    2s Whoop
    3.4.0
    3.5
    3d Printing
    5.8GHz
    6 Inch
    6s
    AKK
    AKK Infinite
    Antenna
    Attitude V5
    Battery Pad
    Beeper
    Betaflight
    Brushless Whoop
    Cheap Mods
    Dji Fpv
    Dshot
    DVR
    Eachine
    Eachine Trashcan
    Emax
    Fatshark
    Fullspeed
    Furibee X140
    Goggles
    Happymodel
    Hawk 5
    Hawk 6
    Headstrap
    Hq Props
    Iflight
    Jello
    King Kong Fly Egg
    Larva X
    Larva-x
    Leader 120
    Lightweight
    Micro Brushless
    Micro CCD
    Micro Quad
    Mobula
    Mobula6
    Mobula7
    Mobula7 Upgrade
    Omnibus
    OSD
    Pids
    Propellers
    Red Devil
    Repair
    Runcam Nano 2
    Sailfly X Upgrade
    Sailfly-x Upgrade
    T65mm
    Throttle
    Throttle Limit
    Thrust
    Tinyhawk
    Tinyleader
    Trashcan
    Upgrade
    USB Charger
    VTX
    Walkthrough
    X2 Elf
    Xlite

    RSS Feed

    follow us in feedly
Thanks for visiting QuadifyRC.com Follow us on facebook below to get all the latest updates
  • RC Cars
  • Car of the Month
  • Quad Reviews
  • Quad Mods
  • COUPONS AND DISCOUNTS
  • Long Range
  • About & Contact