 This mobula 7 is getting more and more upgraded This mobula 7 is getting more and more upgraded Introduction The crazybee F3 and F4 series of all in one boards that are the heart of the mobula7, m7hd, eachine trashcan, snapper7, ur65, uk/us65 and even beta75pro2 are an amazing piece of technology that incorporates a flight controller, 4xBL_HeliS ESCs and a receiver. Cramming all of this on one board does mean some compromises though and the biggest one for me is the poor receiver range. This brief article will show how to get a minor improvement with zero investment. Note: this mod is relevant for all the models listed above. This is the third article in my series of HappyModel Mobula7 upgrades, many of which can be used for the Trashcan too. Also to come are:
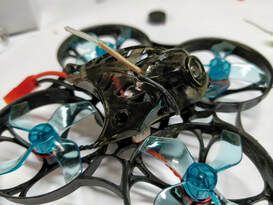
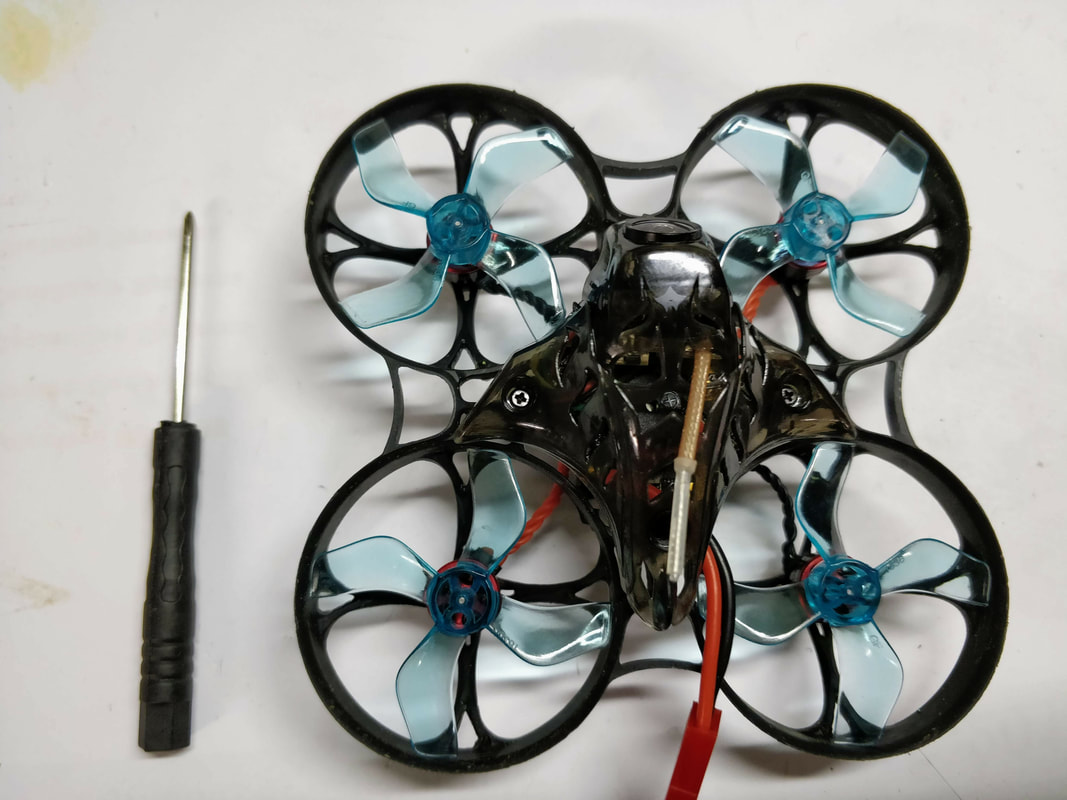
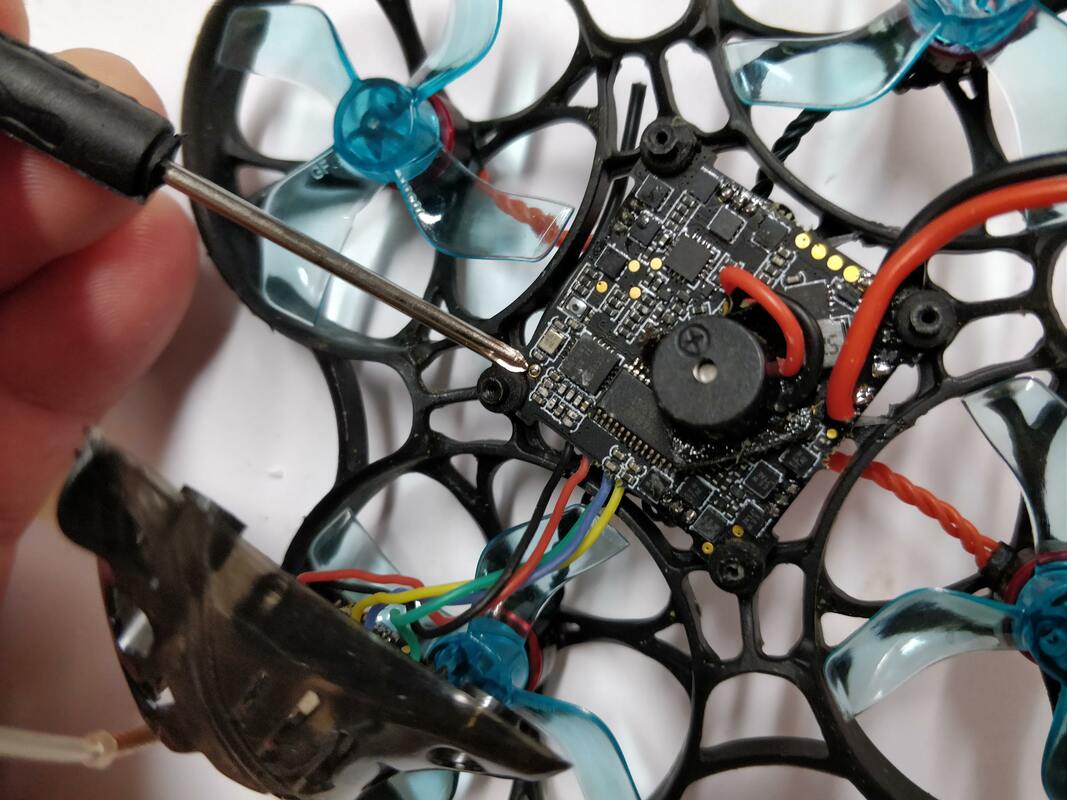
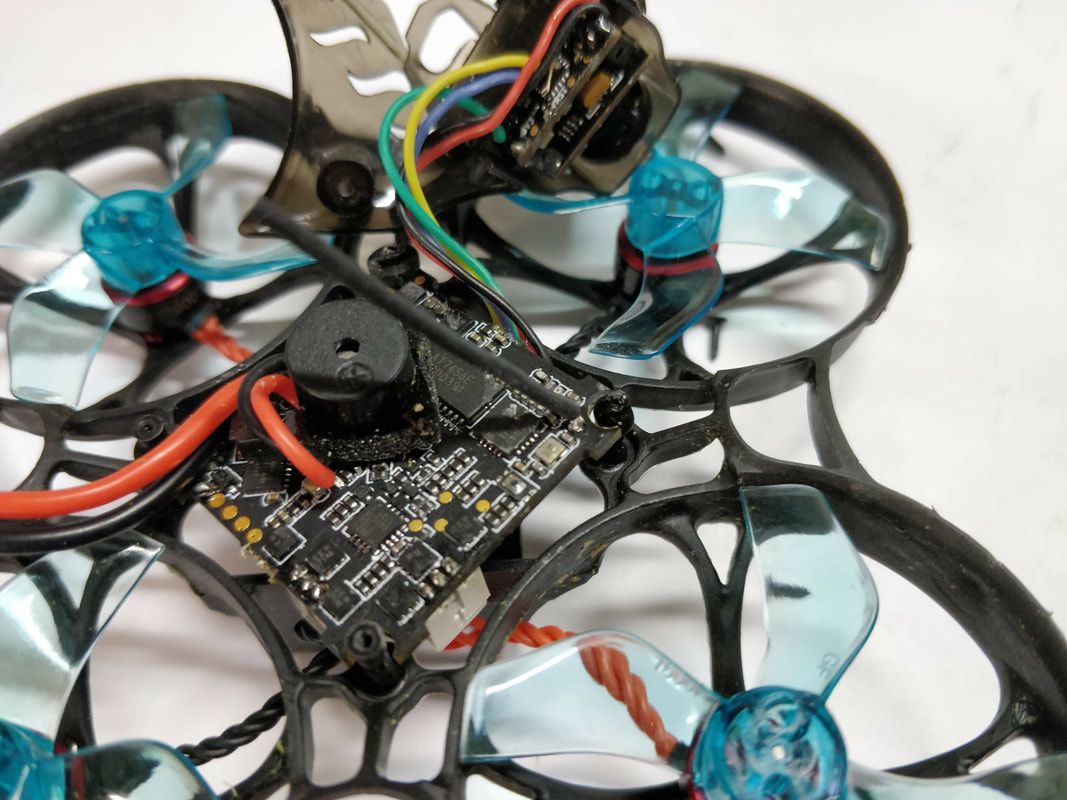
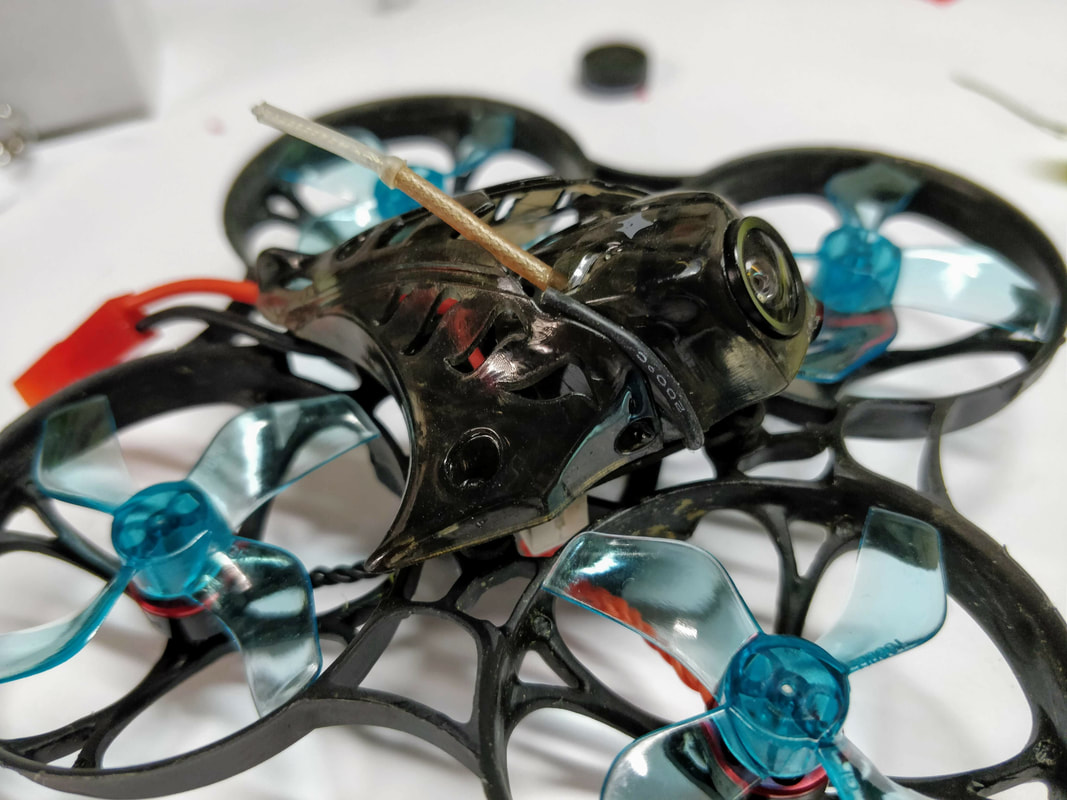
Current situation The mobula7 (and other models listed in the intro) uses an onboard receiver - either frsky, flysky or dsm protocols all of which run on the 2.4GHz wavelength. The have a small antenna soldered to a through hole that is tucked safely underneath the main board and above the battery tray. This is is the most durable solution but not the best option for maximising control signal. 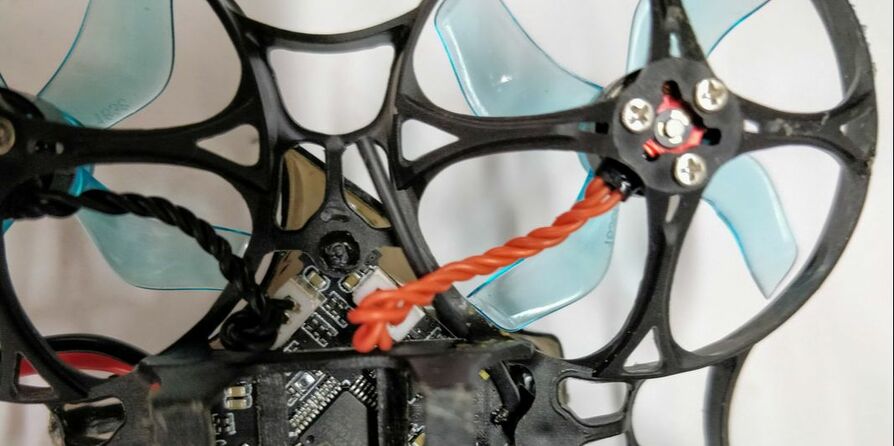 Tou may be able to see the single black receiver wire underneath the red motor wires Optimising the range The easiest way to improve the reception of the control signal without changing anything else is to move the antenna into a better location. This is to receive an unimpeded control signal as clearly as as possible which for me meant pointing the antenna up to clear of the rest of the quad as possible. Obviously the antenna pointing down is not ideal for this so feel free to follow the 5 minute guide below on how to solve this.
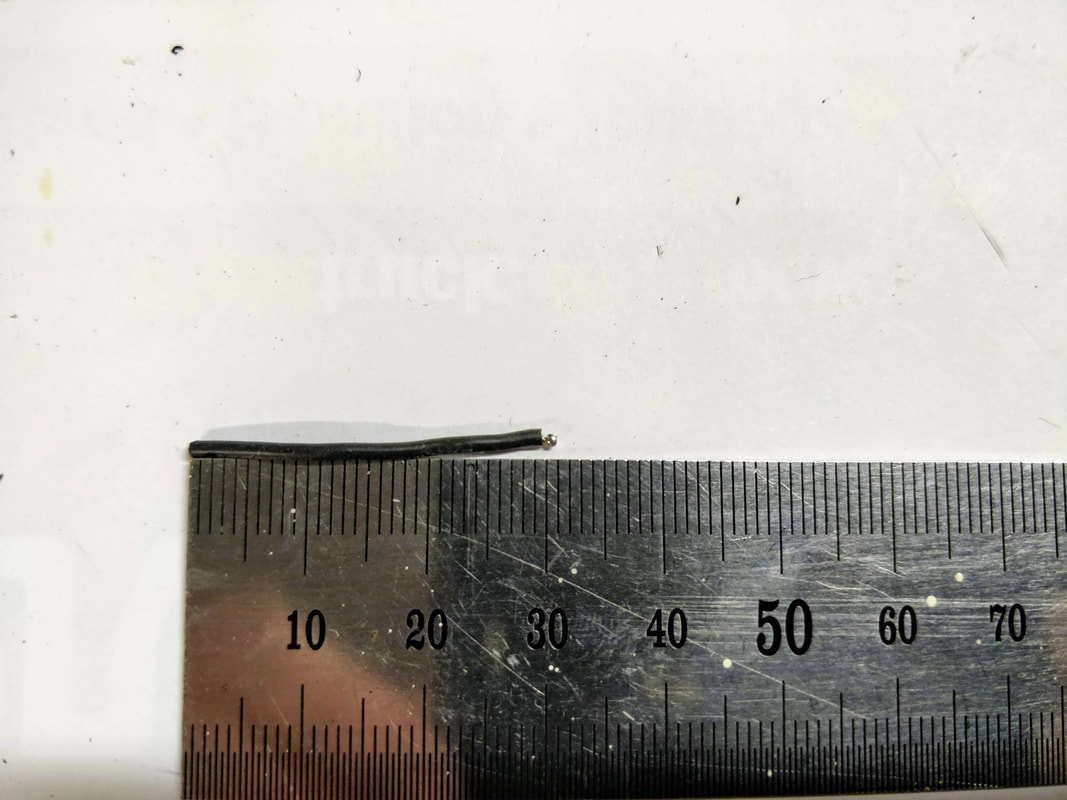
Has it improved? Yes is has, but only a little. I often fly from my backyard and loop a tree about 50m away from where I stand. I'd always get telemetry lost warnings when I rounded it every time but now only about 20-30% of the time. A minor improvement but given the poor range I'll take what I can get. Recommendations for further improvement The next easiest improvement would be to use a piece of insulated wire that is 62.46mm long - 1/2 a wavelength. This is now to much to increase the wavelength as it is to lengthen the active element so that some of it can clear the body of the quadcopter. Credit to KababFPV for this recommendation here. Note if you want to do this I'd recommend using some wire you have lying but if you have none it is available in all gauges cheaply here (I recommend 26AWG for this application)
Thanks for reading, if you found this article useful please feel free to like or share, the facebook links below directly link/like this article. Links are affiliated and help me buy the bits I need to produce this type of content.
15 Comments
Alex
27/2/2019 11:01:49 pm
Great article, had the same experience with my trashcan re RX. I have been trying to figure out how I can use an external RX, I have the FRsky version.
QUadifyRC
2/3/2019 11:47:59 pm
Thanks Alex. Yes you can use an external receiver, Happymodel themselves use this as a workaround from the factory for the EU. Losing an external receiver has no impact on OSD. I'd recommend a fullspeed nano or xm receiver to keep it light if you go down that path
Matthew Brulla
14/3/2019 06:27:13 pm
Be aware that the Crazybee F3 in the Mobula7 does not have enough UARTs to have an external receiver and smart audio - which is why the EU version doesn't have SA. The F4, which is in the Trashcan and the Mobula7 HD, does.
Matthew Brulla
14/3/2019 06:31:00 pm
Next time I should read completely...the SA issue was mentioned in the article. My apologies.
Derek Moore
12/6/2019 03:22:20 pm
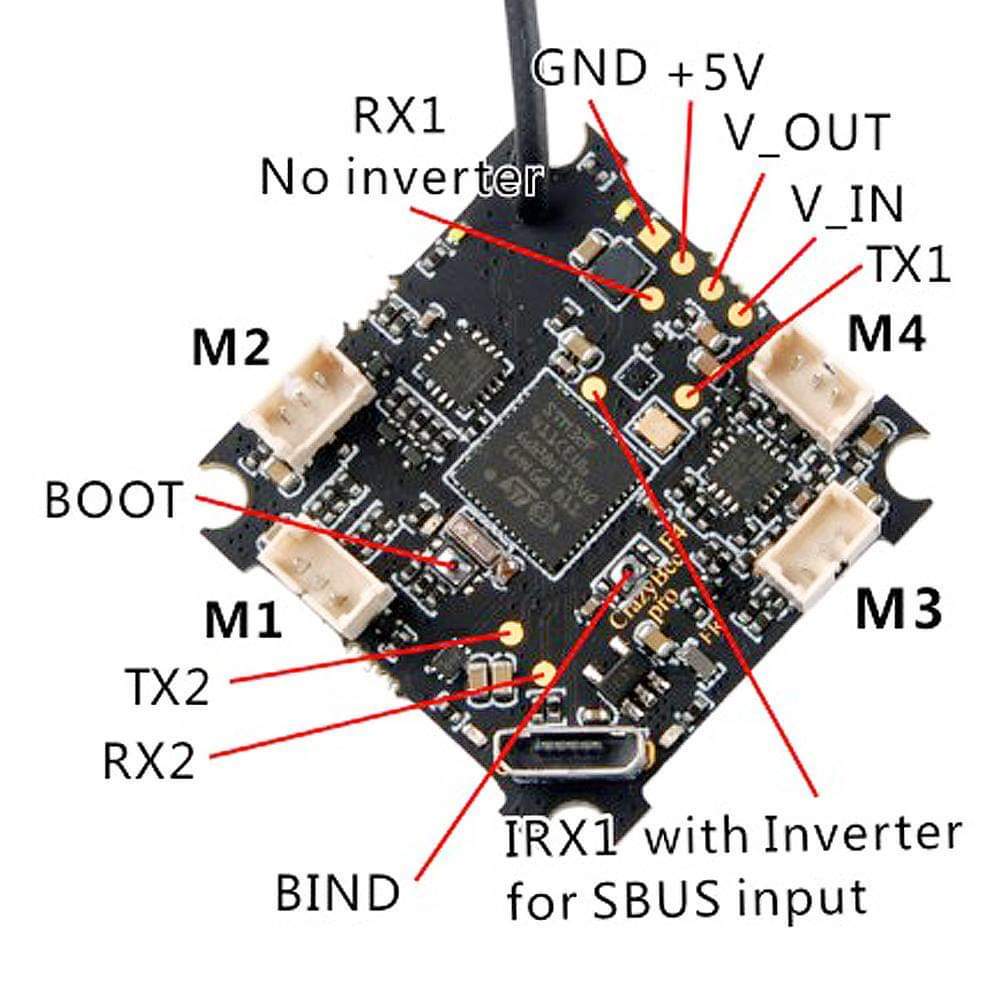
So if I wanted to connect my xm+ I would just solder it to the grnd, 5v, and the IRX1 pins.
Mrpurple
2/6/2019 03:06:22 am
I thought about using one old "real" shielded antenna from a frsky receiver. I would solder the shield to one of the ground pins. This would enable to position the antenna completly out of the canopy. Has someone tried this yet?
Quadify RC
4/6/2019 11:55:59 am
You could do that but unless the ground is very close to the antenna solder point then I vaguely remember it can mess with the signal wavelength.
STEVE
4/6/2019 05:06:29 am
I saw a youtube video back then and the guy probably from China added new 1/2 wave antenna at the top and without cutting the orginal one. I don't understand what he said in Chinese though. Do you see if it actually hurts the range having two antennas?
Quadify RC
4/6/2019 11:57:39 am
From the little I've read about trying to use 2 video receiver antennas without diversity it can actually interfere with the signal. It think emperical testing would not be hard through - maybe worth giving it a crack and see if you notice any realy difference?
Criss Carter
29/6/2019 02:06:59 pm
I run a q100, a China whoop, with the antenna intentionally soldered and pointing down. (Thnz Bobnova of MMC for this tidbit.) I now can fly 200+ meters away. Had to switch vtx cause it lost range before TX does. Pointing up or down doesn't make a difference brother. As long as your tx and rx antennas are matching vertically or horizontal you'll get reception.
Quadify RC
4/7/2019 02:58:09 pm
Bobnova is a great helper in the community, MMC especially. Haven't been there for a while but it's a great technical forum.
jacopo
24/8/2020 04:38:08 am
Hi, thank for your guides about mobula7, they helped me a lot customizing and choosing parts for my quad. During last flight i crashed my Mobula and the little antenna ripped off from the pad. I followed your guide to solder it back on the board. It seems pretty well soldered but my mobula will not communicate with the transmitter anymore. I tried also to do the bind process again but without results. Do you have any advice? thank you
Quadify RC
24/8/2020 09:07:24 am
Hi there
Sami
31/12/2020 04:06:57 pm
I am bad at soldering and ripped the RX3 and LED ports and I want to use a XM+ receiver with F3 board. Can I change TX3 port to RX3 and connect a XM+ receiver. Please help.
Matthew Brulla
1/1/2021 03:07:31 am
You can remap any pins using CLI in Betaflight. Leave a Reply. |
Archives
November 2020
Categories
All
 |
 RSS Feed
Thanks for visiting QuadifyRC.com Follow us on facebook below to get all the latest updates