QUADIFYRC MODS AND REVIEWS
  • RC Cars
  • Car of the Month
  • Quad Reviews
  • Quad Mods
  • COUPONS AND DISCOUNTS
  • Long Range
  • About & Contact

TIPS and TRICKS

Mobula 7 Upgrades: The Complete and Final List

23/7/2019

7 Comments

 
Picture
Picture
The Mobula7 can often be had for less than $80 ($74 at time of writing)
The Happymodel Mobula7 was probably my favourite quad of 2018 because it opened up a category that didn't meaningfully exist before - the power whoop... A quad that could be run indoors safely and was still very capable outdoors at a very sharp price point. If you haven't read it yet my original review is here. It has been a hit for newcomers to the hobby which is great too. It is of course not without it's faults like any other quad but it's benefits well and truly outweigh the disadvantages.
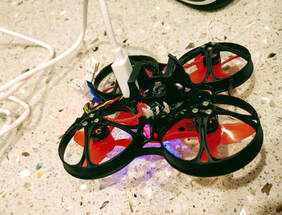
Over the time that I have owned this quad I have improved and customised this quad to overcome some of the initial shortcomings and improve on what already makes this great. I have written several articles on this and have summarised these here with links to the full article plus any other improvements I've since made. Practically all of these upgrades are relevant for the Eachine Trashcan as well (which I reviewed here)
Frame Upgrades
Picture
$2 e6000 glue
​My biggest disappointment with the very original mobula was the frame which was just not strong enough for 2s crashes especially in the cold weather that this is typically flown. In terms of a quick and easy fix I found that $2 e6000 glue from banggood made for cheap and effective repairs in this article here:

MOBULA 7 AND WHOOP FRAME REPAIR GLUE - E6000 FROM BANGGOOD
Picture
V3 frame (yes it was backward for a reason!)
Next I found that the v3 frame from the Eachine Trashcan which is definitely the strongest option and proved this through a lot of crashes and no damage to the frame. My article including instructions on the change to the V3 frame is here:
​
THE BEST FRAME FOR YOUR MOBULA 7
Since then I have found I prefer the V2 mobula frame which is the same design as the V1 but stronger (although not as strong as the V3). This is because I found it was easier to fit my favourite gemfan props and the overall flight characteristics were better, most notably decreased yaw washout compared to the V3. Note: the mobula7 v1 has been discontinued and all new mobulas ship with the V2.
Batteries​ and related upgrades

Read More
7 Comments

MOBULA7 and Trashcan Upgrade: Convert your 1s batteries to a true 2s

12/5/2019

8 Comments

 
Picture
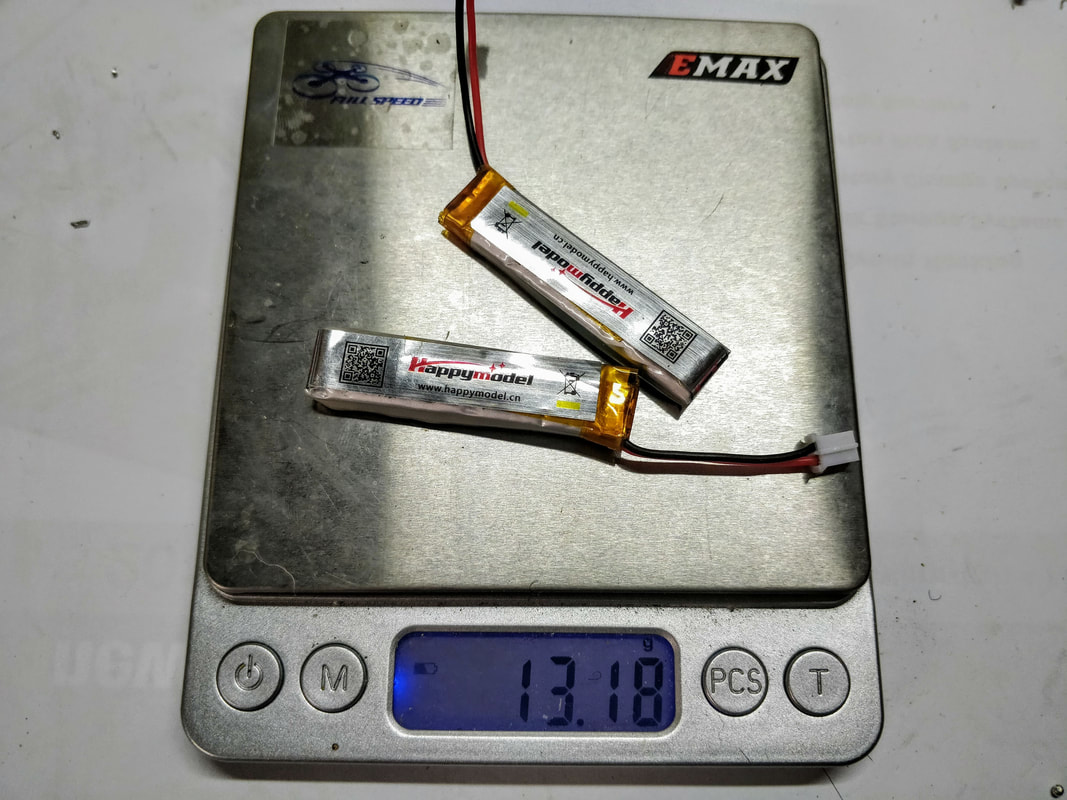
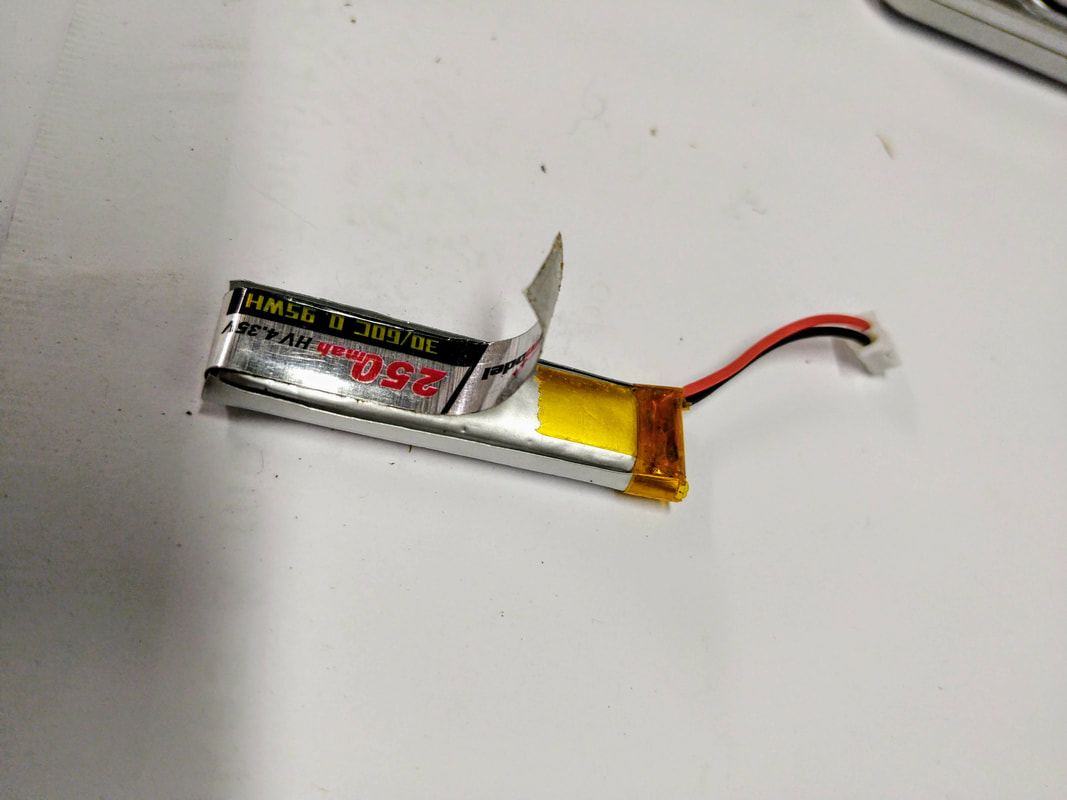
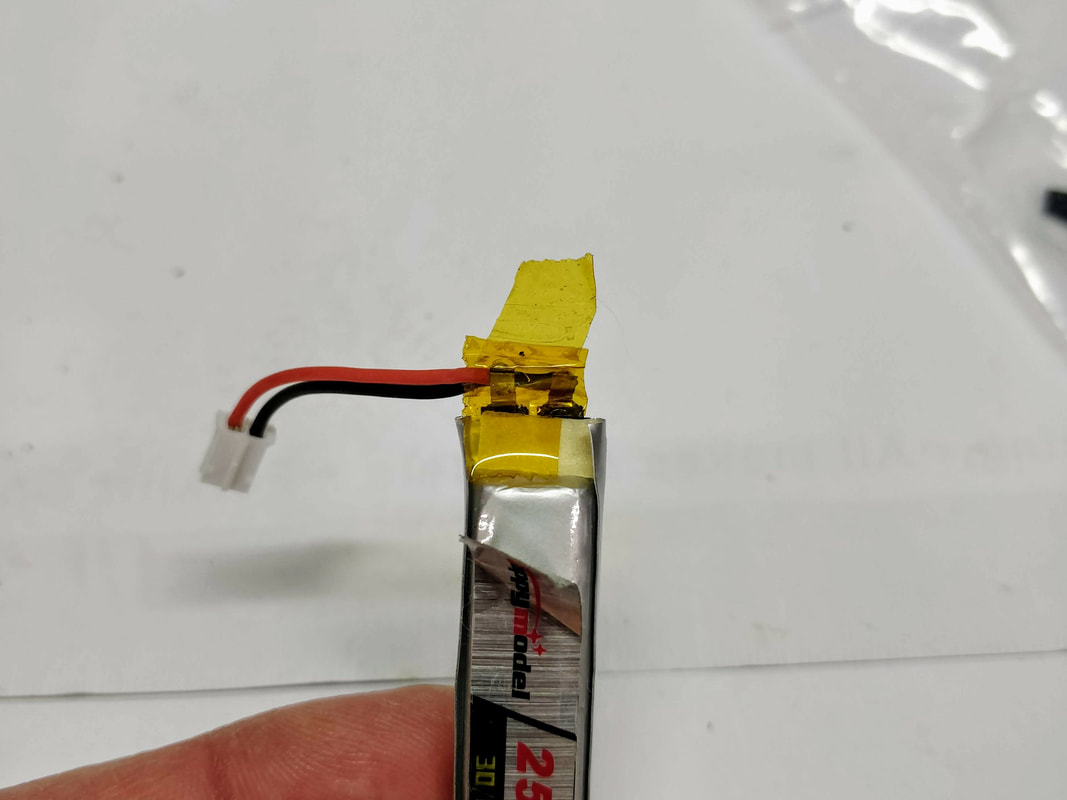
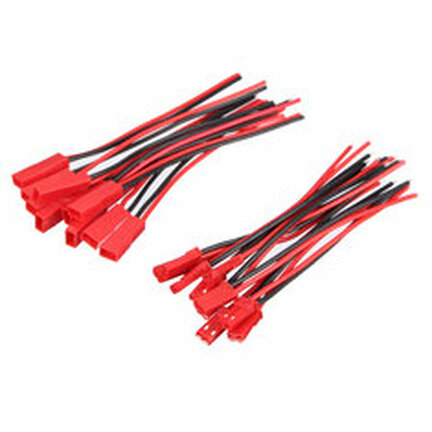
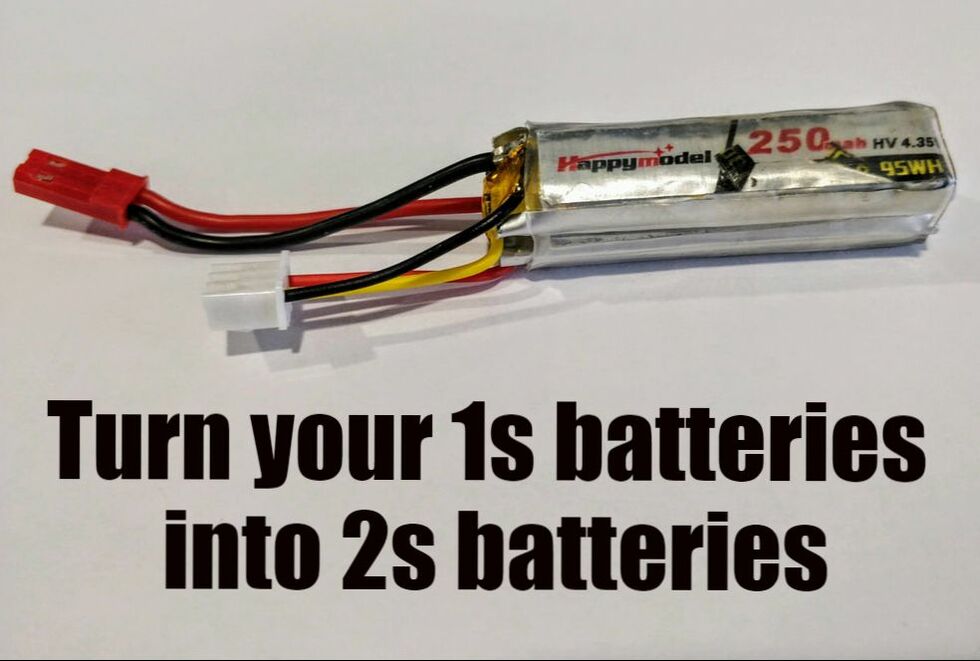
Both the Happymodel Mobula7 (review) and Eachine Trashcan (review) both come with 4 x 1s batteries that are designed to be used in series 2 at a time with a fiddly ph2.0 series connector. This introduces a lot of resistance in the power circuit and resultant voltage drop under load which shows as battery sag. It is easy to upgrade to a true 2s JST connector as I've shown in this blog or a XT30 if you'd prefer. Although 2s 300mah batteries are not expensive it does feel wasteful just leaving the old batteries to die. This article covers how to convert these or any other 1s cell into a 2s battery and is scaleable up to 6s!

This is the fifth article in my series of HappyModel Mobula7 upgrades, many of which can be used for the Trashcan too. Also to come are:
  • Swapping to a much more durable frame​
  • Improving the battery connector for more power
  • converting to run 'props out' 
  • tuning betaflight filters more specifically for brushless whoops, 
  • propeller upgrades. 
  • receiver range improvement​
All links will be updated here when completed. Many of these I've completed the work and am testing at present - it's starting to feel like a more complete little quad now. If you're looking for my review of the mobula7 including setup it can be found here
A Word of Warning
Lipo batteries - even these tiny ones - have a lot of power. Anytime you modify you run the risk of rapid discharge (shorting) which generates heat and possible worse. Only do this mod if you are confident around electronics. Please wear eye protection at a minimum and work in a well lit space. Just go buy the 2s batteries if you are unsure at any point.
Getting prepped
As well as having a well lit area and a good soldering iron, solder and flux (see my article on budget tools here) you'll nee the following items:
  • 2s balance connectors with silicon wire like these: JST-XH 2S LiPo Balance Cable
  • JST female plugs with silicon wires like these: 5PCS Amass 20AWG 10cm JST Male Plug Cable 
  • or XT30 female plug with silicon wire like this: XT30 Connector To 18AWG Cable 100mm
  • 30mm wide PVC heat shrink tubing like this: 5M Flat 29.5MM 18.5MM PVC Heat Shrink Tubing
Picture
1. Here is the start weight for 2 x 250mah batteries that are included with the Mobula7
Picture
2. Carefully peel back the stickers to expose the ends of the yellow insulative tape.
Picture
3. Fold the positive (red) and negative (black) terminals up

Read More
8 Comments

MOBULA7 UPGRADE: EAsiest way to go props out to improve flight

4/3/2019

6 Comments

 
Picture
Reversing the rotation of all of your propellers (known as 'props out') is something you commonly do on larger quads to eliminate debris bring flung into your FPV camera and to push obstacles like branches clear. Obviously these don't apply when the props are gaurded like in a Mobula 7 but there is also a hypothesis out there that it can improve flight characteristics such as note on KababFPV's video here. Some of the beta fpv guys also believe it helps with yaw washout but the evidence appears inconclusive. Typically to do this correctly you need to
  1. Remove and swap all of the props
  2. Reverse each ESC direction in BL Heli Suite
  3. Tick 'reverse props' in betflight.
The method documented here allows you to skip steps 1 and 2 which is especially useful because you can run the risk of damaging the rather fragile motors when removing and re-installing the propellers. Just a quick note the the Eachine trashcan comes default with reversed-props.

This is the fourth article in my series of HappyModel Mobula7 upgrades, many of which can be used for the Trashcan too. Also to come are:
  • Swapping to a much more durable frame​
  • Improving the battery connector for more power
  • tuning betaflight filters more specifically for brushless whoops, 
  • propeller upgrades. 
  • receiver range improvement
  • modding your 1s battery to be a proper 2s
All links will be updated here when completed. Many of these I've completed the work and am testing at present - it's starting to feel like a more complete little quad now. If you're looking for my review including setup it can be found here

Read More
6 Comments

MOBULA7 UPGRADE: Better Range with the Onboard receiver

26/2/2019

15 Comments

 
Picture
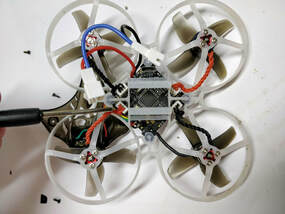
This mobula 7 is getting more and more upgraded
Introduction
The crazybee F3 and F4 series of all in one boards that are the heart of the mobula7, m7hd, eachine trashcan, snapper7, ur65, uk/us65 and even beta75pro2 are an amazing piece of technology that incorporates a flight controller, 4xBL_HeliS ESCs and a receiver. Cramming all of this on one board does mean some compromises though and the biggest one for me is the poor receiver range. This brief article will show how to get a minor improvement with zero investment. Note: this mod is relevant for all the models listed above.

This is the third article in my series of HappyModel Mobula7 upgrades, many of which can be used for the Trashcan too. Also to come are:
  • Swapping to a much more durable frame​
  • Improving the battery connector for more power
  • tuning betaflight filters more specifically for brushless whoops, 
  • converting to run 'props out' 
  • propeller upgrades. 
  • receiver range improvement
  • modding your 1s battery to be a proper 2s
All links will be updated here when completed. Many of these I've completed the work and am testing at present - it's starting to feel like a more complete little quad now. If you're looking for my review including setup it can be found here

Read More
15 Comments

MOBULA7 UPGRADE: More power with better battery connector

5/2/2019

21 Comments

 
Picture
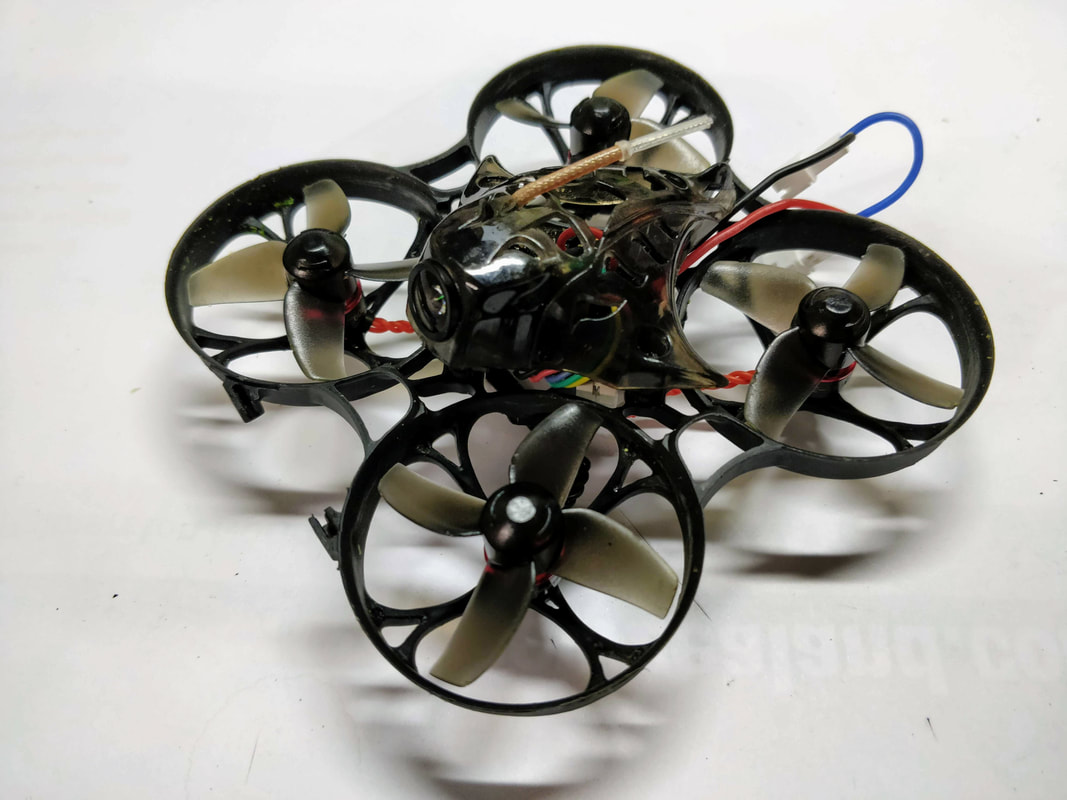
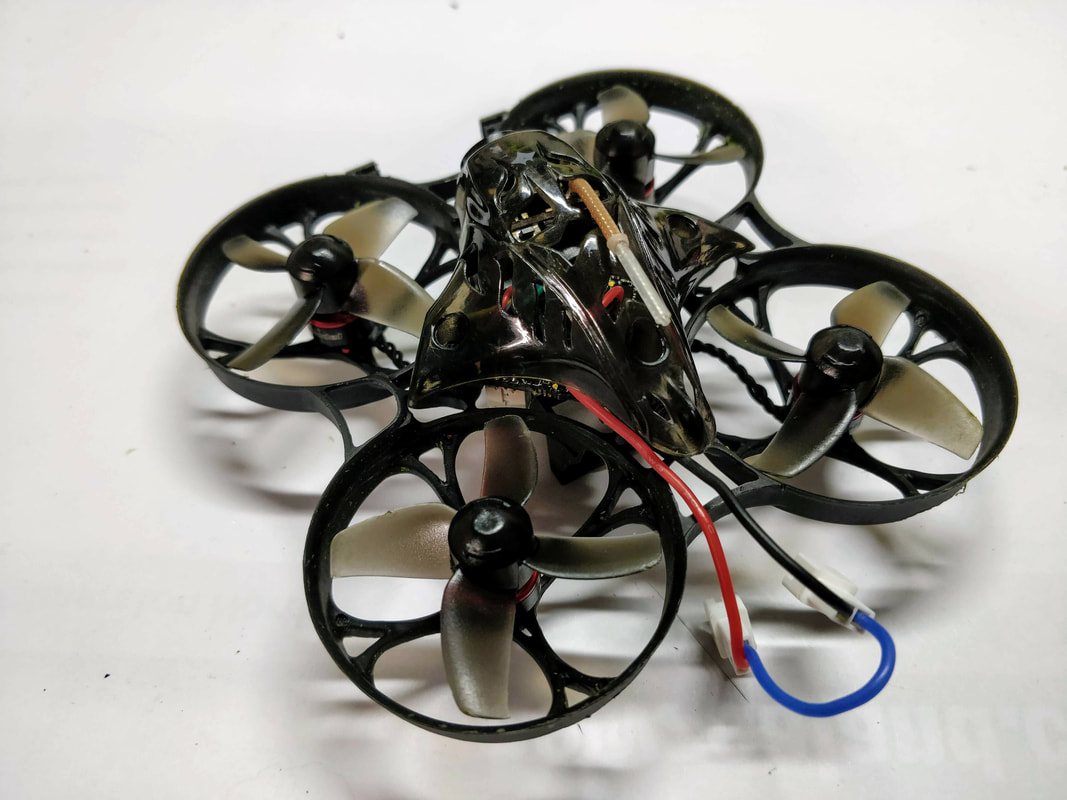
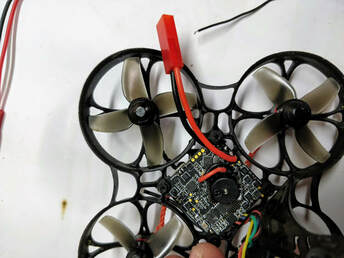
Introduction
In order to run 2s, the Mobula 7 comes standard with 2 x PH2.0 connectors that allow you to run 2 x 1s batteries in series. When running in series the strength of the connection is determined by the weakest link in that circuit. The strength of connection determines the maximum current that can pass and the voltage drop that results. Although it works this system has a very low current overhead from a design perspective - 2 x budget PH2.0 connectors with the dreaded 'folded' pin and very lightweight 26AWG wire. All this adds up to a lot of voltage drop when even reasonable current is pulled - something all will be familiar with on the mobula where you see voltage drop to scary levels (6v and below) during punches even when you have a full battery. Although it recovers almost immediately it does mean you don't get access to the battery's full voltage potential.

New Update: Read here how to convert your 1s batteries to a 2s battery
This is the second article in my series of HappyModel Mobula7 upgrades, many of which can be used for the Trashcan too. Also to come are:
  • Swapping to a much more durable frame​
  • tuning betaflight filters more specifically for brushless whoops, 
  • converting to run 'props out' 
  • propeller upgrades. 
  • receiver range improvement
  • modding your 1s battery to be a proper 2s
All links will be updated here when completed. Many of these I've completed the work and am testing at present - it's starting to feel like a more complete little quad now. If you're looking for my review including setup it can be found here
Picture
JST connectors are very cheap, light and perfect for this application
How to improve the situation
Now that we are through the dreaded theory we can get on to the solution. To cut to the chase I will be moving to a true 2s battery connection with a JST connector and this is why:
  • 1 x JST connector will allow much more current than 2 poor quality PH2.0 connectors
  • 20-22AWG (guage) wire has a lot less voltage drop that the 26AWGwire included
As a bonus this makes it more durable. Although I used a 20AWG in this walthrough, I'd recommend these 22AWG ones because they are much more easy to solder and manage. In order to keep you motivated I'm pleased to say this makes a significant improvement to power and reduction in battery sag, more in the conclusions at the end. 

Read More
21 Comments

Mobula7 Walkthrough Upgrade: The best Frame for your Mobula 7

28/1/2019

11 Comments

 
Picture
Picture
Picture
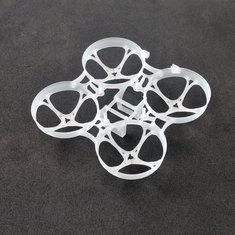
The Mobula7 v3 frame (same as the Eachine trashcan frame)
Introduction and why I like the Mobula7 better.
It's been a few months since I reviewed the HappyModel Mobula 7 (here) and have more recently reviewed the Eachine Trashcan here. Since reviewing the Trashcan I've been flying the Mobula 7 more and find I actually prefer it. Why? Even thought the image quality is better I can't get used to the narrow vertical field of view on the traschan's EOS2 16:9 camera and I find the 0803 motors on the trashcan draw too much power on without delivering a whole lot more speed. The Mobula7's major downside is the frame which breaks easily even though the v2 frame is an improvement and e6000 glue (as tested here) is great for repairs.

For this reason I've written an article for newcomers on how to upgrade to the V3 (trashcan) frame which completely addresses the strength issues.

This is the first article in my series of HappyModel Mobula7 upgrades, many of which can be used for the Trashcan too. Also to come are:
  • installing a better battery connector,
  • tuning betaflight filters more specifically for brushless whoops,
  • converting to run 'props out'
  • propeller upgrades.
  • receiver range improvement
  • modding your 1s battery to be a proper 2s
All links will be updated here when completed. Many of these I've completed the work and am testing at present - it's starting to feel like a more complete little quad now.
Instead of just writing about it, please see the steps below with captions. Click on the picture to embiggen
Picture
1. Remove all of the motor plugs from main wires. You can just pull the wires but I'd recommed small needle-nosed pliers to pull on the plugs instead
Picture
2. Shown here with all 4 motor wires removed.
Picture
3. Use the included Phillips head screwdriver to remove the 3 screws that secure the canopy to the frame. Don't lose them!

Read More
11 Comments

Eachine Trashcan: Improving the Beeper with software only

7/1/2019

4 Comments

 
Picture
Introduction
​Recently I've reviewed the Eachine Trashcan and in many ways it is superior to the Mobula7 as I found in my review here. One omission from the trashcan though compared to the Mobula7 is the lack of a physical beeper. On the upside though is that the trashcan (like most other brushless quads) uses Dshot as the ESC protocol meaning you can use the motors as a beeper. This is in fact immediately available on the Trashcan with some simple software changes which I will outline below.


Read More
4 Comments

    Archives

    November 2020
    July 2020
    January 2020
    December 2019
    October 2019
    September 2019
    August 2019
    July 2019
    June 2019
    May 2019
    April 2019
    March 2019
    February 2019
    January 2019
    December 2018
    November 2018
    September 2018
    August 2018
    July 2018
    June 2018
    May 2018
    February 2018
    December 2017
    November 2017
    October 2017
    September 2017

    Categories

    All
    1.9 Inch
    2 Inch
    2s Whoop
    3.4.0
    3.5
    3d Printing
    5.8GHz
    6 Inch
    6s
    AKK
    AKK Infinite
    Antenna
    Attitude V5
    Battery Pad
    Beeper
    Betaflight
    Brushless Whoop
    Cheap Mods
    Dji Fpv
    Dshot
    DVR
    Eachine
    Eachine Trashcan
    Emax
    Fatshark
    Fullspeed
    Furibee X140
    Goggles
    Happymodel
    Hawk 5
    Hawk 6
    Headstrap
    Hq Props
    Iflight
    Jello
    King Kong Fly Egg
    Larva X
    Larva-x
    Leader 120
    Lightweight
    Micro Brushless
    Micro CCD
    Micro Quad
    Mobula
    Mobula6
    Mobula7
    Mobula7 Upgrade
    Omnibus
    OSD
    Pids
    Propellers
    Red Devil
    Repair
    Runcam Nano 2
    Sailfly X Upgrade
    Sailfly-x Upgrade
    T65mm
    Throttle
    Throttle Limit
    Thrust
    Tinyhawk
    Tinyleader
    Trashcan
    Upgrade
    USB Charger
    VTX
    Walkthrough
    X2 Elf
    Xlite

    RSS Feed

    follow us in feedly
Thanks for visiting QuadifyRC.com Follow us on facebook below to get all the latest updates
  • RC Cars
  • Car of the Month
  • Quad Reviews
  • Quad Mods
  • COUPONS AND DISCOUNTS
  • Long Range
  • About & Contact