QUADIFYRC MODS AND REVIEWS
  • RC Cars
  • Car of the Month
  • Quad Reviews
  • Quad Mods
  • COUPONS AND DISCOUNTS
  • Long Range
  • About & Contact

TIPS and TRICKS

MOBULA7 and Trashcan Upgrade: Convert your 1s batteries to a true 2s

12/5/2019

8 Comments

 
Picture
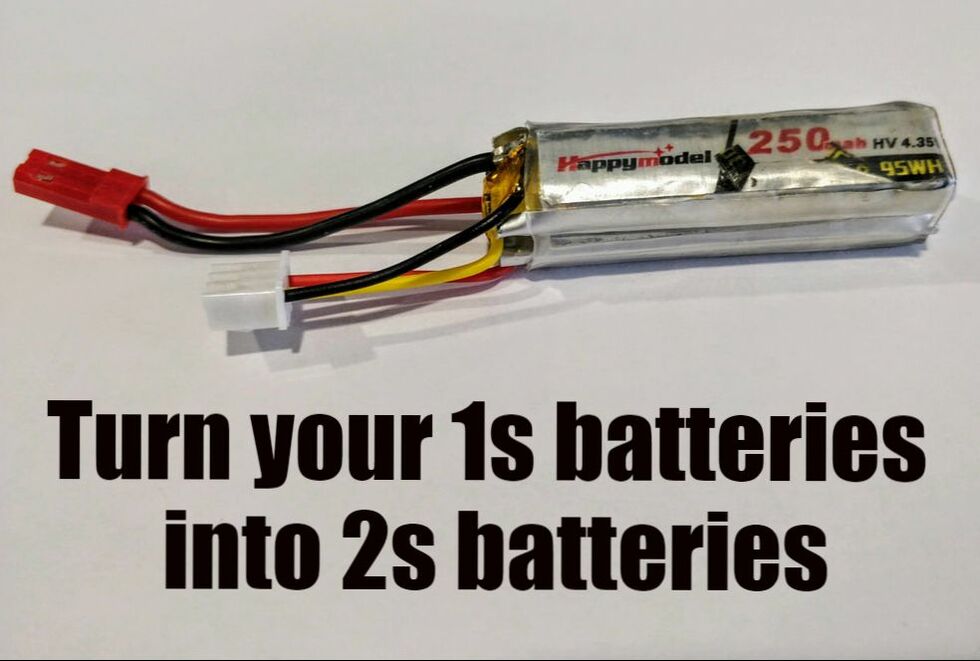
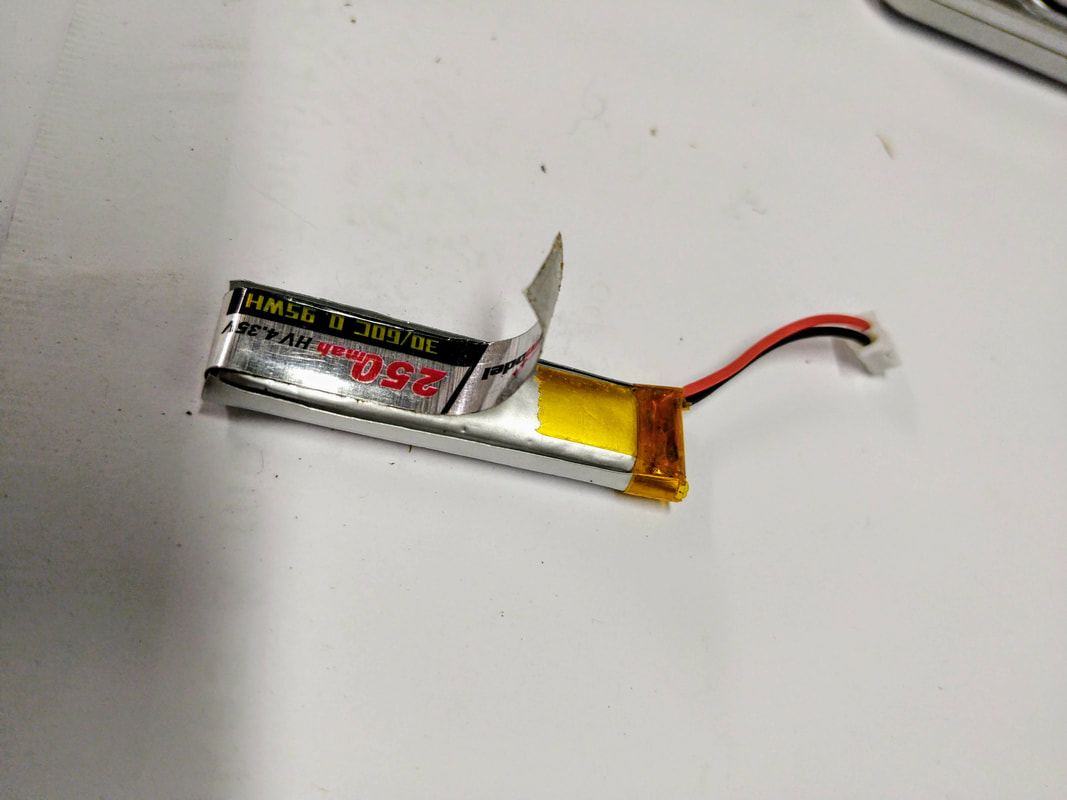
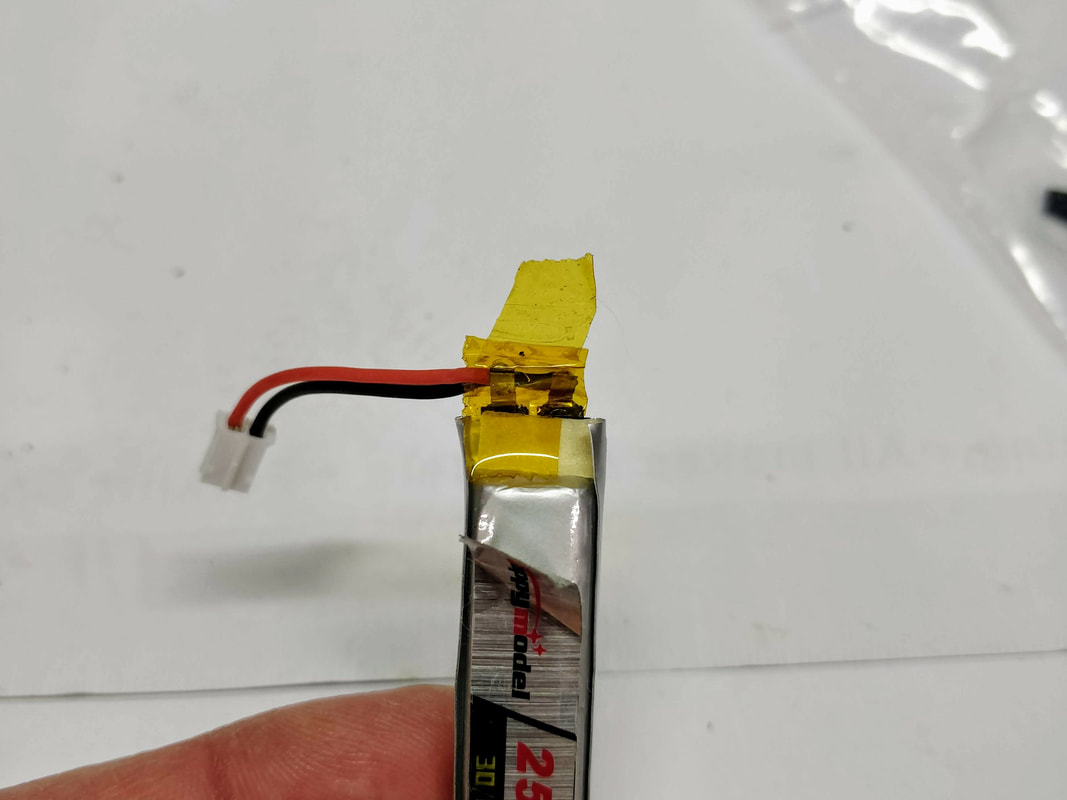
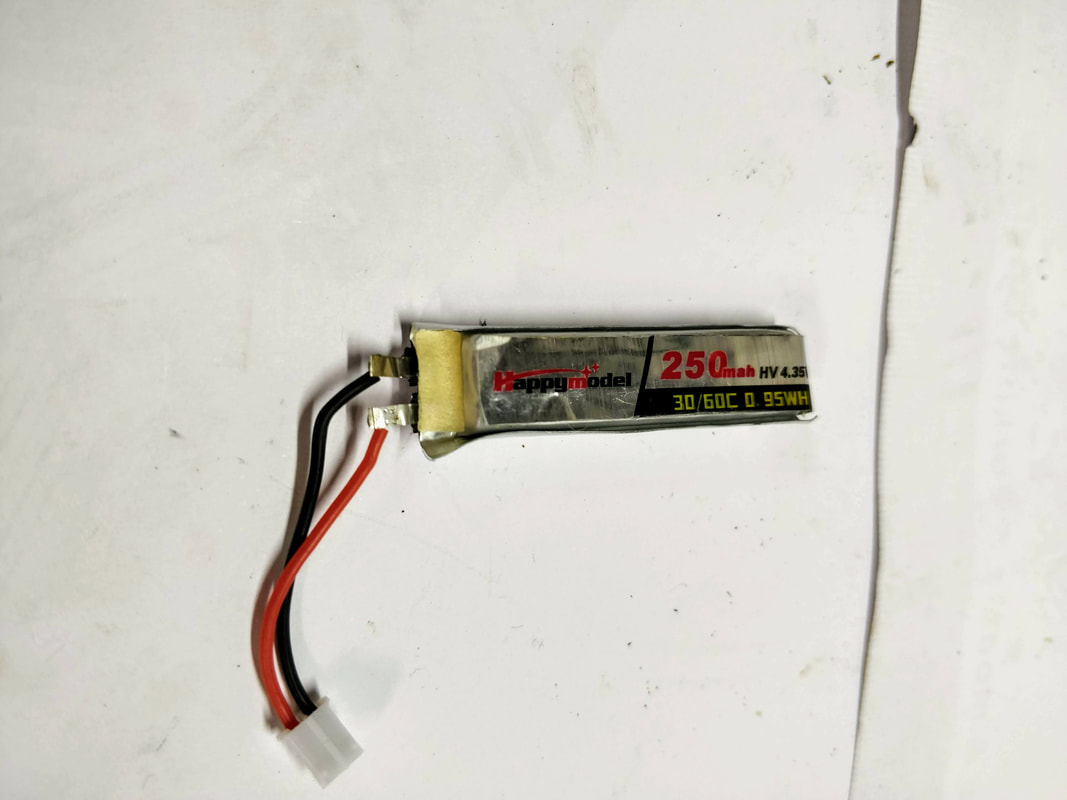
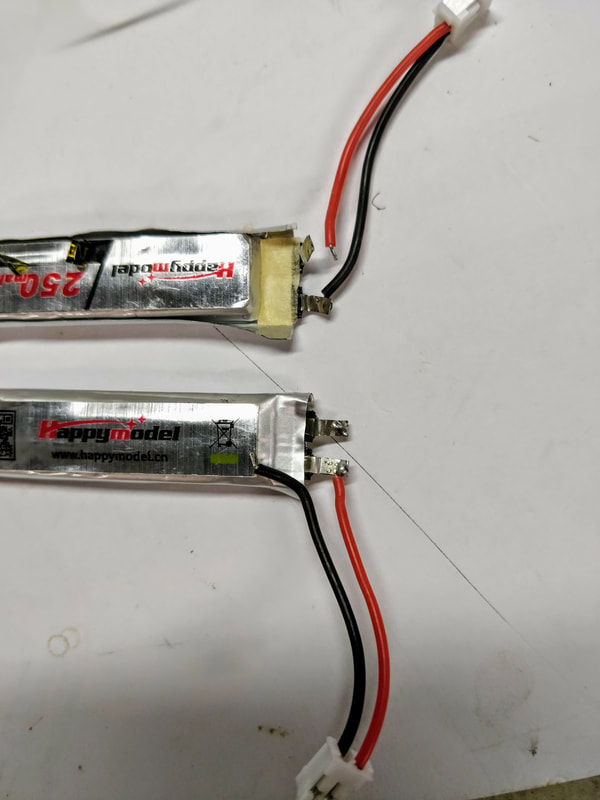
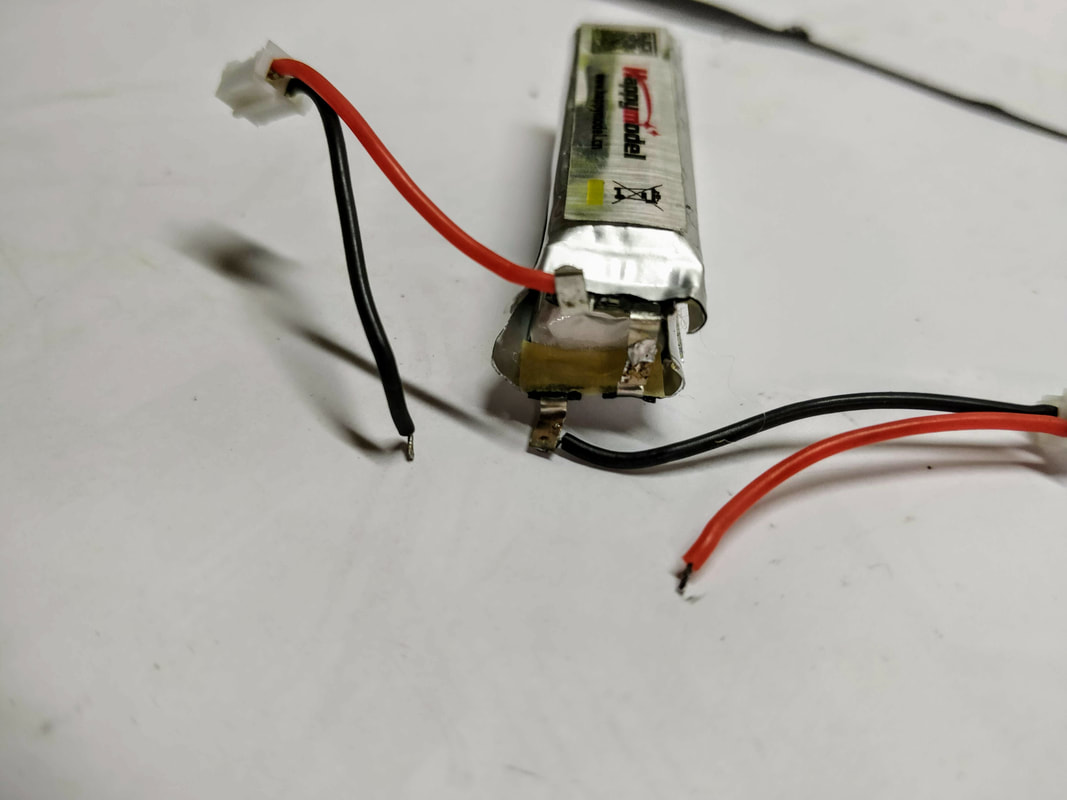
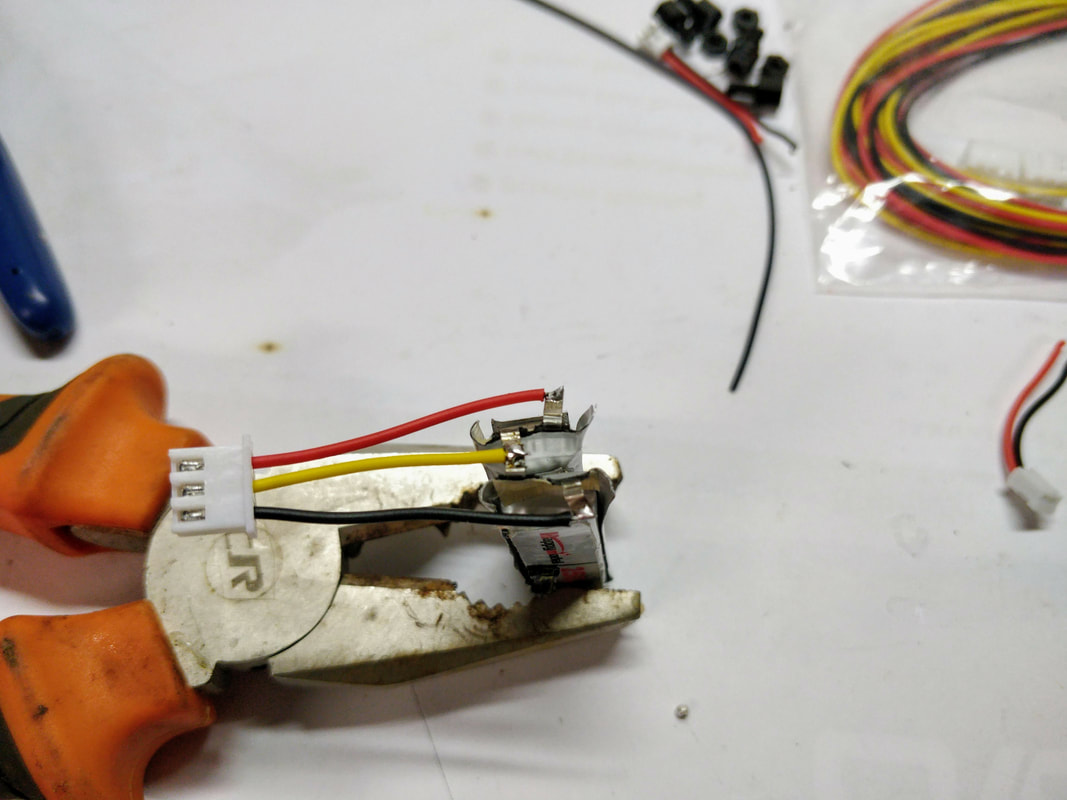
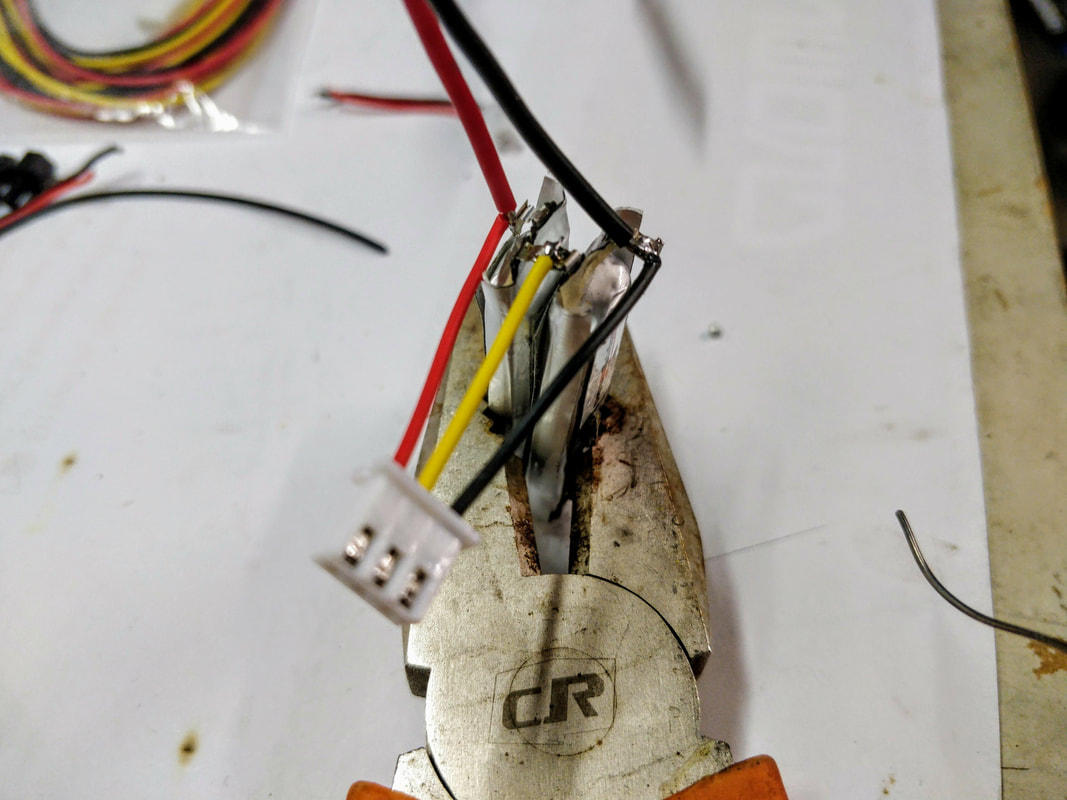
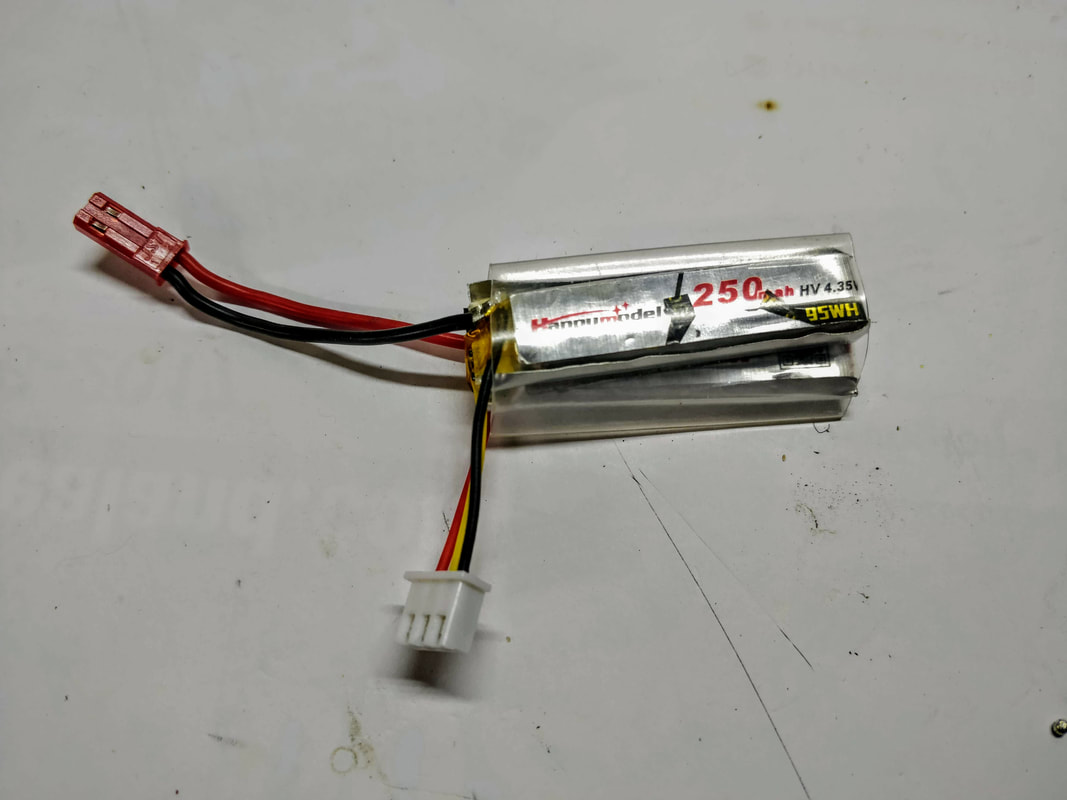
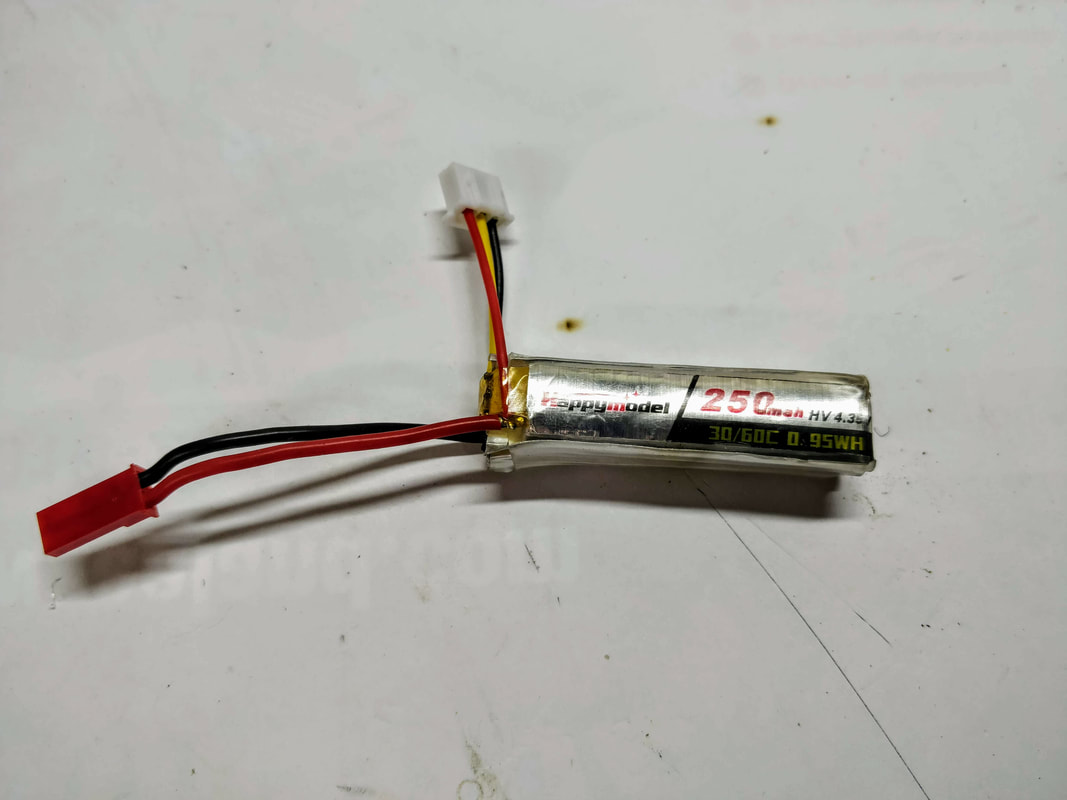
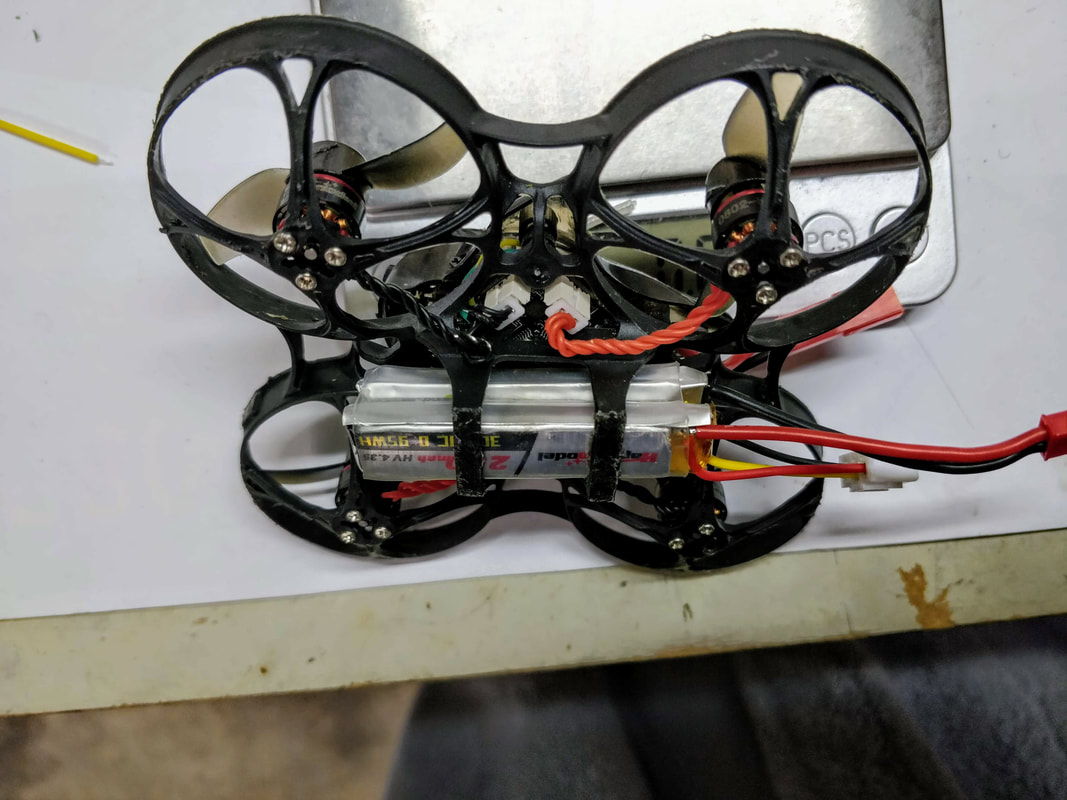
Both the Happymodel Mobula7 (review) and Eachine Trashcan (review) both come with 4 x 1s batteries that are designed to be used in series 2 at a time with a fiddly ph2.0 series connector. This introduces a lot of resistance in the power circuit and resultant voltage drop under load which shows as battery sag. It is easy to upgrade to a true 2s JST connector as I've shown in this blog or a XT30 if you'd prefer. Although 2s 300mah batteries are not expensive it does feel wasteful just leaving the old batteries to die. This article covers how to convert these or any other 1s cell into a 2s battery and is scaleable up to 6s!

This is the fifth article in my series of HappyModel Mobula7 upgrades, many of which can be used for the Trashcan too. Also to come are:
  • Swapping to a much more durable frame​
  • Improving the battery connector for more power
  • converting to run 'props out' 
  • tuning betaflight filters more specifically for brushless whoops, 
  • propeller upgrades. 
  • receiver range improvement​
All links will be updated here when completed. Many of these I've completed the work and am testing at present - it's starting to feel like a more complete little quad now. If you're looking for my review of the mobula7 including setup it can be found here
A Word of Warning
Lipo batteries - even these tiny ones - have a lot of power. Anytime you modify you run the risk of rapid discharge (shorting) which generates heat and possible worse. Only do this mod if you are confident around electronics. Please wear eye protection at a minimum and work in a well lit space. Just go buy the 2s batteries if you are unsure at any point.
Getting prepped
As well as having a well lit area and a good soldering iron, solder and flux (see my article on budget tools here) you'll nee the following items:
  • 2s balance connectors with silicon wire like these: JST-XH 2S LiPo Balance Cable
  • JST female plugs with silicon wires like these: 5PCS Amass 20AWG 10cm JST Male Plug Cable 
  • or XT30 female plug with silicon wire like this: XT30 Connector To 18AWG Cable 100mm
  • 30mm wide PVC heat shrink tubing like this: 5M Flat 29.5MM 18.5MM PVC Heat Shrink Tubing
Picture
1. Here is the start weight for 2 x 250mah batteries that are included with the Mobula7
Picture
2. Carefully peel back the stickers to expose the ends of the yellow insulative tape.
Picture
3. Fold the positive (red) and negative (black) terminals up
Picture
4. Remove the last of the yellow tape to fully expose the terminals. MAKE SURE THAT AT NO POINT THE TERMINALS TOUCH EACH OTHER
Picture
5. Desolder a red wire from the terminal one one battery and a black wire from the terminal on the other
Picture
6. Carefully lay the batteries back to pack so that the 2 terminals empty terminals are back to back with one another. Make sure these have fresh solder on them the solder the empty terminals together - the empty negative terminal on one battery to the empty positive on the other.
Picture
7. Trim and tin your balance lead in the manner above: The red wire goes to the terminal that the battery lead was still attached to, the yellow to the joined middle terminals and the black to the terminal with the black battery lead still attached. Note: the location the wire goes to on the balance connector is the key - use the above pic as a reference,
Picture
8. Before you go any further, verify your work on a balance charger. Your charger should show 2s and the voltage for each of the 2 cells independently. If you get negative voltages or an error, check your work in step 7 and get it right before you proceed.
Picture
9. Carefully solder the discharge lead (JST or XT30) to the outside terminals of the battery making sure the polarity (positives and negatives) are correct. Check and double check on your charger before you take this anywhere near you quad!
Picture
10. I used some 30mm wide polyolefin heat shrink to tie the batteries together after replacing the insulative tape. In hindsight I'd recommend double sided taping cells together first.
Picture
11. Here it is with the heat shrink heat shrunk. This heatshrink is a little heavy and grippy but is what I had in my drawer. I'd recommend a light PVC product like this ​5M Flat 29.5MM 18.5MM PVC Heat Shrink Tubing
Picture
12. the 2 x 1s batteries from the mobula 7 were always an awful fit in the trashcan/v3 frame. In 2s configuration they are much better.
Picture
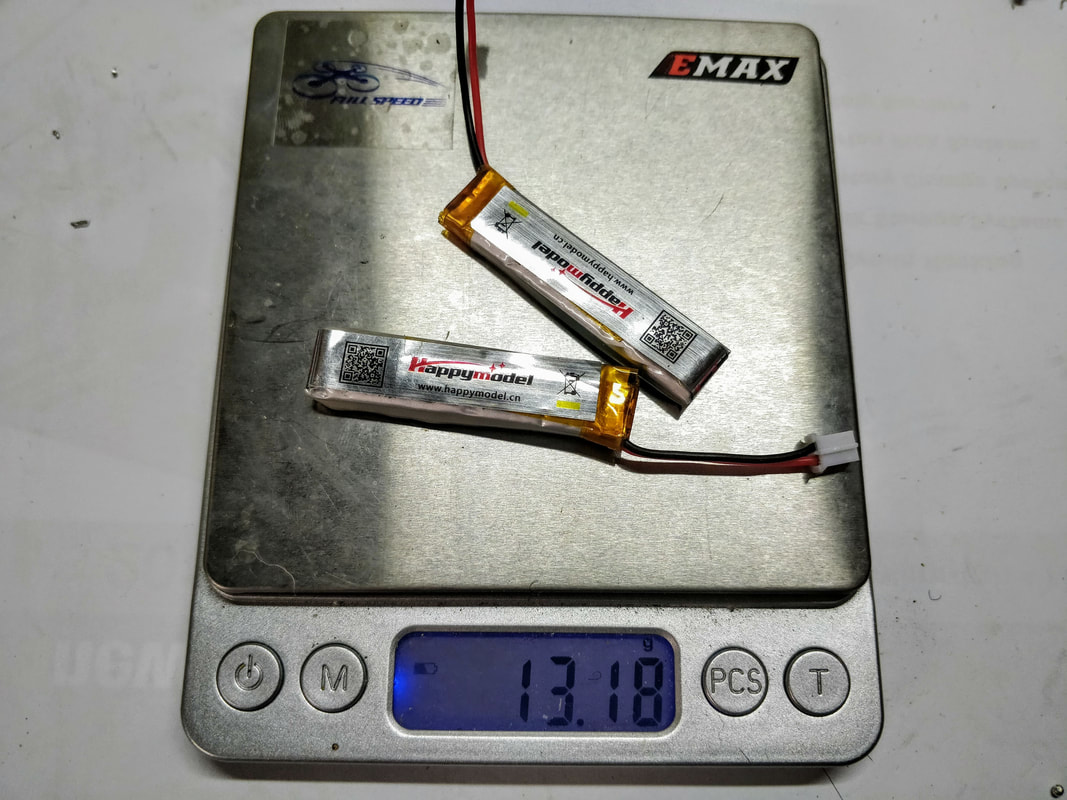
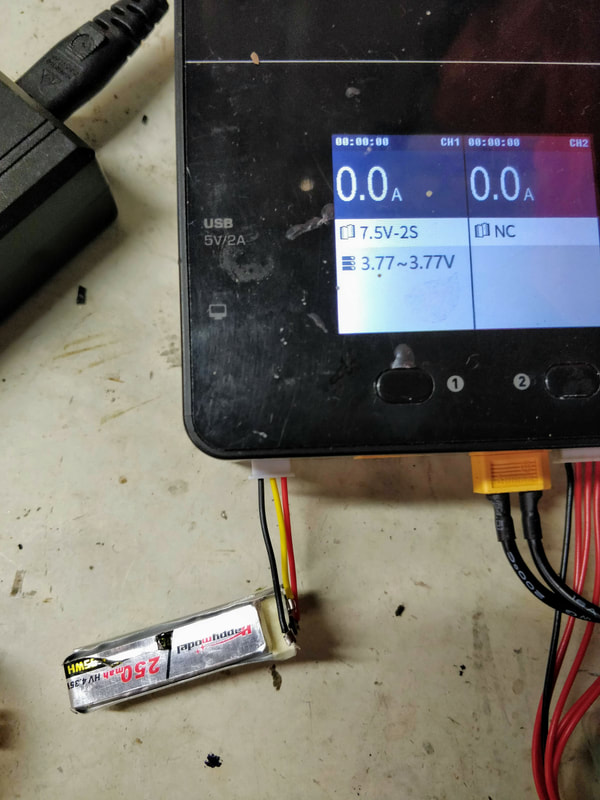
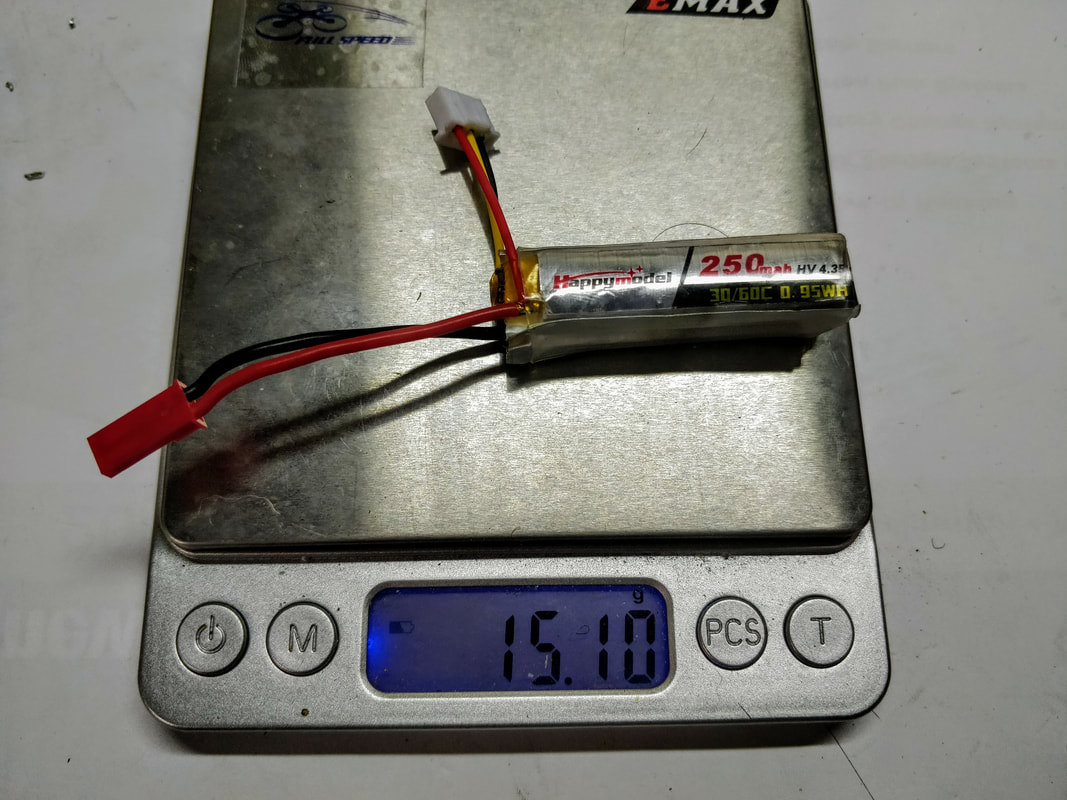
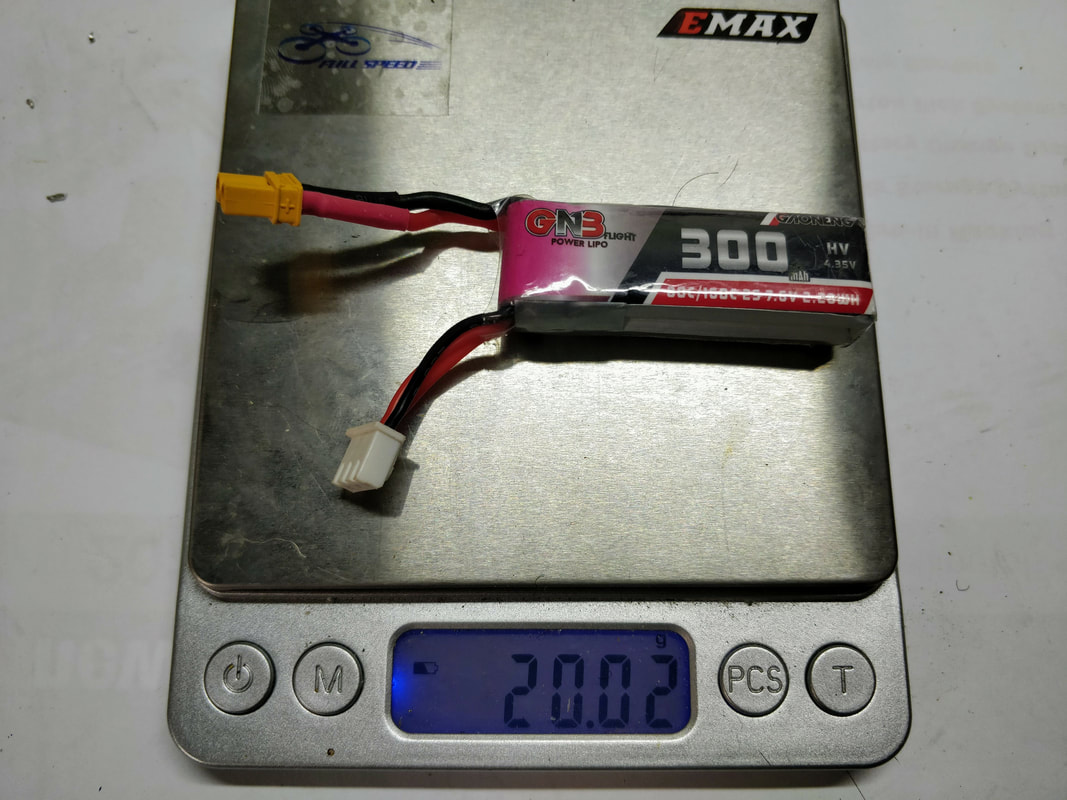
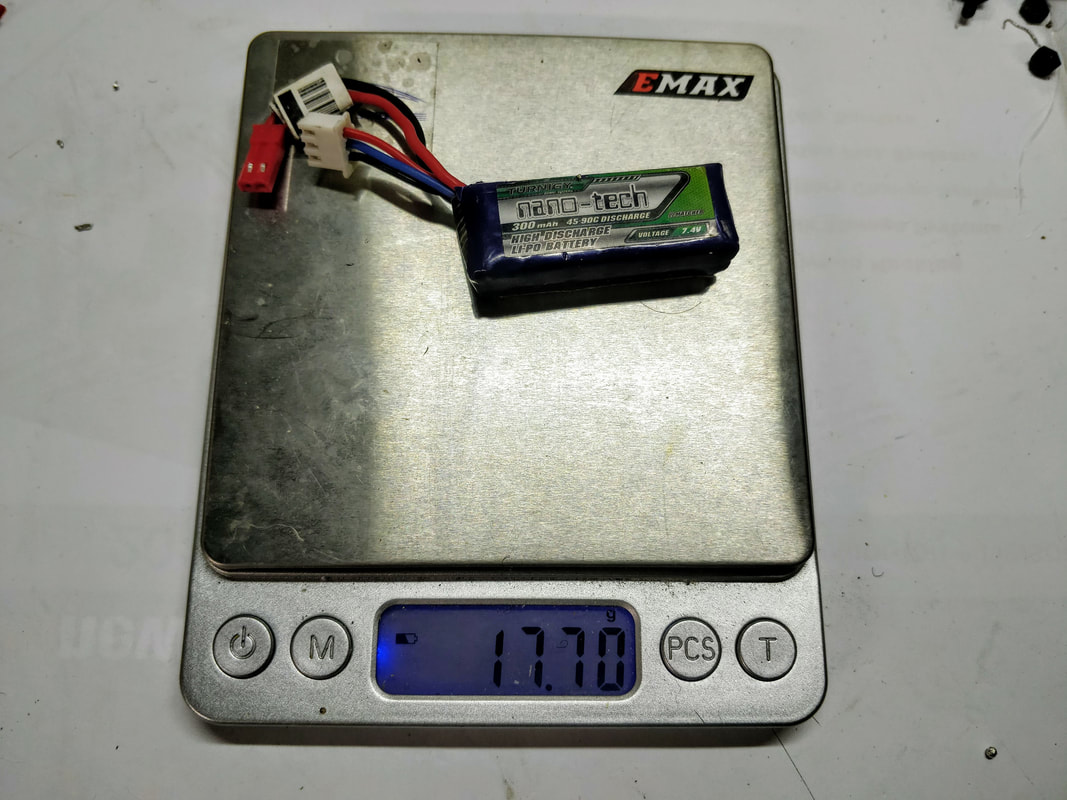
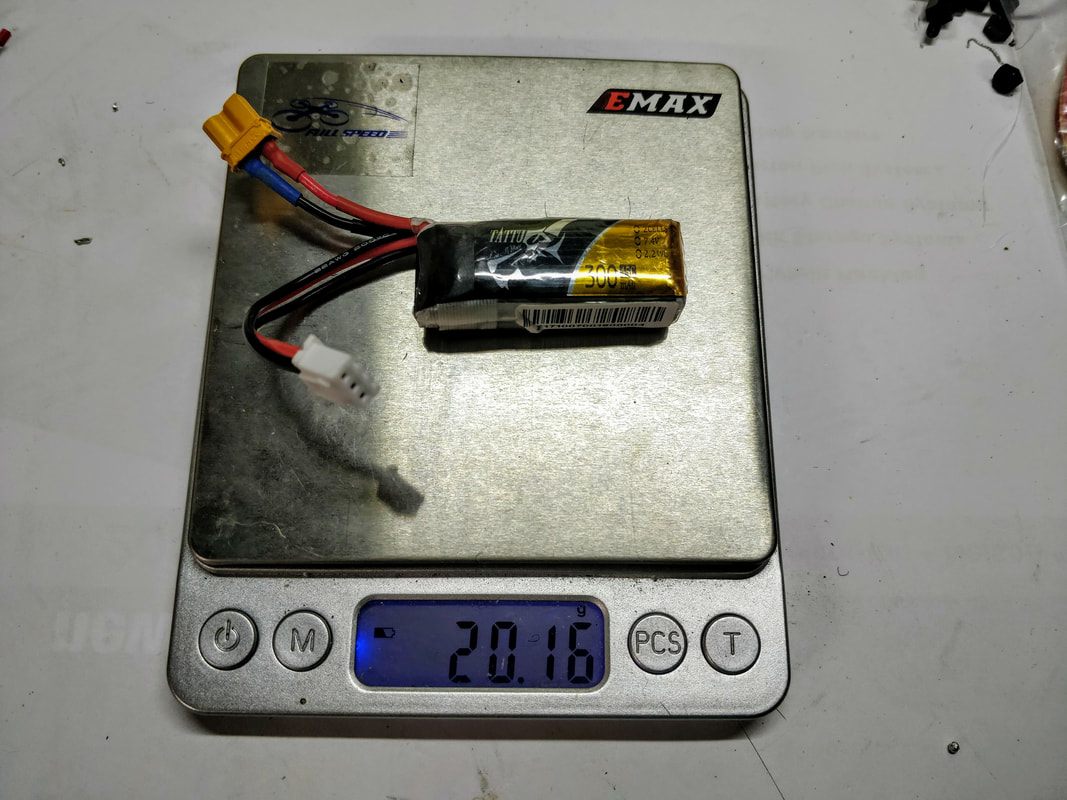
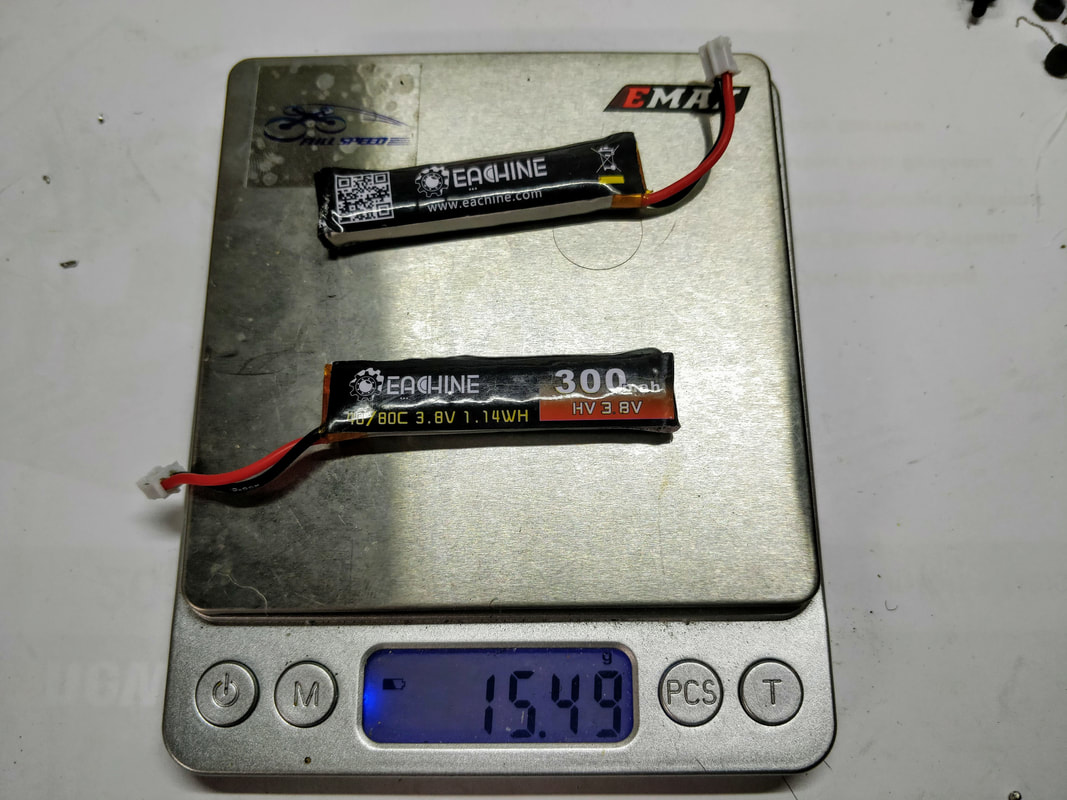
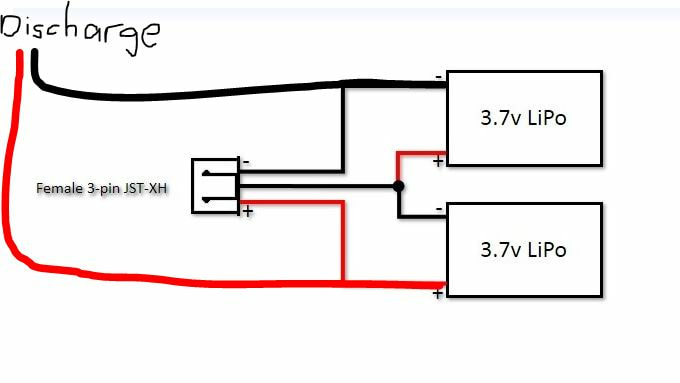
If it makes it easier here is the wiring diagram. Discharge connector can be JST as I've used or XT30. Adapted from an image on this page
So that's it! I've done about 5 cycles in this battery so far and other than the slightly lower capactiy it flies just fine compared to a stock 2s battery. This is a great way to use up the otherwise sound orphaned 1s batteries you may have floating around.

Although you are likely to already have one, if these are genuinely your first multicelled batteries you will need a balance charger so that you can charge more than one cell at a time. Although they can ben expensive, a good charger will stay with you forever and they are a LOT more accurate than the chargers these quads come with which at best undercharge or at worst overchage your cells. My recommendation is the Hobbymade D6 pro duo charger. Without going into detail I've done a full review here.

See below for weight comparisons.
Thanks for reading, if you found this article useful please feel free to like or share, the facebook links below directly link/like this article. Links are affiliated and help me buy the bits I need to produce this type of content.
Picture
Final weight of the 2s 250mah battery with the heavy polyolefin heatshrink (1.9g weight addition)
Picture
Comparison to the GNB 2s 300mah
Picture
Comparison to the Turnigy Nanotech 2s 300mah
Picture
Comparison to the Tattu 2s 300mah
Picture
Comparison to  2x stock trashcan 1s 300mah. Made into a 2s as above I'd expect end weight to be 17.4g (about the same as the nanotech with JST).
8 Comments
K.C.
14/5/2019 04:22:35 pm

I understand the concept, but the wiring is slightly confusing without a wiring diagram. I think it would be a good idea to help people out with one.

Other than that, nice tutorial! I really appreciate your content.

Reply
QuadifyRC
14/5/2019 07:43:27 pm

Excellent point, I'll add a wiring diagram tonight!

Reply
Quadifyrc
15/5/2019 05:13:57 pm

Now updated with wiring diagram, good recommendation 🙂

Reply
CoolDude1350
15/5/2019 01:01:26 am

Looks like the link you have to the D6 is no good. Even the link on their man page is no good. lel

http://hobbycool.com/d6-duo-pro-ac-dc-battery-charger-w-wireless-smartphone-charging/

Reply
QuadifyRC
15/5/2019 08:52:17 am

Sorry, new baby makes my brain soft - I'll fix it now. Thanks for the heads up

Reply
Quadifyrc
15/5/2019 05:15:11 pm

Links updated, thanks again. Looks like I used their historical link which had since been updated. Rookie move on my part

Reply
Random bee user
23/5/2019 11:40:27 am

Really nice description
Works also in reverse
I get a bunch of 3 cell 300mah for cheap and separate some in 1s and 2s
Works great
Always keep lipos away from your inventory /house
Sleep safer

Reply
Quadify RC
28/5/2019 12:17:35 pm

Thanks! You're dead right - can be a good way to get some cheap 1s batteries if you get the right sale.

Also right on the storage, I treat them like fireworks.

Reply


Leave a Reply.

    Archives

    November 2020
    July 2020
    January 2020
    December 2019
    October 2019
    September 2019
    August 2019
    July 2019
    June 2019
    May 2019
    April 2019
    March 2019
    February 2019
    January 2019
    December 2018
    November 2018
    September 2018
    August 2018
    July 2018
    June 2018
    May 2018
    February 2018
    December 2017
    November 2017
    October 2017
    September 2017

    Categories

    All
    1.9 Inch
    2 Inch
    2s Whoop
    3.4.0
    3.5
    3d Printing
    5.8GHz
    6 Inch
    6s
    AKK
    AKK Infinite
    Antenna
    Attitude V5
    Battery Pad
    Beeper
    Betaflight
    Brushless Whoop
    Cheap Mods
    Dji Fpv
    Dshot
    DVR
    Eachine
    Eachine Trashcan
    Emax
    Fatshark
    Fullspeed
    Furibee X140
    Goggles
    Happymodel
    Hawk 5
    Hawk 6
    Headstrap
    Hq Props
    Iflight
    Jello
    King Kong Fly Egg
    Larva X
    Larva-x
    Leader 120
    Lightweight
    Micro Brushless
    Micro CCD
    Micro Quad
    Mobula
    Mobula6
    Mobula7
    Mobula7 Upgrade
    Omnibus
    OSD
    Pids
    Propellers
    Red Devil
    Repair
    Runcam Nano 2
    Sailfly X Upgrade
    Sailfly-x Upgrade
    T65mm
    Throttle
    Throttle Limit
    Thrust
    Tinyhawk
    Tinyleader
    Trashcan
    Upgrade
    USB Charger
    VTX
    Walkthrough
    X2 Elf
    Xlite

    RSS Feed

    follow us in feedly
Thanks for visiting QuadifyRC.com Follow us on facebook below to get all the latest updates
  • RC Cars
  • Car of the Month
  • Quad Reviews
  • Quad Mods
  • COUPONS AND DISCOUNTS
  • Long Range
  • About & Contact