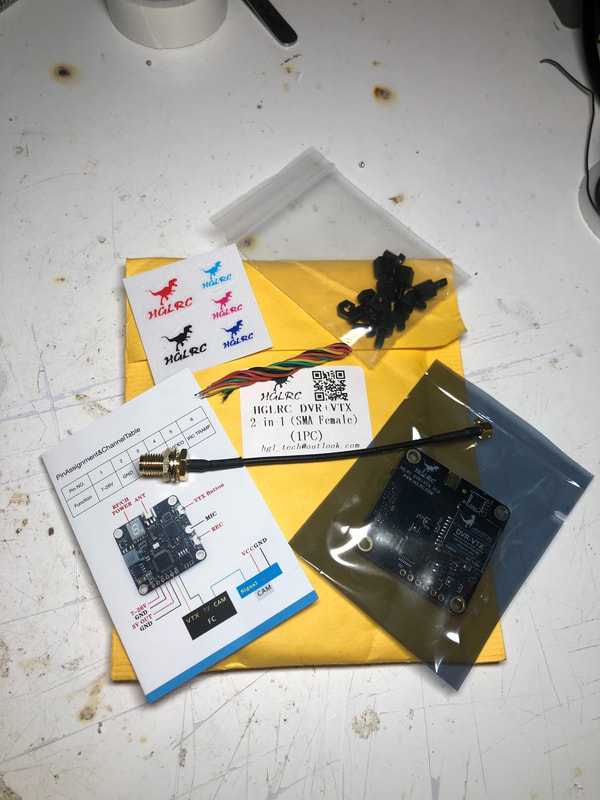
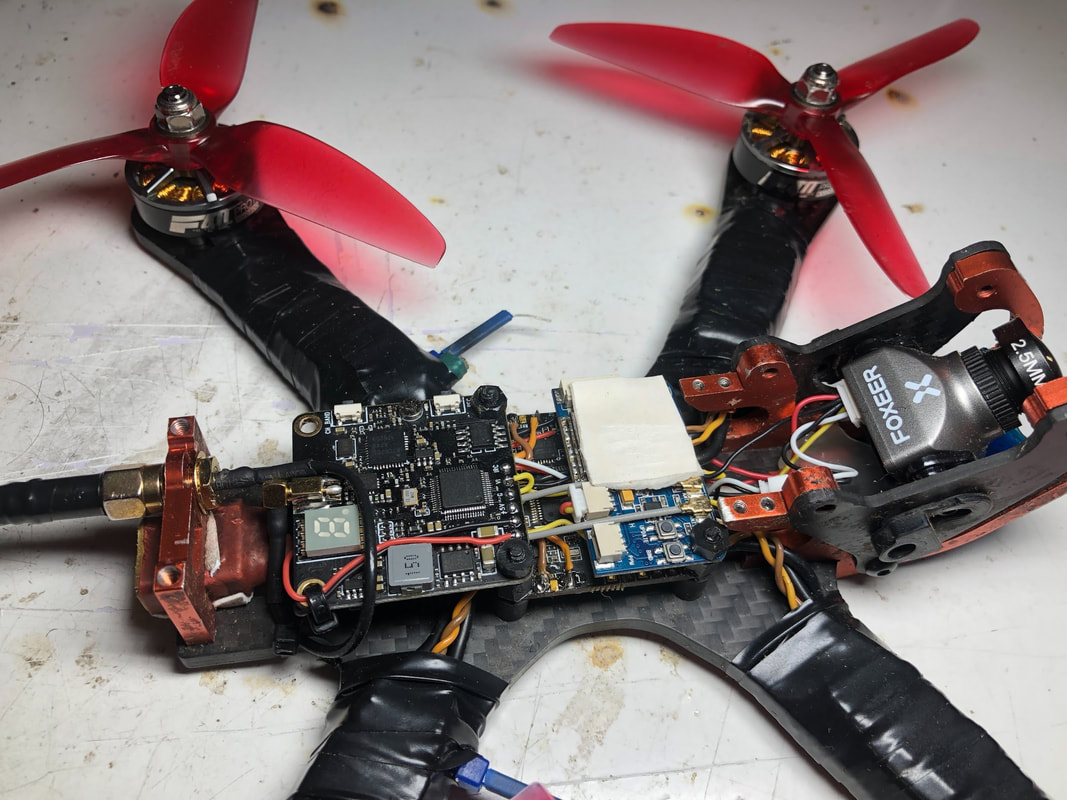
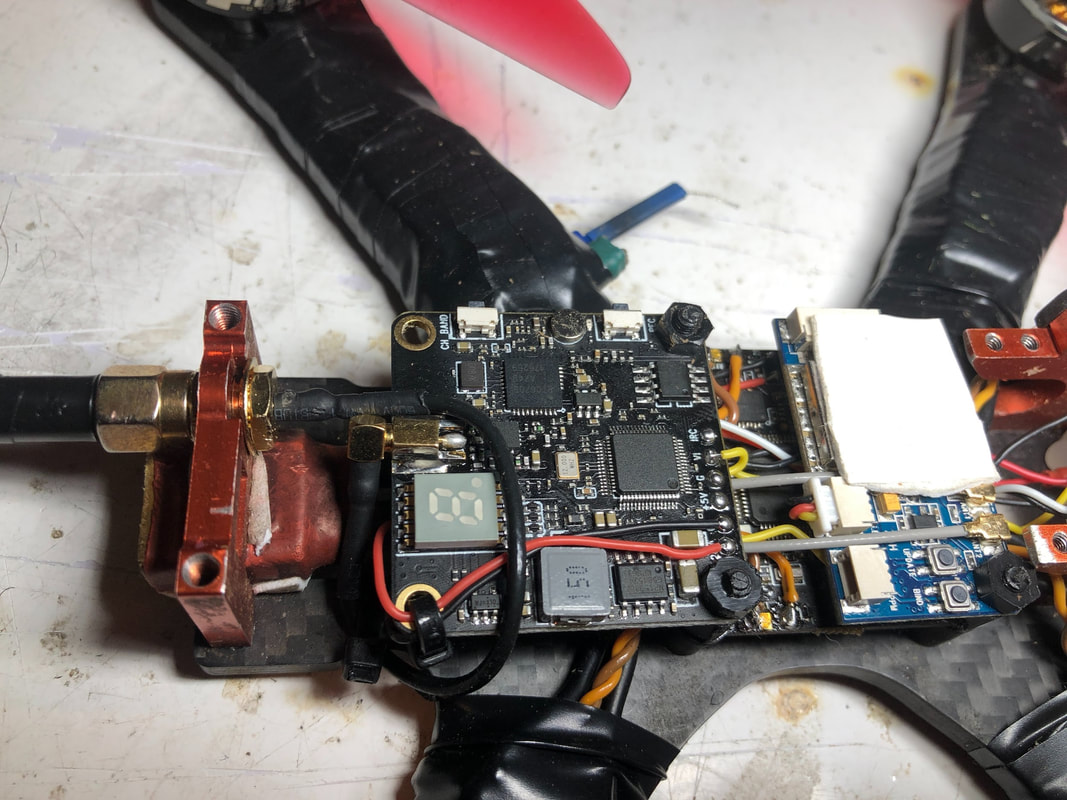
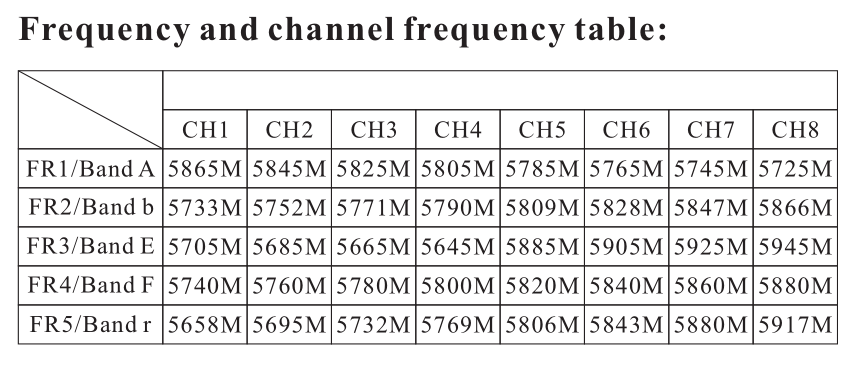
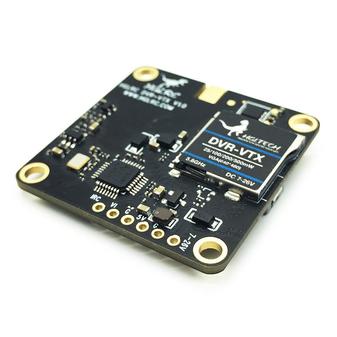
 This review has been kindly written by @fpv_airborne who is looking to become a regular contributor here. Introduction Introducing the 30x30 HGLRC vtx + dvr combo from HGLRC. This is one of the first 30x30 DVR recording vtx available to the public. The DVR is switchable for 40 channels, has power levels of 25mw, 100mw, 200mw, and 500mw, and has a built-in DVR which takes up to a 32gb SD card. This board also includes a built-in microphone that records onboard sound. The vtx has a resolution of 640x480 which is reasonable for DVR recording. The HGLRC AIO VTX DVR can be bought directly from HGLRC here or from your favourite vendors including Banggood and Gearbest. It's about $40 at the time of writing (July 2018). A closer look at the specs. The HGLRC vtx has changeable power levels that include pit mode, 25mw, 100mw, 200mw and 500mw. It also includes 40 channels to connect to your goggles such as A band, B band, Fat Shark and R band. The board measures 36mm x 36mm, with the mounting holes 30.5mm apart. The built-in DVR has a slot under the board to accommodate an SD card up to a 32gb. This records 640x480p quality video with no static or breakup while flying FPV and this is what really sets it apart from goggle DVR. The vtx weighs just 7.9 grams and is the same size and thickness as a 30x30 mounting flight controller. Installation The HGLRC VTX + DVR combo works much better than expected. The small, thin board allows for easy mounting on top of or underneath the flight controller or power distribution board. The easy plug-in and -out MMCX antenna adapter also works much better than the UFL connector which was the main connector used on many types of vtx’s such as TBS unify pro and Tramp vtx. The MMCX adapter is much more durable and sturdy because of the plug-in design instead of the clip-on adapter; the latter can easily pop off during a crash and may not be easily noticed. This in turn can cause major issues such as burning out of the vtx, poor video and overheating and/or ruining other components on the stack. From my first flight with the vtx + DVR combo I was impressed. The vtx was flawless to set up with clear instructions. Included with the vtx is a manual that includes a diagram of the vtx, wire layout, power levels and bands, and “How to's”. The manual explains how to set up the vtx including how to wire up and how to change through power levels, bands and channels; this uses only 2 buttons that are nicely placed on the side of the board. Briefly pressing the channel side button once changes the channel from 1 up to 8, whereas pressing the button for 2 seconds changes the band from A band up to F band. Pressing the button for 4 seconds changes the power levels from 25mw up to 500mw. The DVR recording is set up by inserting an SD card (up to 32gb). Then briefly press the “REC” button and wait for the red LED beside the button to start flashing, indicating that recording has started. Once you are done with your videoing, just press the “REC” button again which will stop and finish the current DVR recording. Note that the DVR will automatically stop recording after 5 minutes. Experience during flight: As soon as I placed the goggles on my head, I was surprised to see the difference in colour compared to my other vtx, a TBS unify pro. The video quality seemed much more saturated and warmer in sunny areas and darker in shaded areas. This was seen partially in the FPV feed but was much more noticeable in the DVR recording after footage was reviewed. I was previously using a TBS unify pro with Foxeer antenna and Foxeer Predator v1 mini that gave images of more natural colour, but once I switched to the HGLRC dvr vtx, the quality of the image improved. I understand that not everyone will prefer the warmer, more saturated colours. If so, this can be changed with the camera’s OSD cable. However, while flying I noticed that there was far less static in the goggle view from the HGLRC vtx compared to the TBS unify pro vtx. Both were running 25mw, and both had the same Foxeer antenna, Foxeer Predator camera, and flight controller. I was surprised to notice this difference but it was quite obvious in my test flights of both quads at the same location and under the same conditions. Because of the built-in DVR, there is no static or break-up which makes the video much more pleasing for the viewer to watch. Conclusion:
In conclusion, I would recommend this vtx to people who want to build a light racing quad with quality DVR footage for their races - but without need to add the extra weight of a GoPro. This DVR vtx board can also replace the more expensive Runcam split for most people, if you do not mind the loss of quality but want to have as little delay to the FPV feed as possible; in racing every millisecond counts. However, there are some issues in terms of possible human error to be considered before purchasing this vtx. Firstly, if your quad flies far away without control, or crashes in long grass, in high trees, in a different property or even unplugs in mid-air, the video feed, that was recording, is not accessible to review to locate where the quad has landed or crashed because the SD card is in the quad and not the goggles. Secondly, after the races you might forget to stop the recording by pressing the button on the vtx, and instead just unplug the quad’s power lead. With the battery lead unplugged, the video will be cancelled leaving no trace of the recording on the SD card. This is because unlike goggles, the vtx-dvr unit has little capacitance to keep the circuit charge while recording is finalised. The HGLRC AIO VTX DVR can be bought directly from HGLRC here or from your favourite vendors including Banggood and Gearbest.
0 Comments
Leave a Reply. |
Quick Access Menu
All
|
Thanks for visiting QuadifyRC.com Follow us on facebook below to get all the latest updates

