QUADIFYRC.COM
  • RC Cars
  • Car of the Month
  • Quad Reviews
  • COUPONS AND DISCOUNTS
  • About & Contact

QUADIFYRC Quadcopter reviews

HobbyMate Comet 5 inch Quad Review Part 1: Build walkthrough

29/9/2018

0 Comments

 
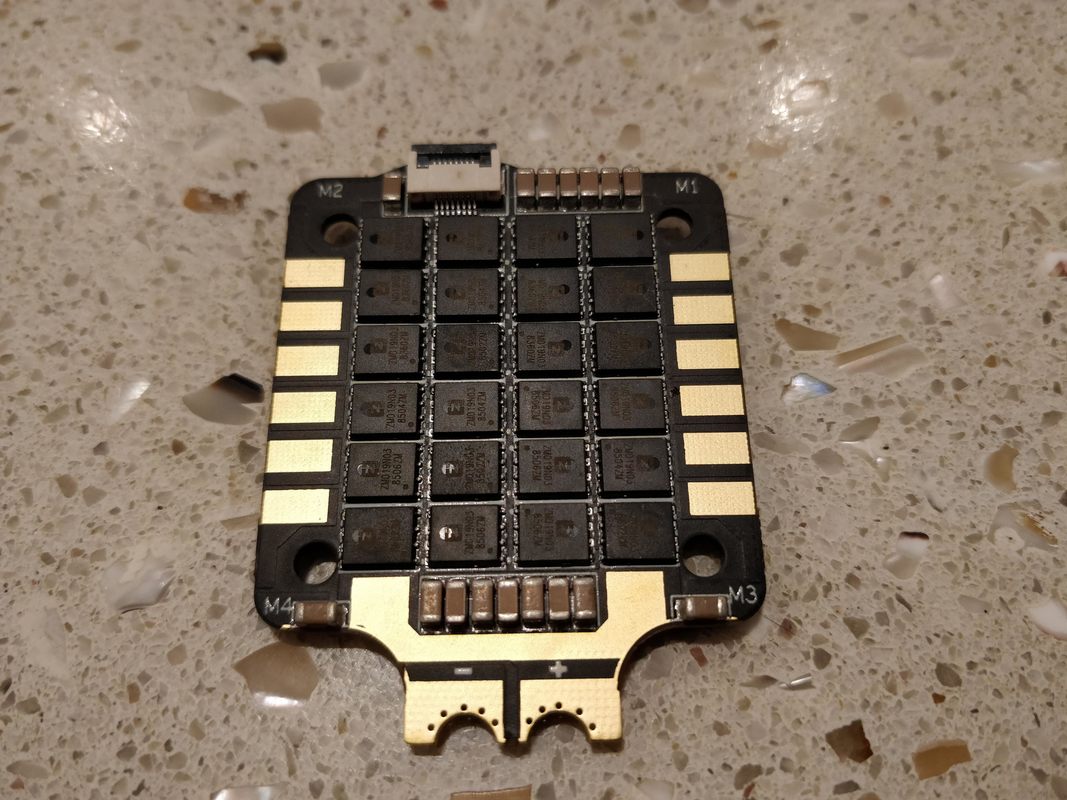
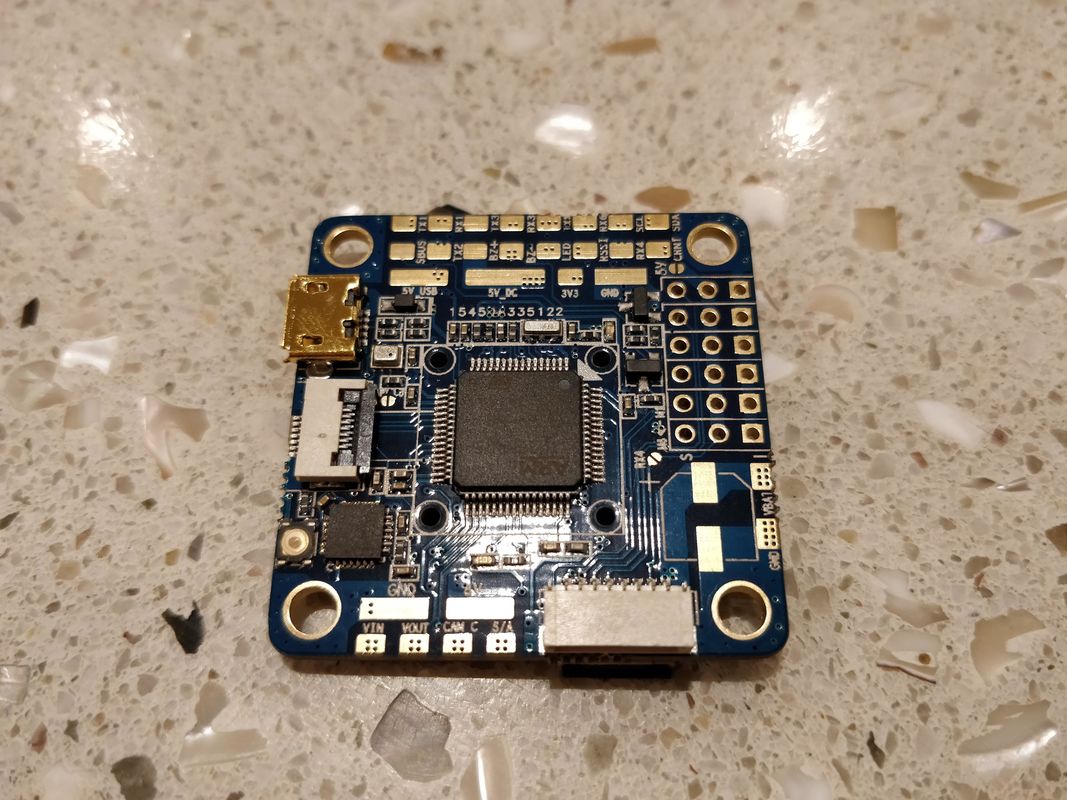
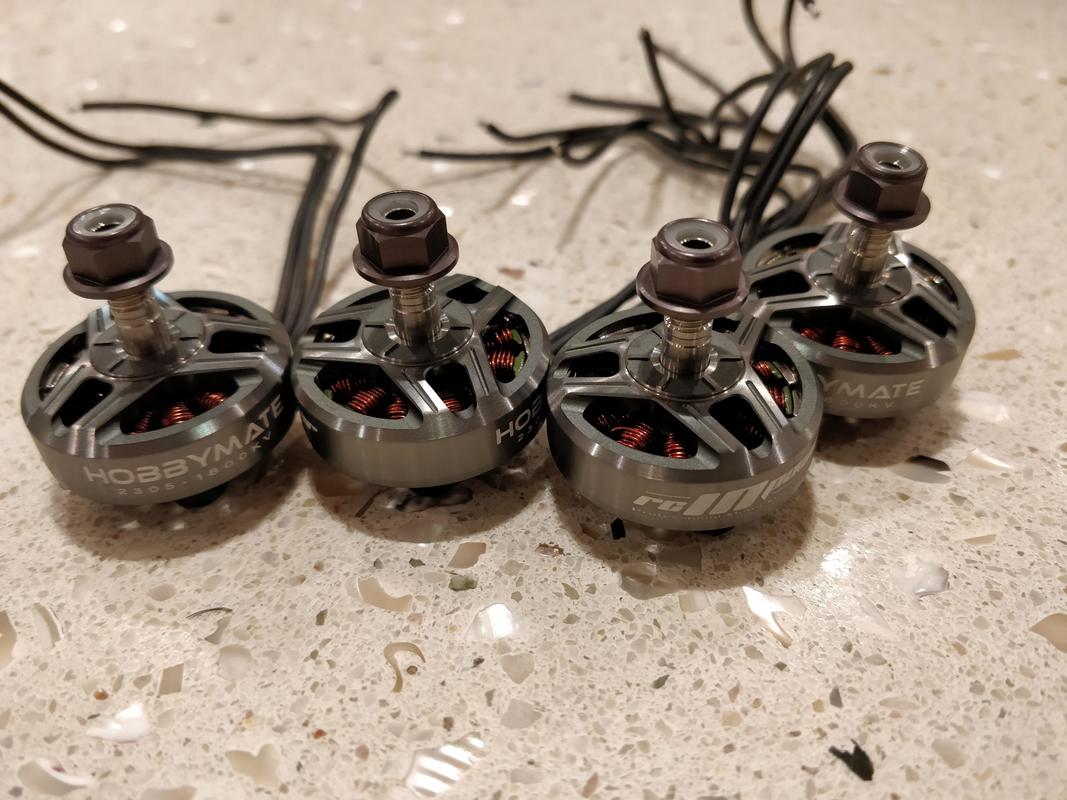
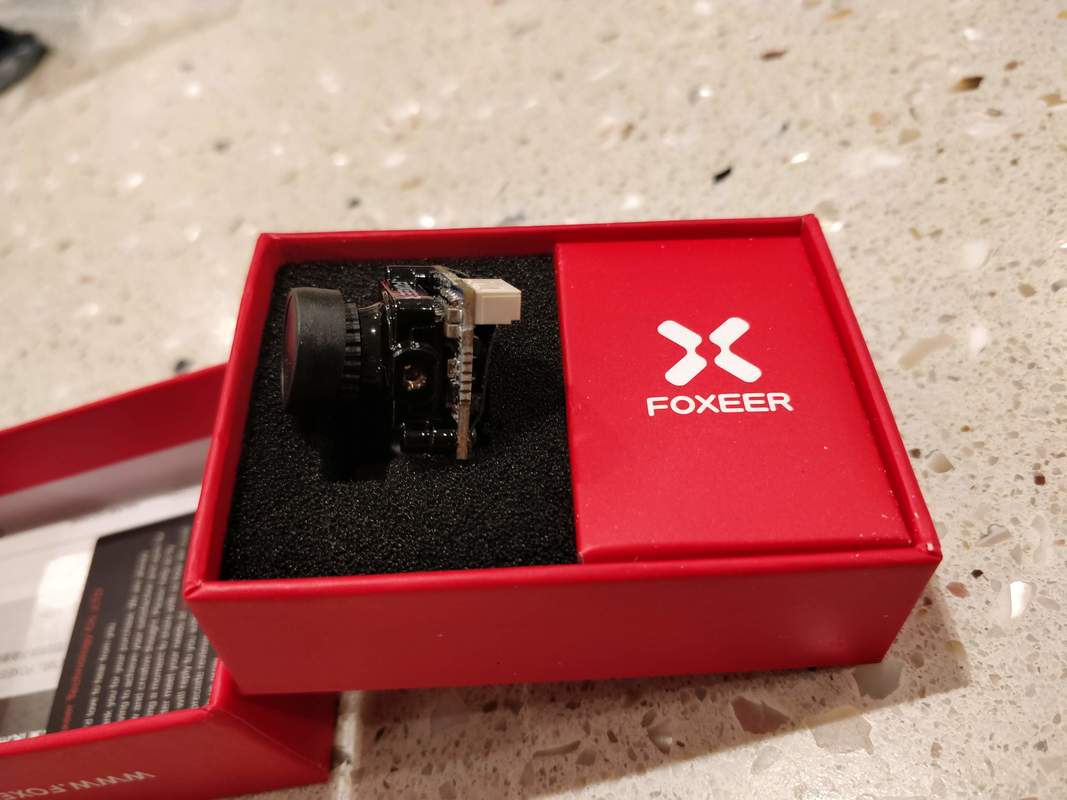
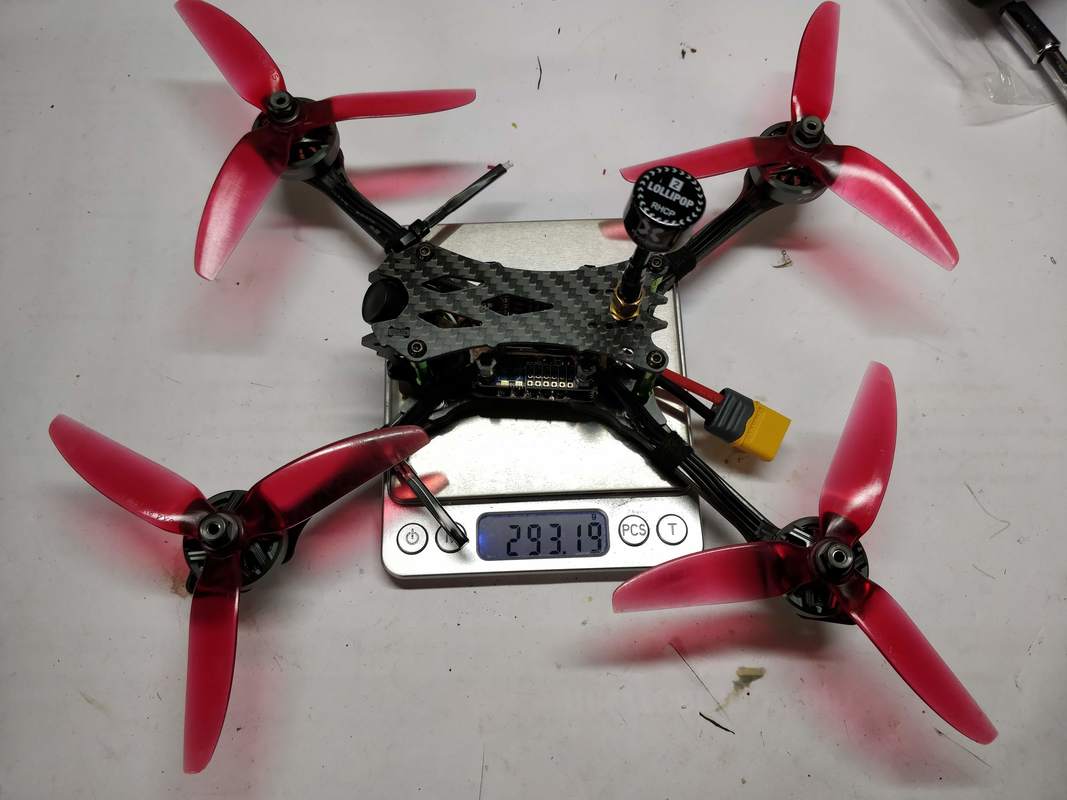
I'll cover this quad over 3 blogs. This first part will cover the build walkthrough, the second the software (betaflight/blheli32) setup here and the last part the flight review. 
PictureThe $180 Hobbymate Comet kit is full of premium and dependable 6s components
The Hobbymate Comet Kit is a premium 5" quadcopter that is currently available as a kit for $180 but will soon be available as a bind and fly version. Update: it is now available as a pre-build pnp or bnf with xm+ or r-xsr receivers. In the days since the Holybro Kopis 1 was released there have been some excellent ready to fly models (along with some not-so-great models) available including the Emax Hawk 5 (review here) and the HGLRC Batman (build here) which have been standouts because they have been well balanced, well built and good value for money overall. Since this is a kit, this particular blog is to walk you through the build and then software setup including a betaflight 3.5.1 cli diff.

The Hobbymate Comet from HobbyCool.com (or Amazon) is a kit the consists of higher quality parts than even the HGLRC Batman at only a fraction of the cost. Infact when bought on their own the parts come to $257 which is clearly much more than the $180 the kit costs (or even the $200 PNP kit). The Electronics are rated 6s from the factory (unlike the Hawk 5) and come with motors suited for either 4s/5s operation (2500kV) or 6s operation (1800kV). I'm especially excited that this include a genuine airbot ESC and flight controller. More details on the parts below:

Picture
ESC is a genuine Airbot Typhoon V2 35a 4in1 BLHeli_32 3-6s capable and it is a BEAST. This is rebadged as a Holybro Tekko32 and is one of the very best ESCs currently available. It has FULL telemetry including current protection. Click here for more specs
Picture
FC is a genuine Airbot Omnibus f4 v6. Don't be fooled by the cheap clones, this is the genuine item featuring 5 full UARTs, expandable gyro and super clean 5v and 8v BECs for an ultra-clean power signal. Click here for more specs
Picture
These are the newest Hobbymate branded 2305 motors and are made by RCinpower. RCinpower aren't widely know outside of China but these motors are well made with 8mm bearings, tight airgaps and hollow Titanium shaft. I opted for 1800kV for 6s but 2500kV is also available. ​Click here for more specs
Picture
This vtx is new to me but looks well featured and according to the manual is i-flight branded. Has tramp control, 0-600mW, mic and the skinny design makes it easy to wire up and maintain. ​Click here for more specs
Picture
The Foxeer Arrow micro pro is my favourite CCD camera and a solid choice here. The micro eagle is the only camera I like more but this still gives a great image and helps manage cost. ​Click here for more specs
Picture
The foxeer lollipop 2 is a new vtx antenna following their v1 which looks like it takes inspiration from the AXII externally. I've used these on other quads and signal quality is excellent. ​Click here for more specs
Picture
Frame is well constructed with some practical design features but nothing that really stands out. Kind of a get the job done kindof a frame. Click here for more specs
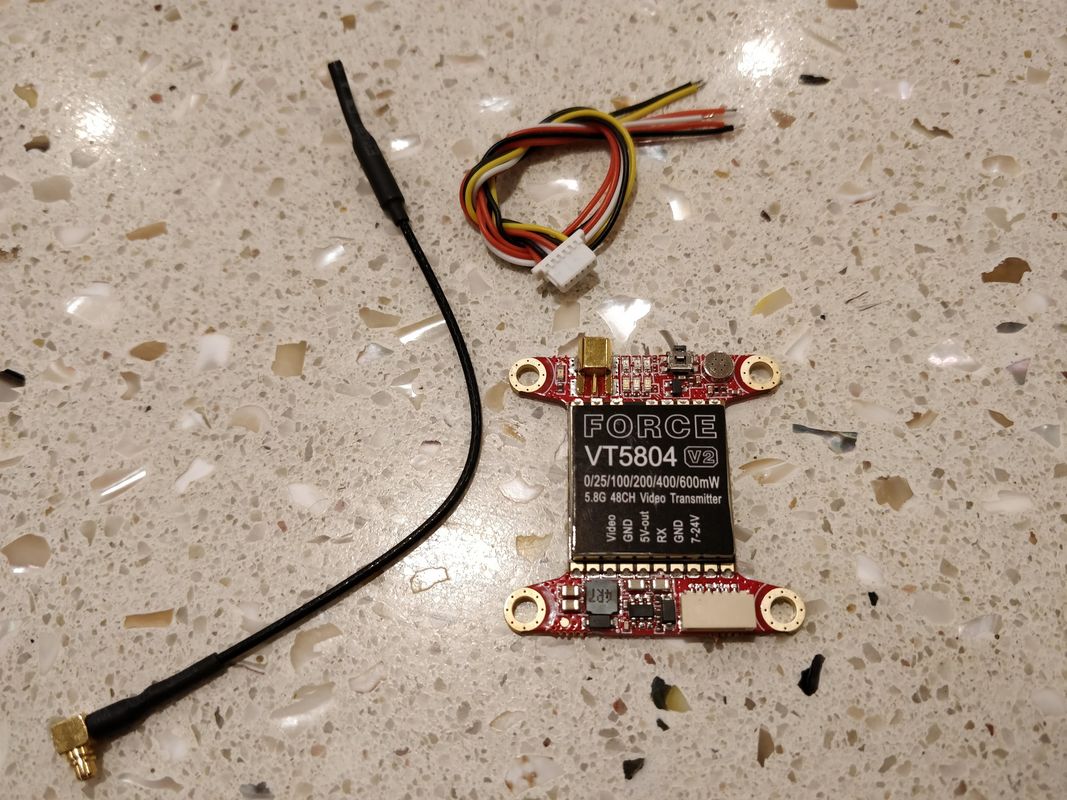
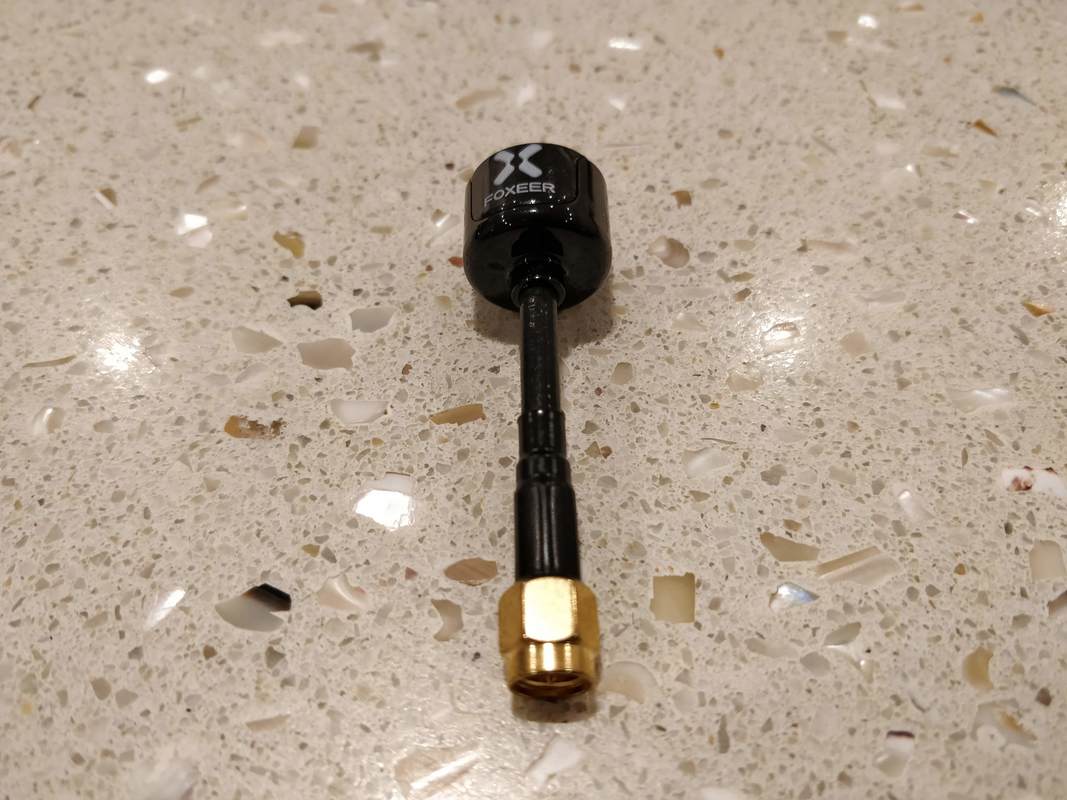
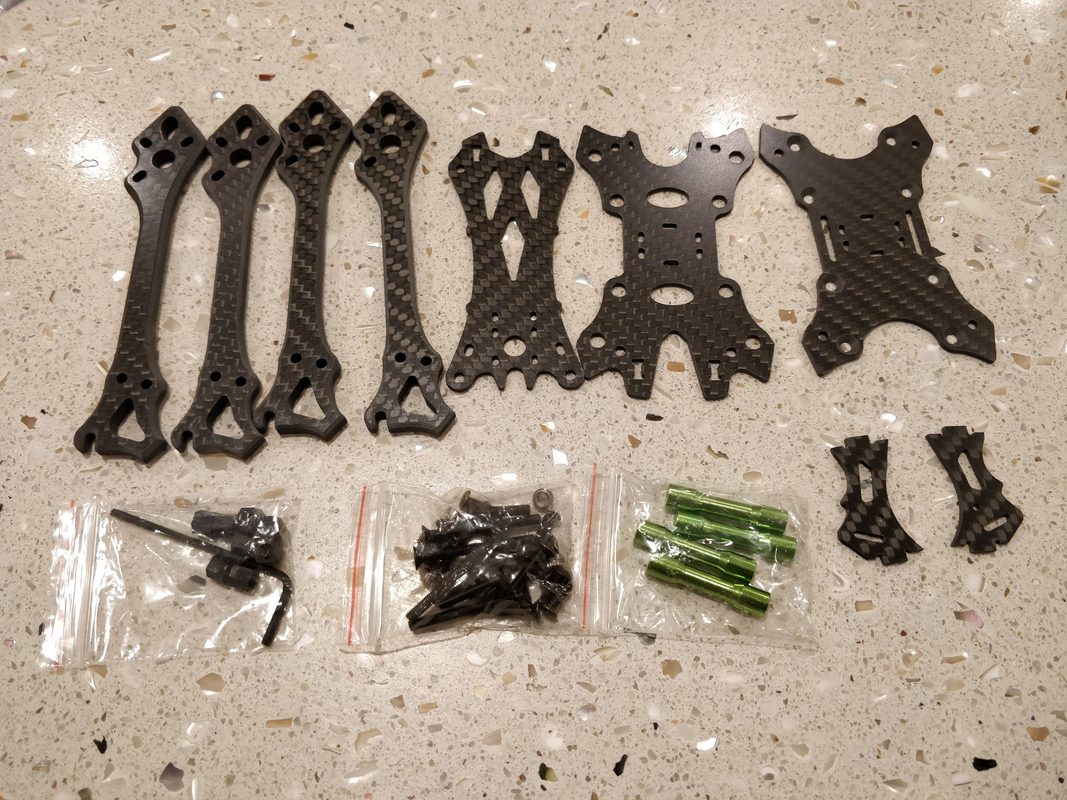
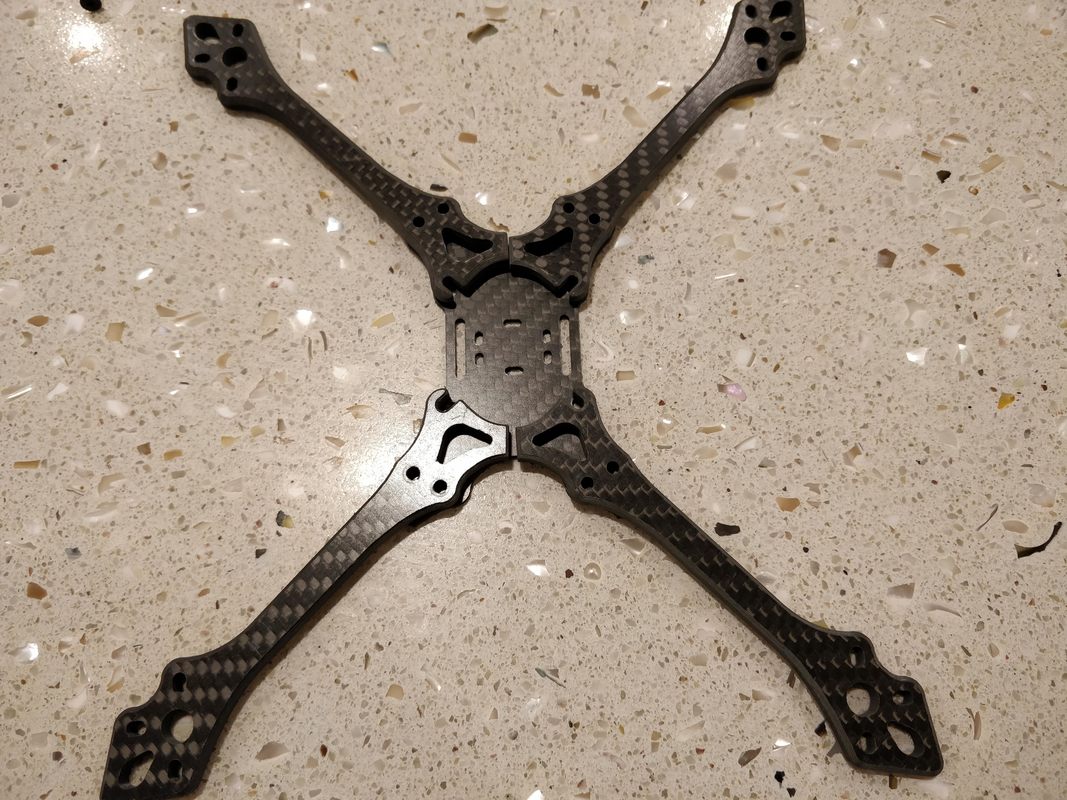
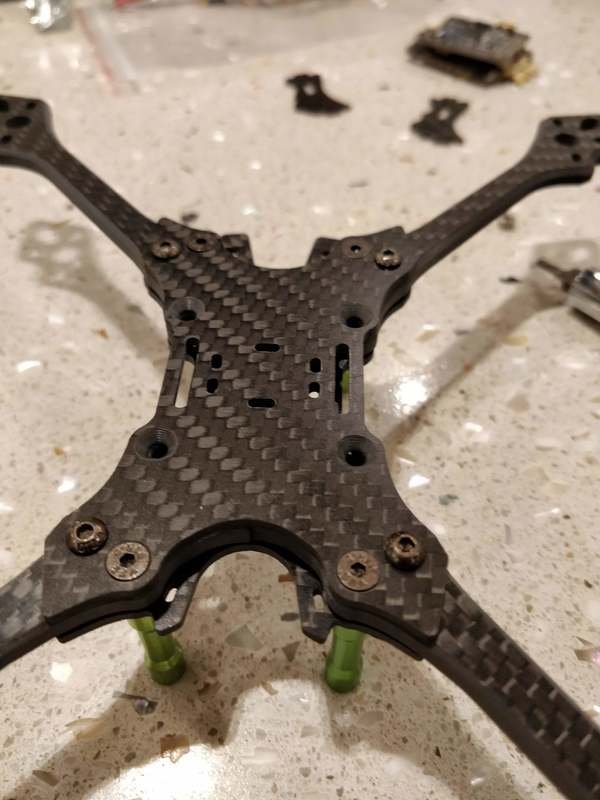
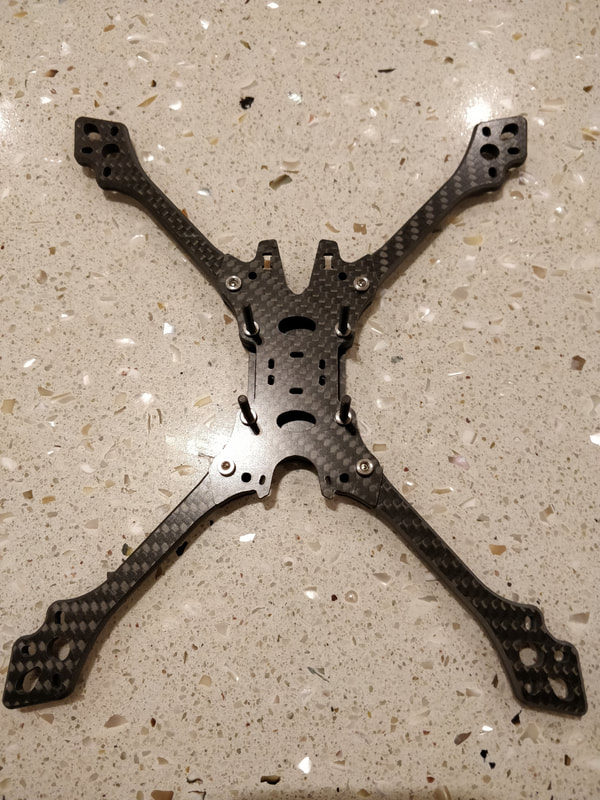
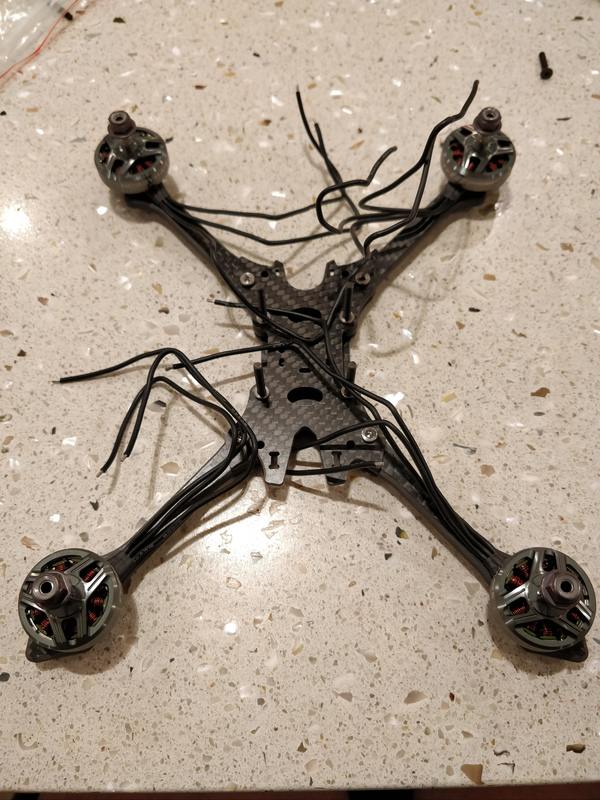
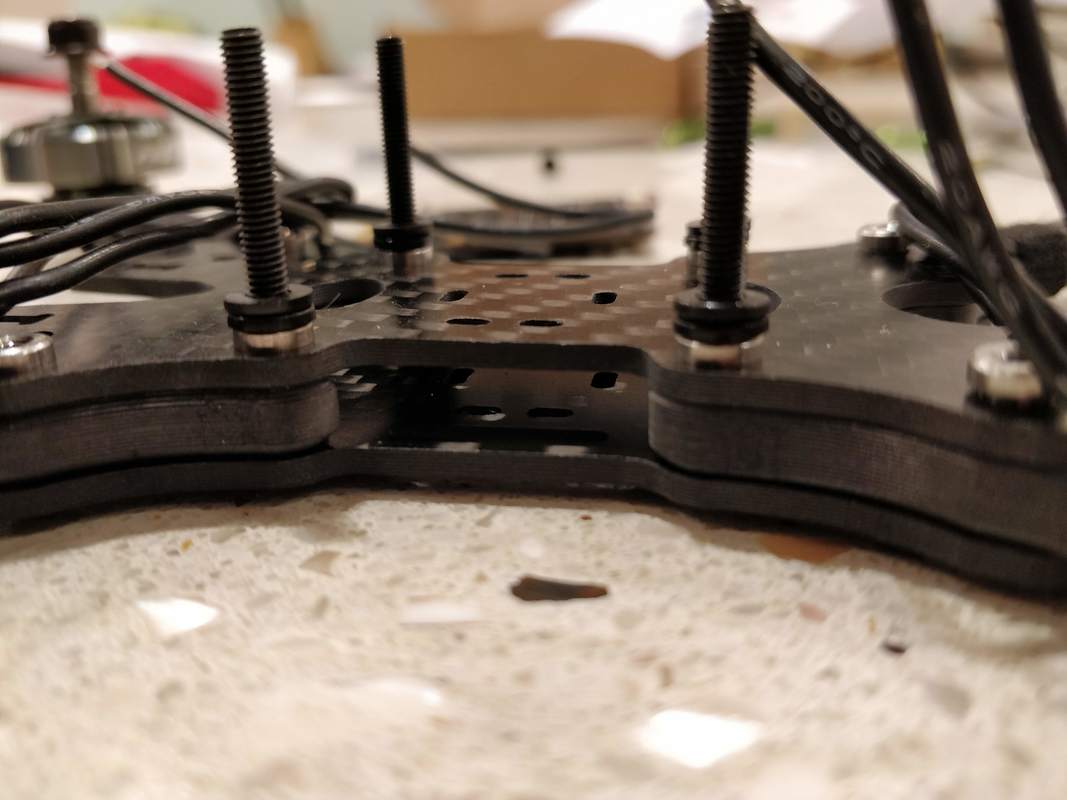
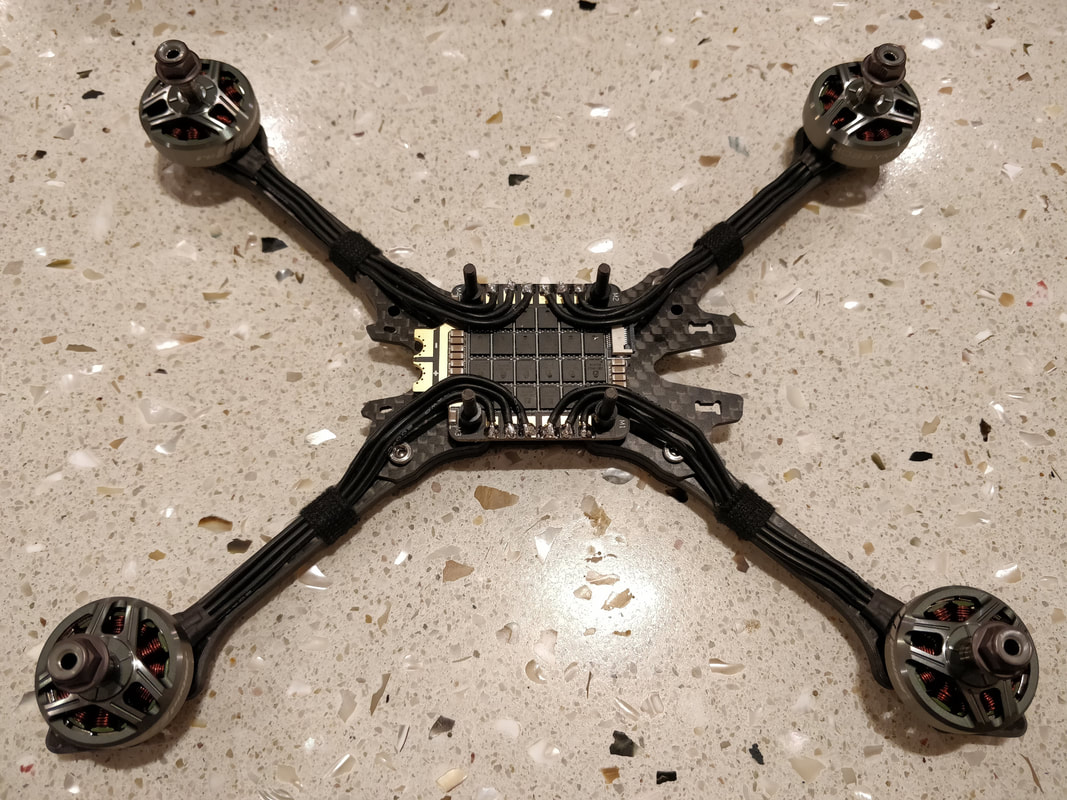
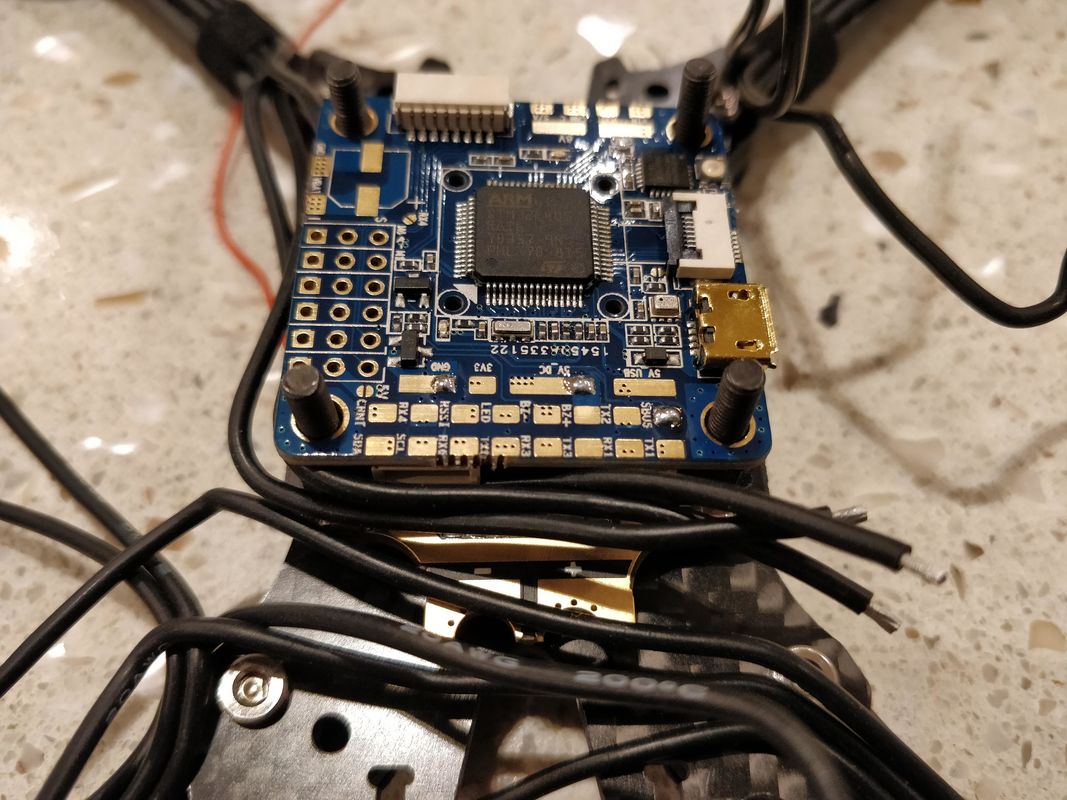
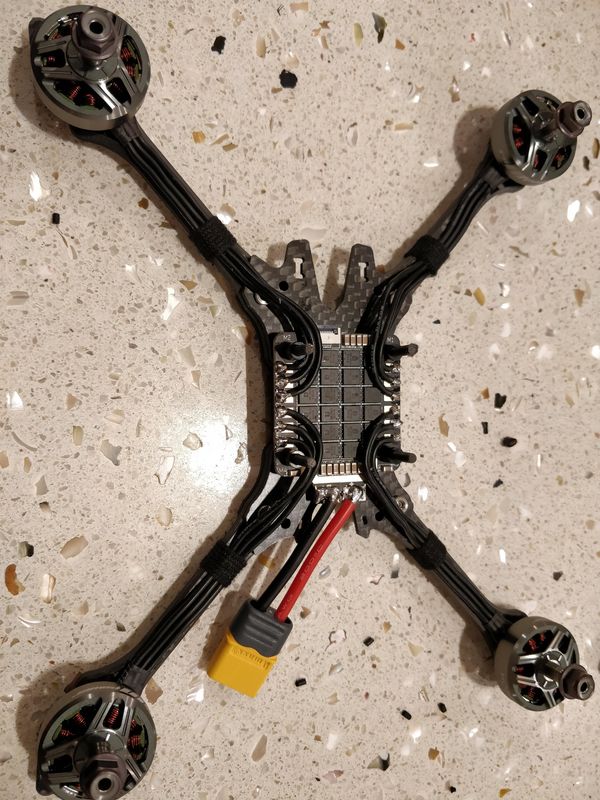
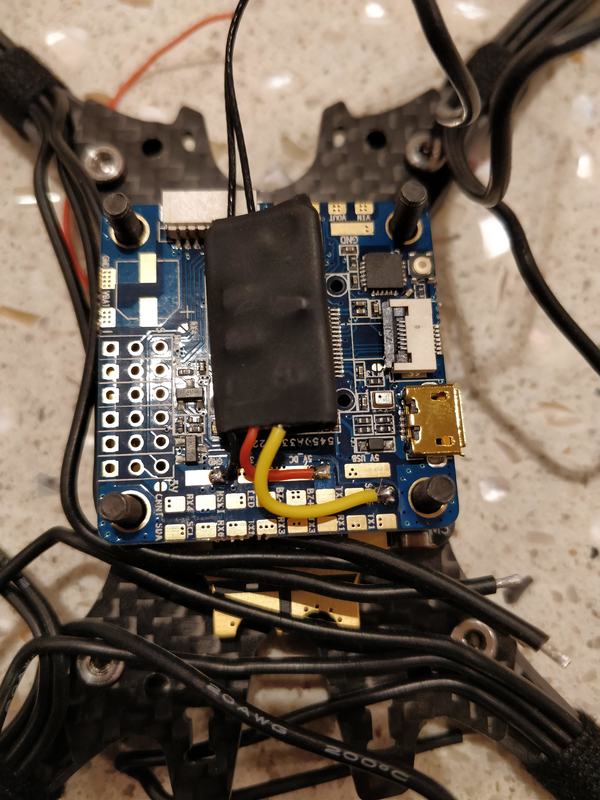
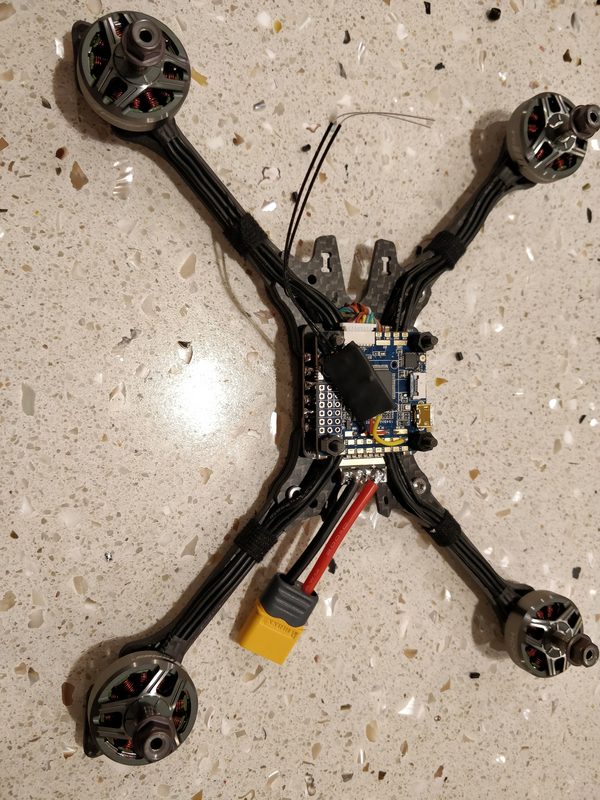
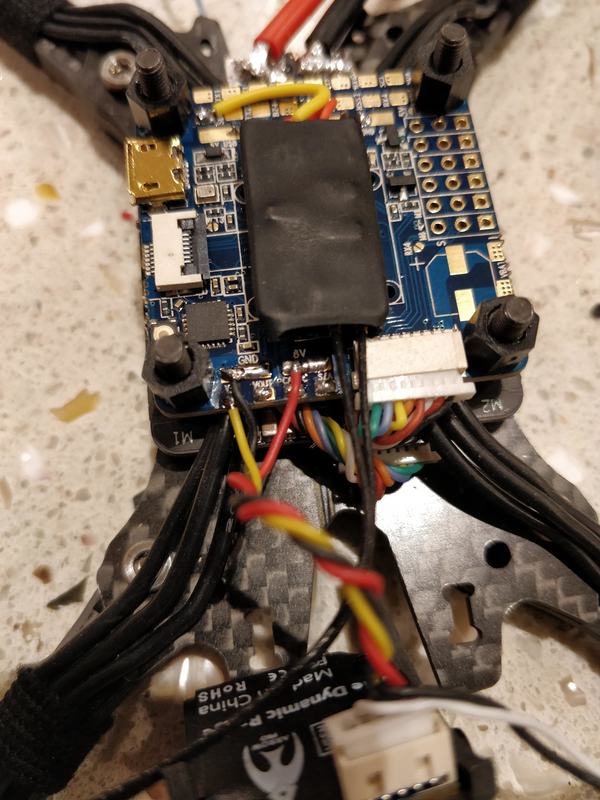
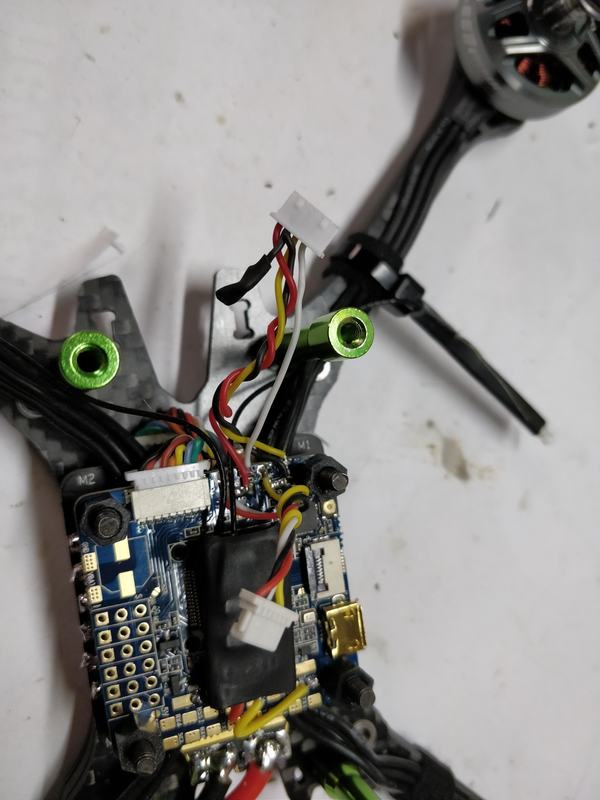
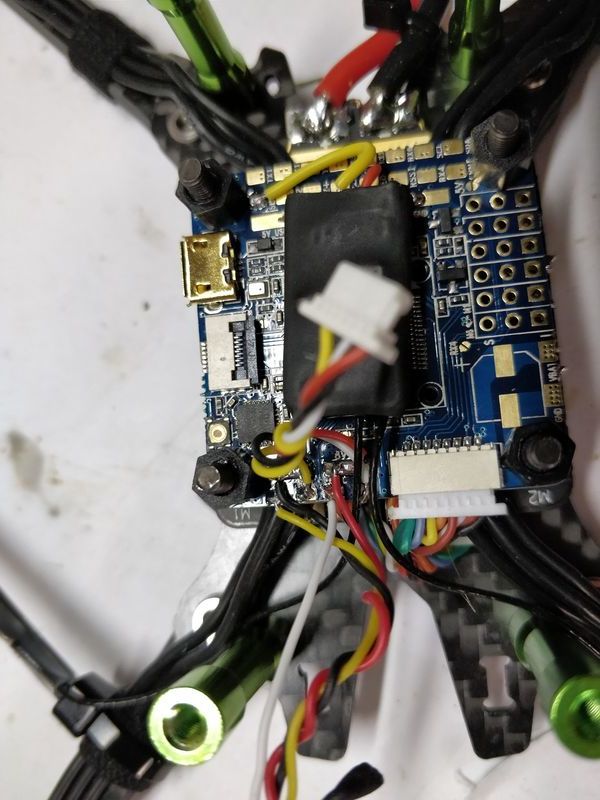
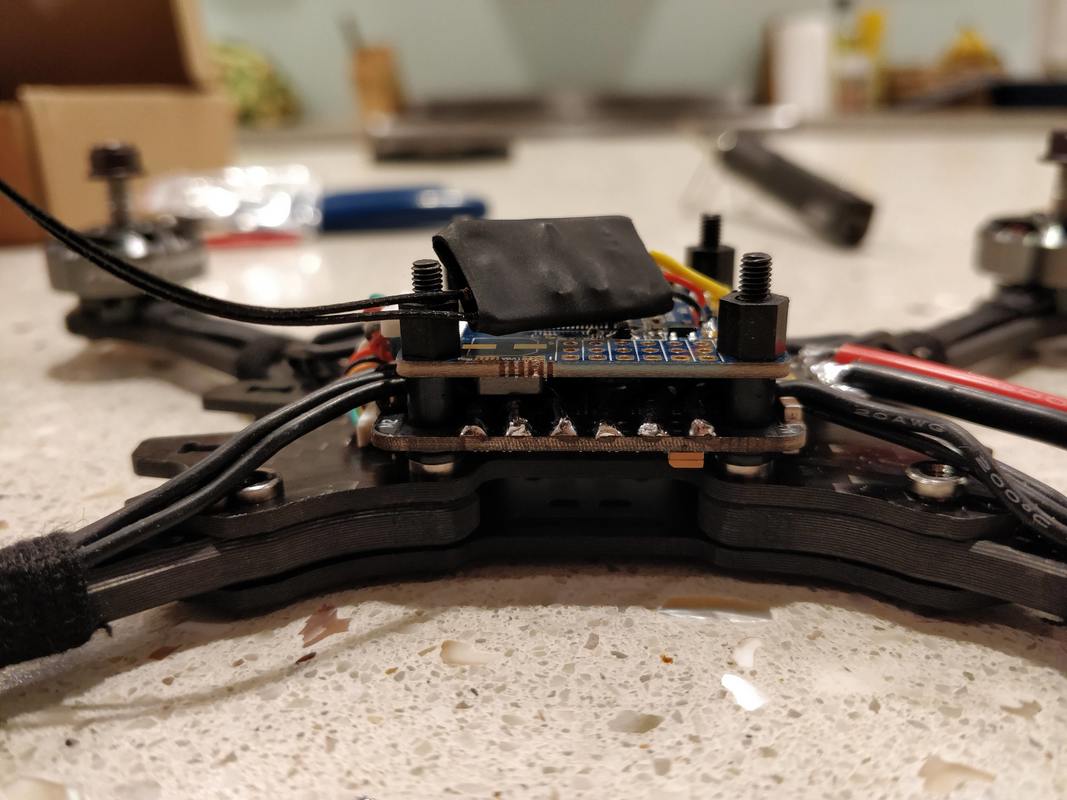
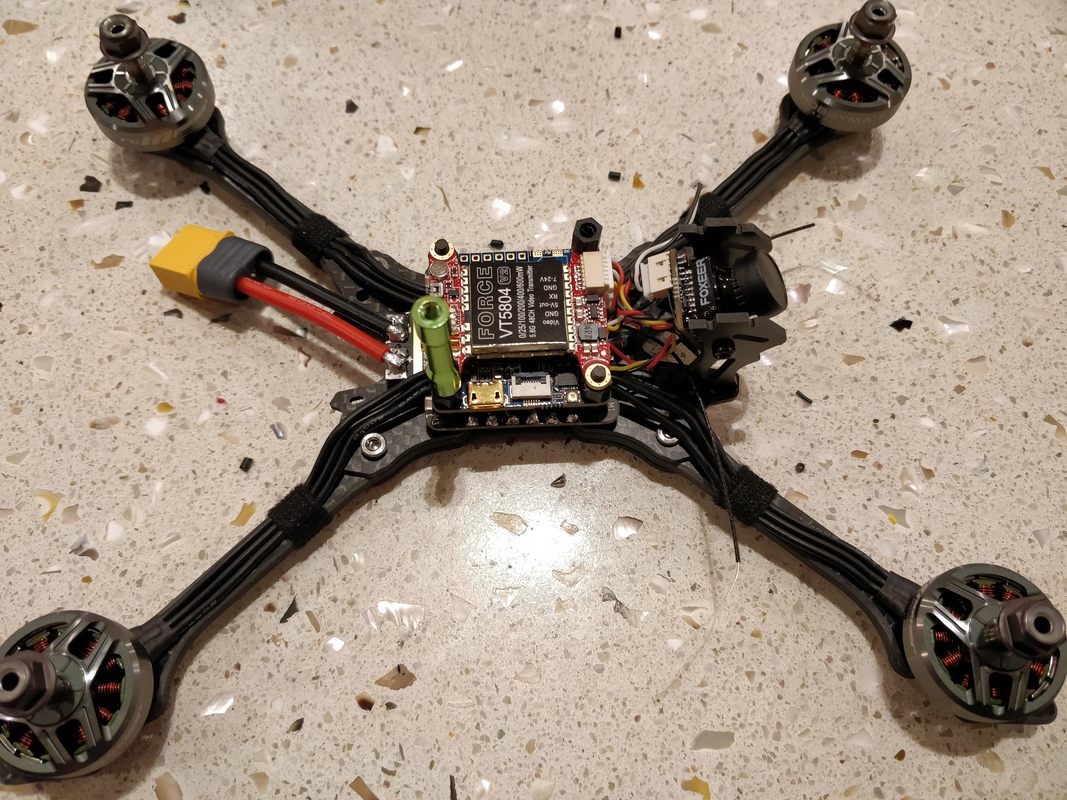
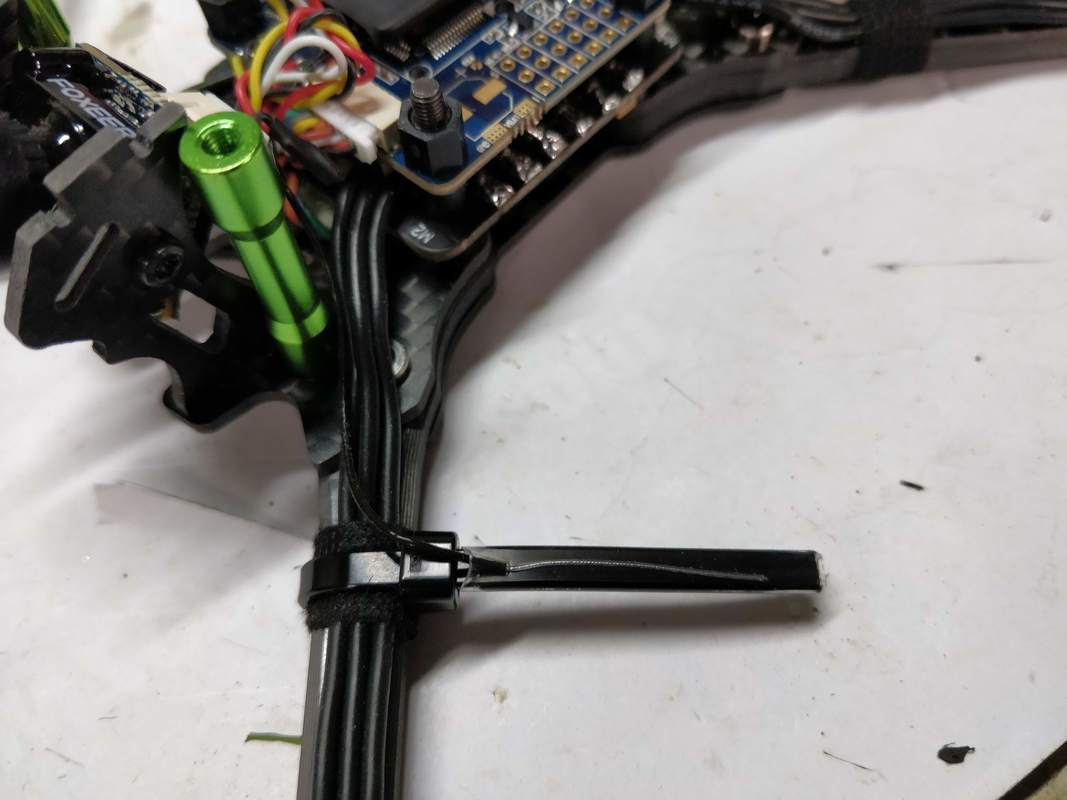
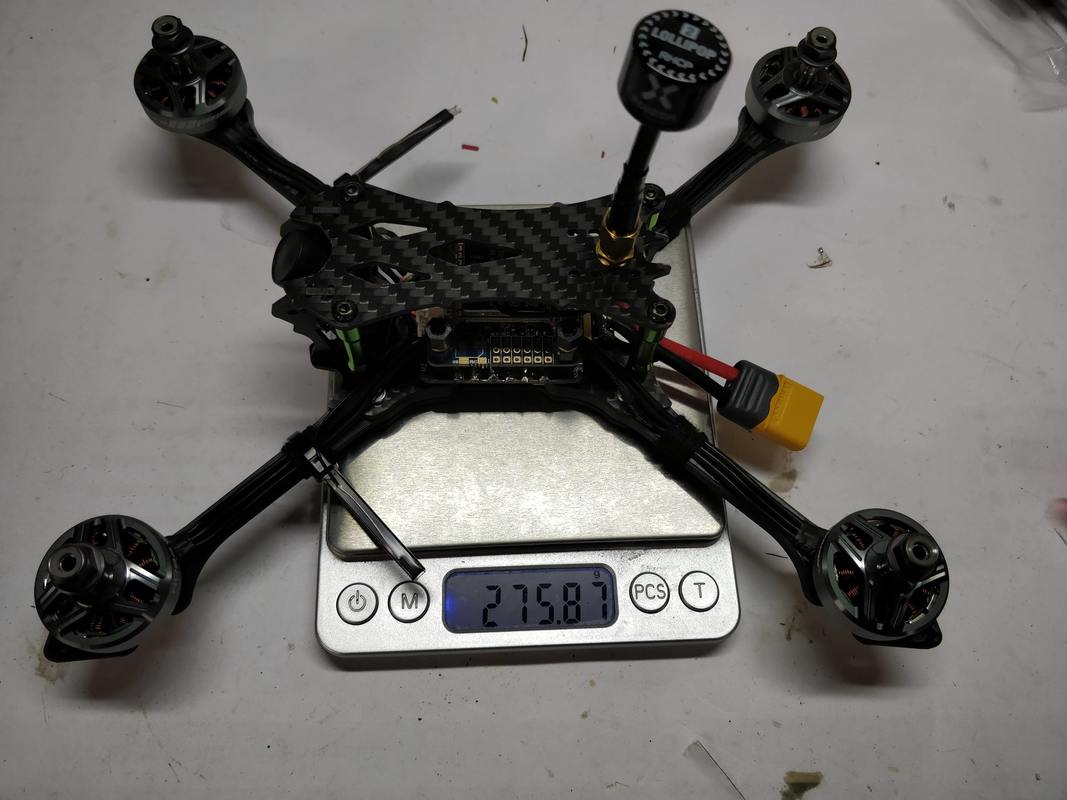
Extra parts and recommended for the build
Firstly you will need extra parts for this build. I've used the following with links to Hobbycool as they tend to have the sharpest price:
  • Frsky XM+ receiver
  • m3 nylon nut assortment
  • m3 Nylon spacers
  • Heatshrink pack
  • cable ties

And tools/sundry items:
  • Soldering iron
  • Hex driver set
  • Loctite or similar threadlock
  • Wiring loom tape
  • Side cutters​
On with the build
Captioned images below should walk you through the build process and I've noted anything tricky as I've gone through. Click on images to zoom.
Picture
1. This image shows how the arms sit on the bottom of the sandwich plates
Picture
2. Here the bolts pass through the bottom sandwich plate, arm, tom sandwhich plate then captive bolt or standoff. Note location of counter-sunk vs. button screws
Picture
3. Same as pervious image but from the top down with standoffs removed to make stack install easier. Note the captive bolts with burr side down and the long countersunk screws that the 30.5mm stack is mounted to.
Picture
4. Good time to mount the motors using the screws included with the motors. Only 3 are required for each motor on this frame. Loctite is not a bad idea here.
Picture
5. After several tries I settled on using 2 x 2mm high m3 nylon spacers to mount the ESC on. This keeps the ESC low to make more room in the stack
Picture
6. ESC is mounted with battery pads towards the rear of the quad. This will allow for shortest wires and cleanest build. I use fabric tape to clean fix motor wires to arms
Picture
7. Here is the FC alignment I opted for. ESC - FC cable is at the front as are the pads for cam and VTX which make most sense to me
Picture
8. This is how I like to route the motor wires for tidyness. Note the battery lead on an angle so I can use a cable tie to tie off against the dedicate hole in the frame. Note also I used the included trimmed washers on top of the ESC to clear the fets and then the included nylon nut spacers to hold it down.
Picture
9. FC back on with the XM+ receiver wired in. Wires kept short here as the receiver will stay sandiwched between the FC and VTX. The receiver has been heatskrinked to insulate electrically
Picture
10. Similar to picture 9 but with the motor wires connected and ESC - FC harness tucked between ESC and FC.
Picture
11. Here you can see the camera harness wire in. Note: I've used the 8v BEC on the FC because this has a clean signal that is used only for cam and vtx whereas the 5v also powers FC and receiver.
Picture
12. Harness for the VTX is wired in here too. Note: The same wide 8v pad is used to power the vtx too. The wide ground pad is also shared between cam and vtx to eliminate ground loops. VTX Tramp control goes to the smart audio pad
Picture
13. As per last picture but you can see I've attached the camera remote wire (white) to the cam contol pad on the FC. As yet I've not got this working so would recommend cutting the camera remote cable until I've confirmed working
Picture
14. Side view of the stack. ESC at the bottom, FC in the middle and receiver currently on top
Picture
15. With the wiring harness completed for cam and VTX these can now be installed. Receiver is sandwiched between FC and VTX. Camera now in place with plenty of room to adjust angle. Ignore the standoff on top of the stack :)
Picture
16. Receiver wires are routed either side of the front standoffs and attached to heavier cable ties with heatshrink. This solution give enough range for racing and close freestyle and is super durable.
Picture
17. With all the electronic work completed the top plate can be installed with the remaining 4 short button screws
Picture
18. Final weight with HQ 5x4.8x3 is just under 300g - reasonably light for a 6s rig with 5mm arms.
Picture
19. Next step is configuration of the flight controller in part 2 of this series.
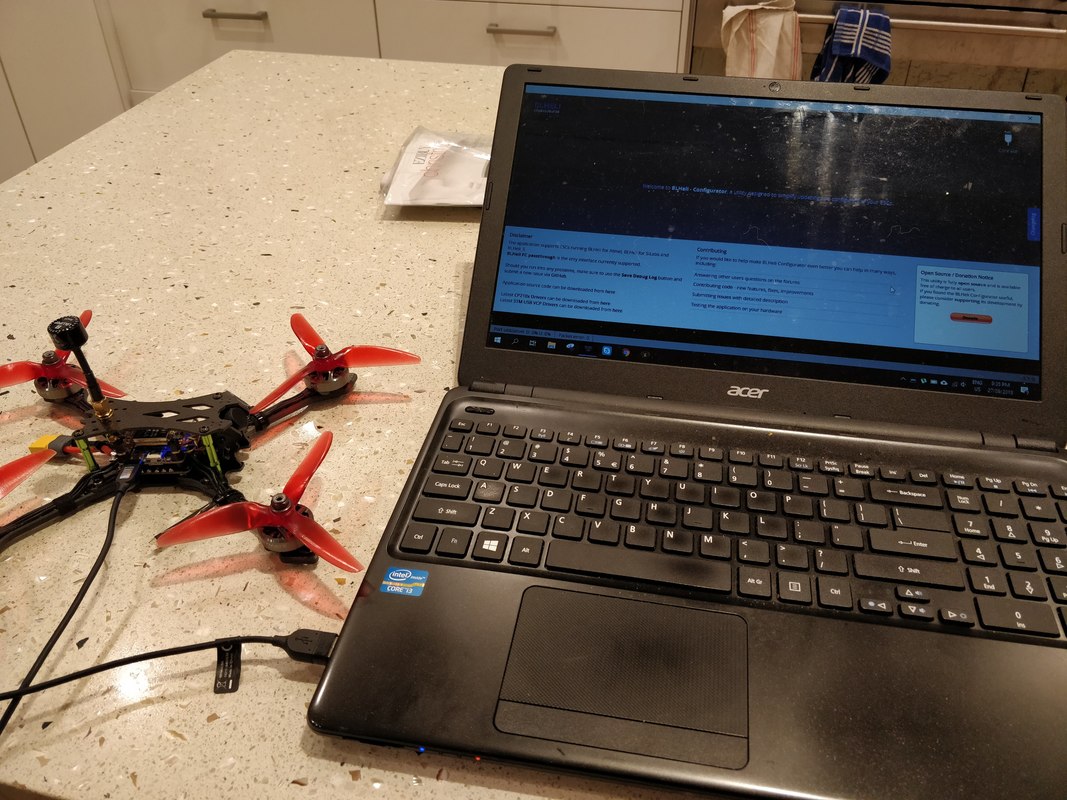
So that is it for the physical build. Not a difficult build at all in the scheme of things - components fit easily with plent of room to work. Part 2 (software setup) is here and part 3 (flight review) here.
0 Comments

    Quick Access Menu

    All
    1103
    1104
    1105
    1106
    1204
    120rs
    1505
    20mm
    2207.5
    2508
    2.5 Inch
    2 Inch
    2s Whoop
    3 Inch
    4s Micro
    5 Inch
    6s
    7500kv
    7 Inch
    Action Cam
    Adapter
    AIO
    AirA
    Antenna
    Aomway Commander
    Ascent
    Asteroid
    Babyhawk R
    Battery
    Beebee 66
    Beeper
    Bench Review
    BNF
    Boldclash
    Bolt
    Brushless Whoop
    Budget
    Build
    Canopy
    Charging
    Christmas
    Cinewhoop
    Cloud 149
    CM275T
    Cobra
    Comet
    Crossfire
    Crux3
    Diatone
    Drone
    Dvr
    DYS
    Eachine
    Eachine Cvatar Cinewhoop
    Eachine Shadow Fiend
    Eachine Tyro79
    Eachine Vrd3
    Emax
    ESC
    F02h
    F3
    Fatshark
    Fatshark Attitude V5
    First Flight
    FlexRC
    Flight Controller
    Flyfox 110
    Fpv
    Frame
    Freestyle
    FRSKY
    FRSKY X-lite
    Ft5
    Full Speed
    FUS Spartan
    FUS X111 Pro
    Gemfan 2540
    Goggles
    Goggle Strap
    Happymodel
    Hawk 5
    Hawkeye Firefly 2
    HB64
    HD Footage
    HGLRC
    Hobbycool
    HobbyCool.com
    Iflight
    Isdt
    JHEMCU
    Jr Port
    Jumper T8SG
    Komori
    Lal5
    Larva-x
    Leader 120
    Leader 2.5
    Leader 3
    LED
    Long Range
    LST S2
    Micro Quad
    Mobula
    Mobula7
    Motors
    Namelessrc
    Novice-i
    Oled
    ORT Dual Shield
    PIDs
    Pnp
    Portable
    Propellers
    R249+
    Racerstar
    Radiomaster TX16s
    Ready To Fly
    Red Devil
    Review
    Roma F4
    Roma F5
    Runcam
    Runcam 5
    Rush
    Sailfly X
    Sailfly-x
    Shootout
    SKY03O
    Skystars
    Skyzone
    Smart Audio
    Snapper7
    Sweet Spot
    Taranis
    TBS Tango2
    Tinyleader
    Tiny Tank
    Tmotor
    T-motor
    Toothpick
    Toothpick Pro
    TP3
    Transmitter
    Trashcan
    Tutorial
    Twig
    TX01
    Upgrade
    V1s
    Vtx
    Whoop
    X120
    X Lite
    X-lite
    ZJWRC 115X

Thanks for visiting QuadifyRC.com Follow us on facebook below to get all the latest updates
  • RC Cars
  • Car of the Month
  • Quad Reviews
  • COUPONS AND DISCOUNTS
  • About & Contact