|
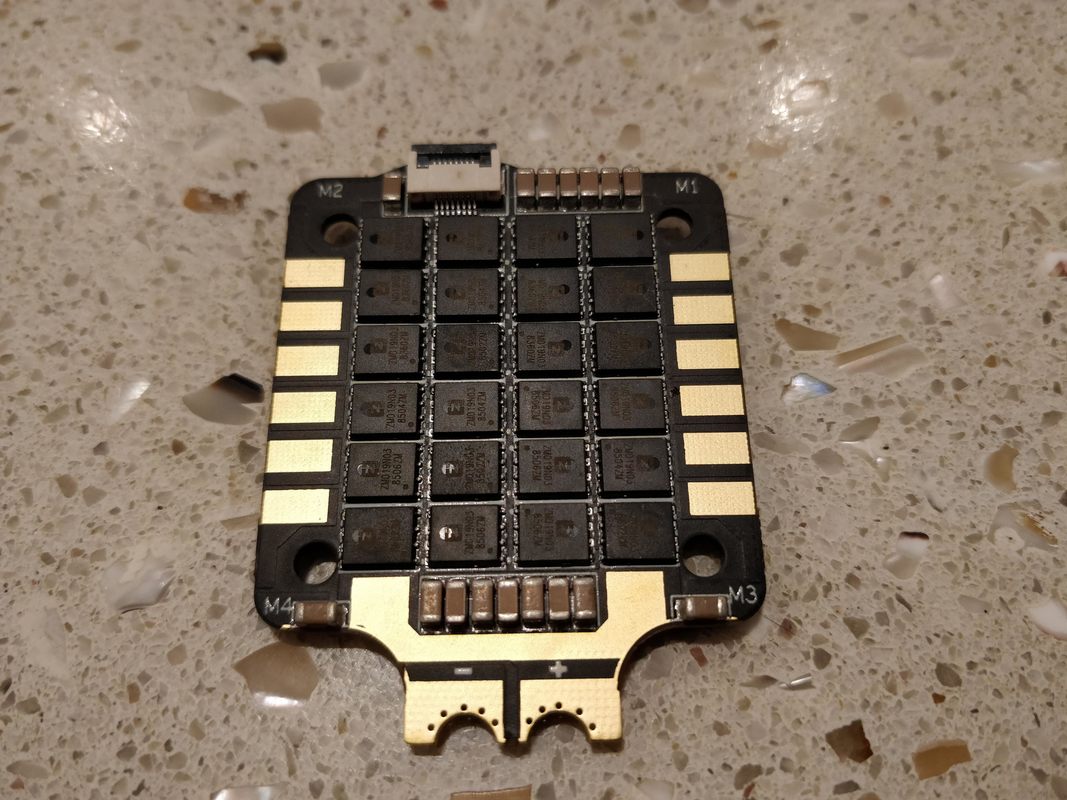
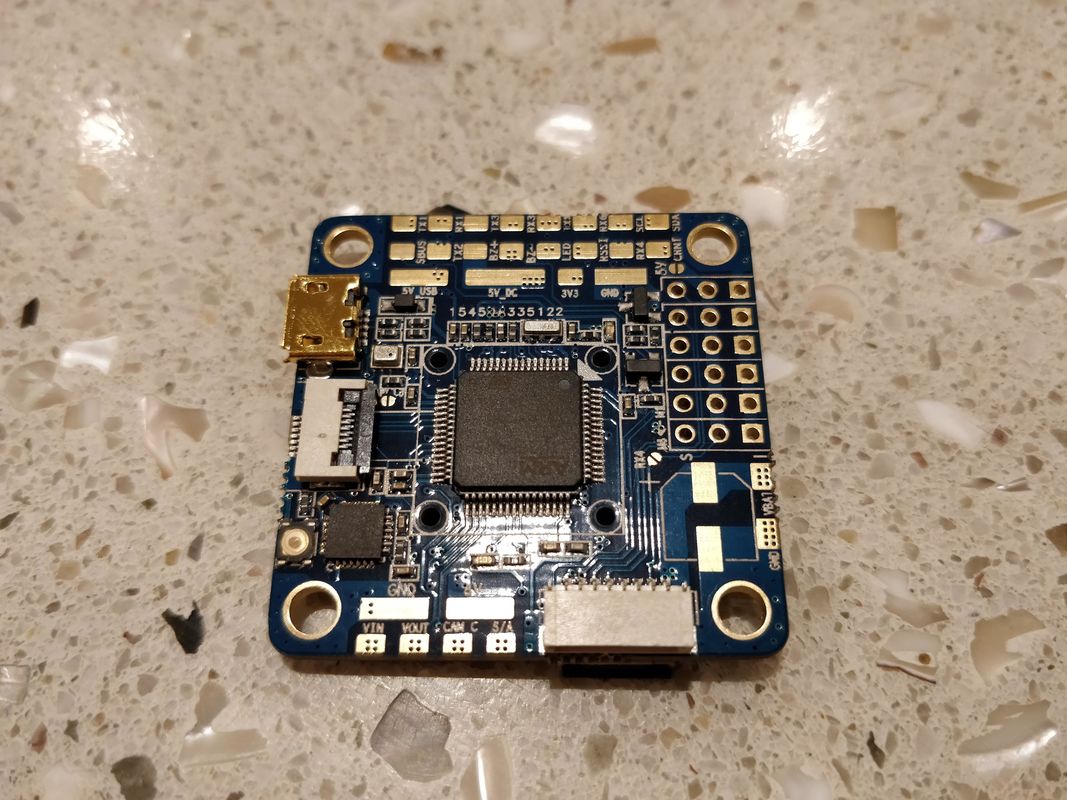
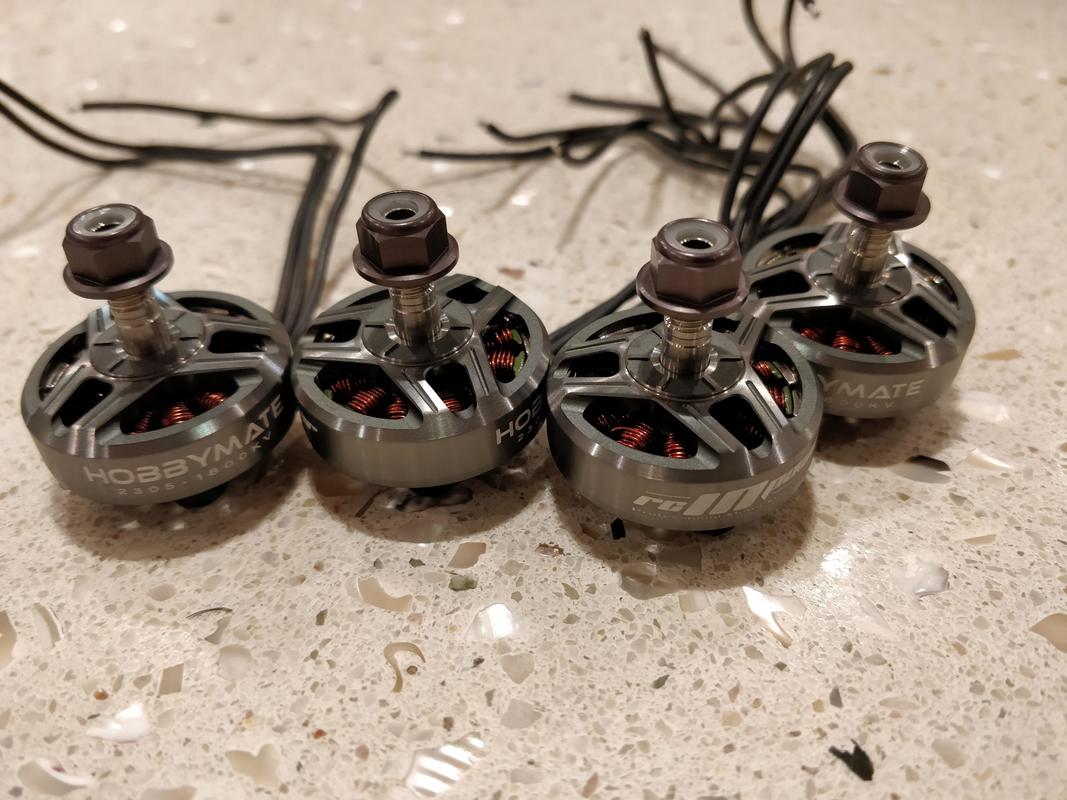
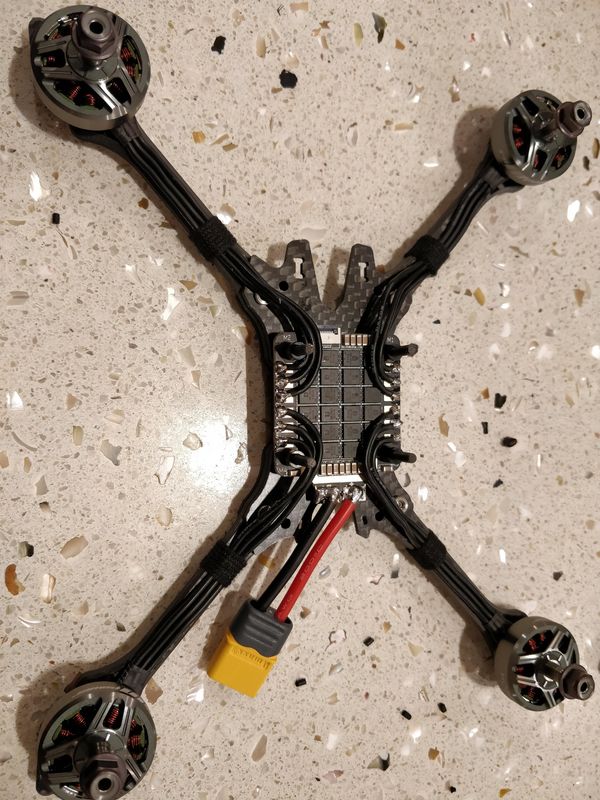
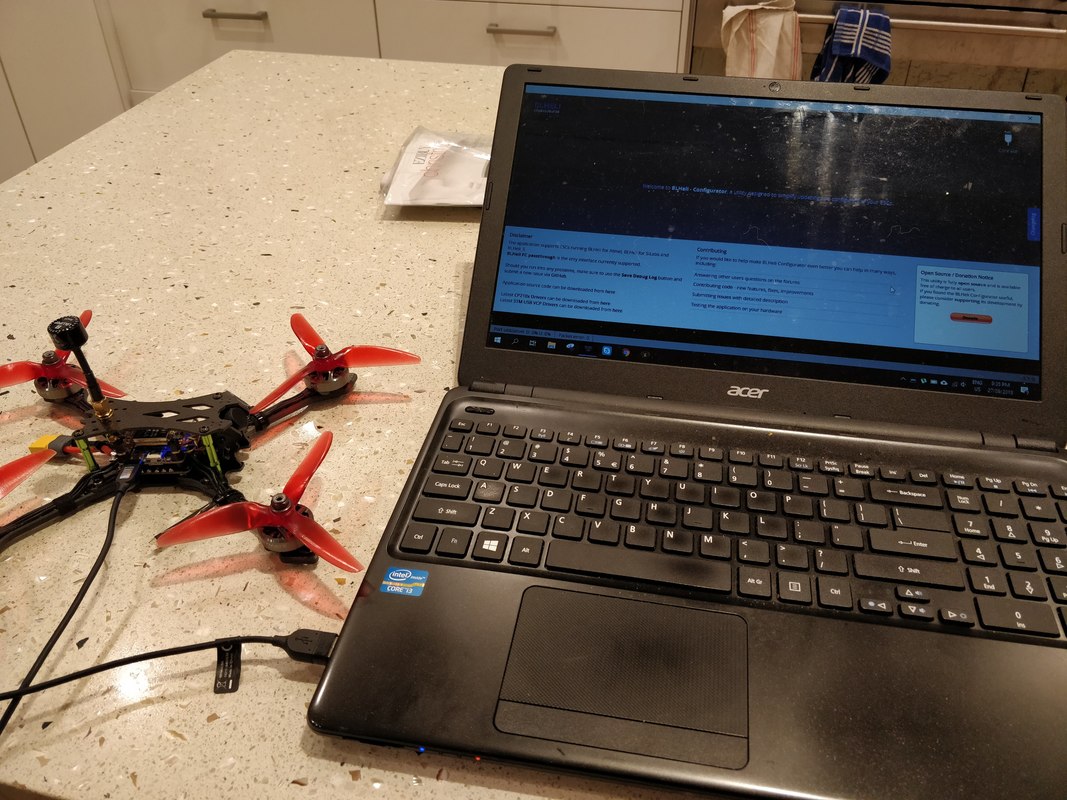
I'll cover this quad over 3 blogs. This first part will cover the build walkthrough, the second the software (betaflight/blheli32) setup here and the last part the flight review.  The $180 Hobbymate Comet kit is full of premium and dependable 6s components The $180 Hobbymate Comet kit is full of premium and dependable 6s components The Hobbymate Comet Kit is a premium 5" quadcopter that is currently available as a kit for $180 but will soon be available as a bind and fly version. Update: it is now available as a pre-build pnp or bnf with xm+ or r-xsr receivers. In the days since the Holybro Kopis 1 was released there have been some excellent ready to fly models (along with some not-so-great models) available including the Emax Hawk 5 (review here) and the HGLRC Batman (build here) which have been standouts because they have been well balanced, well built and good value for money overall. Since this is a kit, this particular blog is to walk you through the build and then software setup including a betaflight 3.5.1 cli diff. The Hobbymate Comet from HobbyCool.com (or Amazon) is a kit the consists of higher quality parts than even the HGLRC Batman at only a fraction of the cost. Infact when bought on their own the parts come to $257 which is clearly much more than the $180 the kit costs (or even the $200 PNP kit). The Electronics are rated 6s from the factory (unlike the Hawk 5) and come with motors suited for either 4s/5s operation (2500kV) or 6s operation (1800kV). I'm especially excited that this include a genuine airbot ESC and flight controller. More details on the parts below:
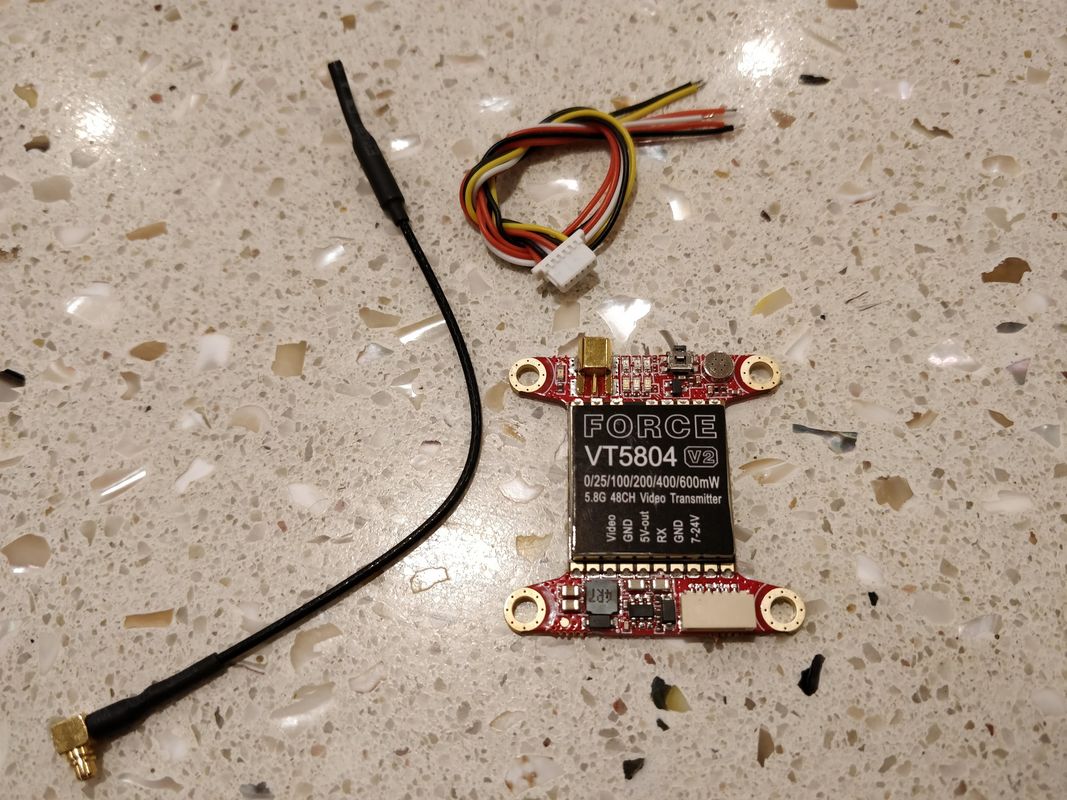
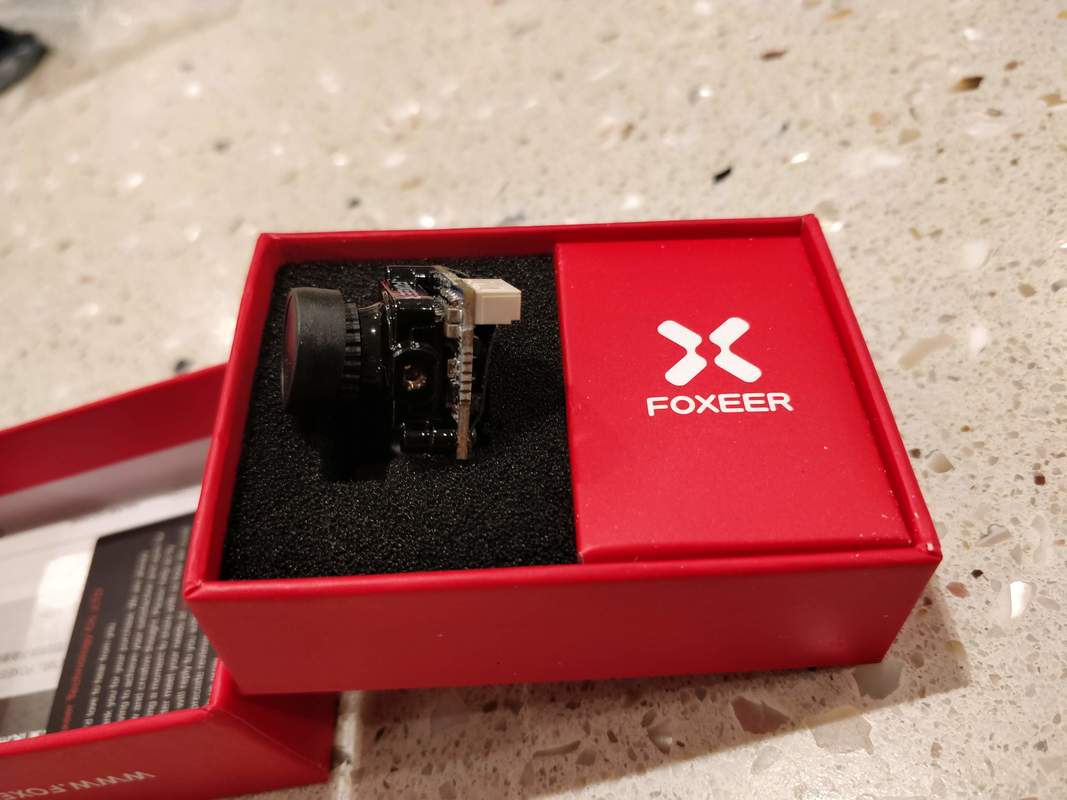
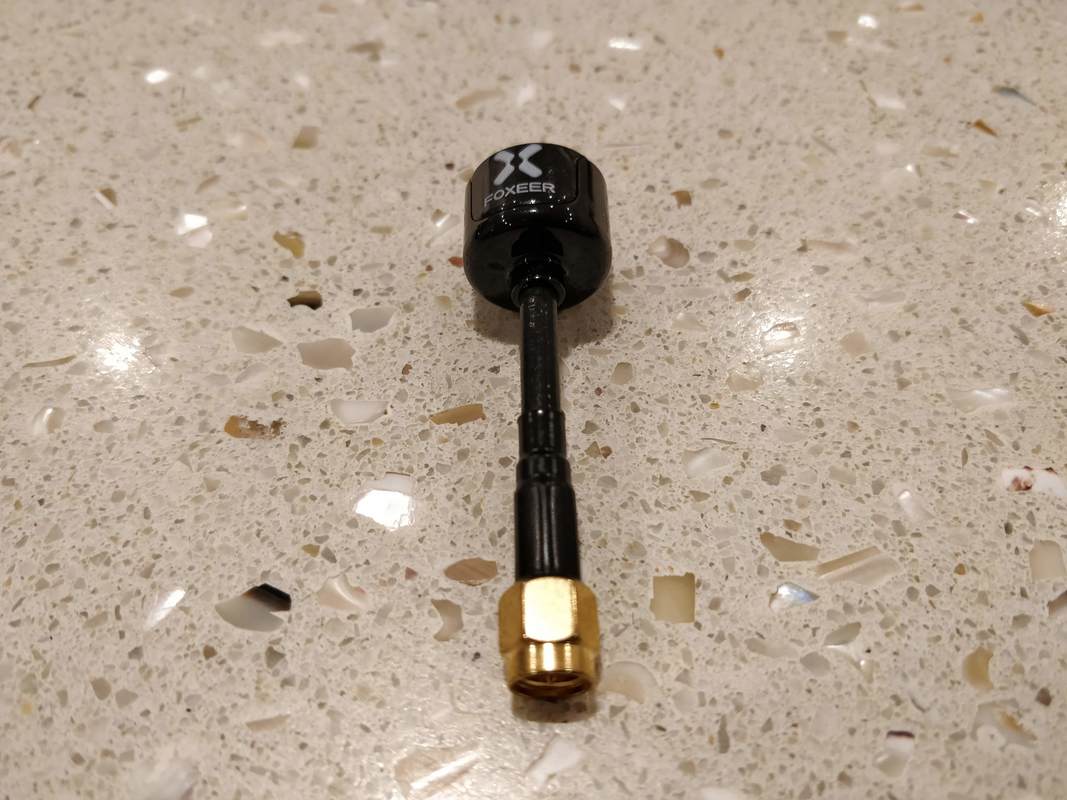
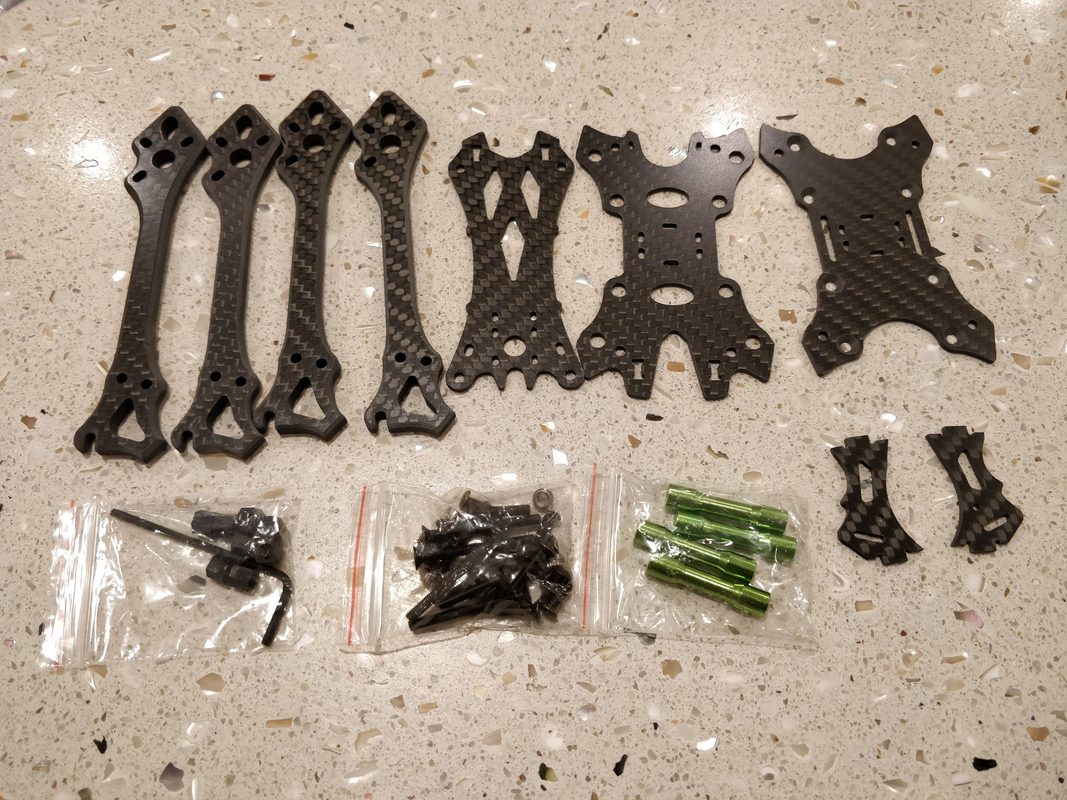
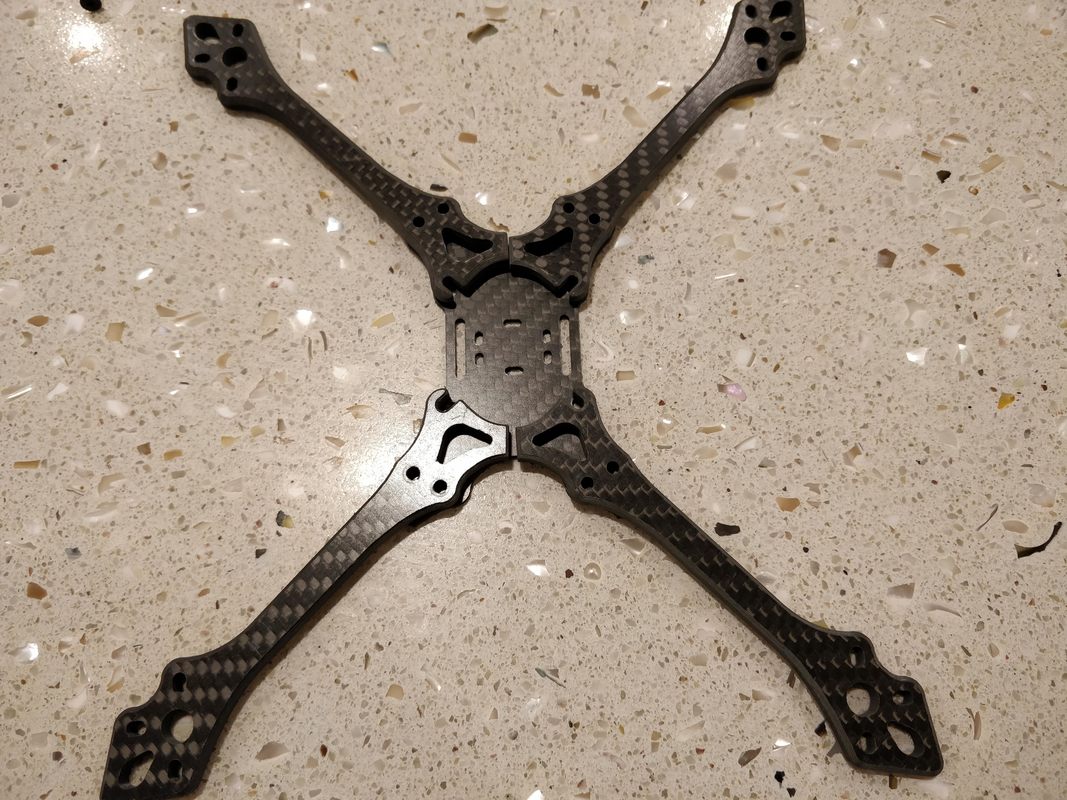
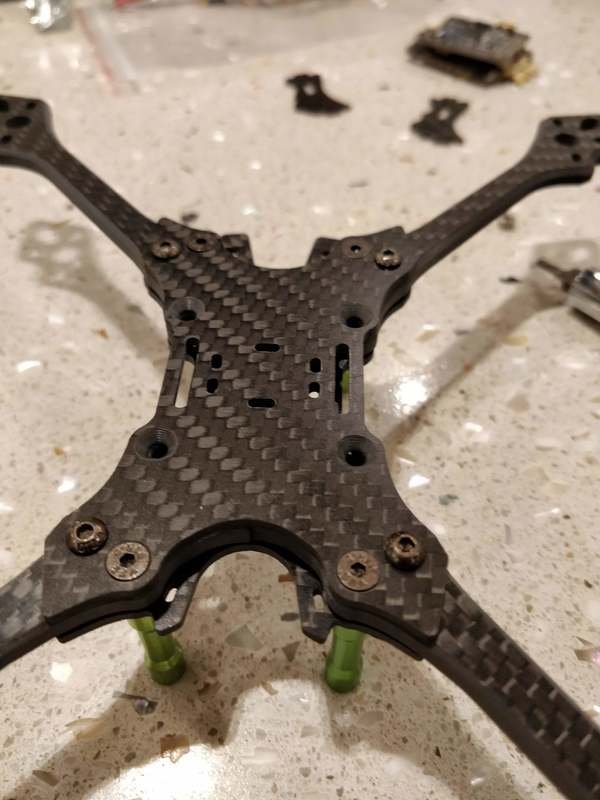
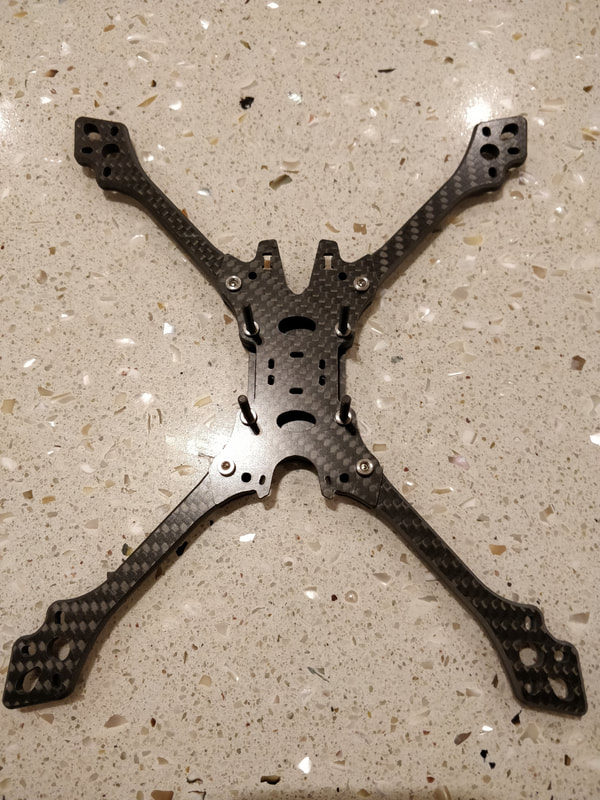
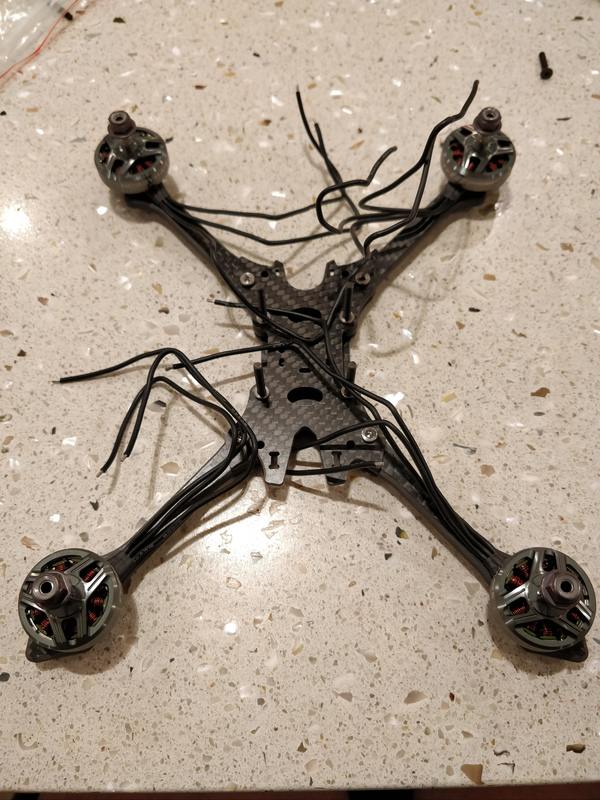
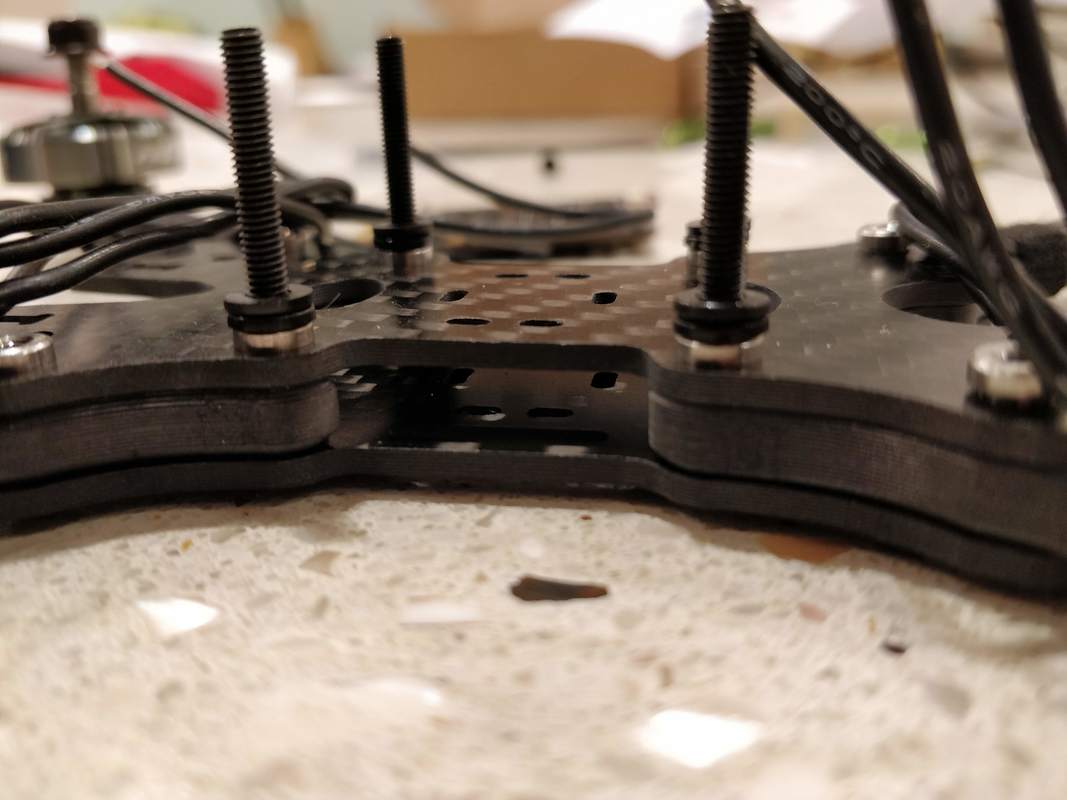
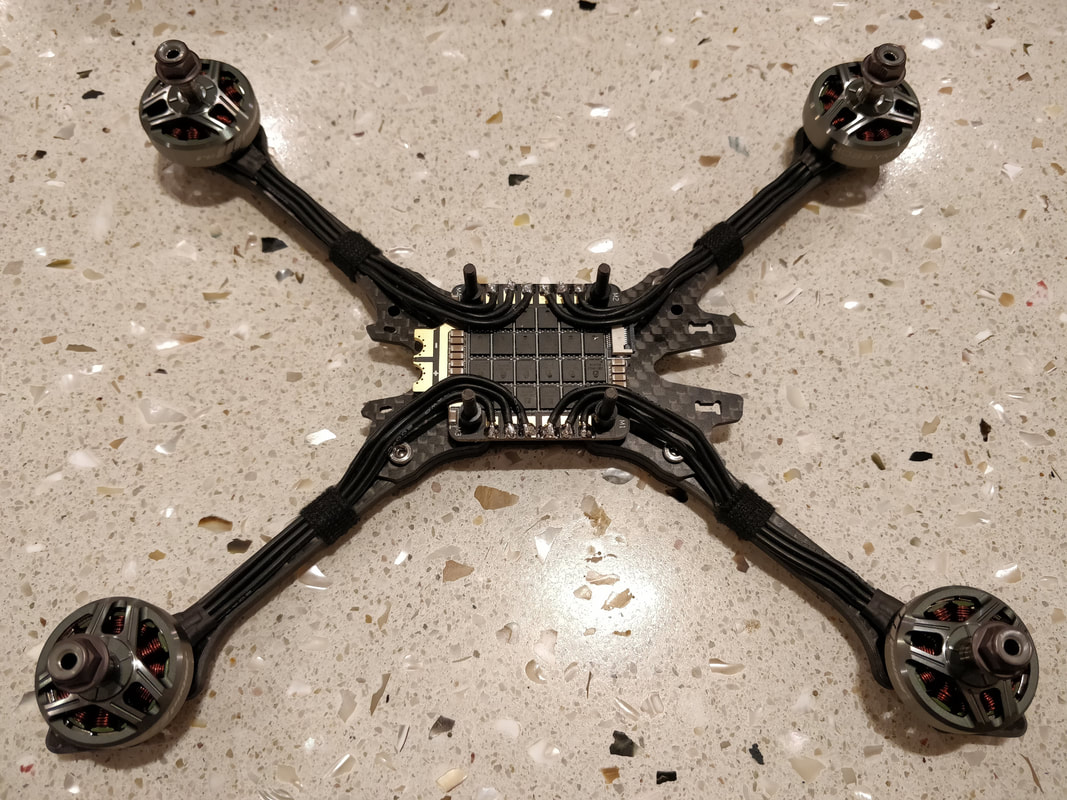
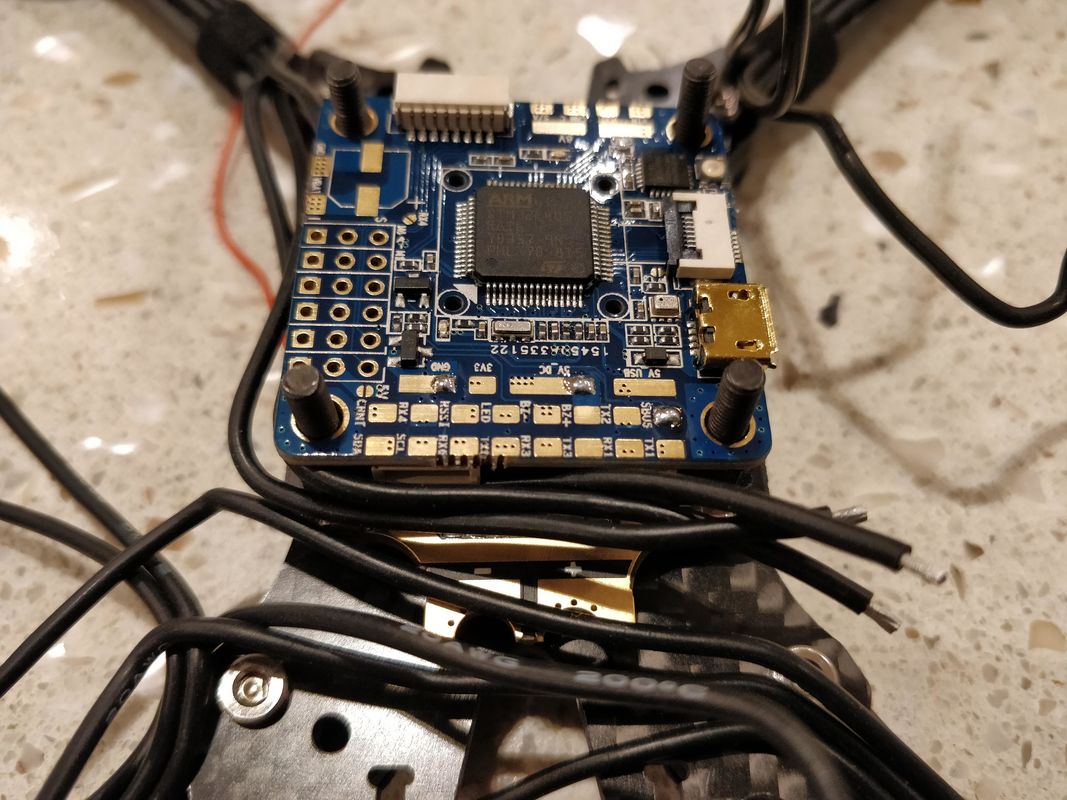
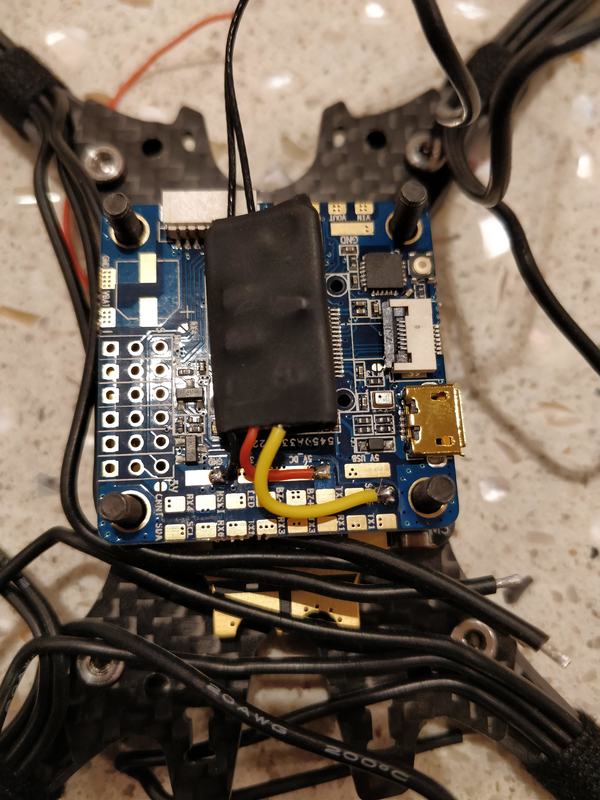
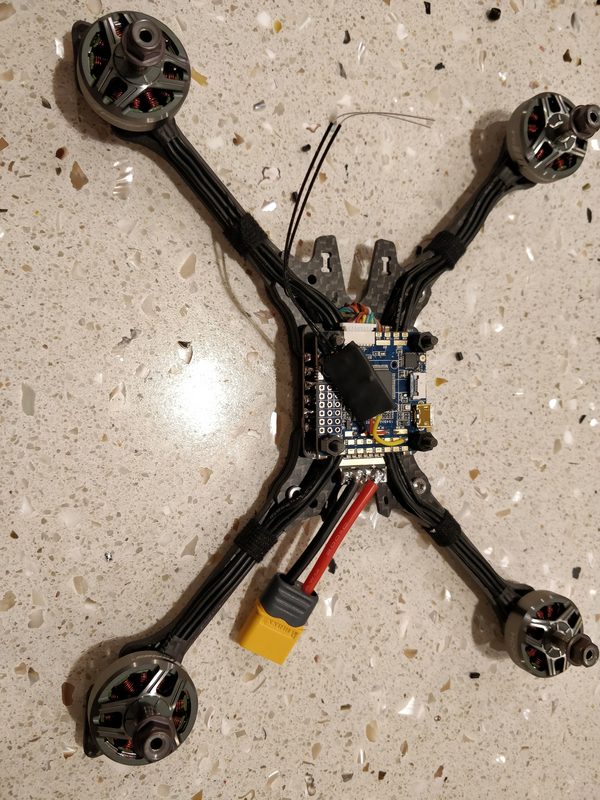
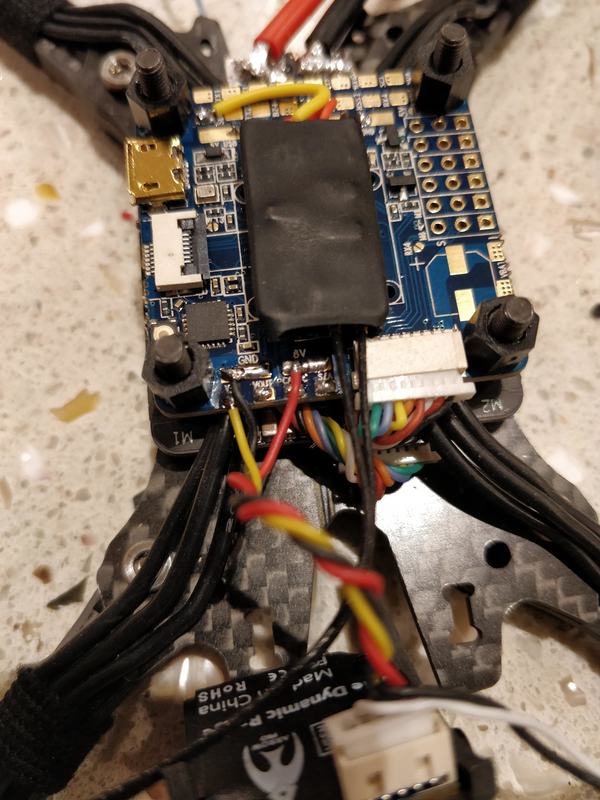
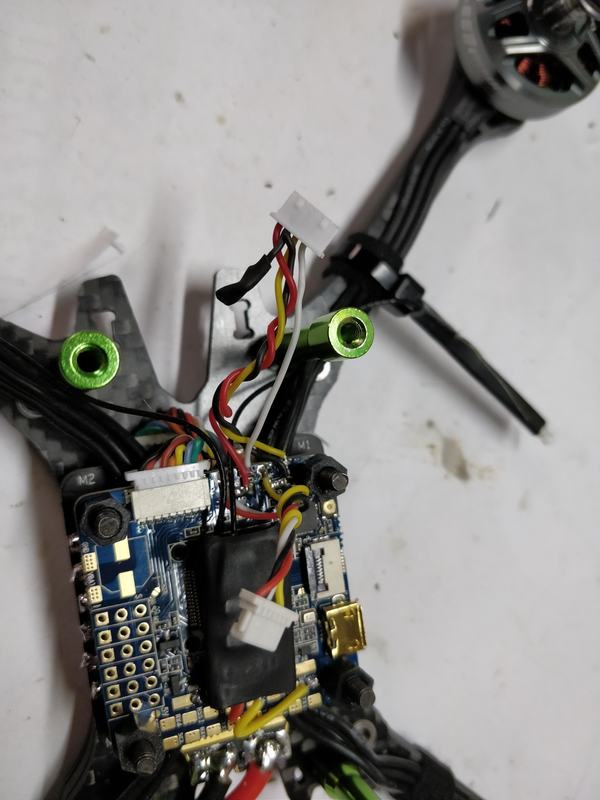
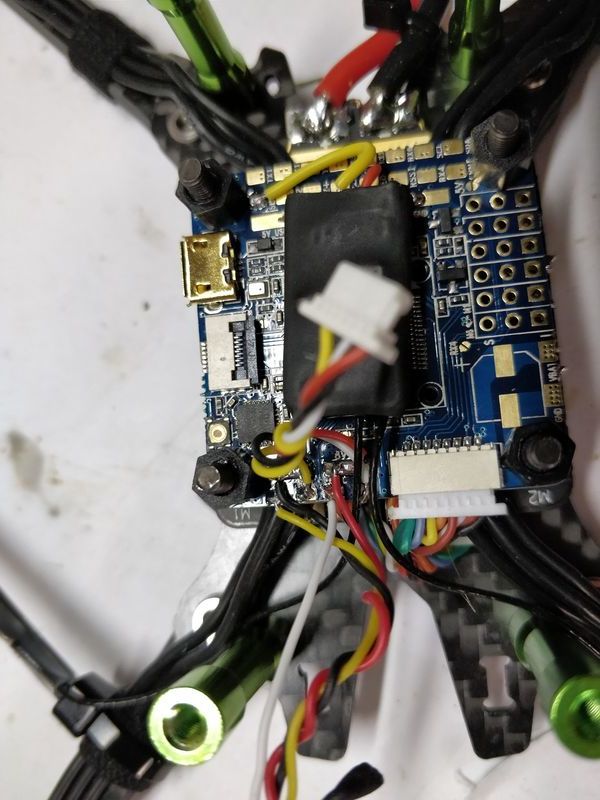
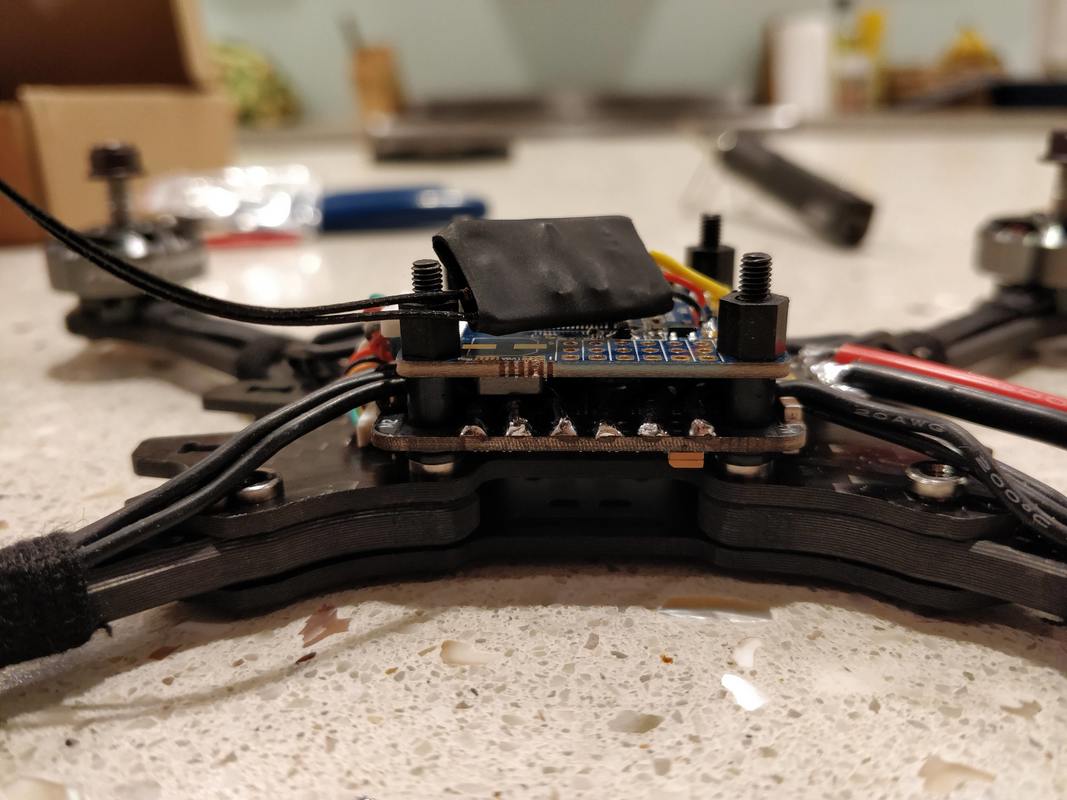
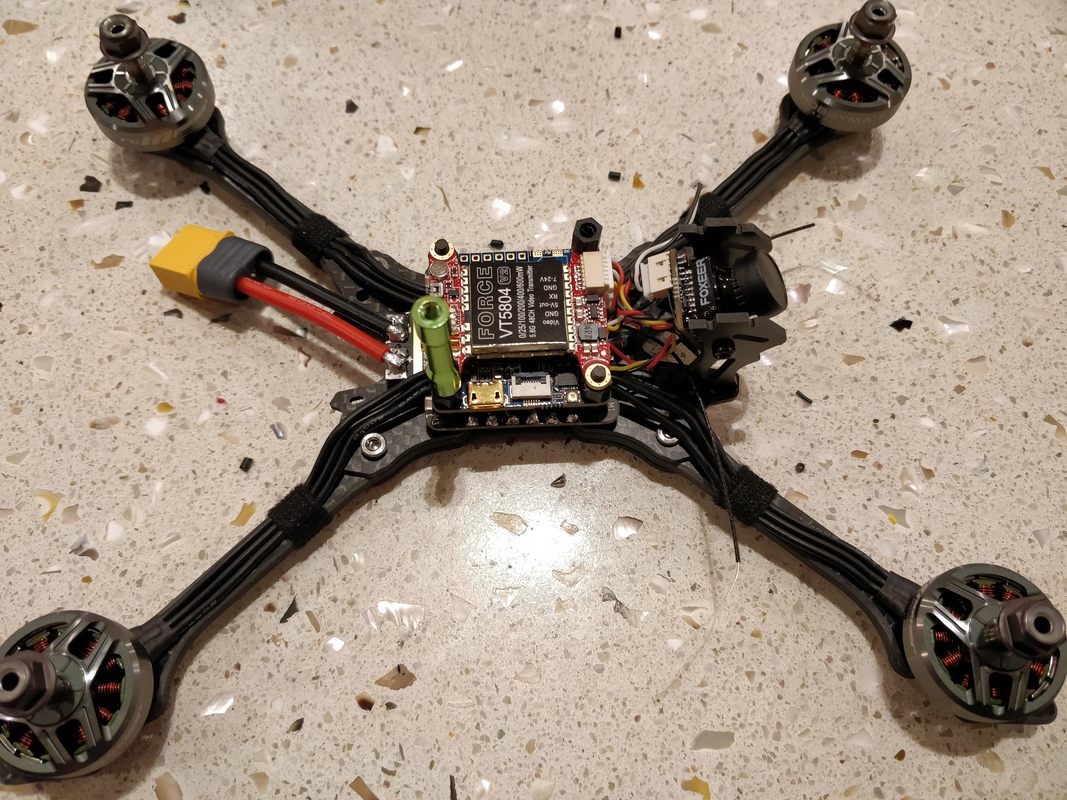
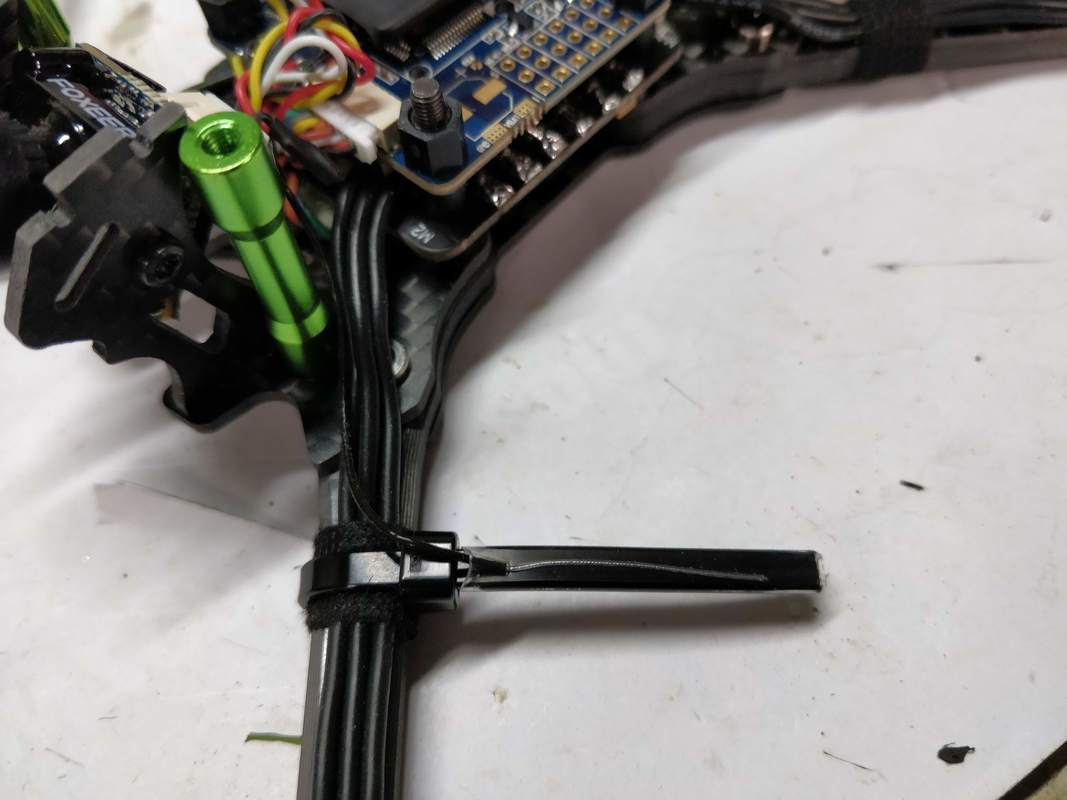
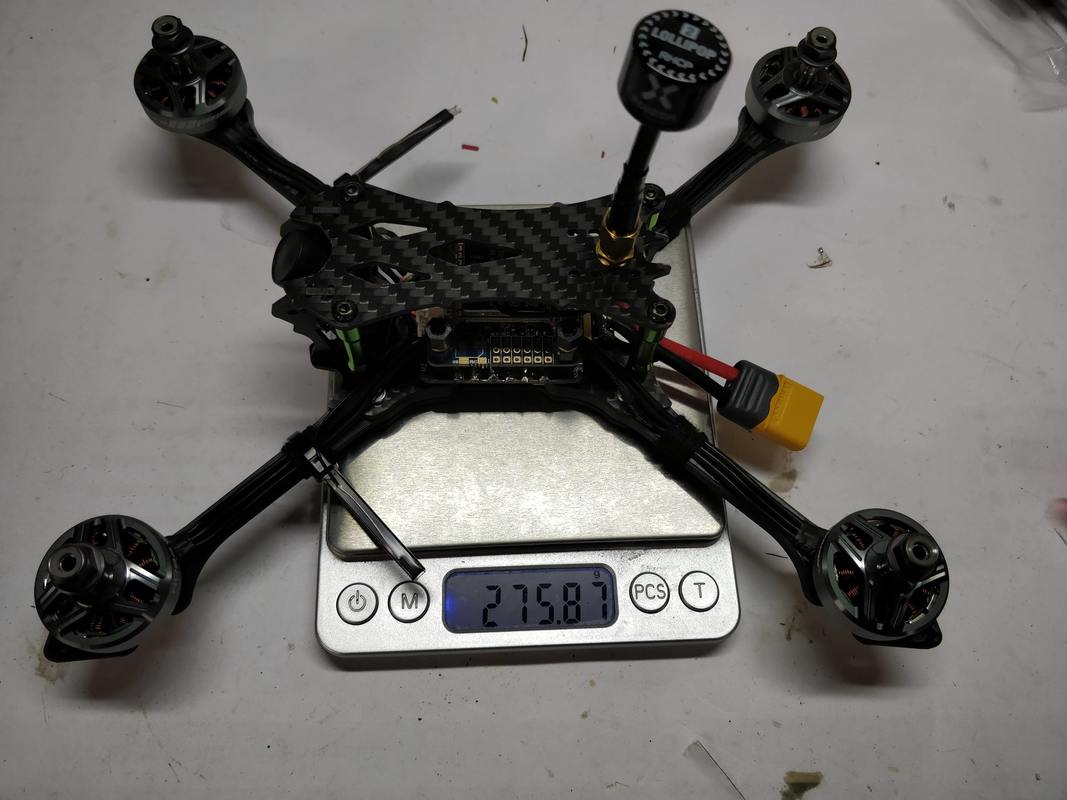
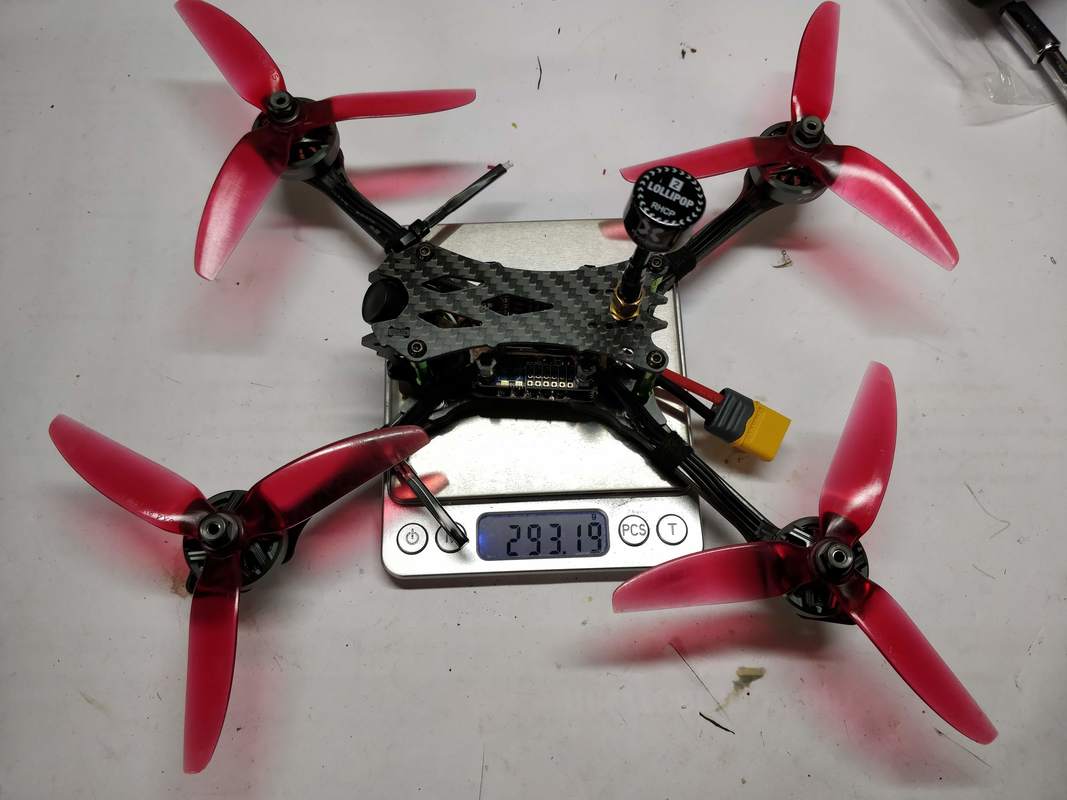
Extra parts and recommended for the build Firstly you will need extra parts for this build. I've used the following with links to Hobbycool as they tend to have the sharpest price: And tools/sundry items: On with the build Captioned images below should walk you through the build process and I've noted anything tricky as I've gone through. Click on images to zoom.
So that is it for the physical build. Not a difficult build at all in the scheme of things - components fit easily with plent of room to work. Part 2 (software setup) is here and part 3 (flight review) here.
0 Comments
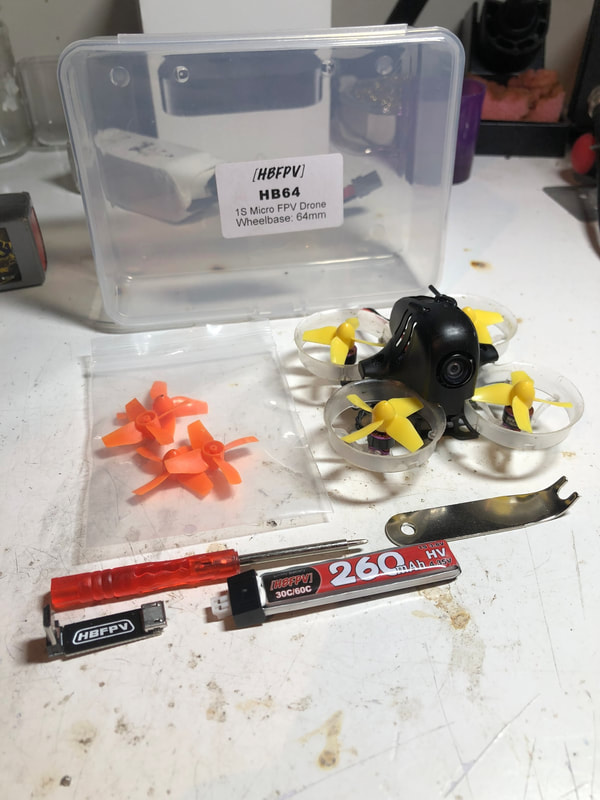
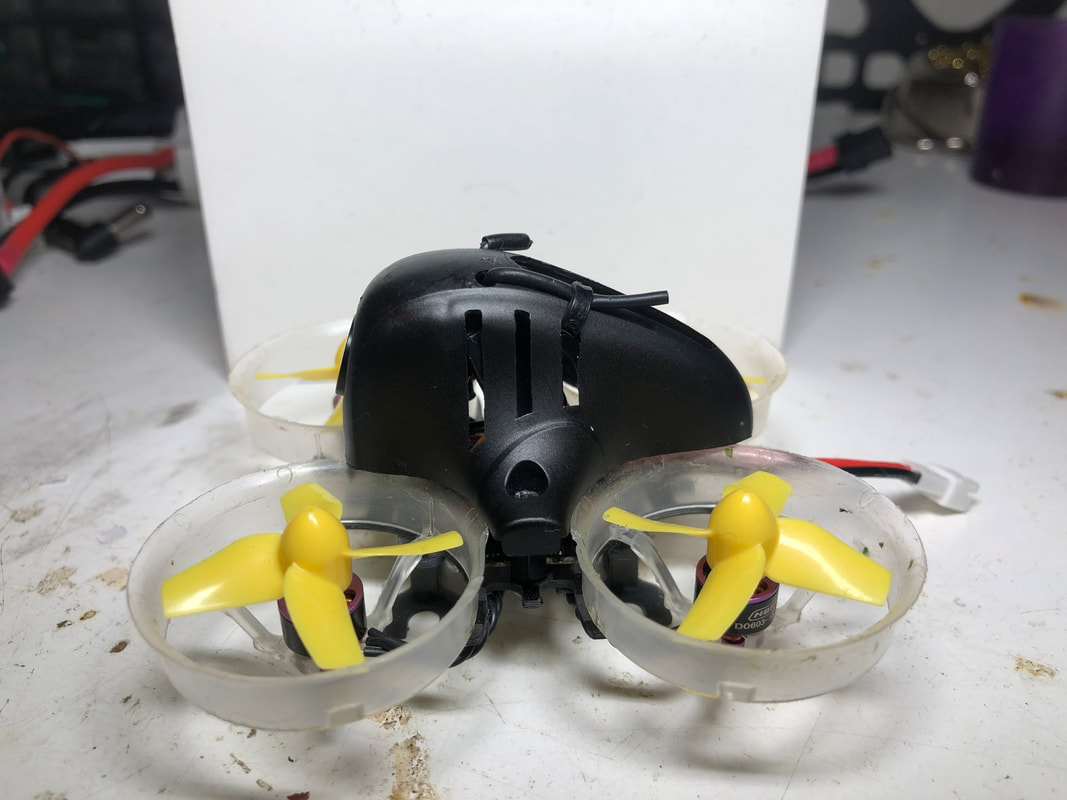
This review has been kindly written by @fpv_airborne who is looking to become a regular contributor here. 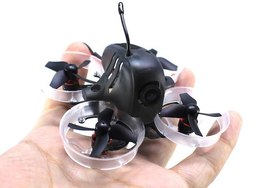 Introducing the HB64 The HB64 64mm micro brushless quadcopter is available as a plug and fly kit from HobbyCool.com with either 14000kV or 16000kV 0603 motors. This review is based on the 16000kV variant and is my pick of the 2. It is just 1mm smaller than a traditional brushed tiny whoop but has much more powerful motors. It is 11mm smaller motor to motor than the brushless Happymodel Snapper7 (review here). I am happy to say that the HB64 has impressed me very much!
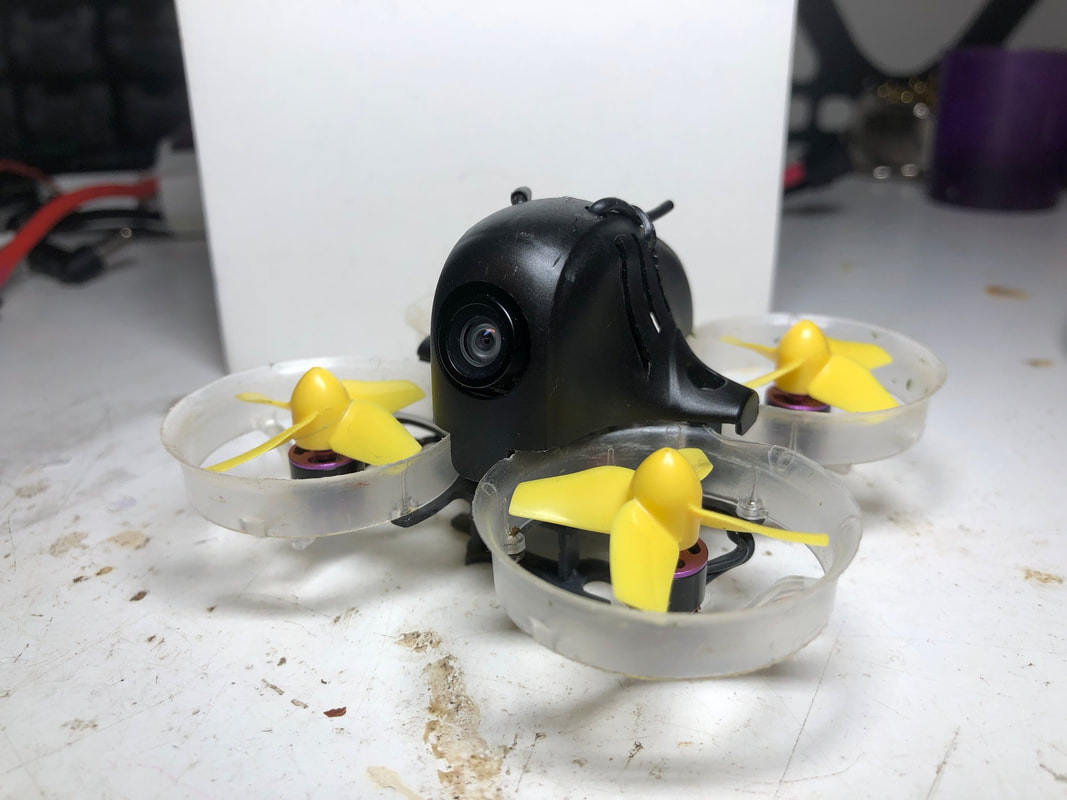
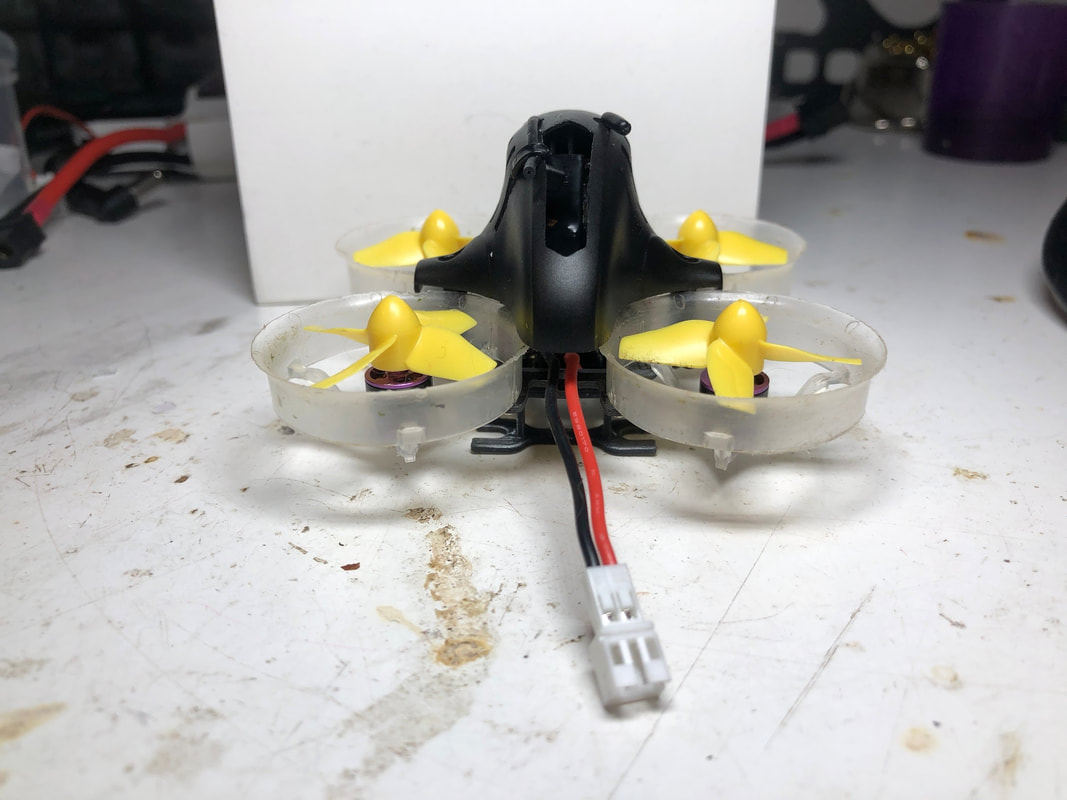
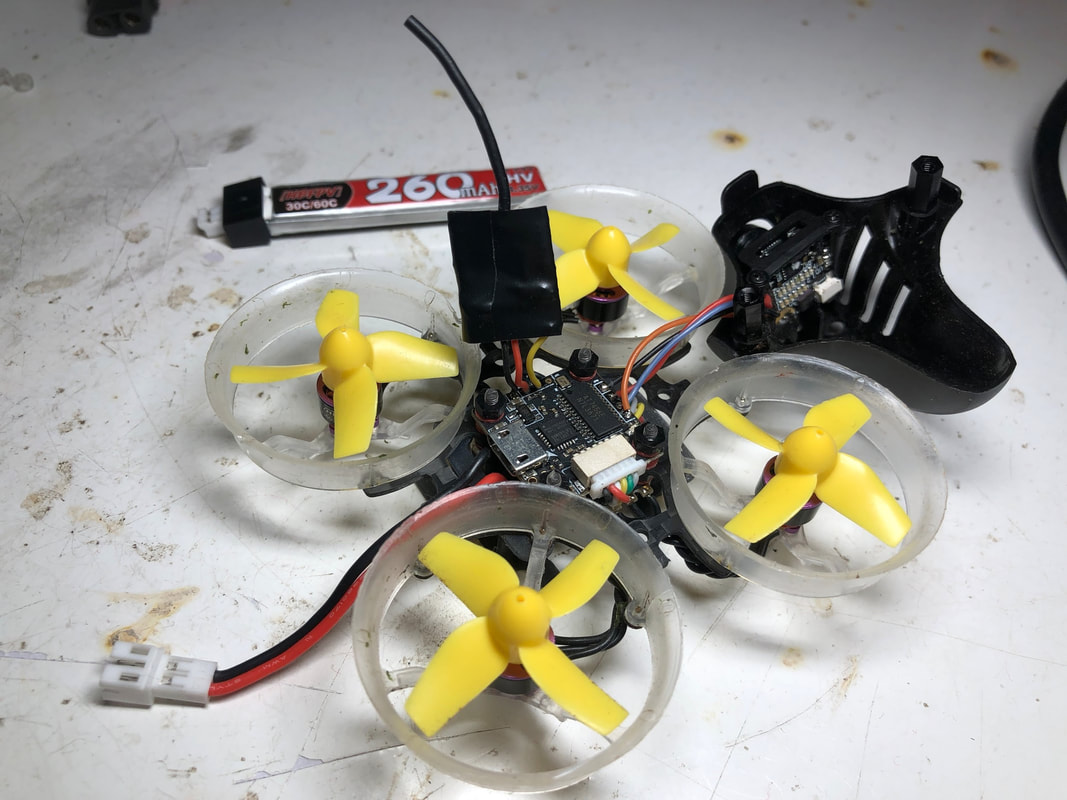
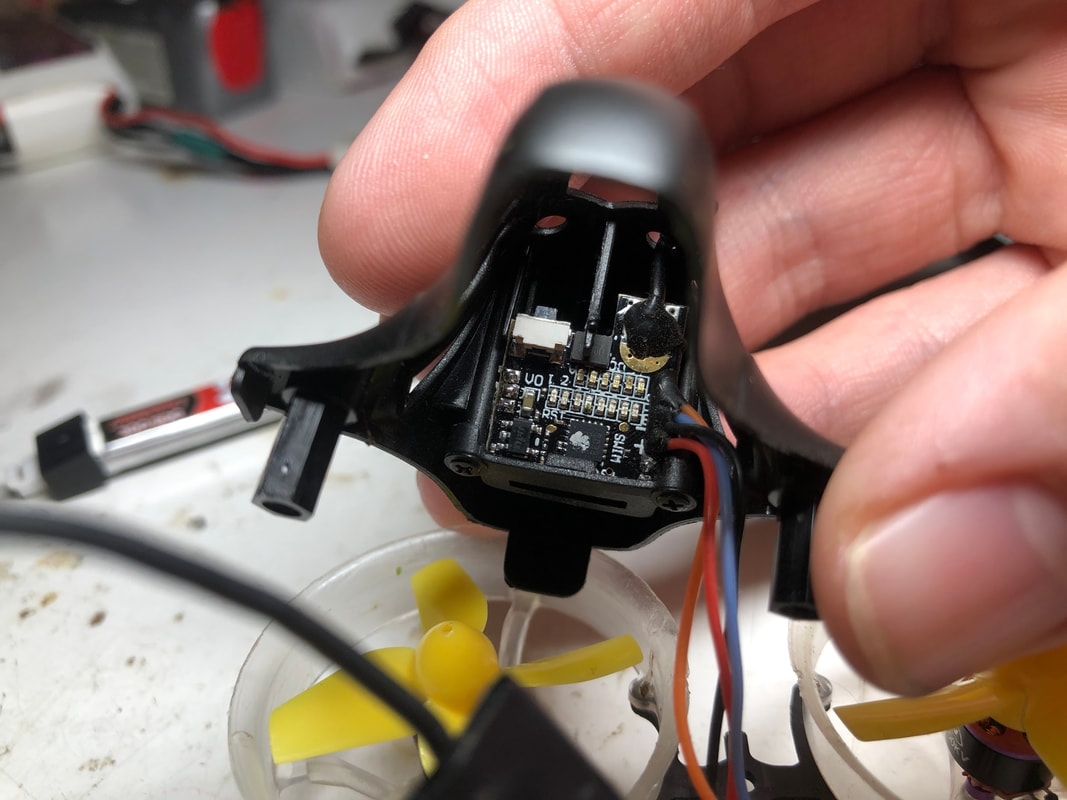
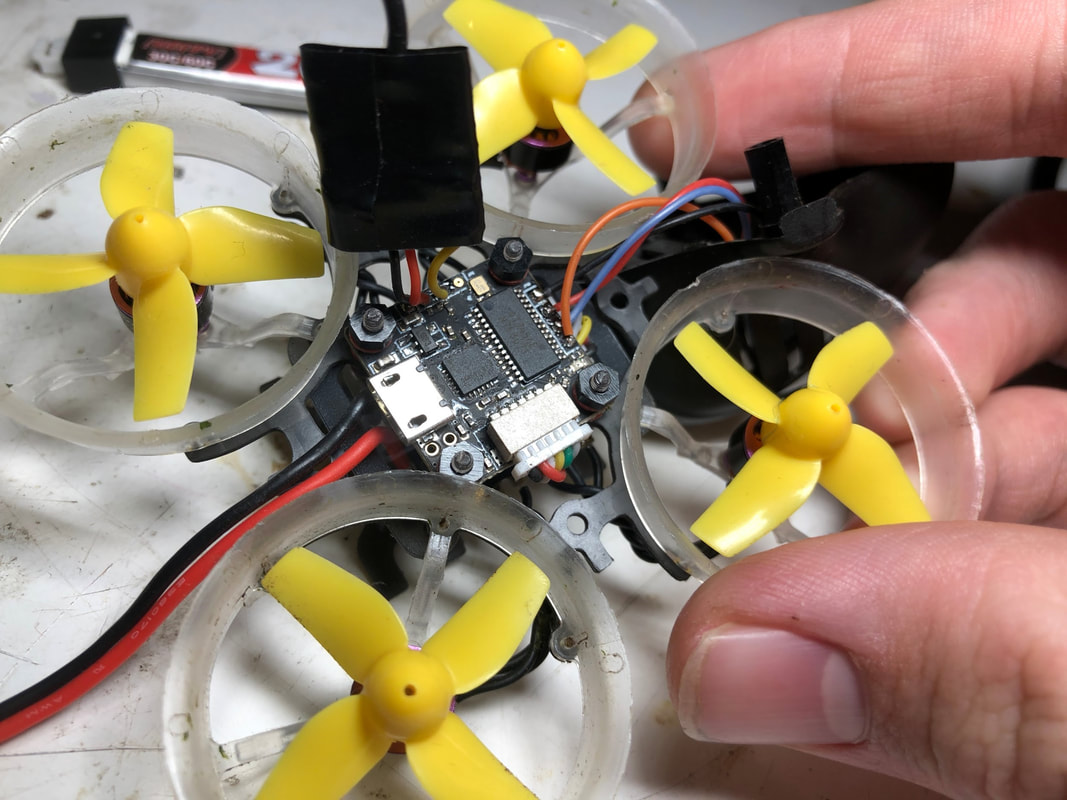
Quad specs: The HB64 brushless quad has a 4 in 1 esc and a F3 flight controller onboard. The 4 in 1 esc is rated to 5A and is Dshot compatible and has BLHeli_S configured onto it. These days, we are seeing several companies who are making AIO FC combo with built in esc but this stack seems to work very well. Added unnecessary weight is a big issue for micros but the HB64 weighing in at only 24 grams without battery or 30 grams all up including battery. This weight is impressive knowing all that is included. 4 in 1 esc, FC, battery, motors, props, frame and cam/vtx combo. The camera/vtx combo works much better than expected. It has a discrete monopole/whip antenna just from vtx to top of frame pod. This antenna is great for the quad because of its extremely light weight. It is also unlikely to be broken because there is little surface area of the antenna to hit objects in crashes. This is an improvement from the original tiny whoops which had the cloverleaf antennas that are easily bendable and breakable.
Setup: The instructions that come with this micro quad are insufficient for the full setup of this quad. Included with my quad, there was a little sheet which had a diagram and labeling of the FC. This diagram only showed the FC and nothing else like the 4 in 1 esc, VTX diagram or receiver setup. Even though there is information on Google, it would have saved a lot of time and effort for the buyer to receive more extensive instructions. To that end I have spent some time here documenting what has worked in case others are looking for this information. I was pleased to find that the betaflight firmware was fully setup with Betaflight 3.2 and only needs to be bound to the transmitter to be ready to fly. The pids and (ALL) settings have been adjusted to suit the quad. All that needs to be done is to bind the receiver to the quad, setup switches for arm etc. in the receiver tab and you’re ready to fly! While I was setting up switches, after I setup arm, I also set up ‘flip over after crash’ which is a MUST for anyone that crashes a lot because it prevents those awkward walks of shame to rescue your quad. To use flip over after crash, just switch the switch which is assigned to flip over in the receiver’s tab and then arm using the arm switch, tilt the pitch or roll depending on the angle and objects around the quad until the quad is upright, then disarm both switches and re-arm the arm switch. You will then be upright and ready to rip again! Since I run a Flysky radio, I used a small FS-RX2a pro receiver but the SBUS-based FRSKY receivers will work in the same manner. To set up the FS-RX2A Pro receiver, all that is required is the receiver to be soldered to FC by the GND, 5V and ibus. Then hold the bind button on the receiver while powering on from lipo. Now turn on the transmitter and go into bind mode and that's it! As simple as that and it is bound together. This receiver only works for flysky transmitters but works amazingly well for the purpose and size it is. Next step is to go into betaflight and make sure the serial based receiver (SBUS AND IBUS receiver) is selected and Sbus or ibus in configurators tab, Then in receivers tab, select switches for arm and I strongly recommend you try flip over after crash and beeper in case it is lost or hidden behind something because this quad is surprisingly easy to lose behind a cabinet etc. Flying: Finally a good flying micro brushless! Before I saw this I was hesitant to try another micro build after my previous Eachine H8 with AIO camera and tiny whoop. This is because back when I had those 2 quads, the power and components were not up to acceptable standard and the power was unbalanced so one motor would normally be powered more than the other 3 which created a lot of issues for the pilot. That is why I did not recommend them before. But all I can now say is “WOW”. From the first battery of this quad, I have been impressed. Within a year and a quarter, I can see the huge improvement that has been made in the performance and quality of micro quads, especially since they are now brushless which allows them to have more power and a much longer flight life. Moving forward into the future, brushless is becoming very popular because it allows for a lot more power than the brushed micros, lasts much longer and is more durable and can save weight because of the new ‘Naked bottom’ motors. While flying this micro, using the first 30 batteries, I was very impressed with the 3 - 3.5 minutes of continuous flying which is great flight time for a micro like this. But after the first around 50 packs through this micro, the battery life shortened to 2 minutes to max of 2.5 minutes before I started to feel the battery sag. This is not that much of an issue because it was only because of the batteries’ life time. You would have much more fun if you purchased at least 4 260mah 3.8V batteries and gain longer battery life because the flying time would be more spread out over multiple batteries versus the 1 260mah battery that is included with this micro quadcopter. I was really happy when flying this quad with the AIO camera quality. The quality and zoom of the lens on this camera cannot be changed, but as a stock unit they perform amazingly well. Everything in the camera’s sight is visible and surprisingly clear for a nano camera. The quality of this camera in my opinion is comparable to the “Stock” Foxeer HS1177 fpv camera with all the colour and clarity in the view. The camera however is fixed view. This means that the camera is fixed at a 20° angle. However, it works very well with the power and the weight of the quad while keeping the speed fast. The video I experienced with this quad has been more than enough for what it has been designed for. Flying this quad indoors, the video feed can travel through a couple of walls before severely breaking up. The antenna is well covered and at 25mw at 12 channels, I have not had many issues with the range unless flying between multiple walls. Conclusion: In conclusion, the HB64 micro brushless quad is an excellent micro quad for anyone from a beginner just getting into FPV to a long-timer FPV pilot for those indoor sessions or just some fun for those rainy days. It has more than enough power for indoor races or to rip around the house/warehouse. Its size and power also allows it to hit those extra small gaps that are impossible for larger micros or 3” quads to hit. Its advantages overlap the advantages from any brushed “Tiny Whoop” and for the HB64’s price point, it is definitely worth checking out and potentially worth buying if it ticks your needs. This quad is also very very durable. I have crashed it from high, slammed into many obstacles and it has just held up without any bent props because of the included prop guards. Within my first 20 flights, I crashed into a deep puddle of water where this quad was fully submerged for several minutes but after putting it under the hair dryer and letting it dry off, I plugged it back in and it worked like it did before the soaking. My last point is to address the quality of the solder joints and construction of the quad. Every part of this quad appears to be well thought out and as a result is strong and durable against many obstacles. In my opinion, I would recommend this quad 100%. The HB64 micro brushless quadcopter is available at HobbyCool.com:  |
Thanks for visiting QuadifyRC.com Follow us on facebook below to get all the latest updates