QUADIFYRC MODS AND REVIEWS
  • Home
  • Reviews
  • TIPS and TRICKS
  • COUPONS AND DISCOUNTS
  • Racing quad builds
  • Long Range
  • About & Contact

Reviews

HOBBYMATE COMET 5 INCH QUAD REVIEW PART 2: betaflight setup incl. PIDs

4/10/2018

0 Comments

 
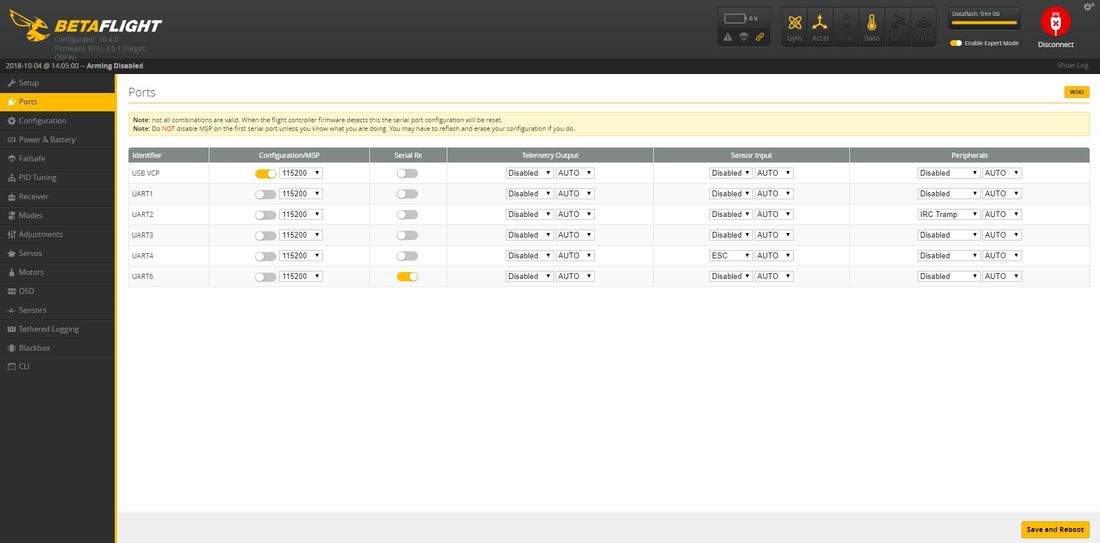
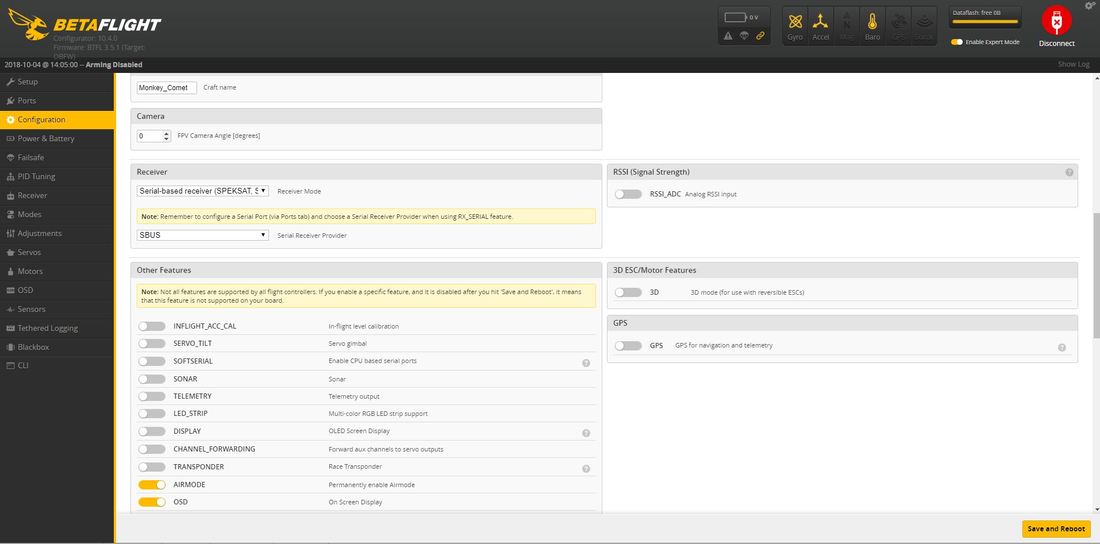
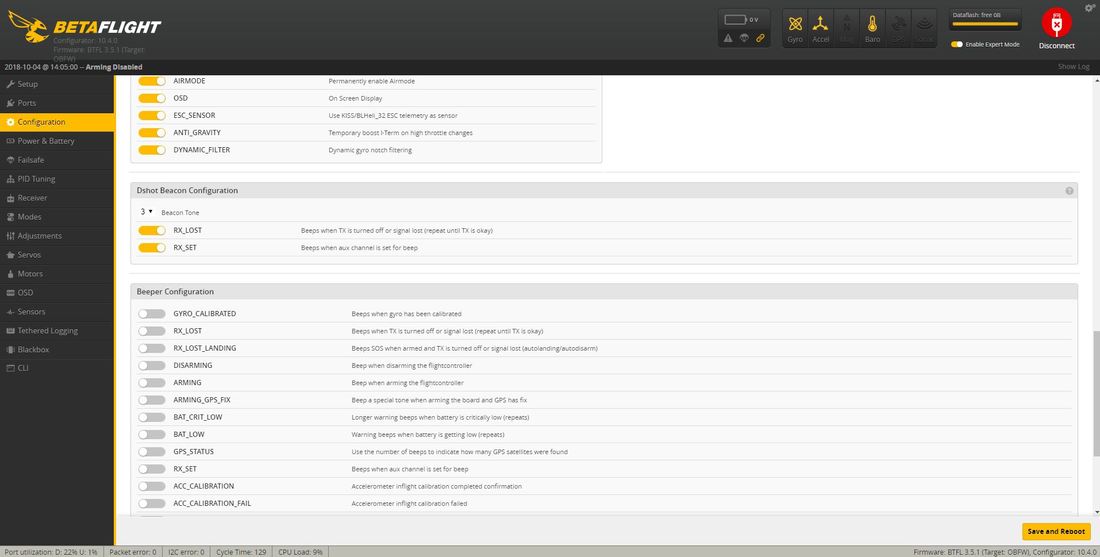
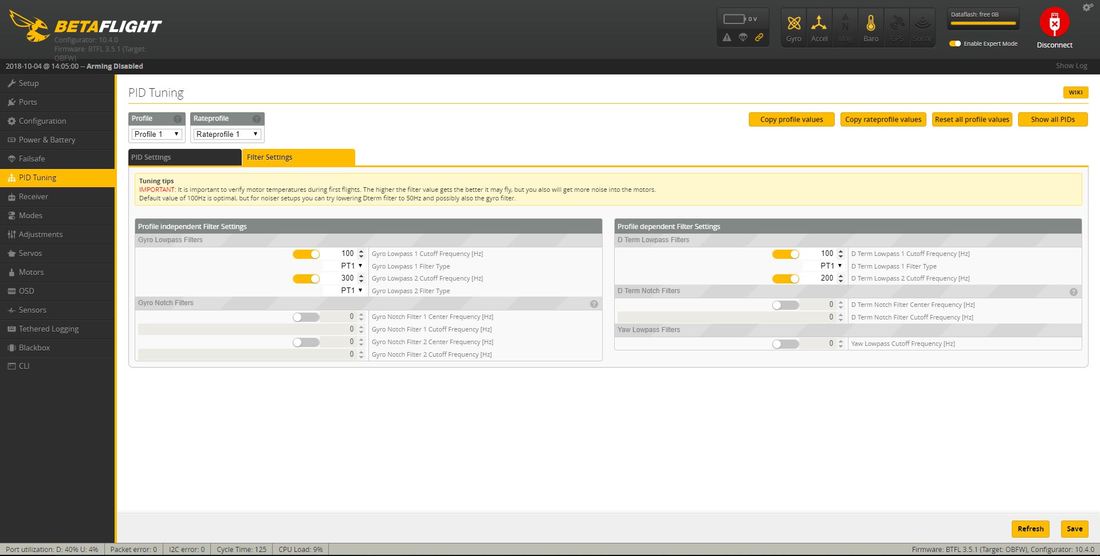
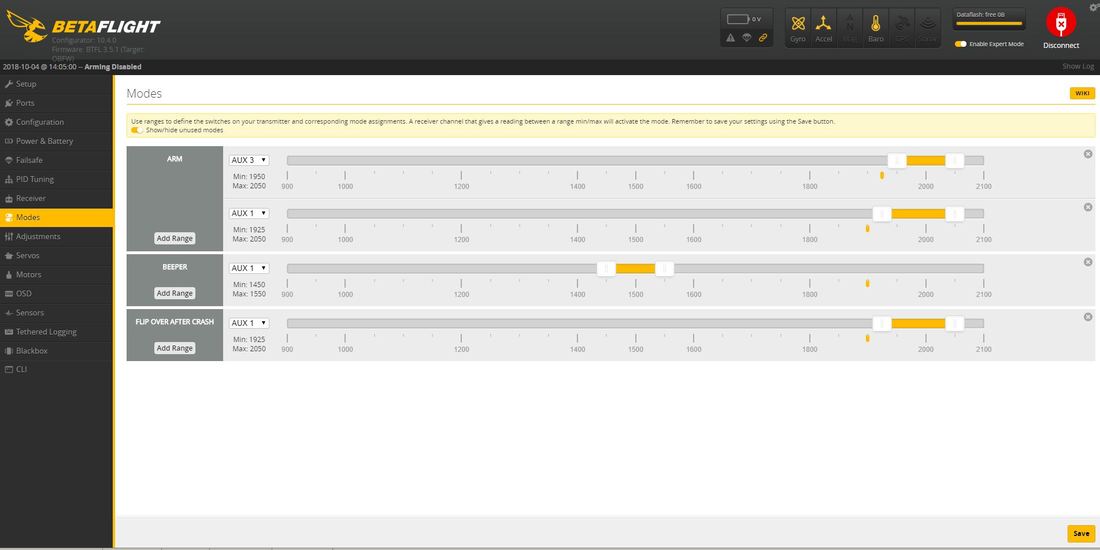
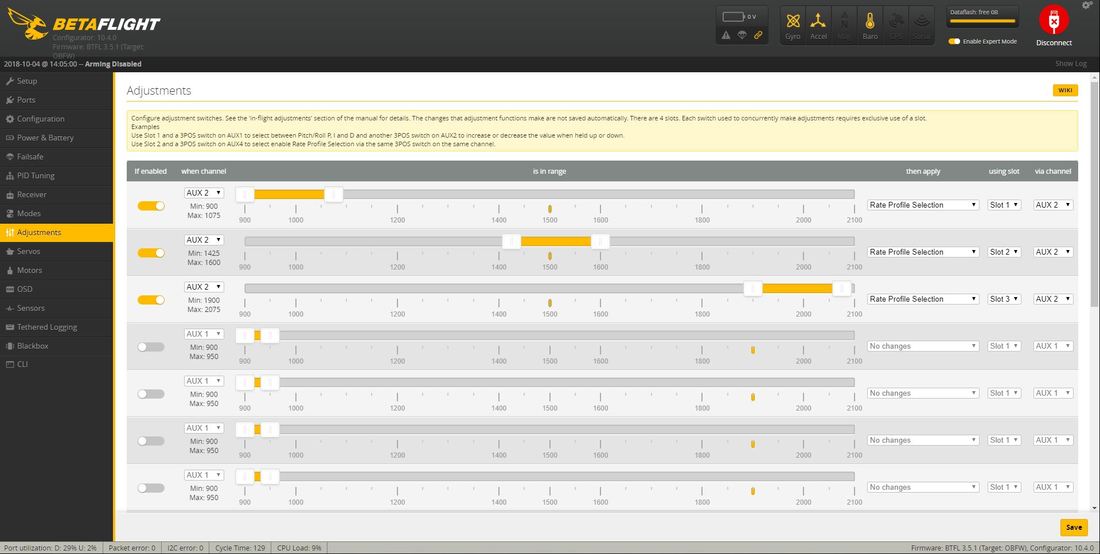
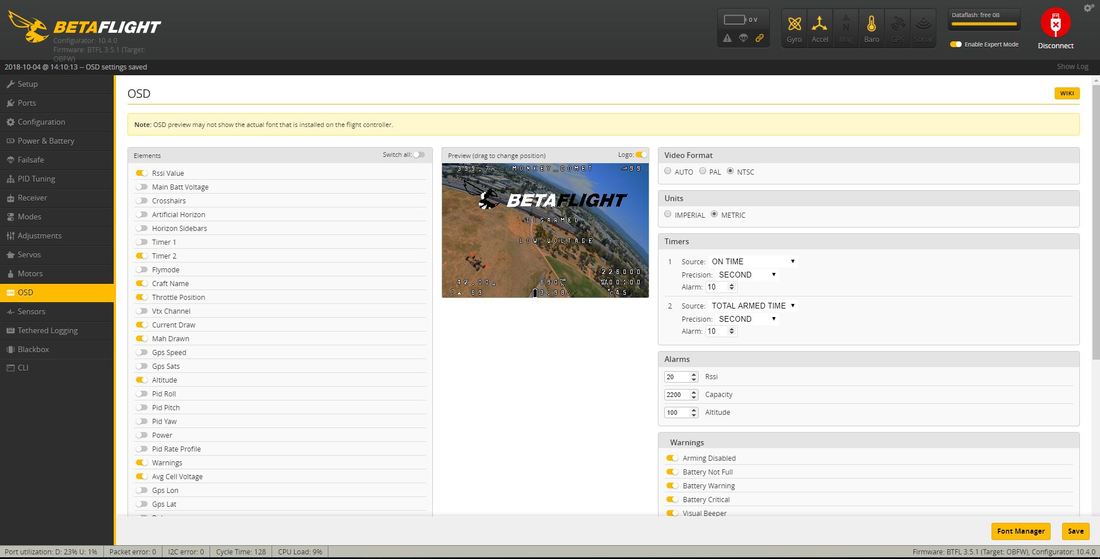
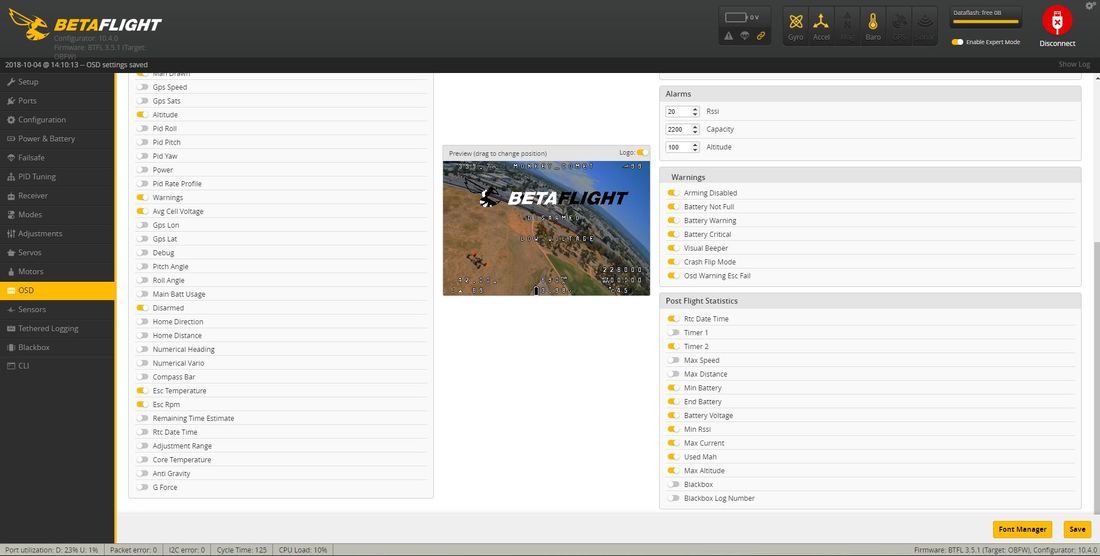
This is the second part of my coverage of the Hobbymate Comet 5" quadcopter. The first part (parts overview and build walkthrough) can be found here and the third part (review) can be found here. If you are here for the PIDs scroll directly to the bottom but would recommend you read through as tuning in betaflight 5 is more than just the PIDs.
Picture
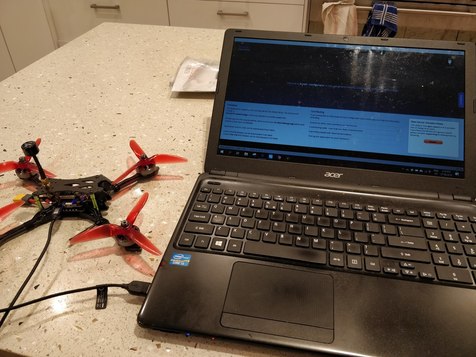
Betaflight setup on this quadcopter is the same as any other but because of the telemetry, VTX OSD control, resource mapping for an ESC that is rotated it is fairly involved. For that reason I have created a betaflight 3.5.1 diff file which can be downloaded below. If you built the way that I did feel free to just load this CLI diff. If you want to read on to see what I changed specifically it's all documented in screenshots and text below.  I'll assume a moderate level of betaflight understanding from the audience but happy to point out more information if needed.


My customised 3.5.1 CLI diff file is here:

comet_3.5.1_diff.txt
File Size: 3 kb
File Type: txt
Download File


Picture
Ports
Port are setup for ESC telemetry on the default UART (4), tramp telemetry on the default UART (2) and an SBUS recevier on the default UART (6)
Picture
Configuration 1
​I'm running reverse props here. I'm pleasantly suprised this has a barometer for altitude readings so have turned this on too. I've made an allowance for the FC to be mounted with the camera connections pads at the front of the quad (which again, I'd recommend as per build walkthrough)
Picture
Receiver settings
Based on an SBUS receiver (XM+ in this case) running RSSI of AUX 12
Picture
Beeper settings
Dshot beeper is turned on, external beeper is turned off. I think that an external beeper is a waste of space/weight now that we have d-shot beeper.
Picture
Power
Nothing changed here other than choosing the ESC to deliver current and voltage readings
Picture
PIDs
I've bumped up i-gain by 50% on pitch and roll and up to 100 on yaw as per the tuning guide. I'm really happy with how these perform - locked in, little propwash and no oscillations on 4s or 6s.
​
Rates
Low racing rates on rate profile 1, same on profile 2 but with a scaled throttle limit to 85%. For more reading on throttle limits in betaflight see my blog here. Profile 3 is my freestyle rates. Please note these are set to a 3 way switch (AUX 2) in the modes tab.
Flight settings
These are the setting recommended in the Betaflight Tuning Guide. i-term relax is on, rc interpolation is on.
Picture
Filters
These are stock dynamic filters but given motor smoothness you could try
Picture
Receiver settings
Based on an SBUS receiver (XM+ in this case) running RSSI of AUX 12
Picture
Auxilliary switches
These are my personal preference on a x-lite controller. ​
Picture
Ajustments
This is how I control rates on Aux2 switch
Picture
OSD settings
These have my preferred view including some of the ESC telemetry features
Picture
OSD settings
These have my preferred view including some of the ESC telemetry features
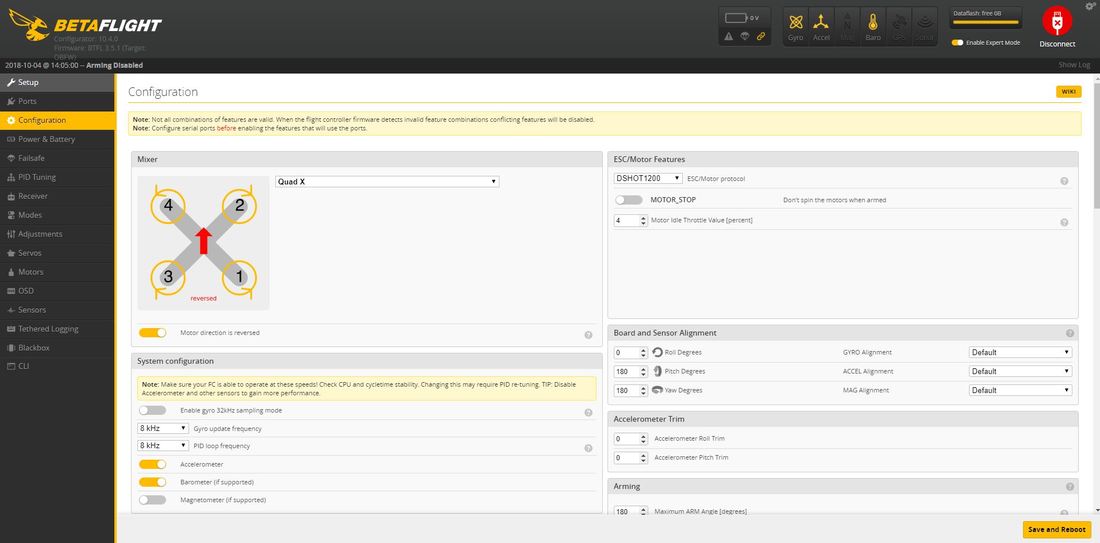
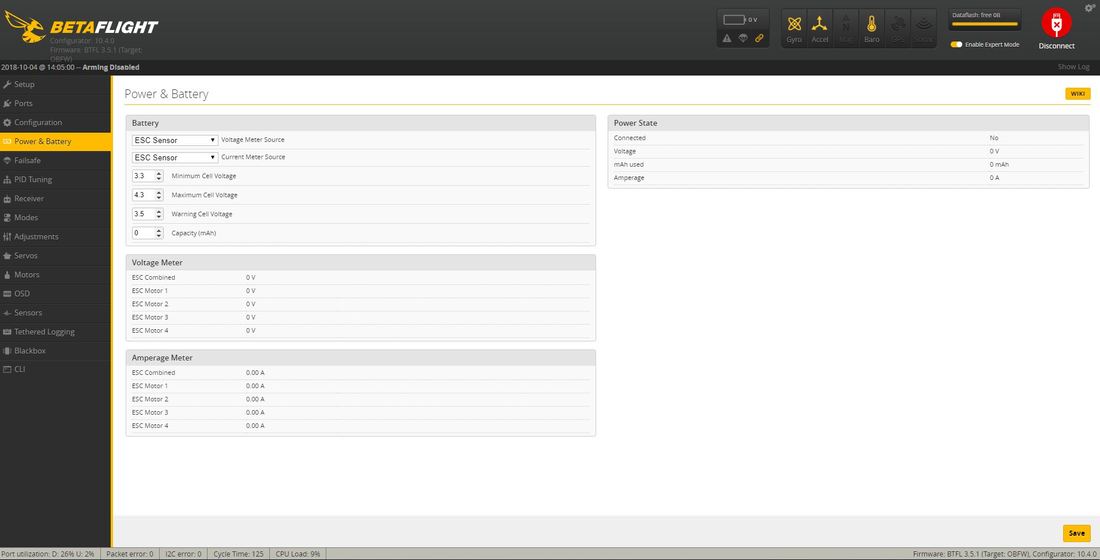
Resource mapping
this diff will change the motor output to be correct assuming you have mounted your ESC with the connector at the back (which I recommend as per build walkthrough)
BLHeli32 settings
These are best described by the screengrab below. Changes from stock are PWM rate increase to 48kHz for smoothness, motor direction adjusted for reverse prop direction (you will need you own values here), Auto motor timing, quiet dshot start up tone, loud shot beeper, min and max throttle adjusted for max resolution and most importantly I've used +25% to calibrate the ESC current meters correctly and have validated this number on my setup. 
Picture
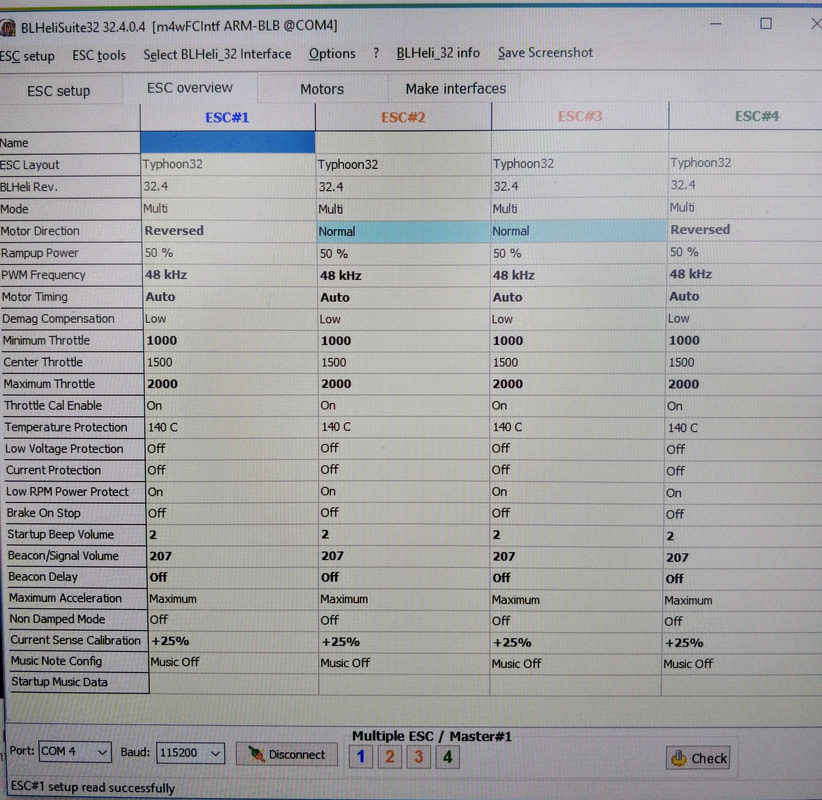
The Hobbymate comet is a 5" quadcopter that is sold in kit, or ready to fly forms and surpasses the Emax Hawk 5 and HGLRC Batman in specs and performance, especially running 6s natively. Better yet it is priced much more sharply. It is available exclusively from HobbyCool.com. My final review is now complete and can be found here
0 Comments


Leave a Reply.

    RSS Feed

    follow us in feedly

    Categories

    All
    1103
    1104
    1105
    1106
    2.5 Inch
    2 Inch
    2s Whoop
    3 Inch
    4s Micro
    5 Inch
    6s
    7500kv
    Adapter
    AIO
    Aomway Commander
    Ascent
    Babyhawk R
    Battery
    Beebee 66
    Beeper
    Bench Review
    BNF
    Boldclash
    Bolt
    Brushless Whoop
    Budget
    Canopy
    Charging
    Christmas
    CM275T
    Comet
    Crossfire
    Diatone
    Drone
    Dvr
    DYS
    Eachine
    Eachine Vrd3
    Emax
    ESC
    F02h
    F3
    First Flight
    FlexRC
    Flight Controller
    Flyfox 110
    Fpv
    FRSKY
    Full Speed
    Gemfan 2540
    Goggles
    Happymodel
    Hawk 5
    HB64
    HGLRC
    Hobbycool
    HobbyCool.com
    Jr Port
    Komori
    Leader 120
    Leader 2.5
    Leader 3
    LED
    LST S2
    Micro Quad
    Mobula
    Mobula7
    Motors
    PIDs
    Portable
    Propellers
    R249+
    Review
    Skystars
    Smart Audio
    Snapper7
    Taranis
    Tinyleader
    Transmitter
    Trashcan
    TX01
    Vtx
    Whoop
    X120
    X Lite
    X-lite

    Archives

    January 2019
    December 2018
    November 2018
    October 2018
    September 2018
    August 2018
    July 2018
    June 2018
    May 2018
    April 2018
    March 2018
    February 2018
    January 2018
    December 2017
    November 2017
    October 2017
    September 2017

Thanks for visiting QuadifyRC.com Follow us on facebook below to get all the latest updates
  • Home
  • Reviews
  • TIPS and TRICKS
  • COUPONS AND DISCOUNTS
  • Racing quad builds
  • Long Range
  • About & Contact