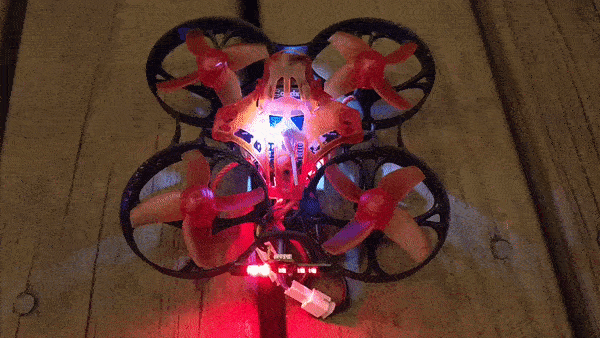
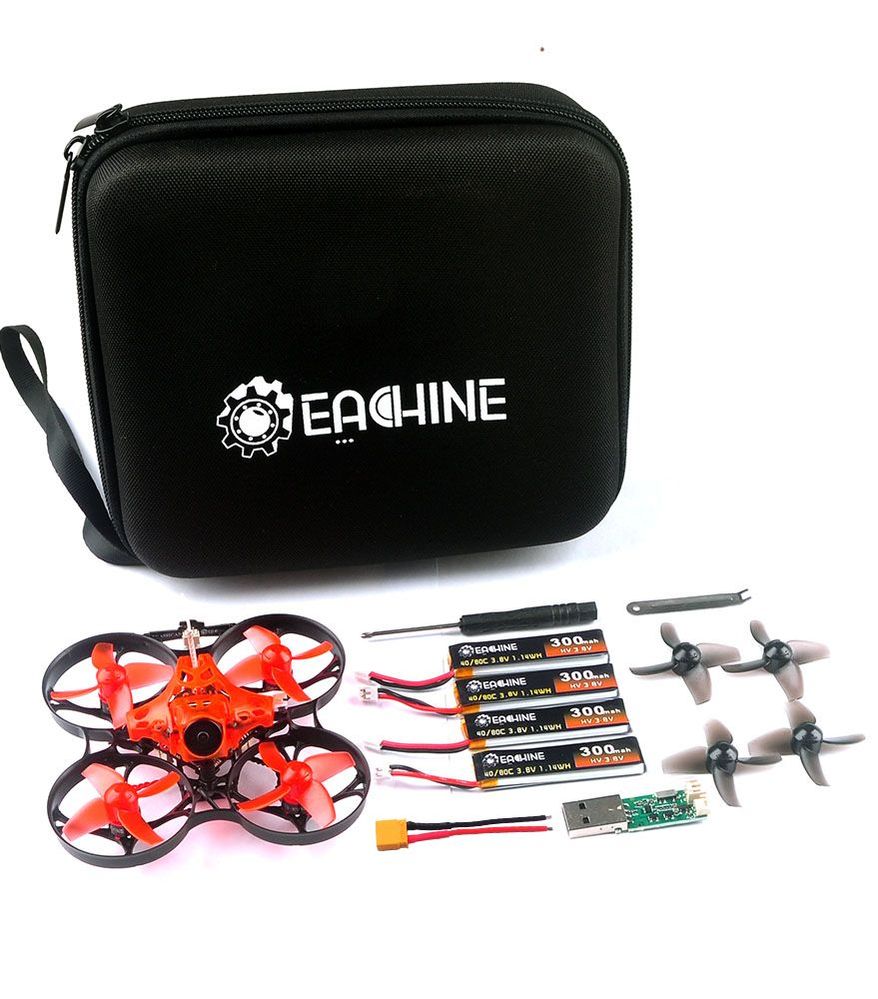
 Thanks for visiting QuadifyRC.com. Be sure to check out our other reviews, tip and tricks and coupons and discounts Introduction In the world of brushless ducted quadcopters (whoops) I have been lucky enough to review most of the big hype products - Happymodel Snapper7 and upgrades, Happymodel Mobula 7, Full Speed TinyLeader and now the Eachine Trashcan. Clearly it is a silly but memorable name and it will surely be easy to search for online.
It is great to see a case included here and like the mobula7, enough battery power to get flying in earnest. The included XT30 is a small gesture but a nice touch nonetheless.
20 Comments
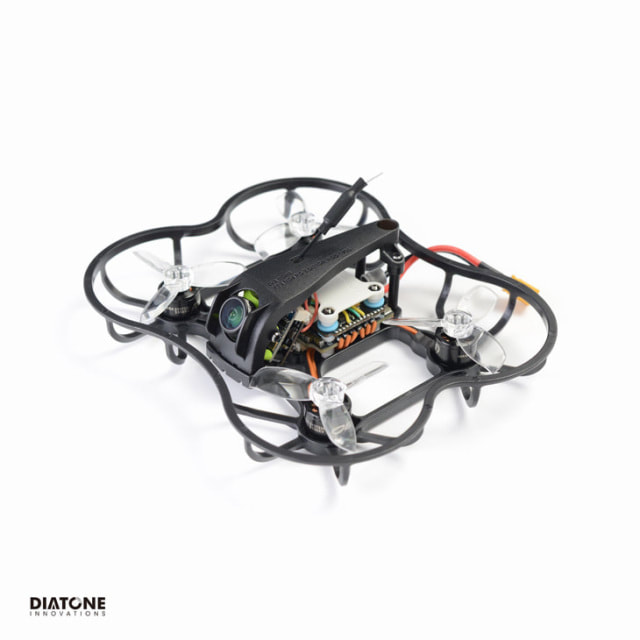
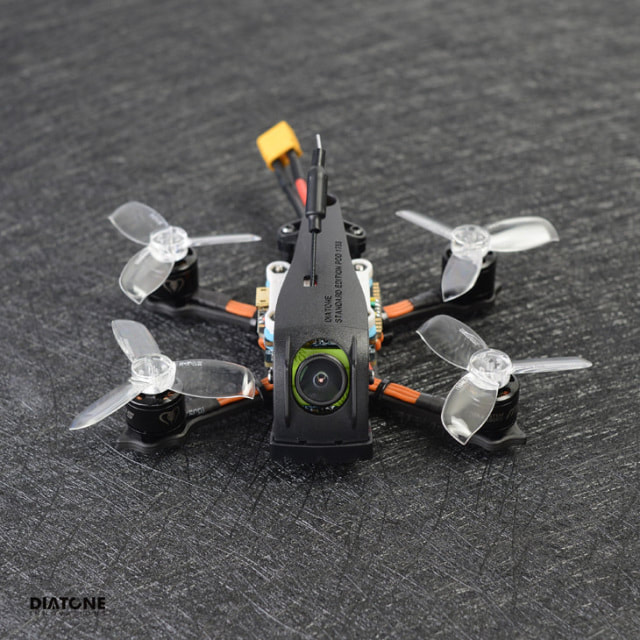
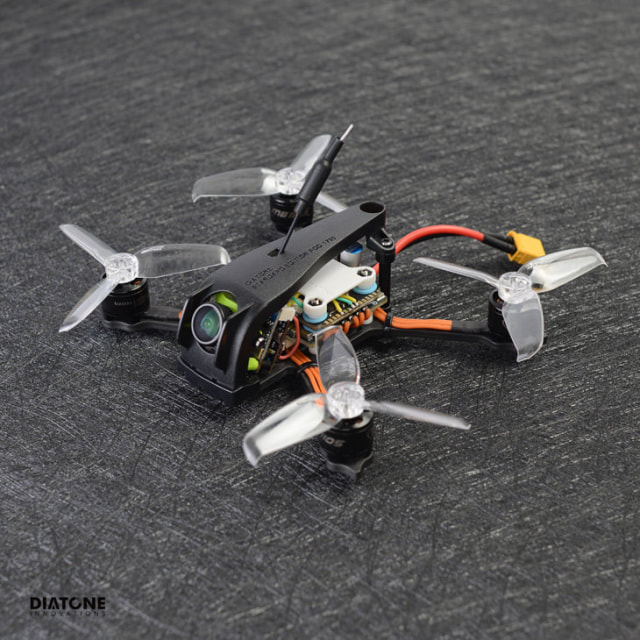
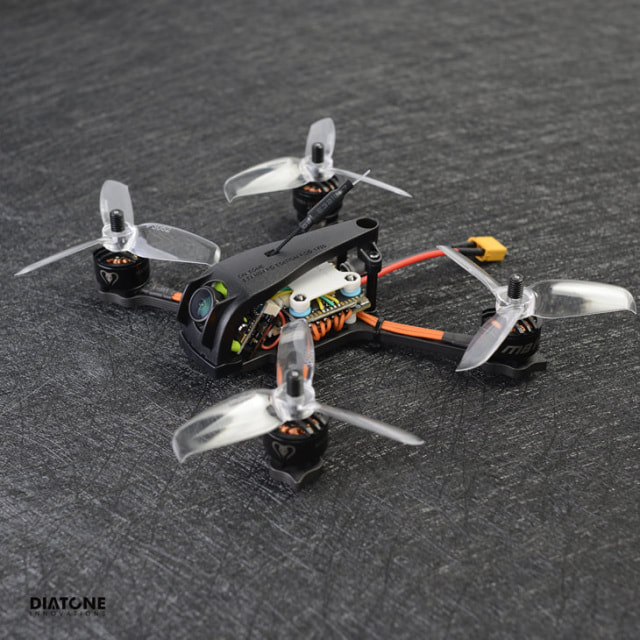
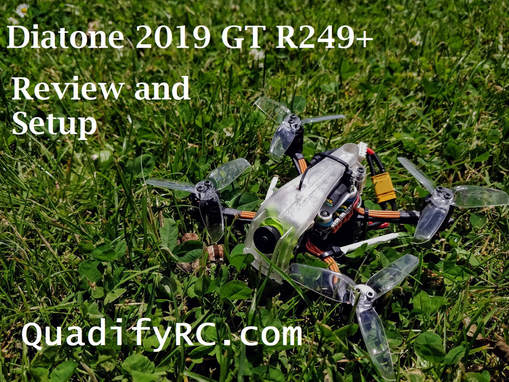 Introduction The Diatone 2019 GT R249+ is one of the newest series of micro quadctopers from Diatone that is built around the Mamba mini f4 stack. The full range from smallest to largest includes: As you can see there is a high degree of modularity - for all except the largest they share the same 1105 5500kV motors. All sizes feature a 3mm thich carbon baseplate except for the R239 which uses and injection moulded plastic chassis and prop-gaurds. All models share the same injection moulded lightweight canopy and mamba mini f4 stack.
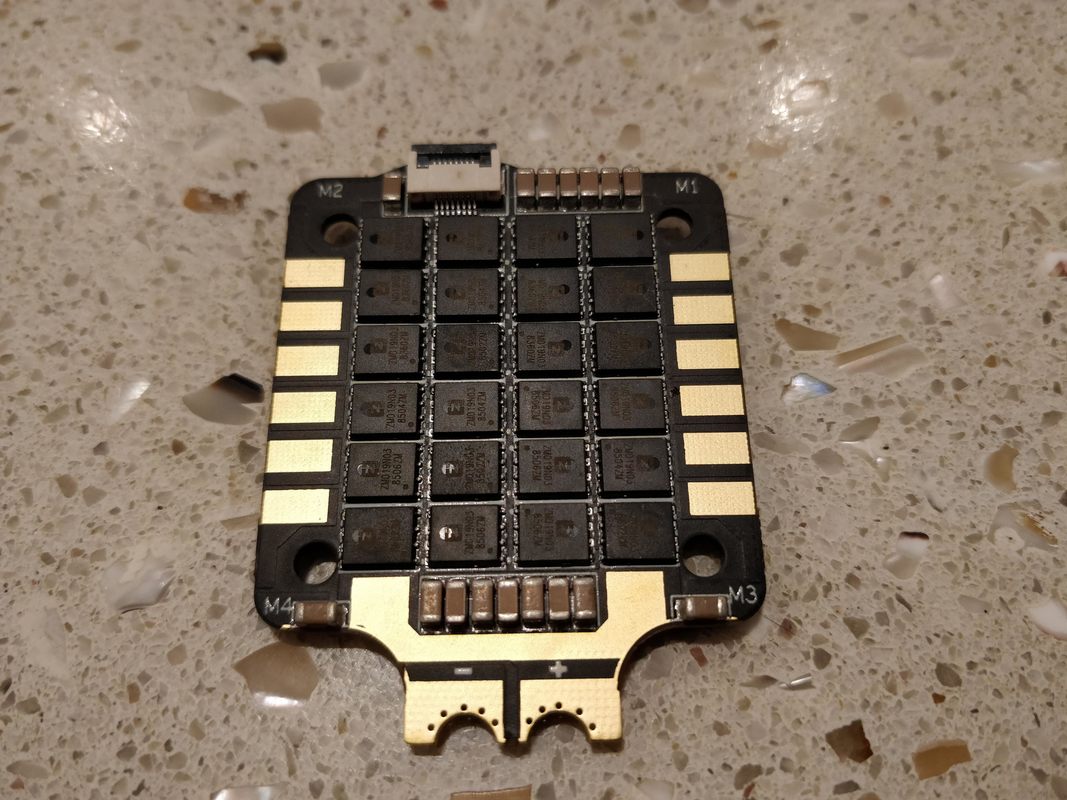
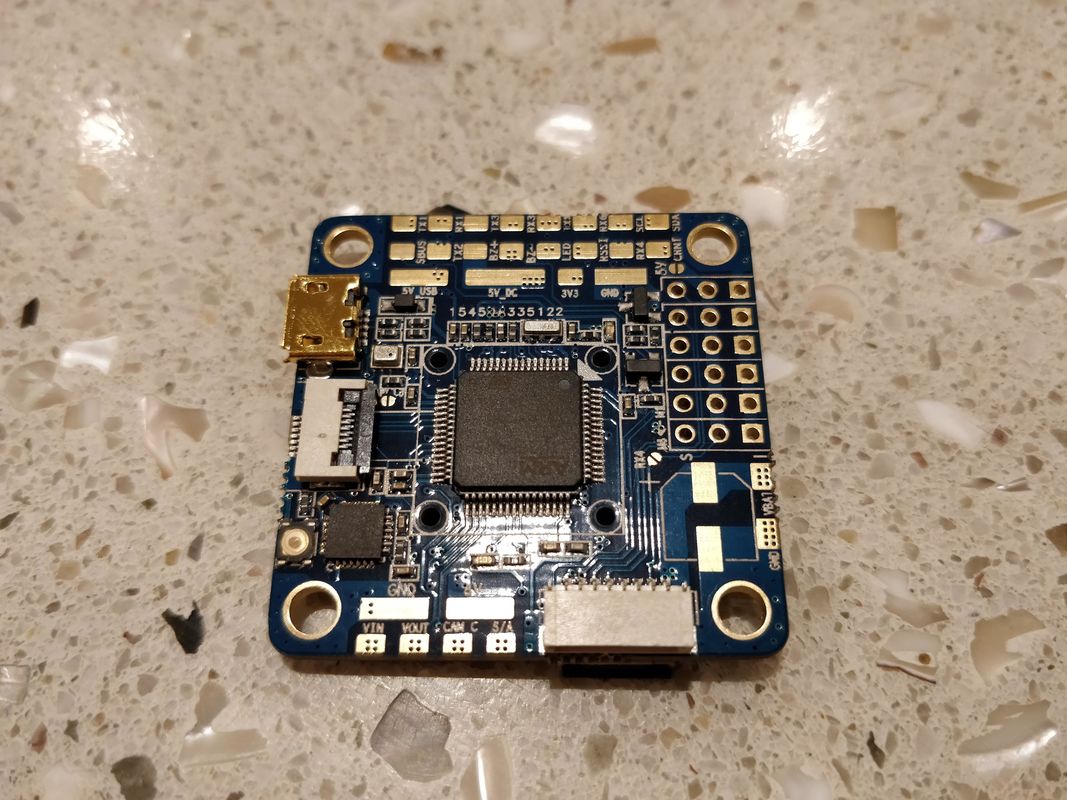
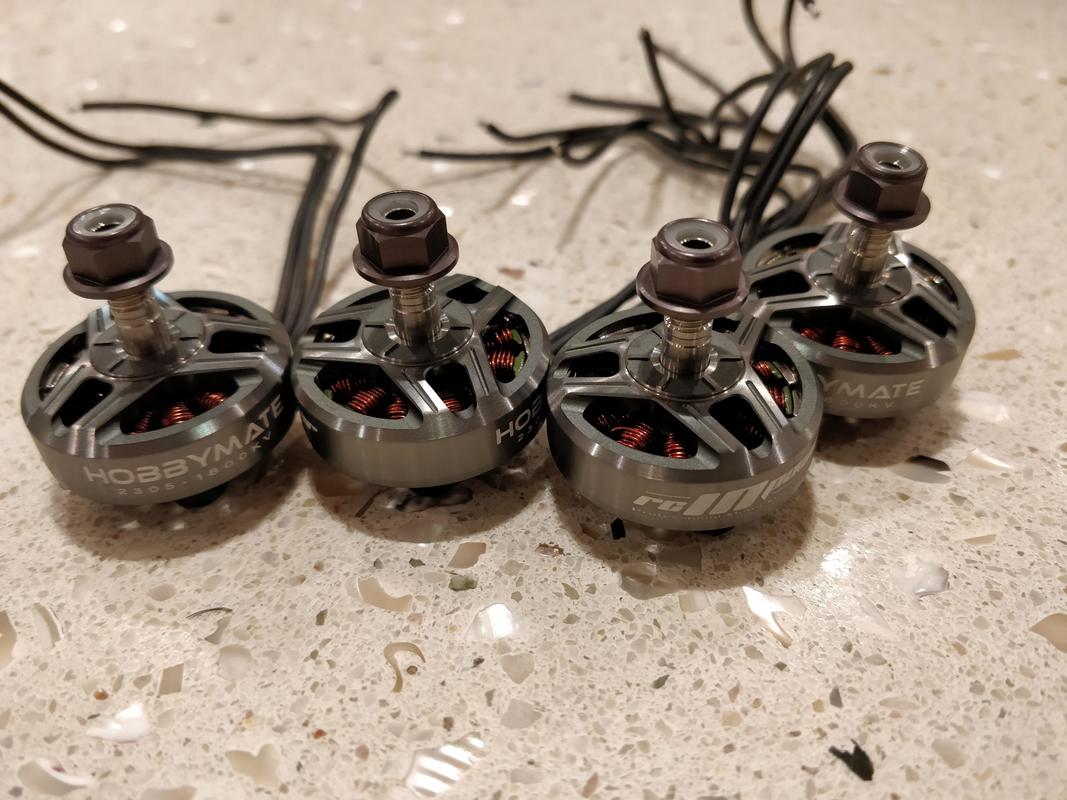
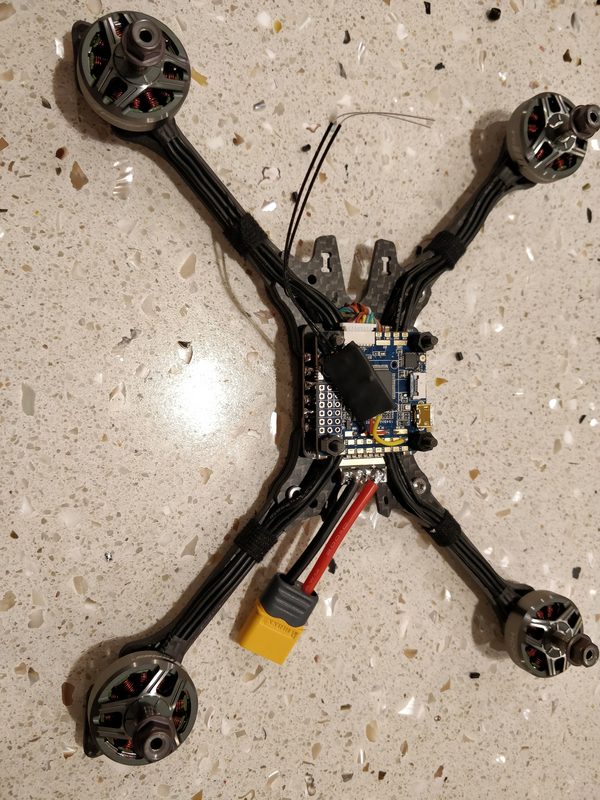
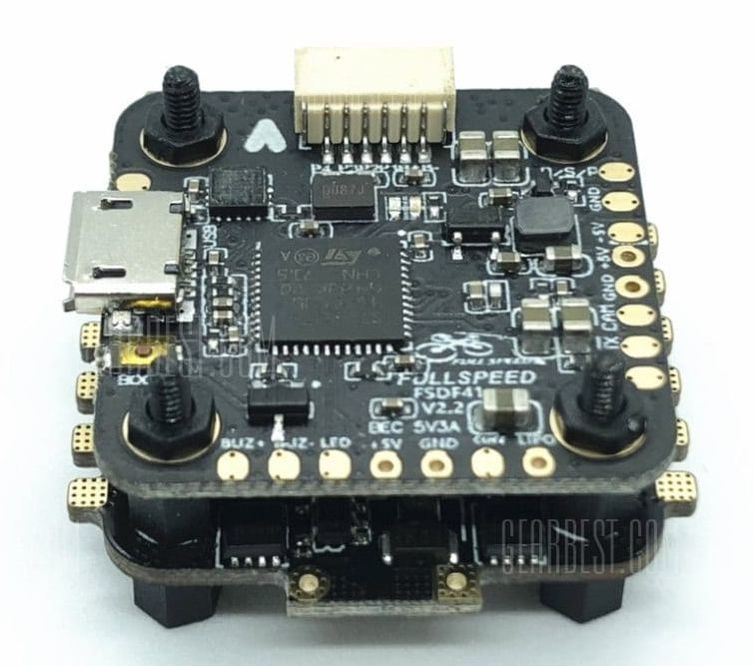
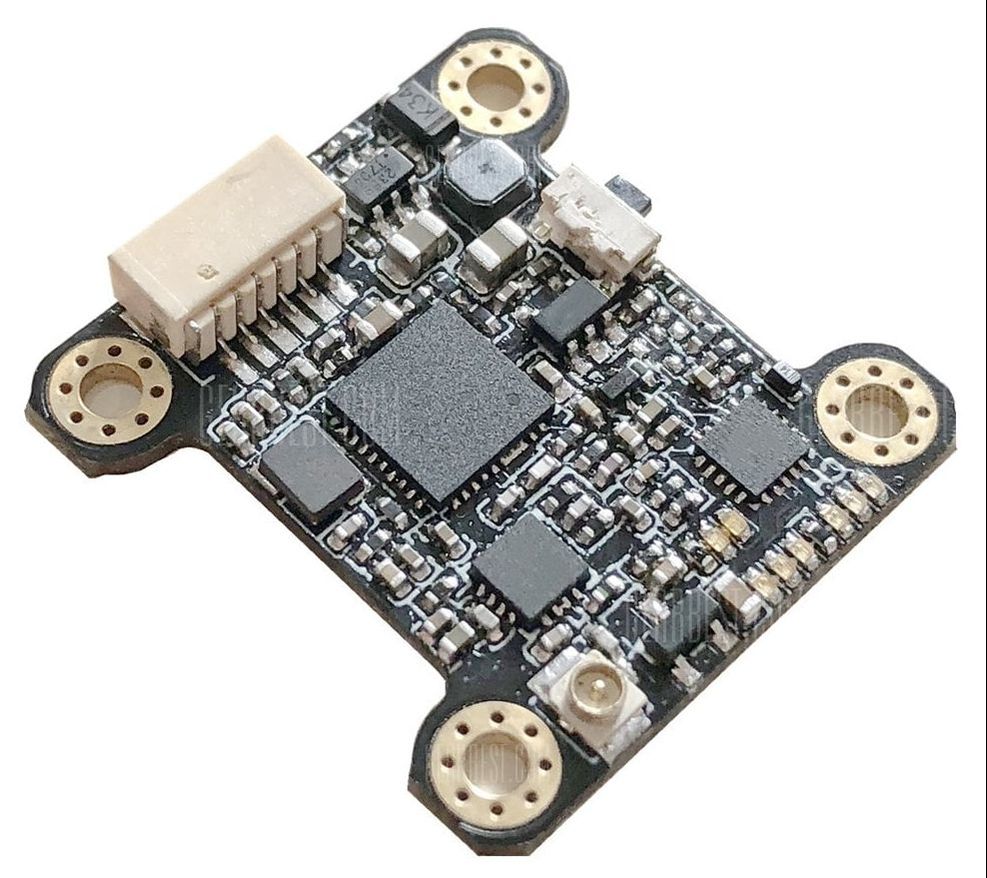
I've chosen to review the R249+ since my experience with micro quadcopters has lead me to believe that this is the 'sweet' spot in terms of performance and staying small and discrete when flying. I'll cover this quad over 3 blogs. This first part will cover the build walkthrough, the second the software (betaflight/blheli32) setup here and the last part the flight review.  The $180 Hobbymate Comet kit is full of premium and dependable 6s components The $180 Hobbymate Comet kit is full of premium and dependable 6s components The Hobbymate Comet Kit is a premium 5" quadcopter that is currently available as a kit for $180 but will soon be available as a bind and fly version. Update: it is now available as a pre-build pnp or bnf with xm+ or r-xsr receivers. In the days since the Holybro Kopis 1 was released there have been some excellent ready to fly models (along with some not-so-great models) available including the Emax Hawk 5 (review here) and the HGLRC Batman (build here) which have been standouts because they have been well balanced, well built and good value for money overall. Since this is a kit, this particular blog is to walk you through the build and then software setup including a betaflight 3.5.1 cli diff. The Hobbymate Comet from HobbyCool.com (or Amazon) is a kit the consists of higher quality parts than even the HGLRC Batman at only a fraction of the cost. Infact when bought on their own the parts come to $257 which is clearly much more than the $180 the kit costs (or even the $200 PNP kit). The Electronics are rated 6s from the factory (unlike the Hawk 5) and come with motors suited for either 4s/5s operation (2500kV) or 6s operation (1800kV). I'm especially excited that this include a genuine airbot ESC and flight controller. More details on the parts below:
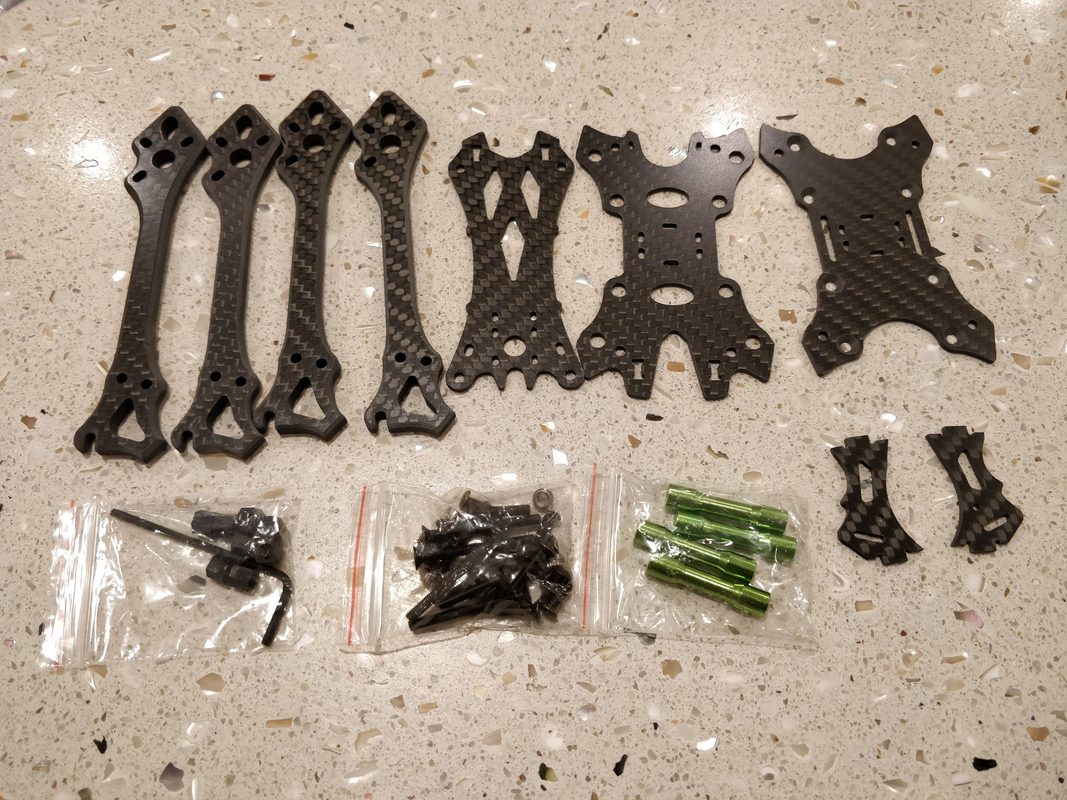
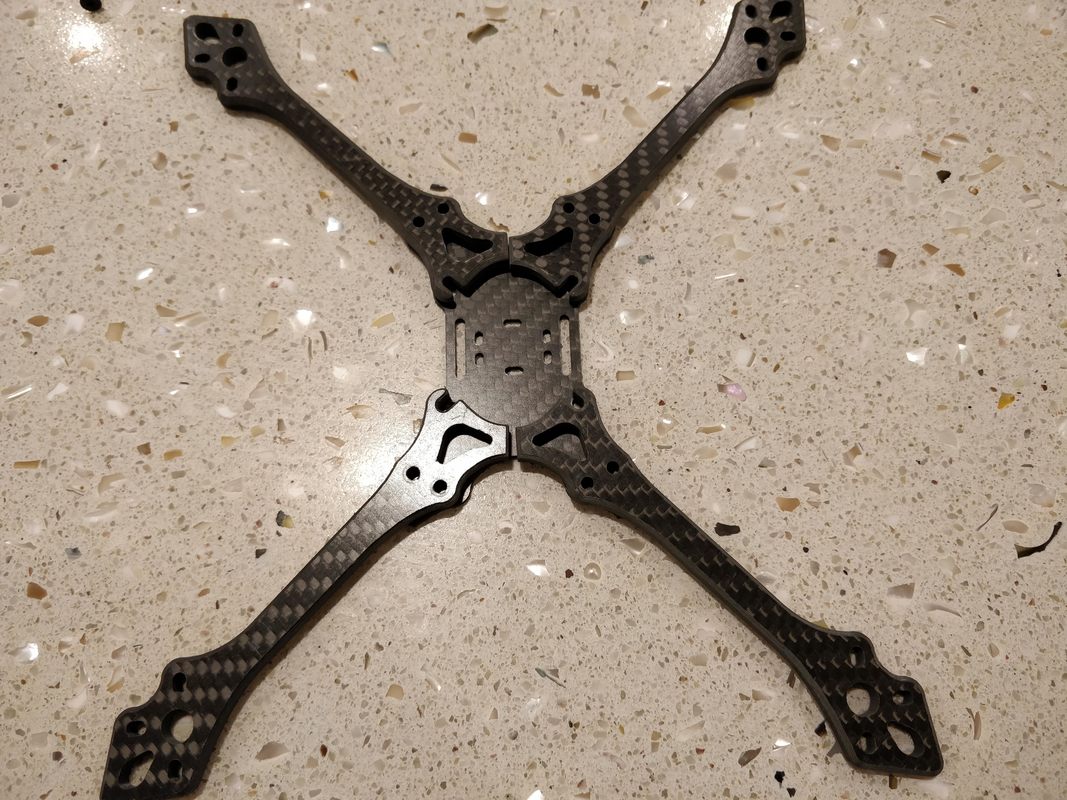
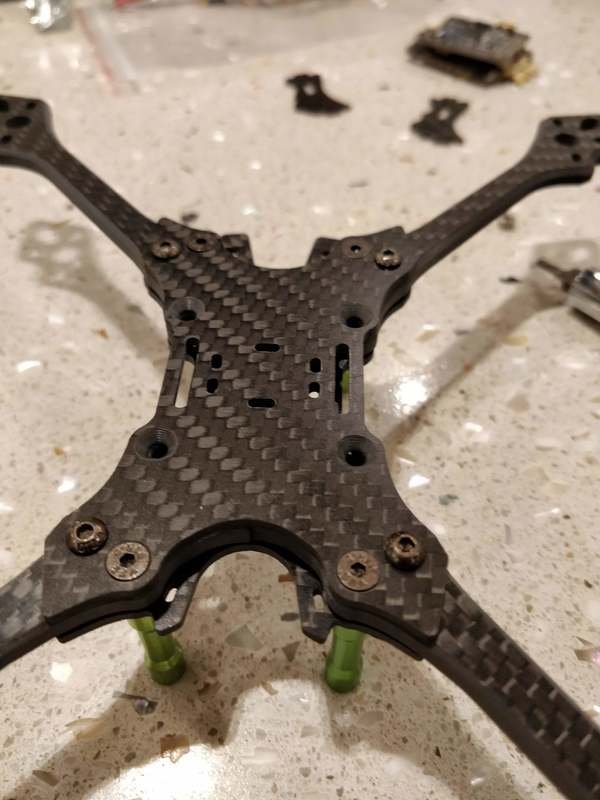
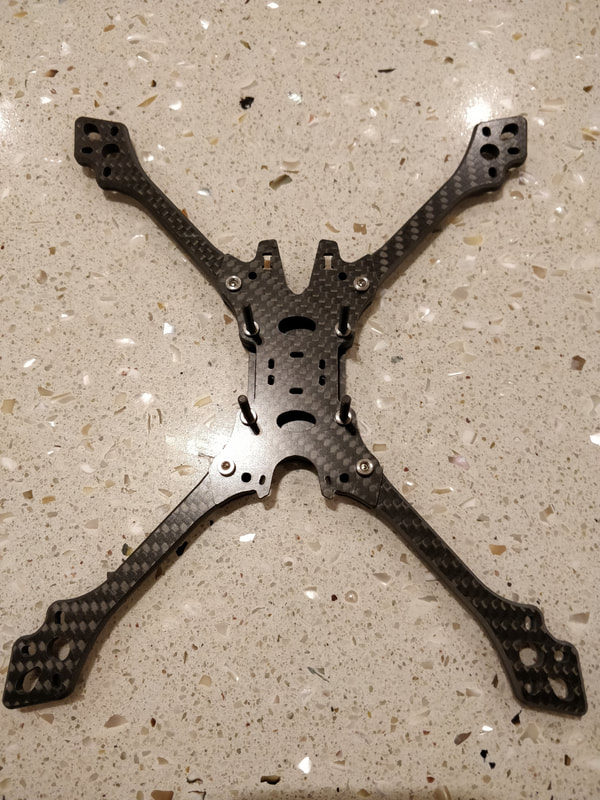
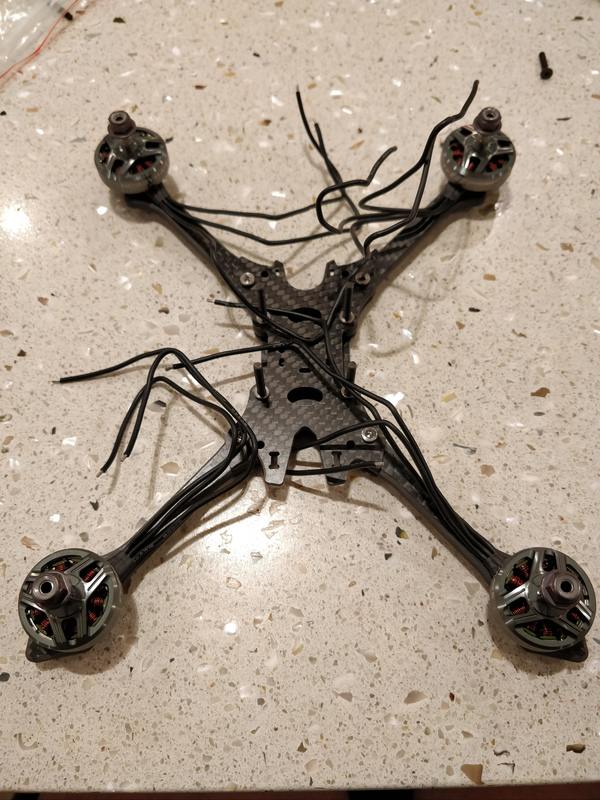
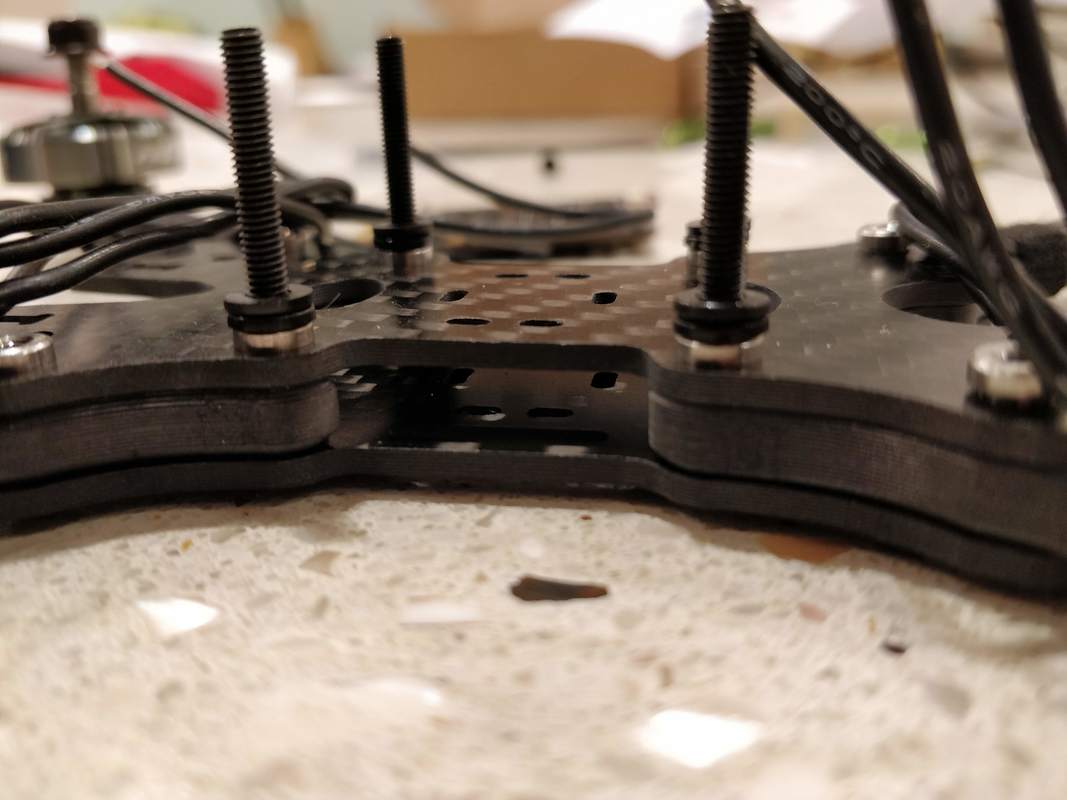
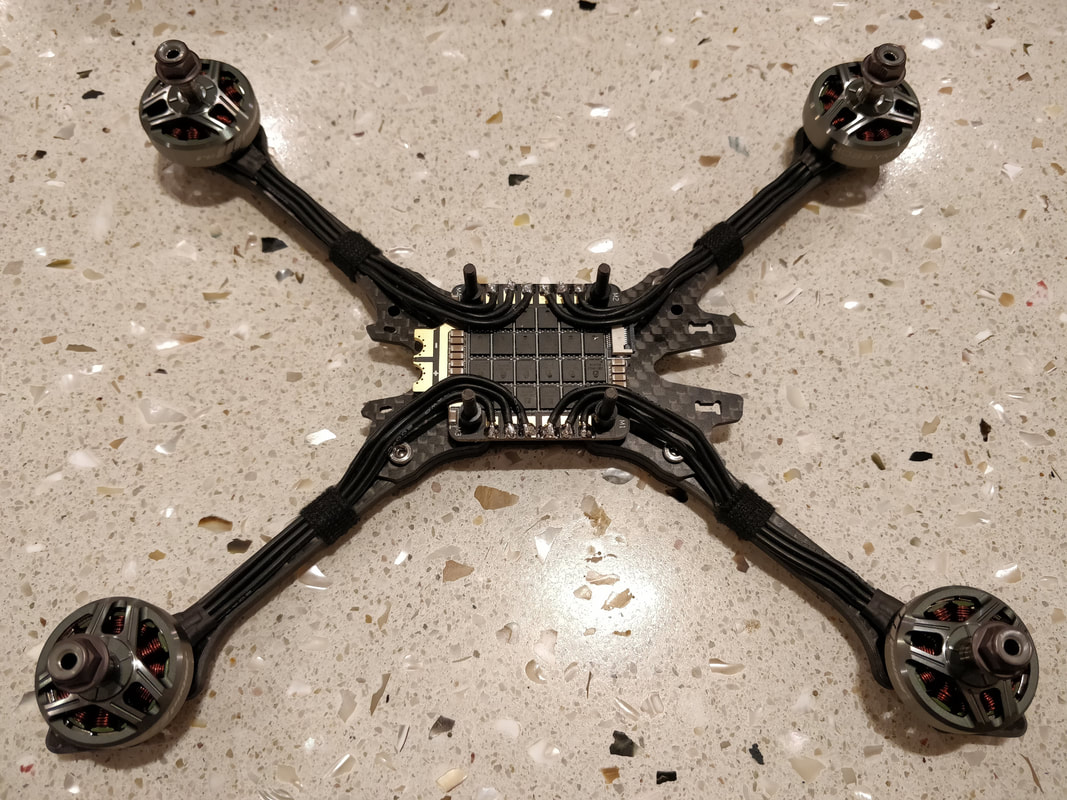
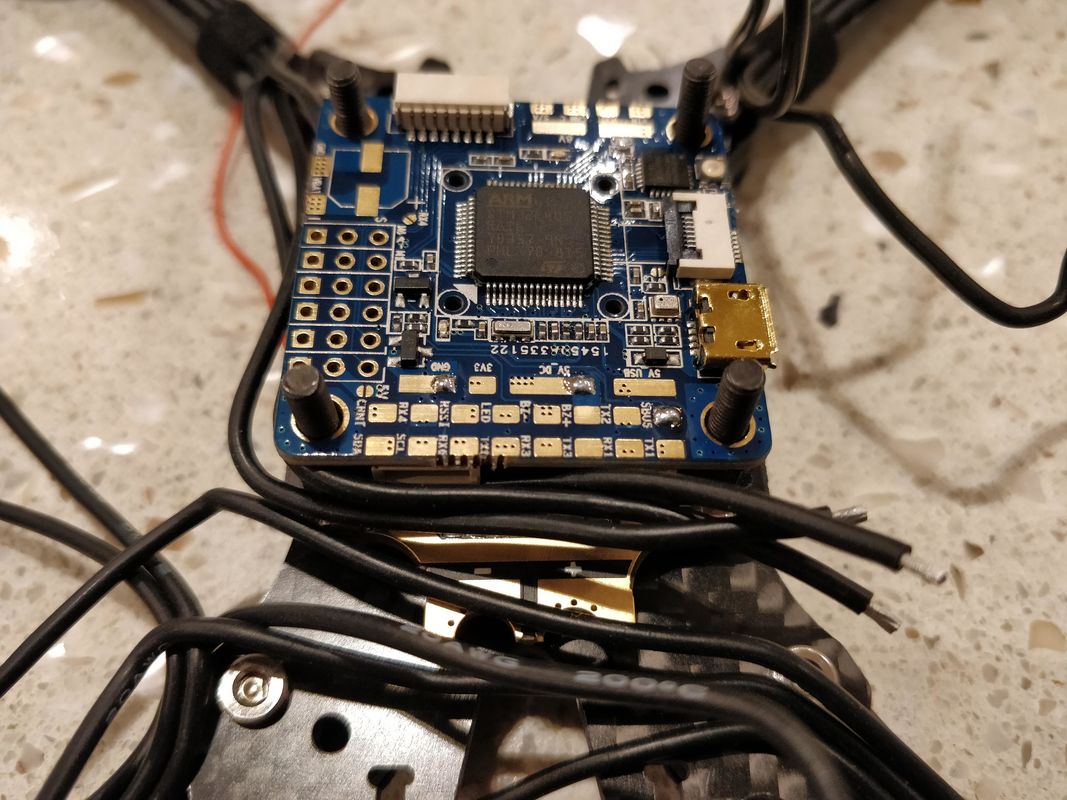
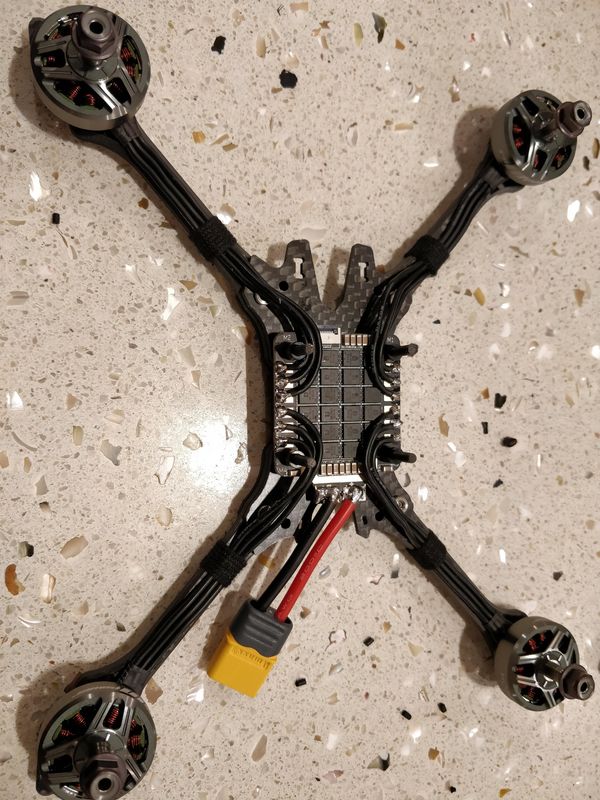
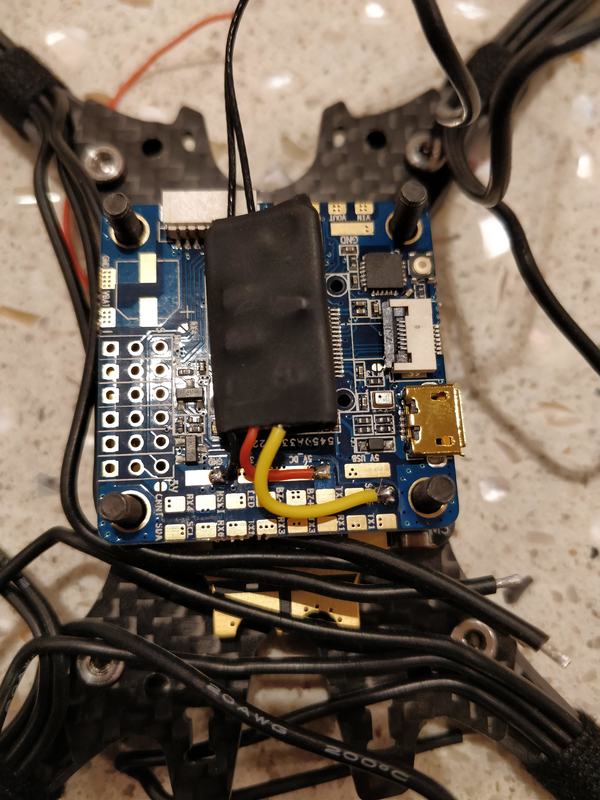
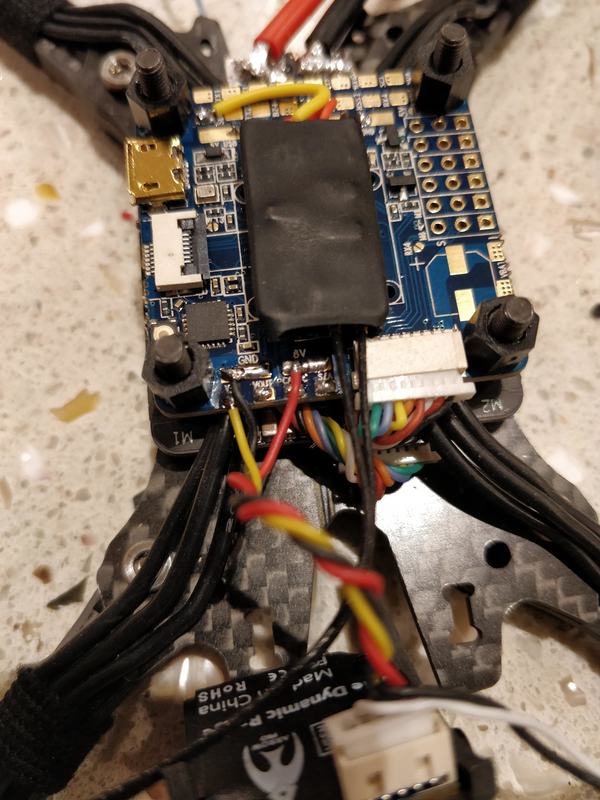
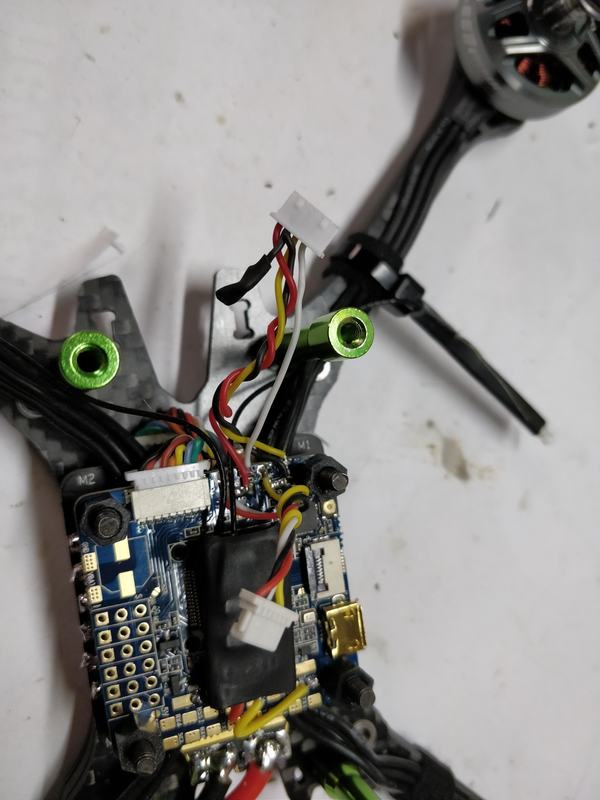
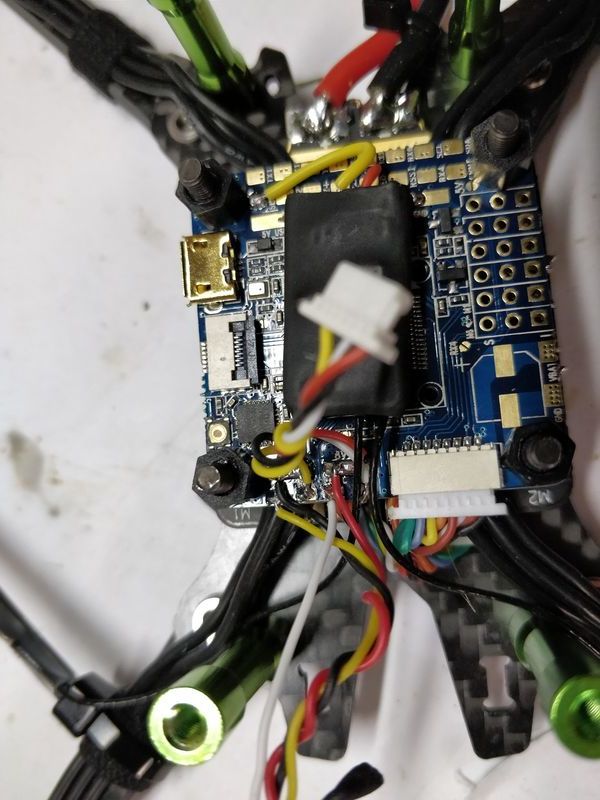
Extra parts and recommended for the build Firstly you will need extra parts for this build. I've used the following with links to Hobbycool as they tend to have the sharpest price: And tools/sundry items: On with the build Captioned images below should walk you through the build process and I've noted anything tricky as I've gone through. Click on images to zoom.
So that is it for the physical build. Not a difficult build at all in the scheme of things - components fit easily with plent of room to work. Part 2 (software setup) is here and part 3 (flight review) here.
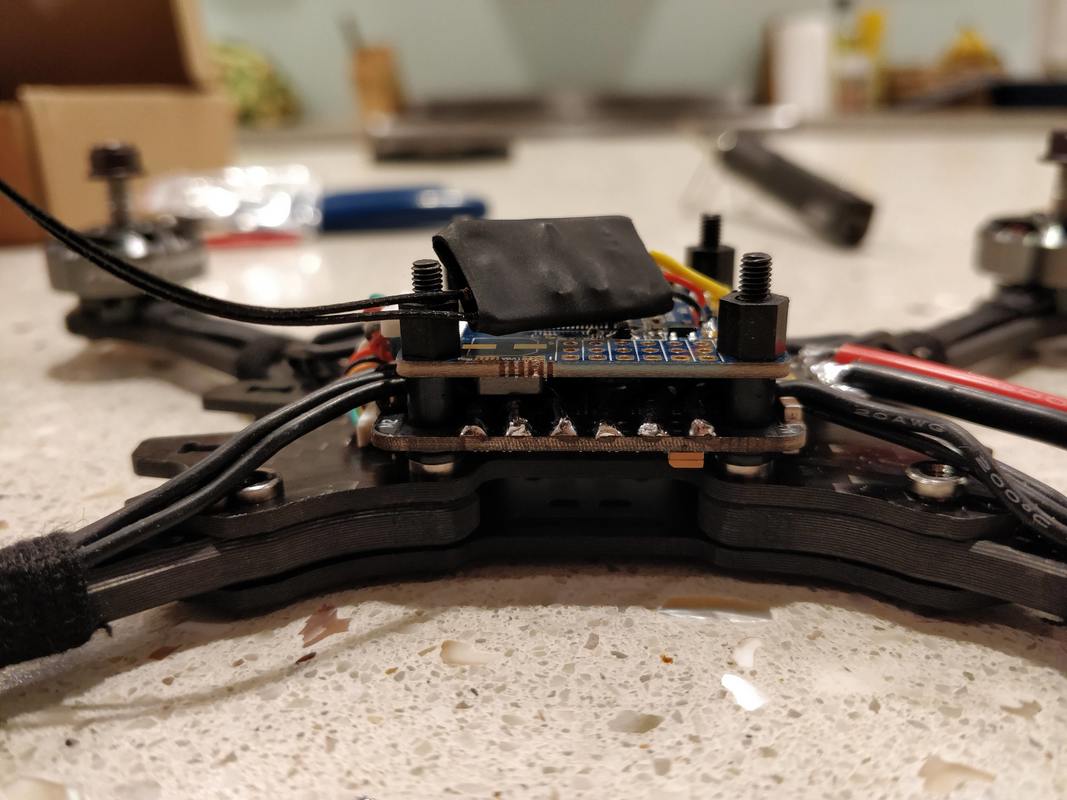
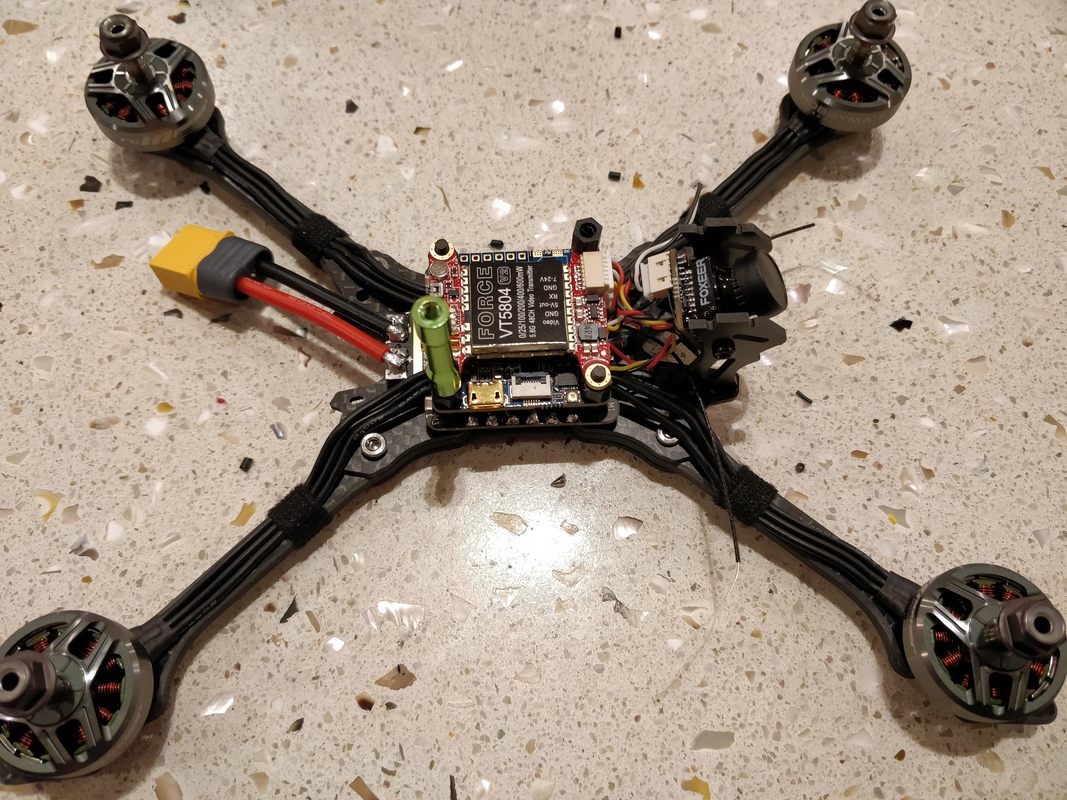
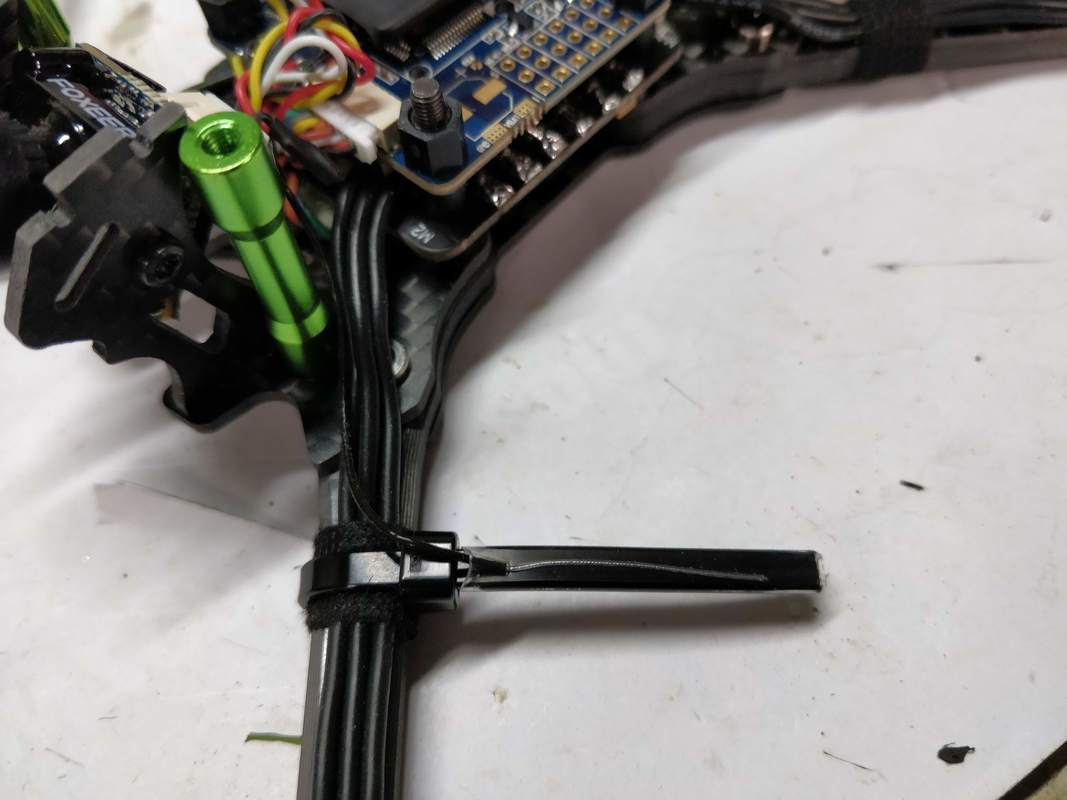
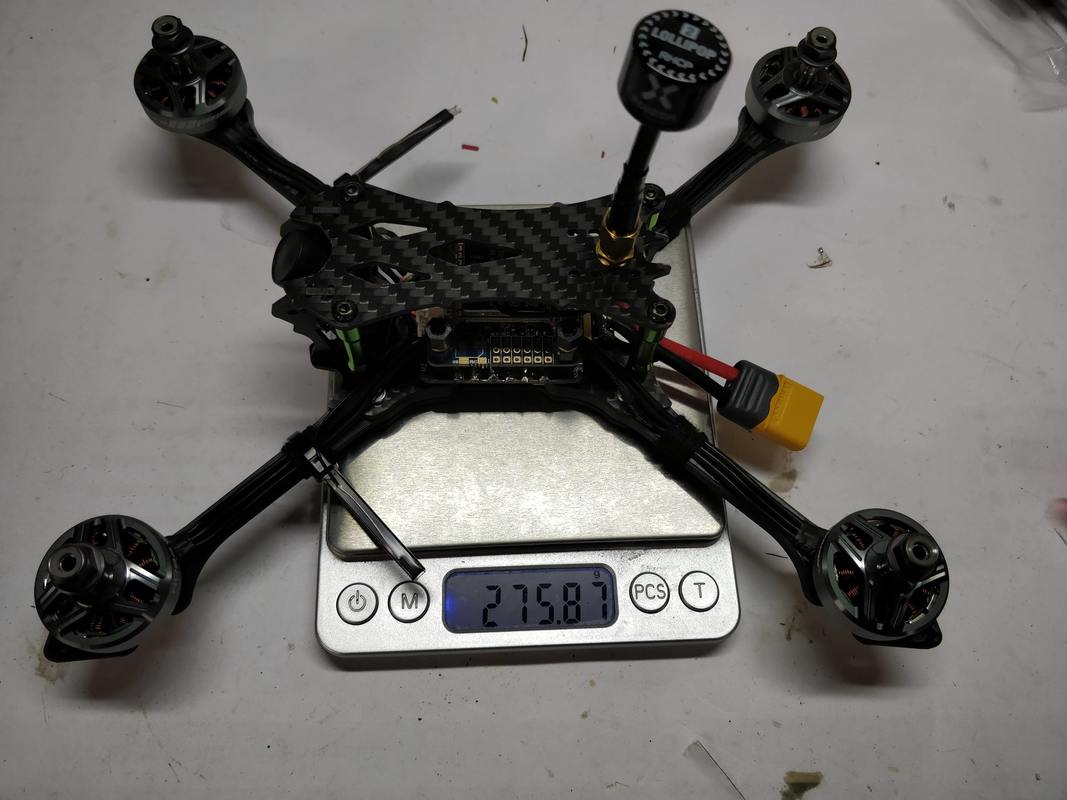
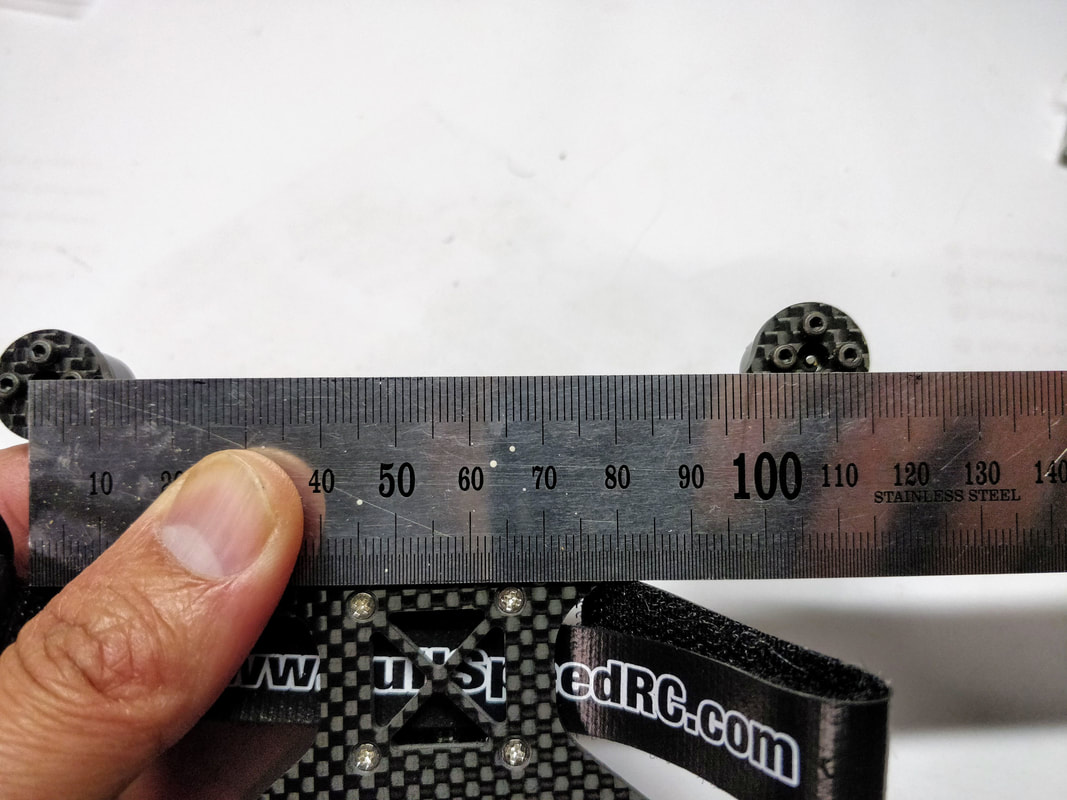
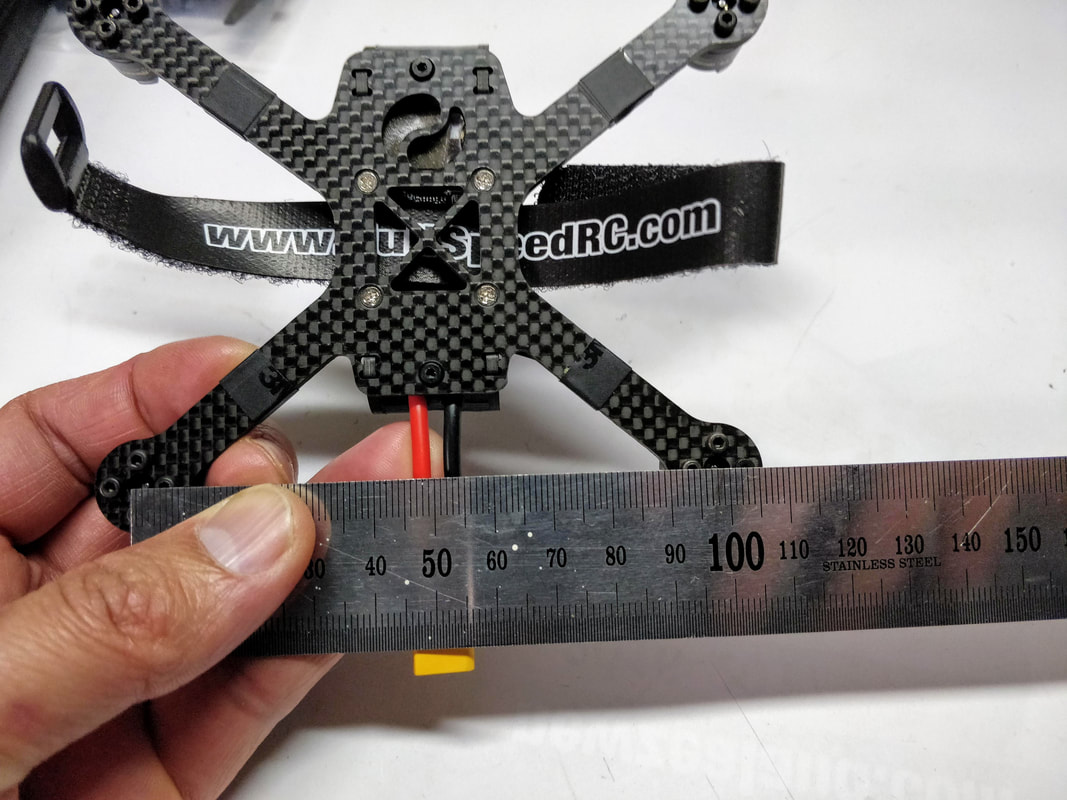
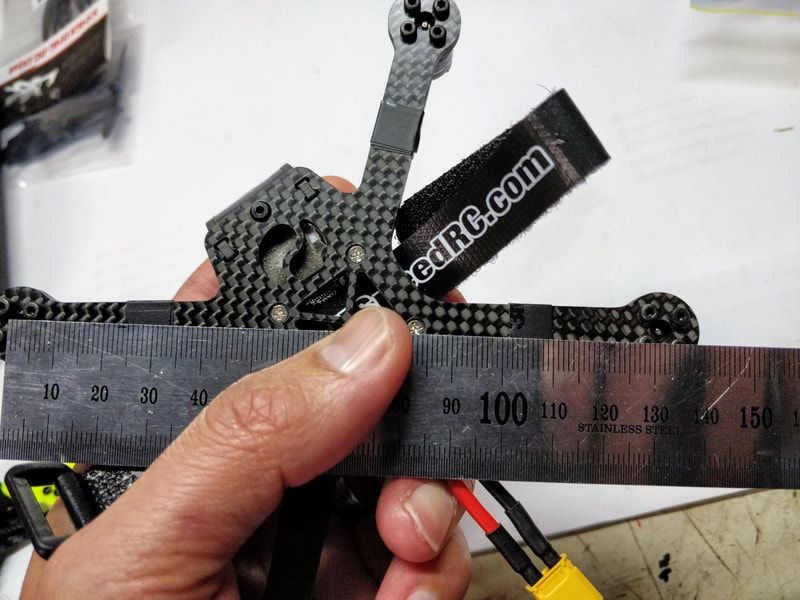
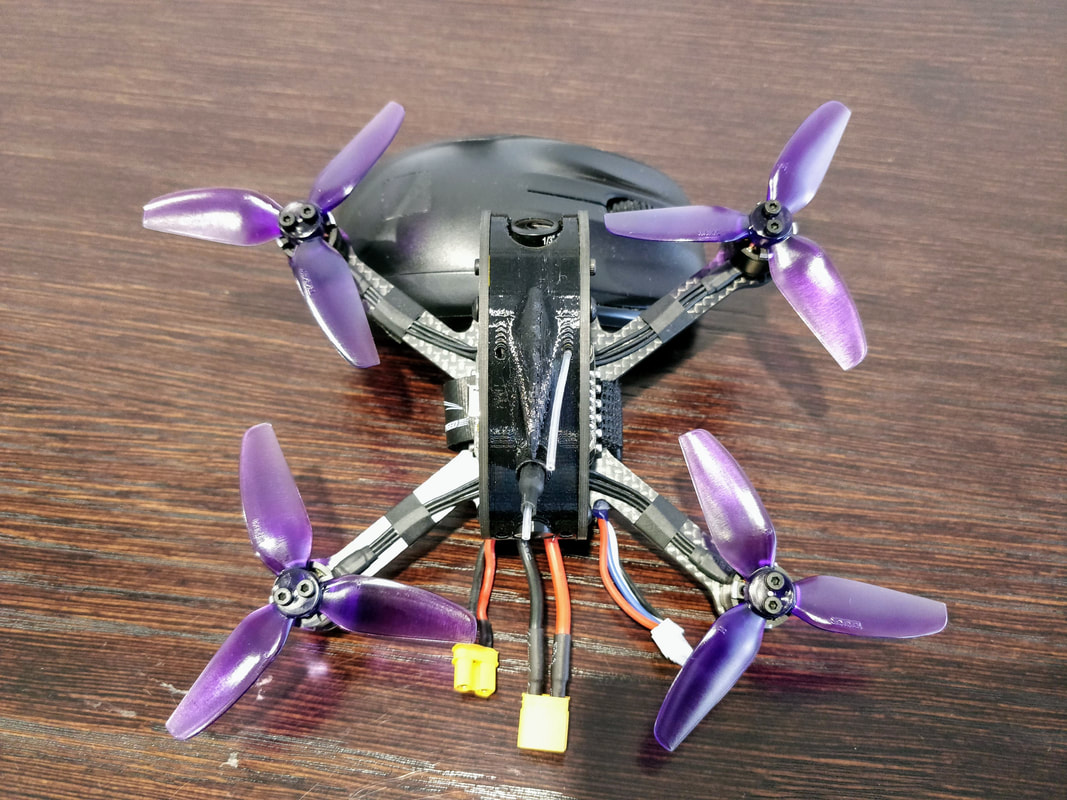
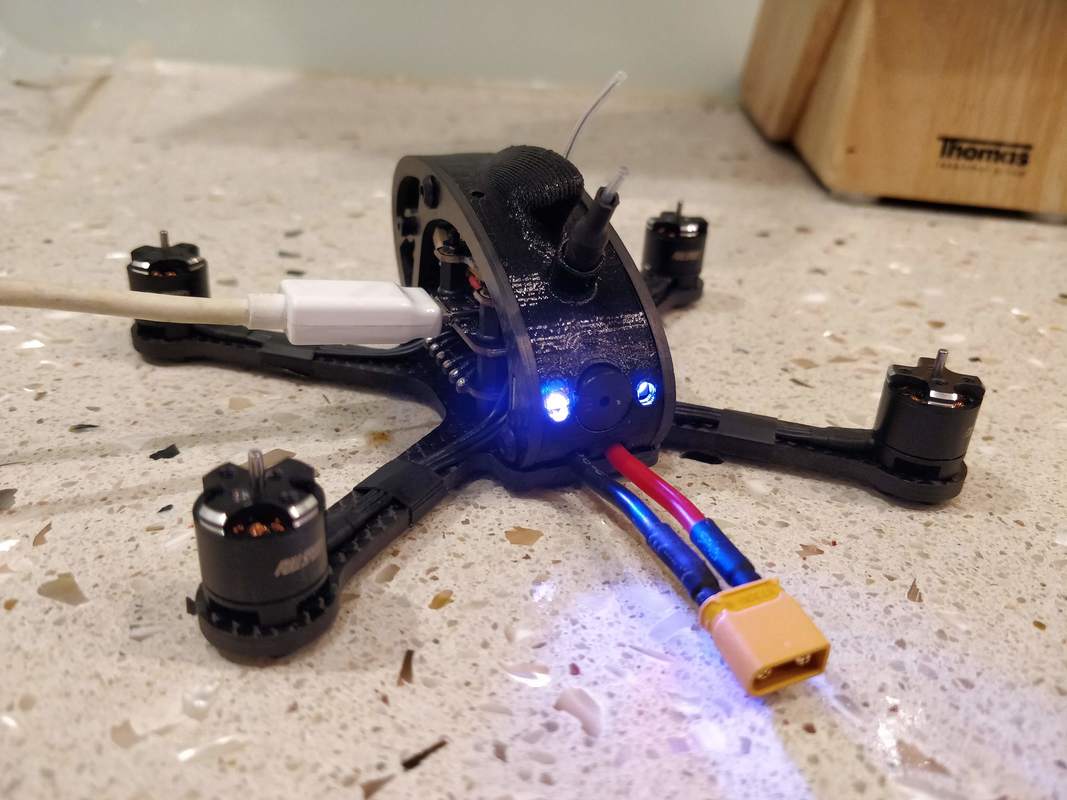
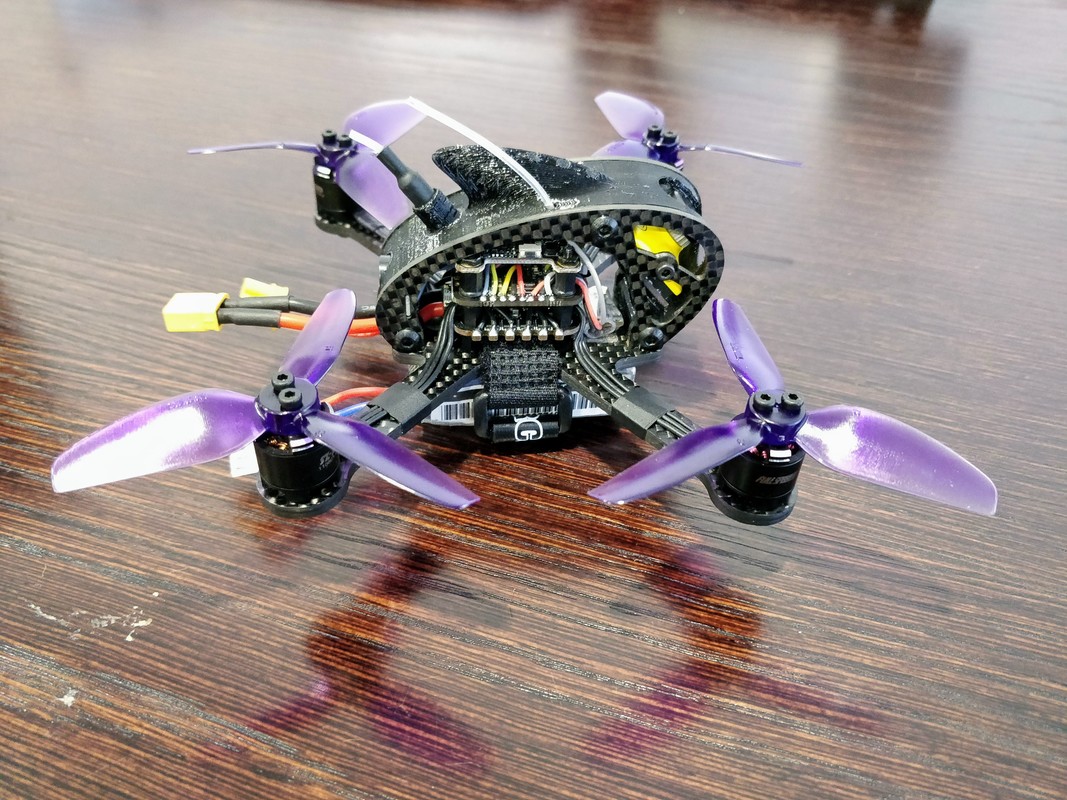
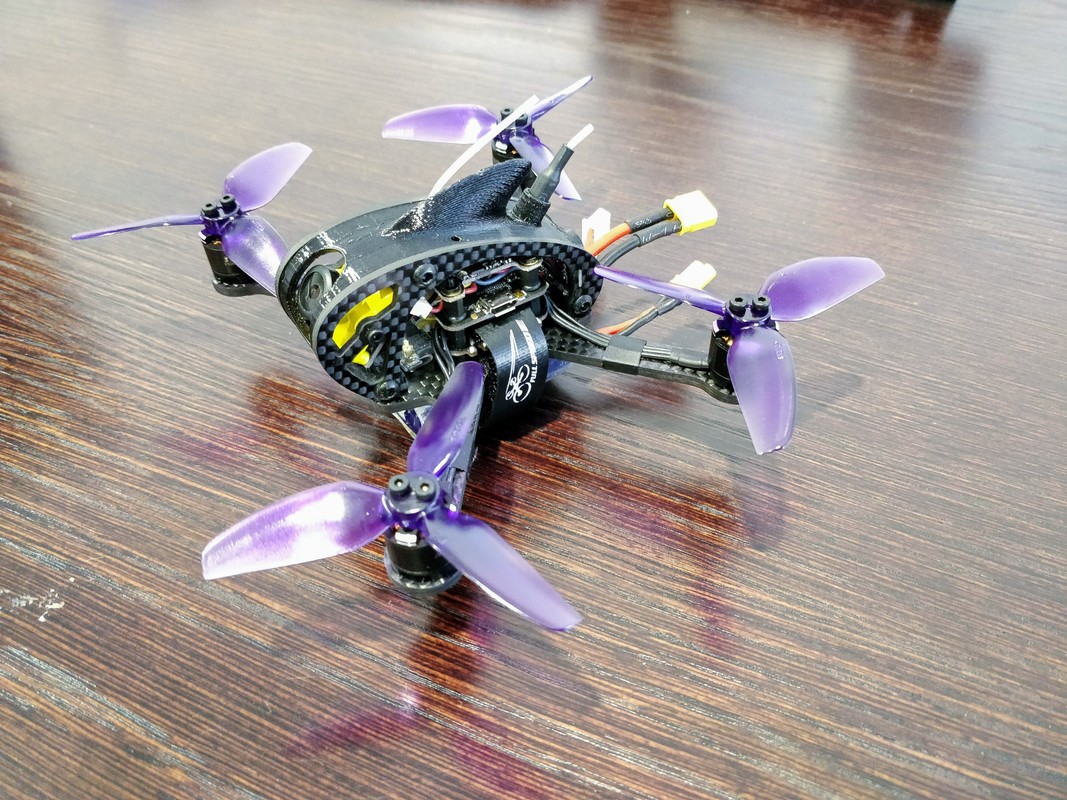 The Leader 3 SE from fullspeedrc.com The Leader 3 SE from fullspeedrc.com Introduction The Leader 3 (SE) is a follow up to the hugely successful Leader 120 which I have reviewed and documented modification extensively, most recently with a summary here. Both are available from Fullspeedrc.com This has been a highly anticipated release not least of which because there has been no releases from Full Speed since last years' Beebee 66 light. The good news is that a big chunk of that wait has been spent working on the Leader 3. FYI two of the main guys are pilots from Full Speed RC are pilots and do a lot of work testing before release which is a welcome change in this hobby compared to many models that come out half-baked. Firstly the Leader is available in 2 variants. The standard model (Leader 3) can be seen below and weighs 87g with regualar standoffs. The Leader 3 SE is exclusive to Fullspeedrc.com and comes with a 3d printed canopy instead of the standoffs. It is 6g heavier but offers several benefits that I'll cover a little later on. A run through the components First the frame. Like the Leader 120 the base plate of the frame is 3mm thick although it has been stretched to 130mm motor to motor diagonally rather than 120mm This means it is capable of accepting a true 3" propeller rather than 2.8" maximum on the Leader 120. The frame is most definitely still a 'deadcat' shape meaning the two motors are further apart (107mm) than the 2 rear motors (98mm). Additionally it is a 'squashed-x' compared to a 'stretched-x' meaning the front and rear motors on the same side are closer together. This means it should be more stable in the roll vs. pitch axis but modern flight software somewhat negates this. Compared to the leader 120, sideplates have increased from 2mm to 3mm thick which should aid durability. More imporatantly a 19mm gap rather than 17-18mm means the leader 3/SE now natively fits a 19mm micro cam. It's worth nothing that the baseplate is only 1 piece so you cannot replace single arms. Personally I think replaceable arms are unnecessary on any quad size less than 4" since there is much less leverage for breaking on a smaller quad. The frame can be purchased separately here.
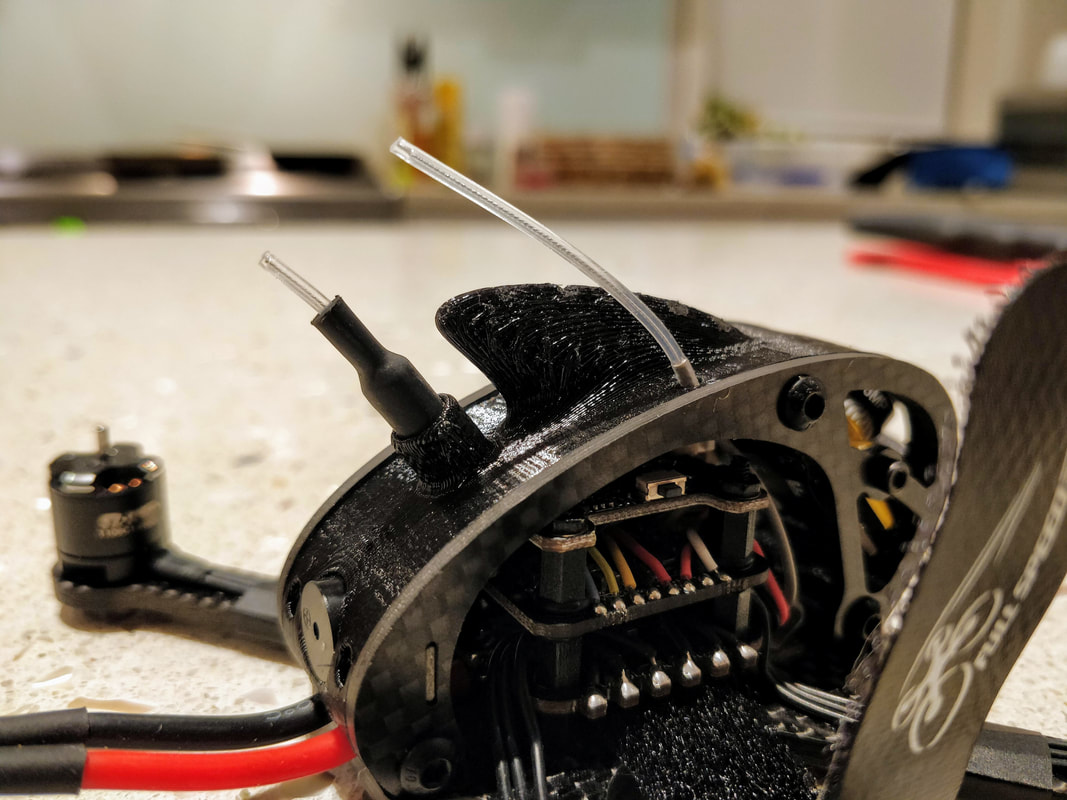
The canopy (Leader 3SE only). When I first saw the canopy I wasn't keen because it adds 8g weight however I think the functionality may just offset that - jury is out until I fly it some more. The 3d TPU print is of very high quality available in black,white, red, purple, blue or yellow and performs the following functions:
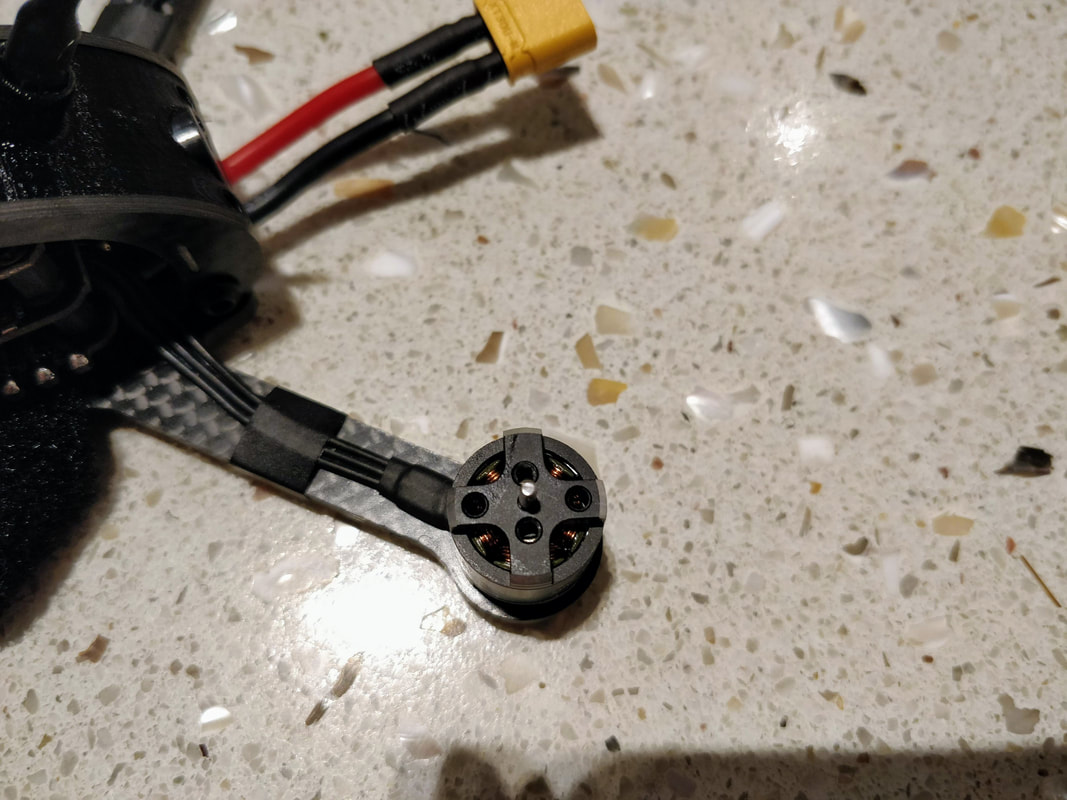
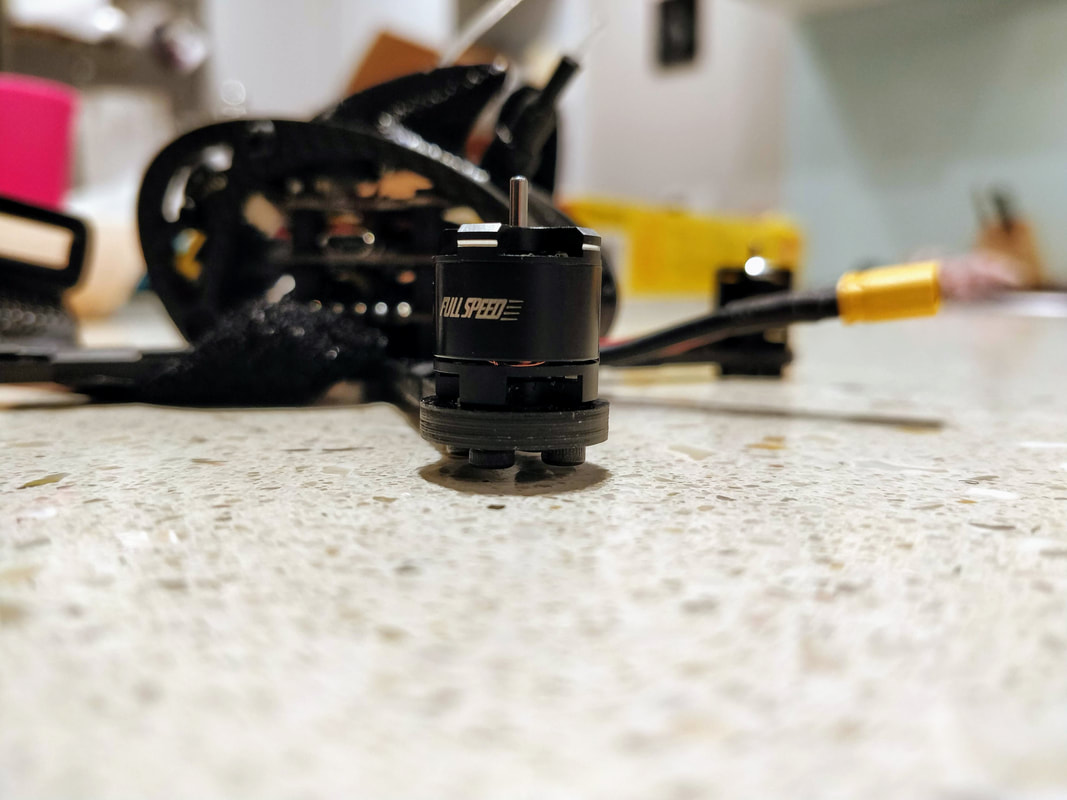
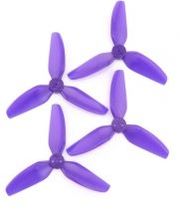
The motors are 1106 4500kv which is the same specs as those found on the Emax Babyhawk R 3 inch and the Skystars X120. They are not open bottom and have mounting holes for regular t-mount props and the emax 2.3" avan props. Most importantly they are rated for up to 4s.
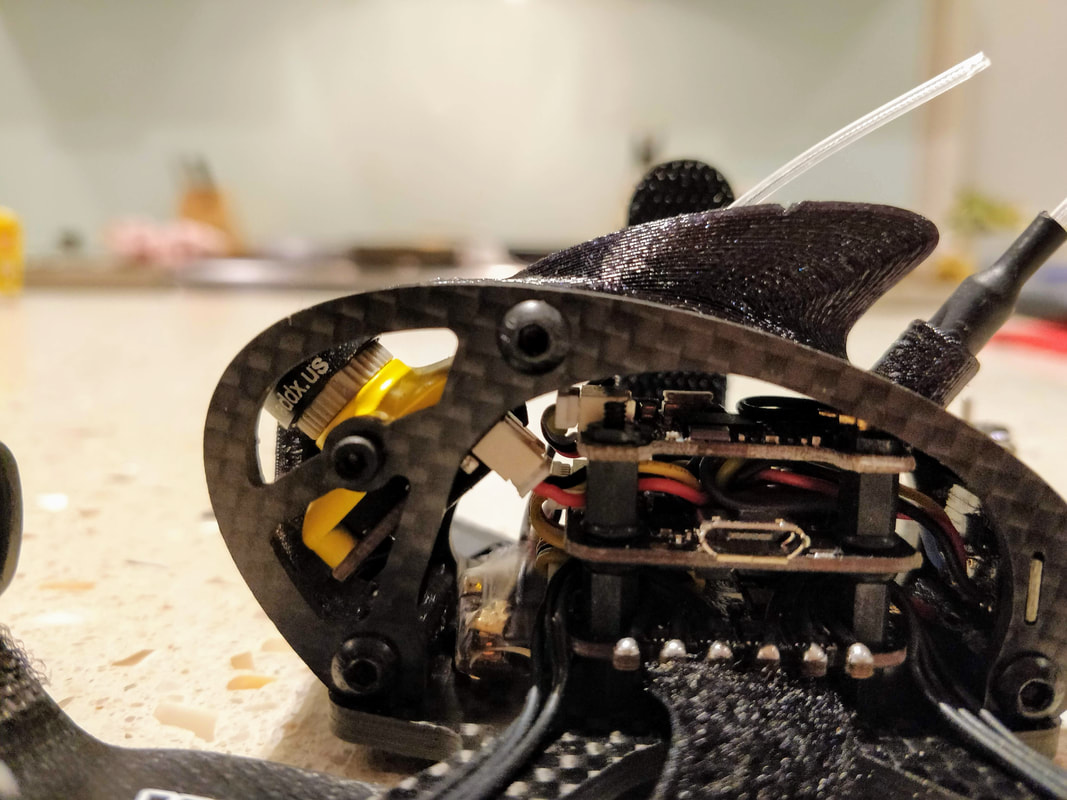
The Build Like the original Leader 120, build quailty is excellent. Solder is clean, wires are cut to length. Not much more to say here, it is well beyond my ability! With the quad assembled there is plenty of room behind the camera to adjust tilt (45° and beyond are capable) and the receiver is mounted in this void. with plenty of room left yet. This is speculation but I'd like to address anyway since it seems like a common thread: my best guess is the caddx turtles HD FPV/DVR (not yet released at time of writing) will fit but not without a little modification. My reasoning is that there seems to be 2-3mm 'spare' room between each stack layer. If these standoffs are trimmed by this amount you will be able to save 6-9mm in height which should be enought to fit the turtles board. It will require some fine wire management and a steady hand to trim the standoff but I do think it may be physically possible - a project for another day. That being said, the double stack of the runcam split micro definitely will not fit.
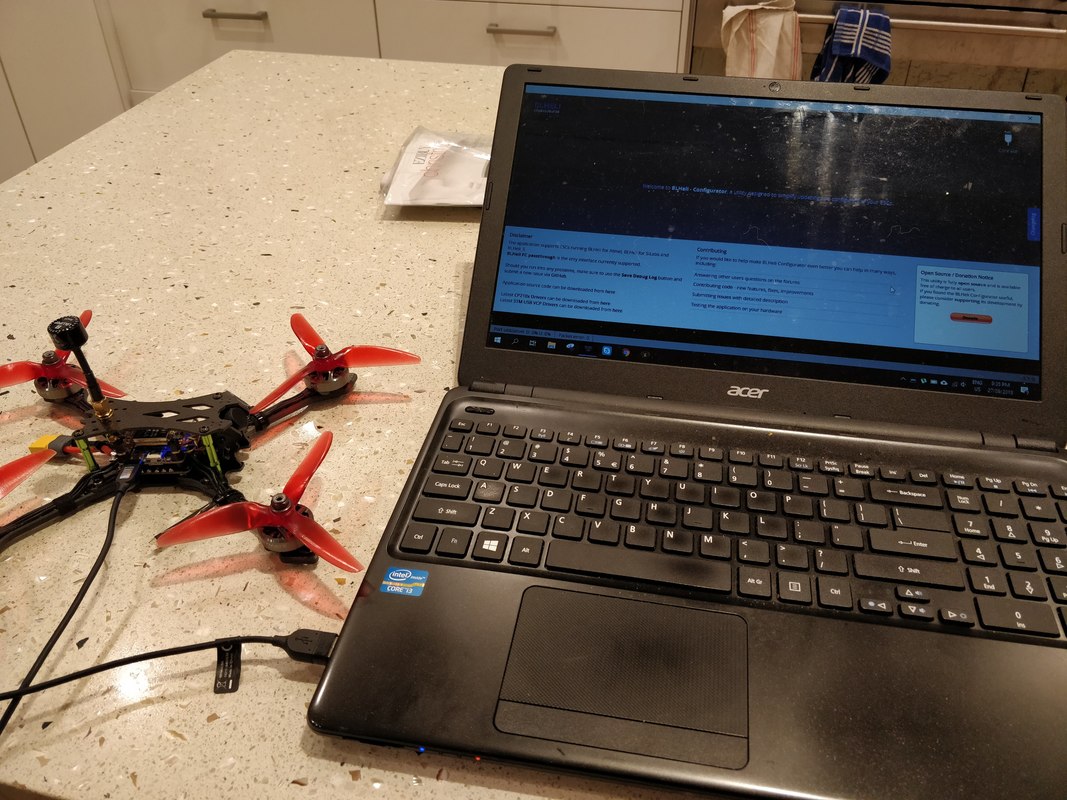
Software setup Plenty to talk about here although most can be foundin commentary of the Betaflight screens below. If you don't choose to read these however:
Final thoughts pre-flight As you can see from above this looks to be a very well thought out quad and not something slapped together from a spare parts bin. The Babyhawk R and Skystars bolt X120 have both shown that 1106 4500kV motors perform well on 4s in 2.5" and 3" so I am excited to see what the Leader 3SE will add here with all the work that has gone into development from a hardware and software perspective. On paper this looks to have the edge on both of those models in terms of weight, VTX capability and ESC current overhead however the real test will come in flight - stay tuned for part 2 of this review where I will cover flight in full - I already have 3s and 4s batteries charged for tomorrow :) 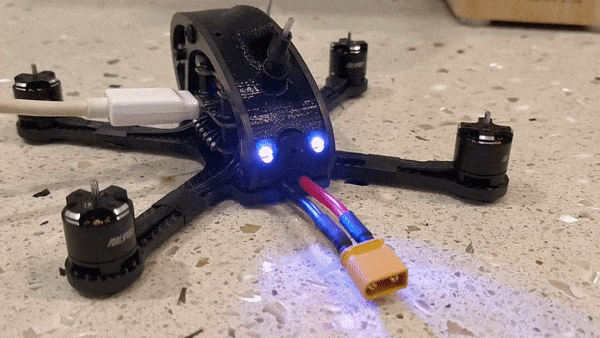 The Fullspeed RC Leader 3/SE can be bought directly from Fullspeedrc.com and is also available at other retailers however buying from the source is your best chance to get your hands on one quickly. If you are new to my site check out my reviews or tips and tricks blogs, they are loaded with useful information
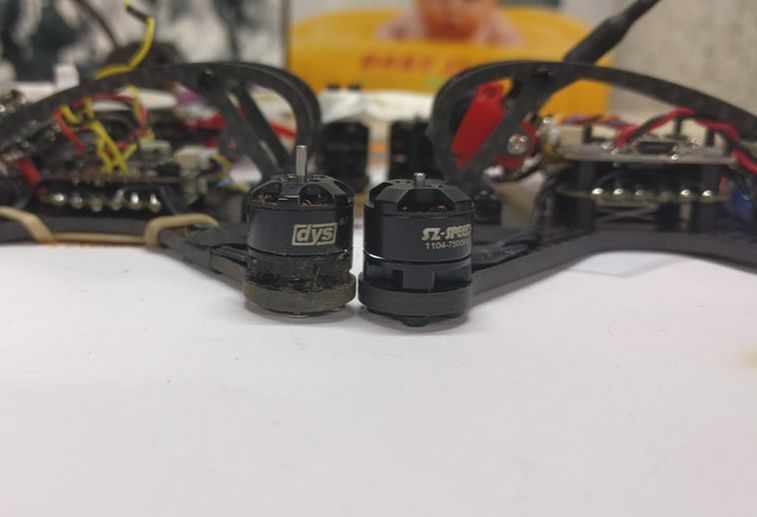
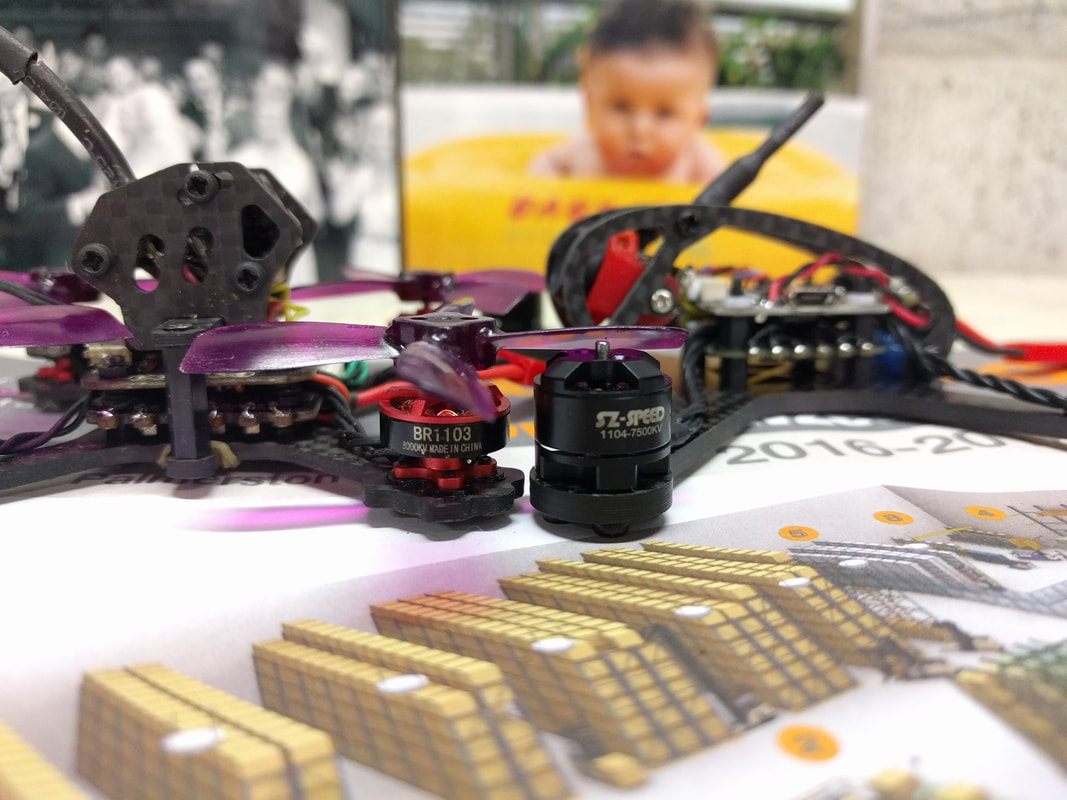
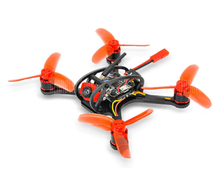 Firstly, thank you to Gearbest for supplying this model in exchange for a full review including my observations and recommendations from having built a very similar quad from parts. I'll review here and then run a series of tip, tricks, mods depending on how it flies stock. You can find the PNP version (no receiver) here. As at September 2017 try code HarvestRCnew7 to get this for only $US93.99! I'm going to skip the unboxing, I don't have anything to add other than the picture of all the parts included below, so straight to the good stuff. 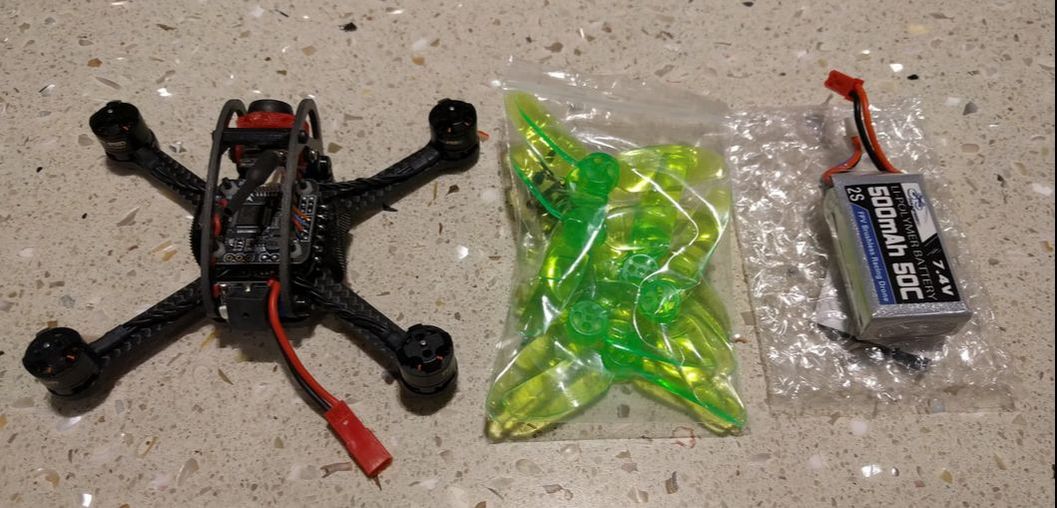 The parts included and build quality have improved... First off the motors are no longer and unbranded red 1104 7500kv. They are now branded SZ speed and full speed but are still rated the same. From what I can see the shaft length extending through the bell is shorter. Great idea - the only job this does is to centre the prop which the screws hold on. Less stress when trying to put tight props on (looking at you Gemfan 2035) and you don't have a 1.5mm drill bit. Below is a comparison to my DYS 1104 7500kV. You can see my review on these here
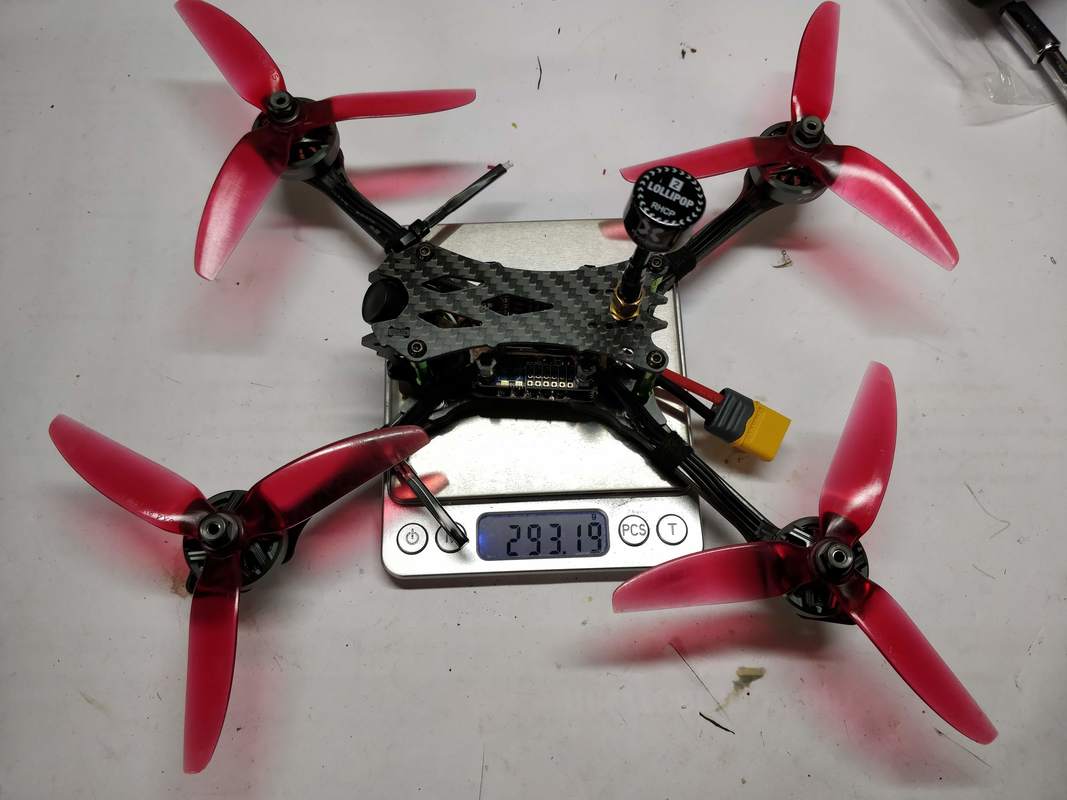
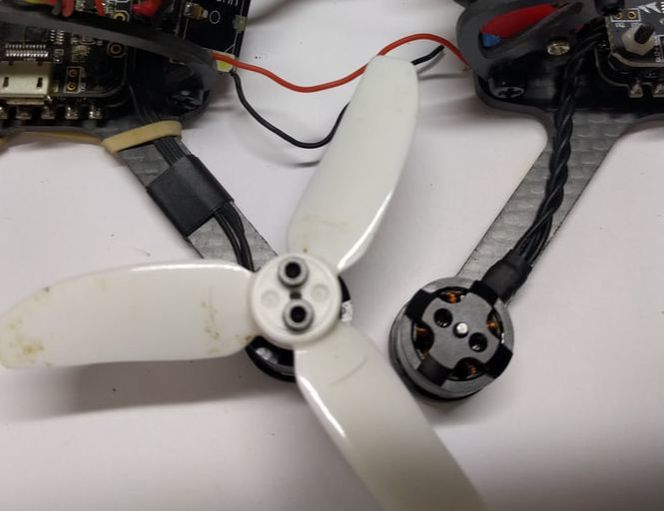
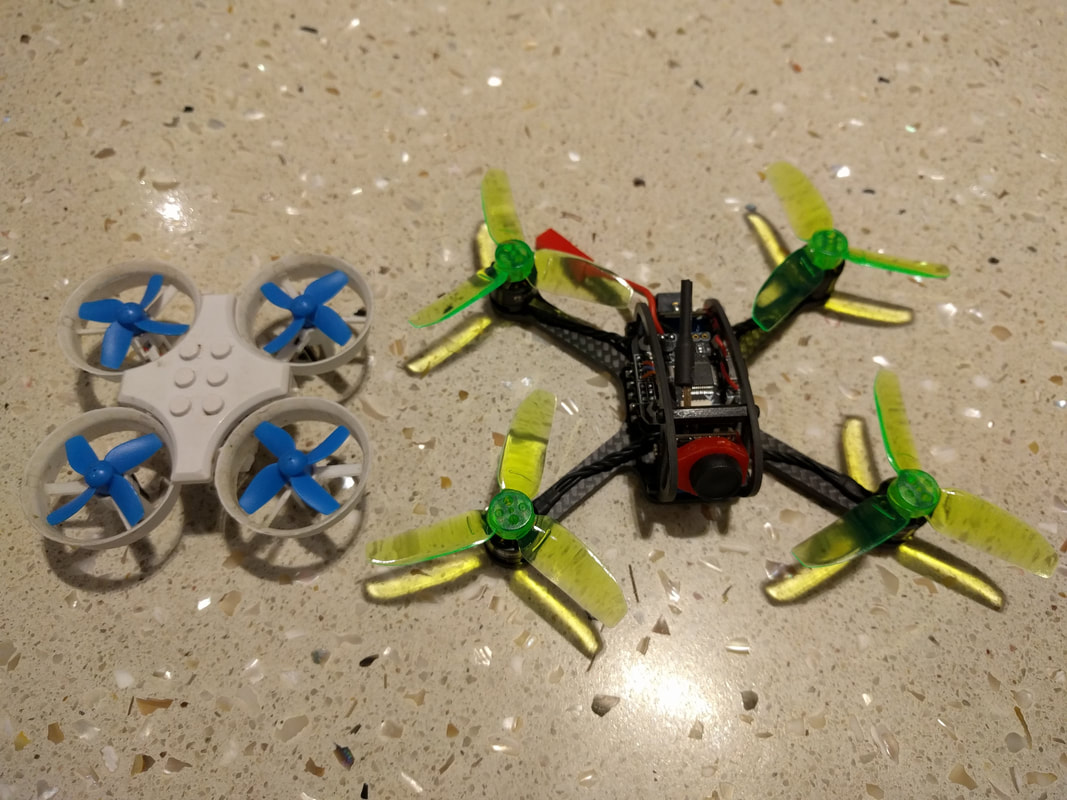
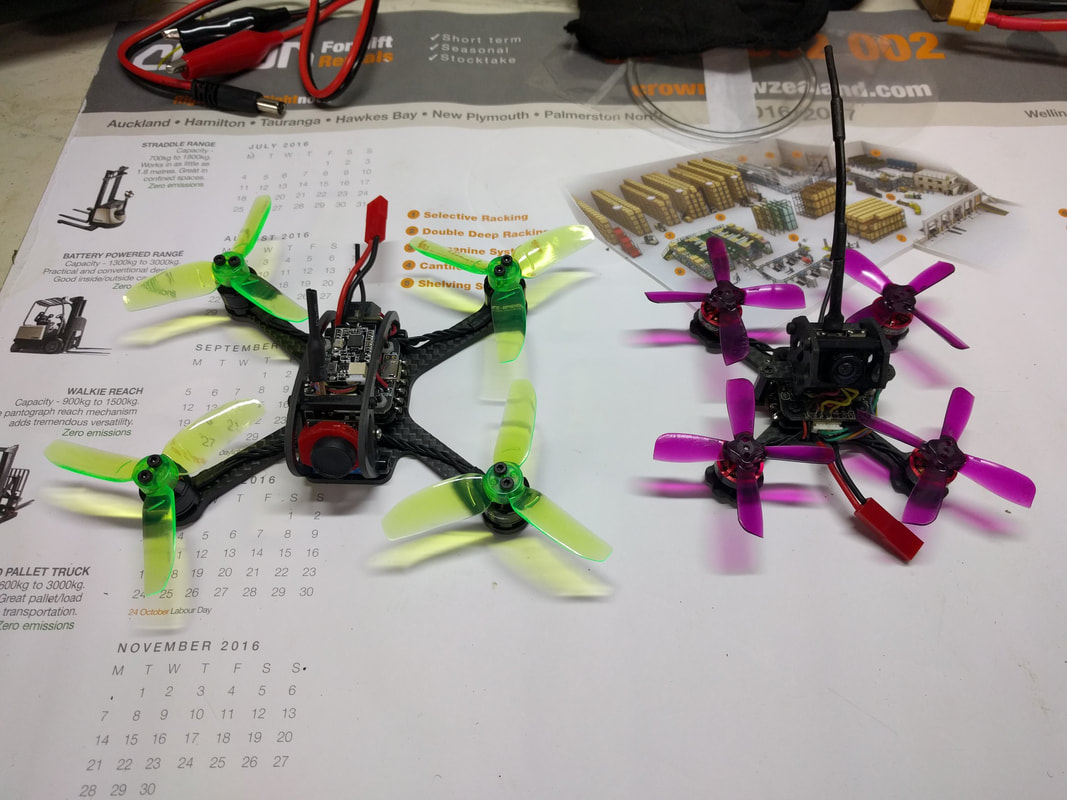
The comparisons to these motors don't stop there. Both are similar external size, and the magnets are simlarly strong - very notchy compared to the racerstar motors. From there the leader 120 motors are better. Wires are multicore, slightly thicker and much more flexible and easy to manager. On spin up in betaflight they are so quiet and smooth! Not noisy like the DYS even when they were new. In fairness the DYS are powferful so if the stock leader 120 motors get anywhere near this I'll be happy, especially given the improvements. This flight controller and ESC is ubiquitous and first appeared on the ARFUN90. I've reviewed one in full here - in short reliable and well featured. What impressed me here was the quality of soldering and the cable managent, just so clean - see below. I wasn't going to compare my efforts but I'd already soldered in the receiver and the macro image makes me feel inadequate! From what I can see of the earlier reviews, this looks to have improved substantially. 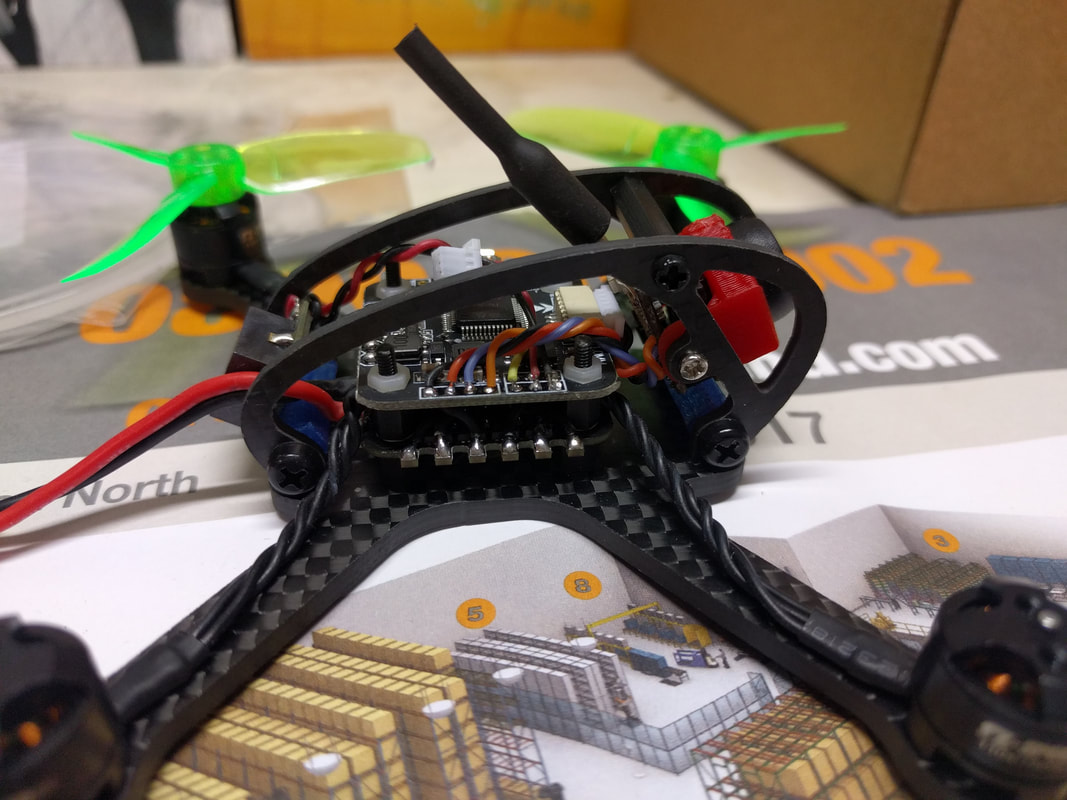 Betaflight setup and the Flip of Death This model shipped with the full release at the time of writing - 3.1.7 (3.2.0 still in release candidate). Interestingly along with the physical changes the software settings have been changed to address some of the brownout/flip of death issues the early reviews had. Most notable digital idle is set at 10%. Since I'll maiden this with stock settings I'll go with that and see if moving back to my standard of 3.5% is still viable. 10% is not ideal for me as you will never be able to fully chop throttle for flips and whatnot. Cool to see that they have addressed it and looking forward to seeing if this issue may have gone altogether. I'll post some pics of the key betaflight screens for prosperity below (flip through them) but I intend to move to 3.2.0 as soon as I have completed initial flights and can confirm everything is functioning as expected. Weight I'm something of a lightweight jukie when it comes to miniquads, benefits include longer flights, better agility, greater crash resistance through lower intertia. See the gallery below for the various weight measures but in short 64g dry, 94g AUW ready to fly with the stock 2s 500mah battery. This include an ibus FS82 1g receiver which was not present when I too the photos. This is a very respectable weight for a micro that swings 2.8" props as these props generate a significant amount of lift in combination with a motor of this rating. All this and it includes my favourite beeper/led combo (reviewed here) - a beeper is a must for micro quads as you can loose them even in short grass! I can anyway. Size comparison to other micros This is not a big model by any stretch. The beauty of these micros - and to be clear this is still a micro - is you can fly in small areas (not indoors!) with less danger and concern to the public. They are also quick to get in the air and consumables like batteries and props are cheaper too. This model measures 120mm diagonally motor to motor and offers most of the experience of a 5" FPV quad. Picture below compare to an E011 typical tiny whoop and an 80mm EYAS x2 with 2" props
|


Thanks for visiting QuadifyRC.com Follow us on facebook below to get all the latest updates