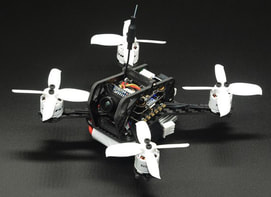
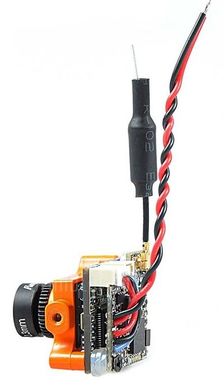
 The Flyfox 110mm is a BNF Micro 2 inch quadcopter for newcomers HobbyCool.com. I was most interested in this micro quadcopter because so far as I can see, the BNF model here is completely exclusive to HobbyCool. Specifications The frame is based on a 3mm bottom plate with 1.5mm sideplates attached by tabs and 3d printed standoff - very similar to the Leader 120 but with a different look and more importantly, a factory micro CCD camera. The frame with hardware on its own weighs 15g and is available here for less than $10. Speaking of the camera, it looks to be nicely protected by the frame without impacting the view however only a limited amount of camera angle is available as can be seen in the image below:
Electronics are fairly typical - F4 flight control and 20A DSHOT600 ESC. 2 nice suprises I was not expecting here though - tramp control of VTX (my first in a micro) and a baromoter in the flight controler (my first altogether!). ESC uses a JST connect which should be ok although I would have preferred a XT30. Voltage drop may or may not be an issue but in practicality in all except my lightest brushless quads (less than half this weight), it is a much more robust and convinient connector.
This quad is PNP so does not ship with a receiver so I used my favourite XMPlus for FRSKY. It does however ship with a nice 550mah 2s GNB battery which unfortunately for me is still with Hobbycool since getting batteries to where I live (NZ) is getting harder and harder. Lastly a buzzer and 2 x programmable LEDS are connected and mounted and 16 x Kingkong 2035 4 bladed props with screws are included. All solder joints that I could see looked to be good, wires were well trimmed, routed and secured and the build quality looked good. All up weight including props, battery strap but no battery is 78g which is heavy but it's worth noting that this is in a power class of it's own with these monstrous motors. When I first plugged in betaflight configurator in I was expecting to see a dead stock list of settings but was pleased to find some customisation - see below for a list of stock settings which included a number of modes set, craft name, DSHOT600 etc but unfortunately no custom PIDs (or rates). Prior to the initial flight the only changes I made to setting were for my receiver with RSSI set to channel 16 and my stock modes - arm-disarm; angle-horizon-air; beeper off-beeper on. Getting ready for FPV Maiden Even before I started FPV I could tell from the hover test that the PIDs were too aggressive by the excessive fluttering I could hear. This is to be expected because the comparitively large motors have absolute control of the motors and so the feedback loop is exaggurated. I knocked P, I and D down for all three axes to get it in the air without risk of damage but it could certainly do with some more tuning to crispen up the controls. Since it was Betaflight 3.2.0 that was installed, PIDs were easily changed via OSD. 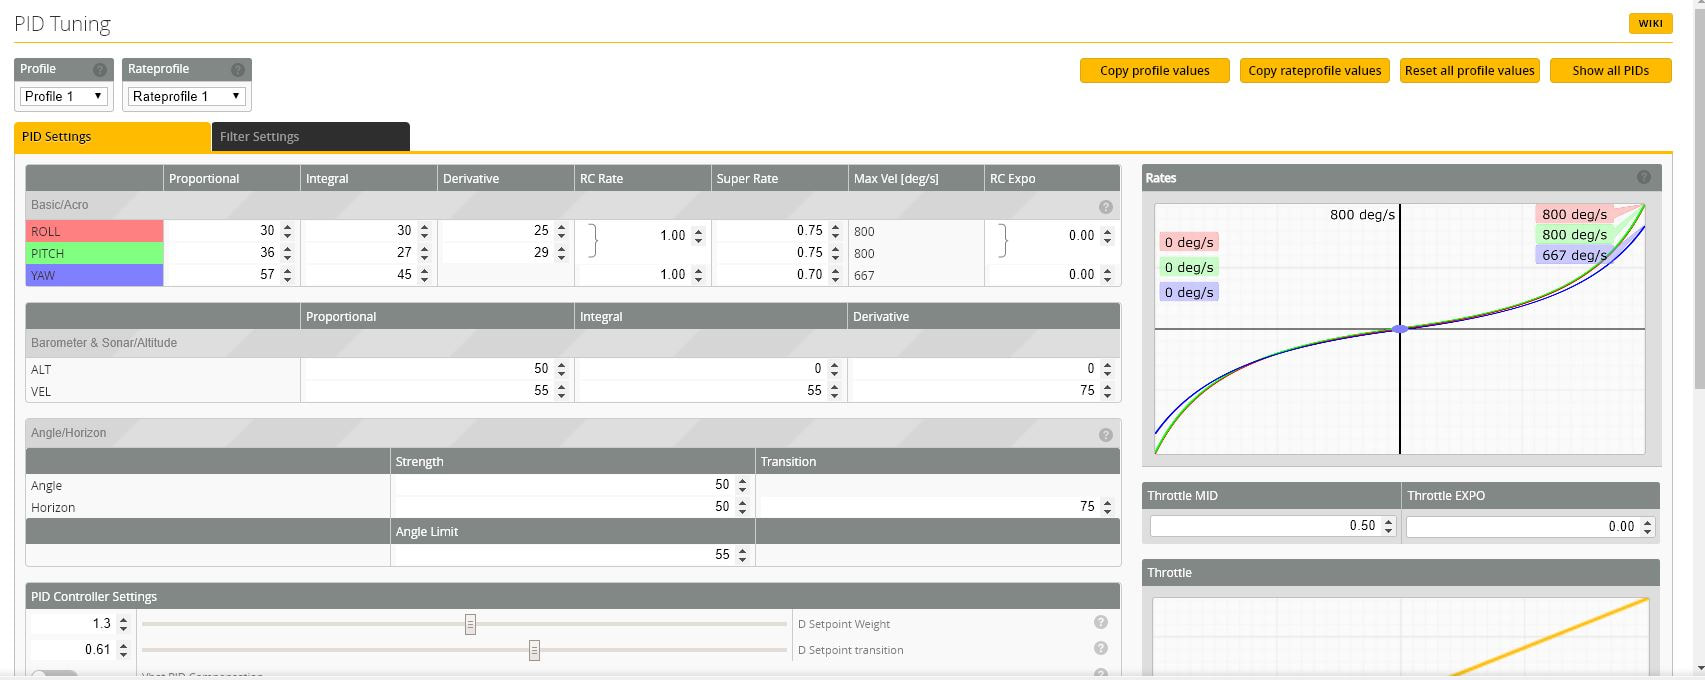 If you are getting a lot of fluttering try these PIDs to start. They take away much of the oscillation and motors remain cool but are overly conservative Since I did not have the stock 550mah 2S GNB battery (which is highly regarded) I used my turnigy bolt HV 2s 500mah 65c batteries charged to regular voltage with stock jst discharge connectors. For what it is worth, radio was FRSKY QX7s and goggles were the AOMWAY commander V1s. Takeoff weight was 104g  Ready to maiden. Here I used the Gemfan 2035 props instead of the stock Kingkong 2035. Not sure what my shadow pinkie finger is doing here. Drinking a cup of tea? Maiden Flight The quad powered on without issue and I was off flying immediately. I started with the stock propellers but switched the the Gemfan 2035 4-blades after finding that they had a bit more top end through a wider blade at the tip. Power was predictably high for a 2 inch but regardless of the large motors lacked a bit compared to a quad swinging a 2.5 inch prop (e.g. leader 120, HGLRC Hornet, Mini Fight). Update: After more time with the Gemfan 2040 Hulkie 3 bladed props I found I was able to get better performance again out of these 3 bladed props over either set of 4 blades. As I suspected when I first reviewed the hulkies, their stiffness and less blades are better suited to a high power setup.
Due to the large motor size response was excellent but given I tend to have a preference for light weight over power I found that hard flying took quite a toll on the batteries. For moderate to heavy flying I found I got about 2 minutes of flight on the 500mah batteries, which recovered to about 3.73 v per cell on resting. During flight though I did get a lot of warning of battery low and land now but in reality just need to change the battery voltage hysterisis setting to be a little more tolerant - article on how to do that here. Update: 15 packs later I consistently get 2 minutes on these batteries. It is fair to say that between the large stator height of 6mm and very high kV of 7800, this motor is designed for 2s and no more - even trying 3s did not cross my mind... not only because of the likelihood of the motor cooking itself but because you simply cannot take advantage of it with the 2 inch props - it will just make more noise and heat. Batteries and motors aside, the quad feels like any other high powered 2 inch - powerful but certainly not floaty where you need more throttle to make it change direction. Camera performance was on par with other CCD micro cameras including the Runcam swift micro, Foxeer arrow micro, HGLRC Elf, Furibee MS 1672. Video signal was good - typical for a dipole but like that it had the option of switching by 25mW-100mW-200mW via tramp protocol in the ESC. To be consistent with other reviews I stuck with 25mW. It's worth mentioning that when the vtx dipole is laying flat against the quads as in my pictures the reception is poor. Even when I temporarily bent it up performance improved a lot, but will cover this more in my list of recommendations. Conclusions
The Flyfox 110mm BNF from Hobbycool is a high powered 2 inch drone that is well built and fairly priced at $129 the time of writing. It's key feature is the massively powerful 1106 AOKFLY motors that are fast but make the quad heavy and limits battery choice to 2s, even though the electronics can take up to 4s. These features make for a fast quad in a straight line that needs extra throttle in corners to help keep a line. The downside is that battery life is shortish - 2 minutes flat out on a 500mah battery. The kit is well provisioned with 16 propellers in total and a very nice 2s 550mah GNB battery. Recommendations
The FlyFox 110mm BNF Micro brushless quadcopter is available exclusively at HobbyCool.com I'd like the thank Kevin for the sample he provided for me to review.
0 Comments
 In this review I set out to build an ultralight micro brushless quadcopter based on the 16mm FULL SPEED Baby 2S F3 Flight Tower. The goal was to get less than 40g with a full featured brushless micro. Previously I'd achieved 41g using a smilar setup with a 2 and 3s capable 20mm flytower but found that the weight penalty of the 3s battery did not give back in performance on the little 1103 motors. More details on that quad on my rotorbuilds page. Please bear in mind this is not a simple build - motor wires are extremely fragile, solder pads are small and space is super tight, even with micro components. The outcome however is might impressive but I'll get to that more later. I won't go into detail about why I chose the other parts but will list them here:
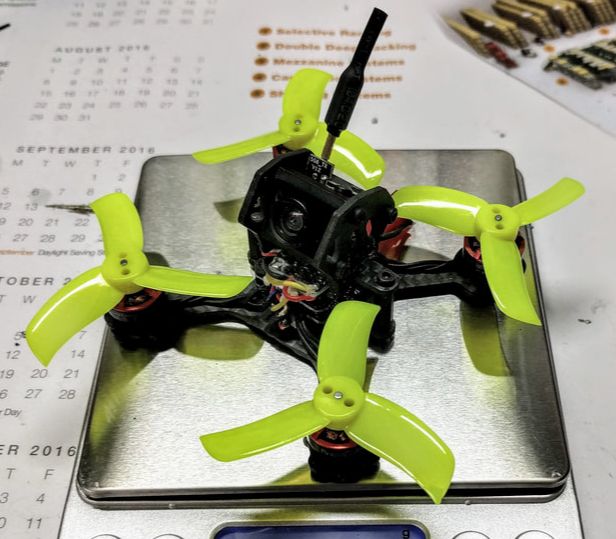
For the build itself I shelved the stock standoffs for the fc/esc since I wanted it super low profile. Instead I used 20mm nylon m2 screws with nylon m2 nuts and m2 orings to get the height I wanted. See my article making a low profile micro stack. I had to mount the ESC upside down and the flight controller rotated 180° about yaw in order to stop esc connectors touching and limiting height reduction. I also went through the painful task of cutting, tinning, soldering and heatshrinking the ESC signal cable to get it as short as possible - not just to reduce weight but because I have so little room to work on this build. I stuck with a JST connector and a short run of 20AWG cable since the connector is much lighter than an XT30 and it won't be passing a lot of current anyway. I'll make a quick note that I used a AIO camera VTX since for this build I decided a superior micro CCD camera like the micro swift adds too much weight for me. The CM275T is the best of the bunch for me at the moment - it is very light at 3.3g and it has standard wiring that allows for betaflight OSD. UPDATE: I never was able to get this to focus correctly so reverted back to an old Eachine TX01 modded for video in and out. I also used the ghetto antenna mod I wrote about here. So what was the final weight? 36g! better that I was hoping especially since I know I can get another 0.5g off from a receiver swap and another 1-2g from a different camera mount. That can wait though as I want to focus on flying this now rather than building. Click on the pics below to embiggen.
Once I finished the tricky stage of completed the build, ensuring all wiring was routed to avoid possible prop strike, the flight controller was set up. This is a full omnibus f3 FC and BLHELI_S esc setup which means I get all of the best betaflight features - Betaflight OSD, Dynamic filtering, Anti-turtle, ESC beeps vis dshot command. The only issue I had here was finding the camera was NTSC rather than my preferred PAL meaning I had to move my OSD elements a little close to the centre of the screen. Since this was one of the two quads I took with me on my Summer beach holiday I got a good amount of flying in with a chance to try some different propellers. I settled on the Gemfan Hulkie 2040 (reviewed here) but think the 1940 version of the same prop would be slightly better as the offer a little more clearance and the 2040 is slightly over-propped - a little too floaty with a big disc/weight ratio. I actually think a 2 bladed prop would be best here but cutting down a larger prop like the gemfan 3020 will mess up the geometry too much with that much trimming. I plan to try the gemfan 2035 quad blades with 2 blades removed at a later time. Just a quick note here that although in the past I found the Hulkie 2040 propellers to be brittle. Not an issue on this quad as the low weight means crashes have very little force. UPDATE: Have now tried the 2040, 2-blade 2035 and 1940. 1940 is the best prop for durability and performance. The 2 blade 2035 was ok but didn't give me the efficiency gains I was hoping for. So how does it fly? I'm impressed. On a 2s 300mah weighing just 17g I get 3 minutes of hard flying time coming down at 3.8v per cell - would be easy to go to 4 minutes but I have plenty of these $4 batteries so it's not an issue to change regularly. In terms of what can be done with the quad it just makes this little guy so much fun. You can fit in tiny gaps with good fine control like a whoop but the top end speed and power for acro make it something else altogether. It doesn't have the speed of a 5" obviously, nor the momentum for tricks but you can still put it where you want, when you want. What separates this from bigger, heavier 1104 and 1105 based 2" micros and more traditional 3" micros is the lack of weight makes it feel so much smoother and easy to recover rather than feeling like a flying brick - something I've felt in all BNF 2" quads 55g and up and in traditional 3" quads like the Furibee X140 (review here) and the GEP RC Sparrow MX3. So far as bro-science is concerned this is not to do with power to weight (for example the GEP sparrow has wicked power/weight with those big 1408 motors) but more to do with disc loading - the area of a 2" is very small and can only support a small amount of weight. Even stepping up to 2.5" allows a lot more weight to be carried for a simlar feel (e.g. the Leader 120). In his own rambling way Bob Roogi does a good job of explaining this further here. After flying exclusively with ccd cameras now I forgot how AIO cameras struggle with light handling. It's not a fault of the VM275t in particular which does seem to be one of the better of the bunch, just the particular CMOS technology used in these cameras. On a good sunny day it is not an issue though and on the cloudy days it is something you can get used to. If you did want to go CCD though I'd recommend swithcing to a micro CCD, FSD TX200 vtx and the FlexRC Ascent frame for an all up weight penalty of about 8g - not my objective for this build but may suit you better depending on your application. Albert Kim actually did a build similar to this in his video here. Coming back to this review being one of the flytower though I can thoroughly recommend it for a lightweight 2s only micro build. The only equivalent that really comes close is the HGLRC Zeus which is 2-3 times the cost and won't fit in small frames like my Eyas build, although it is capable of 3s @ 16A. I'd also like to suggest that the 1103 motors seem to be a good match - they are as light as 3g each and will not stress the little 6a ESC. I'd very much like to try this combination for a cruising micro with a 2.5 or 3 inch superlight frame to see what kind of flight times I can get but for now, this small and ultrlight quad comes with me practically everywere. UPDATE November 2018: It's hard to imagine I've now had this almost a year now and it is still going strong many crashes later. I've settled on the Gemfan 1940 props as the best in this configuration and the Fullspeed FRSKY nano receiver with weight down to a hair over 35g. Current hype is all around the 2s whoops and (Mobula 7 in particular which I'm in the process of reviewing) but objectively speaking this build is superior outdoors because:
Here is the latest image: 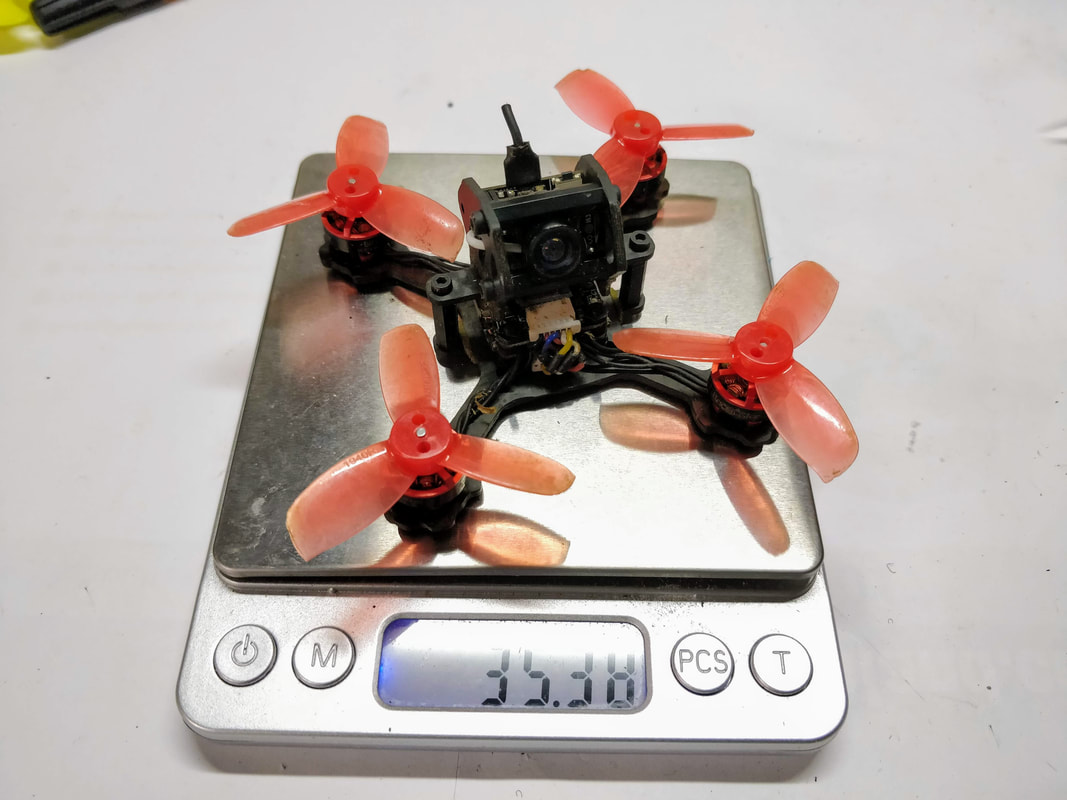  Typically AIO cameras are limited to brushless quads now. Here is my santa whoop with the LST S2 Typically AIO cameras are limited to brushless quads now. Here is my santa whoop with the LST S2 Since half of the planet is currently having weather that is forcing people indoors at the moment (not me haha!) I've reviewed some All In One (AIO) camera and VTX combos. Traditionally these have been used on tiny whoop style indoor brushed quads and smaller micro brushless quads although more and more brushless quads are using slightly heavier micro CCDs as standard. Weight is still very much the name of the game in brushed quads as you'll struggle to get a 4:1 power to weight ratio even on the larger 8520-based brushed micros. This means CMOS-based AIO cameras are still the norm because they are so light. In this round up I've gone for some of the lightest cameras I can find and best of all, 2 include video in / video out so that no tricky wiring hacks are needed to run betaflight OSD. Note: This is clearly not an exhaustive test, I happened to have a number of AIO camera at the same time I ordered for various micros so had a chance to compare. I though the improvements over the Eachine TX01 were impressive so thought it would be work sharing. The Contenders:
Results Clearly discussion on image quality is missing here - I found the 4 CMOS AIO camera above very similar and wouldn't be able to tell apart in a blind test. The only AIO I've picked up which is clearly inferior is the VM2751 standard on the leader which is not included in this shootout. I thought this camera/vtx was the weak point of the Leader 120 quadcopter. Recommendation For a micro brushed quad without an OSD I'd recommend the LST S2. For goodness sakes it is only $9!!! Further to that it is light, easy to change channel / band / video format and small. For a micro brushed quad with OSD or if you are after every milligram of weight savings, get the CM275T. It is CRAZY light at 3.2g and has a very convinient video/in out so that you don't need to mod your cam just to enjoy betaflight OSD - assuming your FC supports it. I know it's at odds with what I said about brushless and ccd cameras but this will be going on my Eyas X2 rebuild going for the lightest 2" possible - targetng 35g with props. Here is my original X2 eyas build on rotorbuilds if your curious. For a brushless quad 2s and up just get the micro swift or equivalent and the TX200 VTX. The video quality is just so superior in all but the best lighting conditions. VTX can be a little tricky with band / channel display but transmission quality is excellent and you have the ability to bump the transmission power up to 200mW.
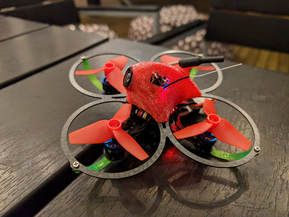 The Beebee 66 is a micro 1s brushless powered quadcopter which is essentially a brushless Tiny Whoop. It is made by Full Speed RC, the same company that produced the highly successful Leader 120. (review here). Gearbest kindly supplied me a BNF Beebee 66 to review. I was desperately hoping for this to be the brushless answer to the tiny whoop but I'm really bummed out that it just isn't. Read on to find out why. Adding a receiver Since this was supplied as a BNF model, it came without a receiver. I opted to use the lightest FRSKY receiver I had on hand - an XM that I'd finally figured out how to fash with the RSSI channel 16 firmware. In most models this is a matter of soldering wires to the exposed pads on the top of the flight controller. However,since the FC and ESC are part of the structure of this quad AND the FC is flipped upside down to sit the ESC connector in a manageable location, the prop gaurd, 4 nylon nuts and the flight controller itself had to be removed before I could access the receiver solder pads. Then I needed the help of a multimeter to figure out ground, +5v and signal wires. Once soldered up with a short length of silicon wire to the receiver it was easy enough to re-assemble and tuck the XM reciever underneath the canopy behind the AIO camera/VTX. Pics below of course can explain this better:
It's not the end of the world wiring in a reciever here but can be fiddly with particularly small hardware. I'd recommend if you did buy this model that you purchase with the receiver of your choice pre-fitted. Betaflight Setup Kept it pretty simple here. Because this is quite a different steup than I am used to I retained the stock settings on Betaflight 3.1.7 that it arrived with. All I did was set an arm switch and a mode switch for angle-horizon-air. Below are the default settings from Betaflight 3.1.7. Oh yeah, receiver had to be set up too. Like most f3 boards receiver is on UART 3. Quad Prep The only other preparation was pretty straighforward. The included GNB High Voltage 1s 260mah Lipo battery was easily charged using the included USB adaptor and a micro usb cable I had on hand. Only 1 set of props was included that are press-fitted on the tiny 0705 fullspeed branded (Sunny Sky made) 0705 brushless motors. I left the VTX on the default channel for the initial flight that my Aomway Commanders (review here) picked up as 5905MHz. First flight Please look away if you love your Beebee 66 because it starts to get a bit ugly here. After fully charging the LiHV batteryand confirming everything was working ok I armed and found the props were fouling on the TPU canopy. Minor annoyance down to the tight tolerance in the slightly flexible TPU canopy. Easy enough to bend out of the way and I was back in action. The first thing I noticed how loud the motors are - not in idle where they are practically silent but under any sort of load. Next as part of test with line of sight attempting a 'punchout' I could clearly see the quad dipping (pitch/roll) and twisting (yaw) under load. I'll attempt to tune this out later on and will post another review if successful. Moving on to line of sight I found the flight performance dull and uninspiring. What's worse was that after just one and a half minutes flight my battery was sagging down below 2.7v - the motors were clearly very demanding for their relatively mild output. I really wanted this quad to be a success and in fairness there is a chance I could have a less than perfect unit but my experience is my experience and I was disappointed. I do have some thoughts on how to improve though and I'll cover this in my Next Steps section below. Comparison to a brushed micro Please understand that these comments aren't made from isolation - I've had some experience with tiny whoops based on 7mm motors (like the JJRC H67 or Eachine E011) and although these are cheap brushed toy grade quads, they offered equivalent or better power and a flight time of 4 minutes plus on the same size battery with much smoother flight performance. A quick note that I actually tried the stock battery from the JJRC H67 (260mah non-HV) and got only 1 minute flight before it sagged below 2.7v under load. After recovery it bounced back to 3.65V but this same battery give my 4 minutes plus in my E011 FPV or santa whoop. Recommendations At this point I can't recommend this quad. The performance I experienced was poor and the flight time was unacceptable. My guess it that the brushless motors do not scale down well to 7mm, at this size the brushed motors seem to be more approprate. I'd recommend going in one of two directions:
Next Steps I'm not content to leave things be with the Beebee 66 and the latest version of this model (Beebee 66 lite) has shown the direction I want to go in - removing weight. I'm skeptical of getting to the level of improvement I want but with some of the parts below I think I can replace the canopy with a simple camera holder. remove the propgaurd and TPU supports and save up to about 4g. Will this make enough difference? Not sure but will report back when I'm done. Make sure you bug me about the follow up in the comments if I'm too slow! Below are some of the weights of the components I'm interested in:  The HGLRC Flame 1105 motors have been out for a while now and I've always wanted to put into a decent build. That build is covered here in my Komori review but here I'll just cover the motors specifically. These motors are available for Gearbest for around $8-10 each making them a mid-price motor. On the bench they feel well made and smoother than the DYS 1104 motors I've reviewed previously. They have a lightweight 'naked bottom' design and come in at 5g each which is very similar to the aforementioned 1104 DYS motor even though they have a 1mm taller stator. For the purpose of this review you will find me making many comparisons to the fullspeed branded 1104 7500kV motors that come standard on the Leader 120 (review here) because this is something of a performance benchmark and a popular model that many can use as a reference point. As above my test rig is the flexRC 3" komori lightweight frame using as fairly standard 20a ESC / F3 flytower combo and Gemfan 3025 twin blade props. Both the Komori and Leader were 71g dry.
Performance on 2s
For 2s flights I used my trusty Turnigy Nanotech 2 950mah batteries. Performance with these batteries on the HGLRC flame motors were smooth and predictable but lacked the top speed of the leader motors. This understandable as the 7500kV rated leader motors are better suited to 2s than the 6000kV HGLRC flame motors, even though the stator on the HGLRC is 1mm taller. I'd suspect this gap would be even smaller if you went with a more agressive prop like the Gemfan 3035 3 blade. Performance on 3s This is where I thought the HGLRC Flame motors would be most suitable and I was not disappointed. The power delivery was smooth, linnear and very controllable with a top end speed comparable or faster than the Leader 120. By comparison the leader 120 dips and feels less controllable at the upper end of the throttle. My guess is this is because the kigher kV and lower torque due to the shorter stater means it doesn't have the force to spin up the propeller to it's maximum speed like the HGLRC motor can. Later on down the track I'll try with the Gemfan 3035 triblade props as I suspect the motors still have a little more to give. I got a 4:30 flight time compared to 4:00 on the Leader 120 which leads to further weight that the 6000kV motors is more in it's ideal power/efficiency range compared to the 7500kV motor. Conclusions Overall on 3s the flight experience with the HGLRC FLame 1105 6000kV was really nice, very predictable and linnear and no sacrifice on top speed. By comparison I think the kV is slightly too low for 2s but a more agressive prop than the 3025 I used would probably be a noticeable improvement. Importantly the motors are well made, sell for a fair price of approximately $10 each and have silicon multistranded wires that make them sooo much easier to work with! I'd recommend these for a high power 2" quad on 3s, any 2.5' quad or very lightweight 3" quads like the Komori My motors came from Gearbest (use RC18off to get them for $8) but can also be found at Banggood or HGLRC directly. Other parts mentioned in this review: Gemfan 3025 propellers (Definitely recommend these for this motor) Gemfan 3035 propellers (I'd like to try these on 2s but current draw may be too high on 3s Gemfan 2540 propellers (My favourite prop for the leader or any 2.5" quad) Ever since I saw the first image of the first FlexRC Ascent I've been impressed. It is a simple micro quad frame that accepts 2" propellers, is super lightweight and has a cage that is designed around a micro CCD camera (runcam micro, foxeer micro, caddx micro, furibee micro etc.) This was one of the first frames designed around these superior cameras and in my opinion still one of the best.
Dmitry from FlexRC has since expanded on this winning formula and this has given birth to the 2.5" Ascent, 3" ascent desinged around the runcam split and most recently the Komori 3". The Komori is essentially based on the original 2" with a baseplate embiggened to take 3 inch props and extra torsion supports between front and rear arms to allow for minimal flex whilst stick with thin (but lightweight) baseplate. All up weight of the frame is 15g with included hardware. Shape is a squashed x - front and rear motors are closer together than left/right motors. *Theoretically* this should mean more stability but slower movement on roll and faster but less stable in pitch. After spending a lot of time with the Leader 120, I was looking forward to a frame that better fits the micro CCD camera and can take a genuine 3" prop rather than 2.8". Build For build components I essentially transferred my gear across from the Furibee X140 (review here) where I felt the heavy frame (although durable) was letting the performance down. After initial flights I decided the 1306 weren't suitable - performance was dull on 3s albeit and improvement on the Furibee X140 owing to roughly 30g less weight in the frame. This is when I switched motors to the HGLRC Flame 1105 6000kV (reviewed here). The build on this was really simple - FC/ESC/VTX were all bolted on to the baseplate as were the motors. I just love the way the side plates clip on with no fuss and still had plenty of room for the 3-layered stacks. Once in place itwas easy to add the 2 nylon standoff supplied which can be used place cable ties on as additional support for receiver and VTX antennas. Components used:
@s Betaflight setup Since this is a custom setup I won't go into betaflight setting but to summarise I went with
Flight I went into more detail on the performance of the motors here but overall 3s paired with these motors and overal setup was excellent. My Leader 120 on 3s was always very quick but was a tad unstable and highly strung. The Komori I felt fixed this feeling of instability - flight was a lot more predictable with linnear power and no twitching. What this translated to in reality was more enjoyable less stressful flight with no loss in top speed compared to the leader. 2s on this quad is ok - not as fast as the leader on 2s but I think some more agressive props like the Gemfan 3035 triblades would be better, This is primarily a 3s quad - I have no interest in 4s.
Durability I've not yet put a lof of packs through but have already had a reasonable sideways landing on to rough chip tarseal. From this the carbon fibre that extends beyond the motors for production has had a slight delamination but nothing that affext performance. There is however a lot of material that extends beyond the motor meaning I could file back to removethe delaminated portion. It also means the motor was well protected in the crash - not a scratch on it. Conclusion It's no secret that I am a fan of light builds - going lighter means better agility and longer battery life as well as better resistance to crash due to less mass. The FlexRC Komori frame fits my desire for a 3 inch frame perfectly - super light with frame designed natively around a micro CCD camera. The komori does sacrifice a bit of durability for it's light weight but given I fly over grass mostly I'm happy to compromise a bit of durability for weight. Since the frame is light this then allowed me to choose lighter duty motors and batteries - which makes the entire build light. As well as the benefits above, lighter motors and batteries tend to be cheaper too. Flight characteristics were excellent andI felt the combination of 3s 450mah - 1105 6000kV - Gemfan 3025 offered a well balanced combination of power, agility, stability and efficieny (i.e. longer flight times. I think my favourite Leader 120 has finally been bettered.  This is not a typical review, there are plenty of those around. Bruce from RCModelsReview and Seth from RCAddict both do a good review on these as do many others. The aim of this review is to detail my experience moving from box goggles to a set of crap binocular goggles to a set of good binocular goggles.  The Quanam Cyclops is a good basic starter FPV goggle set The Quanam Cyclops is a good basic starter FPV goggle set When I first jumped in to FPV quadcopters in March 2017, box goggles were all that fitted into my budget and at the time the Quanam Cyclops V2 from HobbyKing was one of the better models going. I've really enjoyed my time with these - an immersive 5 inch screen, useful OSD and pretty good reception for a non-diversity receiver. The only downside for me in practicality was the large size that was difficult to stuff into a backpack and to a lesser extent the reception for short-mid range flight. Looking dorky doesn't really matter to me, I have kids so a large set of box goggles doesn't even register on the shame scale.  The Eachine EV100 is not a good set of binocular FPV goggles The Eachine EV100 is not a good set of binocular FPV goggles My first move into binocular goggles was unsuccessful. Like thousands of others I jumped on the Eachine EV100 preorder from banggood. They felt and looked good at an excellent price, the lens adjustment was great and I so wanted them to be good but they just weren't. They failed on the most important feature of all - the viewing experience. Possibly because of the innovative lens system but more likely due to cheaper optics, the field of view was tiny. There was a lot of hyperbole around the lovers and the haters but it was just too hard to see the small screen, *especially* coming from box goggles. I really hope that Banggood/Eachine get this right, there is a lot of potential to take the market away from Fatshark in particular who offer great customer service but have offered little innovation in the last few years. 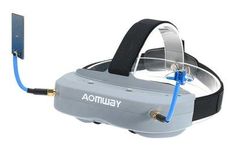 The Aomway Commanders were the binocuar FPV goggles I was looking for The Aomway Commanders were the binocuar FPV goggles I was looking for Naturally I was therefore hesitant with the Aomway Commander V1, even with the glowing reviews around. The hesitation was short lived though. After speding sometime to figure out the menu options I found the field of view to be good, even after transferring from the quanam goggles which have some of the biggest fields of view on the market. The most important measure for me was that I could fly just as well (no worse anyway!) than with the box goggles - a completely different experience from the EV100 goggles. By now, these goggles have been well reviewed but I'll cover of the points that were important to me as succinctly as possible:
Thanks to Gearbest for providing the sample for me to review and use. A link for the most up to date (revision 2) of the Aomway Commander V1 goggle is below, currently available for around $300. Check out my coupons and discounts for the latest flash sale or coupon for these. https://www.gearbest.com/fpv-system/pp_602969.html 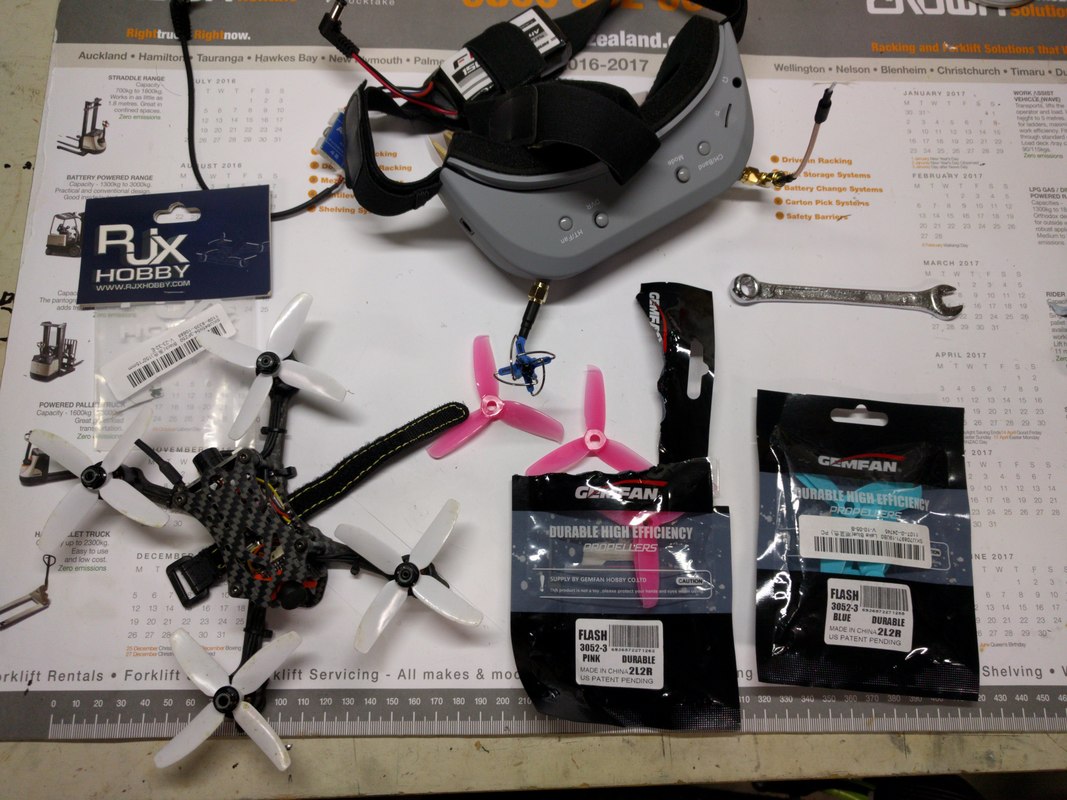  I've now had the Furibee X140 for about 3 months (at time of writing) and have probably put 50-60 lipo packs through it. I've written this final part of the review to draw some clearer conclustions. Part 1 review (bench) is here Part 2 review(inital flights) is here Minor changes since purchasing I've only made very minor changes since purchasing, more for durability rather than anything else:
 Flight performance
I never did get the smaller 4s packs because I ended up being happy enough on 3s. The performance of the quad was never what you would call fast and when pulling out of freestyle manuevers and covering distance I'd find myself hitting full throttle fairly often. Battery life has been nothing short of outstanding though. Even on a 42g Turnigy Nanotech 3s 450mah I had such a tiny amount of voltage sag and I'd regularly get 4 minutes of flight pushing hard. Additionally the lack of power to weight compared to my 5 inch or leader 120 quads gave me a whole lot more control - on a large race track with the camera angle set to around 45°C I was the most smooth, stable and consistent I'd ever been and was able to fly more consistently low (gate height) than I ever have before. At a guess what I lacked in top end was more than made up in smooth cornering and accurate lines. That being set it felt like a chore flying freestyle on the 3s because of the amount of throttle needed to recover. I think a freestyle experience on a 450mah or 650mah 4s would be very good. Durability This is a tank! On my way to consistent high speed low flying I went through a few high speed barrel rolls and the X140 took it like a champ. Other than replacing bent props (with the Gemfan Flash 3052 hopefully arriving soon) Nothing else has broken. The camera is really well protected in the frame - no mishaps there nor for any other of the electronics. Not much to say here other than this is the quad that is always running when the others are being repaired. Electronics Reliability 50-60 packs in and nothing to report - it all just goes.. Although the VTX does take some thinking to change channels and power I tend to fly this one alone so don't change channel or power. 25mW work fine where I fly. I've just seen a replacement ESC / FC / VTX stack listed here but at the current price of $ I'd just replace with the HGLRC F428 TX20 set if it came down to it. Improvements to make Not much left to improve on but these are on my list
Overall Conclusion I can currently think of no better quad for a beginner. The price is currently around $110 but has been as low as $80 but perhaps more importantly they build quality has been good and the quad is highly durable and forgiving. Batteries are cheap compared to a 5 inch and it is gentle on them meaning they do not get stressed and will give you good flight times. Furthermore this is very upgradable for not a lot of money. There are some simple changes here I've suggested but this quad can grow with you. Changing props and batteries will get you more speed and if you change these in combination with higher kV motors you will give a 5" a run for the money. That being said this performs just fine as is and is probably the most complete quad I have come across for anything like that kind of money. I talk about the leader 120 a lot in comparisons and yeah, it is faster and more agile but it is also a lot more fragile and the stock camera and VTx straight up sucks. The Camera here is a CCD and performs just as well as a mirco swift or arrow. The VTx is fiddly to set up but once programmed runs well. Being more of an inermediate pilot I'm surprised how much this quad has taught me about what I should expect from throttle control (altitude management) and cornering lines. I think this would make a great starter quad for a step into proper quadcopter FPV. Conversely for a more experienced pilot this is a great backup for flying in small spaces, especially when all your other quads are busted! Link to the different versions: Furibee X140 no receiver Furibee X140 flysky receiver Furibee X140 frsky receiver Furibee X140 futaba receiver Check out my discount page for the latest deals and voucher codes 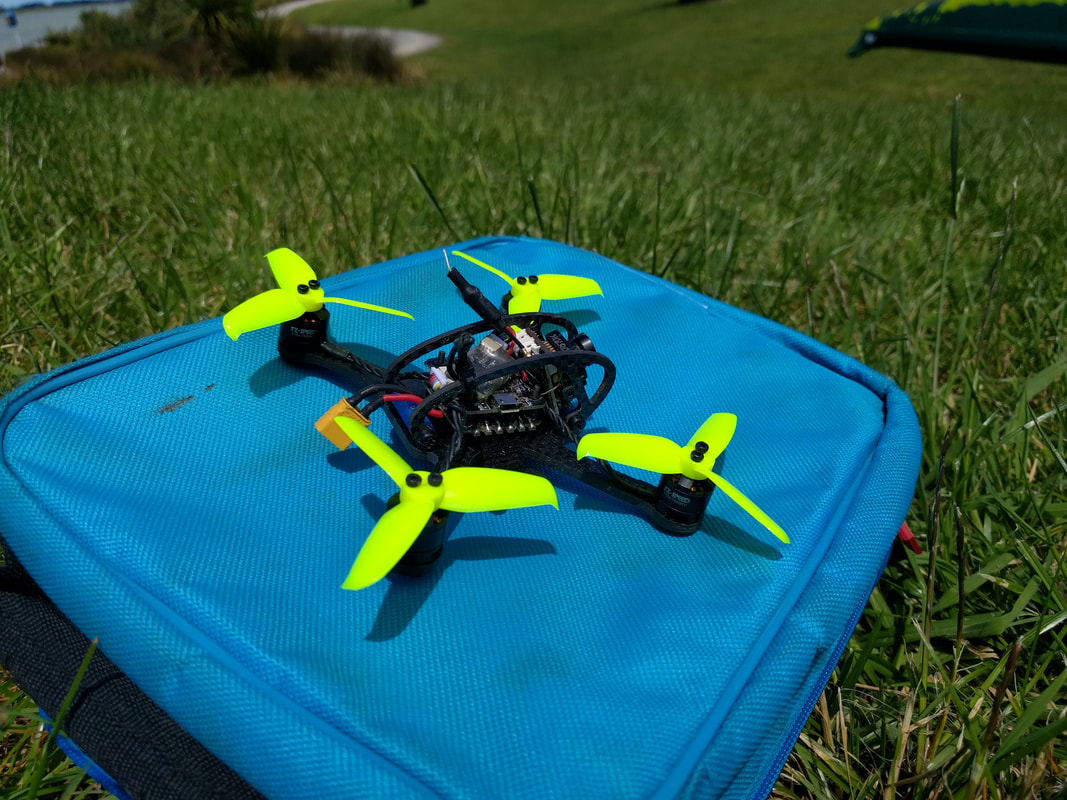 Gemfan have recently released the 2540 Flash propeller to add to their growing library of micro propellers. This time rather than sticking with their 'Hulkie' naming on the 1940 and 2040 propellers, they have gone with 'flash' from their popular 5" 5152 prop. The design is stylistically similar to the 5152 in that it is a swooping 3 bladed propeller with a pronounced wingtip. Colours currently available as below. I like the yellow as they are easy to find!
The material feels very much the same as the gemfan 2040 Hulkies which I reviewed here but the design is much more refined and so will not make any further comparisons as design will impact performance and durability more than material. 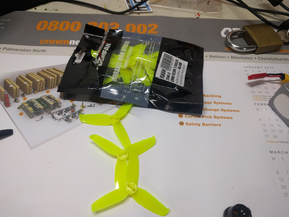 Propellers come in a pack of 4 x CW and 4 x CCW making for 2 sets. These can be bought in multiples depending on the vendors as below.  For testing I used my Leader 120. This is a popular model and I have put 80 odd packs through this one making it a good test mule. Also, I have experimented with other props like the Gemfan 3025 alongside the stock King kong 2840 for more than one point of reference. Since this frame will fit a 2.8 inch 2840 prop there is plenty of room on a 2.5 inch 2540 without losing too much blade area. No issue installing so will move on to flight performance. Performance on 2s The first thing I noticed about these props is that they were very quiet. I flew in a reserve where there were several people enjoying the sun and very few people even noticed the quad flying about. The noise made was even less than the 2840s which are already very quiet. On 2s the performance was almost on par with the 2840s. I was able to hover at around 25% throttle with a 47g 950mah 2s battery and had flat out speed close to the 2840s. Cornering (grip) felt about 90% as good as the 2840s which is the grippiest quad/prop I have - even more than my 5" racing floss 2. Balance was excellent with no increase in jello at high throttle over the 2840s which have always been well balanced for me. Battery life was definitely superior to the 2840 props. As you'll see from my pics below I got around 6 minutes from the 950mah battery with fairly heavy throttle flights as I was in a large reserve. This is about a minute more the the king kong 2840s with similar flying and comparable times to the Gemfan 3025 (although the 3025s were slower on 2s). It was an enjoyable 6 minutes too - the quad felt tight with these on.
Performance on 3s For 3s testing I used my Turnigy Nantoech 3s 450mah 65C batteries that weigh approximately 45g. The performance gap between the stock 2840 and new 2540 propellers were even less pronounced than on 2s. If there was a difference in performance compared to the 2840s in top speed or cornering grip I could not tell. The advantages did remain though - 2540 propellers were again more quiet and I had a similar increase in battery life: from roughly 3 minutes of hard flying to roughly 3.5 minutes+ hard flying (see below). Lastly at higher RPM I actually had less jello than any prop I have used on this quad before. This suggests they have excellent balance. In short I got all of the benefits I enjoyed on 2s with none of the downsides.
Durability Oddly enough I haven't had a crash worth speaking of yet. I'll update here once I've had a view and can give more of an opnion on this. Conclusion
Simply put these are now my favourite prop on both 2s and 3s for the Leader 120. I can only guess that the more modern design helps get the efficiency up over the 2840 on 2s with very nearly the same top speed and grip through corners. On 3s the gap was even less and I'd struggle to tell the difference between these and the 2840s. The only real change was that there was less noise and more flight time. In conclusion these will be my go-to prop from now on my leader 120 on 2s or 3s. The slight downside of marginally less top speed and cornering grip is easily outweighed by the reduced noise and improved battery life. Give them a try for yourself, they are inexpensive.  In part 1 of this review we looked at the specs of this quad and setup with betaflight 3.2.0. In this part I'll review the flight performance and any quirks. Setting up the VTX Before I get into the flight, just a word of warning that the VTX is set to 150mW to start. This may be fine for you but I like to start on 25mW as a baseline and if there are any antenna issues I know there will be less chance of cooking the VTX. Changing the channel and power is probably the most difficult I've found so far although the roomy frame at least makes access easy. I've put the original instructions below for reference but will also put my own notes as a native English speaker: 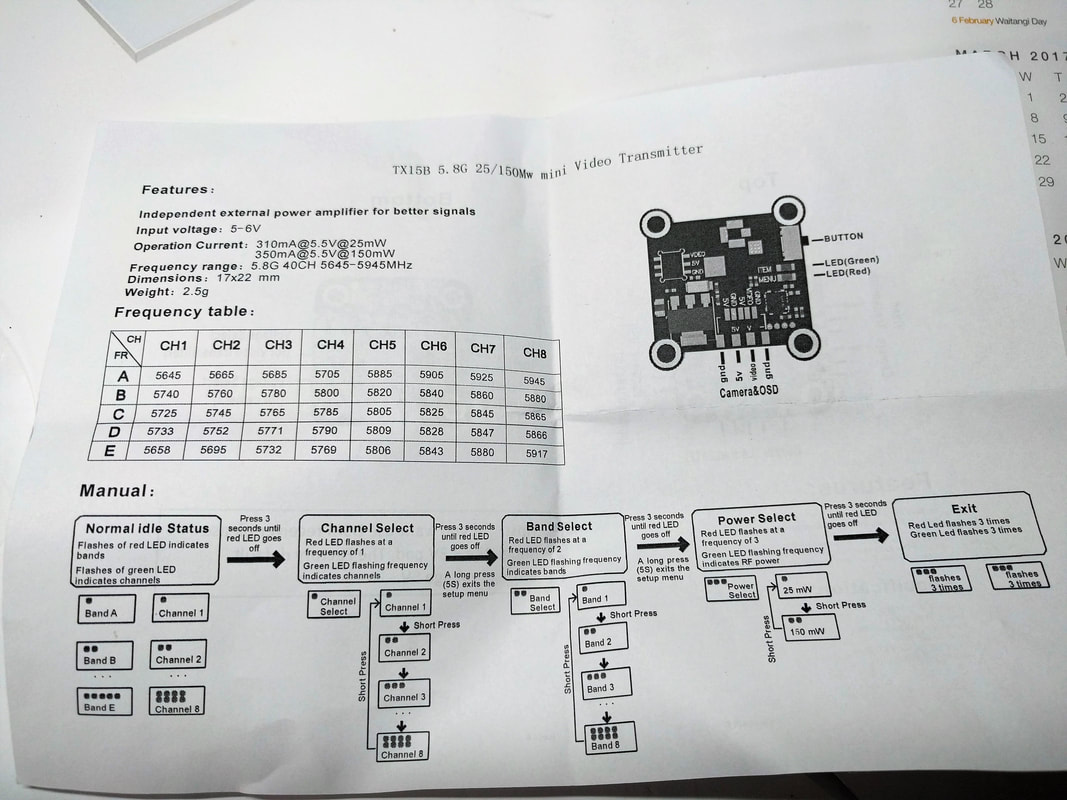 ,When you power up the number of flashes of the green led indicates the channel and number of flashes of the red LED indicates the channel according to the designations to the left. Now, forget what the red and green leds mean. Hold down the button for 3 seconds only till the red light goes off. The red light will flash once periodically meaning you are in 'channel' mode. Each short press of the button will change the channel as indicated by the number of flashes from the green LED. Next hold the button again for 3 seconds as above. The red light will now flash twice periodically meaning you're in band mode. Now, each short press of the button will change band as indicated by the number of flashes by the green LED Lastly, hold down the button for 3 seconds again. 3 flashes of the red LED now means you are in power set mode. Short pressing the button will cycle you between 25mW (1 green flash) or 150mW (2 green flashes). Finally holding down the button for 3 seconds again will take you out of setting mode indicated by both green and red LEDS blinking 3 times in unison. So confuse. Just set and never adjust again! 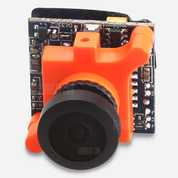 Replacement Furibee MS1672 camera Replacement Furibee MS1672 camera Setting up the camera - just use the stock settings Good news: The CCD camera is actually a CCD camera and is fully adjustable via OSD. Bad news: no remote included. A compatible remote is only only about $3 from Banggood. You can argue that it should have been included but in reality the stock settings will satisfactory for 95% of the people that are likely to buy this quad. Chances are if this is not your first quad you'll have one or more floating around anyway. Performance on 3s Starting out using a 3s 450mah battery that I typically use on my Leader 120 (review here), I found performance to be fairly docile which is not surprising considering the low 3100kV rating of these motors. However, motors were quiet and smooth and flight performance was responsive and predicable - even with the mostly stock settings as covered in part 1. The LEDs on the back are nice and bright and certainly make it more interesting for spectators, particularly in the evenings. Flight time was very good given the battery capacity making this combination pretty usefully for someone new to FPV. However the combination of low motor kV and a fairly gently 3030 4-bladed prop felt me looking for more as an inermediate-ish pilot. I have some new props on order (3052 Gemfan flash) and I think these will make the 3s option more viable for me but I needed more instant gratification and went to 4s. Performance on 4s Unlike the small 3s batteries I don't have a small 4s. The smallest I currently have available is a 4s 1000mah turnigy graphene which weighs in at approx 140g. Ideally a 600-800mah battery at around 70-80g would be a better choice here - such as the 75g 4s Tattu 650mah.
Moving on though flight performance was much improved however the extra 75g weight penalty was noticeable, especially when pulling out of freestyle moves etc. To be fair though I have been flying the Leader 120 a lot recently which is a very 'floaty' quad. Much like on 3s performance was smooth and predictable but with better top end. Like on the 3s though I think there motors would benefit from a more agressive prop. The stock 3030 4-bladed props are better suited to a high-kV motor that needs additional grip from the extra bladed. With the right battery weight I think the Gemfan 3052 props I have on the way will offer the aggressive pitch along with a more modern design and greater efficiency but dropping 1 blade. The good think is though that here we are talking about changing props which are a disposable item rather than anything flawed with the frame, motors, esc, flight controller etc. They are the good kind of boring in that they all just do their job without fuss. Flight time was pretty epic on these batteries. Check out the summary shots from my batteries below. When I got home the batteries will still measuring 3.75v per cell after resting!
Frame durability On first impression, this frame is tough . I had a few crashes on some fairly hard-packed earth without any sign of issue although I'll really need more time to make a definitive conclusion. All of the components seem to be well enclosed and protected, no drama there. Early Conclustions This is a very well priced quad with a good performance range for a beginner stock. Although the realtively low kV motors will limit top speed, they give excellent efficiency which will translate as extended flight time and/or the ability to run a lighter/lower capabity battery with more nimble flight performance. For a more intermediate user some basic changes like a shift to more aggressive props will reward you with a solid flight experience. The equipment on board is well thought out and balanced. This means it is able to do that job that is expected of it at a very impressive price point. The frame appears to be exceptionally durable especially given the compact size and I am hopeful that this will withstand a lot of abuse. Looking for a negative though the tradeoff of a durable frame in this case is weight. Combined the stock props performance is ok but certainly not face melting. I do have some ideas to improve on that though... What next? I think if you were looking to tinker, a lighter frame and the props as above would make this truly exceptional. I have some of the Gemfan Flash 3052 props on the way and think this will really improve things. Keep an eye out in my tips and tricks section as I'll review these more agressive props when they arrive. The Furibee X140 is exclusive to Gearbest and at the time of writing is exceptionally good value at $105 for the model without the receiver or $113 with a frsky/flysky receiver:
 The Furibee X140 is a traditional style 3 inch quadcopter as opposed to a lightweight 3 inch like the Leader 120. It is available as a Plug N Play (PNP) with no receiver or as a Bind N Fly (BNF) with either a flysky receiver, frsky receiver or futaba receiver. Some of the key features of this quad are:
The box it came in is small brown and very boring which is good because on a budget quad I don't want to be wasting my money on that. What I am most happy about are the components: FPV: Micro CCD and switchable VTX They key points for me is that this has a real CCD camera (Furibee micro) and a vtx that is switchable between 25mW and 150mW. I'll cut to the chase and say the camera is excellent and like the HGLRC elf which also appears to be a clone of the micro swift, you would not be able to tell the difference. Combined with the VTX this 'hits' the right FPV feed where other micros miss. 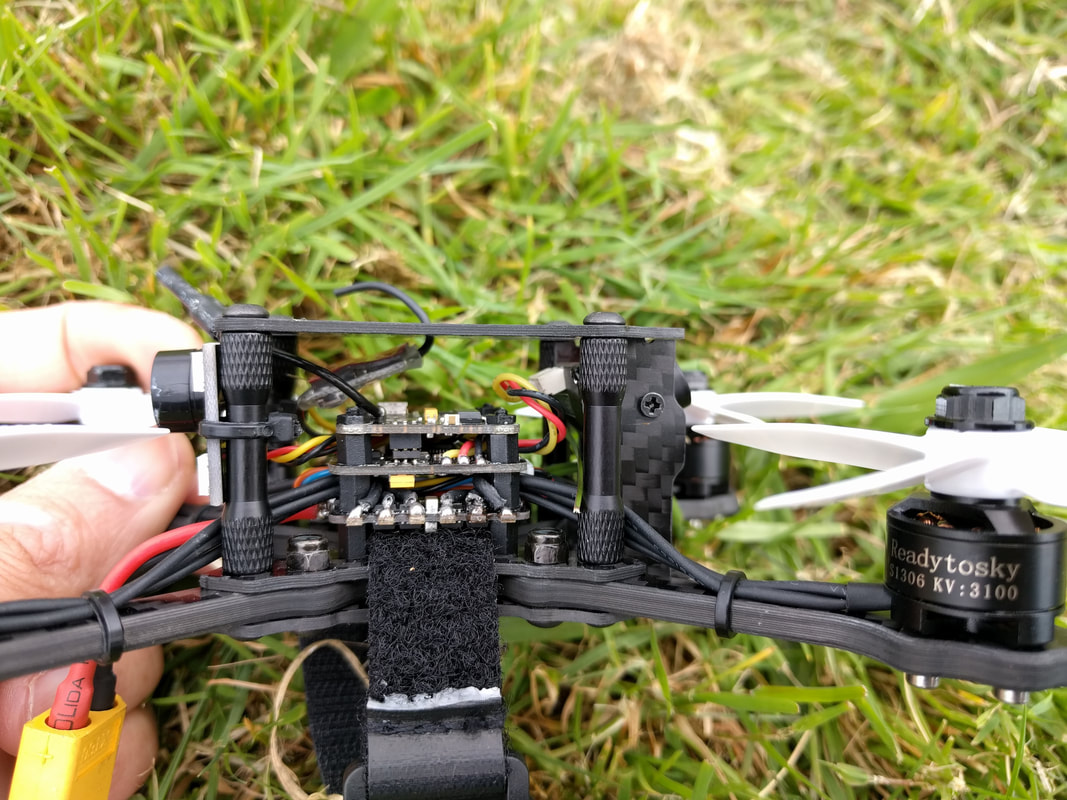 Frame: Good luck trying to break this one. Straight up the frame is a tank. It uses separate 4mm thick double chamfered replaceable indicular arms and is incredibly stiff. It has been designed in the streched - x style (less space between left and right motors than front and rear) which gives better pitch fine control and less turbulent air to the rear props in forward flight. One challenge with the streched X is that props are in full view in FPV (like the floss 2 frame) but a taller set of standoffs and camera mounts elevates the camera mostly above the prop disc line making for a nice FPV view. It is not a light fram however because of this but is crazy durable. I don't doubt gearbest will be listing arms soon but don't think they will be selling many... Electronics: Well balanced Really glad they went with 20mm x 20mm here, I really think this is the way of the future. I'm even trialling a 20mm x 20mm stack in my 5" race build here. Flight controller is an Omnibus F3 with betaflight OSD, a proven unit. ESC is 20a which will have no problem on this quad even if you put much bigger motors on. Best part is that it is 4s capable. Also it is nice they included a real buzzer/led combo. Buzzer is handy but not vital now that we have the motor buzzer on betaflight 3.2.0 and up. Leds are nice and connected to the DIN so there is are limitless options for how you wish for these to light up. Nice to have but in truth I'll probably remove to try save some weight (4g for this unit). 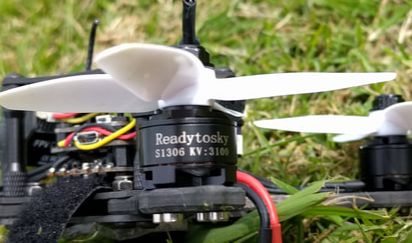 Motors: Efficient but need a 4s battery It's a good thing that the ESC can do 4s because I feel a 4s battery is really needed since the motors are of a fairly low kV (3100kV) They should however offer excellent flight time (update in part 2 review: they do). For the record they are Ready to Sky branded 1306 3100kV motors that appear to have smooth bearings and no obvious visual defects.  Propellers: Easy upgrade here The props included are 4-bladed 3030 meaning they are 3.0inch with a 30° pitch. This is a fairly low pitch, ESPECIALLY for the 3100kV motors. They will get you flying but when you get replacement I would definitely go for something more aggressive like the excellent Gemfan Flash 3052. I think this will be an excellent upgrade and will make a 3s battery more relevant. Weight: Bit of a tank This is not a light quad at 125g dry (no battery). By comparison the Leader 120 was 64g but this is a different class of micro with bigger motors, much more durable frame and superior FPV camera/vtx. In addition it will lug a 4s battery unlike the leader which is 2s or 3s at a stretch. I'd expect this to be more "chuckable" than the leader which has more "floaty" flight characteristics. Betaflight setup Betaflight 3.1.7 came sock on this flight controller. After looking through the settings it was dead stock without even an arm switch set up. Rather than setting up and flying on 3.1.7 I jumped straight to 3.2.1 which is the latest release at time of writing. It is a step change improvement - in particular dynamic filters. Below is a gallery of screens where I changed setting from stock. Clich through and see the captions to help with your own setup. Early pre-flight conclusions I really like the components on this one especially at the price point ($105 currently for PNP on the discounts page). I think it was unecessary to build the frame with removable arms and heavy 4mm thick ones at that. Micro quads tend to be more crash resistant because they are lighter so this looks like an overkill. In saying that it should be VERY VERY durable and should offer good flight times with the more effcient low kV motors it has. I'll comment after part 2 of this review on mods but I have a few in mind that should really make this move. Link to the different versions: Furibee X140 no receiver Furibee X140 flysky receiver Furibee X140 frsky receiver Furibee X140 futaba receiver 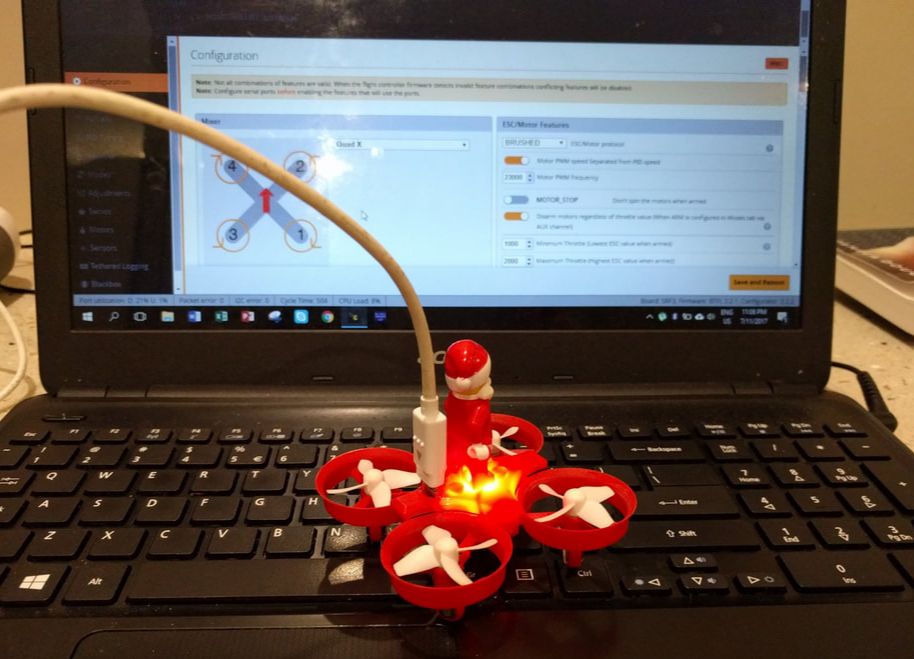 In part 1 of this build we looked at the JJRC H36 quad and LST All In One (AIO) camera/VTX to make a budget yet powerful tiny whoop. One of the limitations of this build is the small remote that, although proportional has poor fine control due to size and low quality 'gimbals'. In part 2 I'll turn this from a toy quad to a hobby quad with the addition of the Furibee F3 flight controller which will allow you to use your proper transmitter (Frsky, DSM or Flysky) and have the full control of betaflight. 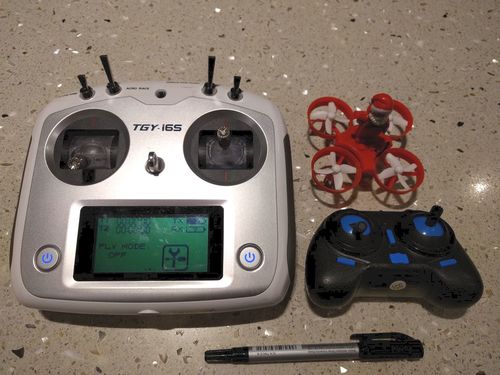 Size comparison of the JJRCH36 stock trasmitter compared to the Flysky i6s The advantage of running a full size remote is for better finger control. The advantage of running a betaflight flight control system is absolute control over all flight functions - angle, horizontal, acro modes, multiple rates set to switches and the least sexy but probably key is a proper failsafe system to prevent fly-aways 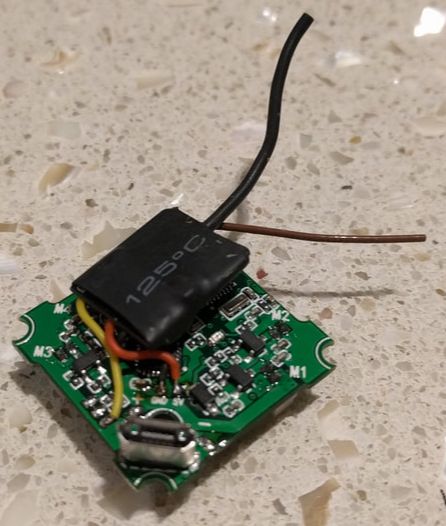 Furibee f3 flight controller with a flysky RX2a pro micro reciever wired in for ibus Furibee f3 flight controller with a flysky RX2a pro micro reciever wired in for ibus First a word of warning. The Flysky version of this board only supports AFDHS and not AFDHS 2a. This means you cannot use the Turnigy evolution nor the FS/TGY-i6s. I made this mistake and so have had to add the RX2a pro receiver which thankfully there are at least pads for. Bad news is that this adds about $6 in cost and 0.8g in weight but the good news is I now have the faster speed and failsafe of an ibus rather than PPM system. For those using FRsky this does support RSSI and VBAT over telemetry. Physical install is simple and probably best described by the pics below with captions. Unfortunately I couldn't keep the sound module as only the speaker is external - the music source is integrated in the stock flight controller. Click to embiggen the pictures and see commentary In terms of setup in betaflight, I updated to the latest version of betaflight (3.2.1 at time of writing) and captured a few screenshots below where I made changes, particularly because I had never before set up betaflight with brushed motors - there are some specific differences. So how does it fly? The standard flight control will no doubt get you off the ground with a respectable ability to buzz around but the being able to use your own remote and run with all the options of betaflight it is like a whole new quad. It feels more agile and surprisingly much faster - probably because you have complete control over all angles. To be fair though acro is challenging indoors and I tend to stick with angle or horizon mode but with a greater maximum angle. Good news is on a still day this can easily be flown outdoors and since it has a decent reciever can get very good range.
Flight time on the stock battery is around 4-5 minutes on the stock battery which is actually pretty awesome compared to the 2-3 minutes you get on the 6mm motor whoops. I think this is because the 7mm motors hit a sweet spot in efficiency that allows the larger 260mah battery. I don't really feel agility is significantly compromised either - especially with the extra power and flight time that is gained. That is because these larger motors spend less proportion of energy just getting the quad and FPV gear (and santa!) off the ground leaving more in reserve for actual flight and manouvers. Will it powerloop? No, that is more the realm of micro brushless but I'm still yet to see and indoor flyer that is as practical and safe as the ducted whoop style. My final conclusion is that the JJRC santa quad and LST AIO camera is a lot of fun on it's own but for the extra $20 or so for the furibee flight controller, it really comes alive. Final note: It is possible to bind a taranis or flysky remote directly to the stock flight controller using a multiprotocol module. These can be more expensive and fiddly than a betaflight flight controller however they can be used with multiple toy models. Futhermore the stock flight controller can actually be 'hacked' to insert dual more angle/acro software but some basic hardware and software fiddling is required. I'd recommend googling silverxxx acro firmware, notfastenuf and CaninoRC for more details, particularly on RCGroups, Micro Motor Community and Youtube. Some great resources put together by talented people if you are willing to put the time in to implement. 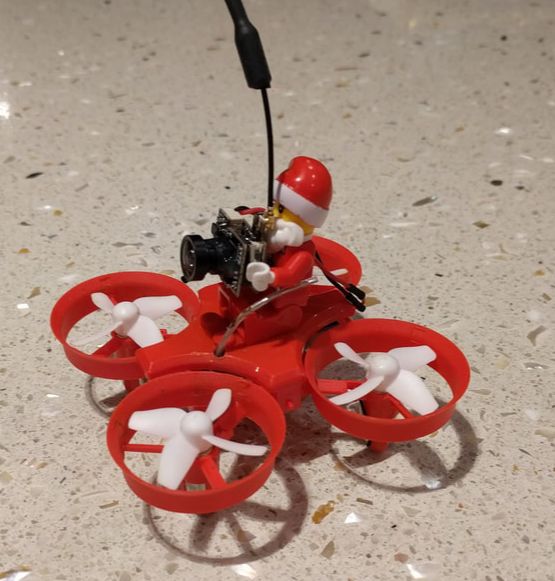 Time for a cheap, high performing tiny whoop build with a twist - Christmas style. I know it is a novelty but the JJRC H67 Flying Santa Claus RC Quadcopter is actually the Eachine E011 in disguise. The E011 in my mind is the absolute best starting poing for a tiny whoop with the larger 716 motors that have absolutely no problem lifting an All In One (AIO) camera. So what make this build so special? Freakin' Santa Claus does! 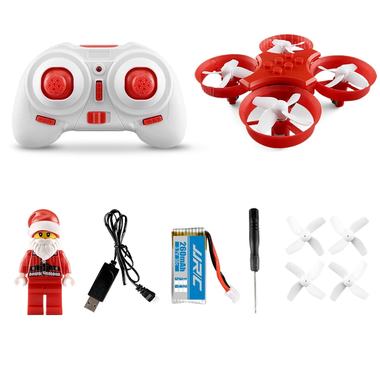 The JJRC drone is in Christmas themed colours and comes with a Santa minifig. The best (and most annoying part as a parent) is the noisy sound module on board that plays a Christmas tune. As a stand alone unit this is a micro brushed quad that flies very well albeit with a small but proportional remote. Of particular note, the motors and battery are very good and will give you a genuine 5 minutes of throttle-heavy flight time. Included in this pack is:
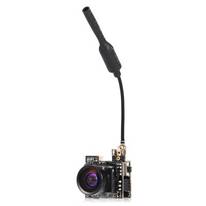 This quad is a lot of fun but it needs more FPV! I used the LST - S2 5.8G 800TVL HD Micro CMOS FPV Camera which is tiny and weighs only 3.5g. I've built an E011 whoop before with a 5g AIO Eachine TX01 camera and it had no problem lifting that. This new LST camera will offer much better performance even the seemingly small 1.5g weight difference has a very big performance impact on these brushed whoops. See below for pictorial instructions for mounting the camera in the spirit of Christmas. The minifig is very heavy at 4g but I couldn't leave santa out of this garish whoop so will take him off when we start taking the Christmas decorations down, weight savings will have to wait for now. Here is a handy tip given the crappy stock reciever range. Drill a 2mm hole on the canopy as shown above and poke the antenna through it. You get over 100% more range which is absolutely necessary as this does not have a failsafe and will fly away from you if you lose signal! In conclusion this is an absolute bargain for a basic little FPV rig. To date all of cheaper fpv ready whoops have the smaller and less powerful 6mm motors and I'm suprised that a 7mm motors FPV ready unit hasn't been released. No problem though, as you can see above building this is not difficult or expensive and much more rewarding. The set up as above flies well enough but needs quite a bit of throttle. When you decide to take the minifig, canopy and speaker out you'll find performance will increase dramatically but that can wait till after the novelty has worn off :) If you want to use your own hobby-grade transmitter and have the full control of betaflight with acro/air mode, check out part 2: Adding the Furibee F3 Flight Controller. I'll have a link live here by 4 November. Parts in this build: See this page for current bargains on Gearbest for play and racing
 Micro quads are great, you can fly smaller spots, they are quiet and less intimidating for other people that may be about. Until recently many have suffered from poor cameras by today's standards. AIO CMOS cameras were a game changer allowing FPV where it simply couldn't fit before but now their poor image quality (especially) light handling is being shown up by micro CCD cameras like the runcam swift micro 2 and foxeer arrow micro 2 and also the camera that is included with the HGLRC XJB F428 - TX20 - ELF . Additionally AIO cameras are limited to 25mW which simply doesn't offer enough range for the newer and more powerful brushless micros. In order to make upgrading as simple as possible, Fullspeed (makers of the Leader 120 and Grasshopper 94) are selling the TX200 5.8G 48CH FPV Transmitter which screws to the back of your micro swift or arrow and protrudes no further than the plug on the back as you can see above. The Leader 120 is my favourite micro and in my initial flight review I found the only chink it's armour was the camera image quality and VTX power. Below is the link to the tips and tricks section where I specifically mount it in the Leader 120: LEADER 120 CAMERA AND VTX UPGRADE Considerations when installing worth thinking about for any quadcopter:
So is it an improvement? Oh yeah! Night and day! For the camera the image is so much clearer and I can focus it properly which was a real problem on my original camera. It handles light so much better and as with all CCD cameras the settings can be adjusted using the included remote. I can see everything especially going around and under trees which is my favourite type of flying. Not only that I found myself being able to fly much closer to sunset with full visibility. For the vtx when I first connected it to my leader I used the flight controller BEC to wire it exactly as I had the original AIO camera. Unfortunately this resulted in diagonal lines which became worse to the point of breakup on high throtte. This tells me it is more sensitive to electrical noise that the AIO it replaced. The good news was this problem was solved by using battery voltage instead. This had the added benefit of taking load off the flight controller BEC (especially @ 200mW transmit power) but was inconvinient in that I had to solder additional wires to the VBAT pads. Once this was rectified, the VTX set to 25mW is actually much better than the AIO - a clearer signal over greater distance when flying without obstructions between VTX and receiver. Set to 200mW and wow! So much better range but more importantly the penetration through trees is superior. Now it is not dicey when I go behind and around large trees, there is minimal breakup compared to before where you rolled the dice every time a large tree came between you and the quad. In essence This means I can fly lower around trees rather than above for fear of losing VTX signal - way more fun! Changing the channel/band/power is comparable to other VTXs in that a single button quick press with change channel, 3-6s will change band and 6s+ will toggle power between 25mW and 200mW. Reading the channel can be a chore though - 1: because interpreting the small LEDs is challenging and 2: Being a piggyback vtx it will likely be mounted somewhere that the LEDs are obscured! The saving grace here is that Micros are typically flown solo as opposed to raced and so channel changing is not a particularly frequent occurence. Your own experience will dictate the importance here. In conclusion the changing the AIO CMOS cam to the micro CCD cam (micro swift, micro arrow, HGLRC Elf) is an absolute game changer and other than the very smallest micro builds I will never go back to CMOS (runcam sparrow excluded). For the VTX, it is compact and tidy but was a bit disappointed in how sensitive it was to electrical noise on 5v. To be fair though, this may well have been the flight controller but wasn't apparent on the AIO. No issue whatsover running off VBat though with the upside of the VTX doing the work of the BEC rather than the flight controller. For a total package (micro CCD and TX200) this is a tidy little combo that is very handy for stashing the VTX in a covinient location in your quad rather than awkwardly added on top of your stack etc. It also makes it easy to transfer between quads.  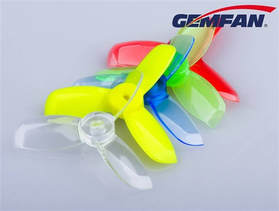 Recently I purchased some of the new Gemfan 2040 "Hulkie" props to try on my lightweight EYAS X2 build (more details on the build here on rotorbuilds). The props are well priced and sold by many vendors now. I used banggood as they offer free international shipping which is especially handy if, like me you live outside the US. I'll be comparing these a lot to the Gemfan 2035 4 blades (cheapest on Gearbest at present) which have become the defacto standard for performance and durability in 2" props. Here are the key qualitative differences I've found: Blades are less durable. The material of these blades are more rigid and seemingly more brittle as a result. It takes a lot off effort to kill a 2035 on a light quad but the hulkies seem to like snapping at the hub as in the pic below. Additionally they chip at the tips which the 2035s don't seem to do. Note: they are still much more durable than the king kong 1935 props which although good and well balanced can explode just by staring at them too long. Last pic is where I flew on Tuesday morning rather than working. Shhh.
They are well balanced. Not much else to say here. They are on par with the 2035 and the king kong 1935. Don't underestimate well-balanced props even on a 2 inch quad - I've had some shocking 2" props (looking at you racerstar) They may be able to handle more powerful motors. Although more brittle, these props are noticeably stiffer and I'd expect they will be able to handle a more powerful 11xx series motor better than the 2035 by not flattening out at high rpm. This is only a hypothesis though as I prefer a larger prop/frame when using bigger motors than an 1103. Efficiency/lift feels similar to the 2035. Gemfan's data at the end of this review suggests that the hulkie props generate more lift at the same current compared to the 2035. Purely from my subjective feel they seem to hover at a similar throttle, have a similar punch out power and get a similar battery life to the 2035 - certainly I couldn't pick up a real difference. Note: my quad is very light at 40.5g dry, 58g with 2s 300mah battery. Interestingly the hulkies have a wider blade than the 2035 meaning the total blade area for each prop is roughly the same. Hulkies are louder. New hulkies are louder than the 2035s and louder than what I remember of the king kong 1935 props. Not 5" loud but not quite as stealthy. They have a slightliy bigger diameter. The 2040 version of the hulkies has a slightly larger diameter than the 2035 which is already a hair over 2". No problem if your frame has plenty of clearance but a big deal if you have a frame like the flex ascent v1, x2 elf, x2 eyas and others. At least there is another option - The Hulkie 1940 which has less thrust but less current draw as well as being physically smaller. I have not yet tested so it would be hard for me to comment further on these. So, my overall verdict? I tried these out after getting bored of the Gemfan 2035s since they just didn't break. The 2035s bend on crashes and I'd bend back, good as new whereas the hulkies usually bend half the time and snap the other half. In the real world the performance of the gemfan 2035 and hulkie 2040 is similar but the durability of the 2035 wins it for me. Only reason I'd stick with the hulkies is if I crashed less (not happening) or if I have more powerful motors than needed a stiffer prop. 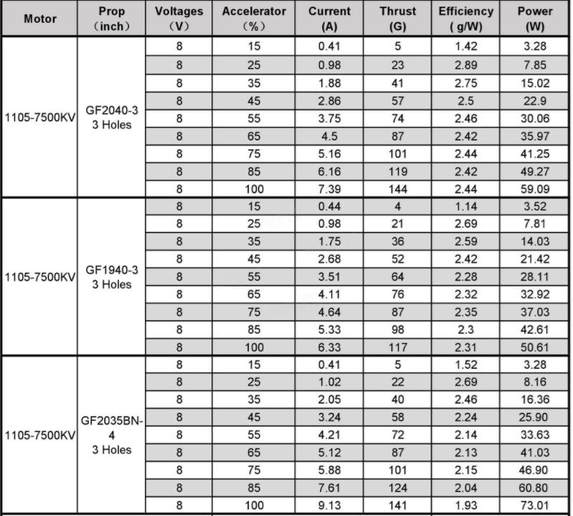 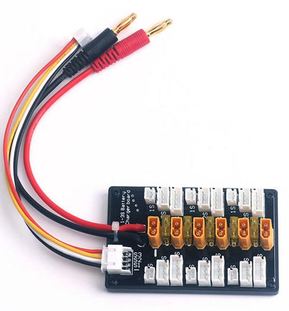 I recently bought a low-cost XT30 balance board that I would share here given it does the job I would expect at a low price: the XT30 1S-3S Plug Parallel Charging Board For IMAX B6 Charger. Although advertised as working with the Imax B6 charger, it will work with any 1-3s capable lipo balance charger that uses banana plugs. The balance board can be used with 1,2,3,4 or 6 batteries with a XT30 connector and standard balance plugs for 1-3s batteries which will cover most micro builds. Each XT30 discharge lead is protected by a fuse if there is a large voltage differential on connection. I also purchased this lead that I will modify to with an XT30 male plug from this set for input so that I can also use this balance board for my batteries with JST discharge plugs. Below is a list of key rules for balance charging but certainly no exhaustive in terms of instructions:
This is part 2 of my review of the Leader 120 by Full Speed from Gearbest. For part 1 click here. As at September 2017 try code HarvestRCnew7 to get this for only $US93.99! 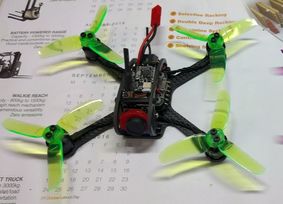 None of the dreaded "brown outs" here Straight up I have had none of the reported issues of brownouts as many of the youtube reviewers found on the first version of the Leader 120. In saying that my review modelis version 2 which I has the fullspeed branded black motors. The default idle speed of which there was a lot of chatter about was set at 10% from the factory in Betaflight 3.1.7. This is very high and reducing it to my regular 3.5% caused no issues. So on to the more interesting stuff! Flight characteristics This is a great little flier, As I expected from hearing the motors run in betaflight they are very quiet and coupled with the well-balanced KK 2840 props it lets off very little noise in flight. Coupled with the size, this makes it much more socially acceptable to be flying in areas that aren't completed isolated. The rates are not stock either and I actually really liked them, even compared to my stock betaflight 3.2.0 settings when I flew my 5" quad immediately afterwards. There are an awful lot of micros that have poor or no tuning from the factory so was escpecially pleased when the tuning here required practically nothing for those either lacking the know-how or too lazy to do. Power is excellent on 2s and comparable to many 2" quads on the 3s - the bigger props and relatively light weight really make these motors come alive. Handling was predicatable and I felt I had good control even in heavy gusts. 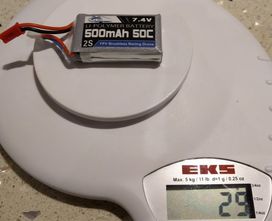 Stock battery The stock battery can be described as adequate. I can see the voltage alarms were set low at 3.0 warning, 2.9 critical to allow for the sag but it keeps you in the air with moderate flying for up to 4 minutes. Considering I was able to flow without esc desync, losing vtx signal or getting failsafe, this probably makes it better than 90% of included batteries out there (not kidding). I'll have a follow up tips and tricks article soon where I look at some of the other internationally available battery options including 3s. FPV - Camera and VTX Ahh a chink in the armour. Hitting a sharp price point eventually means compromise and I think I've found it. Typical of All In One (AIO) cameras this handled low light on a dull day poorly even with the focus correct. Kind of makes branches jump out at you when flying under trees - that's my excuse anyway. Secondly although the VTX does well enough for 25mW, it still only does 25mW. That means that I started seeing breakup at 100-150M away or as soon as I was on the wrong side of even small trees. The good news is you can pop this on your RC car or tiny whoop (I STRONGLY recommed the Eachine E011) and upgrade this one. There is more than enough lift for the extra weight of a micro CCD camera like the Foxeer arrow micro or Runcam swift micro and a Vtx like the new one from fullspeed that is 25mW/200mW switchable to mount on the back. I'll be making such a change in the near future and reporting back in a new article in the tips and tricks section.
Early conclusions
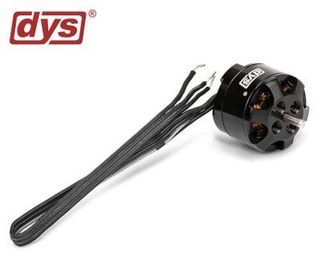
This model is an amazing combination of well-matched parts with good assembly and a custom tune making it compelling on paper. I'm pleased to say that this transfers into flight characteristics and power making it an option you should definitely be considering if looking at a micro in 2017. I personally think this frame size that allows for a 2.8" prop rather than 2" is much better matched to this motor size and not nearly so sensitive to weight meaning for a more robust and enjoyable flying experience. My only real gripe is the video quality where camera light handling and vtx power lets it down. It is hard to argue at this price point though and in a future article I'll be doing a budget mod to address this. Most interestingly, I built a model from parts that was very similar to this before this model was announced. Cutting to the chase the PNP version from Gearbest was more quiet and felt more solid in the air (perhaps due to the tune/rates) than my own build. Power was similar: although noisier I think the DYS motors had an edge although for the small difference I prefered the ones in this PNP model. I preferred the adjustible power vtx on the model I built to bump up power but this is really starting to split hairs. This does have me second guessing my build vs buy strategy but I think this is testament to the well thought out component list Full Speed have chosen. Buy the Leader 120 from Gearbest  Firstly, thank you to Gearbest for supplying this model in exchange for a full review including my observations and recommendations from having built a very similar quad from parts. I'll review here and then run a series of tip, tricks, mods depending on how it flies stock. You can find the PNP version (no receiver) here. As at September 2017 try code HarvestRCnew7 to get this for only $US93.99! I'm going to skip the unboxing, I don't have anything to add other than the picture of all the parts included below, so straight to the good stuff. 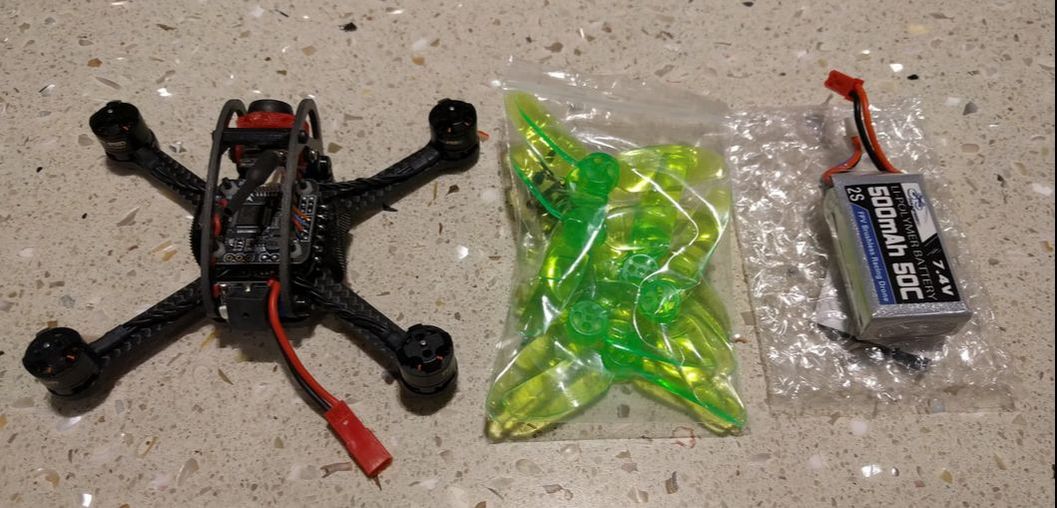 The parts included and build quality have improved... First off the motors are no longer and unbranded red 1104 7500kv. They are now branded SZ speed and full speed but are still rated the same. From what I can see the shaft length extending through the bell is shorter. Great idea - the only job this does is to centre the prop which the screws hold on. Less stress when trying to put tight props on (looking at you Gemfan 2035) and you don't have a 1.5mm drill bit. Below is a comparison to my DYS 1104 7500kV. You can see my review on these here
The comparisons to these motors don't stop there. Both are similar external size, and the magnets are simlarly strong - very notchy compared to the racerstar motors. From there the leader 120 motors are better. Wires are multicore, slightly thicker and much more flexible and easy to manager. On spin up in betaflight they are so quiet and smooth! Not noisy like the DYS even when they were new. In fairness the DYS are powferful so if the stock leader 120 motors get anywhere near this I'll be happy, especially given the improvements. This flight controller and ESC is ubiquitous and first appeared on the ARFUN90. I've reviewed one in full here - in short reliable and well featured. What impressed me here was the quality of soldering and the cable managent, just so clean - see below. I wasn't going to compare my efforts but I'd already soldered in the receiver and the macro image makes me feel inadequate! From what I can see of the earlier reviews, this looks to have improved substantially. 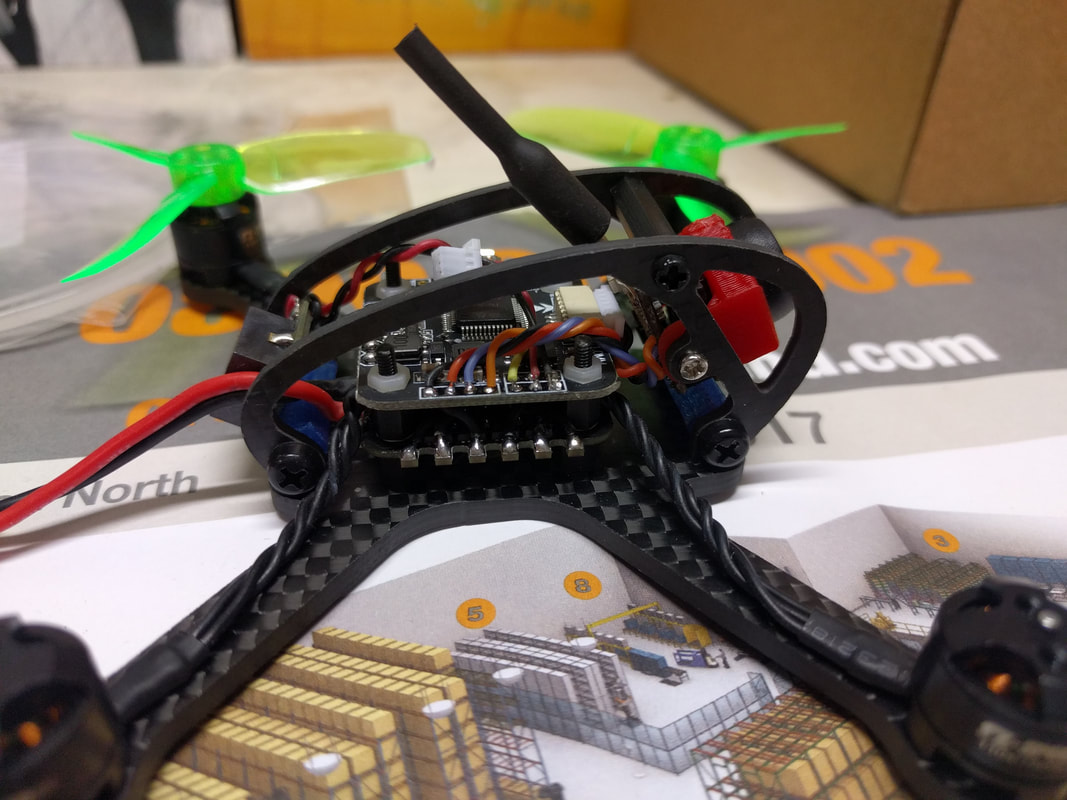 Betaflight setup and the Flip of Death This model shipped with the full release at the time of writing - 3.1.7 (3.2.0 still in release candidate). Interestingly along with the physical changes the software settings have been changed to address some of the brownout/flip of death issues the early reviews had. Most notable digital idle is set at 10%. Since I'll maiden this with stock settings I'll go with that and see if moving back to my standard of 3.5% is still viable. 10% is not ideal for me as you will never be able to fully chop throttle for flips and whatnot. Cool to see that they have addressed it and looking forward to seeing if this issue may have gone altogether. I'll post some pics of the key betaflight screens for prosperity below (flip through them) but I intend to move to 3.2.0 as soon as I have completed initial flights and can confirm everything is functioning as expected. Weight I'm something of a lightweight jukie when it comes to miniquads, benefits include longer flights, better agility, greater crash resistance through lower intertia. See the gallery below for the various weight measures but in short 64g dry, 94g AUW ready to fly with the stock 2s 500mah battery. This include an ibus FS82 1g receiver which was not present when I too the photos. This is a very respectable weight for a micro that swings 2.8" props as these props generate a significant amount of lift in combination with a motor of this rating. All this and it includes my favourite beeper/led combo (reviewed here) - a beeper is a must for micro quads as you can loose them even in short grass! I can anyway. Size comparison to other micros This is not a big model by any stretch. The beauty of these micros - and to be clear this is still a micro - is you can fly in small areas (not indoors!) with less danger and concern to the public. They are also quick to get in the air and consumables like batteries and props are cheaper too. This model measures 120mm diagonally motor to motor and offers most of the experience of a 5" FPV quad. Picture below compare to an E011 typical tiny whoop and an 80mm EYAS x2 with 2" props
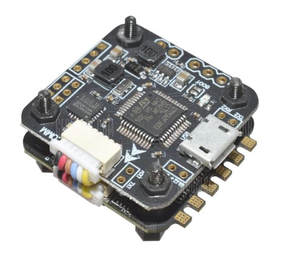 This 20mm x 20mm F3 flight controller and ESC combo is probably the most common combo appearing across BNF or PNP micros and so there is a lot of information around on it. It is sold by GearBest as Mini Brushless F3 Flight Control System. As at the beginning of September it was not available so would recommend the FuriBee Flytower Plus Mini F4 Flight Controller which uses the same 20a ESC but has the faster F4 flight controller processor. Key features for this board are:
Probably the only thing I really need to say about this combo is that for me, everything has just worked as I had expected, no issues with upgrading and using features of betaflight, even the release candidate of 3.2.0 with dynamic filtering. I've never had a brown out on this unit, either on my 2 inch build or 2.8 inch build. There's not much else to say, no quirks or issues and it makes sense that many manufacturers base their build around this one. I'd buy this again (update - I actually did for my lightweight 2 inch build) My recommendations? This is pre-wired and built into the tower. Wire up as below and you should be away. If you want a lower stack height see my tips and tricks coming soon... See below for the all important flight controller pin out diagram:
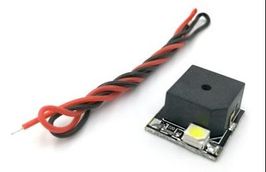 Not massively exciting this one but cheap, lightweight and very functional. The FULL SPEED FSD - BBV1.0 5V 80dB 10lm Buzzer is a lightweight (1.3g) buzzer and LED combo that solders just to you buzzer output on you flight controller. When activated it will beep loudly and flash a suprisingly bright LED. I cannot recommend one of these enough to act as a lost model beeper bound to one of the auxillary channels on your transmitter and secondly as a low voltage warning if you have no OSD or you fly line of sight. In case you weren't certain, the LED is very useful for locating in the dark. Just sayin'. Grab a few already and wire them up to anything with a buzzer output.
 Introduction
First Impression My first impression here was not great - I was not used to the notchiness or seemingly noisy bearings and I had heard bad things about the wires. This was largely solved during build and first few flights - the bearings settled down, the notchiness was the sign of strong magnets and the wires were manageable although still difficult to solder compared to multicore silicon wires. Flying on a 2 inch quad These firstly went on a 2 inch quad here but it felt like it was working to hard just to stay hovering. It was super quick on punch outs but general flying was not enjoyable. My thoughs after some time that the motors were too much for the props (King Kong 1935 or Gemfan 2035) so decided to try a larger build Flying on a 2.8inch quad I transplanted the running gear over to a FD120 frame which is more commonly know from the excellent PNP leader 120 on this build here. The improvement was immediately noticeable - hovering at a lower idle and flight with a lot more control and resolution, really shining with the larger 2.8 inch King Kong 2840 props. It is fast on 2s and mental on 3s. Although I am a big fan of lightweight for micro builds especially, this build could manage the weight a lot better... batteries ranging in weight from 48g 2s 950mah to 18g 2s 300mah was not as different as you would think. Final thoughts and recommendations Firstly I would encourage soft mounting for absolutely all brushless motors. Here is a link for 11xx series motor soft mounts on thingiverse, I got 12 printed for less than $US3 on 3dhubs. Secondly I think these are too much for a 2 inch prop. You may have a different experience but this is mine. I thought a 2.5-2.8 inch prop is right at the sweet spot or 3 inch for a 2 blade like the gemfan 3025. I find the motors themselves well built and very powerful. They have the ability to draw a lot of current, especially on 3s. Because of this I would recommend these 7500kv version for 2s although they are certainly capable of 3s without overheating - I do actually run 3s more often than 2 on this quad. Having had my time again I would have gone 6500kv for mostly 3s as they are more efficient: less current, more torque, longer run time with a small hit on top speed. If I was building the same quad tomorrow from scratch in 2.5 inch and 2s, I would by these again. For 2 inch I would rather go for a lighter build based around 1103 motors. |
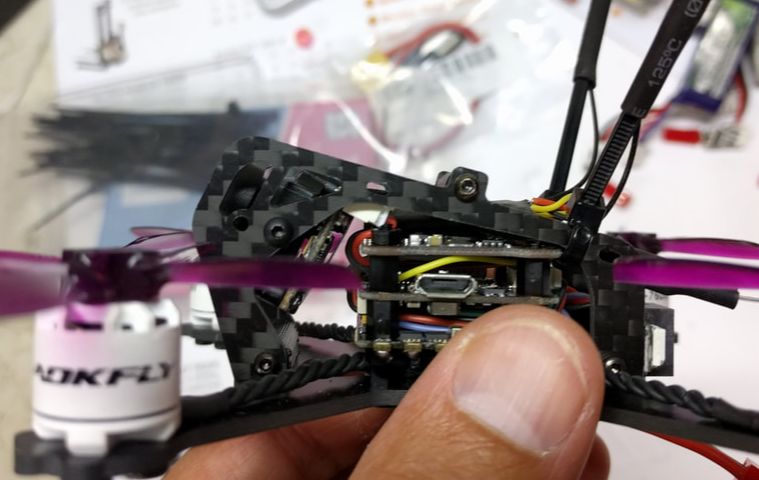
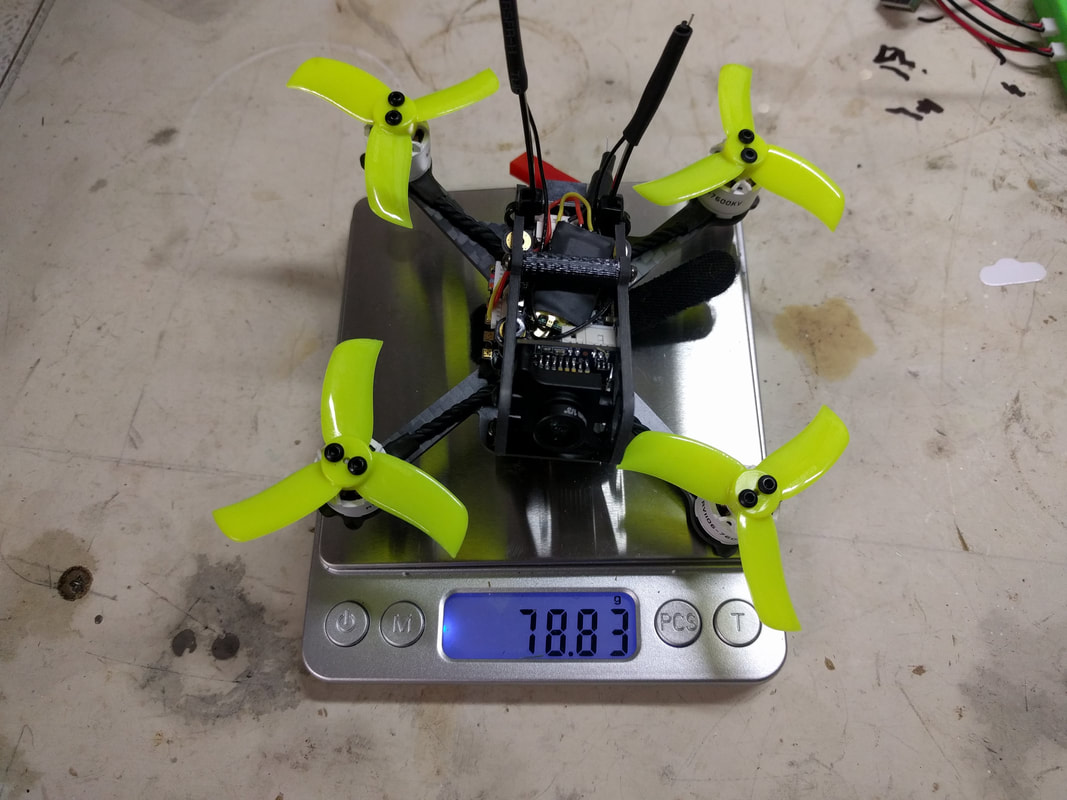

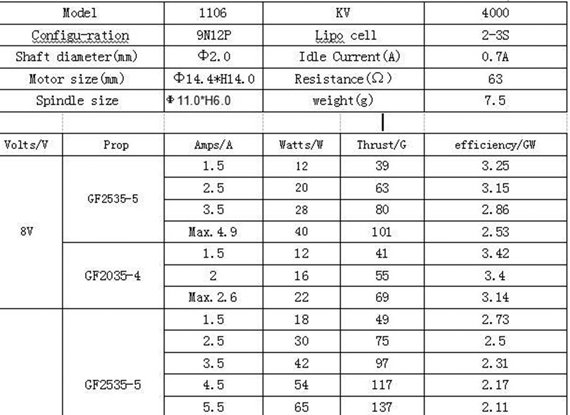
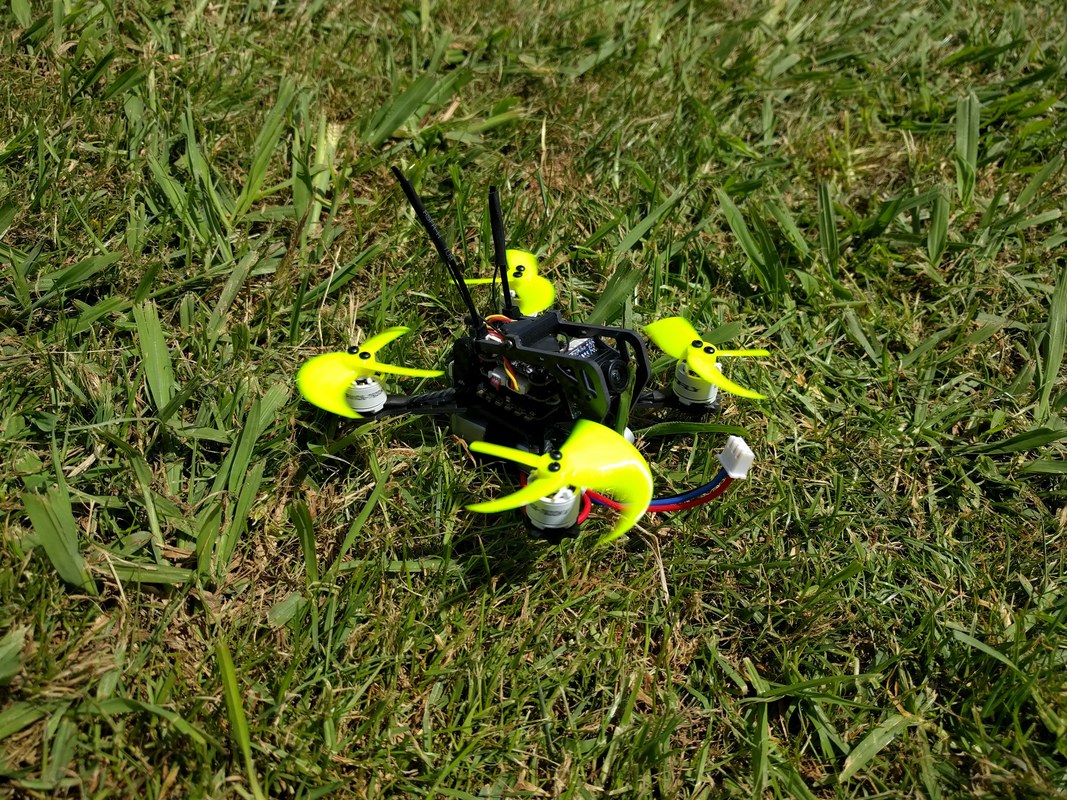
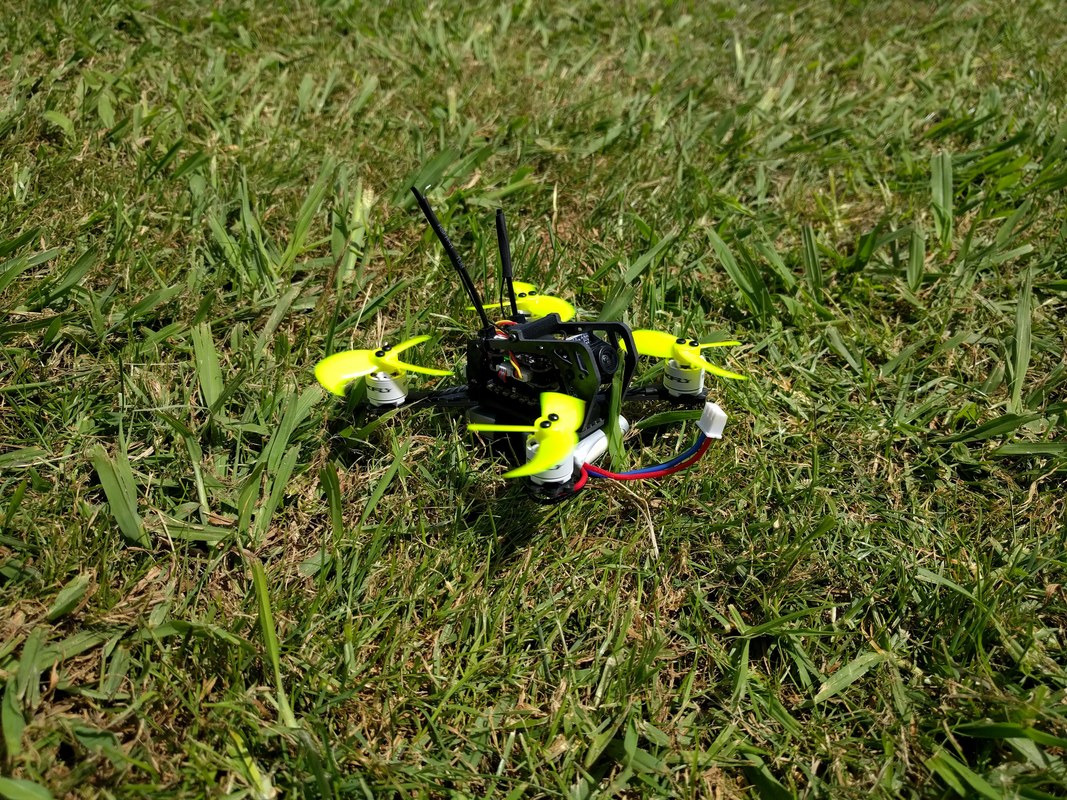
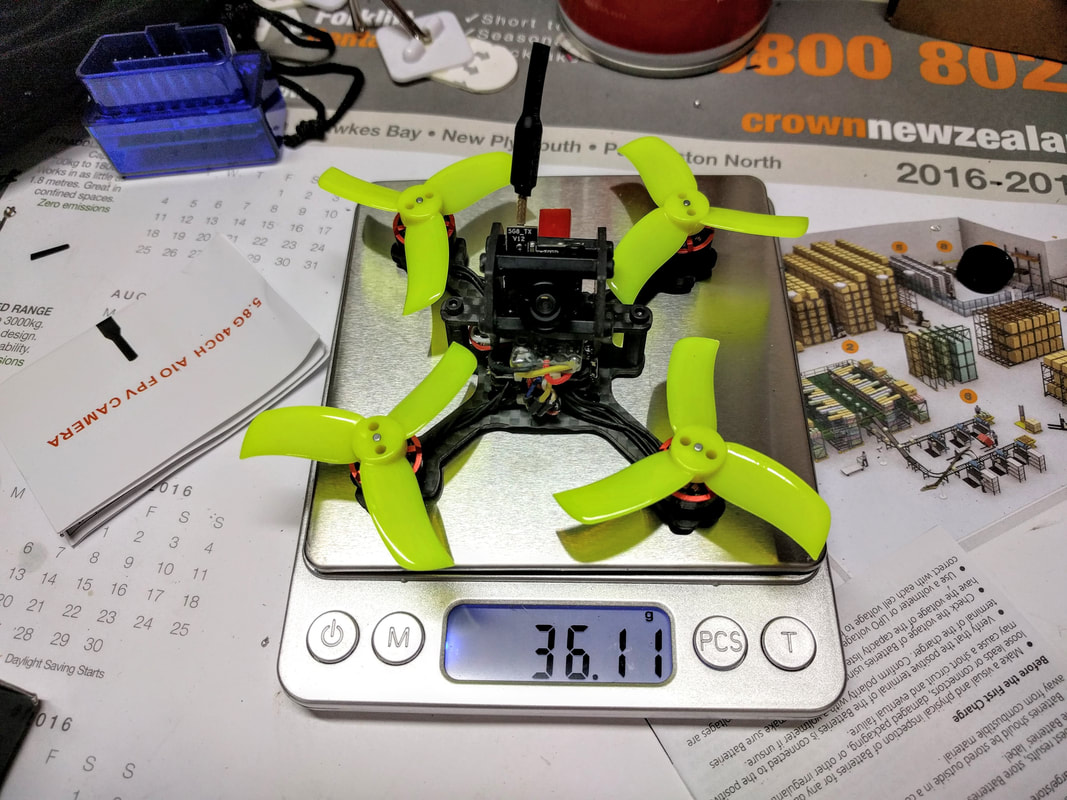
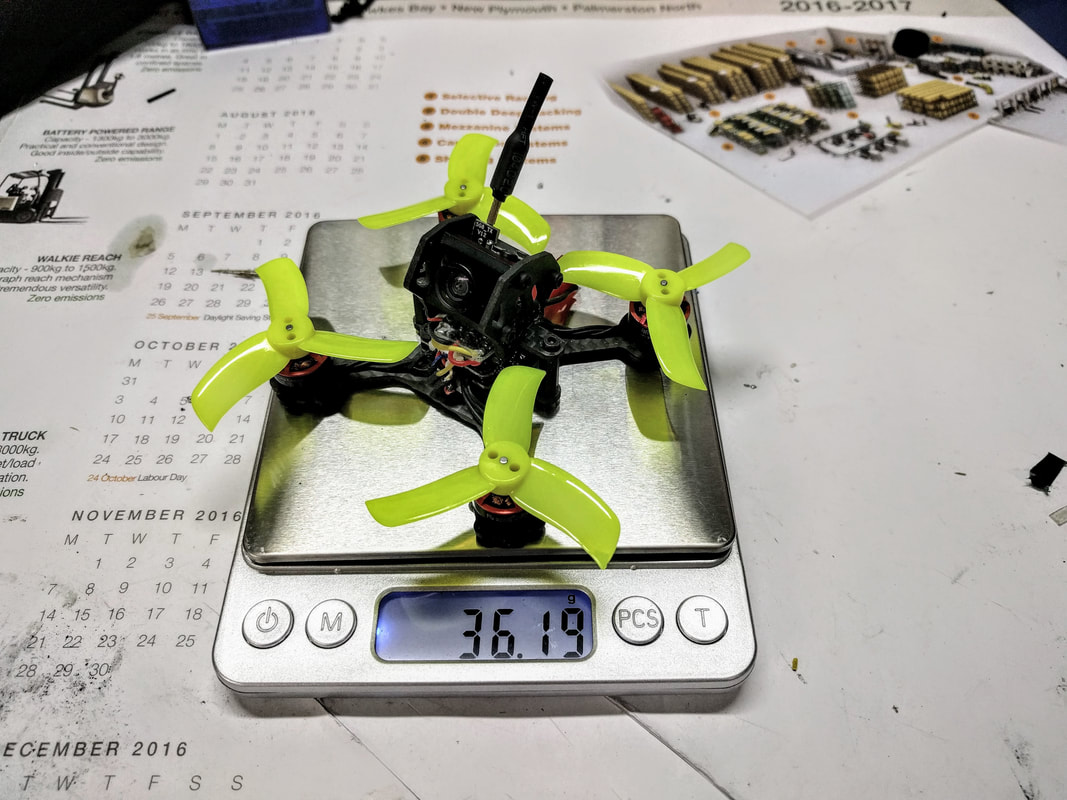
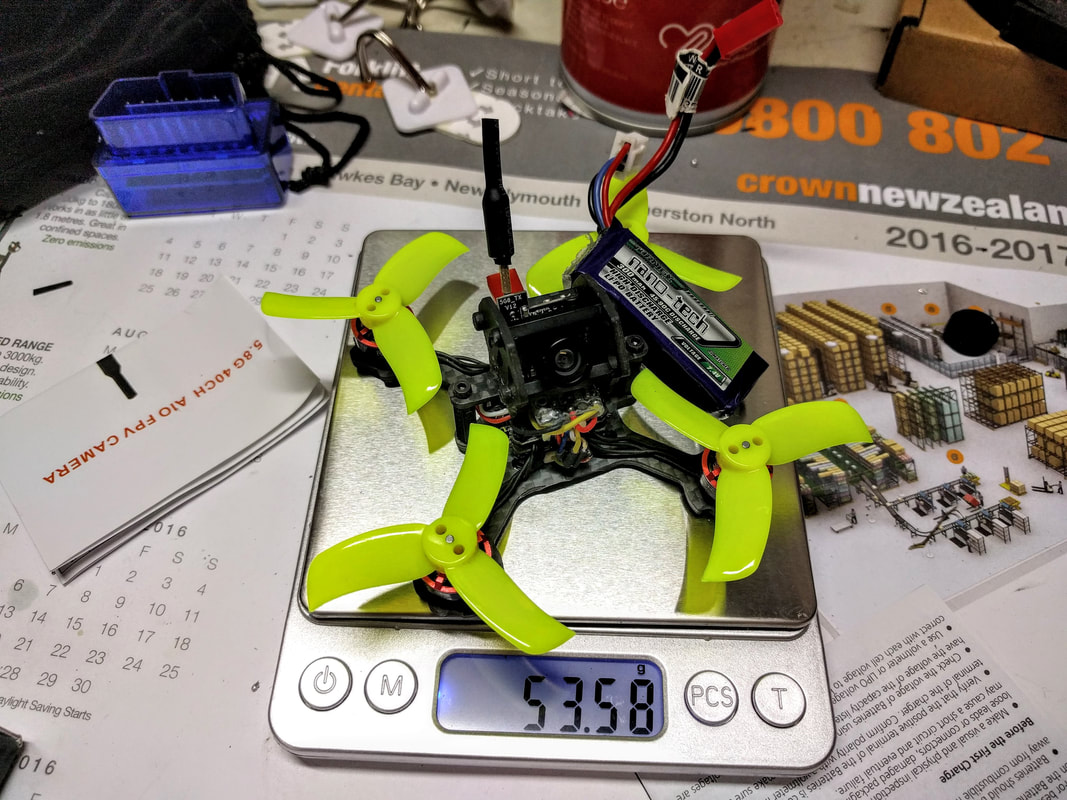
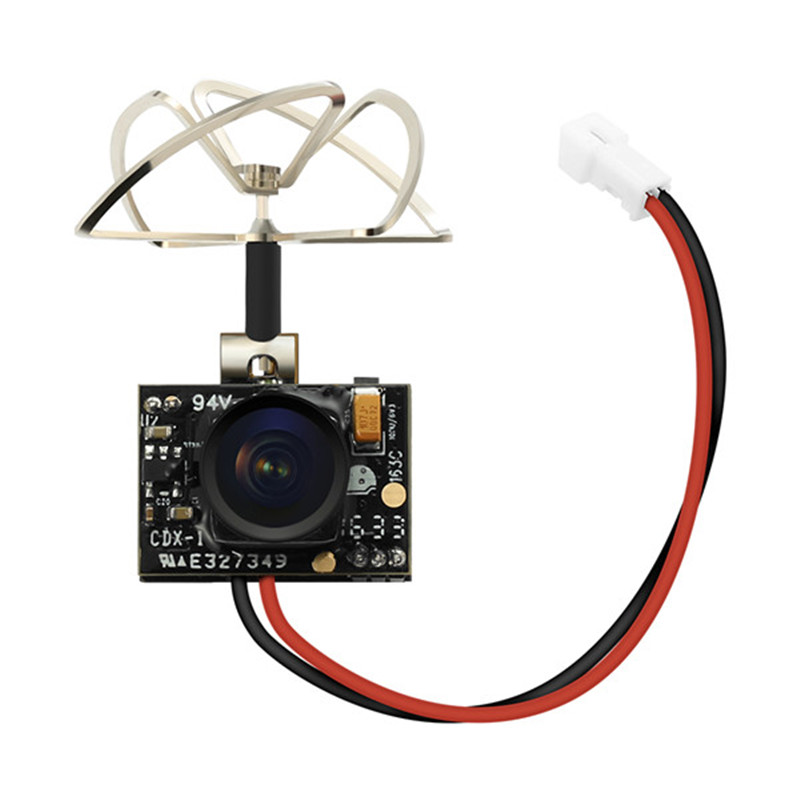
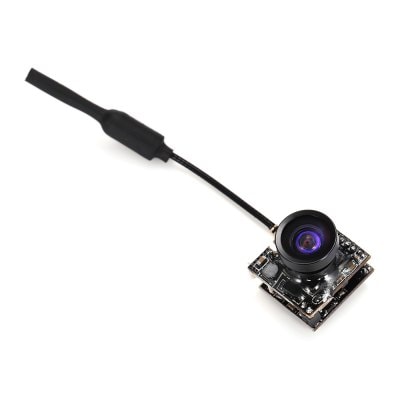
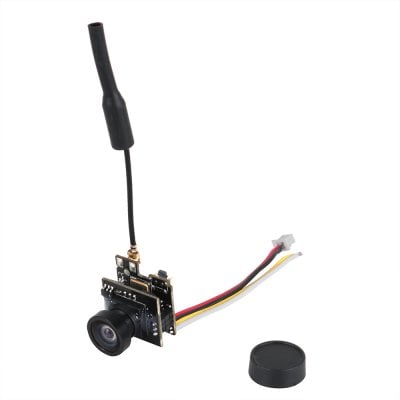
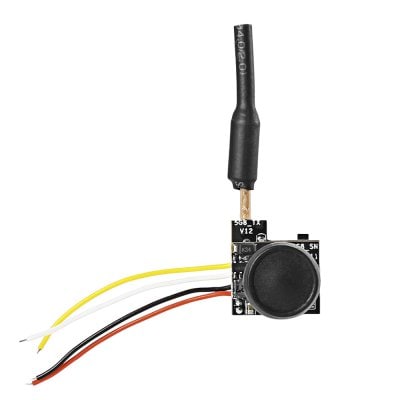
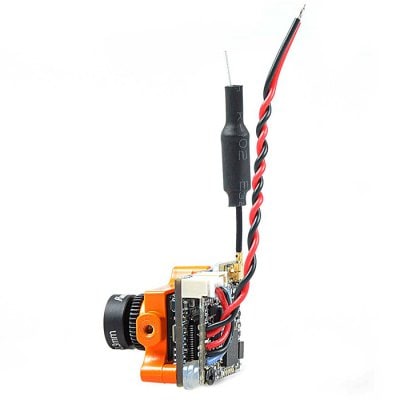
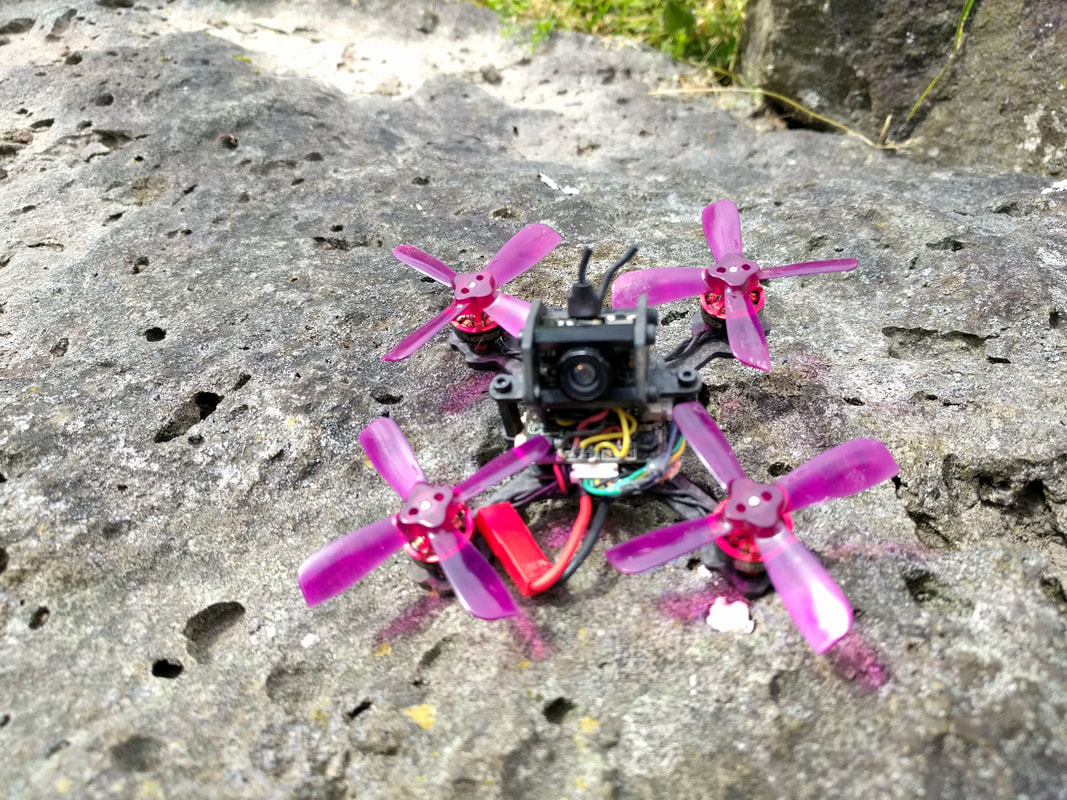
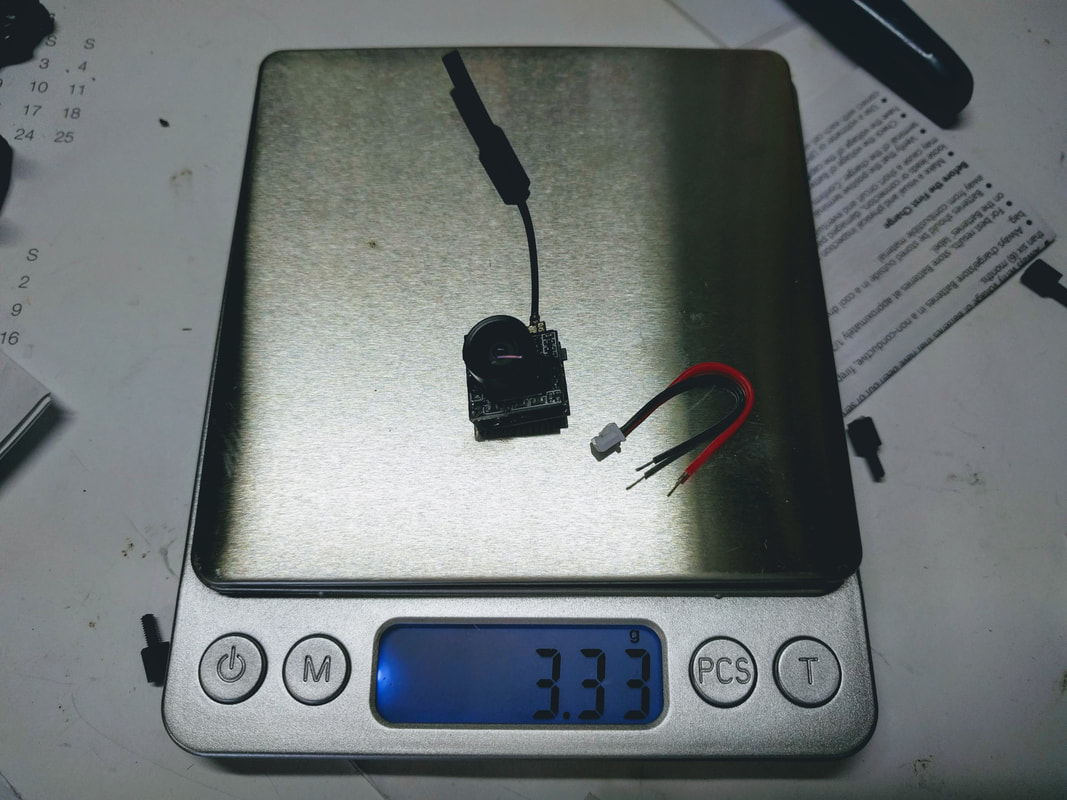
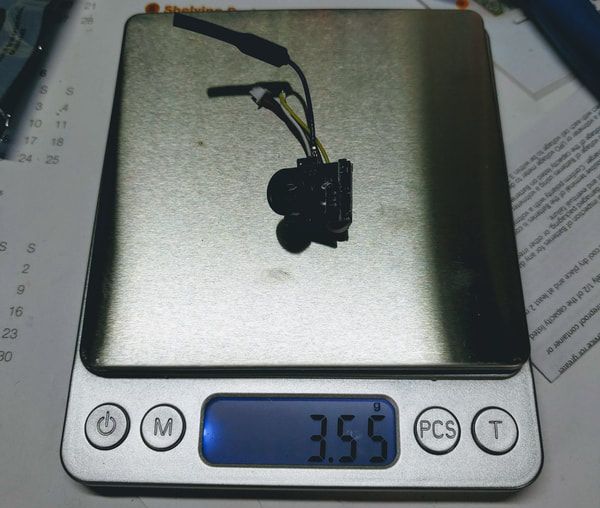
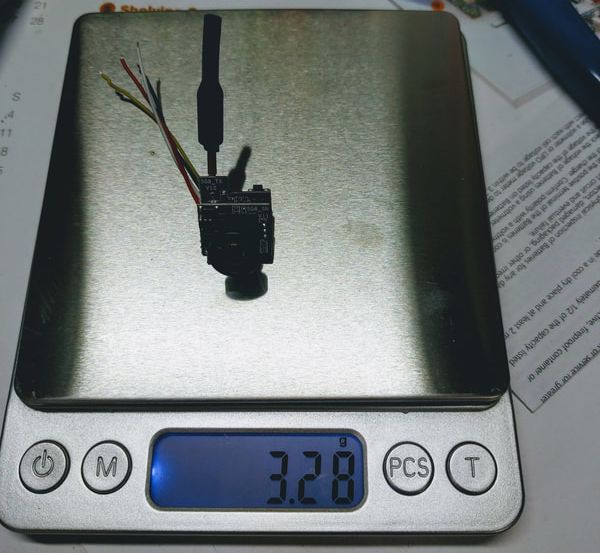


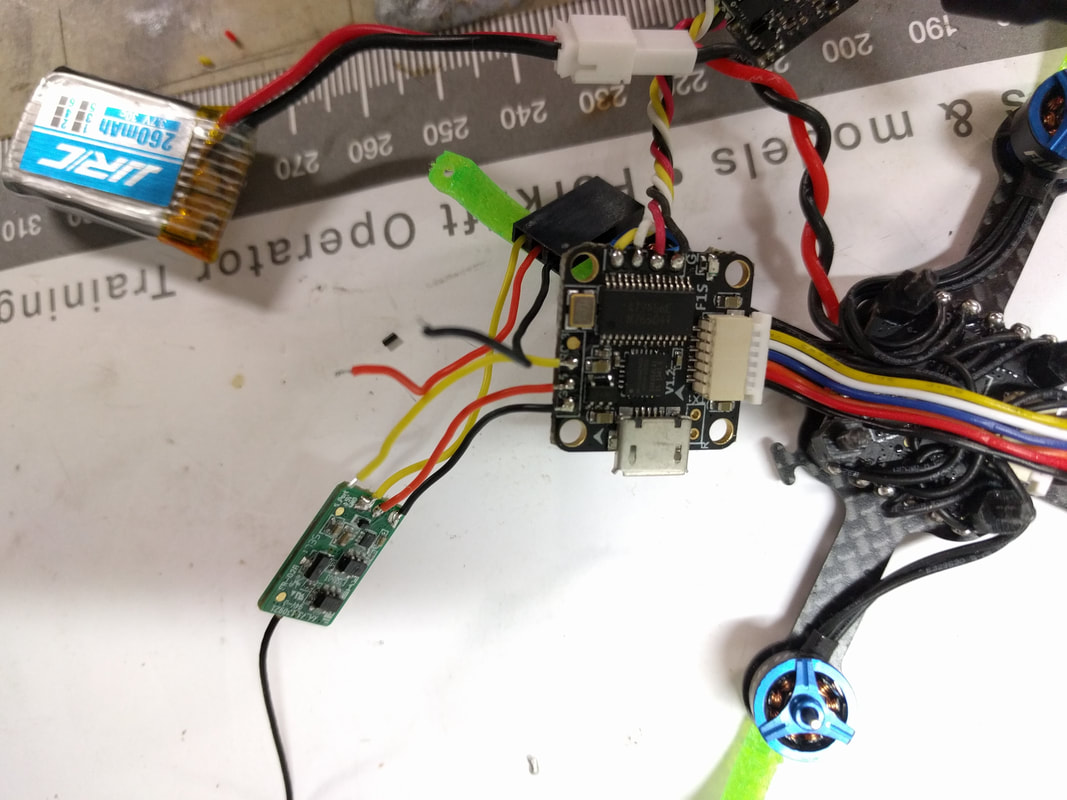
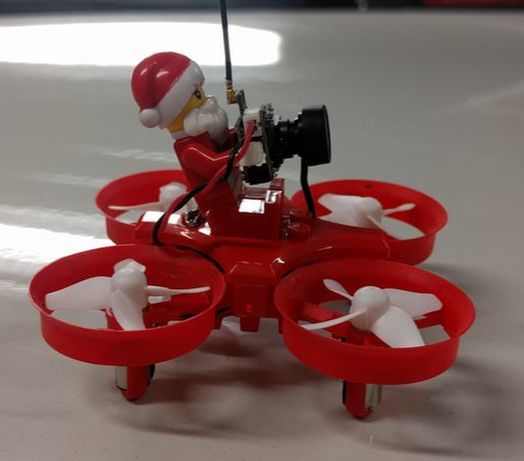
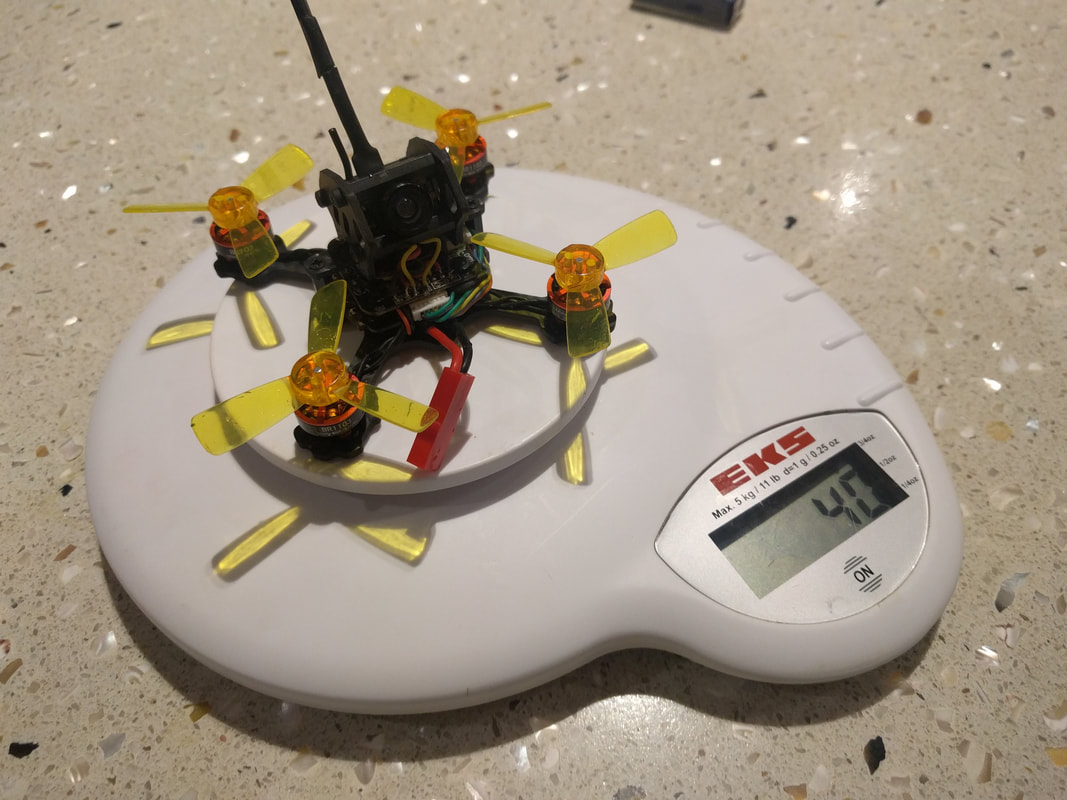
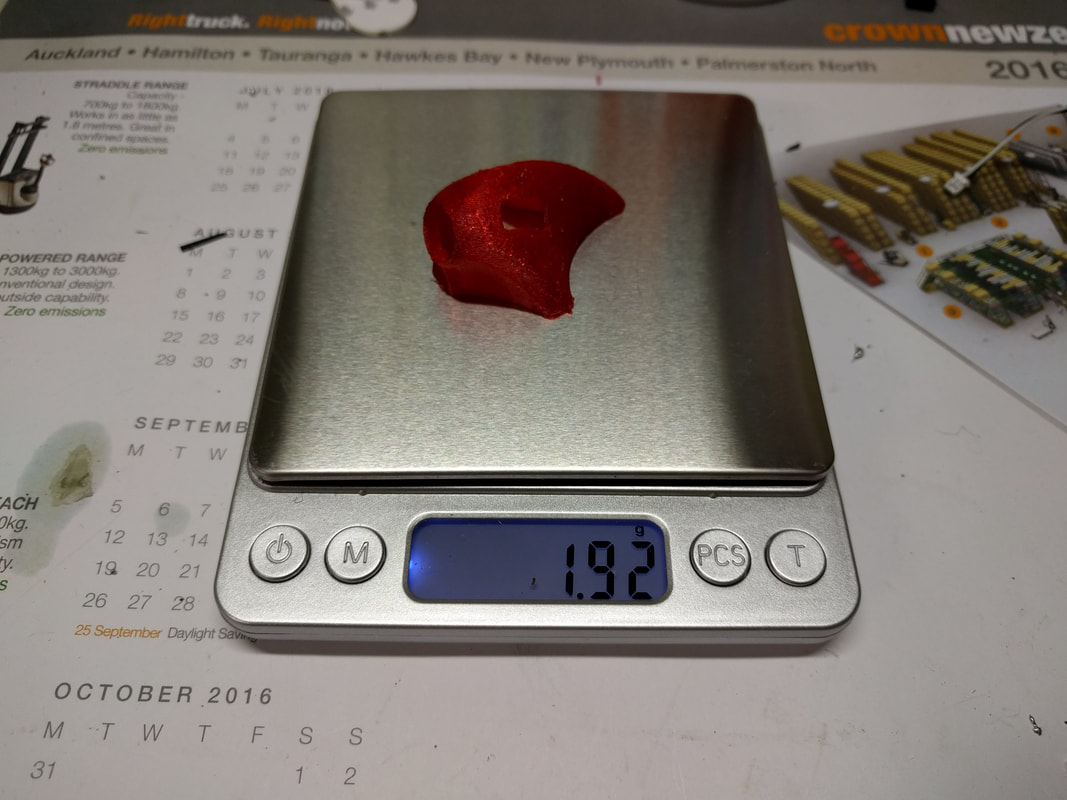
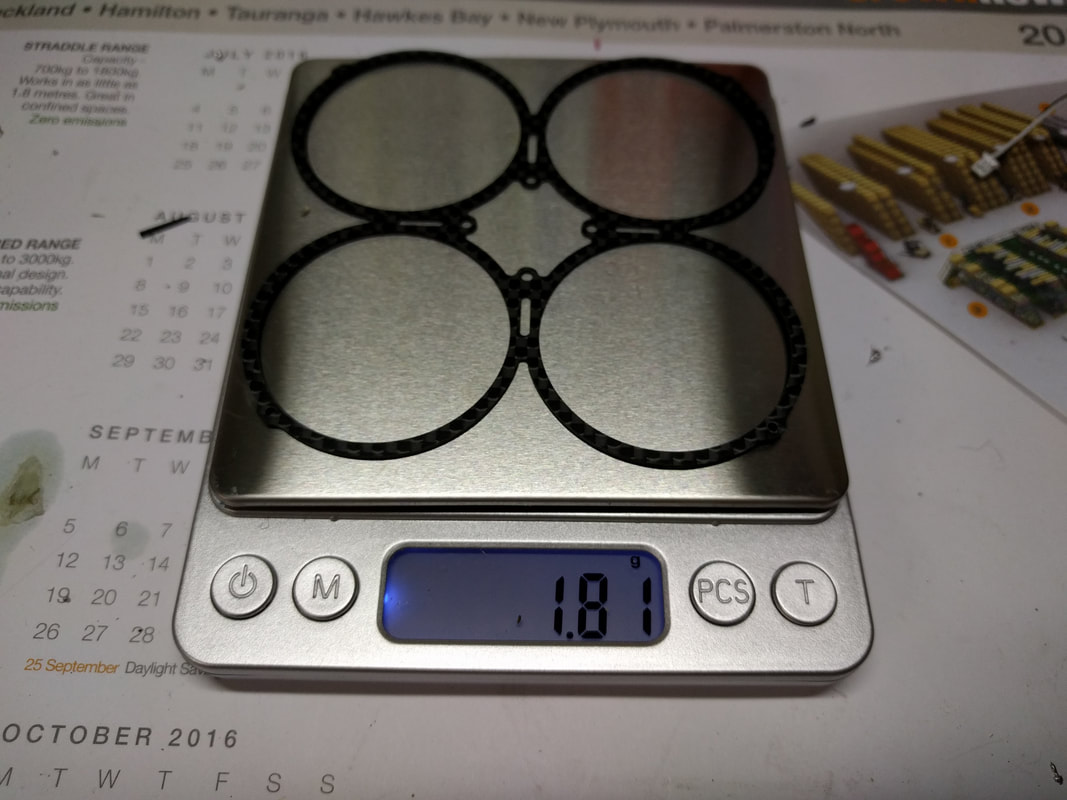
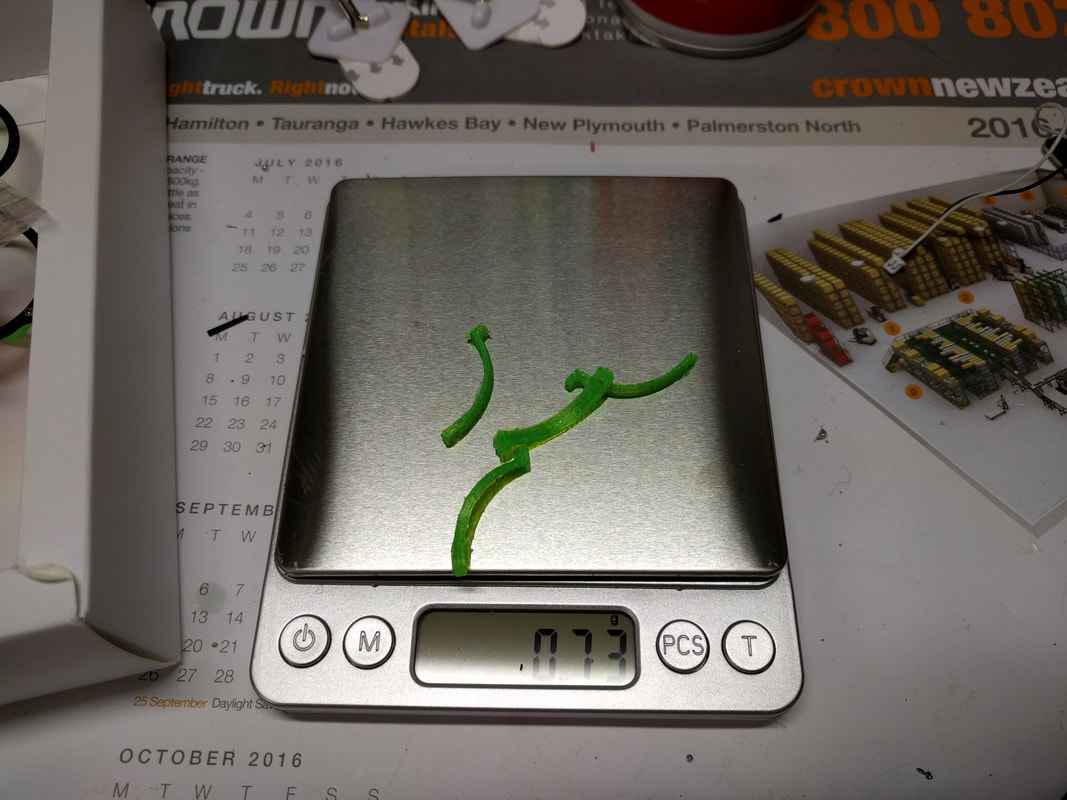
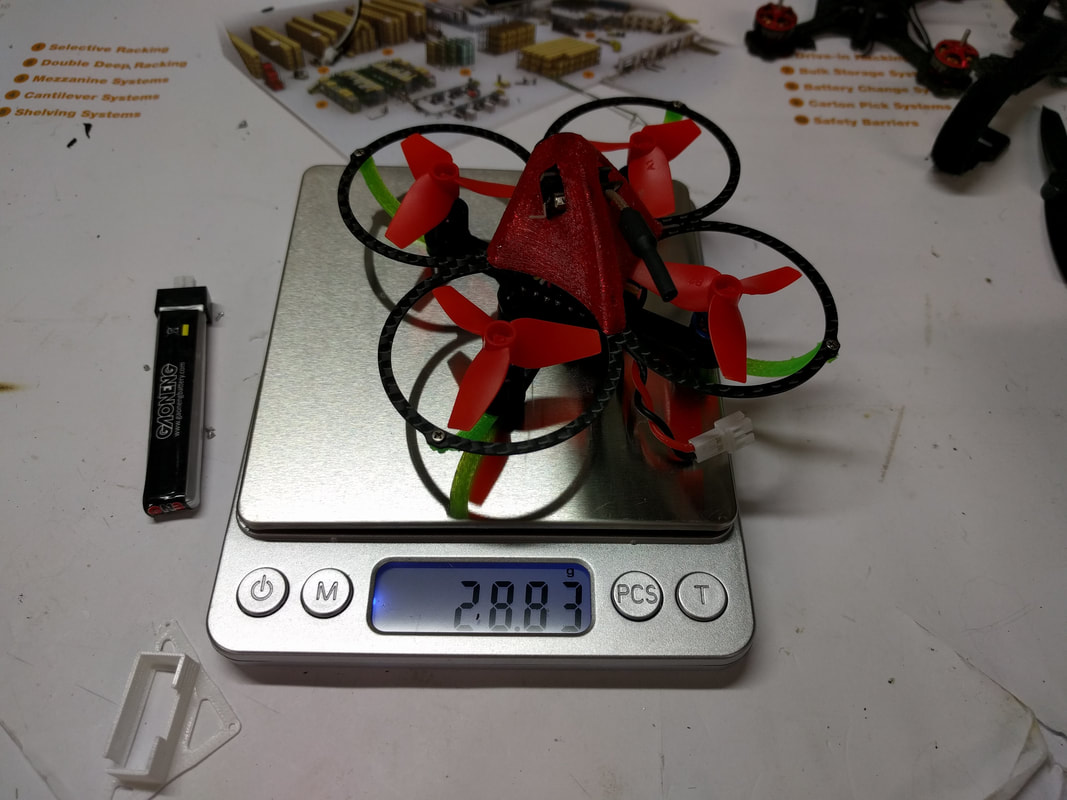
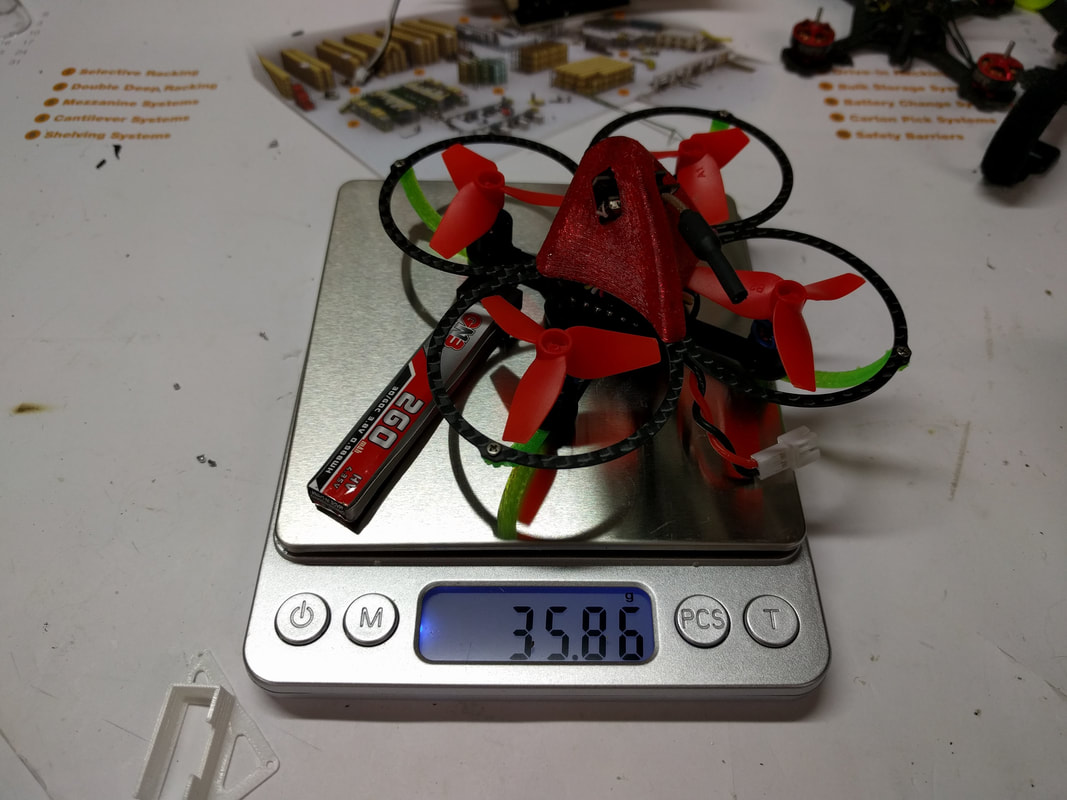
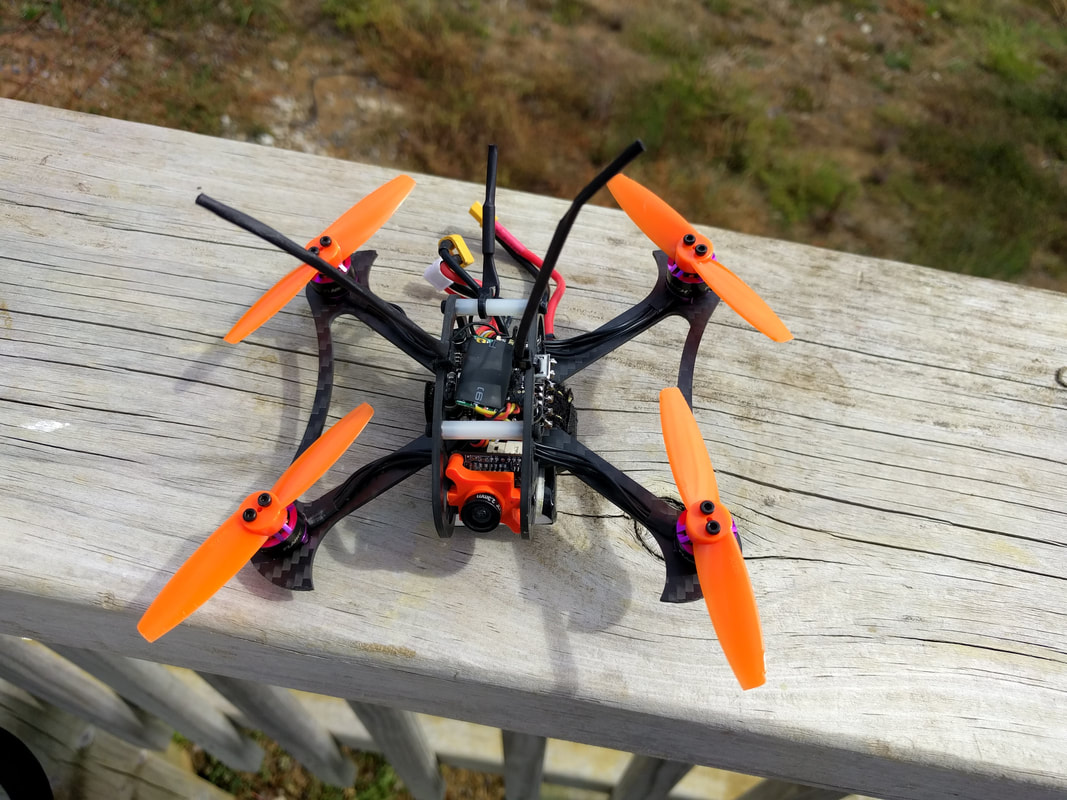
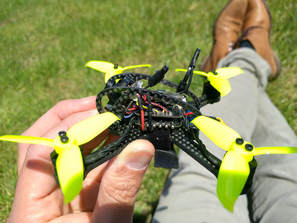
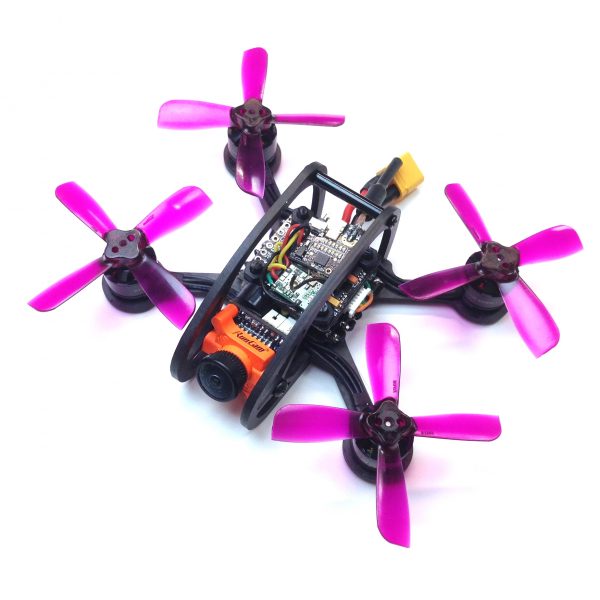

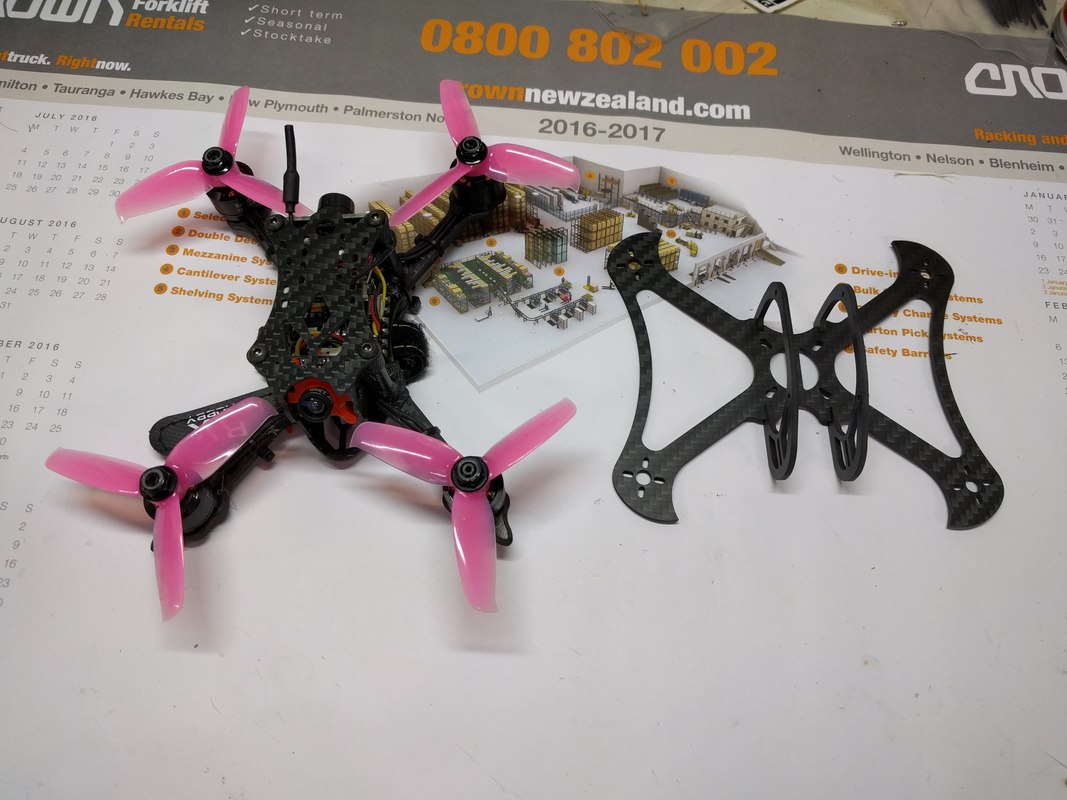
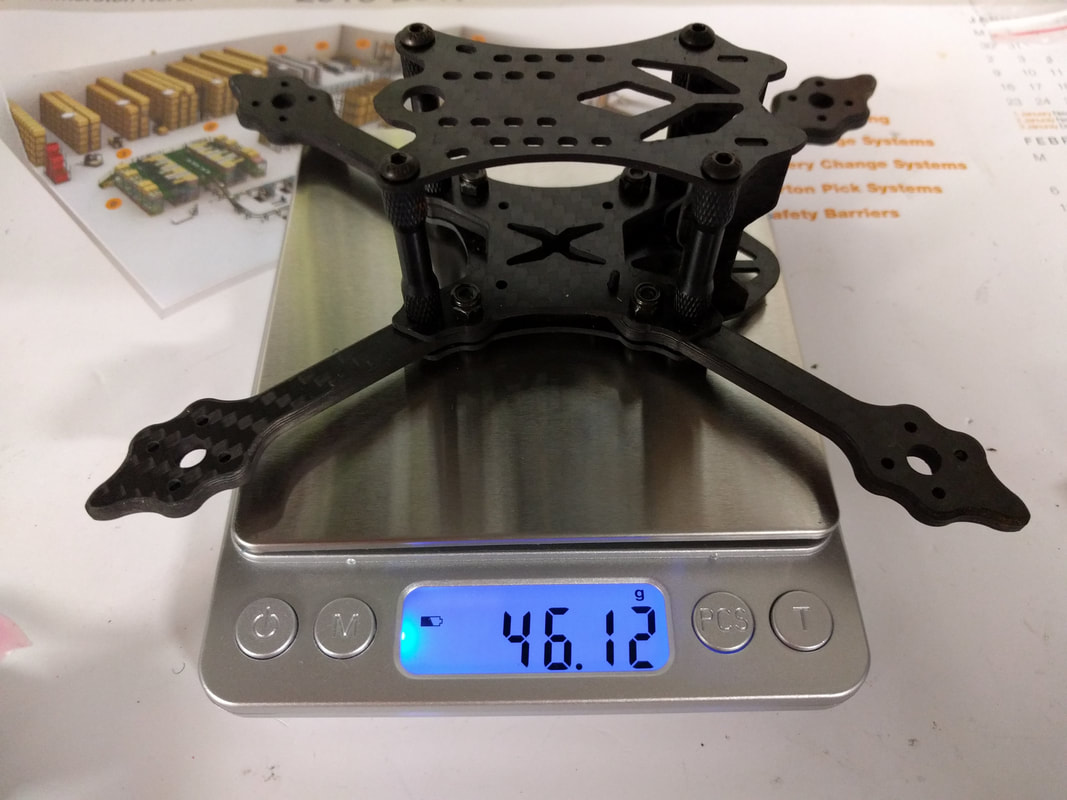
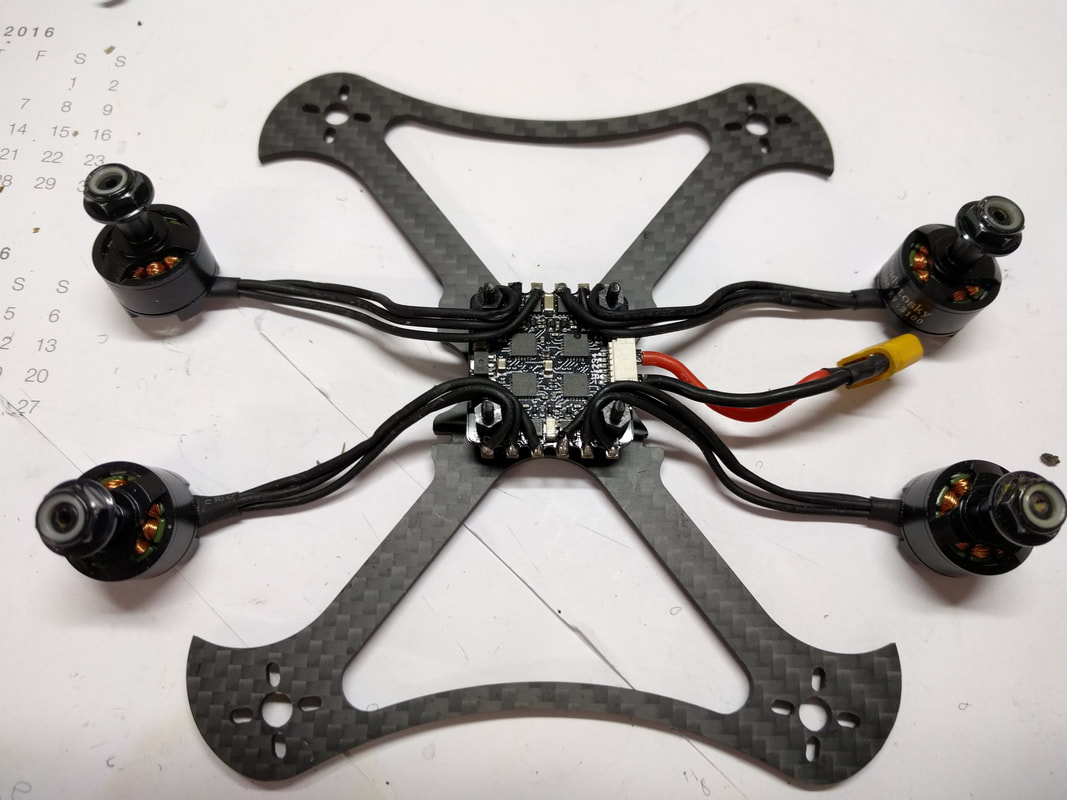
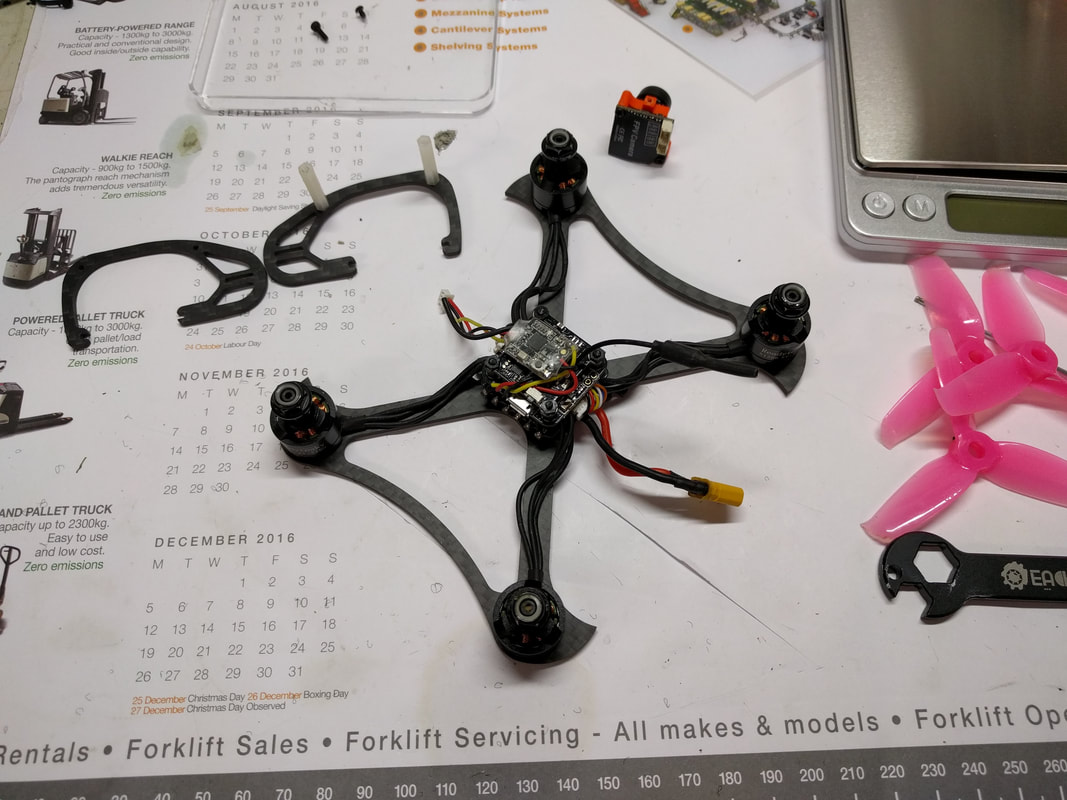

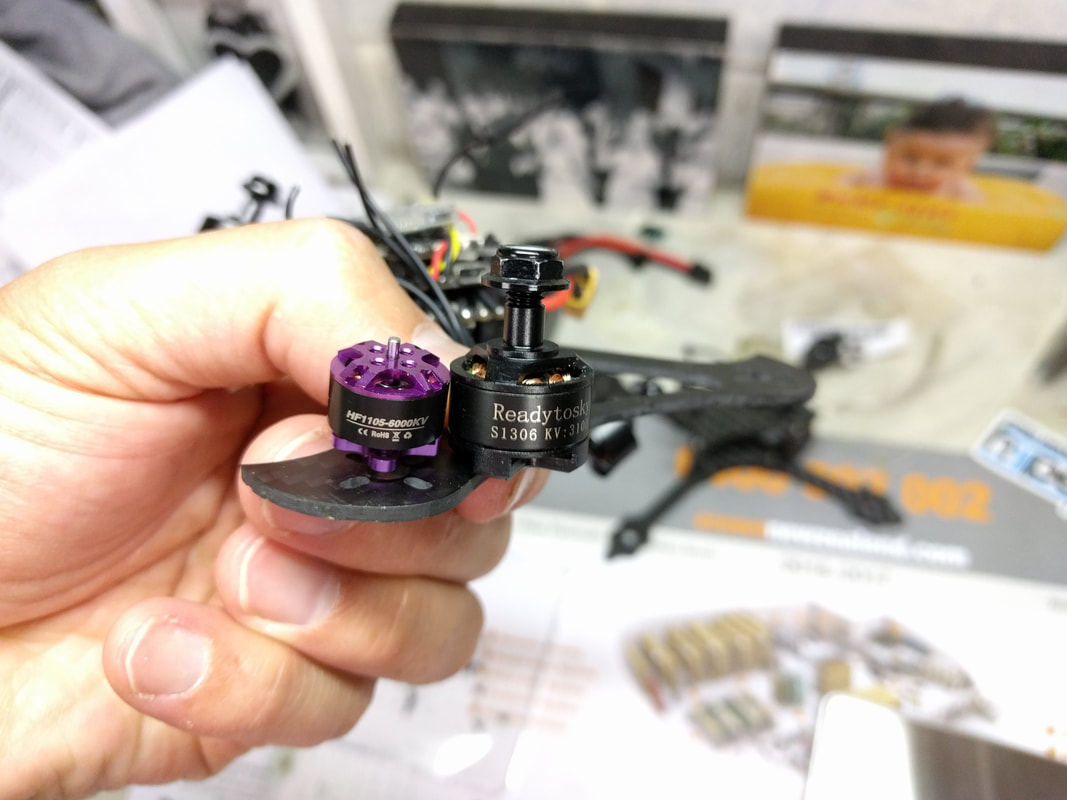
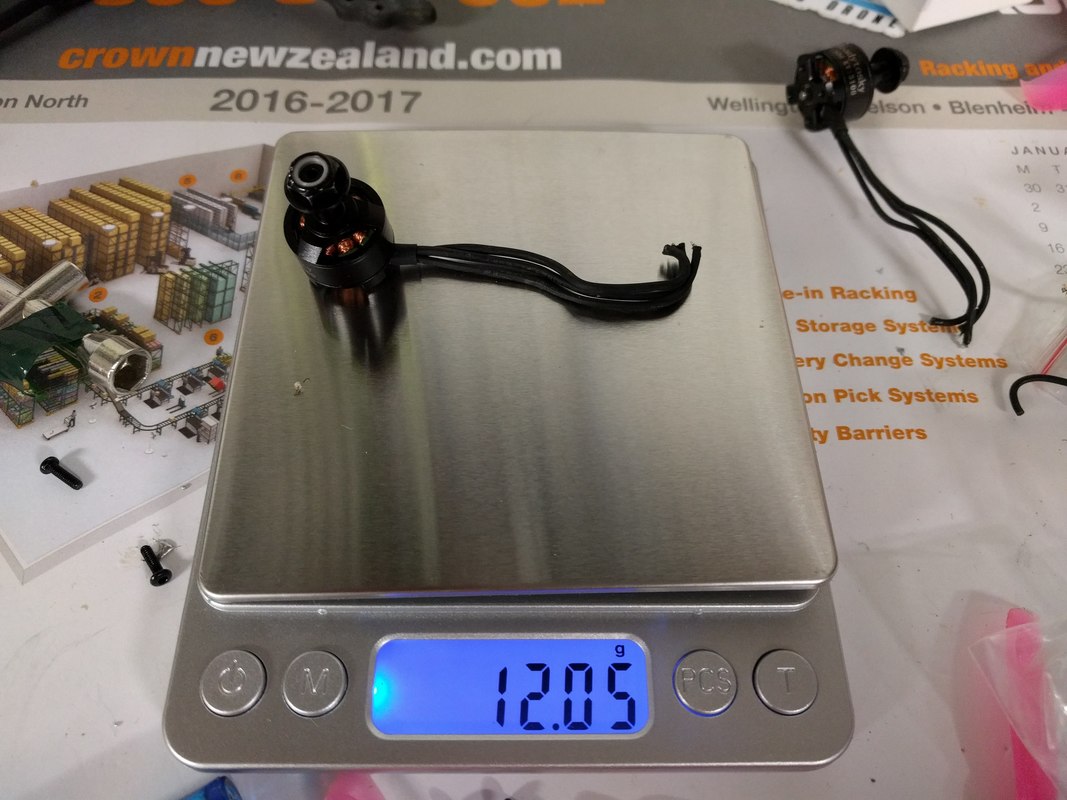
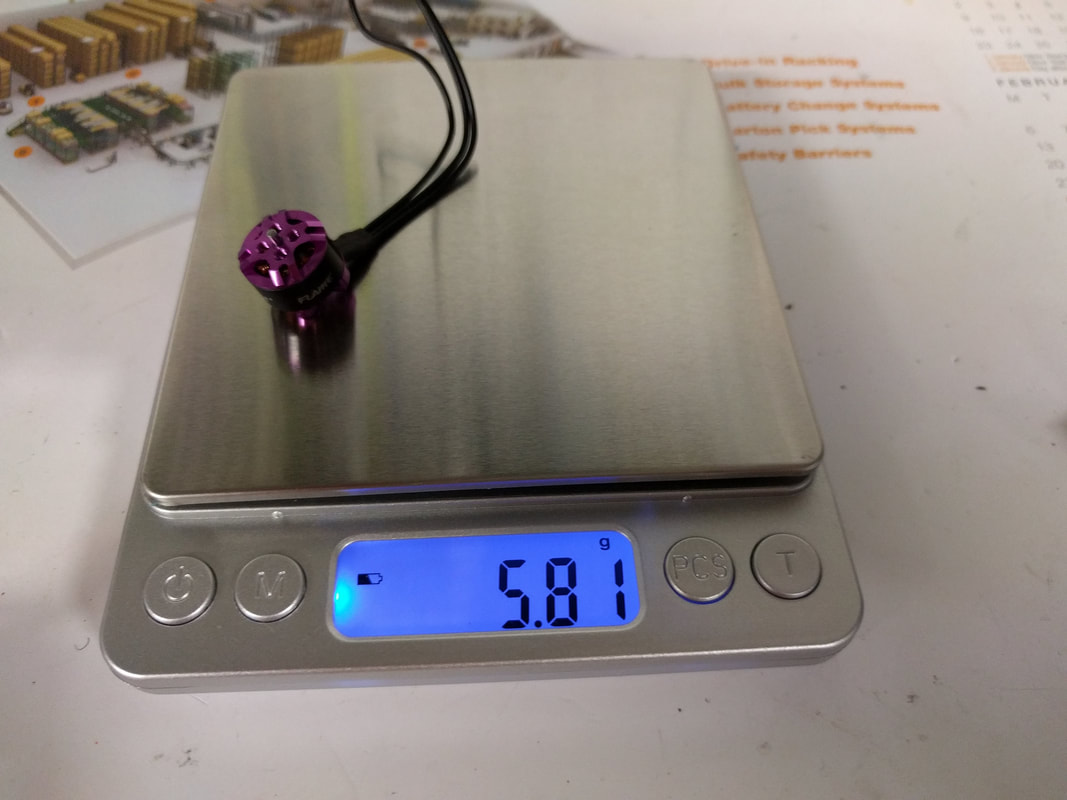
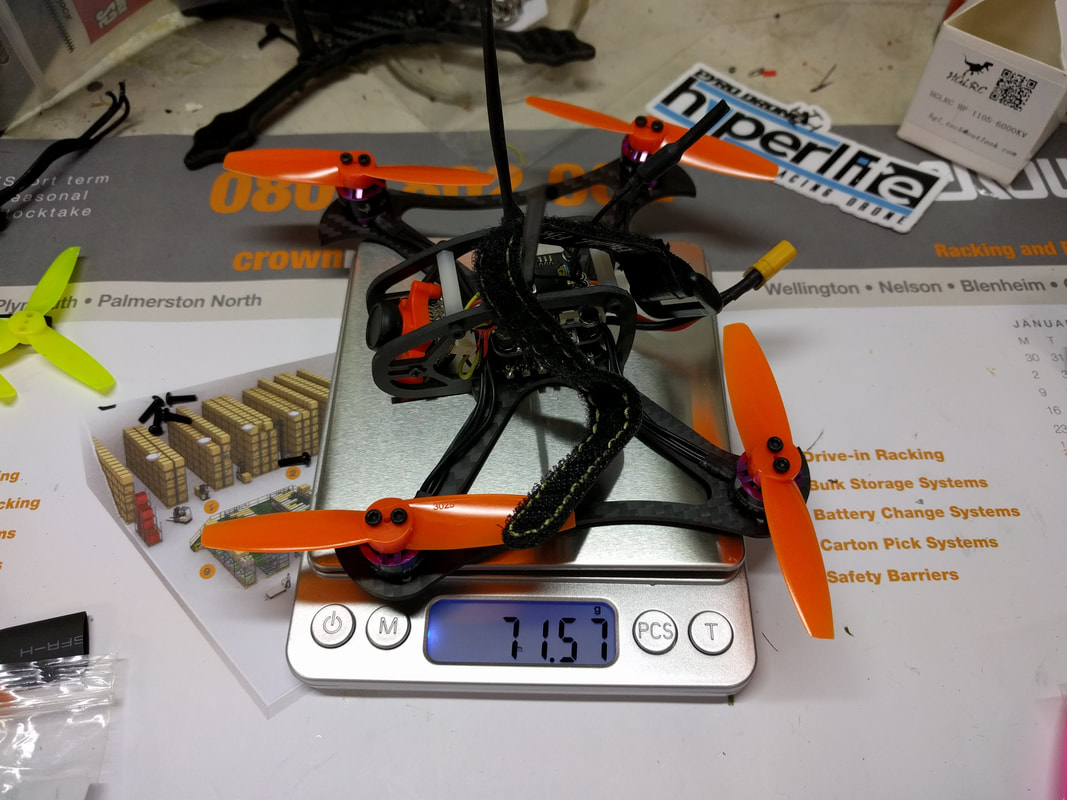
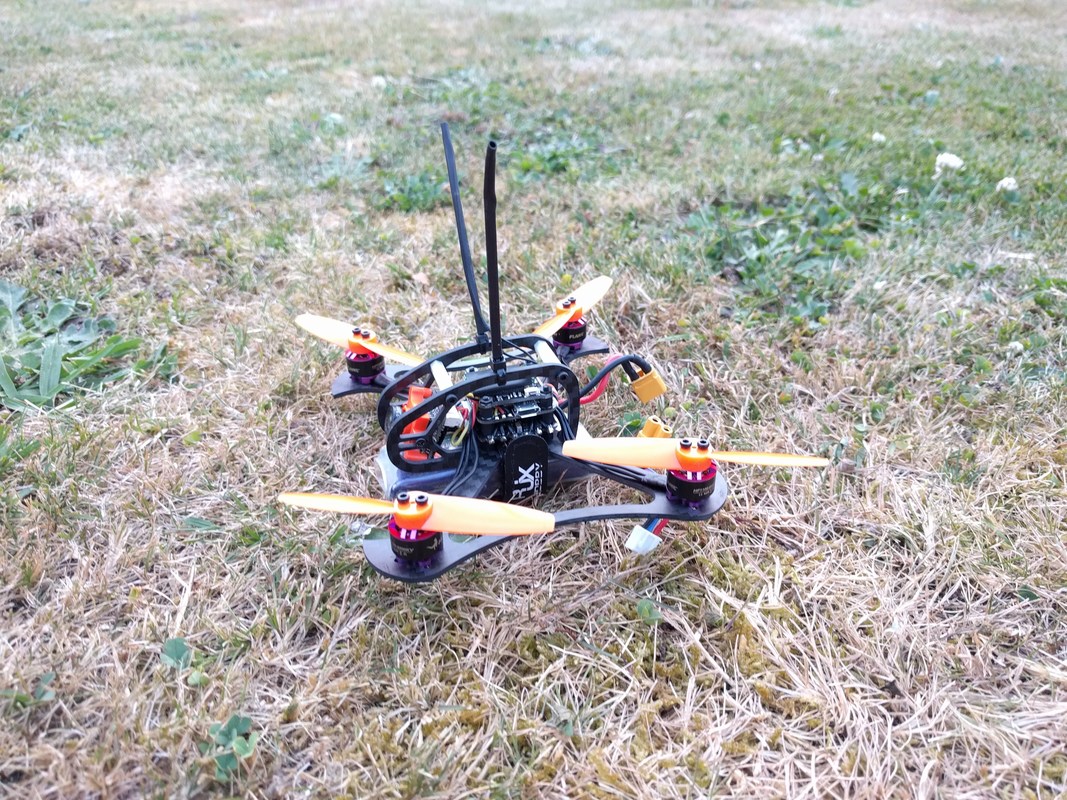
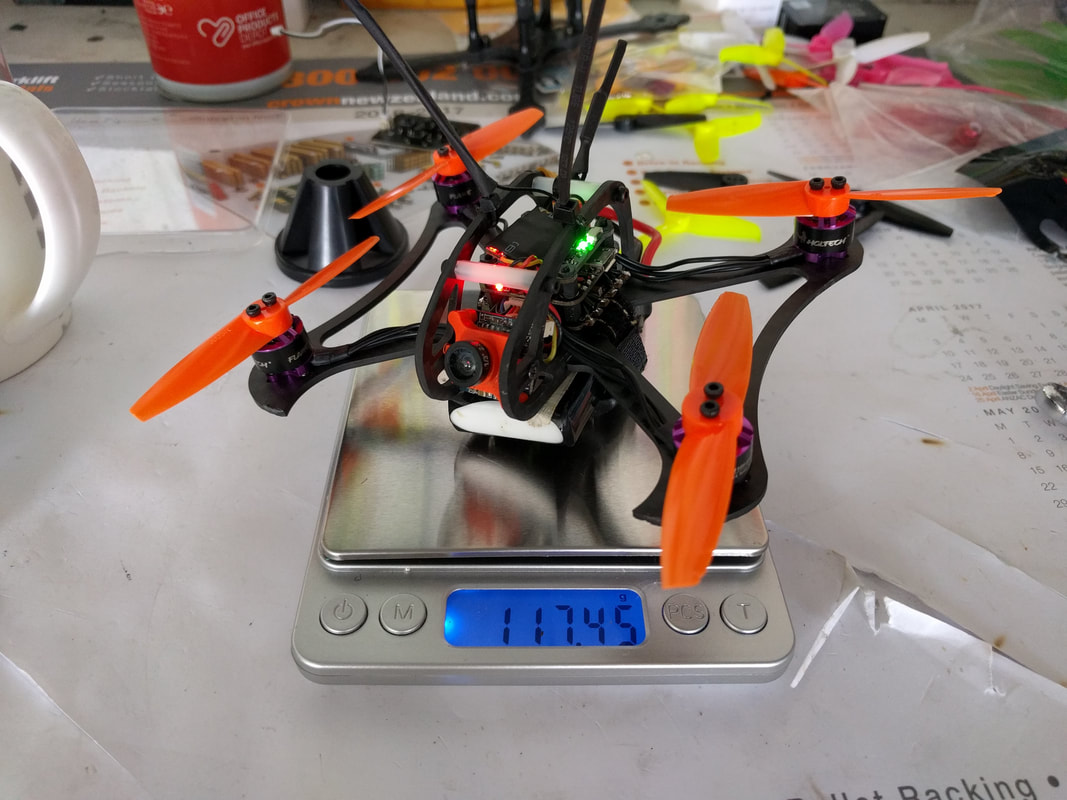
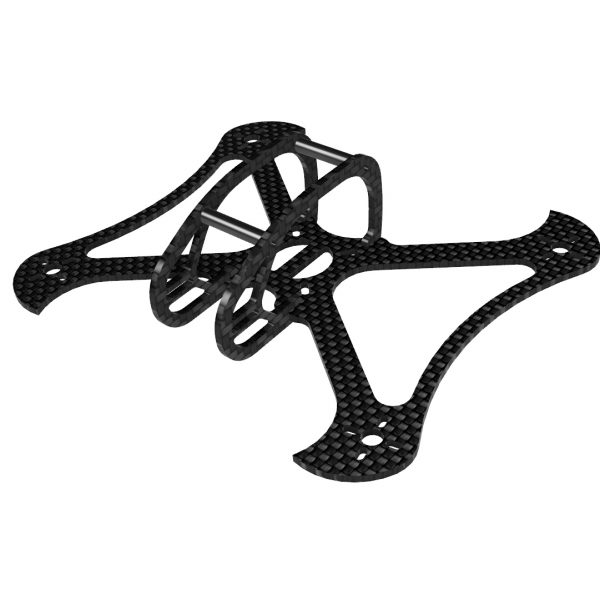
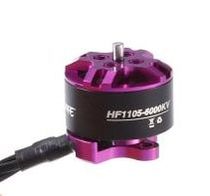

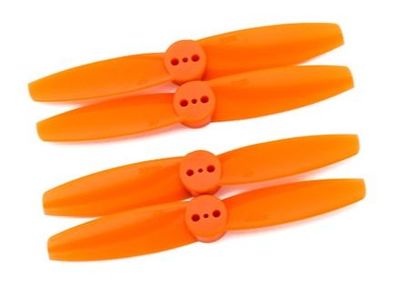
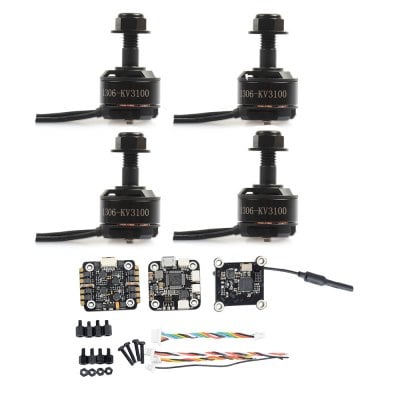
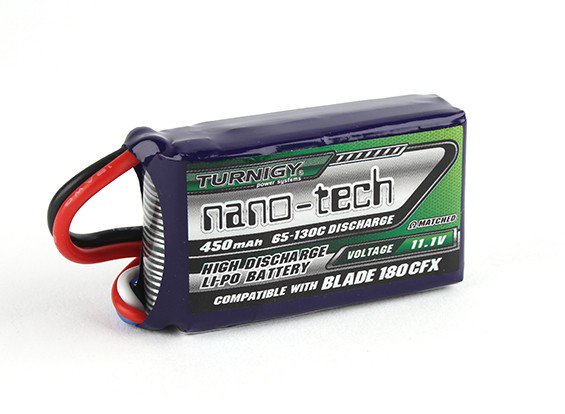


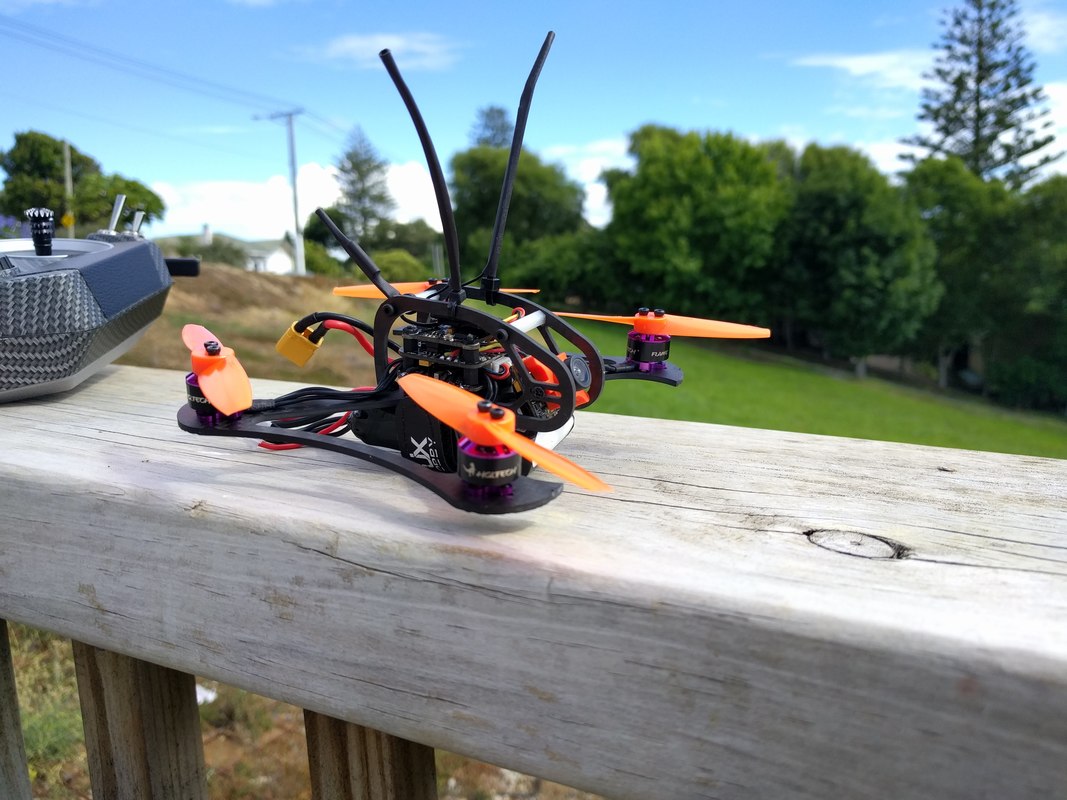
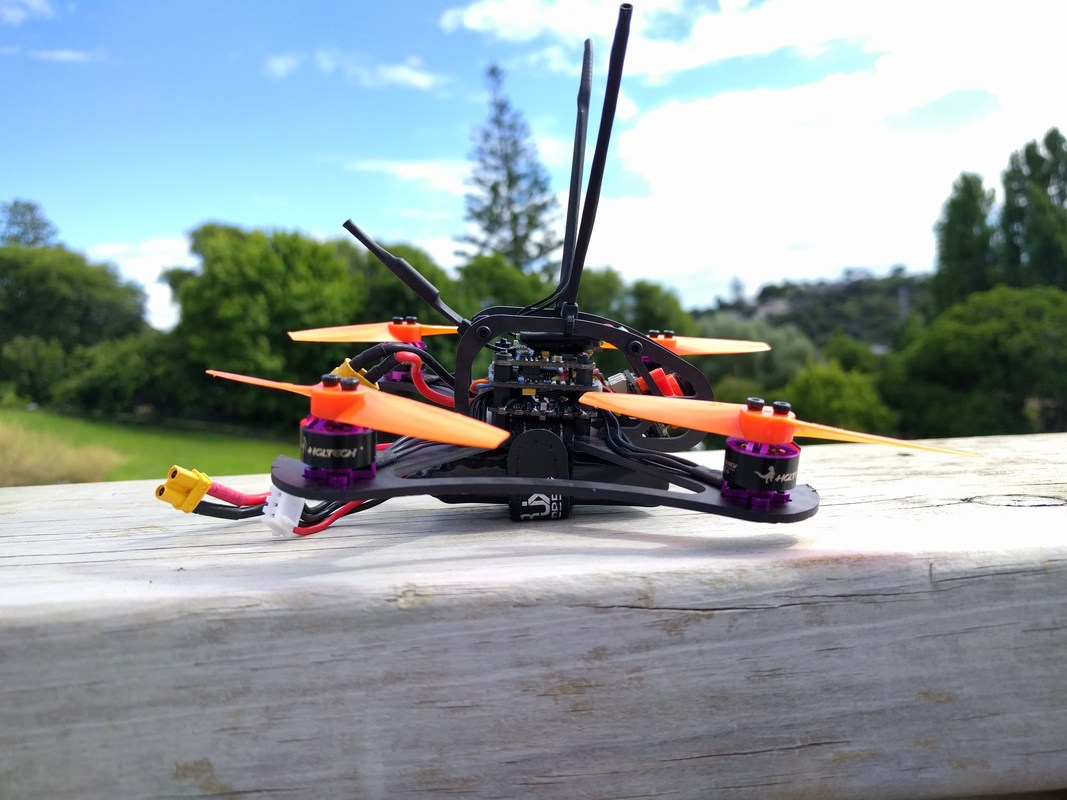
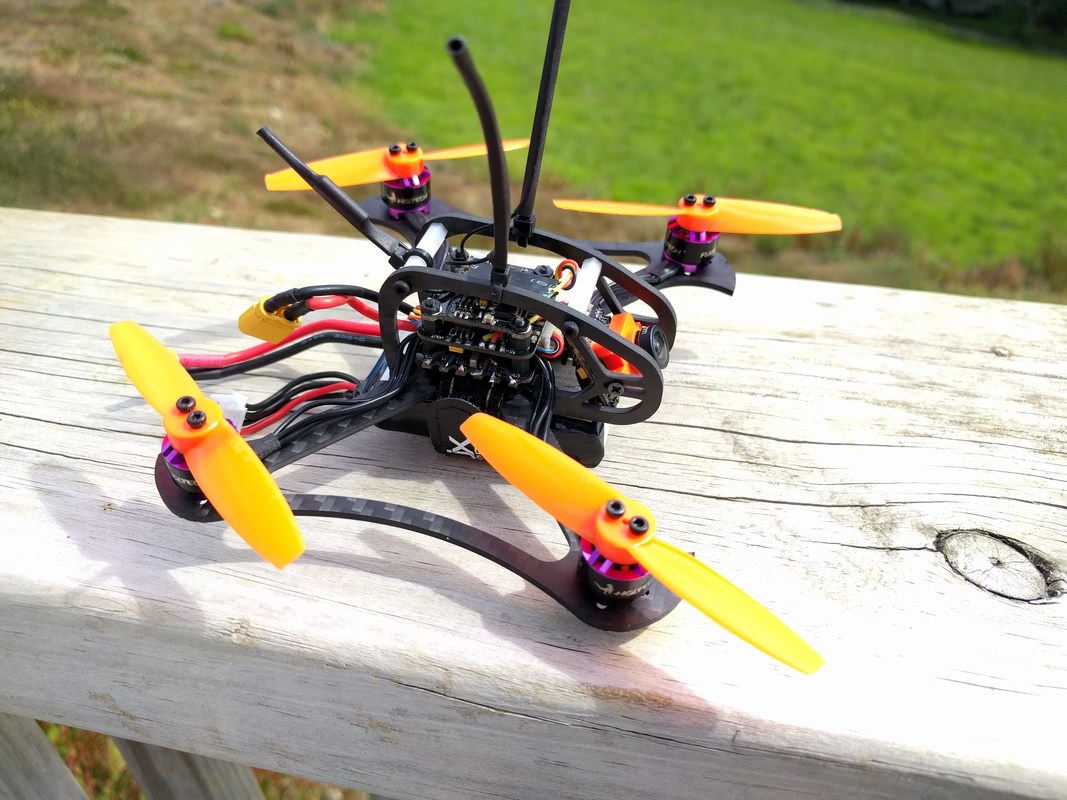
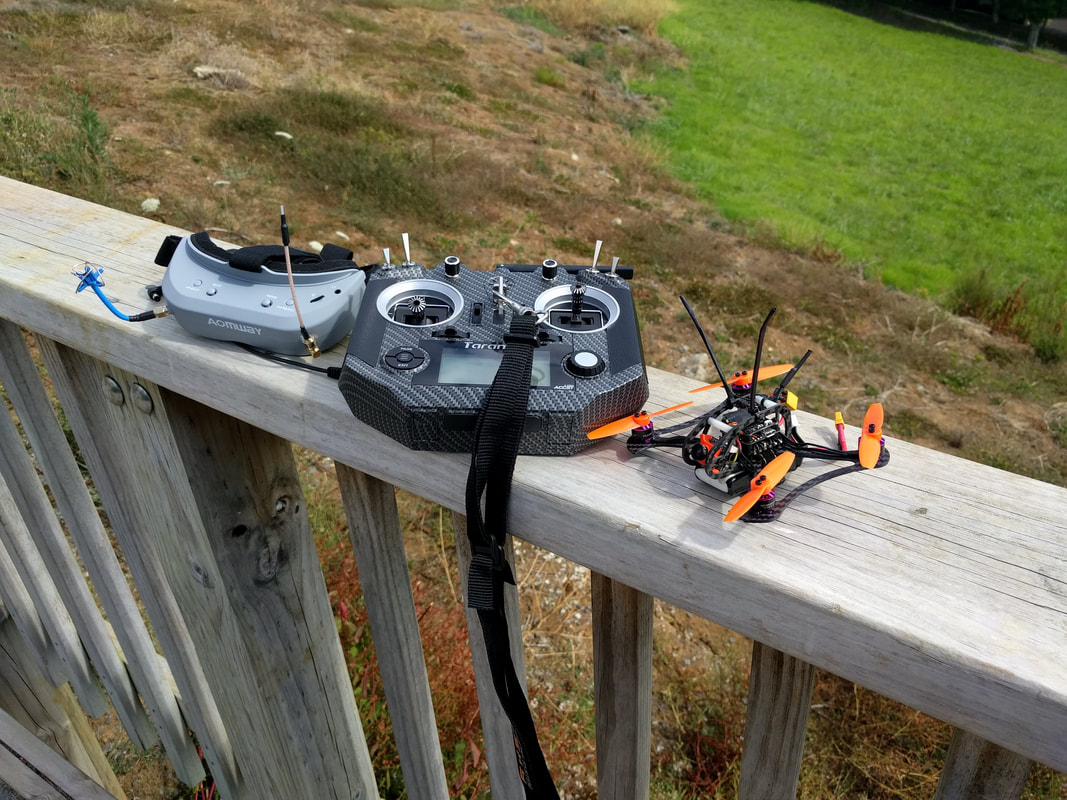

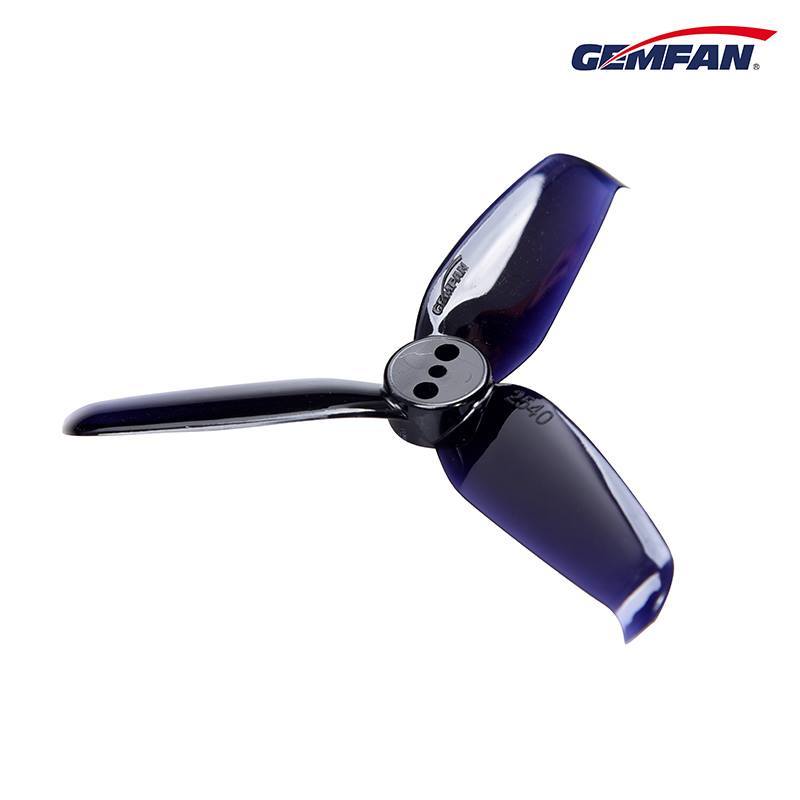

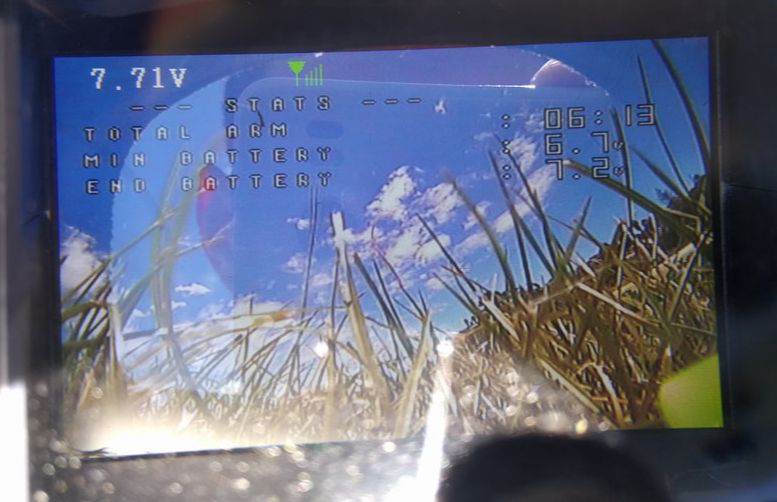
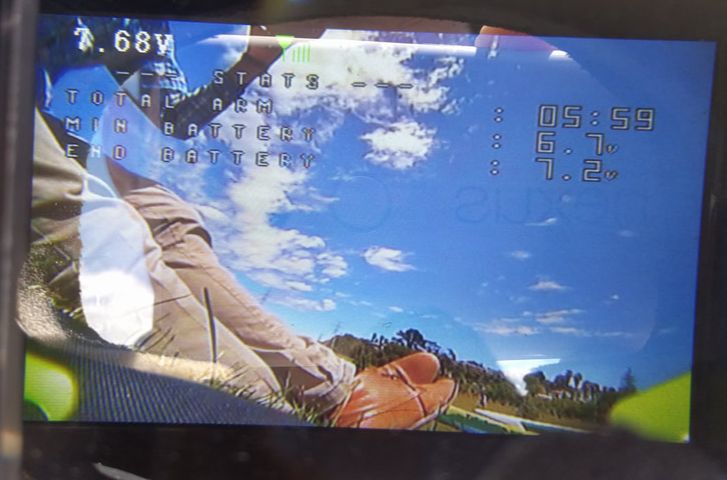
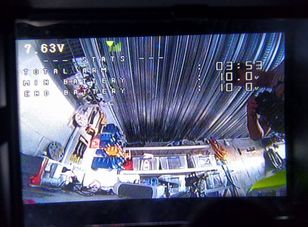
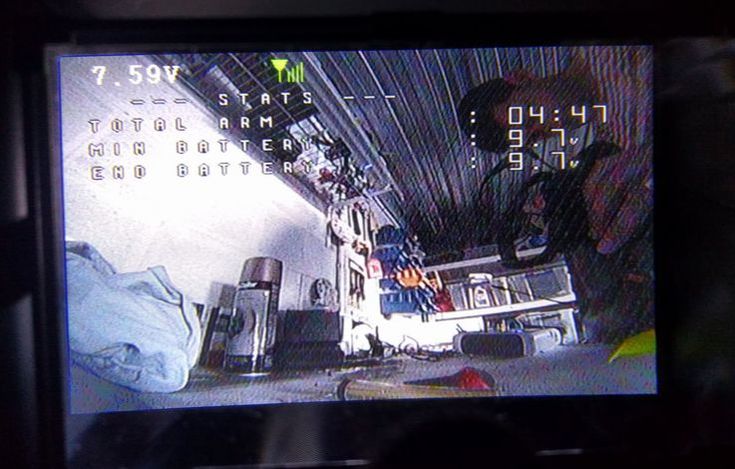
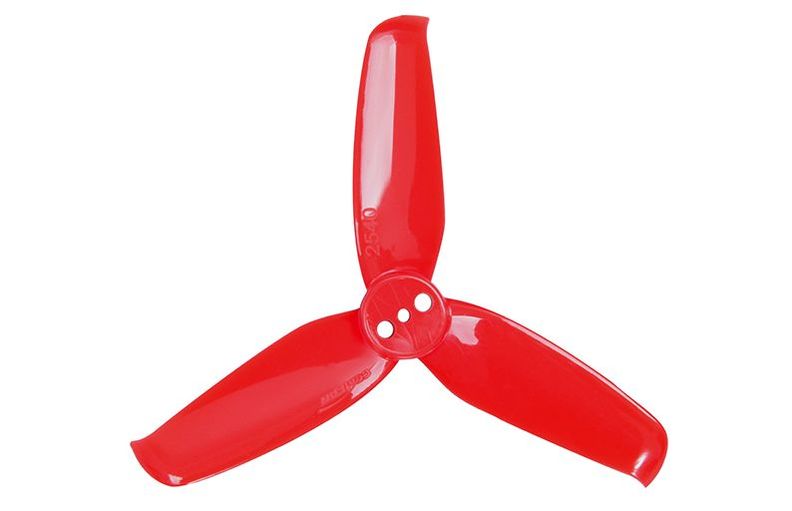
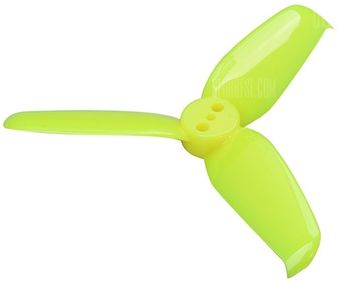
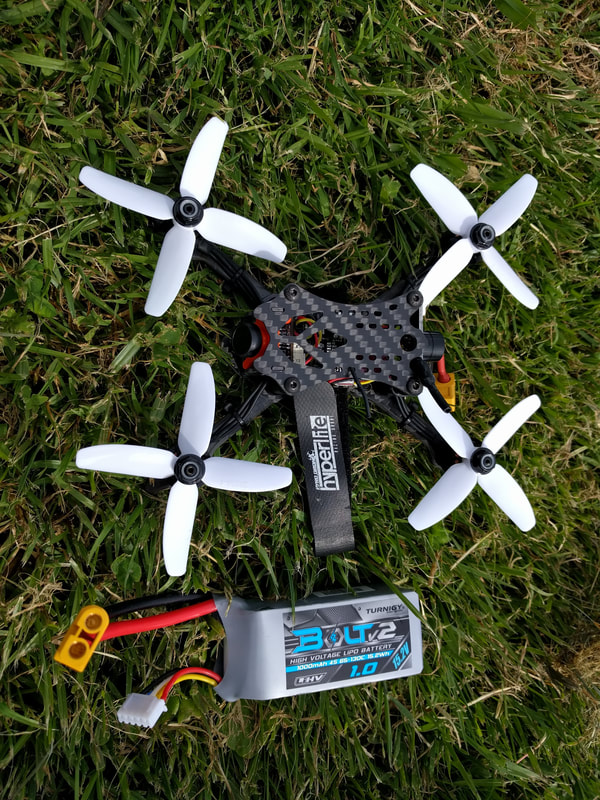
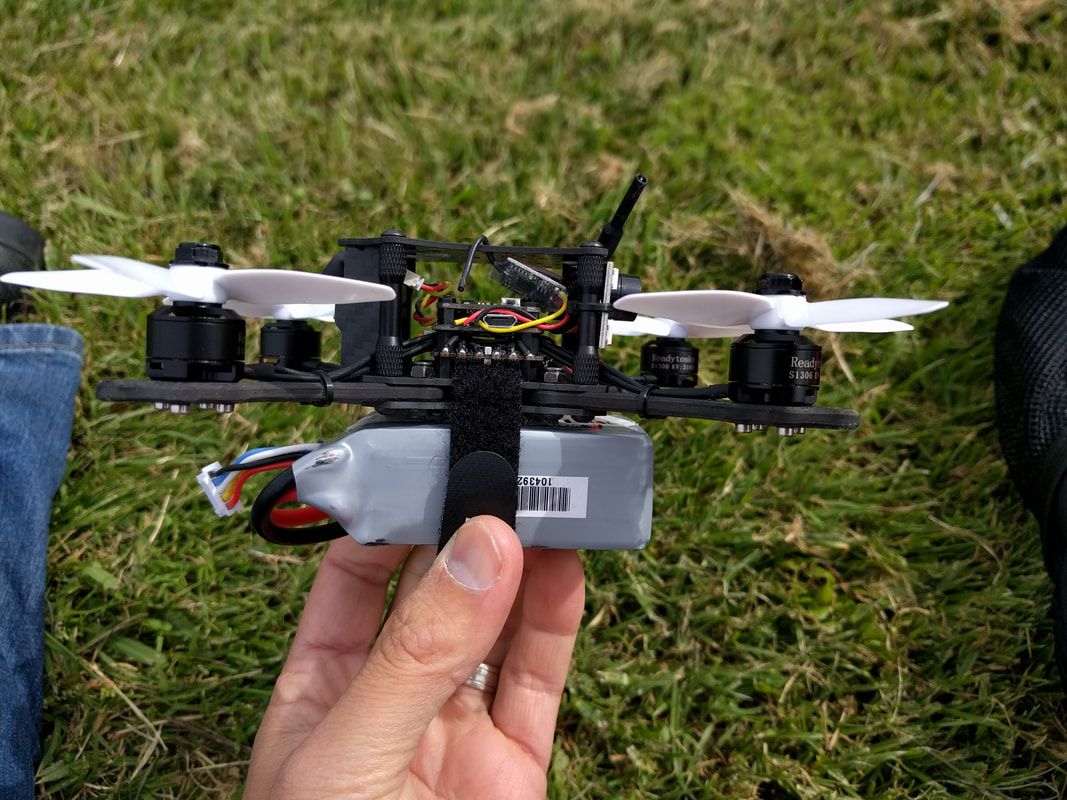
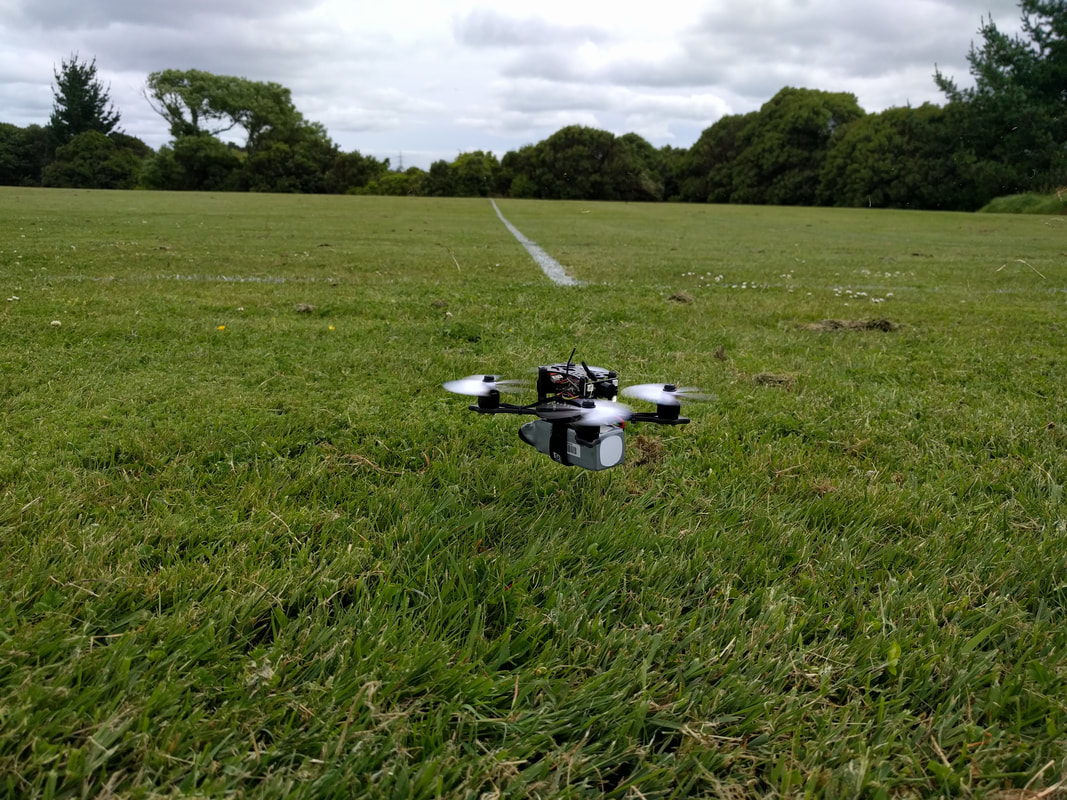

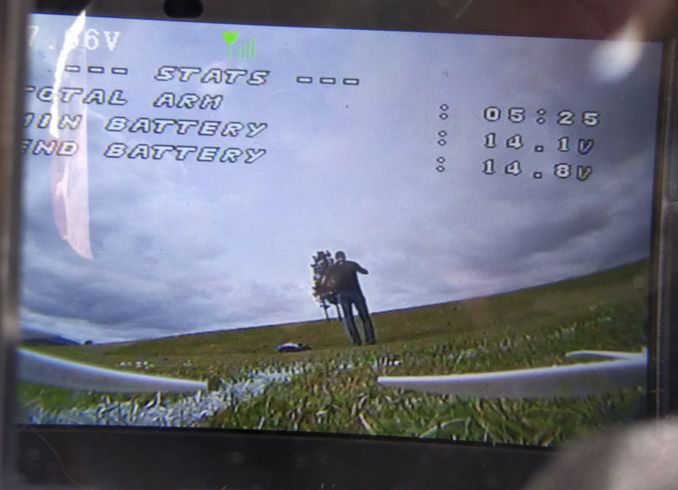
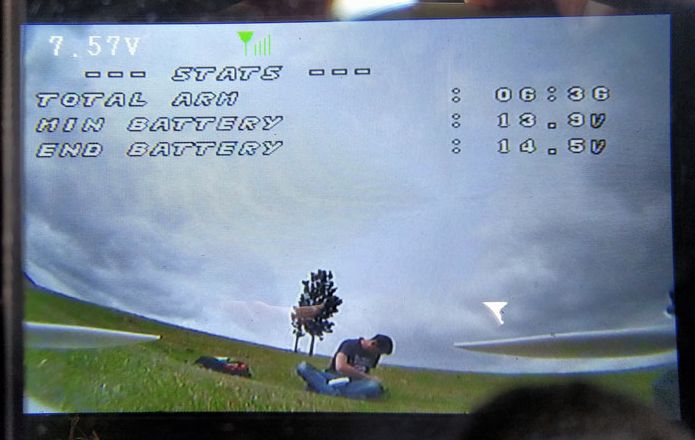

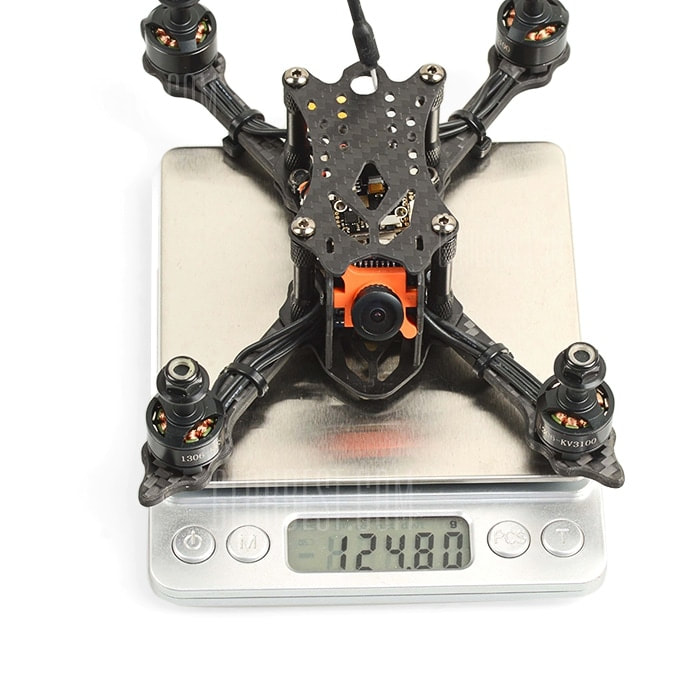
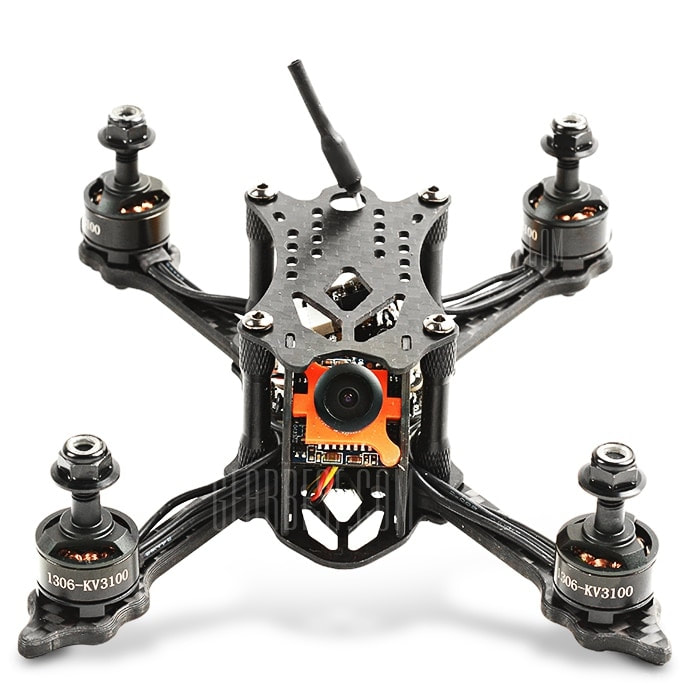

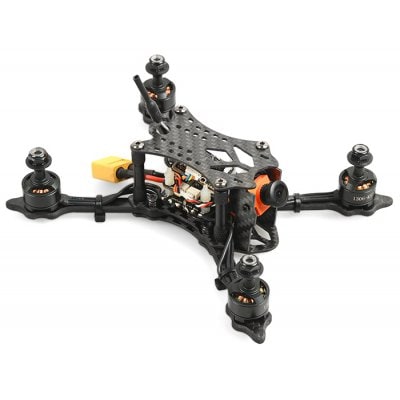
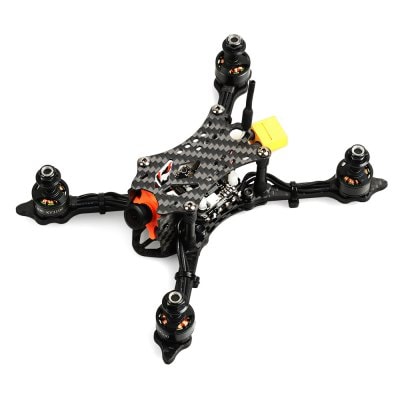
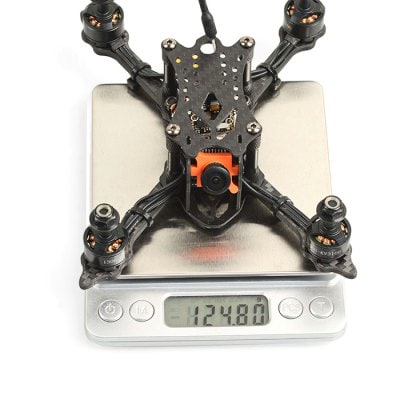
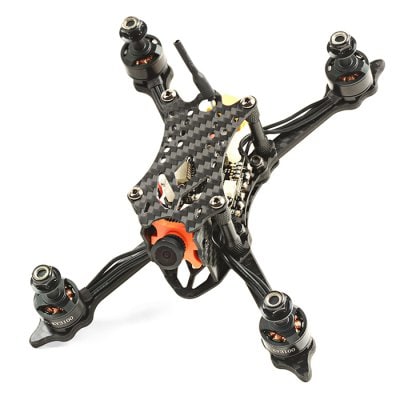
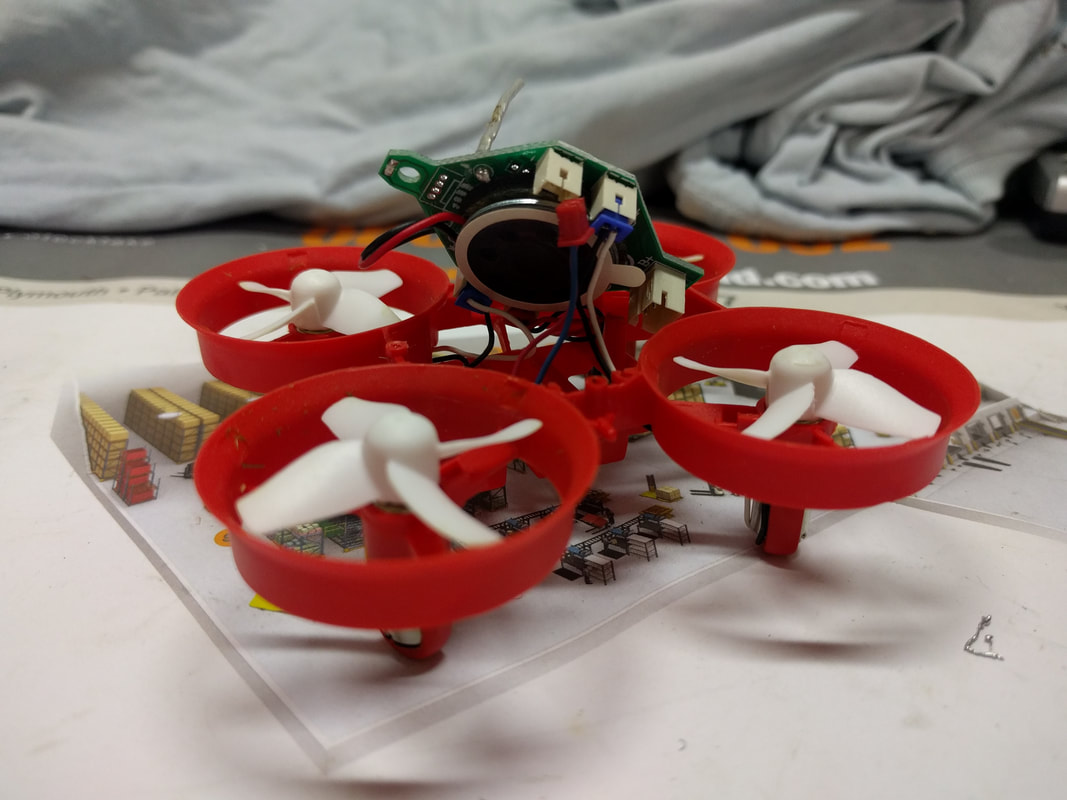

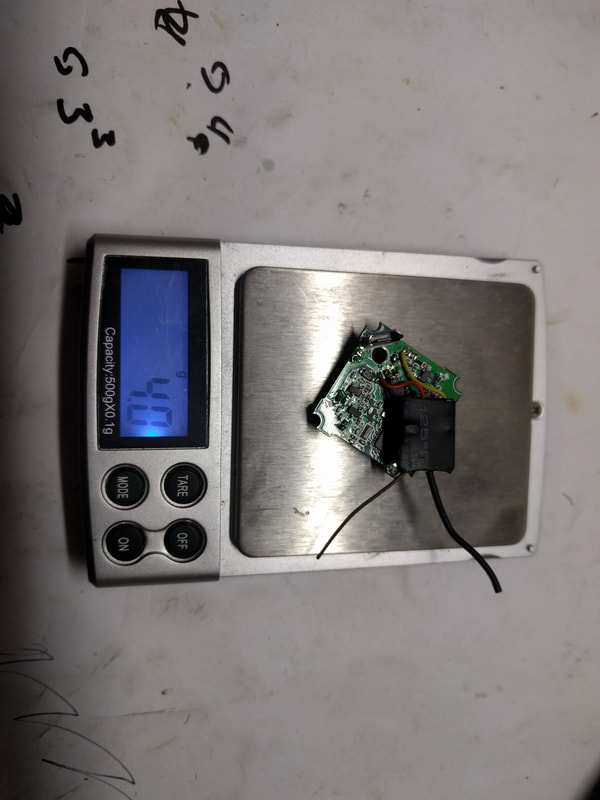
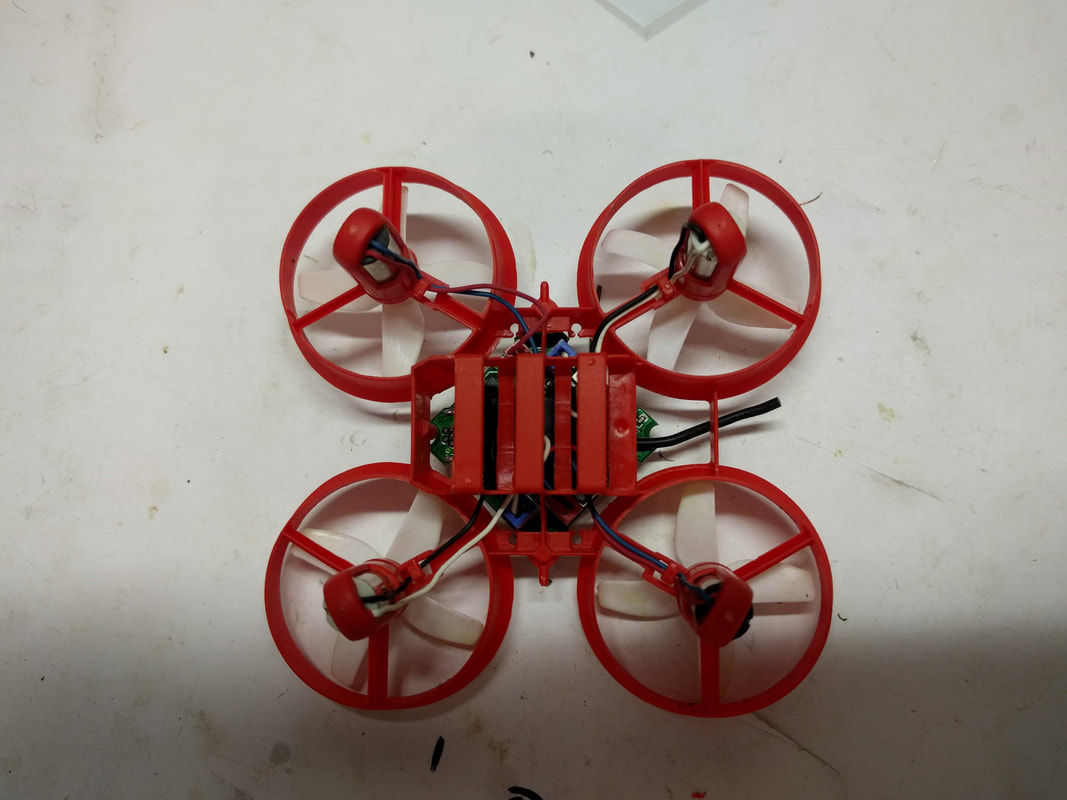
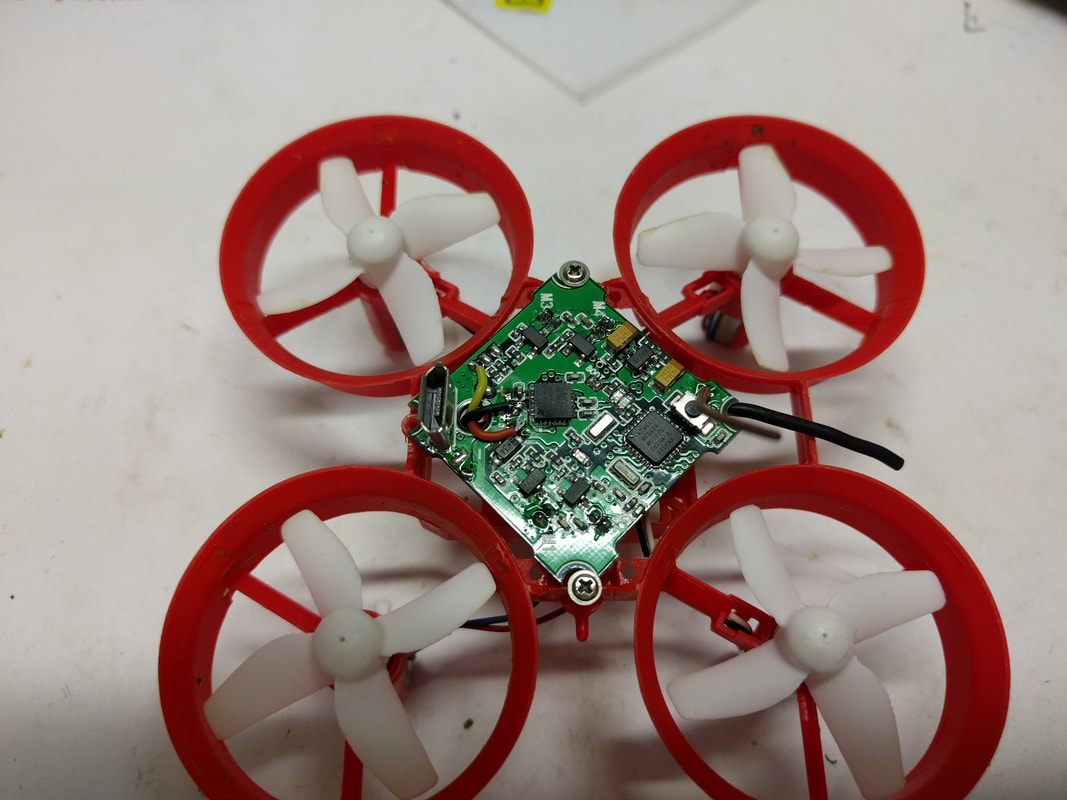

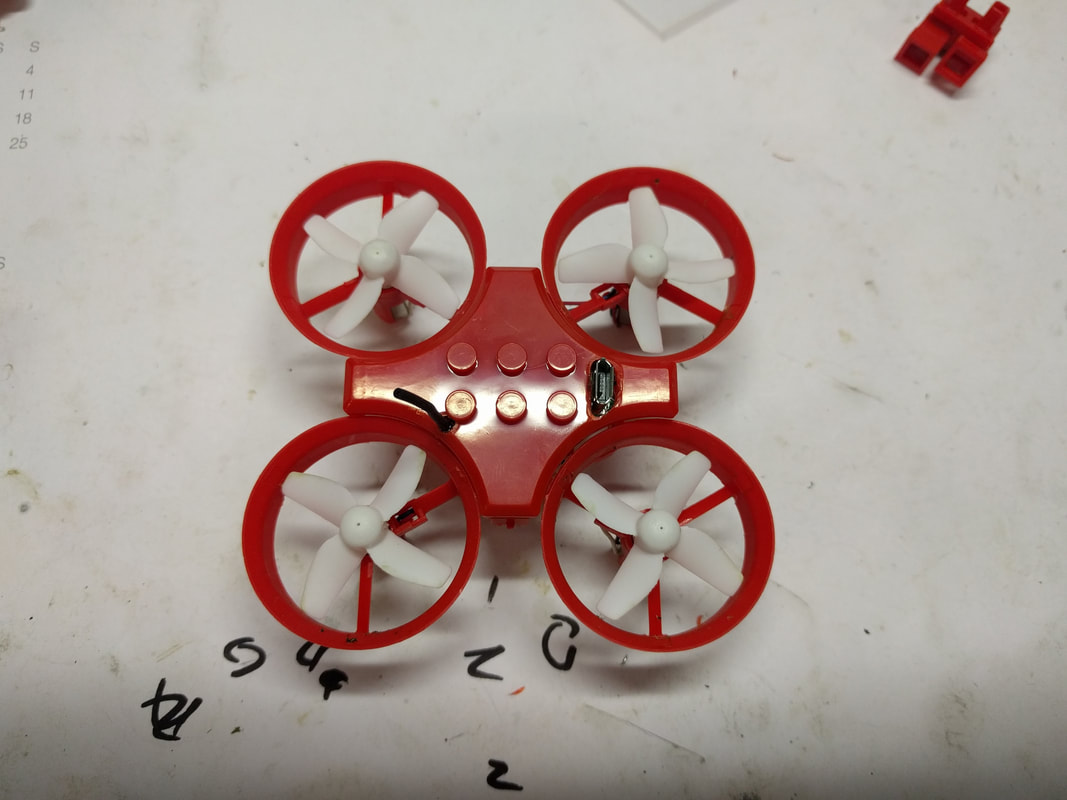
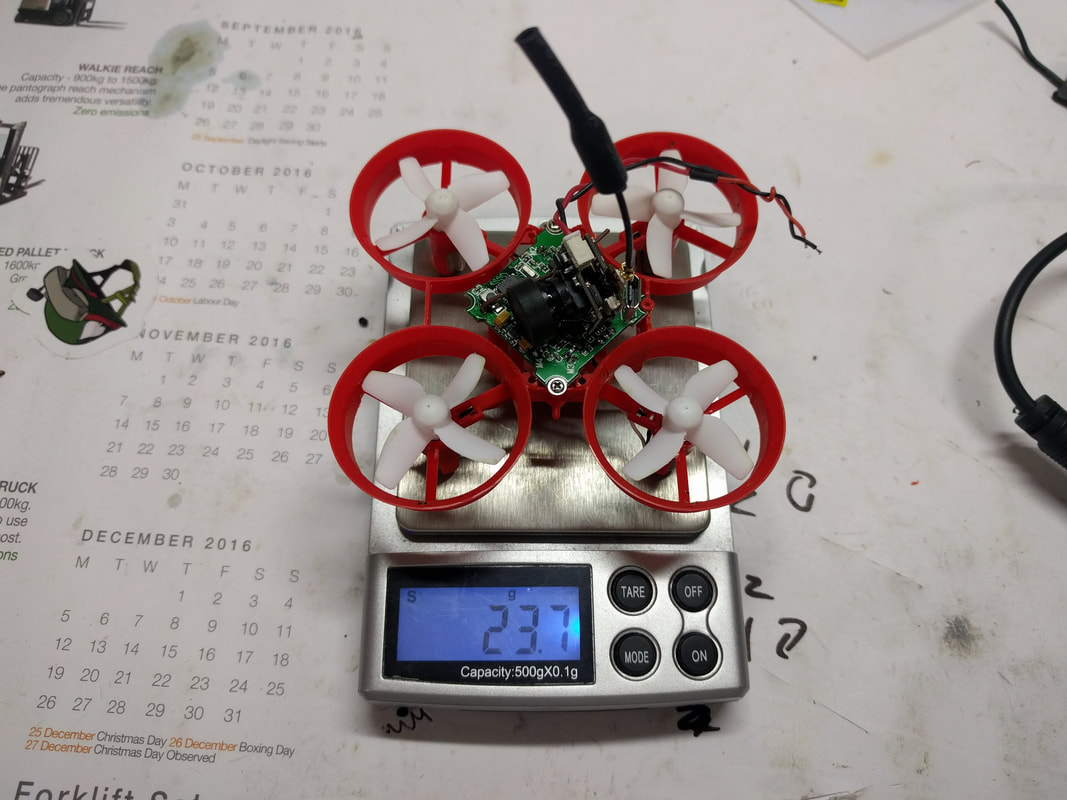
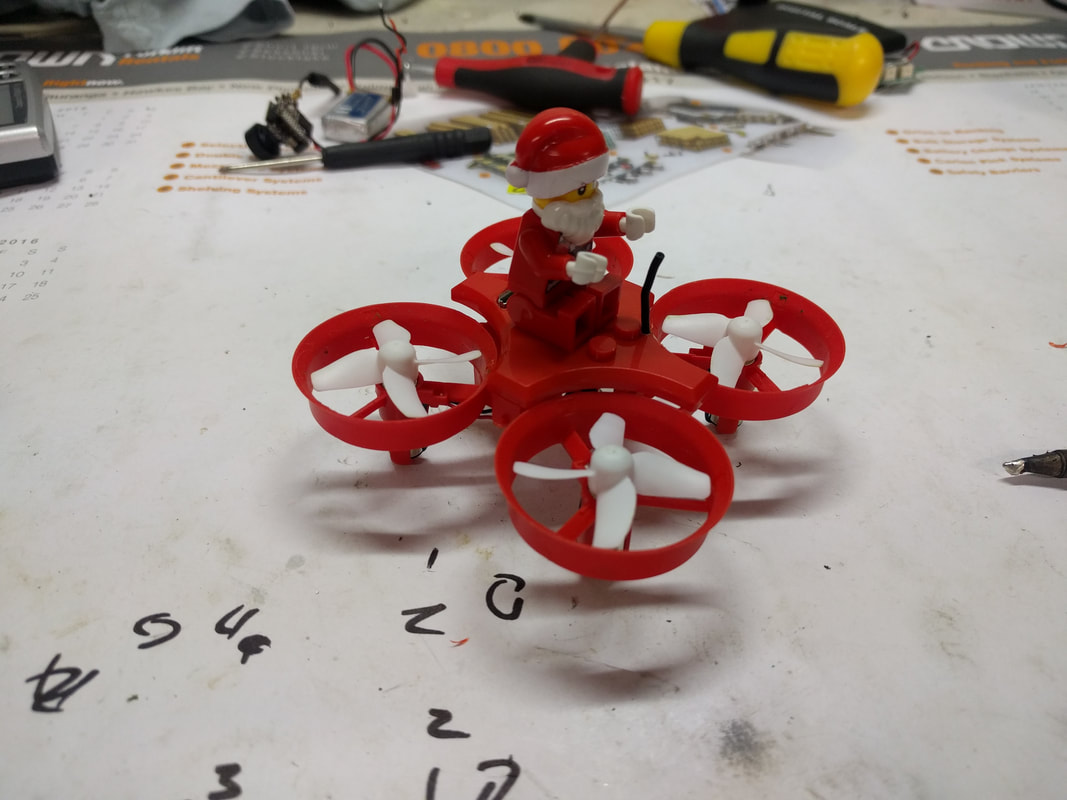
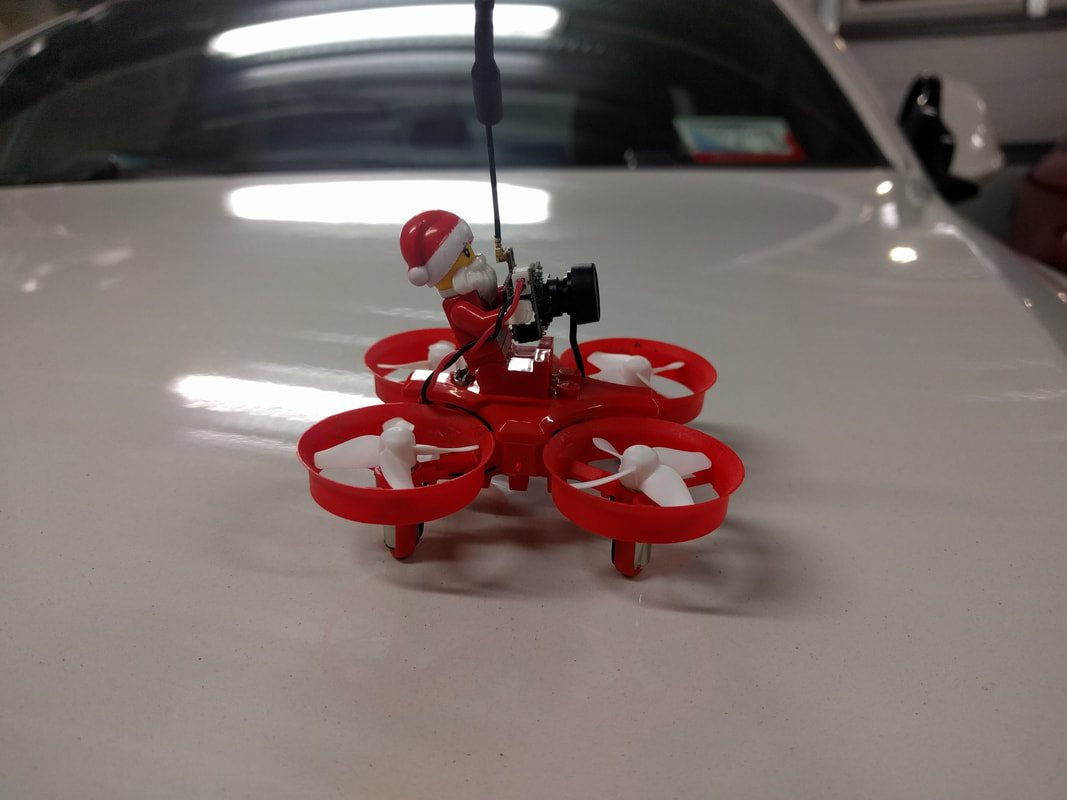
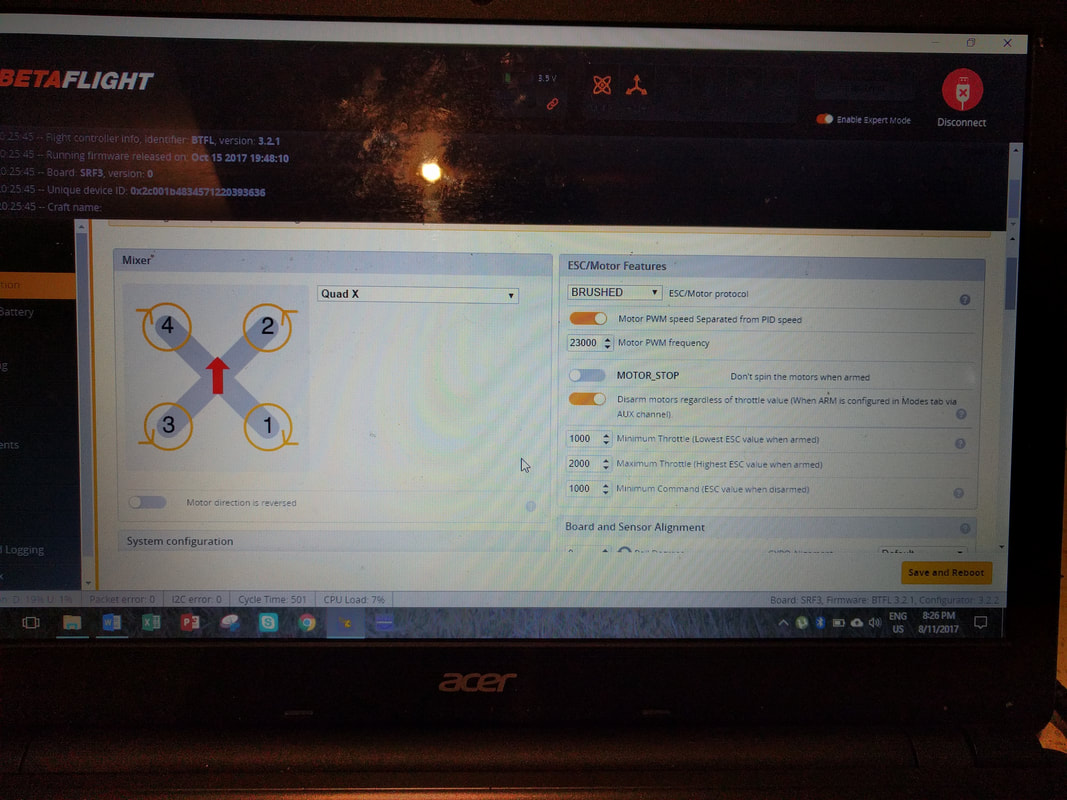

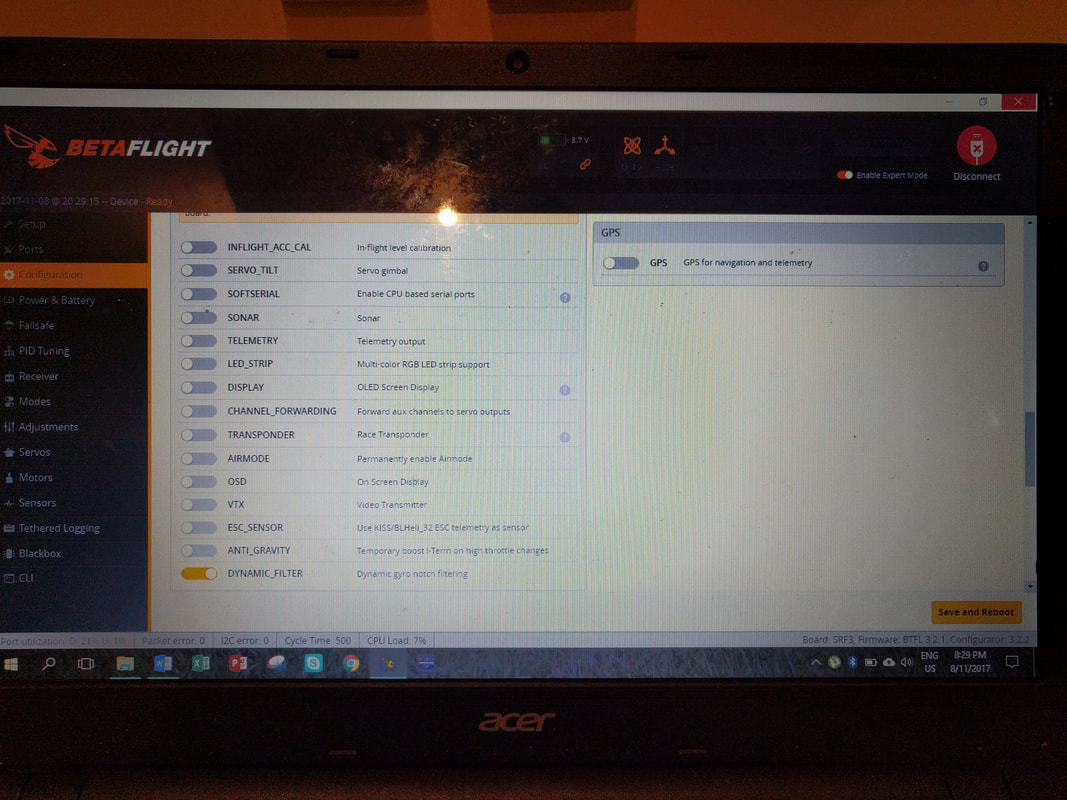
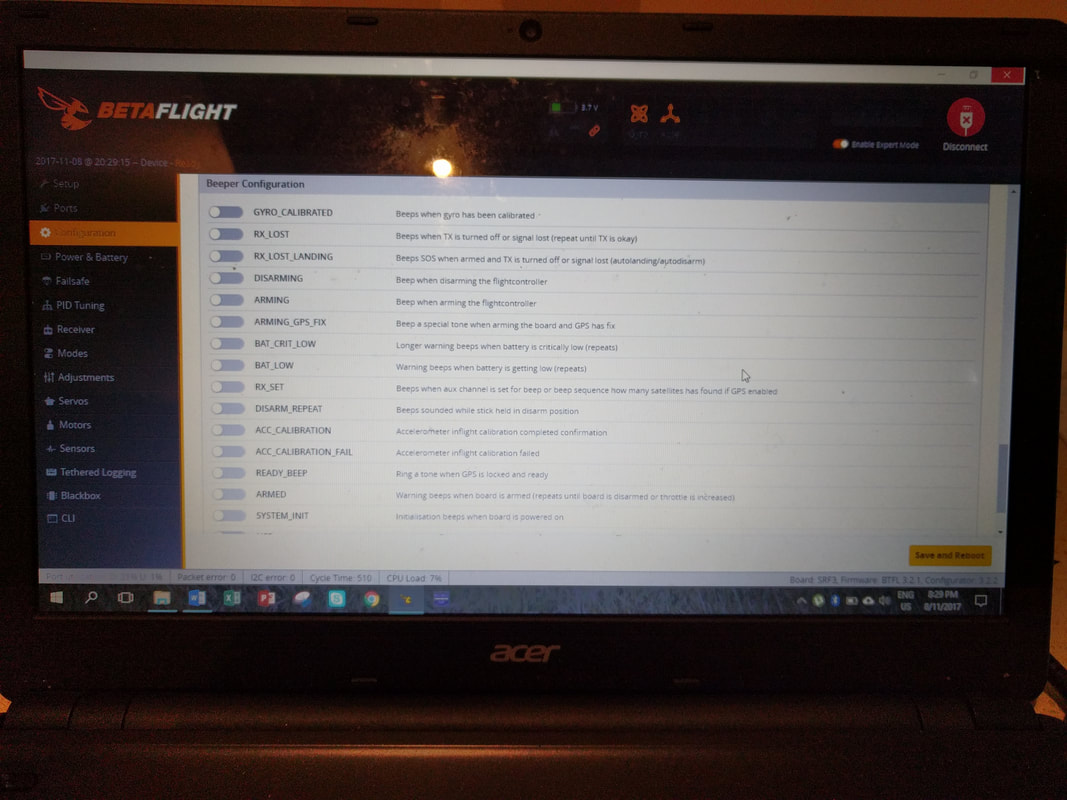


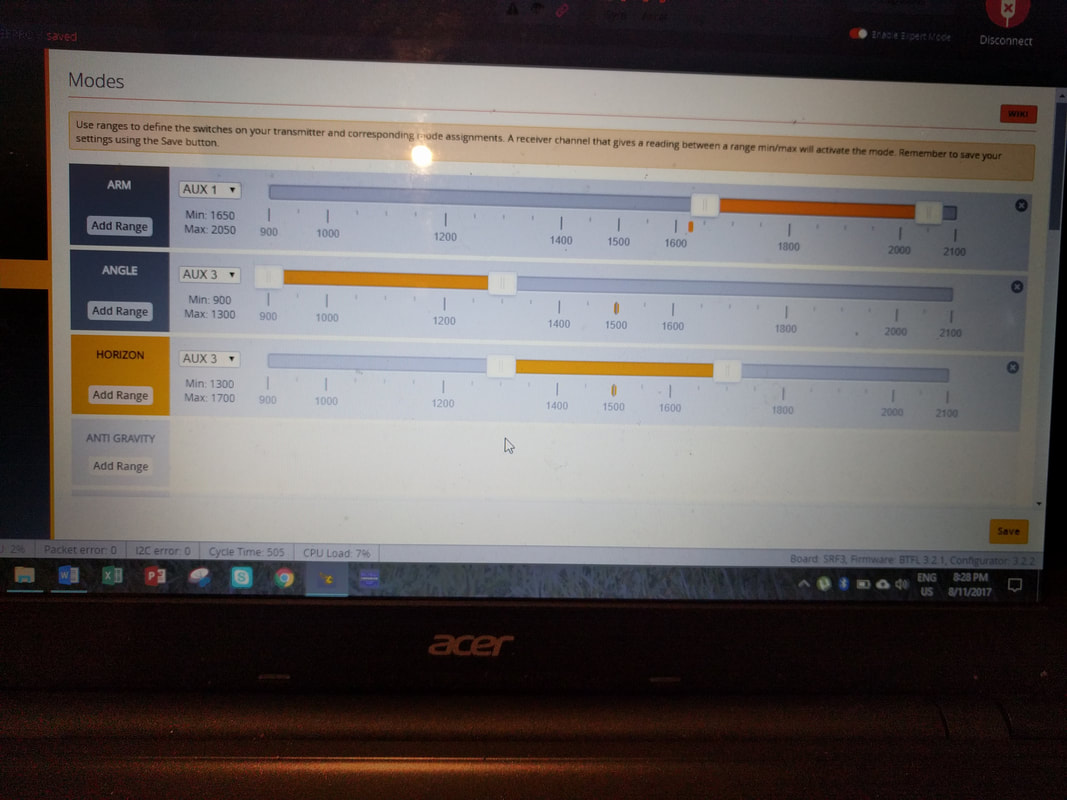

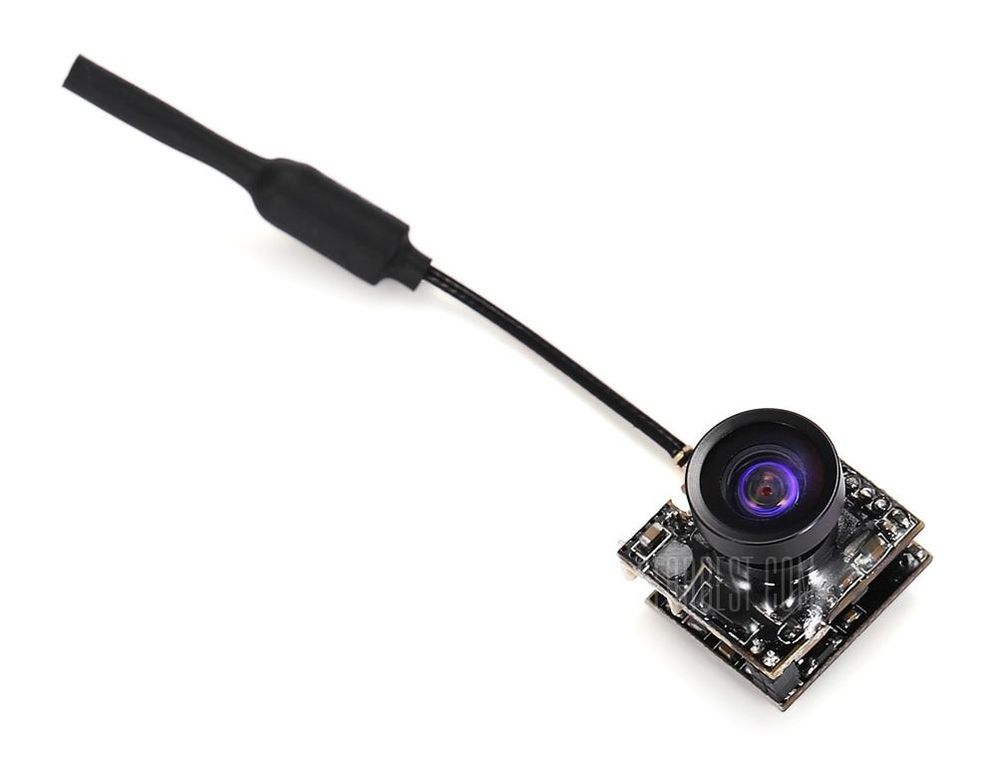
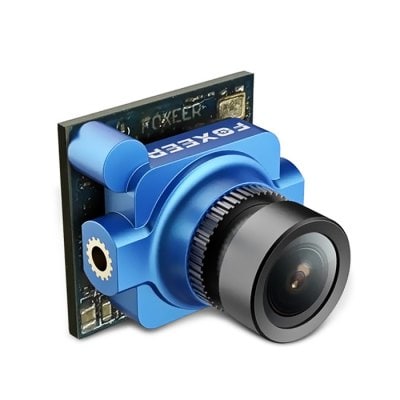
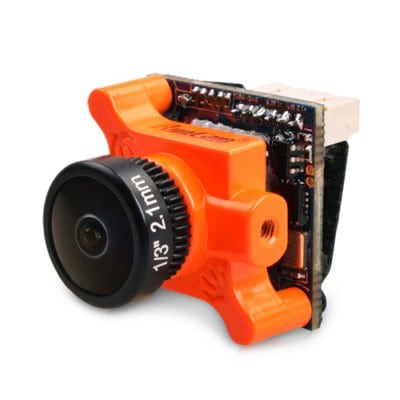
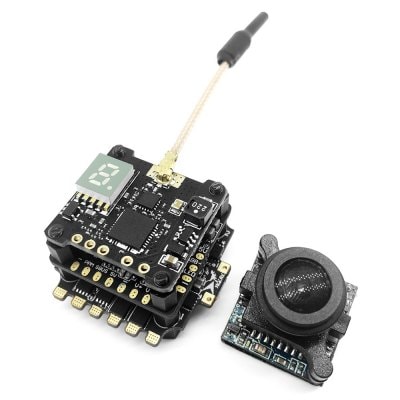
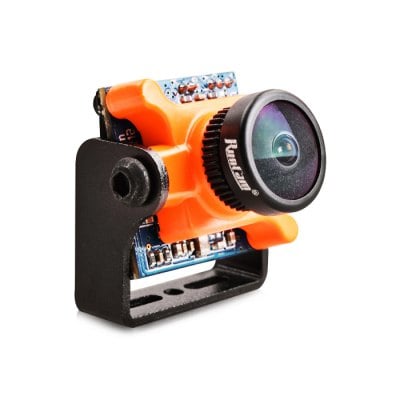
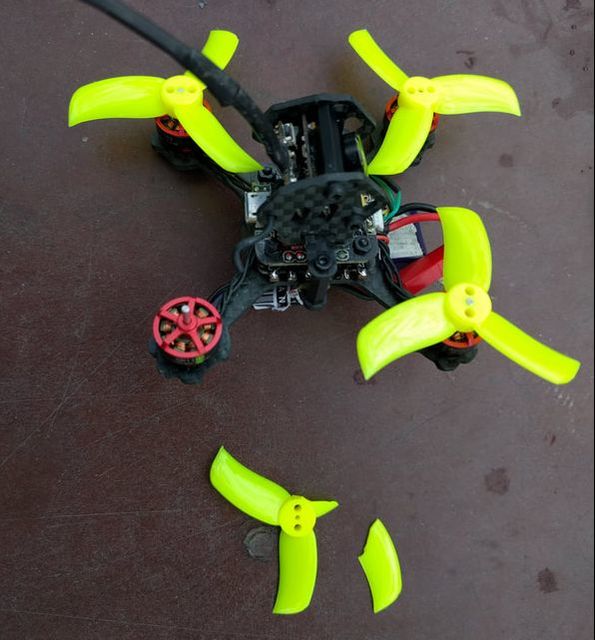
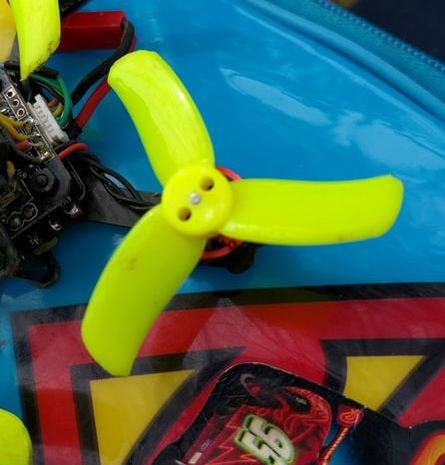


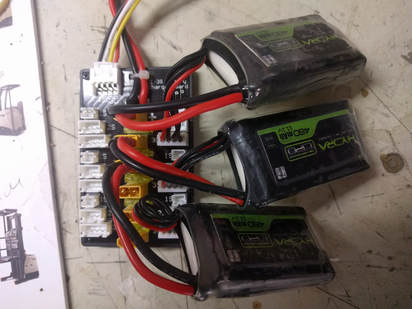


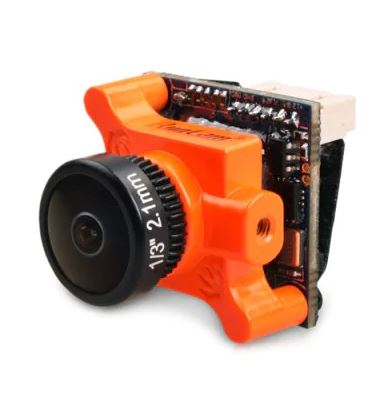
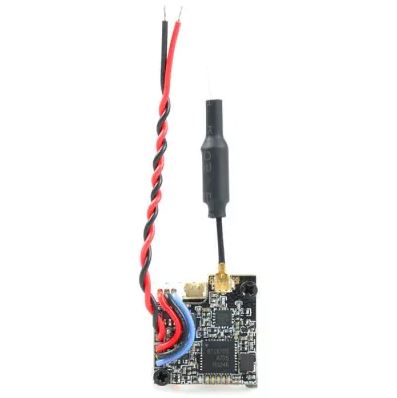
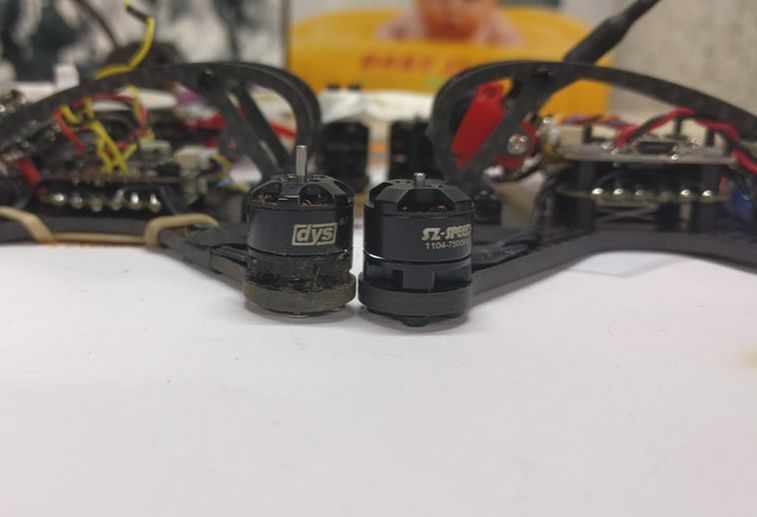
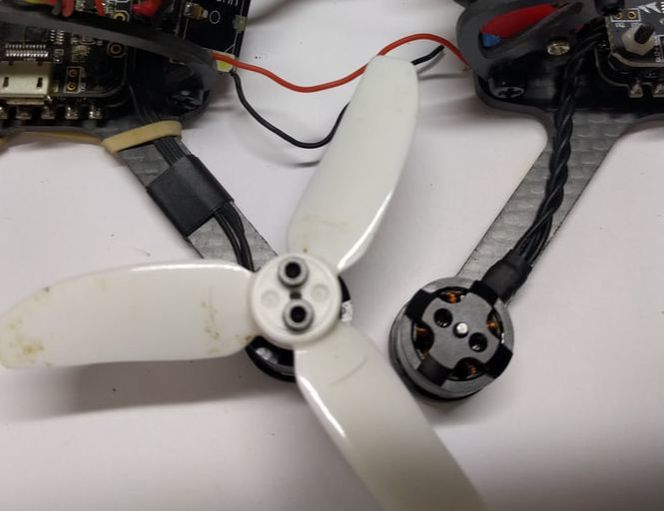
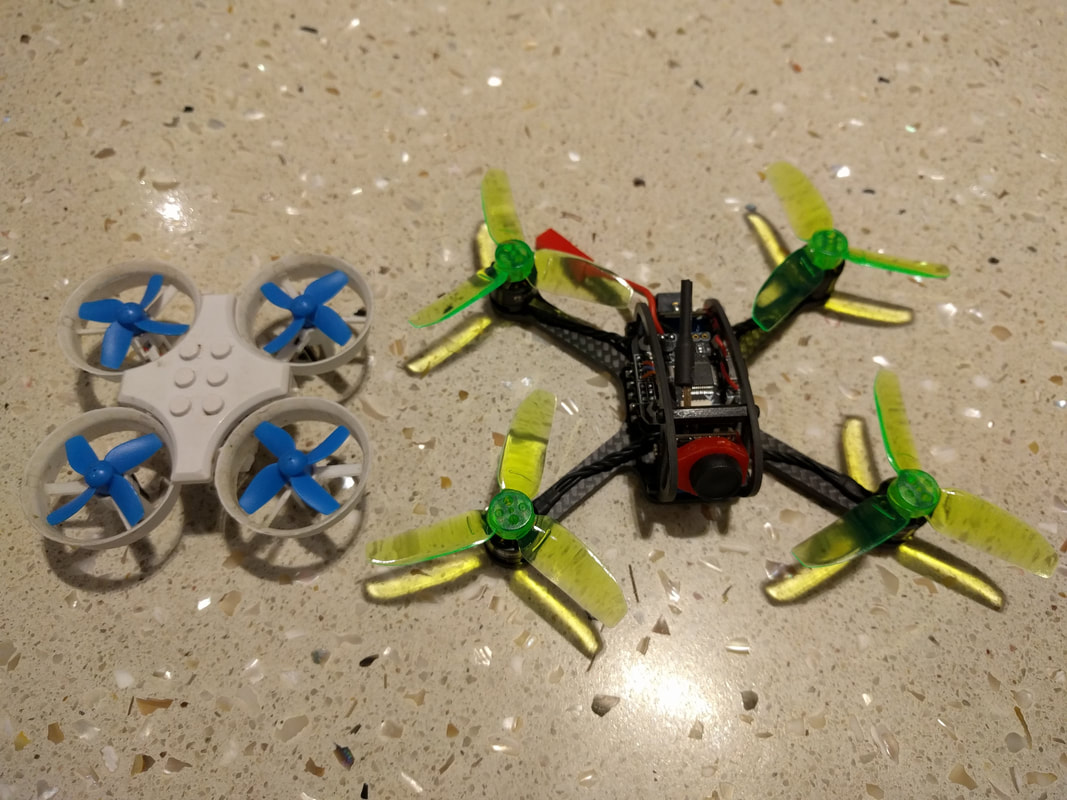
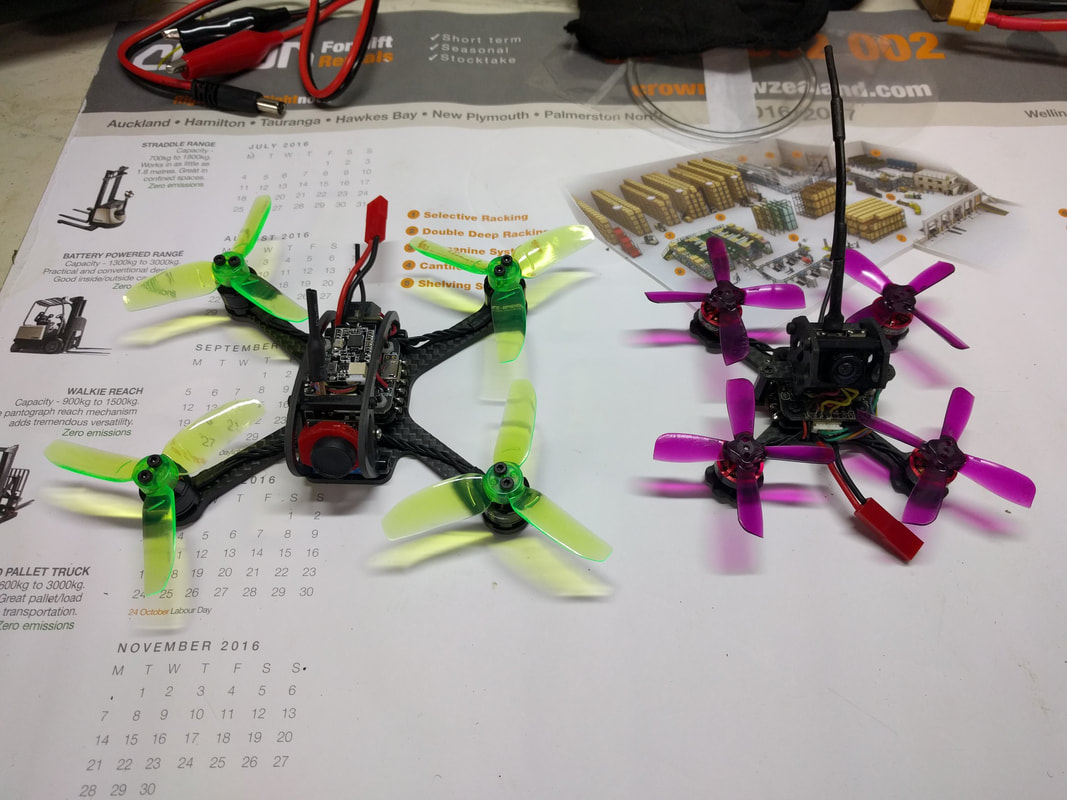
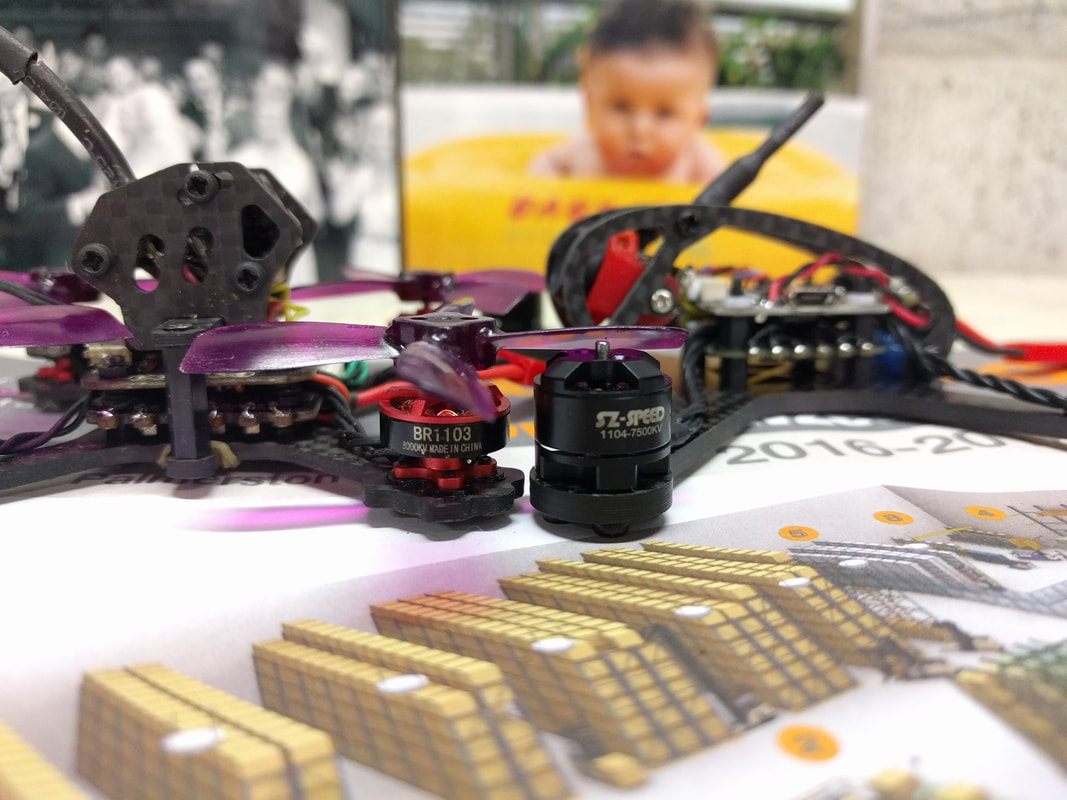
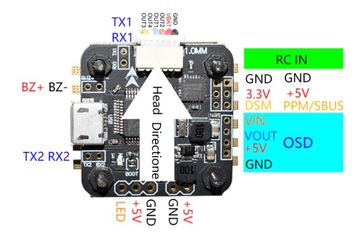
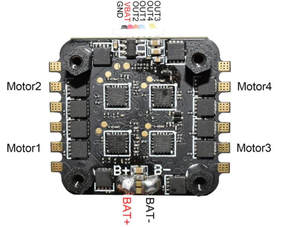
Thanks for visiting QuadifyRC.com Follow us on facebook below to get all the latest updates