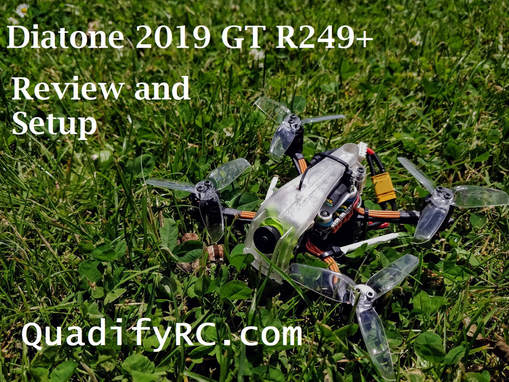
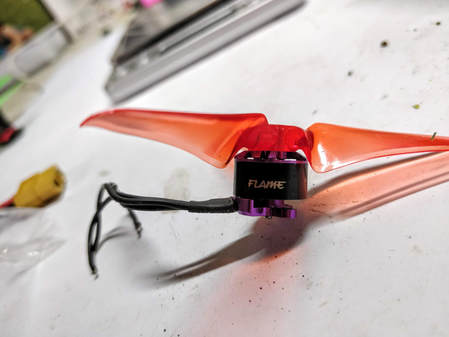
 Introduction The Diatone 2019 GT R249+ is one of the newest series of micro quadctopers from Diatone that is built around the Mamba mini f4 stack. The full range from smallest to largest includes: As you can see there is a high degree of modularity - for all except the largest they share the same 1105 5500kV motors. All sizes feature a 3mm thich carbon baseplate except for the R239 which uses and injection moulded plastic chassis and prop-gaurds. All models share the same injection moulded lightweight canopy and mamba mini f4 stack.
I've chosen to review the R249+ since my experience with micro quadcopters has lead me to believe that this is the 'sweet' spot in terms of performance and staying small and discrete when flying.
9 Comments
 Introduction
The Mobula7 is made by Happymodel who also released the popular Snapper7 which I reviewed here. Like the Snapper 7 it is a 75mm brushless whoop but it is lighter and more importantly, designed for 2s batteries. The Mobula 7 is not the first ready to fly 2s brushless whoop to the market but it is by far and away the lightest at just 28g without battery. That means the small and light 0802 16000kV motors are able to reach their power potential even on the small 260mah batteries included in the kit and make this quadcopter move very quickly with extremely nimble handling. 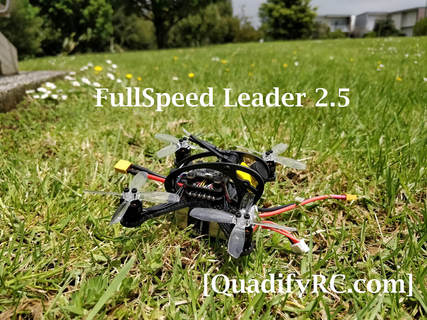 The Leader 2.5 is a recent release from FullspeedRC and as well as being available on their own website, is also available from Banggood and Gearbest. If you do decide to purchase, Fullspeed over many more customisations and offer free shipping till Jan 2019. The Leader 2.5 follows the recent Leader 3 but is limited to 2.5 inch rather than 3 inch propellers. My objective for this blog is not to write a tradtional review due to the similarities to the Leader 3 but to cover the keys settings and physical changes I'd strongly recommend to enjoy this quadcopter.
 Introduction
Boldclash have recently released a new all in one plug and play fpv solution for brushed and brushless whoops called the F02H PRO following on from the F02H which I reviewed here. This includes:
To briefly cover some old ground, the Hobbymate comet 5" racing drone is a 4s/6s lightweight 5 inch quadcopter with premium components sold exclusively at HobbyCool.com It is available from $180 as a kit up to $210 pre-assembled and tuned with a frsky receiver. After seeing the high quality components used in the build and finding how easy it was to tune in the betaflight setup I have been really looking forward to flying this and I have not been disappointed. This is the final part of my 3 part blog where I review the flight performance of the Hobbymate Comet 5" racing quadcopter. To recap part 1 is a build walkthrough and part 2 is a full betaflight setup FPV feed Starting with the power supply, the Airbot Typhoon V2.1 ESC is loaded with surface mounted capacitors and measured a total capacitance of - the highest I've ever come across on an ESC. Additionally the Omnibus F4 v6 flight controller has a special 8v circuit to run the FPV camera and VTX - unique from the 5v circuit that runs the flight controller and receiver. Combined with a LC filter this theoretically makes the cleanest power feed possible - a great start point for a strong FPV link. The next key component in the FPV system was a complete unknown to me - the Iflight Force VTX that looks like it is made by PandaRC. It is well specced with a microphone, 0, 25, 100, 200, 400, 600mW, tramp OSD control, MMCX connector but none of this matters if it performs it's core task poorly. The good news it that it performs it's core task very well. This is the cleanest FPV link I've ever had. In fairness though you could pop practically any VTX in between that clean power supply and the excellend Foxeer Lollipop antenna and I think it would perform well. Speaking of the foxeer lollipop antenna it is compact, seemingly robust and performed well with the other components. The image always looked clean and clear in my Aomway Commander Goggles, even on high throttle with 6s drawing 105A (equivaent power to over 155A on 4s). I have included DVR below but for some reason all Commander goggles (V1 and V2) have DVR issues when diversity switches between channels - none of this showed in my gogges during flight.
As for a fundamentally racing quad I'd have no trouble recommending this FPV system - camera and signal transmission. I think even without diversity the signal strength would be just fine with 25mW on a racetrack but adding diversity and bumping up transmission power will give better performance if running behind obstacles or flying further away from yourself. The Tune and the motors Although I covered off the tune in the previous blog, I didn't say how I arrived where I did. Previously when I have run a stock betaflight 3.5 tune on a 6s quadcopter (this one) it had terrible oscillations and I had to lower p-gain and d-gain significantly. It was therefore a pleasant suprise to see that the stock tune on betaflight 3.5.1 was perfectly fine on the Hobbymate comet. Never being satisfied I turned on i-term relax, boosted i-gain 50% on pitch and roll, 100% on yaw as per the betaflight 3.5 tuning guide. Still no sign of oscillation so I then narrowed the dynamic filter range. Still no oscillations and motors and barely warm. I've left it there though and now have the most locked in quad I've felt - better than the pro-tuned Emax Hawk 5 which was my previous best tuned quad. This ease of tuning is largely due to the smoothness of the motors and from what I can see seems to be the way to go. All out power is great but if it means you need to run a 'looser' tune you will struggle more in the tune with more lag in the system as the result of more filtering for gyro noise etc. To a lesser extent the stiff frame will also have helped as will a reliable gyro (MPU6000) on the FC. A full set of screenshots for the specific tune and a CLI diff file can be found in the tuning blog here. To me this quad + tune feels like it can turn on a dime with the least prop-wash I've ever had. Power, Performance and Prop Choice Straight up these motors are not as powerful as the Hobbymate 2207 motors (rebadged returner R3). They are however much easier to tune as I mentioned above. kV is relatively high for a 6s motor: 1800kV is the equivalent of 2700kV on 4s is is higher than the 1700/2500kV I typically run on 6s/4s respectively. This means props have to be chosen carefully. I started with the HQ 5x4.8x3 V1s but found peak current draw to be too high at 105A (power equivalent of nearly 160A on 4s!). HQ 5x4.3x3 V1s were a minor improvement at 90A so I'll probably stick with these until I get some of the new 5.1x3.1x3 V1s. It felt like the top end of the throttle was less about delivering additional thrust and more about drawing current which makes sense with a 2305 where the wider, lower stator favours torque at a lower RPM at the expense of efficiency at higher rpm. For this reason I placed a 15% scaled throttle limit on rate profile 2 in my betaflight setup section as I wrote about in the betaflight throttle scaling blog.
I'll close this section by saying that these motors are a good for the beginner - moderate/advanced level. They are powerful and easliy tunable but lack the top end punch of the race motors with taller stators. There are probably less than 10% of pilots that could genuinely take advantage of a bigger motor and these aren't likely the type of pilot that will be buying a ready to fly quad anyway. A quick note here in that the ESC has caused no fuss whatsoever. BLHELI32 current meter was easy to tune (+25%) and no dipping during full throttle punches or any other odd behaviour. In a current ambient temperature of 20°C the hottest the ESC has gotten is a measly 32°C according to telemmetry. 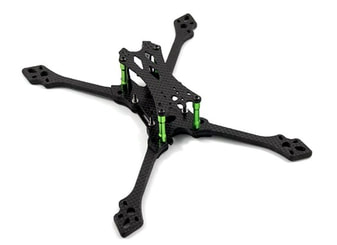 The Frame The HobbyCool comet 5" frame is fairly simple. Strong, chamfered 5mm separate arms in a stretch-x layout with a sandwich lower deck and single top deck. Weight is 85g which is typical for race frames now since they have increased in weight and durabiity again since the original floss, 2.0 floss and v1 mode 2 ghost which tended to break realtively frequently. Rather than go into detail I'll sum up what I like and didn't like about the frame. Like:
Dislike
Conclusions When I started this build I noted the quality of the components but I've seen many quads before that have used good components and have been overly expensive or haven't taken advantage of them (or both). I'm pleased to say that the Comet is very sharly priced at $180 for the kit AND brings these elements together for a fast, well balanced and easy to tune racing quadcopter. There will be obvious comparisons to other well prepared 5" racing quads like the Emax Hawk 5 (review here) and HGLRC Batman but these are significantly more expensive: $230-250 and $280-300 respectively. Additionally they do not support 6s out of the box either. There are a few minor cosmetic issues I have with the frame as above but outside of that, I'd recommend this as the best value racing quad presently available for beginner tomoderate/advanced pilots. Note the kit (build it yourself) is $180 or you can buy preassembled without a receiver for $200, with an XM+ receiver for $210 or with an r-xsr receiver for $220.  This is the second part of my coverage of the Hobbymate Comet 5" quadcopter. The first part (parts overview and build walkthrough) can be found here and the third part (review) can be found here. If you are here for the PIDs scroll directly to the bottom but would recommend you read through as tuning in betaflight 5 is more than just the PIDs.  Betaflight setup on this quadcopter is the same as any other but because of the telemetry, VTX OSD control, resource mapping for an ESC that is rotated it is fairly involved. For that reason I have created a betaflight 3.5.1 diff file which can be downloaded below. If you built the way that I did feel free to just load this CLI diff. If you want to read on to see what I changed specifically it's all documented in screenshots and text below. I'll assume a moderate level of betaflight understanding from the audience but happy to point out more information if needed. My customised 3.5.1 CLI diff file is here:
Resource mapping this diff will change the motor output to be correct assuming you have mounted your ESC with the connector at the back (which I recommend as per build walkthrough) BLHeli32 settings These are best described by the screengrab below. Changes from stock are PWM rate increase to 48kHz for smoothness, motor direction adjusted for reverse prop direction (you will need you own values here), Auto motor timing, quiet dshot start up tone, loud shot beeper, min and max throttle adjusted for max resolution and most importantly I've used +25% to calibrate the ESC current meters correctly and have validated this number on my setup. 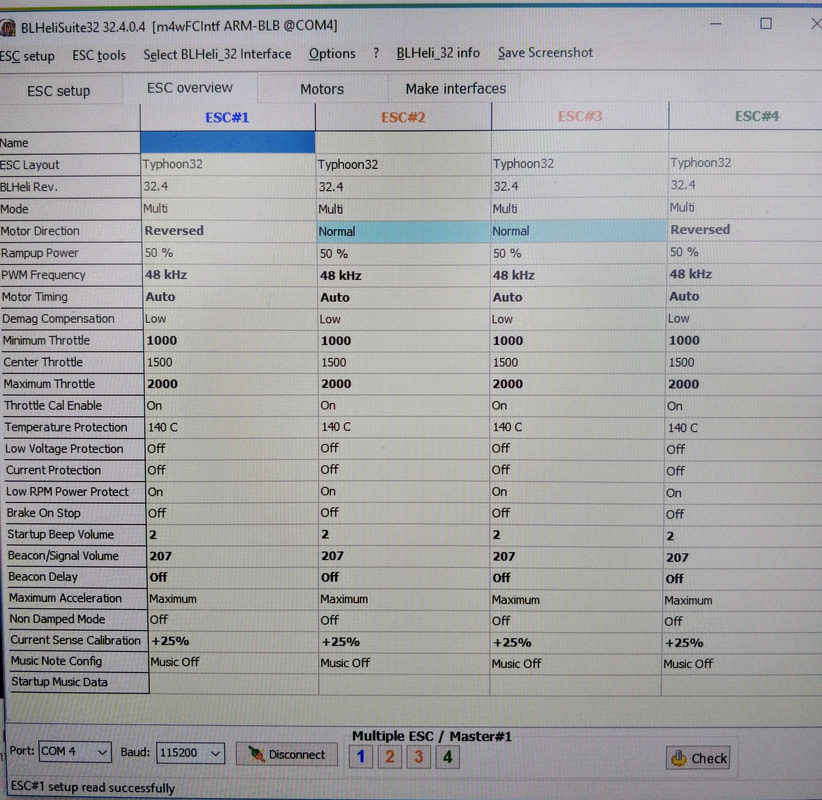 The Hobbymate comet is a 5" quadcopter that is sold in kit, or ready to fly forms and surpasses the Emax Hawk 5 and HGLRC Batman in specs and performance, especially running 6s natively. Better yet it is priced much more sharply. It is available exclusively from HobbyCool.com. My final review is now complete and can be found here
I'll cover this quad over 3 blogs. This first part will cover the build walkthrough, the second the software (betaflight/blheli32) setup here and the last part the flight review.  The $180 Hobbymate Comet kit is full of premium and dependable 6s components The $180 Hobbymate Comet kit is full of premium and dependable 6s components The Hobbymate Comet Kit is a premium 5" quadcopter that is currently available as a kit for $180 but will soon be available as a bind and fly version. Update: it is now available as a pre-build pnp or bnf with xm+ or r-xsr receivers. In the days since the Holybro Kopis 1 was released there have been some excellent ready to fly models (along with some not-so-great models) available including the Emax Hawk 5 (review here) and the HGLRC Batman (build here) which have been standouts because they have been well balanced, well built and good value for money overall. Since this is a kit, this particular blog is to walk you through the build and then software setup including a betaflight 3.5.1 cli diff. The Hobbymate Comet from HobbyCool.com (or Amazon) is a kit the consists of higher quality parts than even the HGLRC Batman at only a fraction of the cost. Infact when bought on their own the parts come to $257 which is clearly much more than the $180 the kit costs (or even the $200 PNP kit). The Electronics are rated 6s from the factory (unlike the Hawk 5) and come with motors suited for either 4s/5s operation (2500kV) or 6s operation (1800kV). I'm especially excited that this include a genuine airbot ESC and flight controller. More details on the parts below:
Extra parts and recommended for the build Firstly you will need extra parts for this build. I've used the following with links to Hobbycool as they tend to have the sharpest price: And tools/sundry items: On with the build Captioned images below should walk you through the build process and I've noted anything tricky as I've gone through. Click on images to zoom.
So that is it for the physical build. Not a difficult build at all in the scheme of things - components fit easily with plent of room to work. Part 2 (software setup) is here and part 3 (flight review) here.
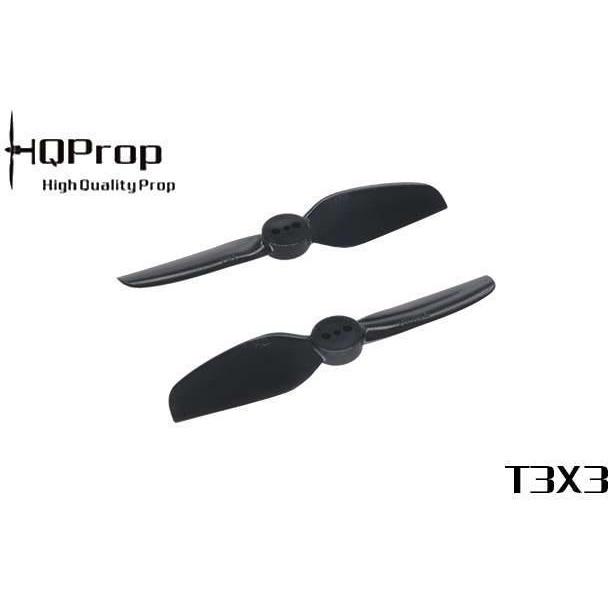
 T-mount propellers are those that are based on a 1.5mm diameter centre shaft secured by a 2mm screw either side. They have been the only mounting option for 2-2.5 inch props but are now becoming more popular for 3" due to the weight they save over a 5mm single shaft prop mount. There are only 4 different types of t-mount 3" prop currently available so I've compared them all plus the new HQ 2 blade which is due for imminent release plus a darkhorse prop in a smaller size to make up the numbers. Please note this is a subjective comparison based on my opinion but my help as a startpoint for your decision. This is based on real world feel, light time and bitter experience with motors I've burnt out.  Emax Avan 3 inch tri-blade This is the first modern design 3 inch prop designed for a t-mount which was released with the 3" Babyhawk R (reviewed here).
 Unique blade design close to hub means 11mm stator (maybe 12mm) is maximum  HQ 3x3x3 v1s tri-blade HQ props have the newest 3" t-mount prop design at present. This has been chosen as the stock propeller for the Full Speed Leader 3 (initial review here and flights here)
 Gemfan 3035 triblade This is quite an old prop and can be hard to find but is still suprisingly relevant.
 Gemfan 3025 bi-blade This is the original 3" t-mount prop and so can be found for sale in weird and wonderful places
 HQ 3x3x2 v1s bi-blade Just released at the time of writing: as per the 3x3x3 above but bi-blade rather than triblade. Disclaimer: I have not tested yet and below information based on assumptions from comparing bi-blades and tri-blades in general. Will update once mine arrive and I've tested.
Dark horse to consider...  Gemfan 2540 flash triblade Yes this is a 2.5" prop but objectively it is so good it is worth considering downsizing. You can find an earlier review I did on these here and a review on the Skystars Bolt X120 which uses these on 4s here
Others:
Please note the King Kong 2840 propeller was not included here because I found the Gemfan 2540 superior in every way. Also I have not include the Rotor X 3044 because it is difficult to source where I am based. The feedback that I have had is that it is more aggressive in pitch than any of the above props and probably only suitable for for stator sizes 13xx and up.  A controller that doesn't dwarf my micros! A controller that doesn't dwarf my micros! I've had the Taranis X-Lite controller for 2 months now and in that time many reviews have been published, each adding to the information available in the public space. I have made sure I've spent a decent amount of time with this controller before writing my review and as a sneak preview I've sold my Taranis QX7s such is my impression of this controller. I've found that the universal comments that resonate with me are:
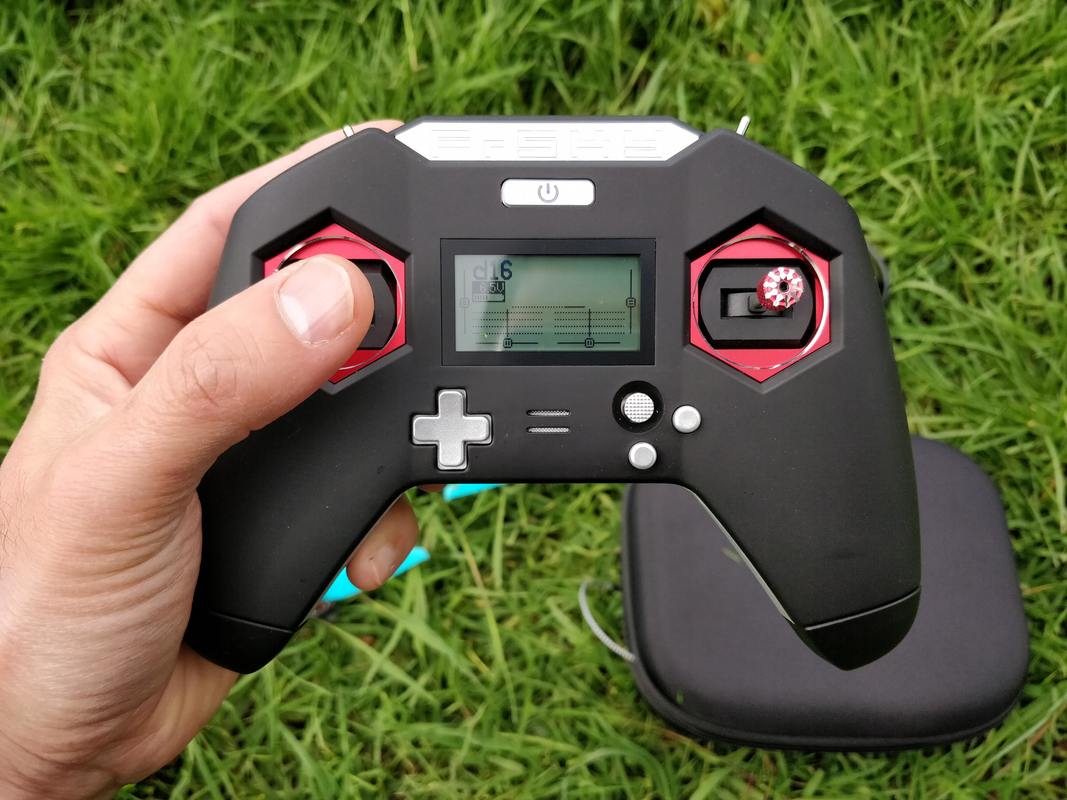 As a thumber my hands and fingers fall into a naturally comfortable position As a thumber my hands and fingers fall into a naturally comfortable position I am a thumber I don't care if I can or can't pinch Let's face it, it's no surprise that this controller has taken design cues from console controllers to target those who have grown up with a controller in their hands. Further more it is suitable for any 'thumber' like myself where your hand naturally fall into a comfortable position with all controls and switches in close proximity. I'm all for the omission of a neckstrap because the weight, size and way you hold makes it unecessary in mind. What if you're a pincher? This review probably isn't for you because I can't empathise but there is no common opinion on whether this will suit you or not. For example two reviews I have a tremendous amount of respect for (NJTech and NickBurnsRC) have opposite ideas on suitability for pinchers. Check out their youtube reviews for more. All I can say is that it is excellent and feels natural for someone who has only ever been a thumber. Open TX is the operating software The Taranis X-Lite runs open TX which is the most common transmitter software in FPV (The Flysky Nirvana and new Jumper Radios use open TX too). The X-lite runs the latest version 2.2.2 and find navigating easier than on the X9d or QX7 with the new 'nub' control. I won't cover Open TX here but for those familiar with the system there are no surprises here. The latest version of Open TX for the X-Lite can be found here I now have a better appreciation for the battery size When the X-lite was first released everyone was upset about it using 18500 batteries instead of the more commonly available 18650. 18500 batteries were not as common but have now popped up in most stores like Gearbest, Banggood, Piroflip etc. Since battery shipping is still dicey I found an option to use "AA" sized 16500 batteries in my X-lite in this blog. I can now appreciate FRSKY's no compromise approach to choosing the 18500 over the 18650 - it is much more compact especially when considering the batteries used in the QX7 and X9D. Below is a picture of how the X-lite would have looked if they'd gone with 18650 batteries - awkward. Here is the link to thingiverse however if you wish to print.
It is so portable! Unfortunately the thumbing/pinching has dominated discussion on this transmitter (at least in reviews) that many tend to gloss over what I believe is the strongpoint that sets it aside from most controllers out there - it is very small and very portable. My last controller was a Taranis QX7s which is up until recently has been the most popular transmitter, particularly in the cheaper QX7 form. Although it is an excellent controller, it is large in size (especially if you fly mostly micros!) and it is not especially robust, particularly the auxilliary switches. Really it needs to go in a protective case first and then in your backpack where it tends to take up most of the room. In contrast the X-Lite is small and even if you use the protective case it still doesn't take up much room. Furthermore the Aux switches are smaller, stiffer and overall stronger meaning if you can find a way of protecting gimabls and the screen you could chuck this straight in your backpack without any other protection. Gimbal protection is included but these are loose and would easily come off if the controller was placed directly in your bag. I've recently ordered the "Realacc Stick Rocker Protector & Screen Guard For FrSky Taranis X-Lite" from Banggood which is a 3d printed minimalist gimbal - screen - joystick protecter that *should* allow me to place this directly on the bag and leave a helluva lot more room. It's worth noting the space and portability was a big reason I preferred Aomway Commanders over box goggles (blog here) and saving room with transmitter is similarly important now I know firsthand what a benefit this is to me.
It takes time to adjust but performs really well It's no lie saying that my flying was significantly worse than usual when I started out with the X-lite because it felt unfamilar. Yes the gimbals are smaller and yes the have shorter throw. What this meant in the first few packs there was a lot of over correction because it makes you feel like you are running higher rates. Don't adjust any settings though because your brain will adjust and correct. Now I genuinely prefer the X-Lite after this adjustment phase becaue I could never reach full deflection comfortably with the QX7s but can with the X-Lite - I get to make use of the entire gimbal. Bottom line - stick with it, it will feel awful at first but you'll soon come right. And on to the switches - they are bloody brilliant. They have a much more positive 'click' than other taranis radios and much shorter length meaning no accidental switch flicks plus they will be way more robust (I broke several switches on the QX7s). All four are much easier reach from your index fingers. The practical outcome for me is a can disarm just off the ground during landing rather than trying to land, boucing because of airmode and the disarming... a minor quibble no doubt but definitely still an advantage. There are 4 switches in total - top left and right are 3-way and bottom left and right are 2-way. You can swap these out for other variants including momentary switches if you want. Lastly there are 2 slider style potentiometers (pots) for progressive rather than binary control over gimbals, servos and the like. For most FPV quadcopters these will not be used. 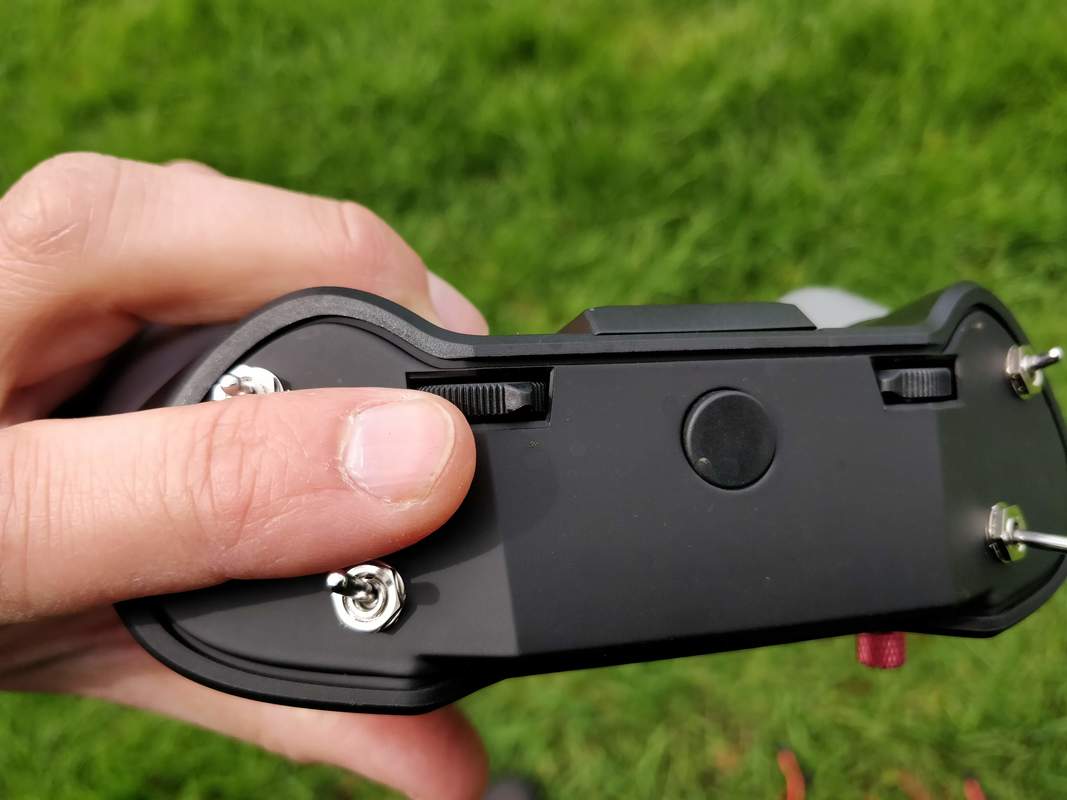 Switches are much closer to inactive fingers making disarming much fast and more natural. It has a proprietary expansion port Historically most modern radios including the Taranis range (X9D, QX7) have used the JR expansion port for additional functionality. This includes multiprotocol modules such as the MTX9D and IRange-X IRX4 Plus for control over other receivers and the TBS Crossfire module for a long-range 900MHz control link. For reasons that are becoming clearer now this has changed on the X-Lite. The module is smaller in size and profile and is unique to the X-Lite. At this stage only 3 modules fit the X-lite - the Vantax MPM Lite multiprotocol module, the IRange-X IRX4 Lite multiprotocol module and the FRSKY R9M slim long-range 900MHz control link. The TBS crossfire modules do not physically fit BUT since the pin out is the same, some clever cookies have made 3d print designs that allow the crossfire module to connect to the X-Lite ableit a little ungracefully. As a side note I have a $6 multiprotocol module that I will look to adapt to my X-Lite in order to control my NFE silverware bayang protocol micro brushed quads.
It's really easy to recommend this to a thumber For a long time there was a lot of hype around project dark knight (now FLYSKY Nirvana) which was due to be the spiritual successor to the Turnigy Evolution. However, the Taranis X-Lite has come out of nowhere with a set of features comparable to the best Taranis controllers in a smaller package at an extremely competitive price and so has kind of knocked the stuffing out of the Nirvana launch. It's a simple upgrade for many in the FRSKY ecosystem because we can use the same receivers which on the whole are the smallest, cheapest and best performing - e.g. the XM+ with excellent range at aroung 1g can be had for around $9 at Hobbycool. The controller is so easy to like and obviously a lot of work has been put in by FRSKY to make this an extremely competitive price - it is only $20 more than their entry level QX7 and includes the much more expensive Hall-effect gimbals as standard rather than an upgrade part. If you are a thumber or are coming from a game controller I would recommend this highly as a first (and last) controller. Likewise I would strongly recommend this as an upgrade from any other controller especially if you are looking for better portability. Quick note on the FLYSKY Nirvana This looks like an excellent controller but is $40 to $50 more expensive that the X-Lite. It has support for a standard sized Crossfire module, better grip options for pinchers and a more colourful touch screen display. It is bigger though - closer to the QX7 in size than the X-lite. If these things are important to you, consider the Flysky Nirvana but if they are not (like for me) then go with the X-lite if you are looking for a console controller style of remote. One potential downside of the Nirvana is that is uses flysky receivers by default which have historically been lacking in features (RSSI, Telemetry) and range although this will supposedly be rectified soon. If you have come from FRSKY though it would mean a full set of new receivers rather than just a re-bind. Please note this Taranis X-Lite was kindly provided by Gearbest.com. If you find this review help you in your decision to purchase, please consider purchasing from them at this link Accessories currently available for the X-Lite
Note: Any replacement parts can be purchased from HORUSRC.com
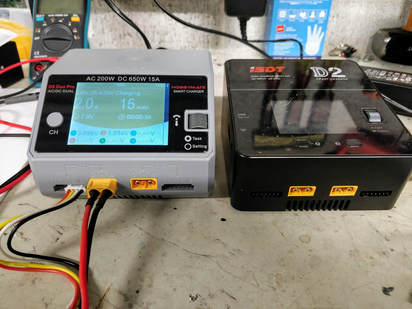 The HobbyMate charger is similar to the ISDT but has it's own pending patents for design The HobbyMate charger is similar to the ISDT but has it's own pending patents for design The Hobbymate D6 Pro Duo is quite simply this is the most complete charger I've come across. Up until very recently the charger I have been using most is the ISDT D2 smart charger than can charge up to 6s lipos x2 at a time on separate channels. This has been and excellent charger and the allowance for charging 2 batteries at a time (entirely independently) means that I have no used my balance board since I got it. User interface is very simple and it is a joy to use but there is a glaring omission - it only has AC in put meaning although it can be directly powered from a wall plug, it cannot be powered from a DC (battery) source when you are travelling or have no access to AC power. I'm happy to say the the Hobbymate D6 Dup Pro addresses this and allows you to power and charge from a dc source ranging in 6.5v - 30v meaning you can power from a 2s to 6s lipo/li-ion or a car battery for example.
It's fair to say there is more than passing resemblance to the ISDT D2 as you can see in the image above - the interface although different graphically is almost identical on a functional level. Menus are simple and intuitive as is the way you navigate - a click wheel that is mounted horizontally rather than vertically on the ISDT. The menu and options are a little more extensive in this charger as you can see below. The wireless mobile phone charge is a nice touch but for me at least I haven't had a wireless charging-ready mobile for some time. If I did though I often have my phone floating around when I'm charging lipos so probably makes sense.
In use it works as expected. There are 3 simple modes for your battery - charging, discharging and storage. A very wide range of voltages are available for each mode meaning you can charge, discharge or store rechargable batteries with any chemistry (e.g. Lipo, LiFe, NiMH, NiCd, Lead Acid etc.). The charger will automatically balance each cell in any mode up to 6s as you'd expect. It's easy to adjust current to suit your needs up to 15A on each channel meaning you could easily run 2 parallel boards at a time if you wanted. Current adjust is also available after you have started charging.
I've been using the Hobbymate D6 pro duo for about 2-3 months now and it has become my charger of choice to to flexibility. For the most part I no longer bother with the stress of parallel charging and matching voltages with 2 independent charging channels but with 15A available per channel it is easy to do so. You'll find that many reviewers in the community including Joshua Bardwell and Kabab FPV have also reviewed this charger with a similar conclusion - it simply does everything that is asked of it. It has clearly taken inspiration from the ISDT D2 but they have innovated with additional functionality without losing any of the intuitive functions of the ISDT D2 meaning that they look to have improved on an already excellent product. This charger is made by Hobbymate (HobbyCool) and they are starting to get a number of local retailers but I'd recommend buying from the source at HobbyCool.com here: http://hobbycool.com/d6-duo-pro-ac-dc-battery-charger-w-wireless-smartphone-charging/
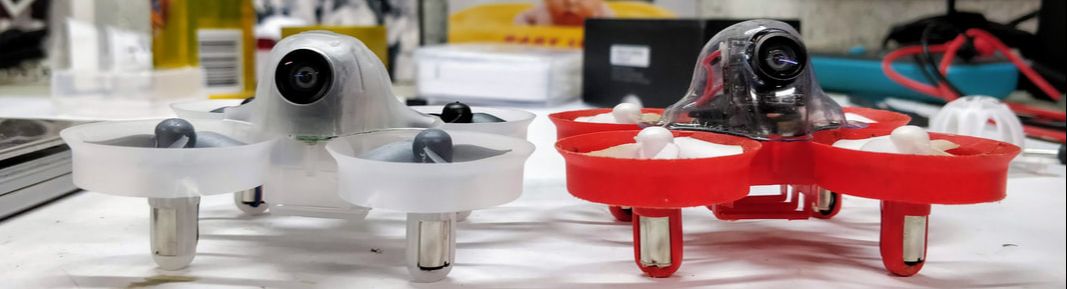 B03 pro with f02H canopy compared to an E011 with Betafpv canopy Introduction Tiny whoops have firmly cemented themselves as a bonafide class of FPV flight. Racing is held indoors and can be run irrespective of weather and is very popular as a dedicated series rather than just something you do when the weather is rubbish. The beauty is that if you only want to do it when the weather is rubbish it is not expensive and you can have a great FPV experience even at the lower end of the scale which you can add to if you feel like it. Last year I wrote a series on the E011 whoop using a budget camera and F3 flight controller (part 1 and part 2 blogs) but in this review I'll cover the Boldclash B03 Pro which has better control as a stock quad, devilishly simply to convert to FPV and offers something for rate mode flight that is superior in performance to Betaflight or Butterflight.  The B03 Pro whoop The Boldclash B03 Pro is a tiny whoop style quad made by boldclash and features the 716 size motor (7mm diameter, 16mm long) which is now generally recognised as a superior size to the earlier 615 motors for performance and flight time on 31mm props. It is generally similar to the Eachine E011 except in cowl design, transmitter and flight controller. This last bit is particularly important as I'll get to later. It can be bought with either 1 x 300mah battery or 3 x 300mah batteries - larger than the 260mah included with the E011. The set of spares included is basic - screwdriver, 1 spare set of spare props, a prop removal tool and a basic USB charger. 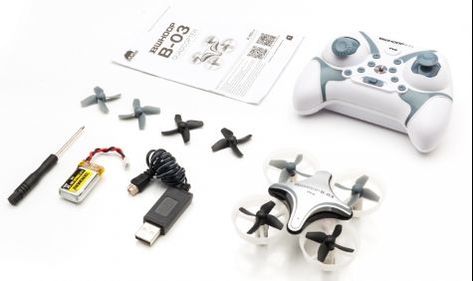 Obligatory what's included in the box pic. I'll assume you, the reader here is somewhat familiar with quads so in order to keep this review concise will focus on the similarities and differences between this and comparable tiny whoop style quads. First of all I'll note that the B03 Pro compared to the earlier (now obsolete) B03 standard does not have the psuedo altitude-hold mode - the controller operates the same as any other mode 2 controller. Flight performance is comparable with the E011 which makes complete sense - same motor size, similar weight similar battery size. What heavily weighs in the B03 pro's favour though is that the highest rate mode allows a much greater angle than the E011 meaning much faster forward flight and better rates in general. The B03 pro battery has approximately 15% more capacity meaning that flight times are up about 15-30 seconds but flight-time repleatability is difficult here. The transmitter is slightly larger than the E011 model but otherwise comparable: toy-style gimbals and basic trim control as well as a 'flip over' button and a button that cycles your rates. I'll mention here that this runs the Bayang protocol which means that you can use your full size remote to run with a cheap multiprototcol module $7 for a FRSKY compatible one from Banggood and the same price for one comparible with a FLYSKY controller at Banggood. Alternatively the Jumper radios (I can recommend the T8SG V2.0 plus) are all compatible with baked in multiprotocol. Interesting fact that Bayang protocol has much lower latency than Frsky, Flysky or even Crossfire... If you go no further than just buzzing around line of sight then this is a great little quad - solid performance from a ducted brushed micro quad with good battery life and only $17 with one battery or my recommendation is $23 with 3 batteries. We're not here for line of sight though and where Boldclash really stands out is their genuinely plug and play option for FPV. Which brings me to the... BoldClash F02H FPV - The most complete FPV whoop solution I've ever come across FPV whoops have the jankiest camera mounting solutions you ever seen - 3d prints that fully expose the delicate camera, rubber bands, double sided tape. I've tried them all and get between 1-5 crash landings before I have to reassemble it or replace the camera/vtx unit due to damage. Sadly this is even the case with my beloved santa whoop as you can see below. Vacuum formed cowls like the one developed bu NotFastEnuf (Shanghai mullet) or the one by BetaFPV improve camera protection greatly but still don't positively mount the camera. The Boldclash F02H fixes all of this by using a purpose build canopy that exactly fits the Boldclash F02 separated camera/VTX and that alone. The result is a unit that is built as one and is very positively mounted and bolts down exactly to the mounting points of any tiny whoop-style quad. Things go one better with the Boldclash B03 pro though where it plugs into the main board. To install:
The finished unit weighs just 5.5g which is very reasonable considering it includes a full cowl. Vtx channel buttons are easily accessble with a button integrated into the canaopy and there is direct provision for video in/out if you wish to use a FC that supports Betaflight OSD. The Angle is fixed at 10° which is very common for whoops. The camera will run down to 2.9v meaning you do not need to run an up-regulator; 1s vbat is just fine. Since the camera vtx is based on a split board it is much lower profile that the BetaFPV cowl, Shanghai Mullet or even the UR65 cowl which I use as well. 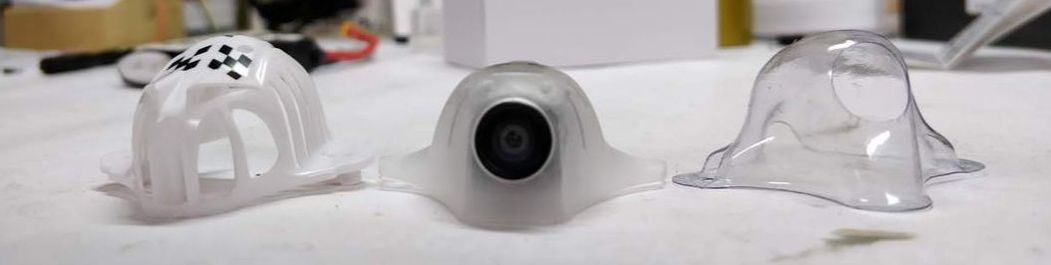 Video performance is good - comparable with the VM275t and other more recent AIO cams that I run. It's 48ch/25mW fixed which is pretty much the norm and signal range is no better or worse than anything else I run. I do like that it is switchable PAL/NTSC as I prefer the extra resolution of PAL but I know others prefer the slghtly higher NTSC refresh. I can't recommend this unit enough. It seems more expensive at $20 but it is so sleek, clean and durable that I can see it lasting a heck of a lot longer than anything else I've used so far. I'll clip this blog here as this is where you may want to stop if you are just want a cheap basher that performs well using the included toy remote or your own with multiprotocol. In the next blog (which I'll link here when available) I'll cover more powerful CM03 insane 19000kV motors and most importantly the upgrade to NotFastEnuf silverware - this particular flight controller lends itself to flashing with this particular firmware that outperforms anything betalfight, butterflight or inductrix is capable of. It is not an easy process though so will keep this to the next blog.
If you haven't yet seen the first part of my Leader 3 (SE) review, click here. In it I cover an overview of the New Leader 3 including full discussion of the components, build and software setup. A quick correction too: I mentioned originally that the flight controller (namely the gyro) will only do 8kHz loop times. This is incorrect - it will actually run up to 32kHz! Certainly the first I'm aware of on a board this size and something for me to test in future. 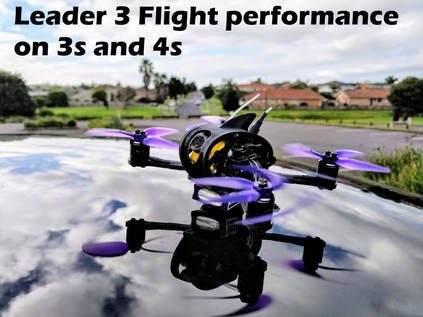 Before I go any further I should note that my Leader 3 is a review model and so there may be minor improvements in the final version shipped to buyers. I'm in regular contact with Full Speed RC to give them feedback on what I find to assist with these improvements. The Leader 3 is available directly from FullSpeedRC.com, Gearbest or Bangood. Video performance Since FPV performance is common between 3s and 4s I thought I'd cover that first. In short it is outstanding. Fullspeed RC shared a lot of the development of the included TX600 vtx with me an a lot of effort went in to ensuring a clean video signal all the way up to 600mW and the results sure doesn't disappoint. The result is that the Leader 3 has the cleanest video signal I have every used. There is absolutely no impact of throttle or other electrical noise on signal and it is hard to put in words just how much more enjoyable this makes the signal. I do miss the audio that AKK VTXs allow for but most people don't rate this as being important, especially on a micro. It's noteworthy that the the transmission power will go as high as 600mW - equalled only by the AKK FX3 ultimate (review here) in this form factor. OSD control of settings via Tramp works as expected. Antenna connection is via UFL is common for micros and fit for purpose. No propellers in FPV view Great news for those who don not like seeing their propellers - the frame design means that even with fairly modest camera angles of around 35°and up there are no props in view. Hopefully this is clear from my videos below. This also make the drums for a Caddx Turtles HD camera install beat even louder... Camera Angle I wanted to clear things up on camera angle since Nick Burns mentioned it couldn't go past about 45° in his otherwise excellent review. I can confirm that the camera connector does not foul on the flight stack and does infact smoothly go all the way up to about 90° amgle. Pictures are best here so please see below:
Performance on 3s When the Leader 3 was shipped to me, 2 custom PID prodiles were programmed in by fullspeed, Profile 1 was designed for 3s and profile 2 for 4s. 3s was tested with profile 2. Both of these profiles can be seen in full in part 1 of the review here. For 3s testing I used Turnigy Nanotech 3s 450mah 65c batteries. They weigh less than 45g meaning all up weight was around 140g. Flight time using these batteries was typically around 2.5-3 minutes with batteries coming to a resting voltage of arounf 3.75v per cell. Flying exclusively with the HQ 3x3x3 propellers flight felt very 'balanced' - what I mean by that is the quad didn't feel overly heavy (or light), top speed was fast enough but not ludicrously fast like the Skystars Bolt X120 on 4s (review here). It was however very predictable - I could hit gaps and avoid obstacles in a way where I felt I had complete control. It was fairly similar to the way the Emax Babyhawk R 3 inch felt (review here) but the HQ props felt more predictable and familar compared to the EMAX Avans. This makes sense - both the Leader 3 and Babyhawk R are of similar weight and with 1106 4500kV motors on 3 inch props and both have optimised PID tunes. Full Speed RC seem to have done a good job on the tune here not just for the feel during flying but also in keeping propwash to a minimum, even when I tried to put myself in dirty air in 180° turns or descending directly down. Below is a video from an early flight (2nd pack ever) in a local carpark. Typical I had DVR issues in a flight later that day where I'd gotten more familiar with the flight characteristics :/ Performance on 4s The battery I used for all 4s testing was the China Hobbyline Ministar 4s 650mah pack. It is an excellent battery that I even use on my 4 inch racer so is very capable although a little heavy at 87g. First of all I'm going to talk about straight up speed and my perception. It did not feel as fast as the Skystars Bolt X120 using the same battery. This is not an objective measure, purely feel. It did feel faster than the Babyhawk R 3" using the same battery. To dig in to this further though I do need to say that that Skystars Bolt X120 is very hard to control with this battery and I did not enjoy flying it because it felt difficult to control. It felt like it needed more open space which then kinda defeats the purpose of a micro. By comparison the Leader 3 felt in complete control using 4s and PID profile 2 as customised for 4s by Full Speed RC. As a result it felt right at home on 4s with all the control and balance I felt on 3s. I think part of this is due to tune but moreso that that larger 3 inch blade is able to better support the additional weight from the heavier pack and hasn't overloaded the propeller (disc loading theory). All other features of flight were similar to 3s - excellent video, precise handling and minimised propwash. I was really enjoying flying this until... Disaster Struck! When I first received this model, Full Speed RC cautioned me to use 4s using the smaller Gemfan 2540 props (review here) since motors could overheat. Since I was the only reviewer to receive mine where it is winter presently rather than summer, this was less of an issue although I did keep an eye on motor temps. For this reason I stuck with the included 3 inch props for 4s. About 10 packs in of warm motors (40-50°C only) I fell out of the sky when attempting a short speed run (see video below). On closer inspection the left rear corner had failed that I could later confirm as a motor failure (as opposed to ESC). The motor definitely was warm only as above and not hot. The only other time I've had a motor failure was on the babyhawk r when I used PIDs with too much P and D on 4s and even then the motor did not fail mid flight, rather afterwards intsead. This motor was scorching hot. I discussed this with Full Speed RC and found that they will be using a stronger motor on the production version - the review version like I have are a prototype. As you can see below when comparing to my burnt out motor on the Emax Babyhawk R, the Fullspeed one does not look nearly as abused - it failed at a much lower load. Interestingly shortly after this I saw Andy RC's review and found he had an identical problem - motor failed mid run using 4s with HQ 3x3x3 props. Update: The prototype motors are actually 4800-4900kV and the production version will be 4500kV.
So, what does this mean for you? Until I can confirm that Fullspeed RC have moved away from the proptotype motors I can't recommend using the HQ 3x3x3 props with 4s, even in cold weather. For now stick with Gemfan 2540 props on 4s. Of course if it ships with new motors then all bets are off. Full Speed RC is sending me a full set of new motors so I will test with these and post my results in a follow up review as soon as I am able. Update: The prototype motors are actually 4800-4900kV and the production version will be 4500kV. Conclusion The Full Speed RC Leader 3 is as an excellent flyer on 3s - great video signal and predictable handling make for an enjoyable flying experience. On 4s the Jury is out... custom pids make this fly well too but the motors' inability to cope with the included 3" props are a bit disappointing. For now a bandaid solution is to run with Genfan 2540 props on 4s but I expect that Full Speed will release with a stronger motor for launch as they did with the original Leader 120. Again, my sample is a reviewer model and this feedback is used to make changes if needed to the final launch product. Full Speed RC has proven themselves to be a reputable company with well researched (and tested) quadcopters and I expect them to follow through on this model too. The Leader 3 can be purchased directly from FullSpeedRC.com - their shipping is a little more expensive ($8) but is the fastest. Alternatively you can now purchase at Gearbest (standard version) or Banggood (standard or special edition) or Hobbycool (special edition)
 This review has been kindly written by @fpv_airborne who is looking to become a regular contributor here. Introduction Introducing the 30x30 HGLRC vtx + dvr combo from HGLRC. This is one of the first 30x30 DVR recording vtx available to the public. The DVR is switchable for 40 channels, has power levels of 25mw, 100mw, 200mw, and 500mw, and has a built-in DVR which takes up to a 32gb SD card. This board also includes a built-in microphone that records onboard sound. The vtx has a resolution of 640x480 which is reasonable for DVR recording. The HGLRC AIO VTX DVR can be bought directly from HGLRC here or from your favourite vendors including Banggood and Gearbest. It's about $40 at the time of writing (July 2018).
A closer look at the specs. The HGLRC vtx has changeable power levels that include pit mode, 25mw, 100mw, 200mw and 500mw. It also includes 40 channels to connect to your goggles such as A band, B band, Fat Shark and R band. The board measures 36mm x 36mm, with the mounting holes 30.5mm apart. The built-in DVR has a slot under the board to accommodate an SD card up to a 32gb. This records 640x480p quality video with no static or breakup while flying FPV and this is what really sets it apart from goggle DVR. The vtx weighs just 7.9 grams and is the same size and thickness as a 30x30 mounting flight controller. Installation The HGLRC VTX + DVR combo works much better than expected. The small, thin board allows for easy mounting on top of or underneath the flight controller or power distribution board. The easy plug-in and -out MMCX antenna adapter also works much better than the UFL connector which was the main connector used on many types of vtx’s such as TBS unify pro and Tramp vtx. The MMCX adapter is much more durable and sturdy because of the plug-in design instead of the clip-on adapter; the latter can easily pop off during a crash and may not be easily noticed. This in turn can cause major issues such as burning out of the vtx, poor video and overheating and/or ruining other components on the stack.
From my first flight with the vtx + DVR combo I was impressed. The vtx was flawless to set up with clear instructions. Included with the vtx is a manual that includes a diagram of the vtx, wire layout, power levels and bands, and “How to's”. The manual explains how to set up the vtx including how to wire up and how to change through power levels, bands and channels; this uses only 2 buttons that are nicely placed on the side of the board. Briefly pressing the channel side button once changes the channel from 1 up to 8, whereas pressing the button for 2 seconds changes the band from A band up to F band. Pressing the button for 4 seconds changes the power levels from 25mw up to 500mw. The DVR recording is set up by inserting an SD card (up to 32gb). Then briefly press the “REC” button and wait for the red LED beside the button to start flashing, indicating that recording has started. Once you are done with your videoing, just press the “REC” button again which will stop and finish the current DVR recording. Note that the DVR will automatically stop recording after 5 minutes. 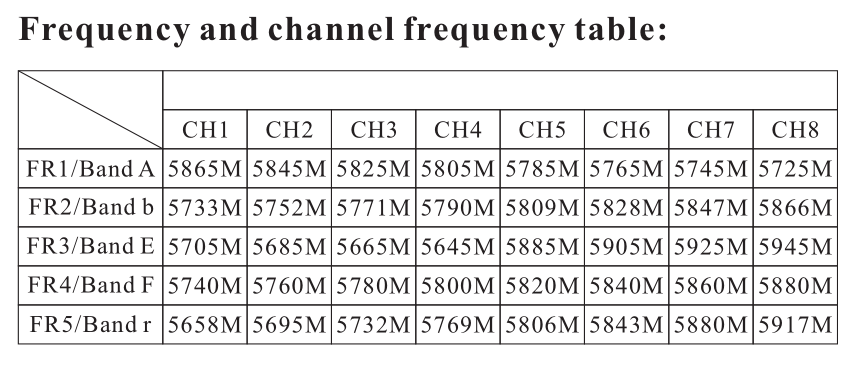 Experience during flight: As soon as I placed the goggles on my head, I was surprised to see the difference in colour compared to my other vtx, a TBS unify pro. The video quality seemed much more saturated and warmer in sunny areas and darker in shaded areas. This was seen partially in the FPV feed but was much more noticeable in the DVR recording after footage was reviewed. I was previously using a TBS unify pro with Foxeer antenna and Foxeer Predator v1 mini that gave images of more natural colour, but once I switched to the HGLRC dvr vtx, the quality of the image improved. I understand that not everyone will prefer the warmer, more saturated colours. If so, this can be changed with the camera’s OSD cable. However, while flying I noticed that there was far less static in the goggle view from the HGLRC vtx compared to the TBS unify pro vtx. Both were running 25mw, and both had the same Foxeer antenna, Foxeer Predator camera, and flight controller. I was surprised to notice this difference but it was quite obvious in my test flights of both quads at the same location and under the same conditions. Because of the built-in DVR, there is no static or break-up which makes the video much more pleasing for the viewer to watch. Conclusion:
In conclusion, I would recommend this vtx to people who want to build a light racing quad with quality DVR footage for their races - but without need to add the extra weight of a GoPro. This DVR vtx board can also replace the more expensive Runcam split for most people, if you do not mind the loss of quality but want to have as little delay to the FPV feed as possible; in racing every millisecond counts. However, there are some issues in terms of possible human error to be considered before purchasing this vtx. Firstly, if your quad flies far away without control, or crashes in long grass, in high trees, in a different property or even unplugs in mid-air, the video feed, that was recording, is not accessible to review to locate where the quad has landed or crashed because the SD card is in the quad and not the goggles. Secondly, after the races you might forget to stop the recording by pressing the button on the vtx, and instead just unplug the quad’s power lead. With the battery lead unplugged, the video will be cancelled leaving no trace of the recording on the SD card. This is because unlike goggles, the vtx-dvr unit has little capacitance to keep the circuit charge while recording is finalised. The HGLRC AIO VTX DVR can be bought directly from HGLRC here or from your favourite vendors including Banggood and Gearbest. 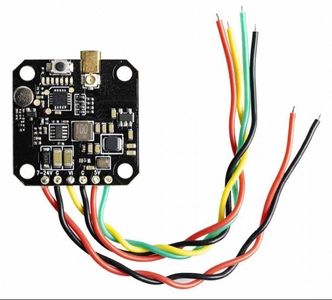 The AKK FX3 Ultimate VTX from AKK The AKK FX3 Ultimate VTX from AKK AKK bring out new products at an amazing rate, particularly VTXs which are their core product. They tend to go through stepwise rather than stepchange product development where they make gradual improvements to already good products - the opposite of 'if it ain't broke, don't fix it' which is a say I HATE. Best of all they do this at an extremely competitive price which is possible only because they tend to sell direct rather than go through a third party. Don't worry they ship at zero cost or very little and are available on Amazon. I've already reviewed the excellent FX2 (30.smm stack) here and have installed the original FX3 (20mm stack) here on a 4 inch lightweight build. Features as listed The product I am reviewing today is the AKK FX3 Ultimate which builds on the AKK FX3 as mentioned above. Key features are:
The install I wanted to do a rebuild of my FlexRC Komori (original build here) as an efficient longer range quad so this was the perfect product to use - full control with smart audio, 20mm stack mounted for extra security and up to 600mw power for improved range. Having audio on longer range is highly underated too since you can hear if anything is suspect with your props or motors long after you've gone out of range of direct sound. To summarise install was painless. I prefered the solder pads to the connectors on the FX3 and the stack mount means I can get a super reliable and secure mount without reverting to doublesided tape or cable ties. I love having the option of UFL or MMX in this size. See below for images and specific commentary on the install - click to embiggen.
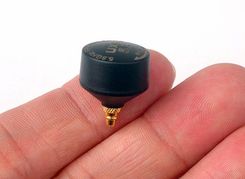 The antenna Like my tooth fairy and floss 2 builds I've used the Realacc UXII Stubby RHCP MMCX-J 5.8GHz 1.6dBi Super Mini Short Antenna here. It is a $6 right or left handed CP 1.6g antenna that is plugged into and supported by the MMCX connector if the frame allows. For me these are a super clean solution - no long pagoda or cloverleaf stalks or even dipole whips that need extra supports. Even the AXII ufl requires more room and a 3d print support. Reception is 'good enough' given the benfits I get. Other connectors and formats are available. Performance I fly with Aomway Commander goggles (review here). Reception is good enough for me but not a good as some of the stand-alone modules that are available for Fatshark goggles. I found the signal to be clear and static free when in line of sight and got fairly minimal break up with behind trees which lessened as I ramped the power up. I used the Aomway Clover for omni directional and the RealAcc patch for directional (review here). I can confirm there are absolutely no issues with Smart Audio on Betaflight 3.3 and 3.4 and adjusted bands, channels and power without issue. The vtx it replaced from the origianal Furibee X140 (review here). This VTX transmitted video well be had no audio, no smart VTX, a very awkward button/LED interface and a direct solder connection only for the antenna. The FX3 not only brought more transmission power options but also added a lot more convience - I would choose to never change channel or power previously now I frequently change to suit the conditions. Also the option of using UFL is excellent because for micros this is typically a more suitable connector given space constraints. I'm just lucky that the Komori frame has the stack mounted close to the back for the UXII antenna with good clearance. See below for a DVR of my flight running 200mW. AKK pricing strategy? From what I can tell AKK run on very tight margins akin to RCX motors at MYRCMART. This means that they only sell direct since there is not a lot of margin available for resellers and so the prices are very low for the feature set. For example the retail price of this unit is only $18. Nothing gets close to this price for the feature set. Furthermore at the time of writing, AKK have a sale on, meaning it is available for only $16  There is a sale on at time of writing that is actually pretty good. They have these on every 3 months or so. Summary
The AKK FX3 Ultimate is simply the most feature packed 20mm vtx available at time of writing. It is also the first 20mm sized VTX to offer 600mW maximum power and options for MMCX AND ufl connections. It is simple to install and maintain with direct solder connections and the standard stack size mound means it is very simple and secure in your build. I can happily recommend this for new build or replacing an older VTX that doesn't have the full feature set you want. 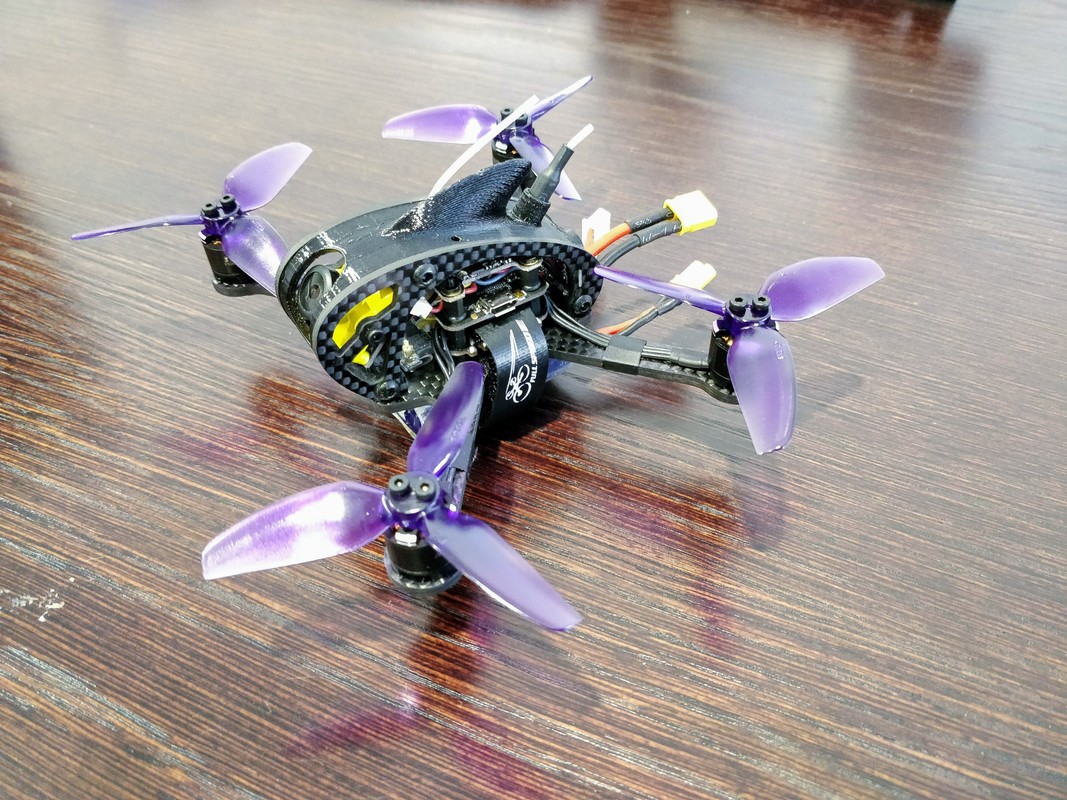 The Leader 3 SE from fullspeedrc.com The Leader 3 SE from fullspeedrc.com Introduction The Leader 3 (SE) is a follow up to the hugely successful Leader 120 which I have reviewed and documented modification extensively, most recently with a summary here. Both are available from Fullspeedrc.com This has been a highly anticipated release not least of which because there has been no releases from Full Speed since last years' Beebee 66 light. The good news is that a big chunk of that wait has been spent working on the Leader 3. FYI two of the main guys are pilots from Full Speed RC are pilots and do a lot of work testing before release which is a welcome change in this hobby compared to many models that come out half-baked. Firstly the Leader is available in 2 variants. The standard model (Leader 3) can be seen below and weighs 87g with regualar standoffs. The Leader 3 SE is exclusive to Fullspeedrc.com and comes with a 3d printed canopy instead of the standoffs. It is 6g heavier but offers several benefits that I'll cover a little later on. A run through the components First the frame. Like the Leader 120 the base plate of the frame is 3mm thick although it has been stretched to 130mm motor to motor diagonally rather than 120mm This means it is capable of accepting a true 3" propeller rather than 2.8" maximum on the Leader 120. The frame is most definitely still a 'deadcat' shape meaning the two motors are further apart (107mm) than the 2 rear motors (98mm). Additionally it is a 'squashed-x' compared to a 'stretched-x' meaning the front and rear motors on the same side are closer together. This means it should be more stable in the roll vs. pitch axis but modern flight software somewhat negates this. Compared to the leader 120, sideplates have increased from 2mm to 3mm thick which should aid durability. More imporatantly a 19mm gap rather than 17-18mm means the leader 3/SE now natively fits a 19mm micro cam. It's worth nothing that the baseplate is only 1 piece so you cannot replace single arms. Personally I think replaceable arms are unnecessary on any quad size less than 4" since there is much less leverage for breaking on a smaller quad. The frame can be purchased separately here.
The canopy (Leader 3SE only). When I first saw the canopy I wasn't keen because it adds 8g weight however I think the functionality may just offset that - jury is out until I fly it some more. The 3d TPU print is of very high quality available in black,white, red, purple, blue or yellow and performs the following functions:
The motors are 1106 4500kv which is the same specs as those found on the Emax Babyhawk R 3 inch and the Skystars X120. They are not open bottom and have mounting holes for regular t-mount props and the emax 2.3" avan props. Most importantly they are rated for up to 4s.
The Build Like the original Leader 120, build quailty is excellent. Solder is clean, wires are cut to length. Not much more to say here, it is well beyond my ability! With the quad assembled there is plenty of room behind the camera to adjust tilt (45° and beyond are capable) and the receiver is mounted in this void. with plenty of room left yet. This is speculation but I'd like to address anyway since it seems like a common thread: my best guess is the caddx turtles HD FPV/DVR (not yet released at time of writing) will fit but not without a little modification. My reasoning is that there seems to be 2-3mm 'spare' room between each stack layer. If these standoffs are trimmed by this amount you will be able to save 6-9mm in height which should be enought to fit the turtles board. It will require some fine wire management and a steady hand to trim the standoff but I do think it may be physically possible - a project for another day. That being said, the double stack of the runcam split micro definitely will not fit.
Software setup Plenty to talk about here although most can be foundin commentary of the Betaflight screens below. If you don't choose to read these however:
Final thoughts pre-flight As you can see from above this looks to be a very well thought out quad and not something slapped together from a spare parts bin. The Babyhawk R and Skystars bolt X120 have both shown that 1106 4500kV motors perform well on 4s in 2.5" and 3" so I am excited to see what the Leader 3SE will add here with all the work that has gone into development from a hardware and software perspective. On paper this looks to have the edge on both of those models in terms of weight, VTX capability and ESC current overhead however the real test will come in flight - stay tuned for part 2 of this review where I will cover flight in full - I already have 3s and 4s batteries charged for tomorrow :)  The Fullspeed RC Leader 3/SE can be bought directly from Fullspeedrc.com and is also available at other retailers however buying from the source is your best chance to get your hands on one quickly. If you are new to my site check out my reviews or tips and tricks blogs, they are loaded with useful information
This review has been kindly written by @fpv_airborne who is looking to become a regular contributor here.  Introducing the HB64 The HB64 64mm micro brushless quadcopter is available as a plug and fly kit from HobbyCool.com with either 14000kV or 16000kV 0603 motors. This review is based on the 16000kV variant and is my pick of the 2. It is just 1mm smaller than a traditional brushed tiny whoop but has much more powerful motors. It is 11mm smaller motor to motor than the brushless Happymodel Snapper7 (review here). I am happy to say that the HB64 has impressed me very much!
Quad specs: The HB64 brushless quad has a 4 in 1 esc and a F3 flight controller onboard. The 4 in 1 esc is rated to 5A and is Dshot compatible and has BLHeli_S configured onto it. These days, we are seeing several companies who are making AIO FC combo with built in esc but this stack seems to work very well. Added unnecessary weight is a big issue for micros but the HB64 weighing in at only 24 grams without battery or 30 grams all up including battery. This weight is impressive knowing all that is included. 4 in 1 esc, FC, battery, motors, props, frame and cam/vtx combo. The camera/vtx combo works much better than expected. It has a discrete monopole/whip antenna just from vtx to top of frame pod. This antenna is great for the quad because of its extremely light weight. It is also unlikely to be broken because there is little surface area of the antenna to hit objects in crashes. This is an improvement from the original tiny whoops which had the cloverleaf antennas that are easily bendable and breakable.
Setup: The instructions that come with this micro quad are insufficient for the full setup of this quad. Included with my quad, there was a little sheet which had a diagram and labeling of the FC. This diagram only showed the FC and nothing else like the 4 in 1 esc, VTX diagram or receiver setup. Even though there is information on Google, it would have saved a lot of time and effort for the buyer to receive more extensive instructions. To that end I have spent some time here documenting what has worked in case others are looking for this information. I was pleased to find that the betaflight firmware was fully setup with Betaflight 3.2 and only needs to be bound to the transmitter to be ready to fly. The pids and (ALL) settings have been adjusted to suit the quad. All that needs to be done is to bind the receiver to the quad, setup switches for arm etc. in the receiver tab and you’re ready to fly! While I was setting up switches, after I setup arm, I also set up ‘flip over after crash’ which is a MUST for anyone that crashes a lot because it prevents those awkward walks of shame to rescue your quad. To use flip over after crash, just switch the switch which is assigned to flip over in the receiver’s tab and then arm using the arm switch, tilt the pitch or roll depending on the angle and objects around the quad until the quad is upright, then disarm both switches and re-arm the arm switch. You will then be upright and ready to rip again! Since I run a Flysky radio, I used a small FS-RX2a pro receiver but the SBUS-based FRSKY receivers will work in the same manner. To set up the FS-RX2A Pro receiver, all that is required is the receiver to be soldered to FC by the GND, 5V and ibus. Then hold the bind button on the receiver while powering on from lipo. Now turn on the transmitter and go into bind mode and that's it! As simple as that and it is bound together. This receiver only works for flysky transmitters but works amazingly well for the purpose and size it is. Next step is to go into betaflight and make sure the serial based receiver (SBUS AND IBUS receiver) is selected and Sbus or ibus in configurators tab, Then in receivers tab, select switches for arm and I strongly recommend you try flip over after crash and beeper in case it is lost or hidden behind something because this quad is surprisingly easy to lose behind a cabinet etc. Flying: Finally a good flying micro brushless! Before I saw this I was hesitant to try another micro build after my previous Eachine H8 with AIO camera and tiny whoop. This is because back when I had those 2 quads, the power and components were not up to acceptable standard and the power was unbalanced so one motor would normally be powered more than the other 3 which created a lot of issues for the pilot. That is why I did not recommend them before. But all I can now say is “WOW”. From the first battery of this quad, I have been impressed. Within a year and a quarter, I can see the huge improvement that has been made in the performance and quality of micro quads, especially since they are now brushless which allows them to have more power and a much longer flight life. Moving forward into the future, brushless is becoming very popular because it allows for a lot more power than the brushed micros, lasts much longer and is more durable and can save weight because of the new ‘Naked bottom’ motors. While flying this micro, using the first 30 batteries, I was very impressed with the 3 - 3.5 minutes of continuous flying which is great flight time for a micro like this. But after the first around 50 packs through this micro, the battery life shortened to 2 minutes to max of 2.5 minutes before I started to feel the battery sag. This is not that much of an issue because it was only because of the batteries’ life time. You would have much more fun if you purchased at least 4 260mah 3.8V batteries and gain longer battery life because the flying time would be more spread out over multiple batteries versus the 1 260mah battery that is included with this micro quadcopter. I was really happy when flying this quad with the AIO camera quality. The quality and zoom of the lens on this camera cannot be changed, but as a stock unit they perform amazingly well. Everything in the camera’s sight is visible and surprisingly clear for a nano camera. The quality of this camera in my opinion is comparable to the “Stock” Foxeer HS1177 fpv camera with all the colour and clarity in the view. The camera however is fixed view. This means that the camera is fixed at a 20° angle. However, it works very well with the power and the weight of the quad while keeping the speed fast. The video I experienced with this quad has been more than enough for what it has been designed for. Flying this quad indoors, the video feed can travel through a couple of walls before severely breaking up. The antenna is well covered and at 25mw at 12 channels, I have not had many issues with the range unless flying between multiple walls. Conclusion: In conclusion, the HB64 micro brushless quad is an excellent micro quad for anyone from a beginner just getting into FPV to a long-timer FPV pilot for those indoor sessions or just some fun for those rainy days. It has more than enough power for indoor races or to rip around the house/warehouse. Its size and power also allows it to hit those extra small gaps that are impossible for larger micros or 3” quads to hit. Its advantages overlap the advantages from any brushed “Tiny Whoop” and for the HB64’s price point, it is definitely worth checking out and potentially worth buying if it ticks your needs. This quad is also very very durable. I have crashed it from high, slammed into many obstacles and it has just held up without any bent props because of the included prop guards. Within my first 20 flights, I crashed into a deep puddle of water where this quad was fully submerged for several minutes but after putting it under the hair dryer and letting it dry off, I plugged it back in and it worked like it did before the soaking. My last point is to address the quality of the solder joints and construction of the quad. Every part of this quad appears to be well thought out and as a result is strong and durable against many obstacles. In my opinion, I would recommend this quad 100%. The HB64 micro brushless quadcopter is available at HobbyCool.com:  This is part 2 of the review. In part 1 I discuss an overview and setup (including betaflight settings from factory) are covered in detail: Part 1 review  Correction Firstly a very important correction. In the first review I showed a picture of the quadcopter minus battery sitting on a set of scales at 65g. I took this for granted and after measuring on my own scales got 84g. I don't usually trust weight in text but seeing it was sitting on digital scales I did not measure myself. Disappointing as this is misleading so I updated Gearbest immediately. To their credit they promptly took the image down and corrected the weight in the description - see below.
Preparing for flight Just some minor housekeeping prior to the first flight. XM receiver was fixed in place on top of the VTX as it was dangling free when I received it. Antenna was fixed in place with a cable tie off the rear arm and heatshrink to secure. VTX antenna got the same treatment off the rear upper-deck of the frame. Lastly I replaced the rubbish battery strap with one from RJX hobbies (review here). Although a buckled strap was included as well as the one picture above, it was much too long? Weird.
Flight performance on 2s Just because the Bolt X120 *can* fly on 2s doesn't mean you *should* fly on 2s. I used my Turnigy Nanotech 2s 950mah (47g) pack and needed about 40% throttle to hover. I could fly but performance was lacklustre and I got bored. I did get about 4 minutes flight time but won't say any more. Flight performance on 3s After my initial disappointment on the weight, performance on 3s 450mah turnigy nanotech was better than I had expected. It felt controlled with enough speed to be enjoyable. I had to switch to default betaflight 3.3 PIDs though since the customised PIDs look more like a 4s tune and felt sloppy as a result. I did manage to get good flight times on these little batteries of approximately 2.5 - 3.0 coming down at 3.75 volts and had fun doing so. Given then power of the quad I'd probably pefer a 650mah 3s for another minute or so of flight and would have less concern about sagging on big throttle punches. For the places I usually enjoy micros the most (tight with small trees) I found 3s the most fun. Quick update: compared back to back on same batteries with my Leader 120 which is lighter (68g vs 84g) with 'smaller' motors (1104 7500kV vs. 1106 4500kV). I found it was similar speed with comparable handling and I actually got as good if not slightly better flight time on the Skystars Bolt - the extra stator size was negated by the lower kV from an efficiency standpoint. The leader however cannot do 4s...  4s 650mah CNHL is a lot of battery on this quad 4s 650mah CNHL is a lot of battery on this quad 4s Powah When I went from 3s to 4s on the BabyHawk R 3" (review here) I got a reasonable increase in speed but not 33% as you'd probably expect. Given the same motor size (1106 4500kV) I was expecting something similar here but got a complete shock here - This thing ABSOLUTELY SCREAMS on 4s. I've always liked the Gemfan 2540 props (review here) but have never tried them on 4s and boy, they sure hold up and deliver on the extra power, it was like a different quad altogether. The speed was like nothing I'd felt on a micro and I had real trouble managing in a tight area. This probably wasn't helped by the fact I was using a CNHL Ministar 4s 650mah battery which weighs 87g so I was really blowing out on corners, even with a lot of extra throttle. It reminded my of running a heavy 4s 3 inch with 1408 motors - super fast but handled like a brick. I'd dare say 450mah 4s at around 62g would be a better option for weight control. at the cost of some flight time. As it stood I was getting 4 - 4.5 minutes on the 650mah battery. I've since moved to betaflight 3.4.0 and have got the tune tighter without oscillations but it is still a handful. For my piloting ability running this quad on 4s requires a bigger area akin to my 4 and 5 inch quads but that kind of deafeats the purpose of this micro. For my money and ability I actually prefer this on 3s - It is much quieter and handles better with the lower weight which is better suited to small parks. The noise alone on 4s makes people more wary of this one. Conclusion Rather than trying to recommend how many cells you should run I've merely stated my opinions on what I want from a micro. The most important thing here is that this Skystars Bolt X120 is well and truly capable of comfortably running 3s or 4s depending on where you are flying or how you are feeling on a particular day. The new throttle limiting feature on betaflight is a great way of limiting power to fly on 4s if for example you want to stick with just this battery size with power more akin to 3s. I've written a full tutorial on this here including how to assign to an AUX switch. Although I alluded to the similarities to the original Leader 120 (review here) it is clearly a different quadcopter with a different feel and different capabilities - it has a much better camera and VTX but is much heavier and designed to run on more cells which make it heavier again for a different flight feel. A better comparison is perhaps the BabyHawk R 3 inch which I find handles better but lacks the speed of this model, particularly on 4s. Images below on a scale for all of these for comparison.
The Skystars bolt can be bought exclusively from Gearbest in several different formats - an unbuilt kit with no receiver (PNF), a built quad with no receiver, or as a built quad with FRSKY or Flysky receivers.
Check on my discounts page regularly for specials but at the time of writing the unbuilt kit is available for $117 and the FRSKY BNF as seen here is available for $134  Emax Hawk 5 pictured here with a turnigy graphene 4s 1500mah 65c lipo Emax Hawk 5 pictured here with a turnigy graphene 4s 1500mah 65c lipo So the Emax Hawk 5 has been out for a couple of months now and it has really captured the imagination of community. This is because it was an EMax-USA driven initiative that started as a way to sell more parts (Magnum stack, LS motors, Avan props) but ended up so much more. Where the Hawk 5 separates itself from all other bind and flys that have come before (except perhaps the holybro kopis) is that is more than the sum of it's parts - the development that has gone into matching the components, developing a strong, stiff yet lightweight frame and then tuning the whole package means it is a bind and fly that is genuinely competitive for racing out of the box. Listening to HyphPV and Sean Taylor in various channels they both believe this is a bonafide racer which is high praise coming from them. I'll try keep this review brief because there has already been a lot said about this quad but I'll try to address the aspects that struck me as peculiar or aspects I don't thik have been well covered. Component choice I think the component choice looks solid but unspectacular however the way that this comes together in for flight is super impressive.
Setup Rather than going through the setup step by step in boring text, I've screen-grabbed all the relevant tabs from betaflight below. In short this quad includes custom filters setup, PIDs and rates so that you have an excellent tune right out of the box. This perfectly matches the specfic frame geometry, weight, motors and props that are used. Confident tuners will no doubt be able to adjust to their specific feel but I can say that I've come across no better custom tune in any quad yet, it is comparable to the babyhawk R (my review here) which makes sense - it was tuned by the same team.
Early flight performance Wow. I had preconceptions that the 2206 low kV motors would be underpowered but was completely wrong. This is a fast, highly manouverable quad that is well tuned. To date it is the quickest quad I've flown and objectively has been found to hit over 100mph consistently. More than that though it corners well thanks to the 'grippy' props and light weight. I won't carry on here about flight but it felt well and truly locked in, the best quad I have flown. In terms of FPV the signal was excellent on 25mW which is what I'm limited to on racing. There was absolutlely no sign of electrical interference or noise on my go-to channel (F2 - 5760MHz) at any throttle level. Just as importantly the image from the foxeer arrow micro pro is surprisingly good. This camera is a surprisingly good improvement over the micro arrow 1 or 2 and the micro swift 1 or 2 - I believe the presets were greatly approved on. I've actually ordered 3 more of these cameras to replace my others with because so far have not been a fan of the newer CMOS cameras. One thing that felt unfamiliar to me were the way the props delivered power and the noise or the lack thereof. Additionally they pull a lot of current -I peaked at 110A on a 1500mah 4s pack. My guess is that in order to take advantage of the relatively low kV motor they went with a VERY agressive propeller with a distinct geometry. After swapping over to a HQ 5x4.8x3 which is stilla fairly agressive prop the Hawk 5 felt much more familiar and predicable to me with a power delivery and audible feedback I'm much more familiar with. I didn't feel I lost anything in speed or grip but peak current draw dropped off to 97A, i.e. 10% improved efficiency at high throttle. I need to note that props are a personal thing and this is my preference. You may find you like the stock Avan Flow props much more, I'm more of a HQ/Dal guy. Lastly I'll say the efficiency on this is very impressive, again probably down to their choice of motor.. Everyone flies differently so will get different flight times depending on what they are doing but this I founf that even with my most tired 4s 1000mah pack I was able to get 3 minutes of flight which outperformed my lighter Floss 2 build which hand 'only' 2205 motors. On a good 1300mah I got 4 minute sof hard flying and from 1500mah about 4.5 - 5 minutes.
Conclusion If you are looking for a 5" bind and fly quad quite simply this is the one to get. $250 sounds like a lot compared to other cheaper ones but as I've said before this is so much greater than the sum of it's parts. The clever choice of components, lightweight frame and wonderful tune make this a great quad and it shows - at the time of writing it is always in and out of stock depending on where you shop. Since so many have sold there is also a very big community - more people to solve problems and enhance. For example customs canopies, go pro mounts and recommendations for budget meaningful modifications and customisation is much more readliy available than for less common quads that tend to come and go. I'll bet this quad will be around and supported well for a long time. Support is great - as you can see above all parts are available from many retailers so replacements are not just available but commonly available. I can't speak to reliability yet since I haven't flown enough but since they haven't gone with the very latest and leading edge technology and hardware, that means there have been time to iron out the bugs. I'm expecting few problems but will certainly report back if there are. Lastly I'll make a note again on the efficiency. In the race for power with bigger motors and steeper props this often gets forgotten but EMax seems to be going down the path of optimised efficiency and it shows here. The rhetoric from them is the the LS and newer RSII series are motor were not developed for all out power but more for efficiency which is what racers have really been demanding - making sure that on fast tracks that they still have battery left at the end. This is a benefit to the racer of course but for the casual pilot more efficiency = longer flight time = more stick time for learning and more of the the fun part of FPV... actual flying! In summary this is a great model and comes highly recommended from me. Of course I'll be looking to improve where I can do so effectively and cheaply and will write about this where it's meaningful. Gearbest kindly supplied me this model and I'd encourage you to purchase from them as per the link below. Using this affiliate link comes at no cost to you but will help me to continue making and publishing reviews like this and recommendations for improvement. Updates! I've new written a blog on bang for buck upgrades and also a comprehensive walkthrough on a VTX upgrade to allow DVR, smart audio, great power options.
Parts available:
Please note this review will be in 2 parts. In this part (1) I will cover an intro, overview and setup of the quad and I will completed part 2 once I have a decent amount of packs through it. Part 2 is now here  Skystars X120 Bolt Skystars X120 Bolt Intro In the last 10 or so months that the Fullspeed Leader 120 (review here) came out, a whole new category of 2.5" quadcopters have been released. These have mostly knocked out the 2" brushless market owing to better power and efficiency that the 11xx series motors are able to deliver with 2.5 inch props - most notably the Gemfan 2540 (review here). In all this time, none have really hit upon what made the leader unique: it's supremely light weight. The Aurora Mini Fight, the HGLRC Hornet and to a lesser extent the 3" babyhawk R (review here) have all showed what more powerful 1106 motors can do but have all had 15-25g or more weight on the Leader. Enter the Skystars X120 Bolt. This is an 1106 powered 2.5" quadcopter and weighs 65g - only 2g more than the Leader 120 whilst retaining a durable 3mm thick bottom plate. Better yet it receives all of the modern improvements that have become more common on brushless micro quads since the Leader's release:
Overview of the build
Soldering around the stack looks adequate and it is nice to see they took the time to keep motor wiring tidy and tucked away. Motors themselves are 1106 4500kV and are a naked bottom design which helps with cooling and weight. They are similarly notchy to the Emax RS1106 motors on the Babyhawk R. Motors have only 2 mounting holes on the frame arm by design. On mine 3 had all 3 screws but one had only 2. No big deal for me but a little sloppy on QC.
Software setup Below is the stock betaflight setup. At the time of writing (June 2018) Betaflight 3.4.0 has just been released as RC1. The Skystars Bolt X120 came defaut with 3.2.4 which is a release that has dynamic filtering so I am happy to leave this be. The default target was omnibus F4 SD which is odd since this card certainly has no SD card for blackbox storage. When I update I will be changing the target to omnibus F4 no SD. I am pleased to say that setup has been customised. In particular I like that the dynamic fliter has been turned on but especially that custom pids are present on profile 2. All values are significantly lower than default and my guess is that they are set up for 4s. Interestingly the rates look quite unique - max yaw rate is increased over stock @ 769, pitch is higher at 870 and roll is very high at 1176. For the purpose of reference I have a screen shot of all customised screens below and my take on the unique settings. So that will wrap up part 1 of the review. Keep an eye out here for part 2 where I will maiden and try with 2s, 3s and 4s of varying sizes with my take on performance and DVR footage. Thanks for reading. The Skystars Bolt X120 can be bought from Gearbest who kindly provided this model for review. It can be bought from Gearbest in multiple formats to suit your transmitter including:
I've had the AKK FX2 in my main race quad now for 3 months because of less than ideal experiences with longevity from other VTXs in the past. I can say that after numerous race meets, fun fly sessions and solo practice it has held up perfectly with no issue performing exactly how I want - no fuss. Furthermore when flying in a group I've had no problems of channel bleeding or power-up blasting which are the features that TBS and Immersion RC promote as key features in their premium VTXs that cost nearly twice as much. More importantly than this though, the FX2 gives an excellent signal. I don't find myself wanting more than 25mW except when flying around dense trees when I use 200mW for extra penetration. I have had no need to run 500mW or 800mW other than just to test that they work. For disclosue I use an emax RHCP pagoda antenna and a RealAcc 8dbi patch (review here) on my Aomway Commanders (review here) and a UXII MMCX stubby on my quad. None of the above are 'killer features' but again, just do the basics that you'd hope for in a good vtx. What is unique about this model though is that it sits tidily and firmly in the flight stack of my Floss 2. Alongside the Sunrise Cicada all in one ESC/FC (review here) I use it makes for a super solid stack that has not cable ties, double sided tape or hot glue. Additionally given the way the MMCX connector exits cleanly out the back I can either use the included pigtail but my new preference is to use the UXII stubby MMCX CP antenna. This is super light and super compact on my floss 2 - no protruding antennas or mounts to be broken. Lastly the base of the board is dead flat. I didn't see the advantage of this until I saw FC board like the Kakute with the elevated gyro - the FX2 definitely clears this with standard standoffs. Alternatively you can fit a skinny receiver like a FRSKY XMplus between the FC and vtx like I've done below:
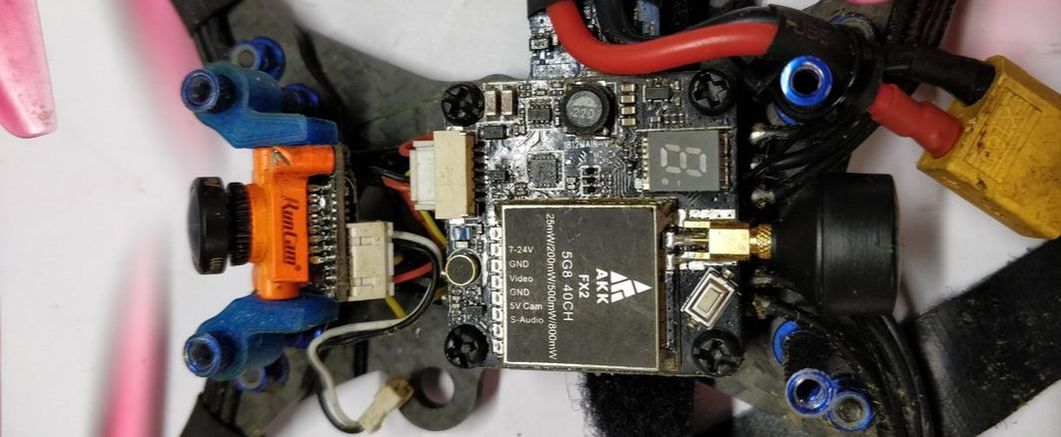 My super low stack all back together. In summary, all of these 'little things' done right make for a really good vtx ESPECIALLY since it can be had with free shipping under $20. These are sold exclusively from AKK with free (and fast) shipping or from Amazon. If 30.5mm mounting is not your thing, the FX3 is based on a 20mm stack and the X2 is a board that will require the aforementioned cable ties or double sided tape while the nano3 will mount to the back of your runcam micro similar to how the FullspeedRC TX200 (review here) does it. The Nano only accepts 5v but does do smart audio. The FX2 is also available in the 'ultimate' variant which will output up to 1200mW but it's hard to recommend this for quadcopters - even for long range the pros like FPVProvo recommend only 200mW and rather focussing on your aerials and receivers. The options from the article above:
If you are reading this between the 6th and 12th of June, AKK currently have a sale on as below, click on the picture or any link above and it will take you to their sale pricing:  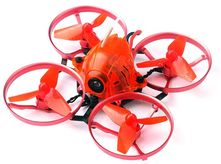 The Happymodel Snapper7 is available from Gearbest The Happymodel Snapper7 is available from Gearbest After several false starts including the FullspeedRC beebee66 which looked so promising (review here) I've finally found a real brushless tiny whoop - the Happy Model Snapper 7. This 75mm brushless quadcopter is 10mm larger in diagonal motor to motor distance than a typical tiny whoop or clone but can still be very much classified as an micro indoor quadcopter. I'm pleased to say that the awfully named Happy Model Snapper 7 exceeded my expectations in practically every area. What is included? The standard version is $10 more than the basic version and simply speaking offers superior value for money. Included is:
As you can probably see above the standard version includes 3 batteries instead of 1 and a 6 channel charger instead of a single USB charger. Because I was so impressed by the charger, I'll call out here the details of what made it so special:
 Awesome charger! Quad specs and discussion Key specifications of the quad are:
The real innovation and star of the show is the integrated flight control/ESC/receiver. The flight control and BLHeli_S ESC on the same board is nice and a useful step forward from spearate boards as on the BeeBee 66 that mean it is more compact and weighs less (4.3g for this board). We've seen integrated receivers before but not with an SPI interface as this one has. In theory the SPI interface is much faster than the SBUS interface (gyro is connected via SPI) but for practical results this frees up a spare UART and ensures you get FULL telemetry (confirmed on my Taranis Q-X7s). Addionally it means that rather than choosing a serial receiver in betaflight, you choose a dedicated SPI receiver and can choose between D8 or D16 for FRSKY or AFDHS or AFDHS2a for FRSKY. Lastly binding is easy! you no longer need to use 3 hands to hold the tiny button down while binding - power on and then hold the bind button down for 2 seconds. Bliss!! The Crazybee F3/ESC/RX is available separately in FRSKY and FLYSKY versions
Nothing much to note about the AIO camera from spec perspective, nor the motors - the real test will be in flight. The frame however is intersting. The rings around the props look like ducts but are actually just protectors meaning you should expect flight performance more like a typical guard-less quadcopter rather than a ducted whoop. Guards look to be cast from 7075 aluminium and are integral to the frame, i.e. cannot be removed.  Can't take these gaurds off unless you want to remove the motors too. Setup The instructions that come with this model are succinct, well written and complete. It goes into detail with receiver choice in betaflight and binding procedure due to the SPI interface. As mentioned above: Easier to bind and choose the correct recevier. For flysky users it is particularly useful that you can choose between AFDHS and AFDHS2a. You'll be pleased to know that betaflight has been full set up from factory for all the elements that are unique to this quad althought the PIDs are stock (yet run fine). Please see below for stock betaflight setup and my comments in the gallery below: It's worth noting that since this runs BLHeli_S, all of the latest Dshot commands are available including motor beep and anti-turtle mode aka 'flip over after' crash. Both work very well :)
Flying I've seen a number of brushless whoops that have looked great on paper but none yet have actually bettered the flight experience by a simple brushed whoop like my santa whoop (part 1 and part 2 reviews here). That's because until now the brushless motors haven't scaled down well and offered poor power and efficiency. This meant they had no better thrust than a good brushed whoop and much worse battery life. I'm really pleased to say that this model is different. Yes I know it has a 10mm larger frame and a 450mah battery but performance is superior to even a heavily modded whoop. What does this mean? It can better recover from manouvers and it is a more viable outdoor flier on still days. Punch outs are surprisingly good! As you can see from the video it will happily navigate a playground and trees. The flight characteristics are really interesting. I'd liken it more to a micro burshless than a whoop because of the extra power and lack of full ducts. This means I can be more aggresive with cornering using more roll rather than the yaw-heavy flying I do with whoops. Further to this it makes me more confident in acro mode whereas I find a whoop in acro mode really foreign. In tight spaces and obstacles and at lower speed (e.g. indoors) I still feel more comfortable in angle mode, just like a brushless whoop. For flight time I got about 3 minutes when charged to 4.2v or 3.5 minutes when charged to 4.35v. Open field flying dropped battery life to about 2 minutes but this is not typical flight with a micro like this. This tells me these motors are most efficient in the 30-80% throttle range which is where most tighter flying is done - like the playground, indoors or around small trees. Nice to know the power is there if needed though. I'm not a fan of brushless motors smaller than 1102 but think these 0703s are actually pretty good - particularly with this combination of components. Furthermore they are the quietest sub-1102 motor I have heard. Spares are available here: https://www.gearbest.com/motor/pp_1717534.html I was really pleased with the image out of the little AIO cam - it was as crisp as I've seen with as good a colour handling as you can expect for this type of camera. The camera angle adjustment was really nice and with the power this offered a well thought out capability. Video signal was very good even around trees and I started to drop RSSI on the control link well before video deteriotation before travelling out on an open field. I think the receiver antenna location could be optimised (below) but think you'll struggle to get the 300m claimed range... <Quick update> I've since routed the antenna up through the canopy rather than underneath. I think the reception may be marginally better but certainly no more than 100m in line of sight conditions.
Conclusion The HappyModel Snapper7 is an excellent supermicro brushless whoop-style quadcopter that is available in a great value 'standard' pack which includes 3 batteries and and versatile charger. For it's size it is very light weight thanks to the heavily integrated FC/receiver/ESC board that includes the very latest receiver interface that makes setup extremely simple. By combining this with well made 19000kV motors and a suprisingly good AIO camera they have created a brushless tiny whoop that lives up to what we've wanted - a familiar whoop style quad that is suitable for indoors with a level of power and response that micro brushed quads just cannot achieve. Furthermore it feels much more at home in rate mode (acro) flight compared to a ducted whoop. Unlike earlier brushless models this does not come at the cost of battery life where 3-3.5 minutes flight time is realistic. Only time will tell how the motors and aluminium prop guards will hold up but with 20 or so packs through I've not caused any permanent damage plus the motors are still running quietly. The Happymodel Snapper7 is available in a basic bind and fly package with 1 battery and a simple charger for just $85 in flysky or frsky versions but I'd recommend instead going for the $95 standard package which includes 3 batteries and an excellent 6 port charger.
Recommendations:
I'd happily recommend this as more powerful alternative for a brushless whoop for indoor flying and even outdoor flying in no or low wind. Unlike a the heavier brushless ET100, ET115 and ET125 models, the light weight will have much less chance of damaging your home with crashes when flying indoors.  This receiver weighs less than 0.5g This receiver weighs less than 0.5g FRSKY is the most popular quadcopter digital radio protocol because of regular development and the availability of low cost highly effectiver receivers meaning that every quad you own can have it's own receiver without always changing in an out. A benefit to this means is that each quad can have a customised reviever for what that specific quad needs - long range with diversity and redundancy, full telemetry, the new f-port protocol, pwm output for servos or just the smallest and lightest receiver possible. In terms of the latter, micro quad builders generally need the smallest and lightest receiver possible and up until recently this has been the FRSKY XM. This is a receiver that weights just over 1g and measures 15x10x3.5mm. Silly as it sounds but what if this is too big? In the case of my ultralight X2 Eyas (rotorbuilds build details here) this was exactly the case. The Full Speed FrSky-Nano 2.4GHz 8CH Receiver is the smallest FRSKY receiver you'll find - it is approximately half the size and weight of the XM, coming in at just 0.5g and measuring 12mm x 10mm x 2.5mm. It's worth mentioning that this is the same FullspeedRC that came up with the Leader 120 and the TX200 VTX - strong credentials in the micro quadcopter space. It certainly helps these models are designed and tested by Lewis who is a micro pilot himself rather than just a marketer.
Binding (from FullspeedRC.com) 1. Select D8 mode on Frsky remote control. Hold the bind key on Frsky-Nano receiver and connect the battery, then the receiver's red light will be always on. 2. Select the BIND mode on remote control , the Frsky-Nano receiver's blue light will flash slowly and the red light will be always on which means bind complete. 3.Enter: set sbus_inversion = off (set serialrx_inverted = on if your FC is BF3.3 or newer)on BF CLI and save. 4. Repower the Frsky-Nano receiver . The red light on it will flash very quickly which means it receives the singal from remote control RSSI I did know that this nano receiver sent RSSI over an auxilliary channel but it was a nice surprise to find this set up out of the box unlike every XM, XM plus, XRS, RXSR receiver I've ever come across. Better still was that it was set to Aux 5 (channel 9) meaning all 4 auxilliary channels are available for control. With betaflight set to recognise Aux 5 as RSSI it is easy to add to betafilght OSD and display RSSI which is important as i'll get to shortly. In flight For a defined digital protocol (in this case SBUS) the only parameter to discuss in receiver performance is range. I'll be the first to admit that my antenna placement is not great but the range was probably a little less that I was expecting. When I ventured more than about 100m away in a residential neighbourhood I started dropping to about 30 RSSI. Given this was an ultralight build with an all in one camera/VTX I was not concerned beacuse this is about the realistic range of my 25mW vtx anyway. The good news is that with RSSI displayed in the OSD you at least have the tool to manage this. I think the range is a fair limitation for this receiver. I see it being used for ultralight brushless micros or tiny whoops where you mostly fly in close proximity to yourself. It's also worth reiterating that with better pacement of the receiver/antenna I should be able to get much better range if I needed it.
The Fullspeed FRSKY Nano Receiver can be bought:
Also available in DSMX for spectrum users: 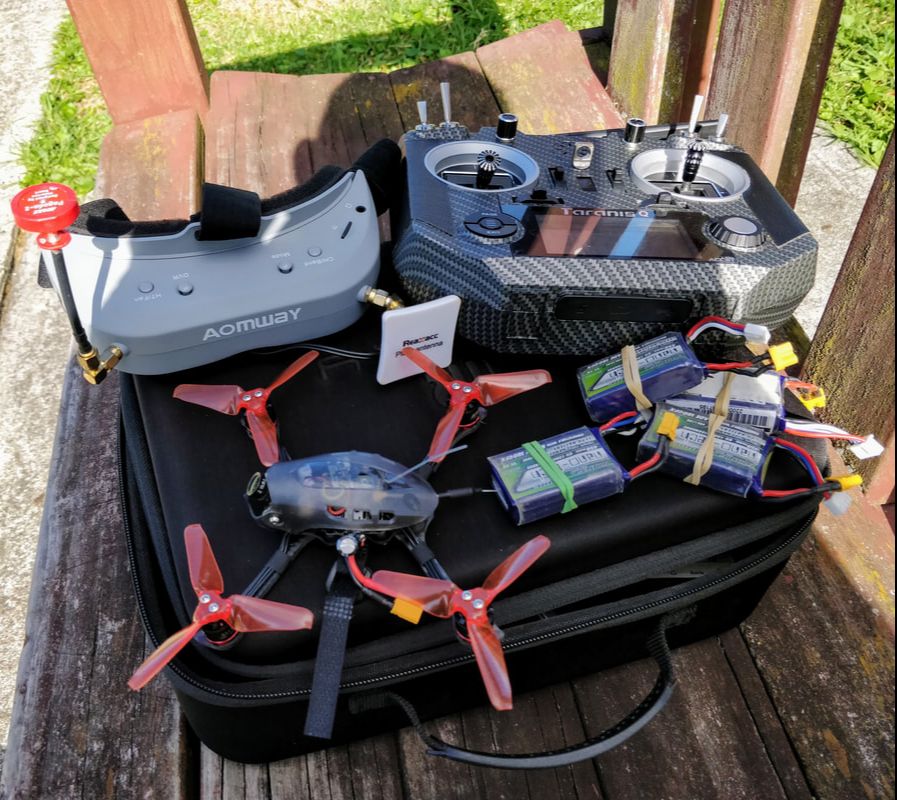 The Emax BabyHawk R 136mm with all the gear I need to fly FPV The Emax BabyHawk R 136mm with all the gear I need to fly FPV The Emax Baby Hawk R is a micro brushless quadcopter that was launched by Emax in early 2018 as a follow up to the highly successful Emax Babyhawk (not r). It was launched as a 2 inch but 2.5 inch aftermarket arms quickly became available in the aftermarket and hugely improved the power to weight ratio, disc loading and efficiency. Emax themselves have now taken this one step further with the Babyhawk R 136mm (3 inch). Compared to the 2 inch version is has the longer arms with the new Avanflow 3 inch 3-blade propellers and a reduction in motor KV from 6000kv down to 4500kv although motor size is still the same 1106. Weight of the 3 inch is 86g compared to 82g. I will review the Babykawk R 136mm (3 inch) here. Specs and discussion
On paper none of these components are especially exciting or on the hype-train. A big HOWEVER though - all are very tried and true, solid and well balanced. This means reliability and reduced cost. The each have a job to do and do it without fuss or flair. It's fair to say though that when you bring them together they are greater than the sum of parts. Quick rambling thoughts how 3 inch quad weights I think of 3 inch quads in 2 ways - a shrunk down 5" based on large motors and 4s batteries or an embiggened micro based on 11XX series motors and 3s. This clearly fits in the camp of "embiggened micro" since it is based around 1106 motors however it is farily unique in that the ESC, motors as well tough frame and cowling are well and truly engineered for 4s - best of both worlds as it were. By constrast my lightweight FlexRC komori (build blog is here) can take 4s but the frame would not hold up to carrying the extra weight of a 4s. Conversely something like the Furibee X140 (review blog here) is pretty gutless on a 3s where it can't overcome the 120g+ weight of the quad.
Setting up I haven't delved into all the betaflight screens this time because for the most part this is down to preference and your gear. What I can say though is that although not installed from the factory, EMAX have provided some VERY good PIDS for both 3s and 4s. Here is the link to their page or for convinience please see below:
Fly the damned thing At the time of writing I've only run this on 2s and 3s. 2s was using a 46g 950mah turnigy nanotech battery and was very uninspiring but hey, at least it can be done! 3s was much better than I thought it would be. I used the Turnigy Nanotech 3s 460mah battery (about 42g) and got 2.5 - 3 minutes flight depending on how hard i pushed, coming down at about 3.75v per cell at rest. The first thing I have to say about the flight is that all of these solid if unspectacular components do come together so nicely - they are all well suited which not only make for an enjoyable and reliable fllight experience but means the cost does not blow out. In addition the protection offered by the 3mm carbon-armed and cowled frame means that even after tumbles there is a good chance you can just rearm and get flying again - it is tough! The other benefit of the cowl is that it looks cool, different from the top plate/bottom plate or side cage frames that are out there.
Punch out power is ok on 3s but will hold my judgement till I get some 4s packs. understandably the light 3s packs make for great agility which is why I had a lot of fun with proximity around the small trees in the park that I have close to work. For FPV camera performance is good - as to be expected from the foxeer arrow micro CCD. VTX is clear in the right conditions and is better than most other micros however I do undersand this can be improved significantly with an AXII ufl antenna (or the cheaper UXII). Channel and power level is easy to change via the small button but as suggested above there is no smart audio or tramp protocol to do this over betaflight OSD. Summary Obviously I haven't tried on 4s yet (I am just choosing a 500-700mah 4s to order), but based on the performance of 3s I think this quad is a real winner. Emax have done a fantastic job on not getting carried away on needlessly overspeccing the quad in areas you cannot really taking advantage of. In doing so they have a solid, robust and well priced offering that I can see becoming very popular like the babyhawk before it albeit with less shortcomings. Better still the support that emax appear to be offering beyond regular customer service such as offering tuned PIDs means that community support will mean there are always going to be clever fixes and modifications that will be available, making obsolesence for this model is less likely. Make no mistake obsolesence is a real issue with quads because once the community moves away from a model there is less support in total available. Although experienced builders and customisers will still likely want to build their own, It is very easy to recommend this as a first 'racing' micro quad becuase of it's inherent features and support. As a micro quad builder myself it's hard for me to say but this is actually more enjoyable to fly than most of my custom builds because it all comes together so nicely. For that reason it is easy to recommend this to the more experienced set that just want to fly and not fiddle with the micro electronics etc - for example if you have come from 5 inch racing or freestyle quads. The Emax BabyHawk R is currently available from Gearbest with or without receiver. The model without receiver is $166. If I get access to any specials I'll post on my coupons ans discounts page.
Flight videos
...to follow 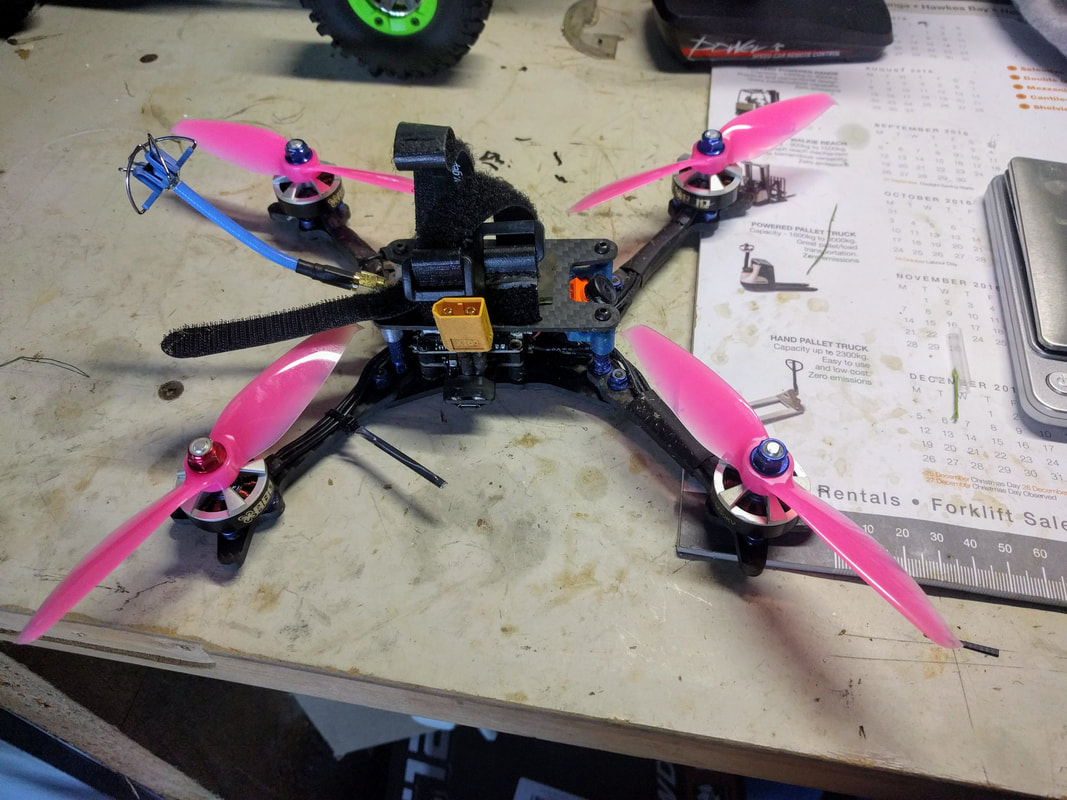 My final build at 260g with everything except battery. t 2-blade gemfan 5152 props make it less floaty than the tri blades My final build at 260g with everything except battery. t 2-blade gemfan 5152 props make it less floaty than the tri blades I currently run a Floss 2 5" racing rig (see series of articles here) that is powered by 2205 2450kV Returner R2 variants and a HGLRC F428 stack with vtx and camera. The F428 stack has always been fiddly - VBAT pads have broken off easily and I've burnt out 1 ESC when the external cap was knocked off. Although it is still working, I quickly realised I need a very robust (read: crash resistant) system that doesn't leave me wondering if it is going to work or not for each heat I race. I decided I wanted to replace with an all in one FC/ 4in1 esc to simplify and minimise wiring. I'm confident enough now that 4in1 escs have reached a point in reliability that I'm not worried about a failure obsoleting an entire board. For me the key benefits are:
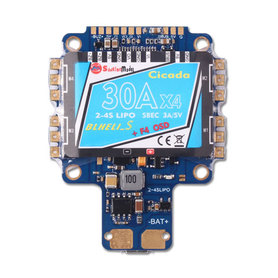 My choice of branded AIO FC/ESC - the Cicada F4/30A BLHeli_S from Hobbycool My choice of branded AIO FC/ESC - the Cicada F4/30A BLHeli_S from Hobbycool Because of reliability I decided to go brand name and in doing so skipped the racerstar options from Banggood. I had my eye on the Airbot Asgard and underground FPV kamikaze variant for a while but for around $100 they were fairly pricey. This is when I came across the Cicada AIO F4 30A BLHeli_s for $56 from HobbyCool - about $35 less than the other options. Both the f4 flight controller with mp6000 gyro and BLHeli_S are mature technologies and I know what to expect - solid performance that can handle the latest firmware and options (Betaflight 3.3 / Butterflight 3.4 at time of writing) but will be super reliable - in summary do the basics well day in day out. The BlHeli_32 version of the Cicada AIO had just been released but is about $20 more and at the time didn't see the advantage on what it a straight up racing. Installation was really straight forward - this AIO board has the standard 30.5mm x 30.5mm mounting pattern and paired it with a new AKK FX2 VTX. I used softmounts out of habit but in reality it's probably not necessary with the MP6000 gyro and 8k/4k gyro/pid frequency. Just a little more insurance if props or motors get donked up. 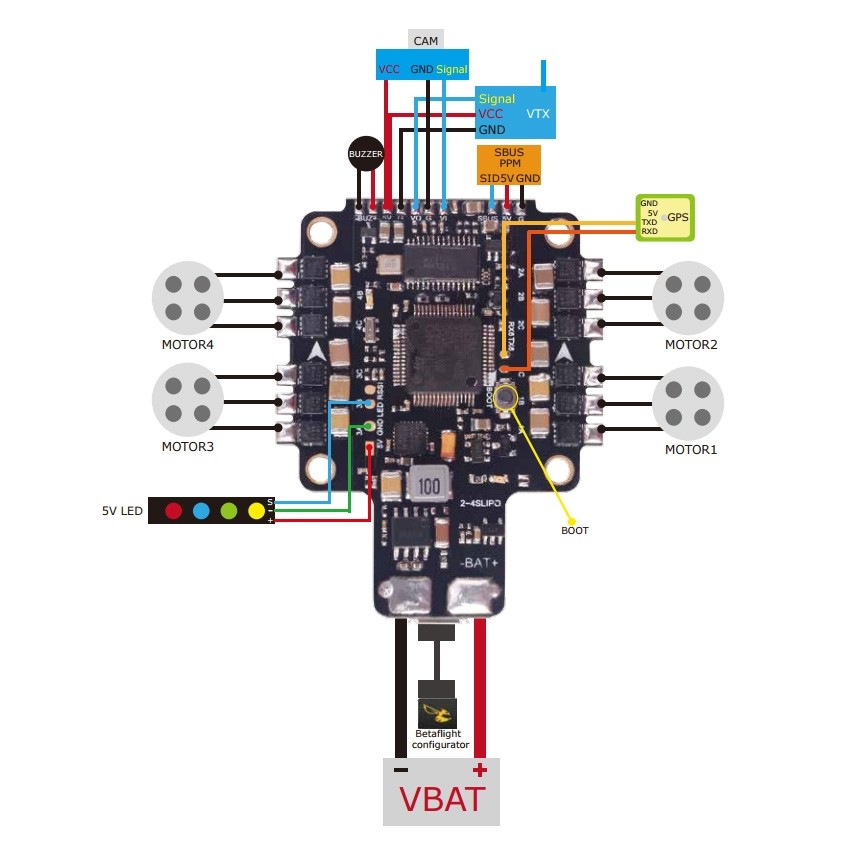 Wiring diagram for the Cicada AIO FC ESC Wiring is fairly easy after removing the shrinkwrap cover from on the AIO unit. An XMplus FRsky receiver was soldered up to the easily accesible side pads and bound and the AKK FX2 vtx was installed powered by the BEC/filter on board the FC (3A @5v which is plenty). The only thing outof the ordinary for me was wiring the 'smart audio' signal for the VTX to the TX6 on the AIO unit - it is a smaller solder pad closed to the centre of the board on top, clearly labelled. The runcam micro swift 2 camera was powered directly from the VTX as is best practice for a clean video feed.
After making sure the power up was successful I updated to the latest version of BLHeli_S via BLHeli configurator and the latest version of betaflight which was 3.2.5 OMNIBUS F4 target at the time of writing. I've included screens of my specific betaflight setup below but for the most part this will be to your liking and particular motor/prop/frame setup rather than the board in particular. The one exception is the current meter details which should act as a good starting point. This was as accurate as I could get mine using Oscar Liang's method. 3 months on from install the quad is still flying well. I've been through several sets of props, 1 arm and a camera lens but the Cicada FC/ESC nor any of the other electronics have given me no issue whatsoever. Although the HGLRC F428 may have held up similarly at a push, I would not have the confidence to try new tracks with the same gusto as this setup - a concept that is less tangible but is super important to learning and improving. PIDs are stock and since I don't have particularly agressive motors they work well for me using some of the key betaflight 3.2.5 features: dynamic filtering, PT1 filter, notch filters off, airmode etc. Dshot commands are also working well: the beeper has saved my bacon in long grass several times and turtle mode works well with my top mounted battery although I still tend to be scared of it!
So there it is. The CICADA AIO F4 FC W/ 30AX4 BLHELI_S ESC which is availble for $56 with worldwide free shipping from HobbyCool is a stable and reliable solution for simplifying your electronics.
Introduction - why a patch antenna? Recently I switched to the Aomway Commander Goggles (review here) which have built in receiver diversity. This means the receiver with the antenna attached with the highest RSSI value is fed to the displays. Aomway are well known for making a great omnidirectional antenna but a rubbish patch antenna is included with the goggles. The advantage of mixing antenna types when you have true diversity is that omnidirectional antennas will cover all directions good enough whereas patch antennas (directional) will cover in the direction the antenna is 'pointing' only but with the benefit of much less signal loss. What does this mean in the real world? When the vtx signal is coming from the directional path of the patch antenna you can go further and the signal can be better received from behind trees and other obstacles. The omnidirectional antenna will pick up all the other areas - behind, beside and in front. What kind of patch antenna? Since the Aomway patch was rubbish I went looking for a cheap alternative that was small so that I wouldn't have to continually take on and off my goggles. Patch antennas come in linnear or circular polarised, just like any other vtx antenna. Since I run circular polarised antennas in my 5" freestyle and race quads where I'm likely to travel further or need guaranteed reception I went with a circular polarised patch - specifically Right Hand Circular Polarised (RHCP) to match my cloverleaf and pagoda RHCP antennas on my quads. Note there are few linnear patch antennas but I have heard good things about the Menace RC Bandicoot. This would be great for micros which pretty much exclusively use linnearly polarised dipole antennas. Why the RealACC 8dBi patch antenna? The RealACC 8dBi patch antenna looked like it met my needs on paper and is only $7 on banggood. Definitely worth a try! It comes with option of RHCP or LHCP (I chose RHCP) and SMA or RP-SMA (Aomway Commander are SMA) which means there are options for everyone. Since the SMA connectors come out of the Aomway Commanders at a 45° angle, I also bought some 45° SMA adaptors so the patch antenna would point straight ahead.  Not the best image in the world but should give you a sense of scale on the goggles - fairly compact. In use The best test for the patch antenna was when I mistakenly left off my omnidirectional cloverleaf antenna during racing. Below is DVR footage of that run with 3 or 4 others on the track at the same time and everyone running 25mW vtx power only. One of the pilots had a defective VTX antenna and was causing video issues for all the other pilots except me. Of course this is anecdotal but throughout the day I had crystal clear video. I'm just glad all racing was done directly in front of me! Conculsion Since then I've used the RealACC patch antenna with all my quads - both with circularised polar and linnear antennas. I'm really enjoying the extra range this gives me without sacrificing portability. The Pagoda triple feed patch antennas are well recognised as being excellent but I wasn't willing to stomach the larger size and lesser portabilty. With a young family I don't get to fly as much as I'd like so when I am out I want to fly more and spend less time setting up. I'm really pleased with this little patch antenna for what I wanted.
|
||||||||||||||||||||||||||||||||||||||||||||||||||||||||||||||||||||||||||||||||||||||||||||||||||||||||||||||||||||||||||||||||||||||||||||||||||||||||||||||||||||||||||||||||||||||||||||||||||||||||||||||||||||||||||||||||||||||||||||||||||||||||||||||||||
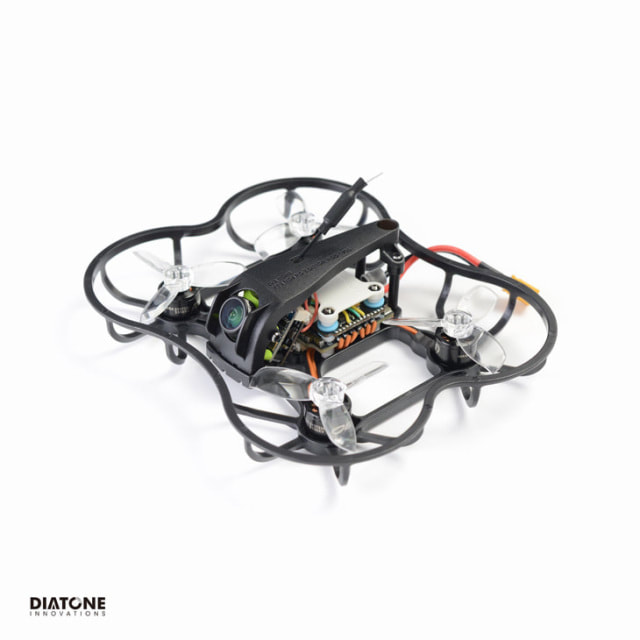
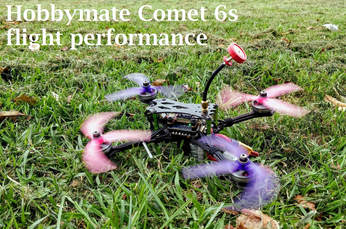
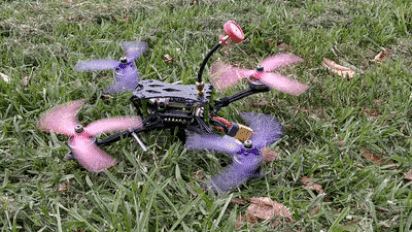
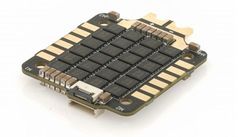
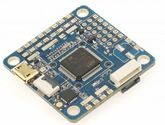
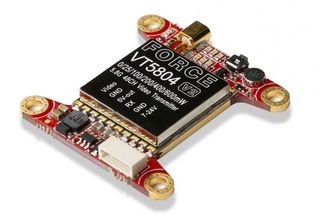
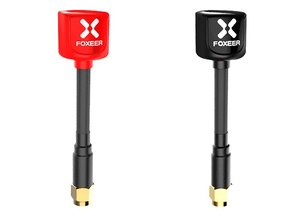
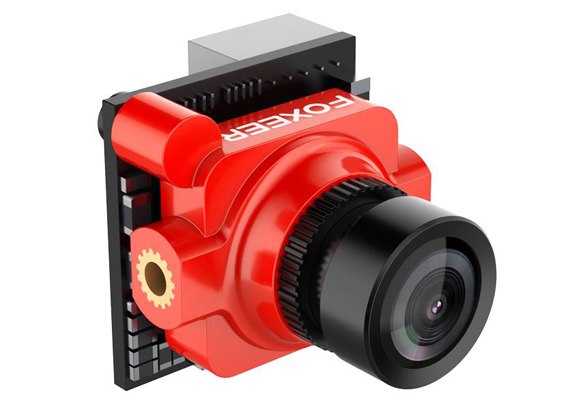
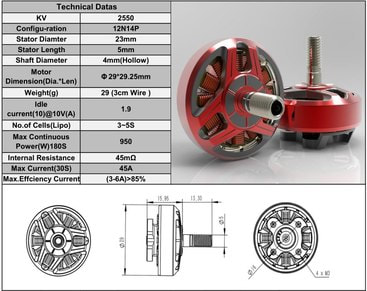
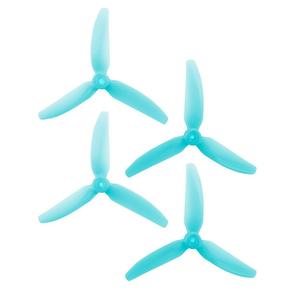
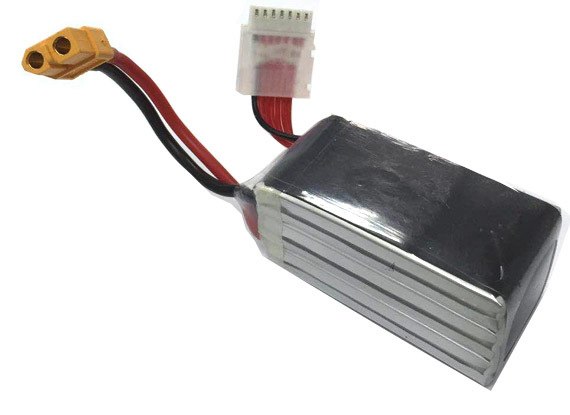
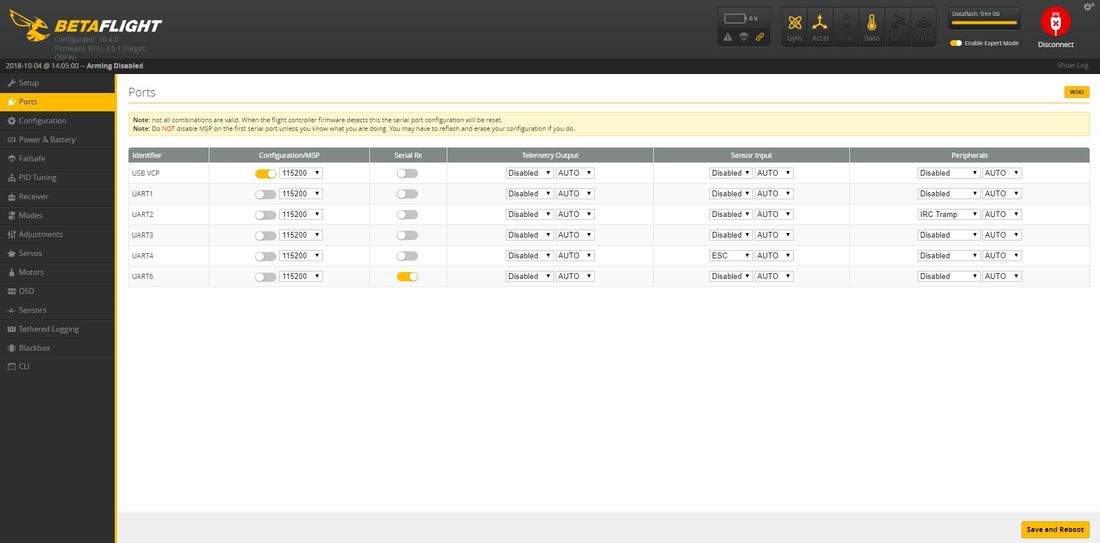
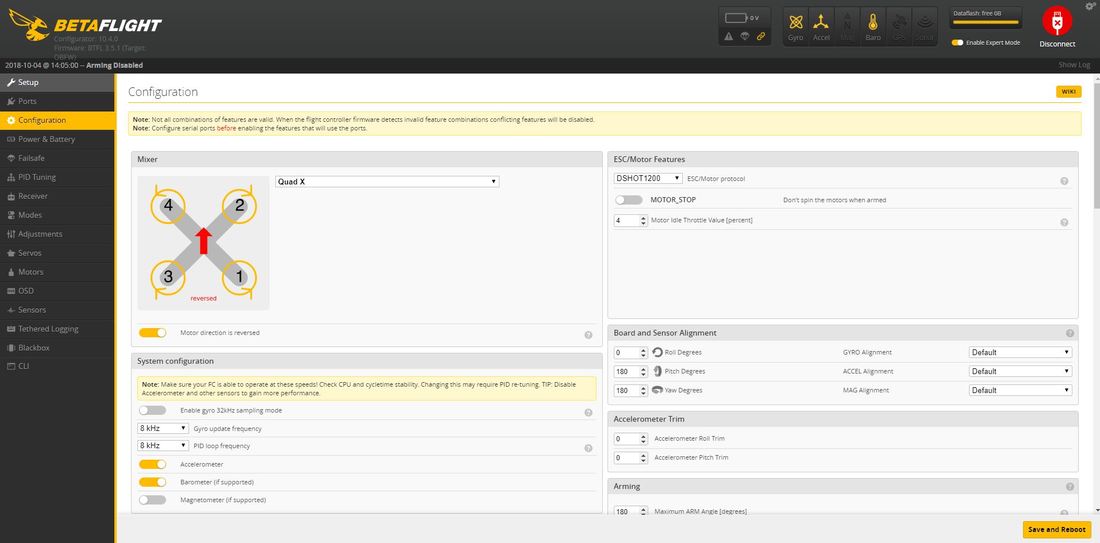
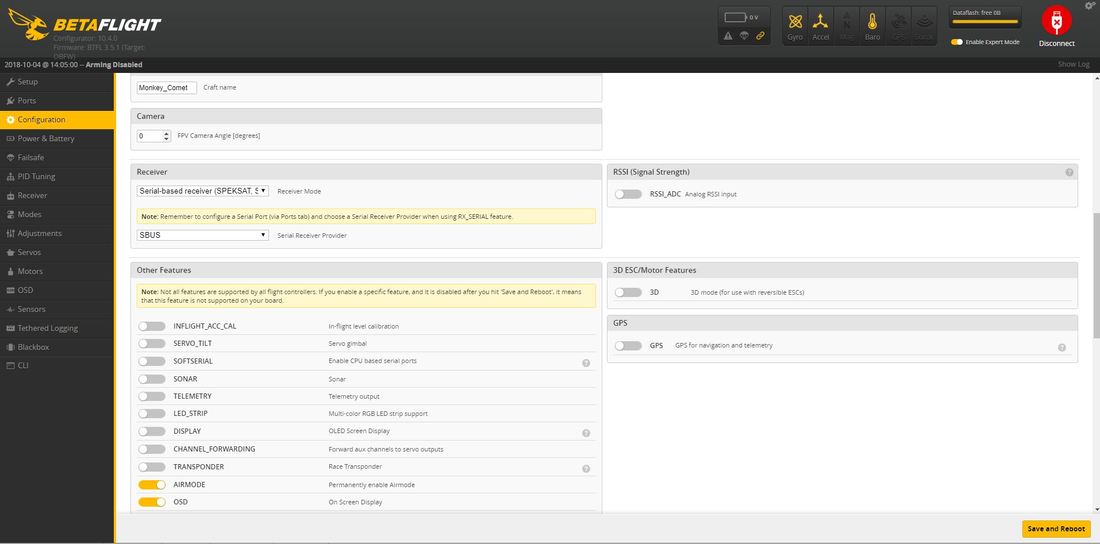
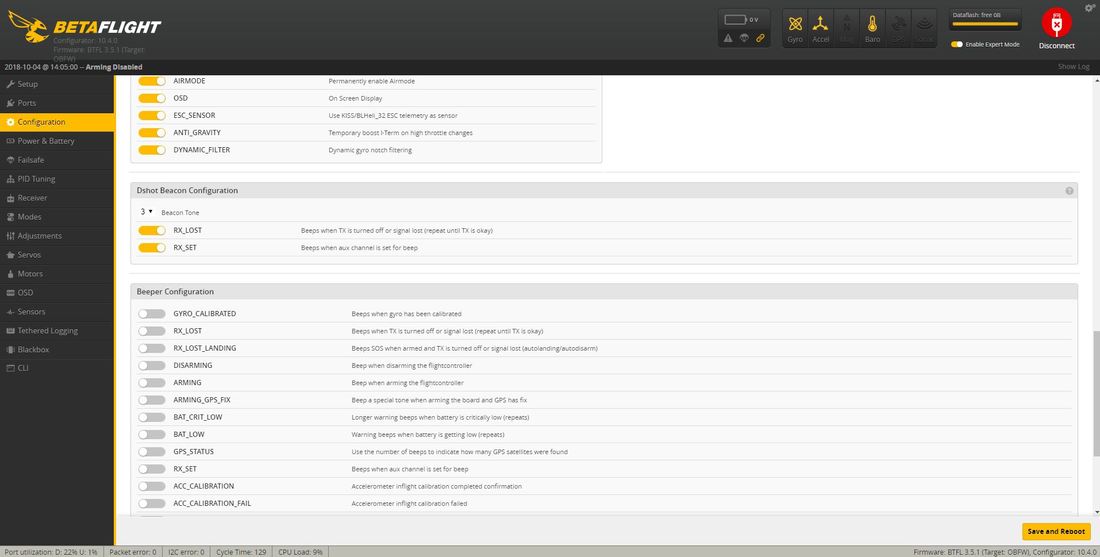
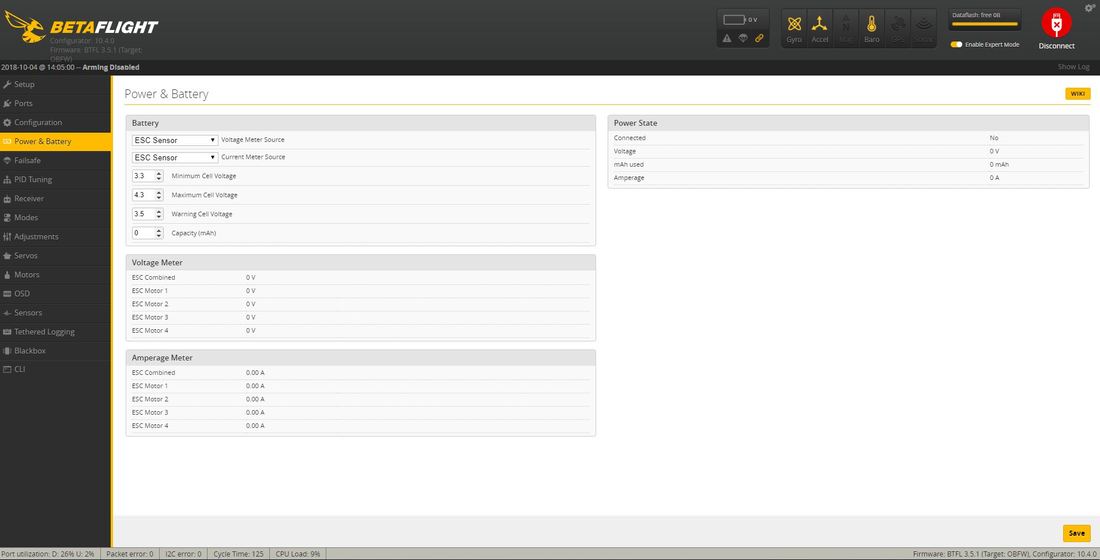
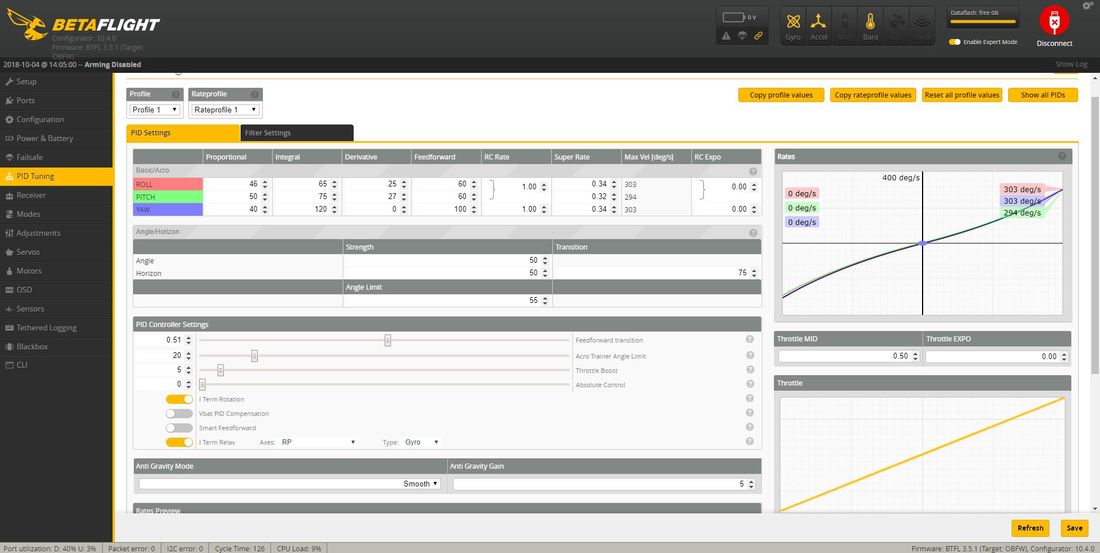
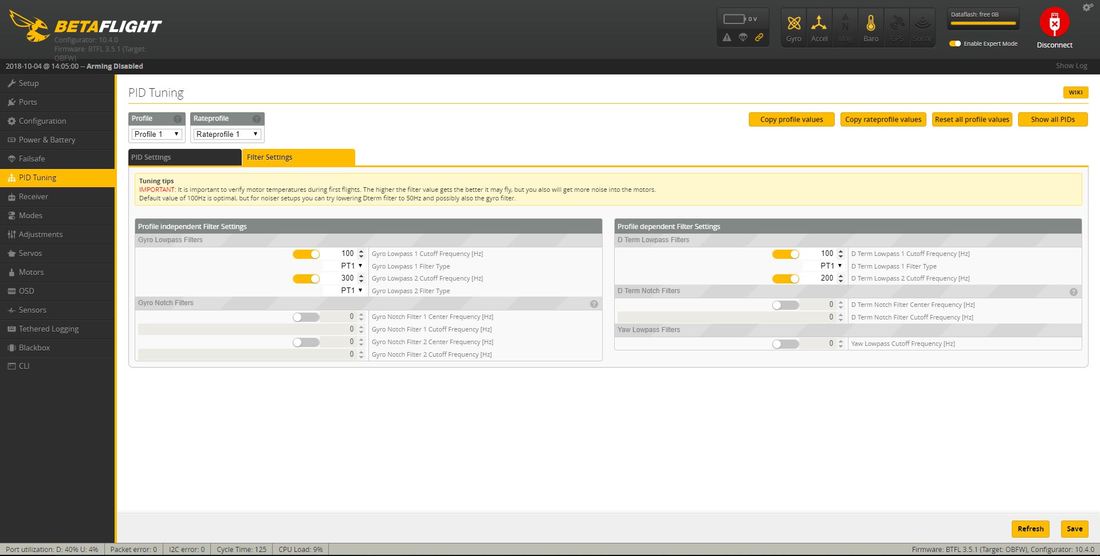

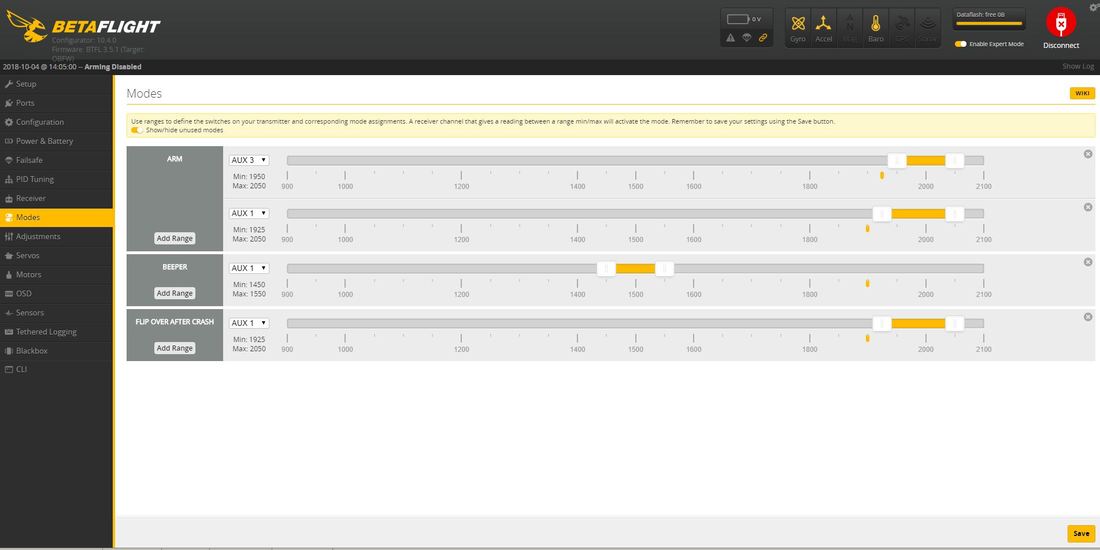
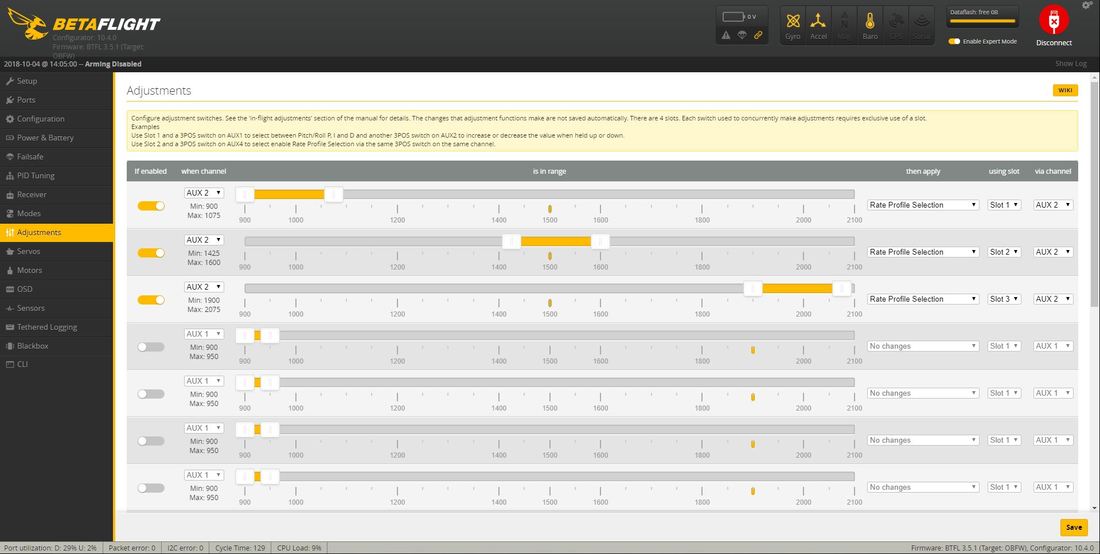
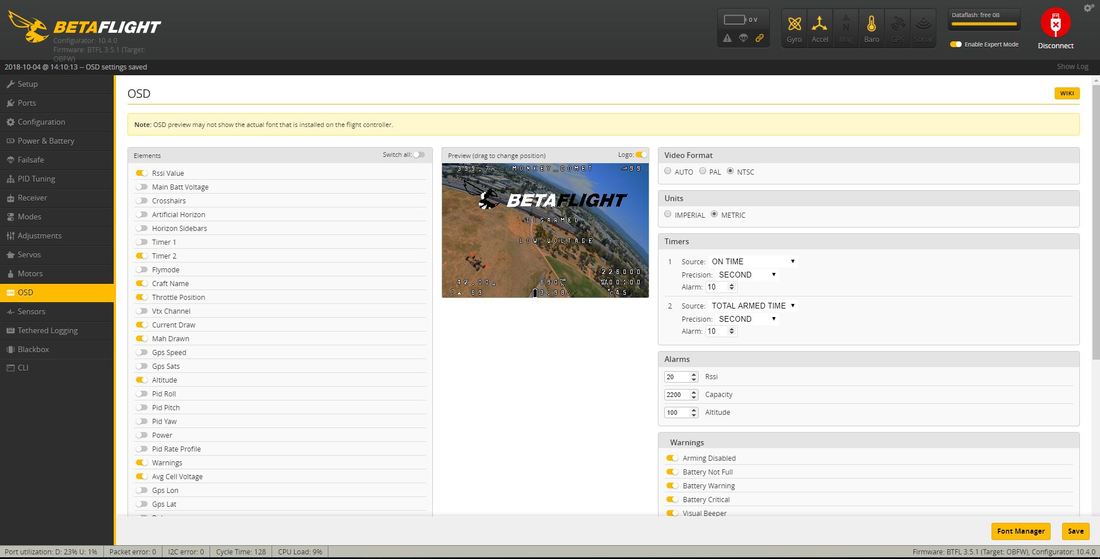
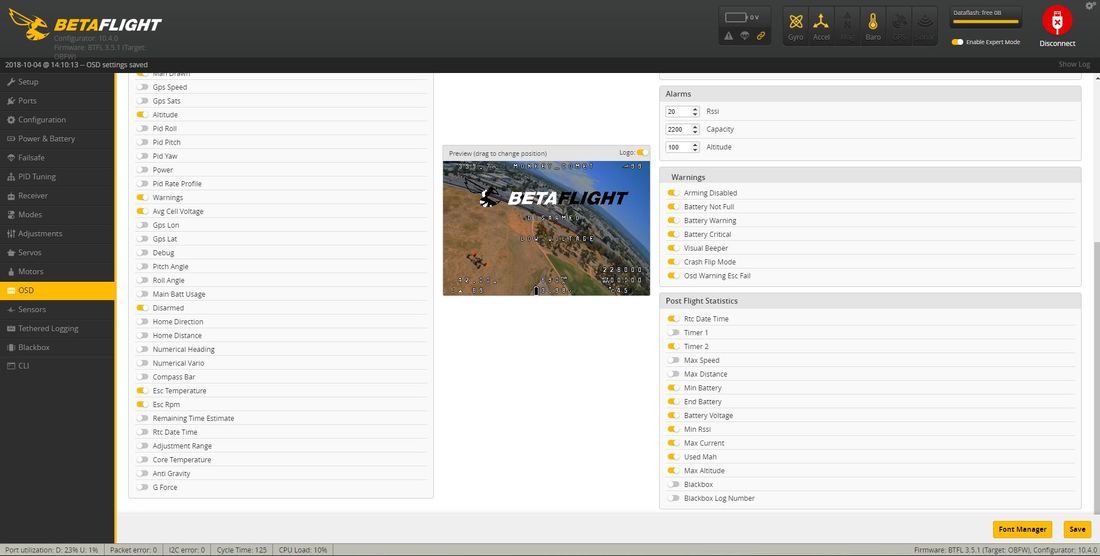
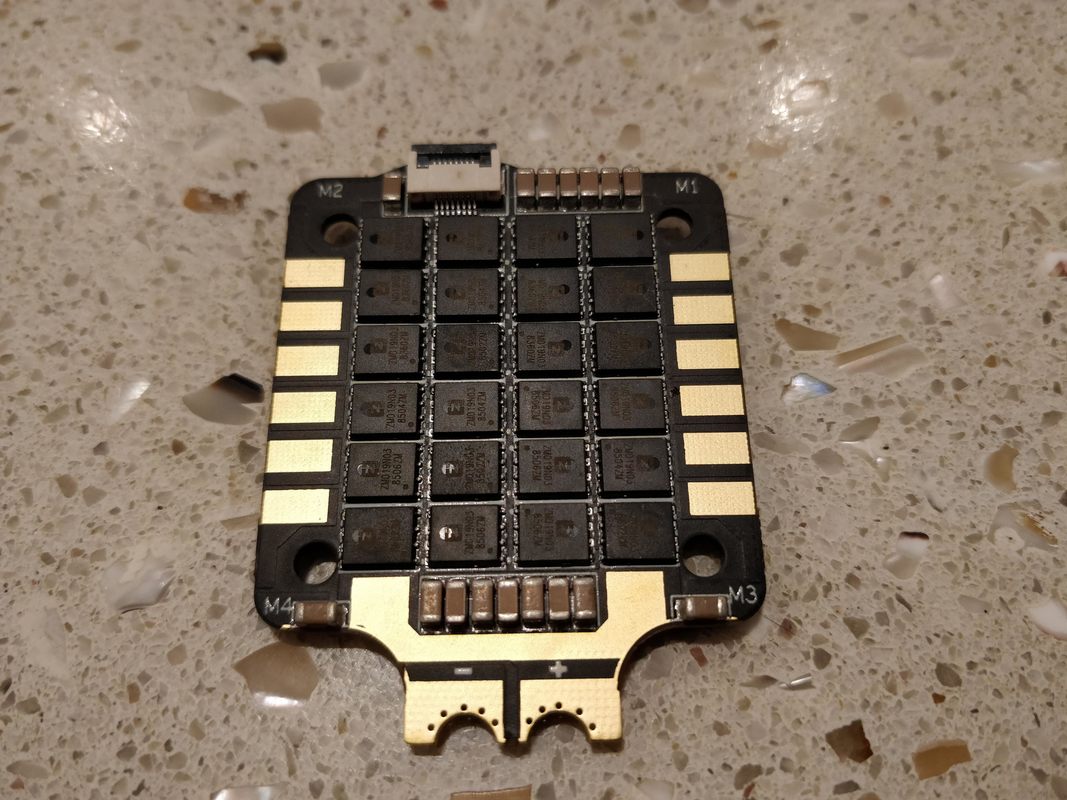
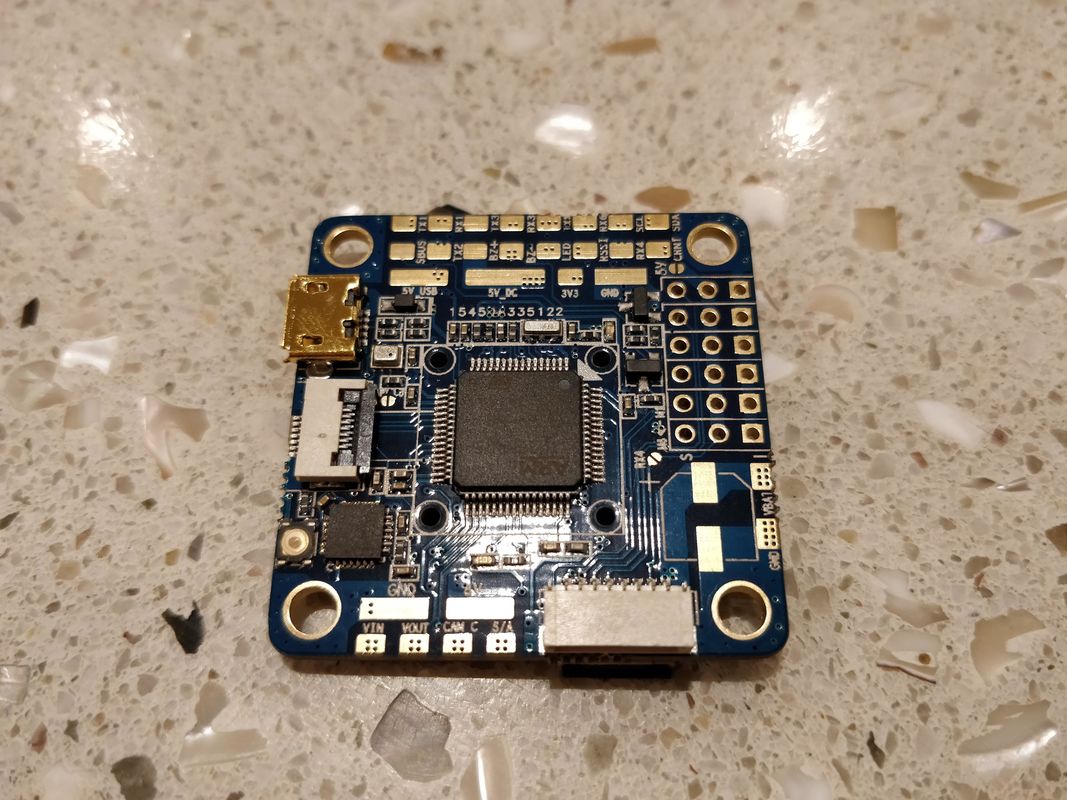
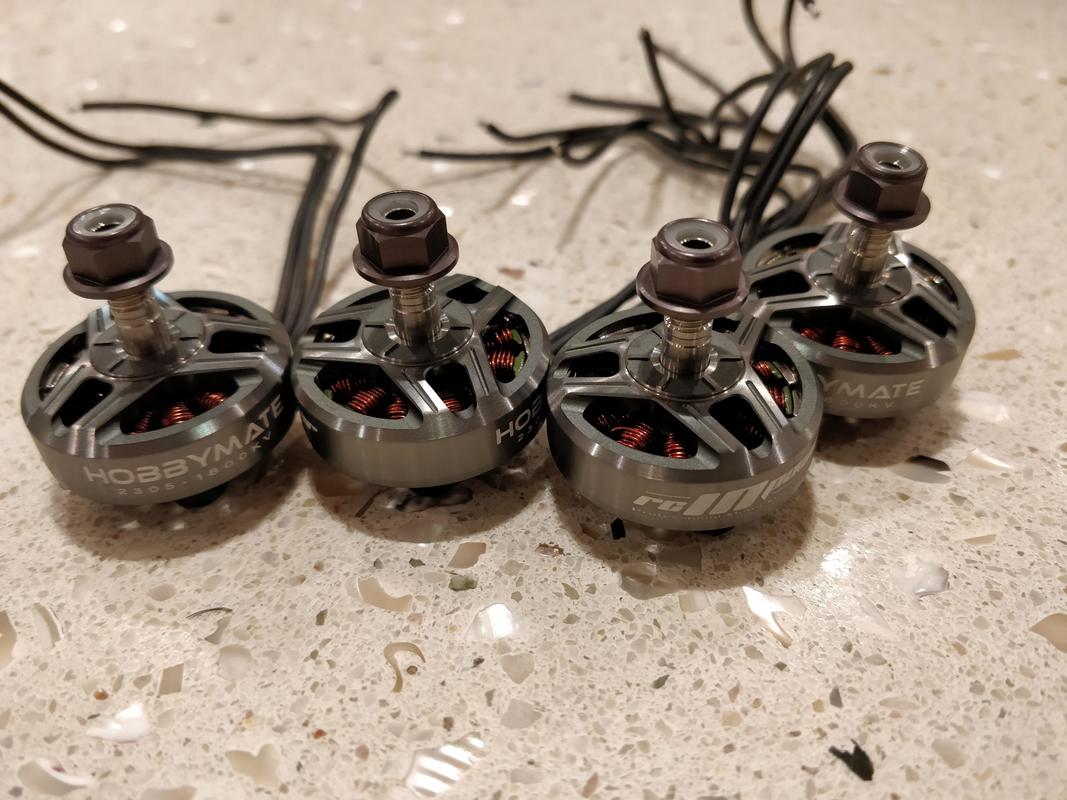
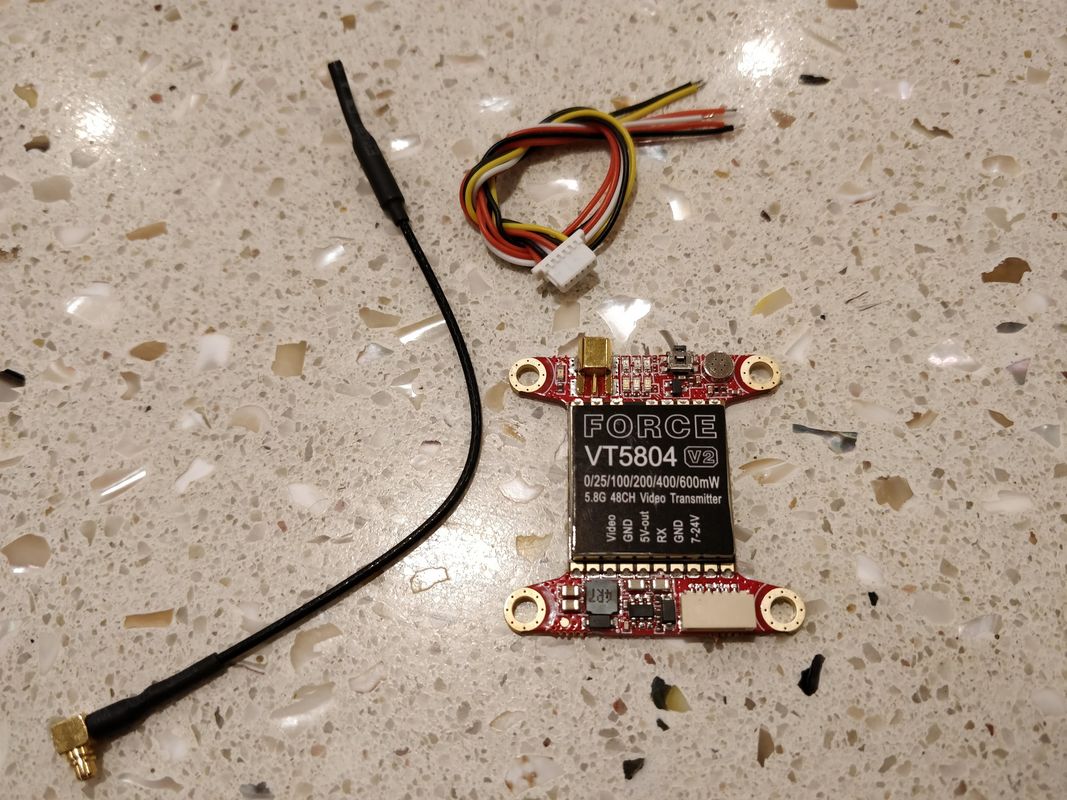
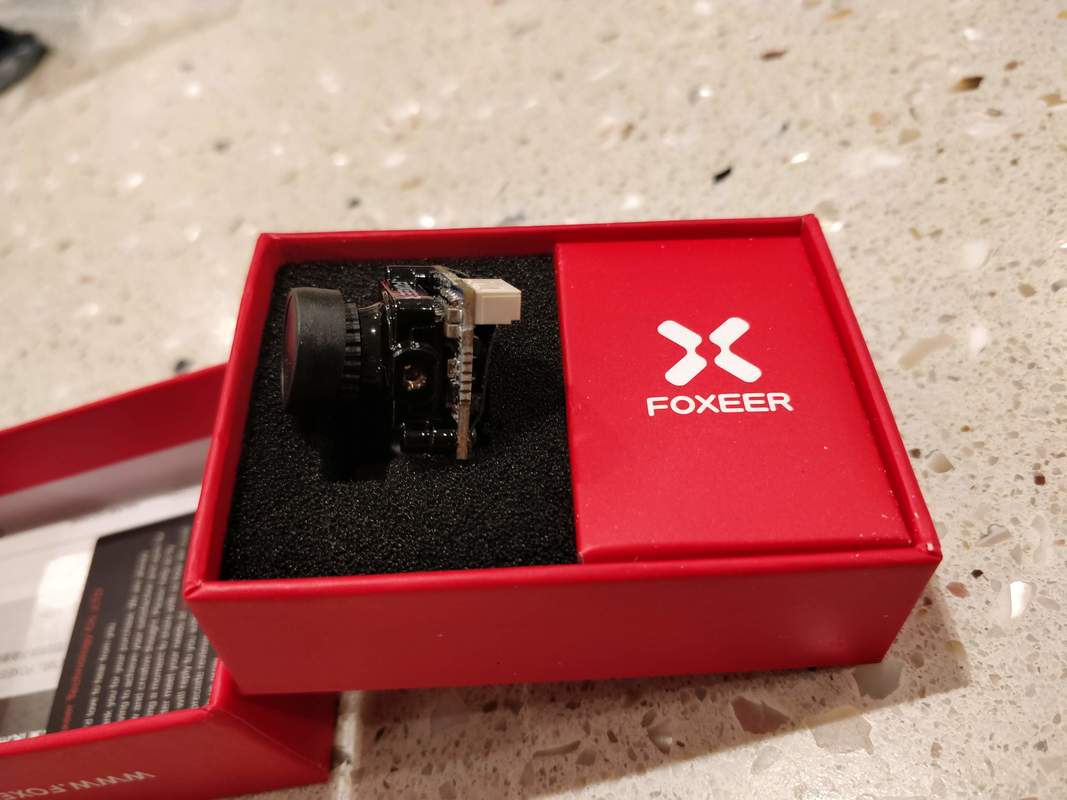
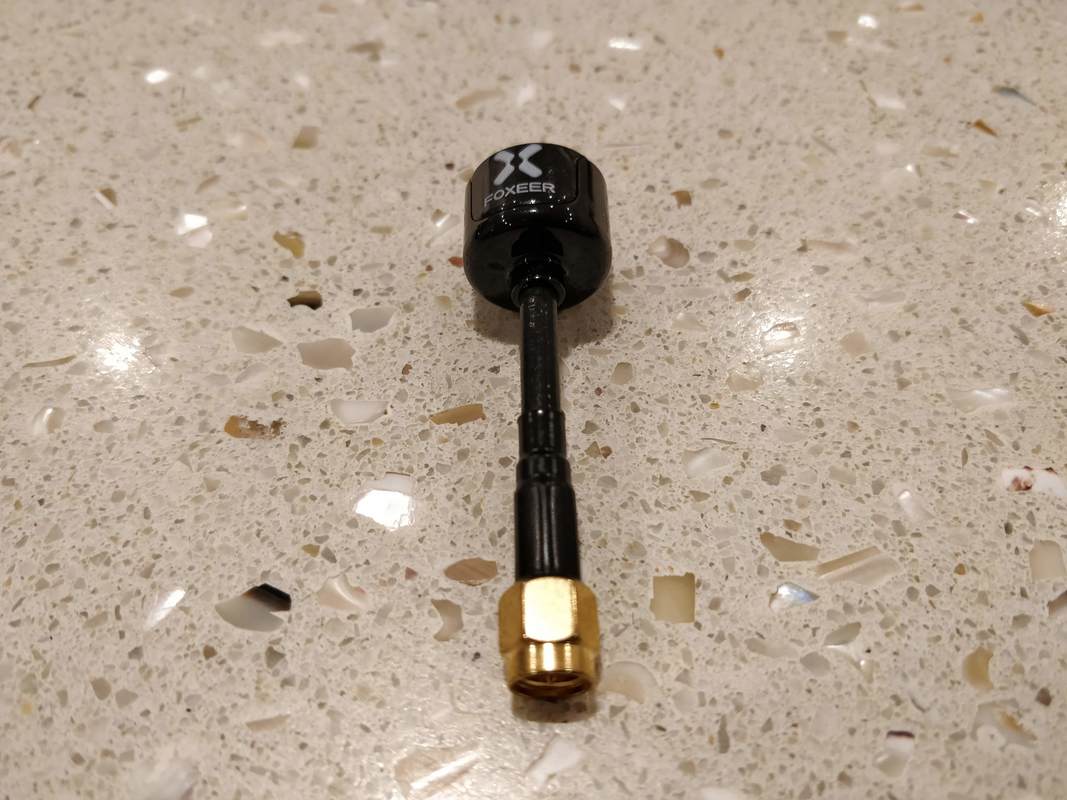
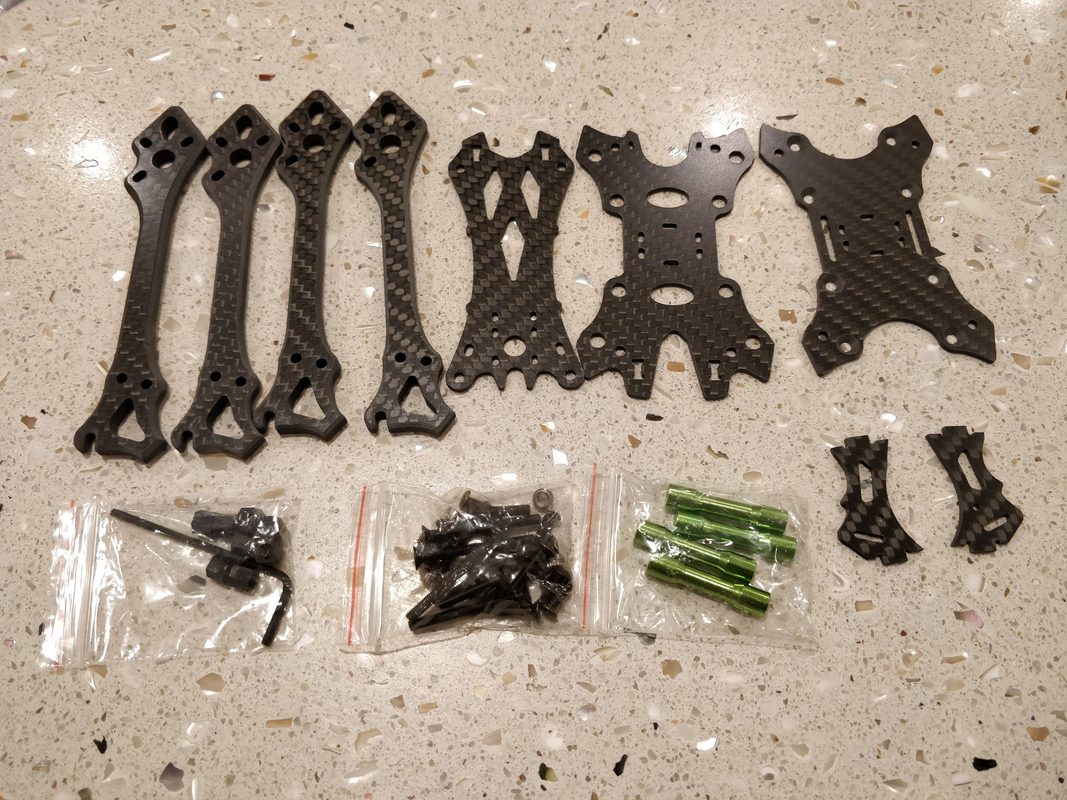
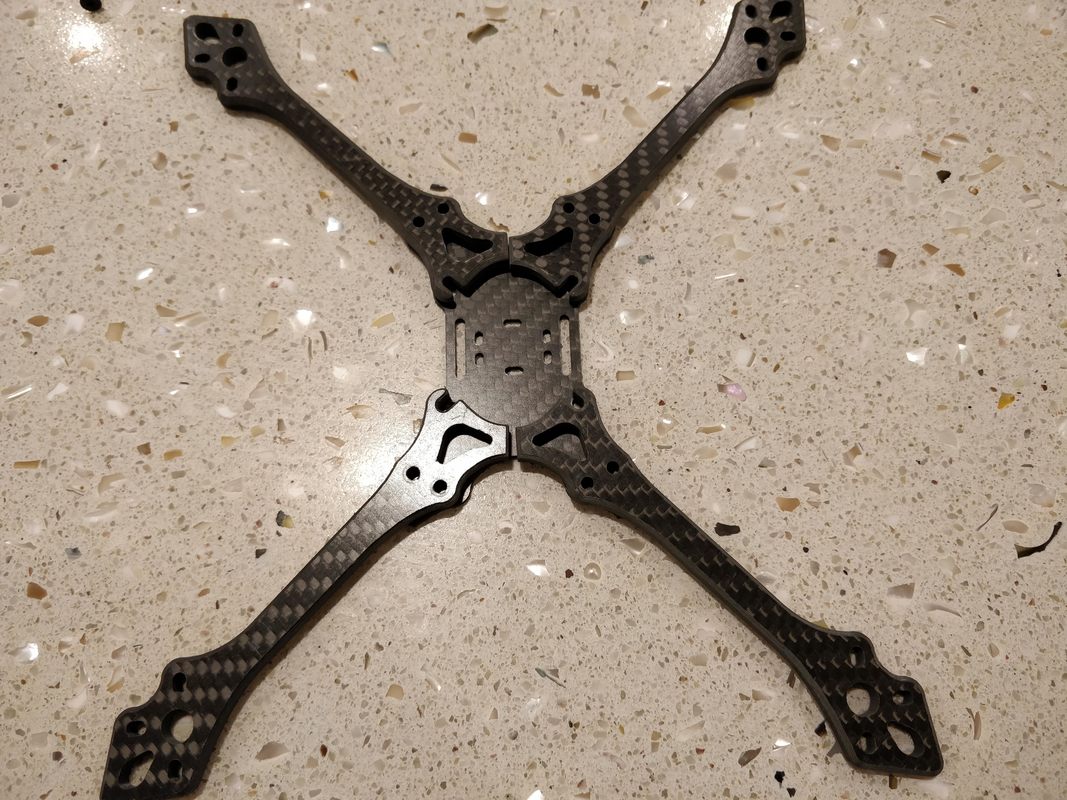
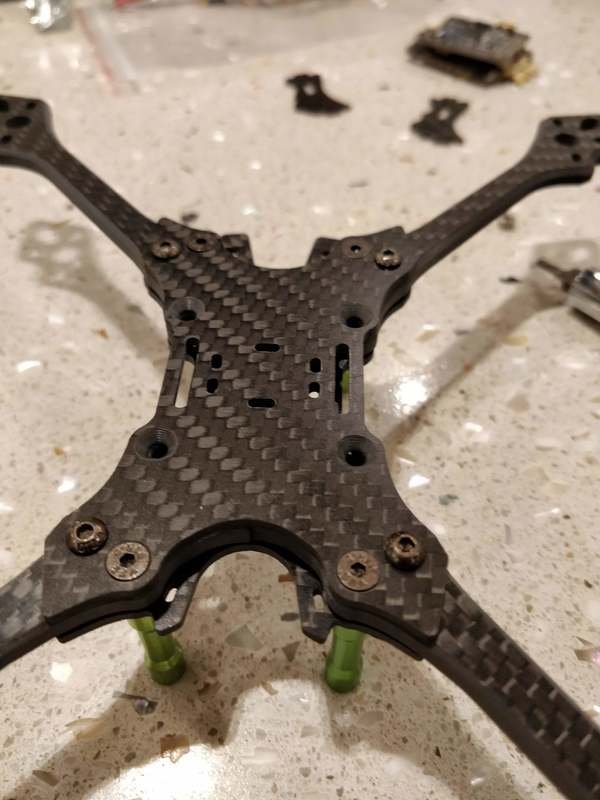
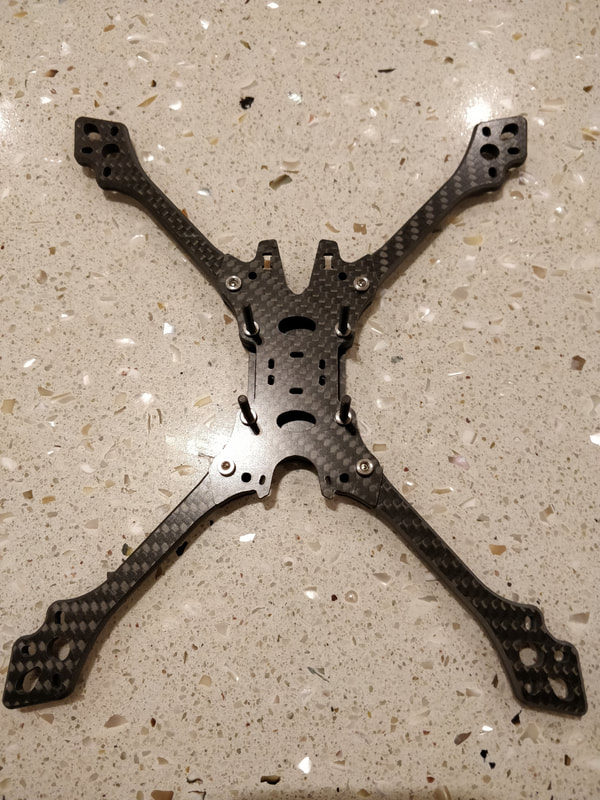
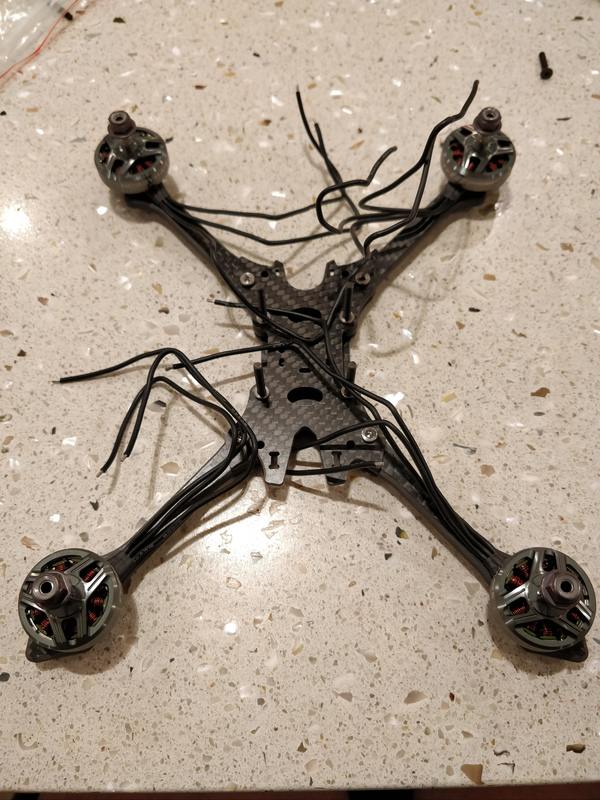
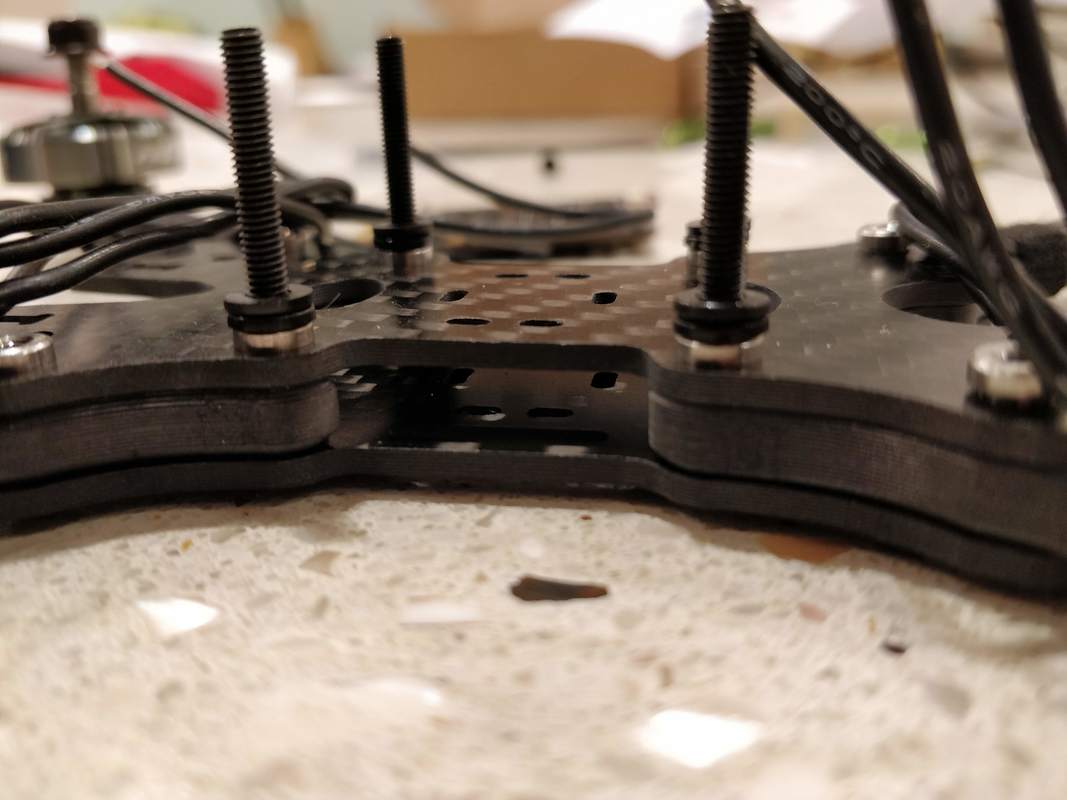
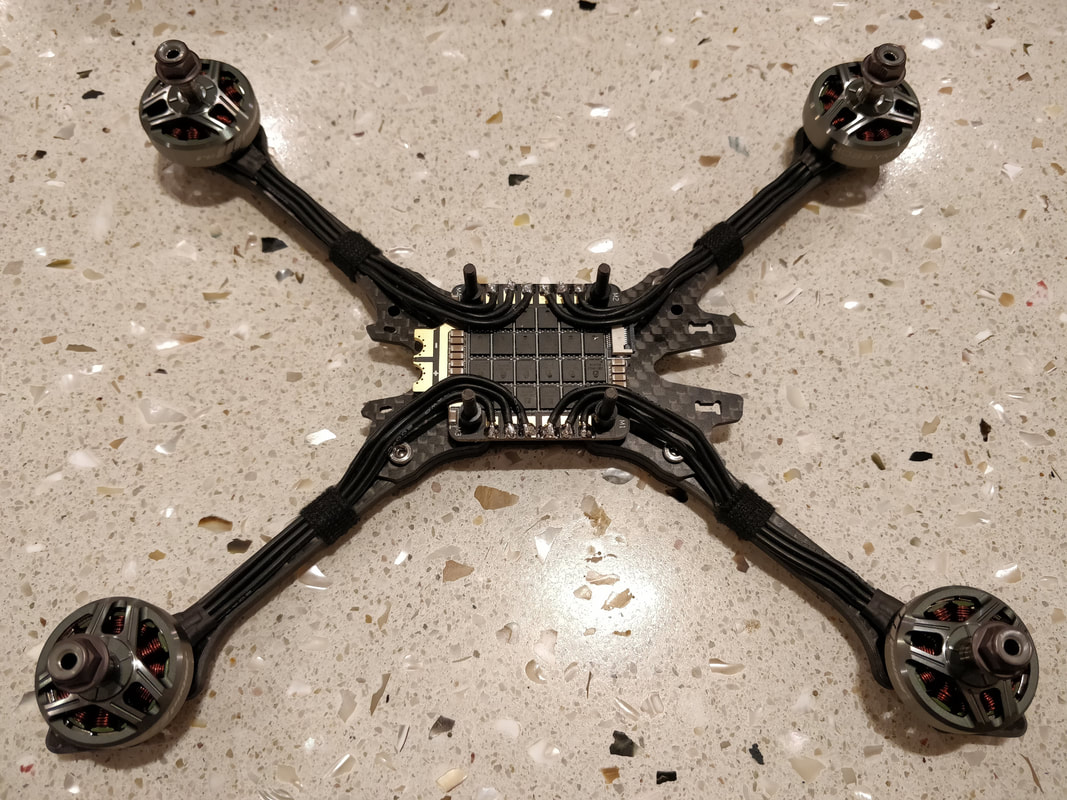
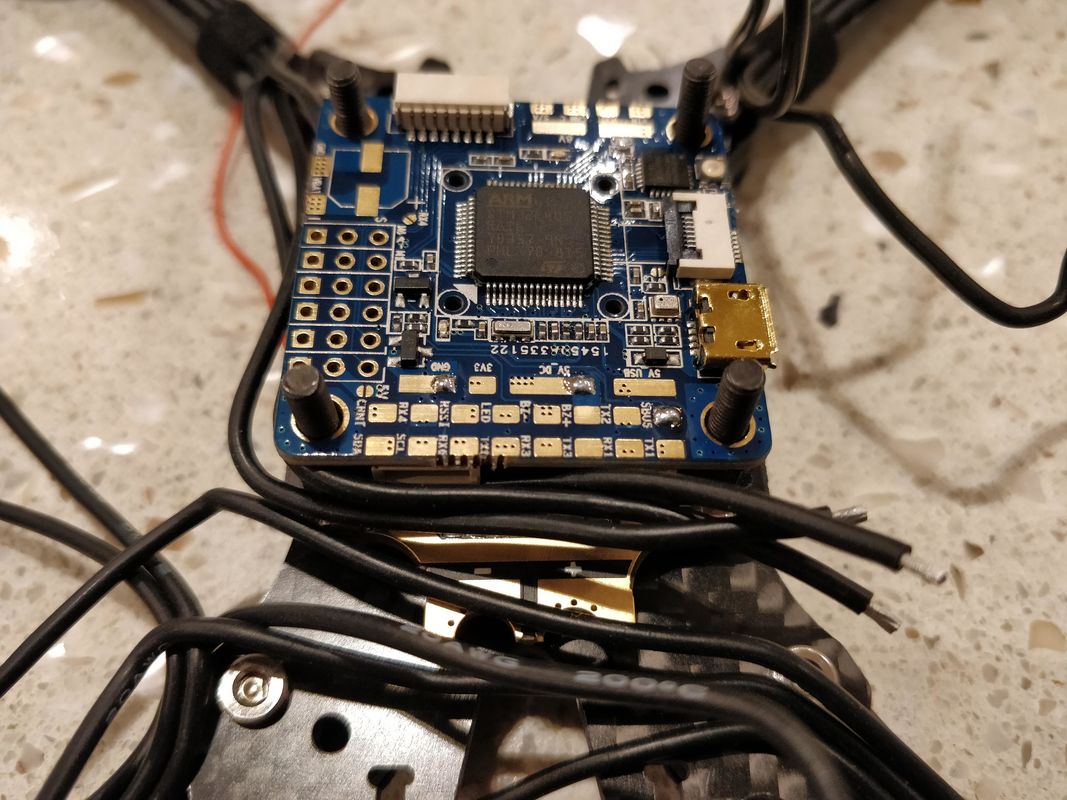
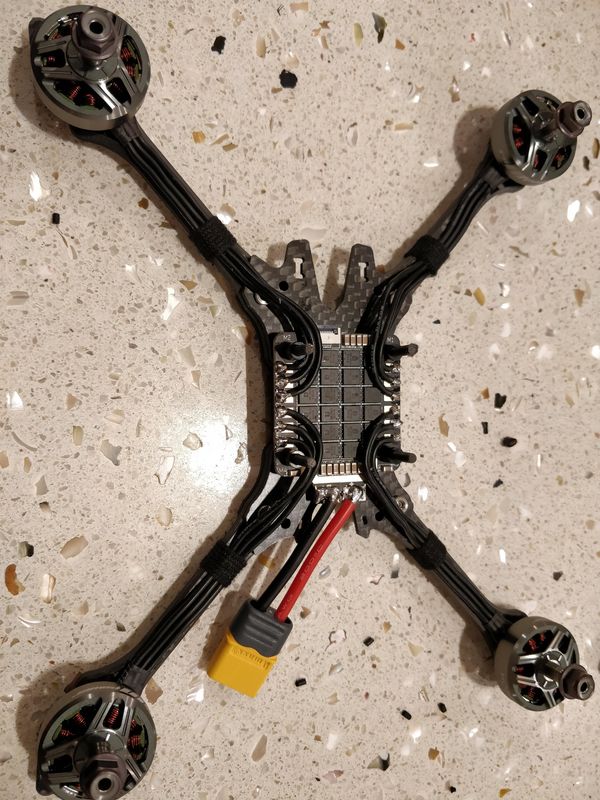
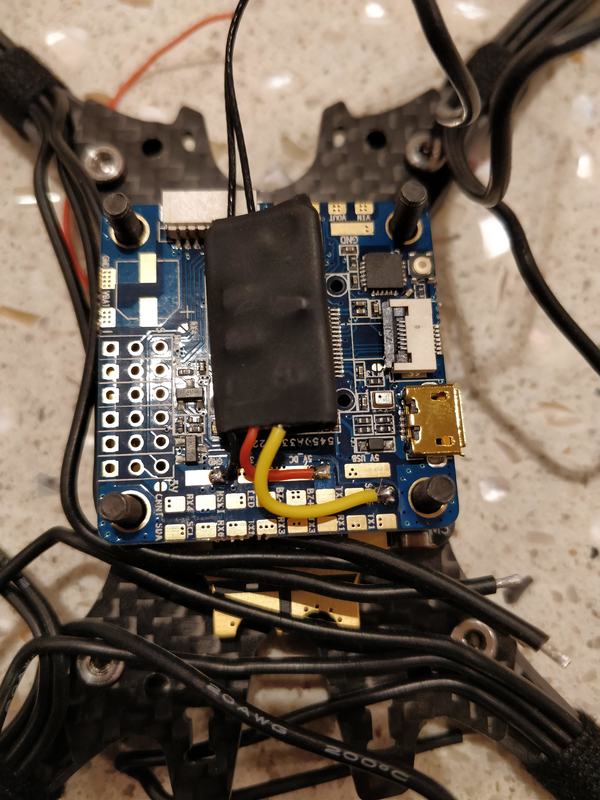
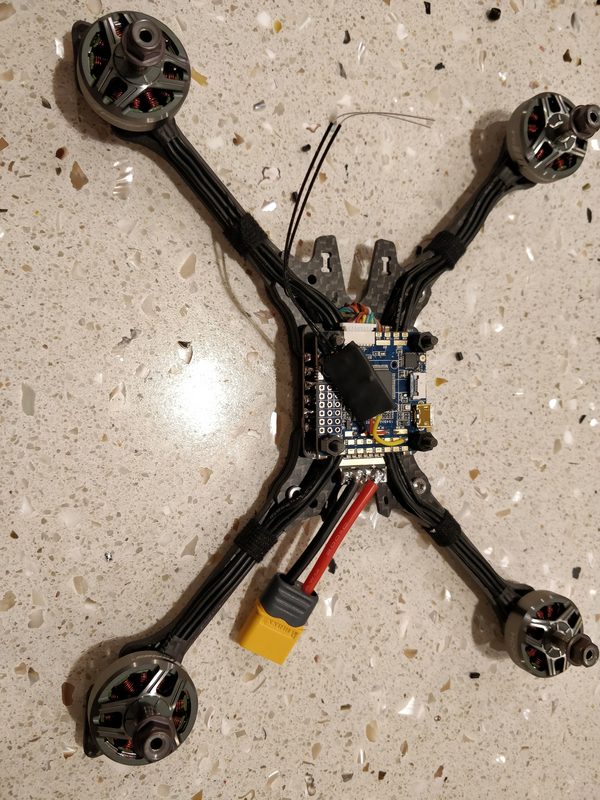
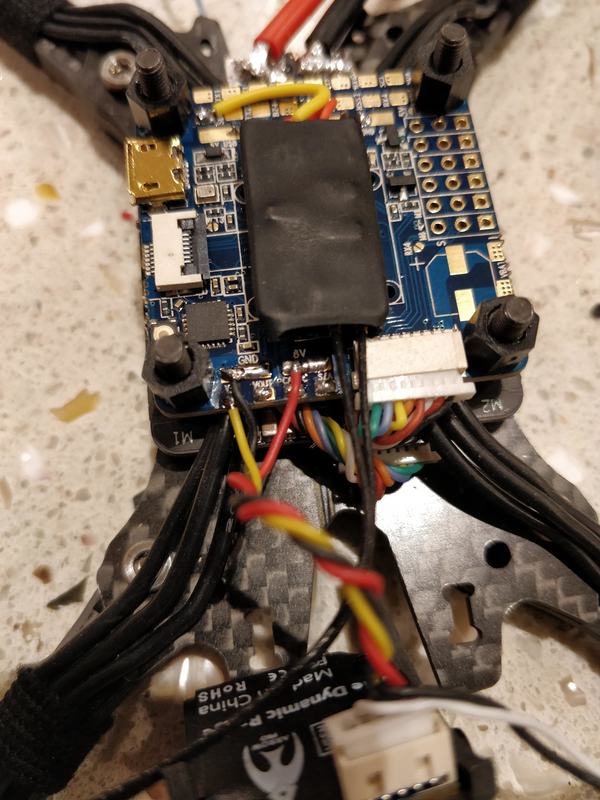
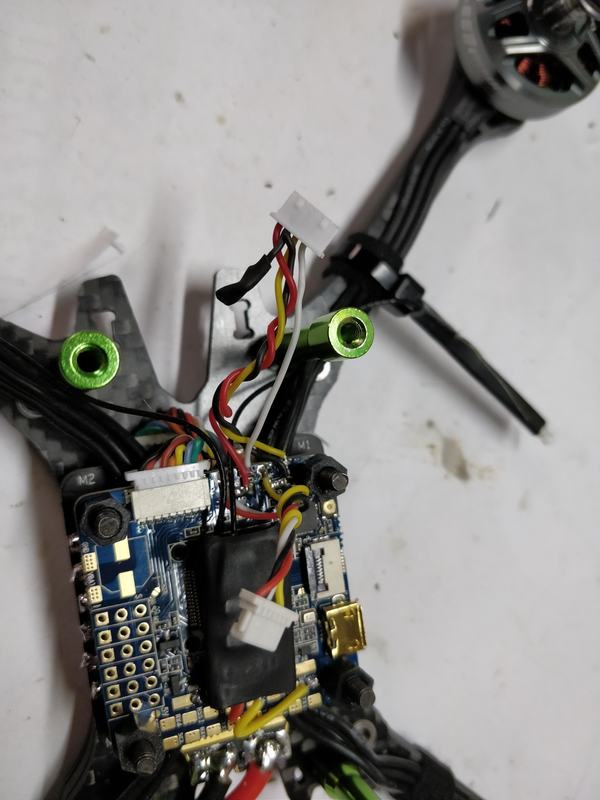
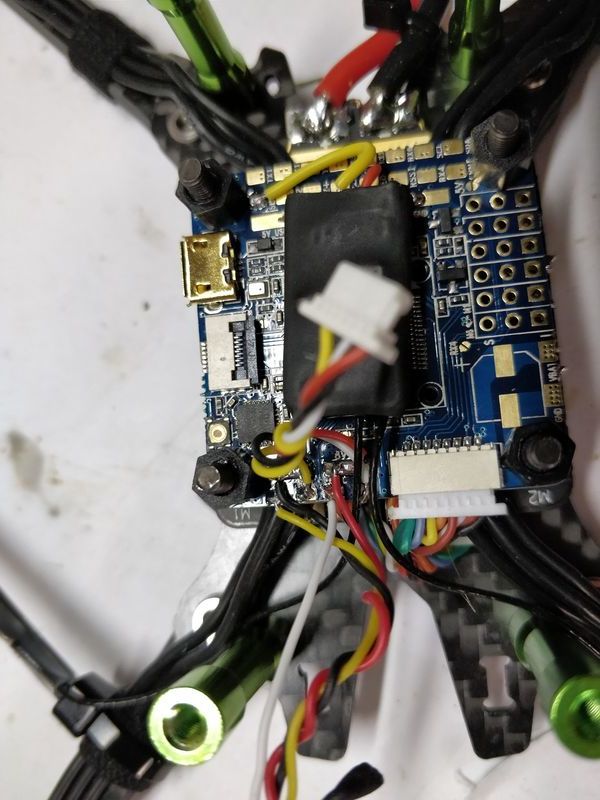
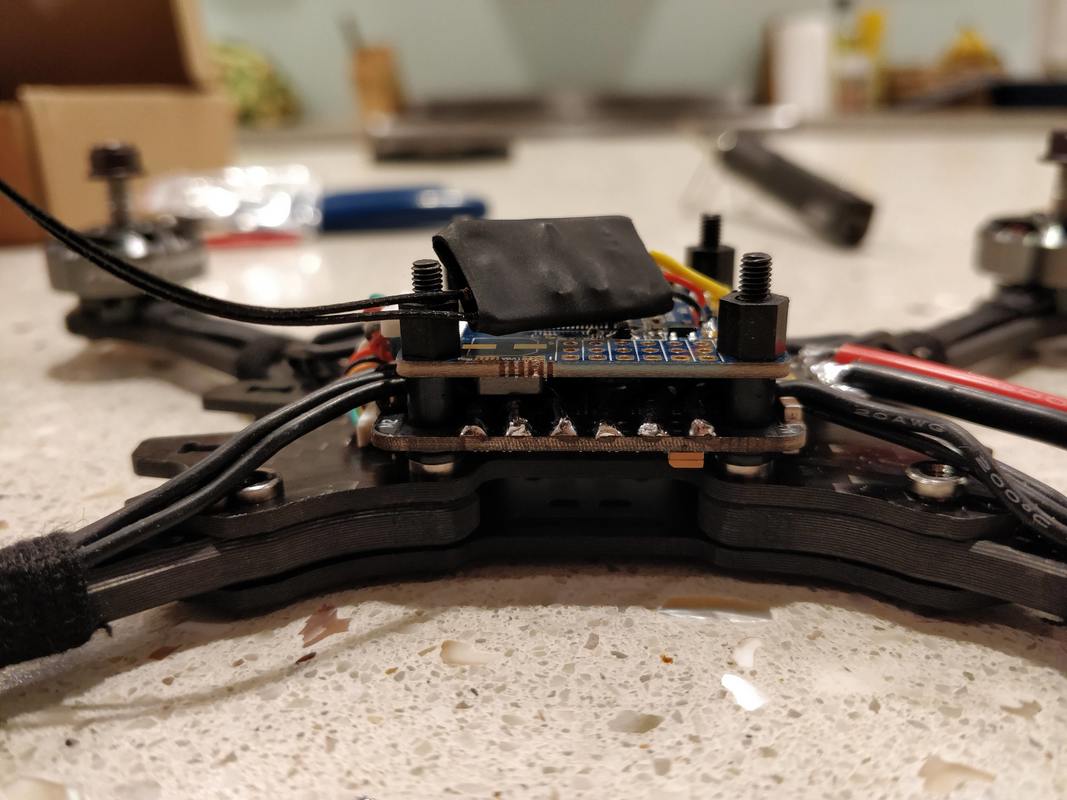
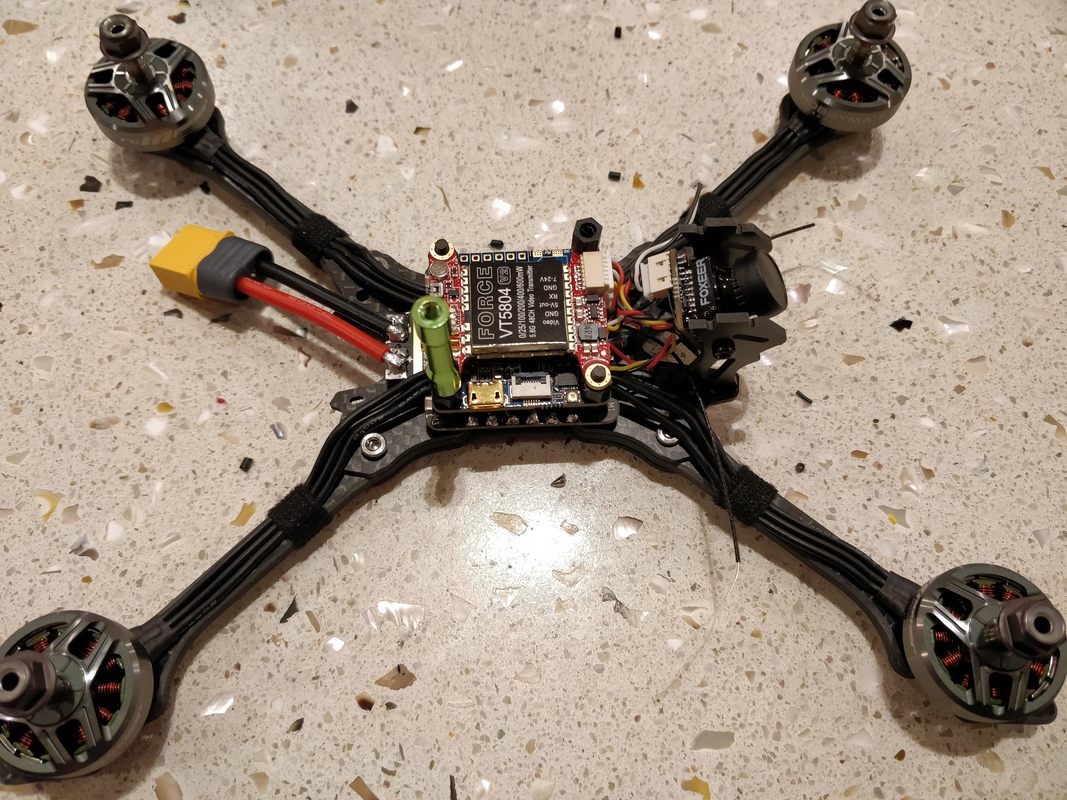
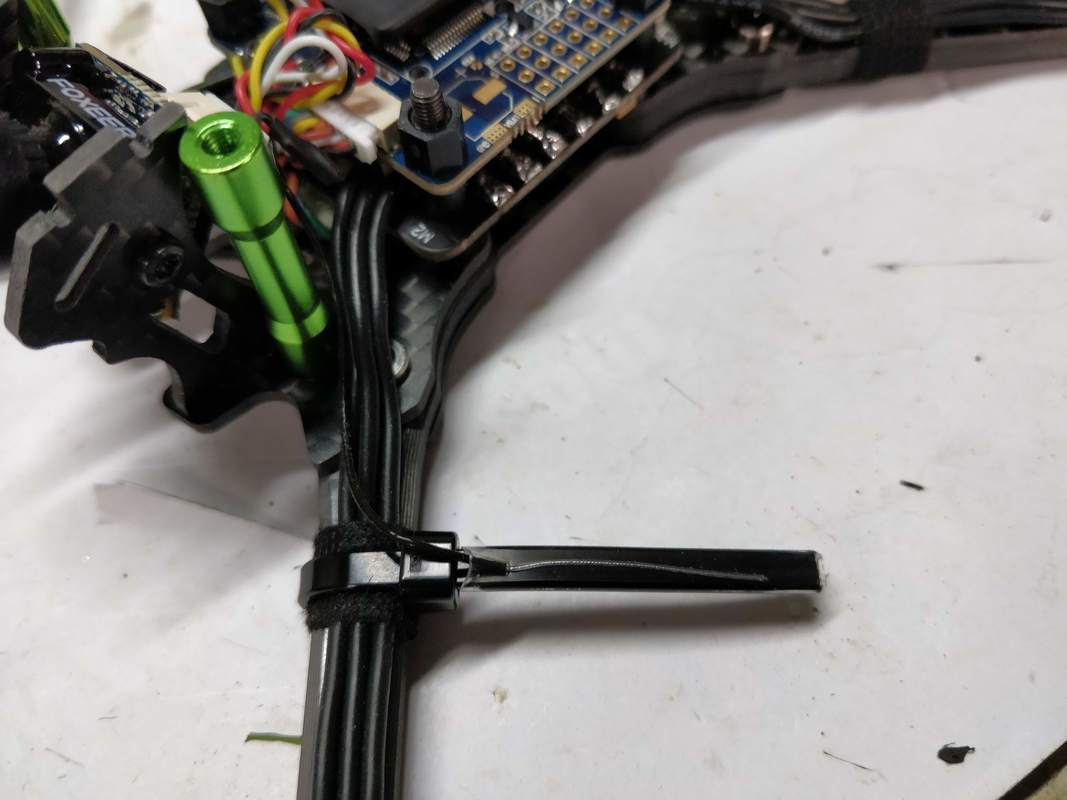
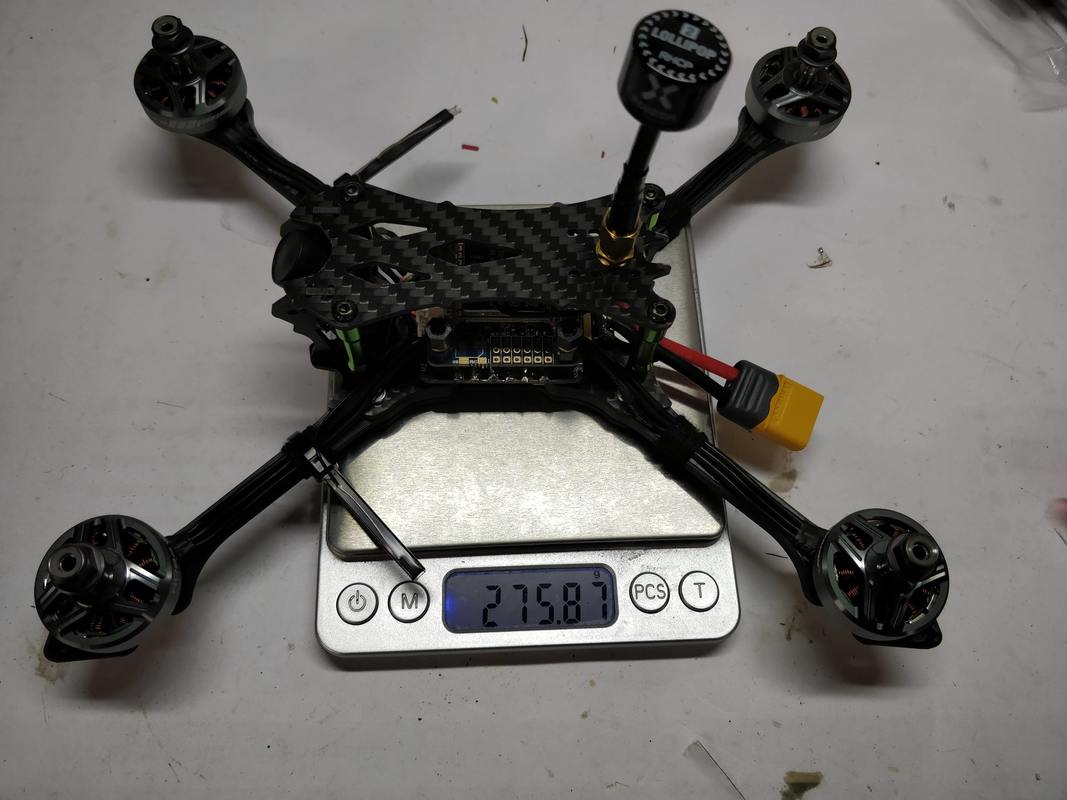
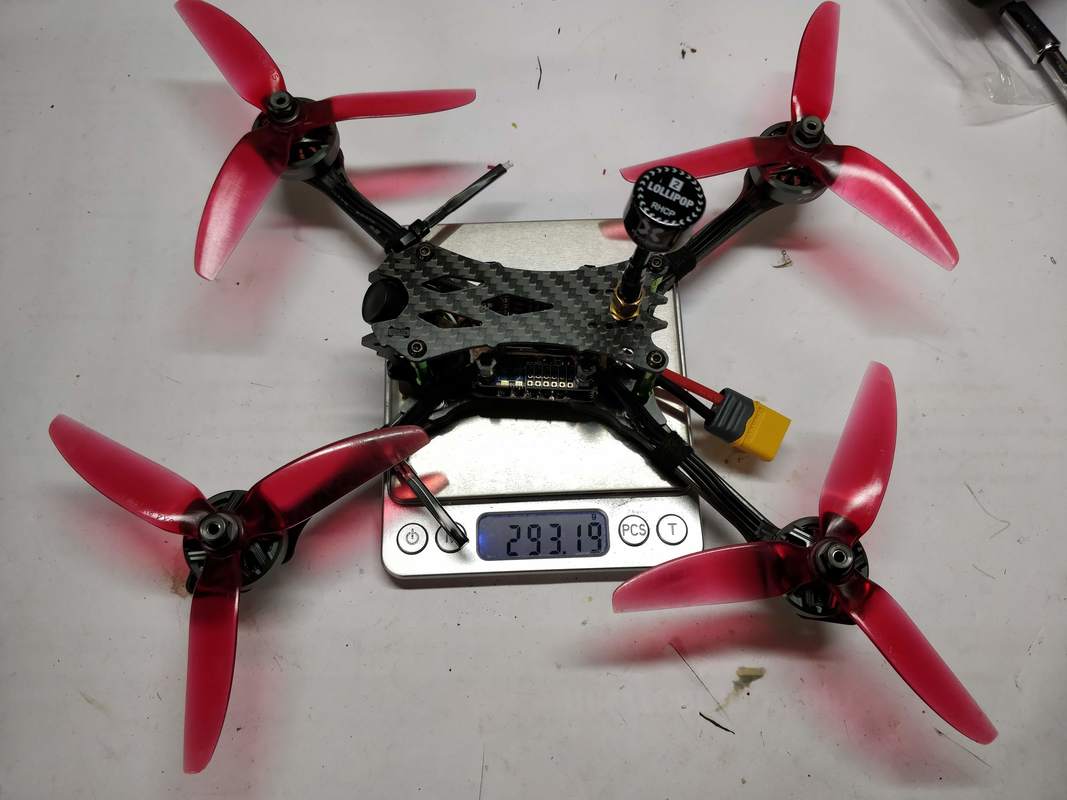
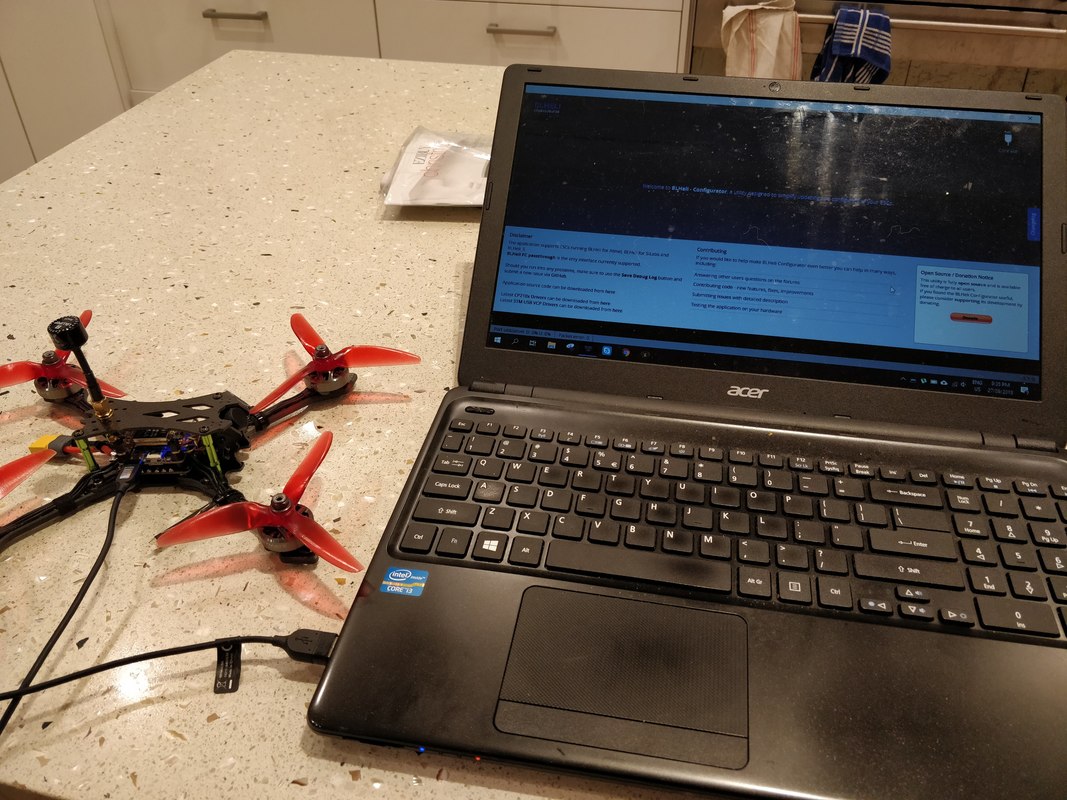
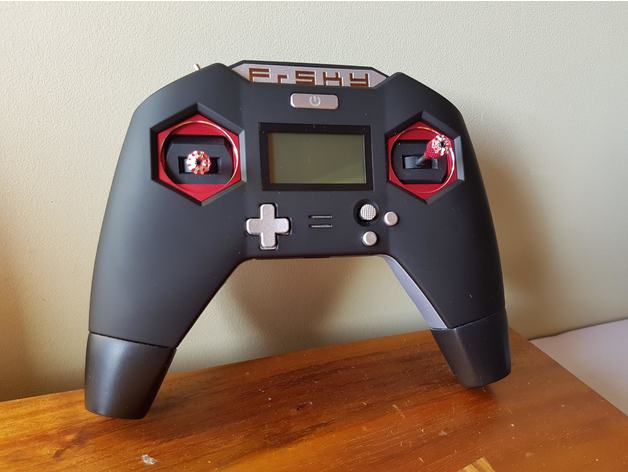


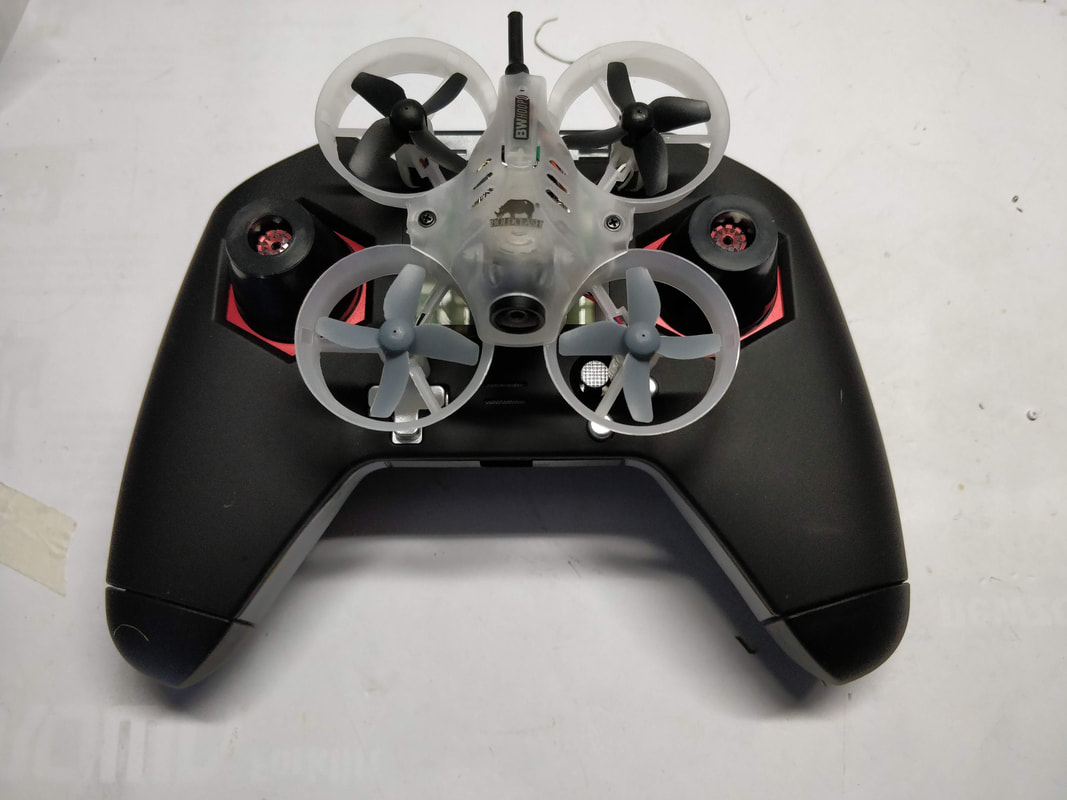

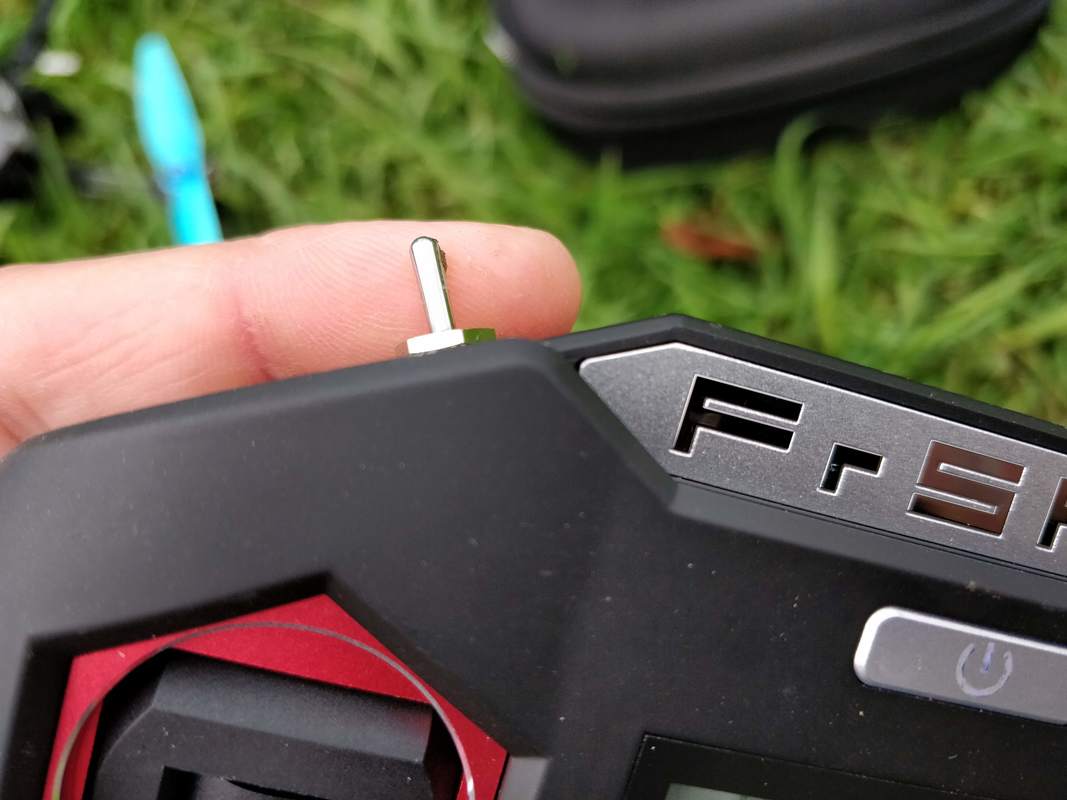


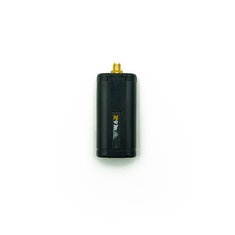
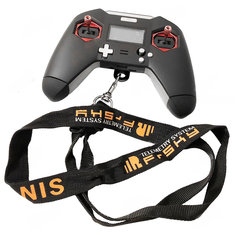
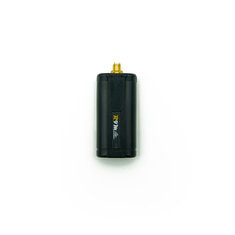
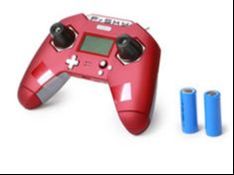
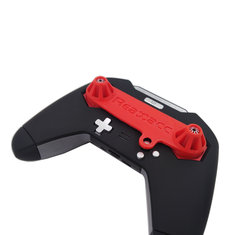

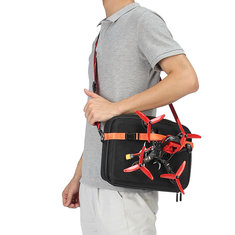
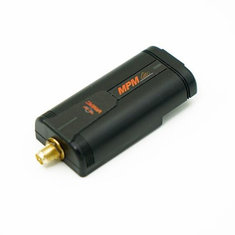

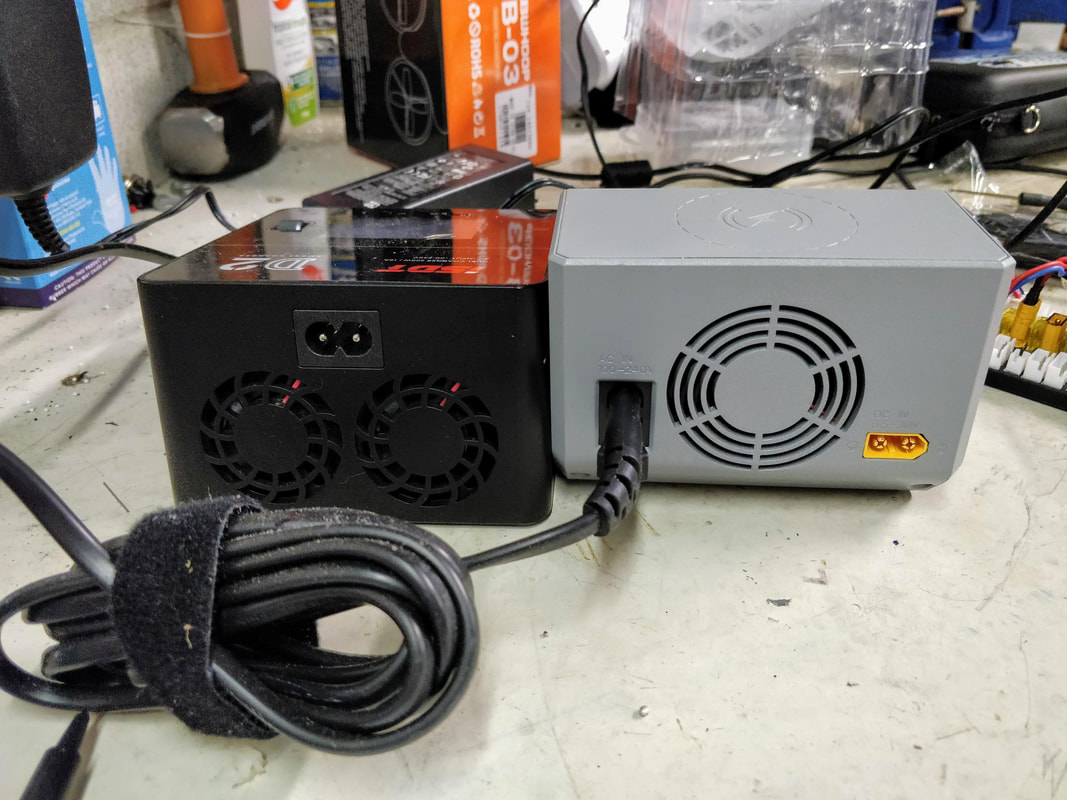
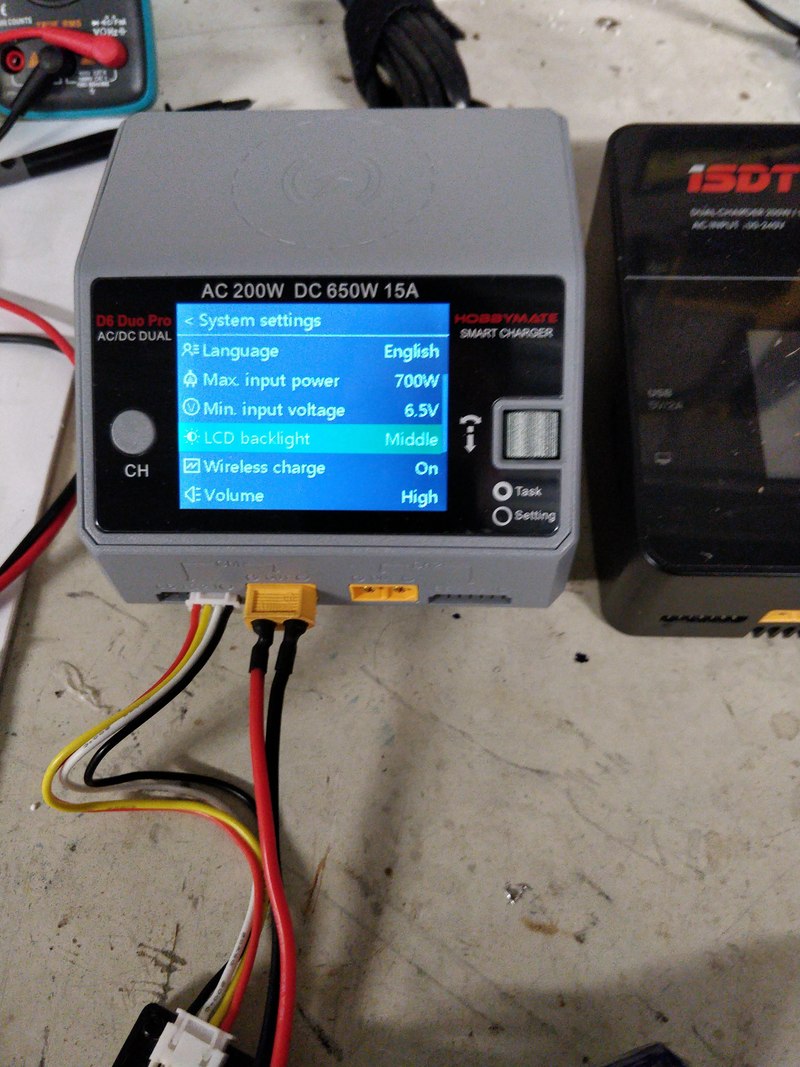
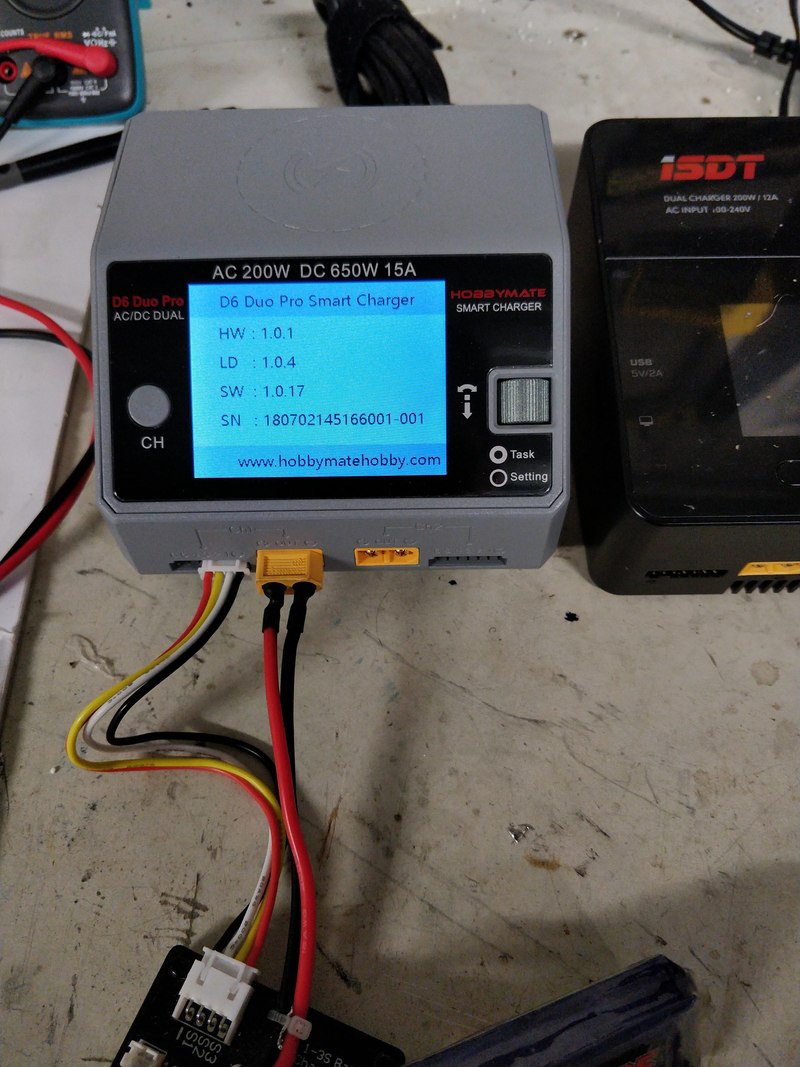
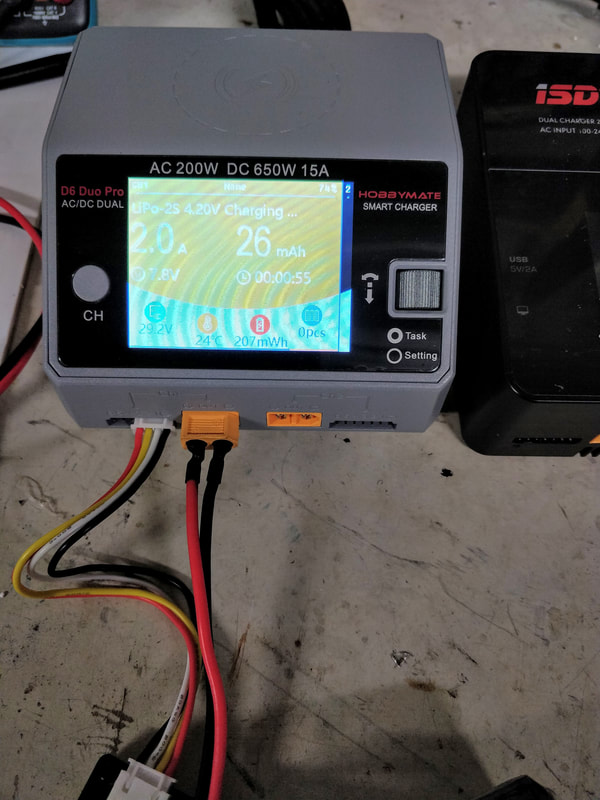
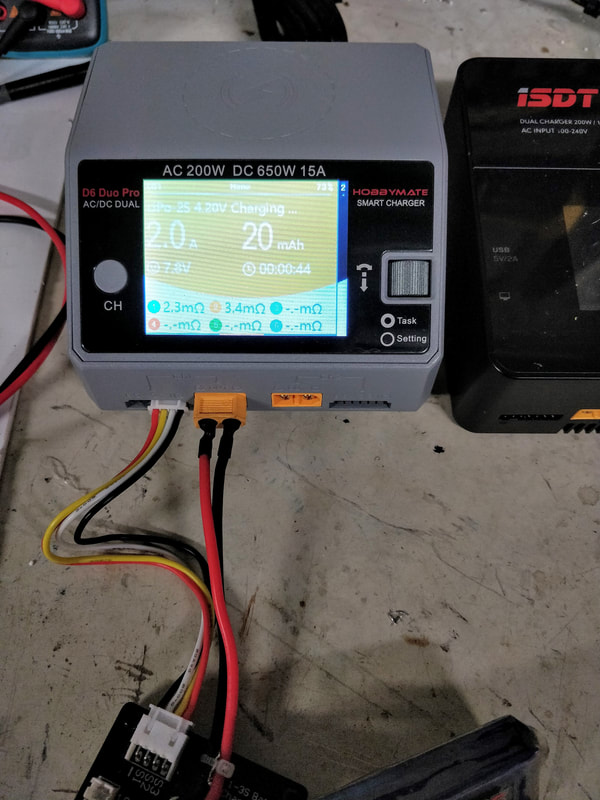

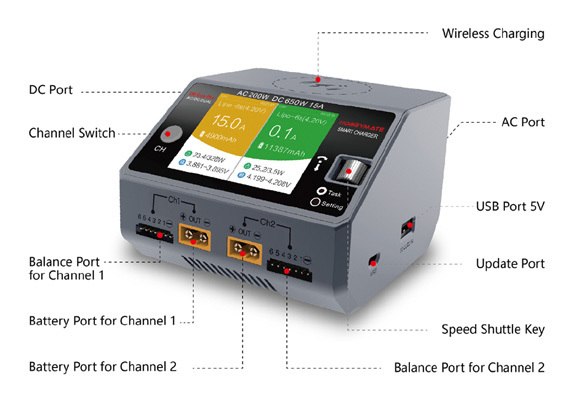
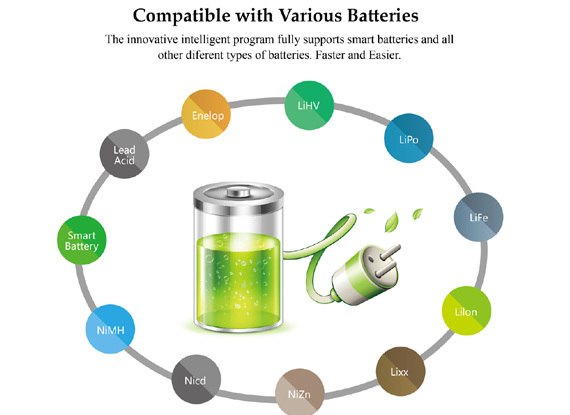
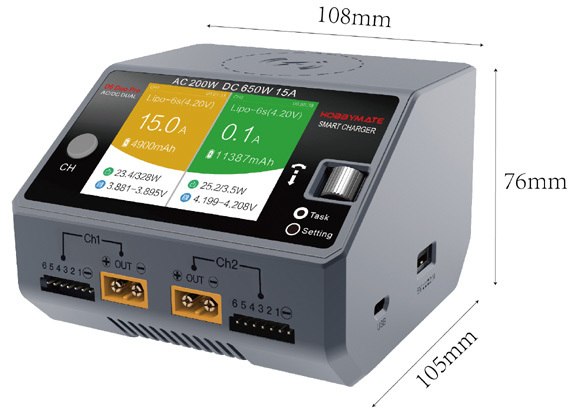

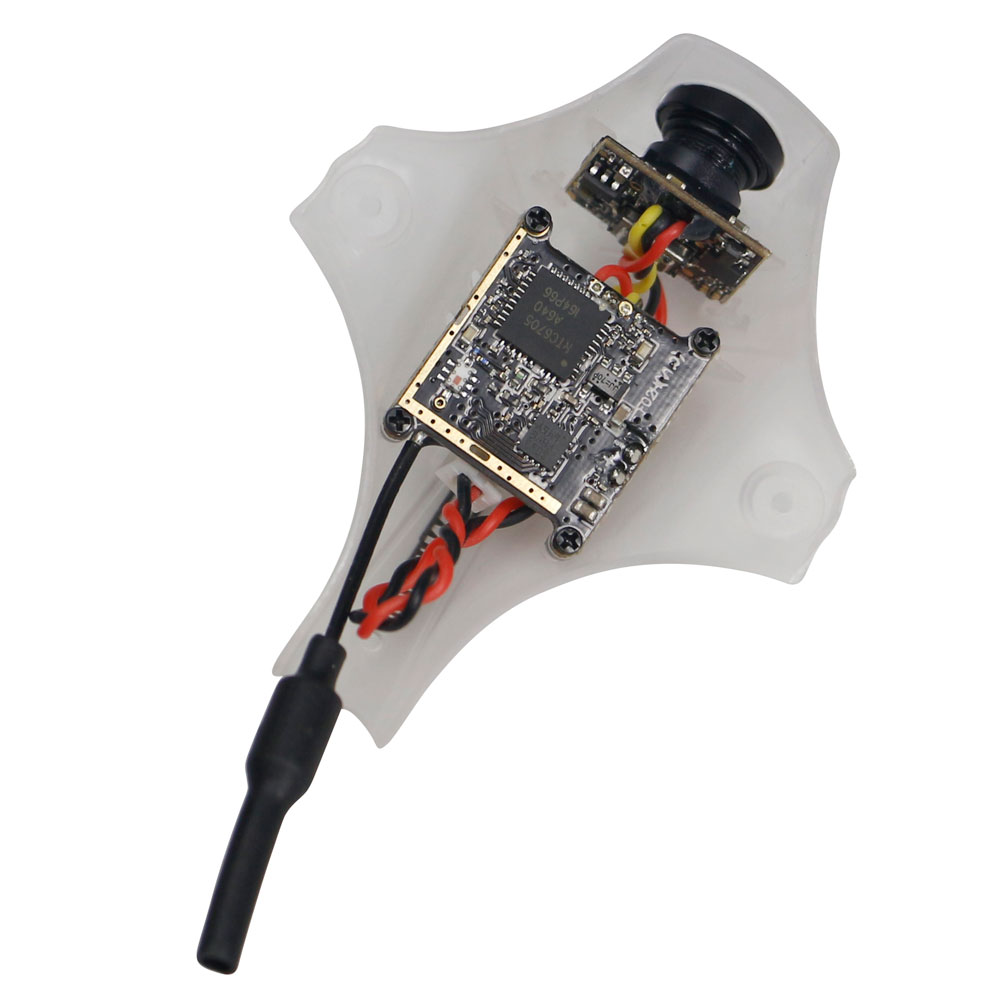
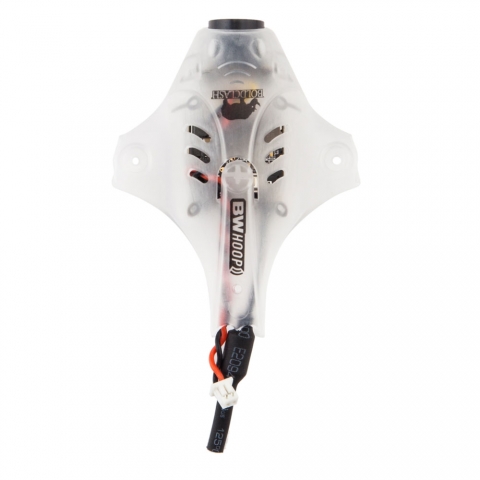
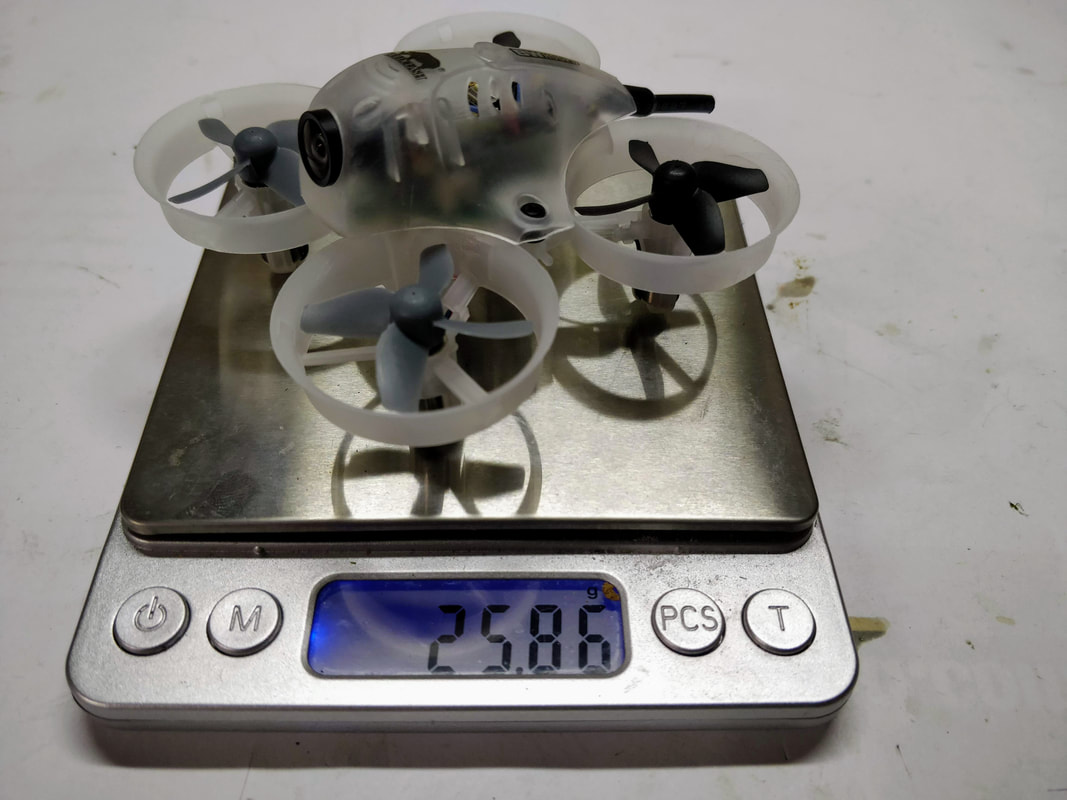
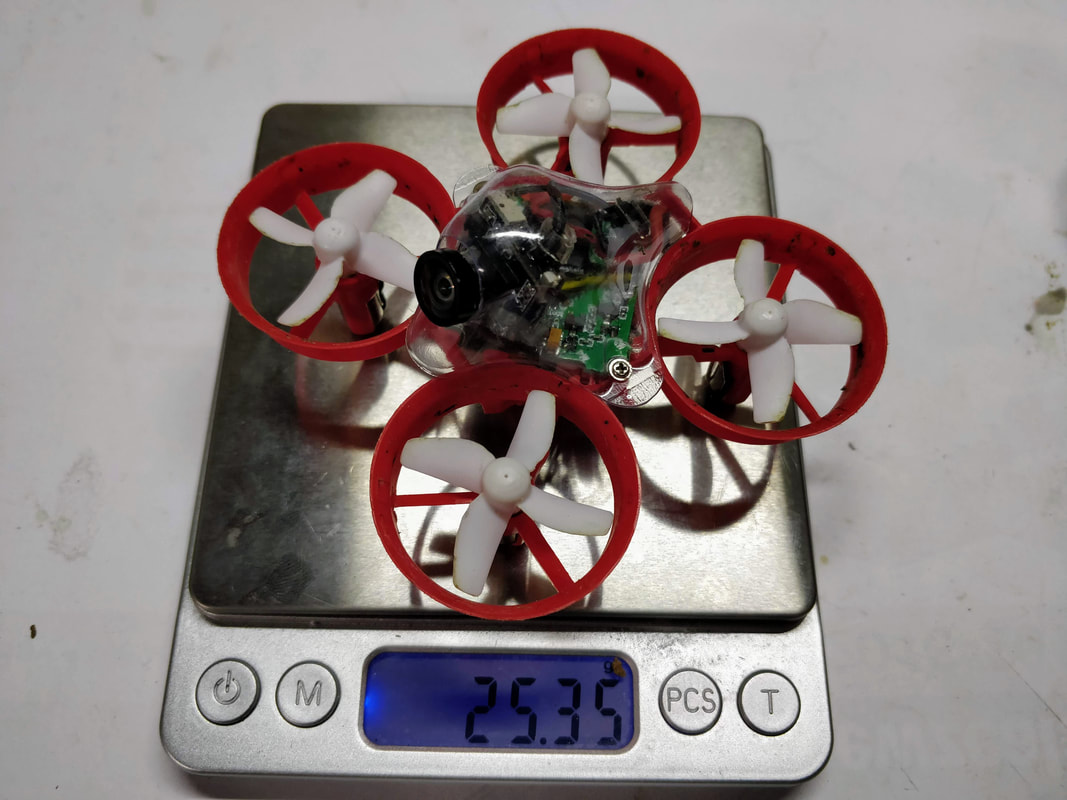
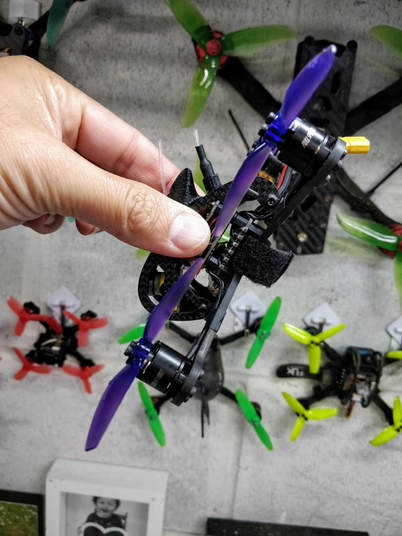
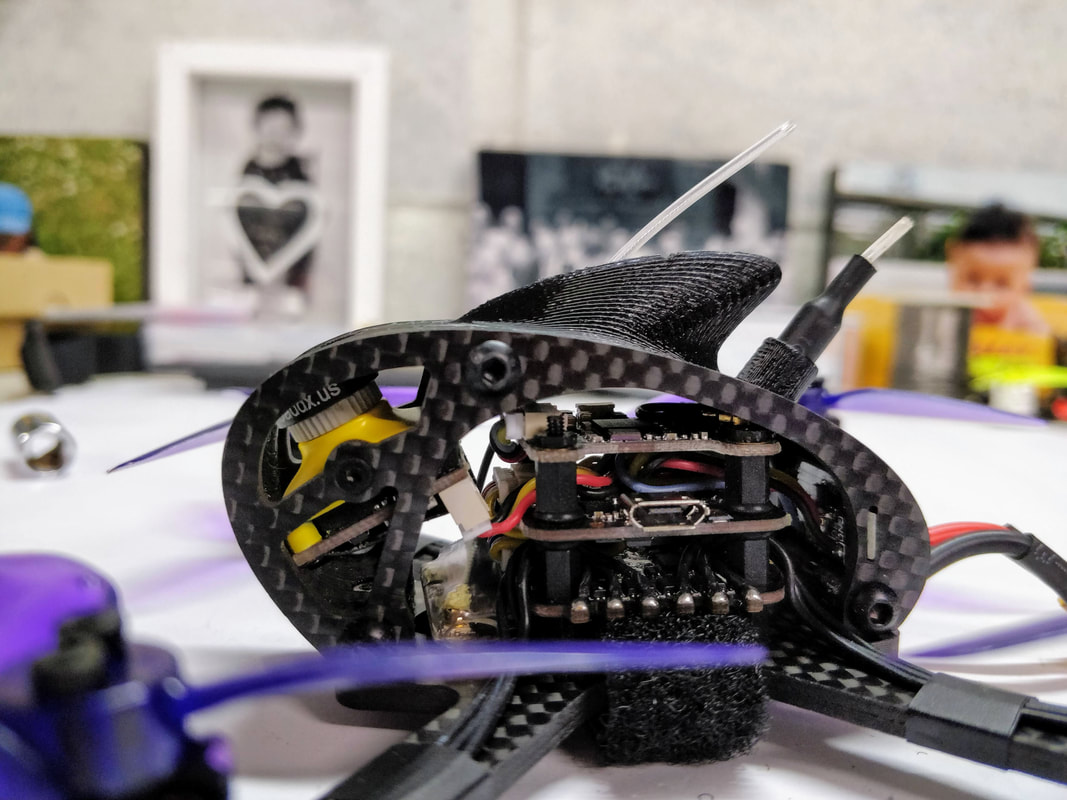
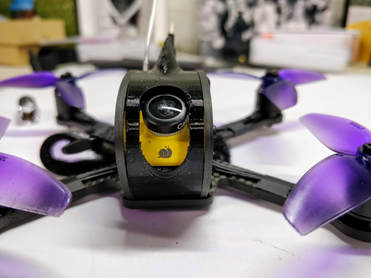
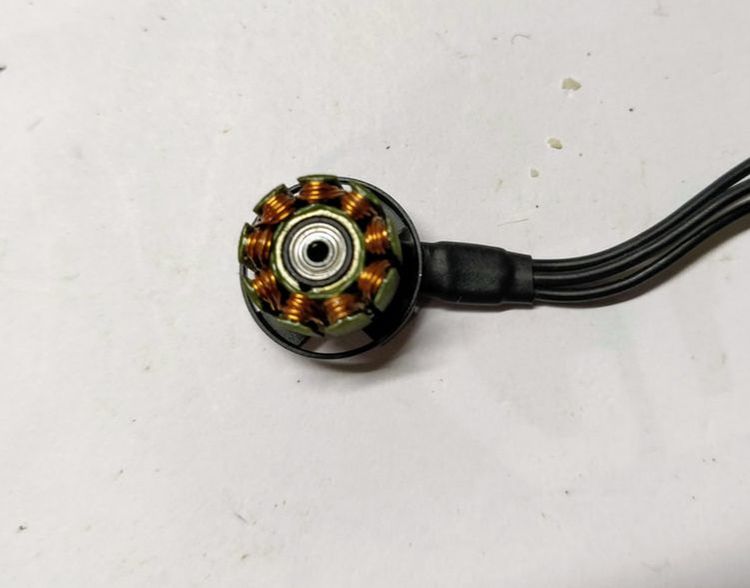
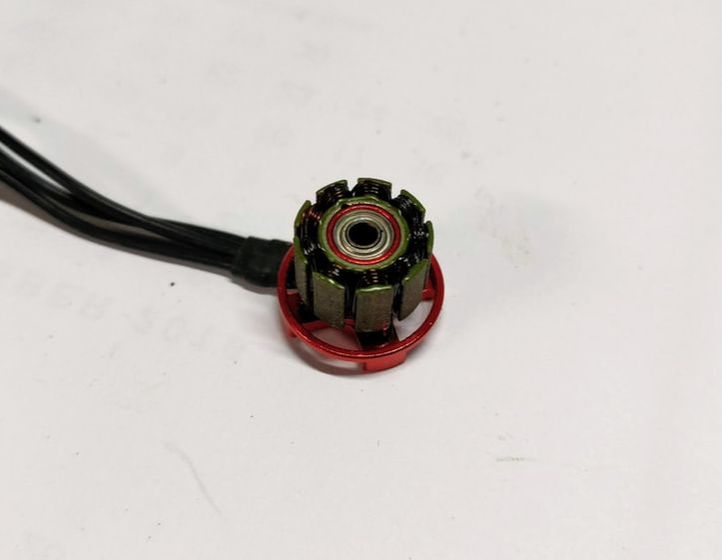

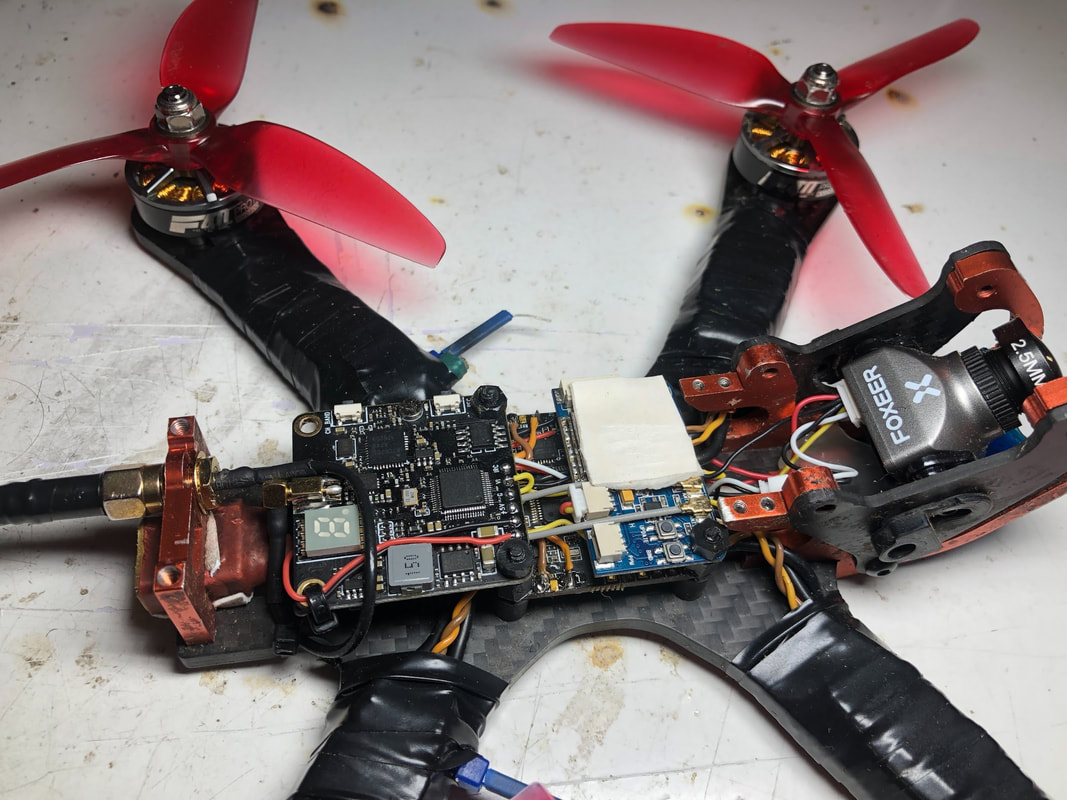
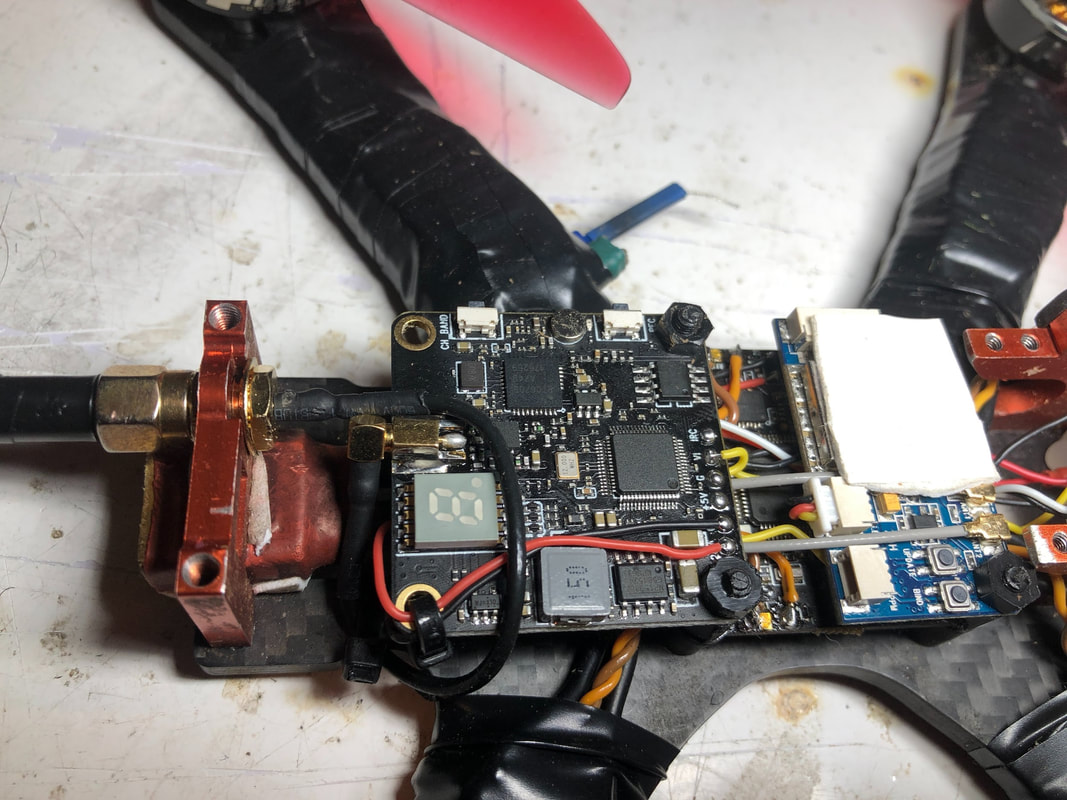
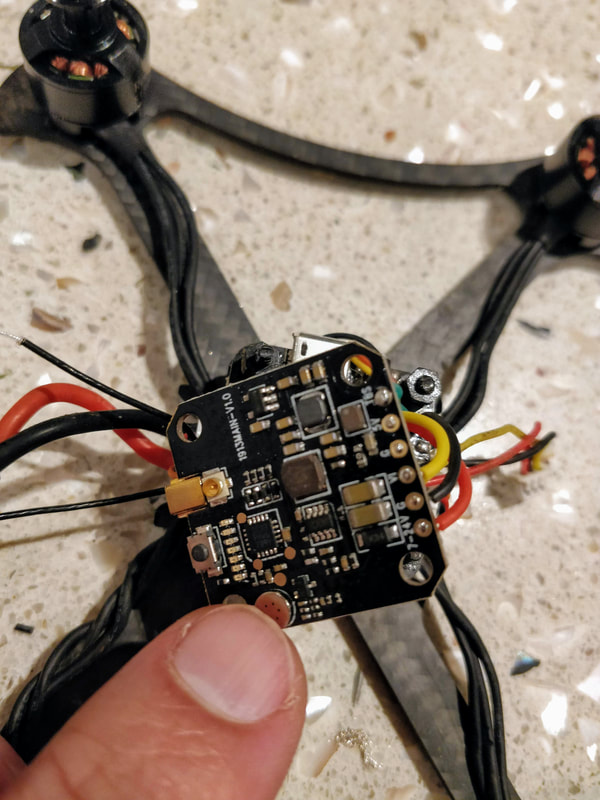
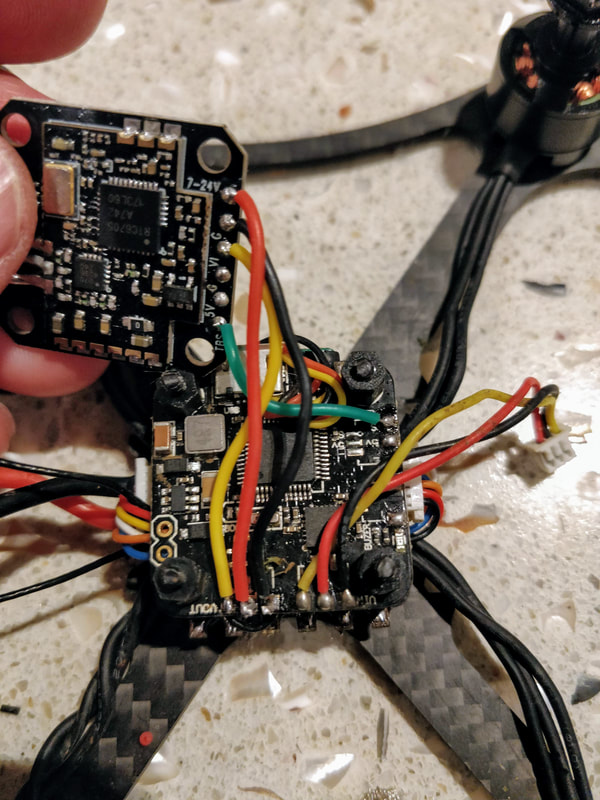
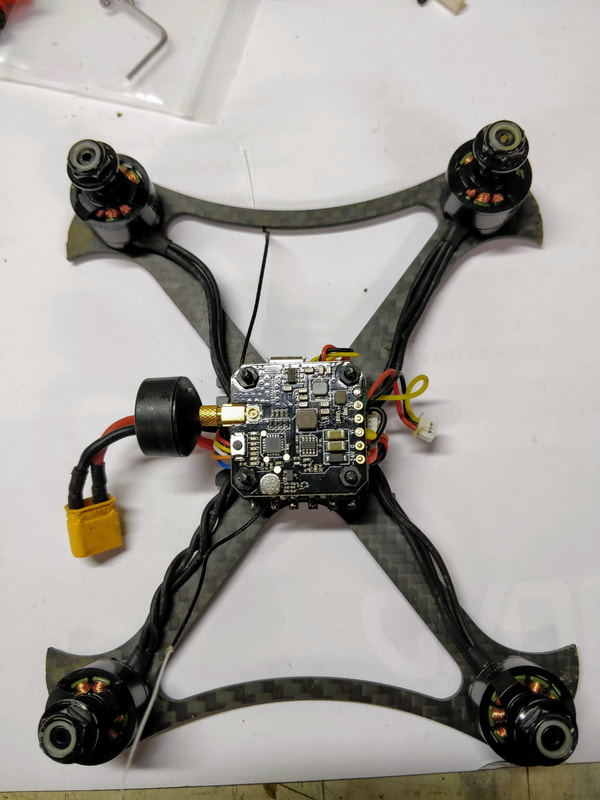
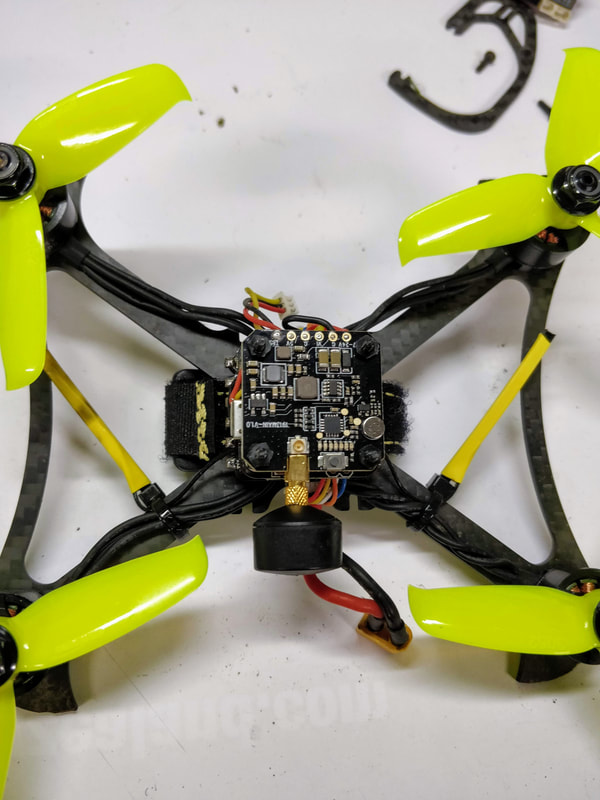
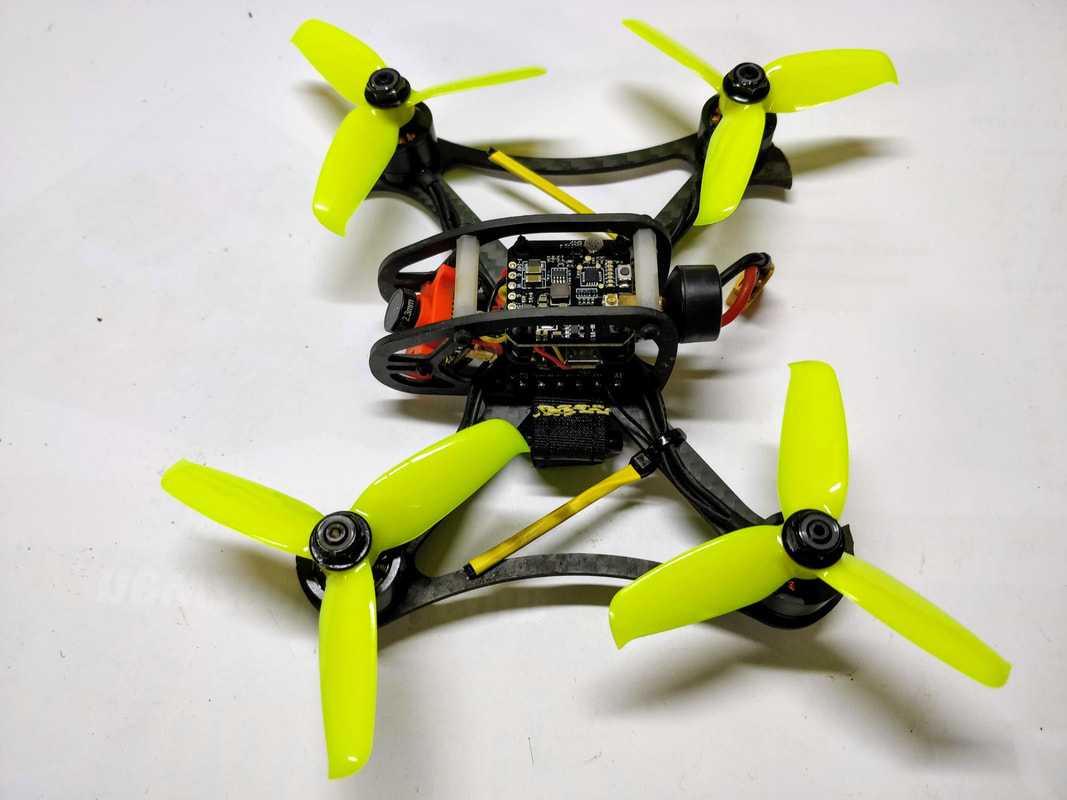
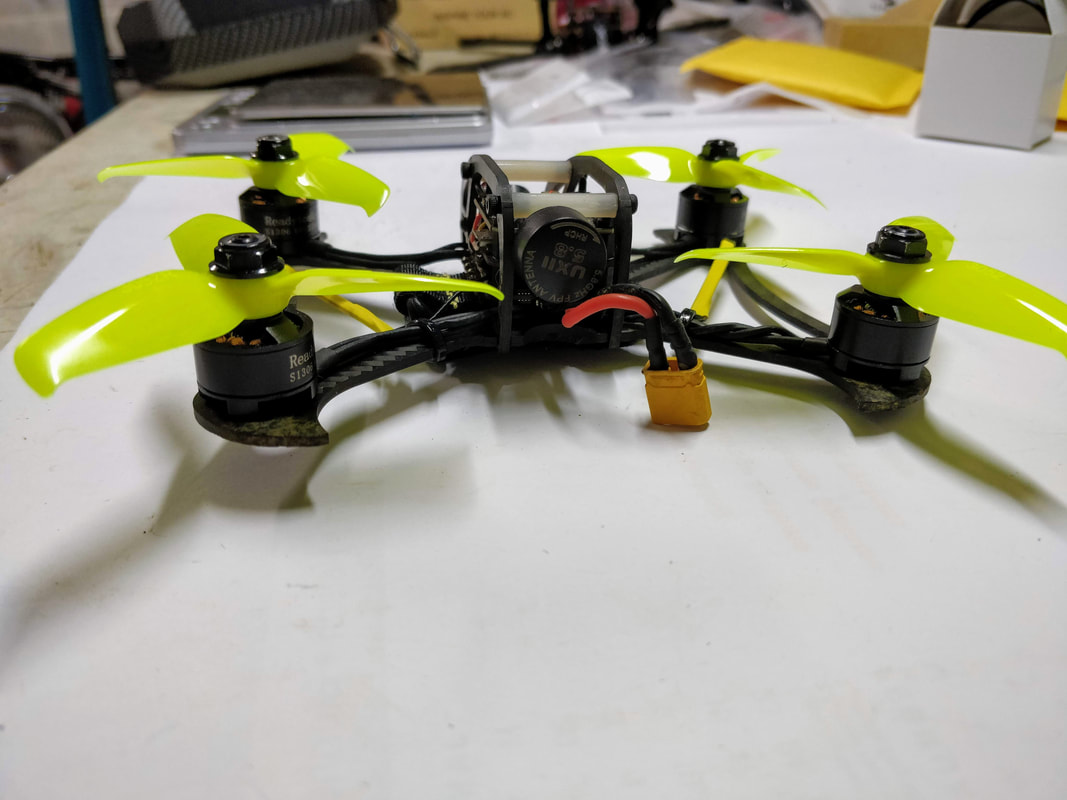
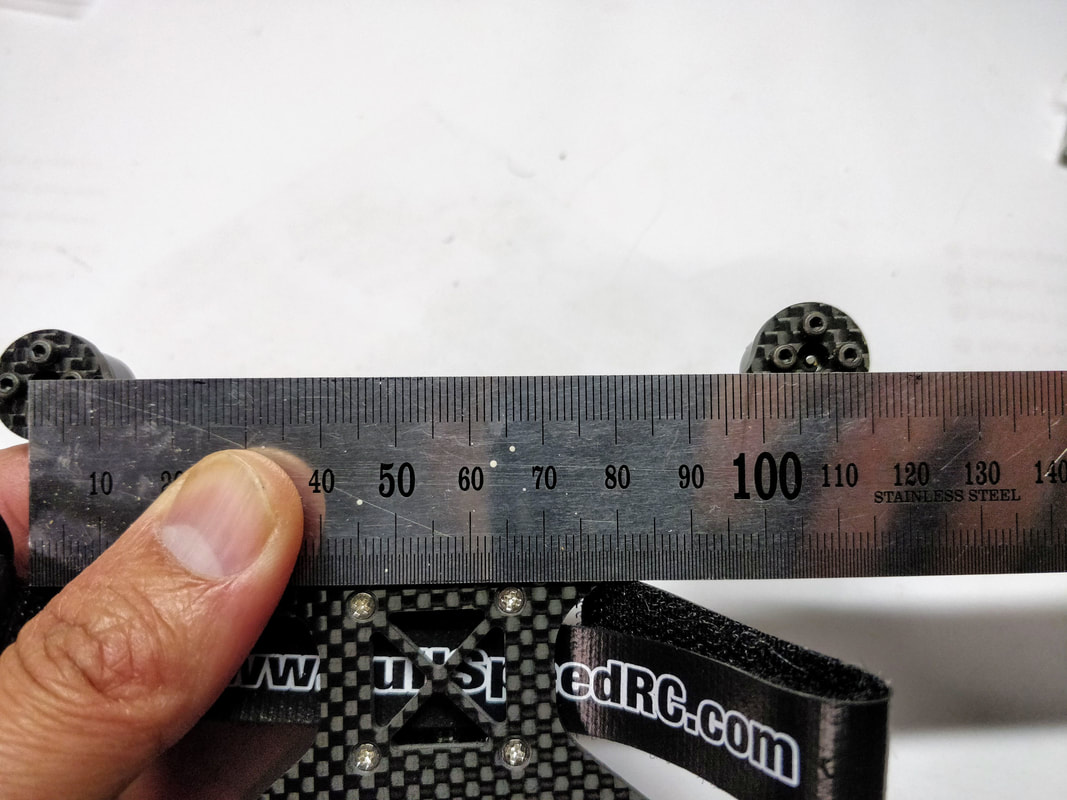
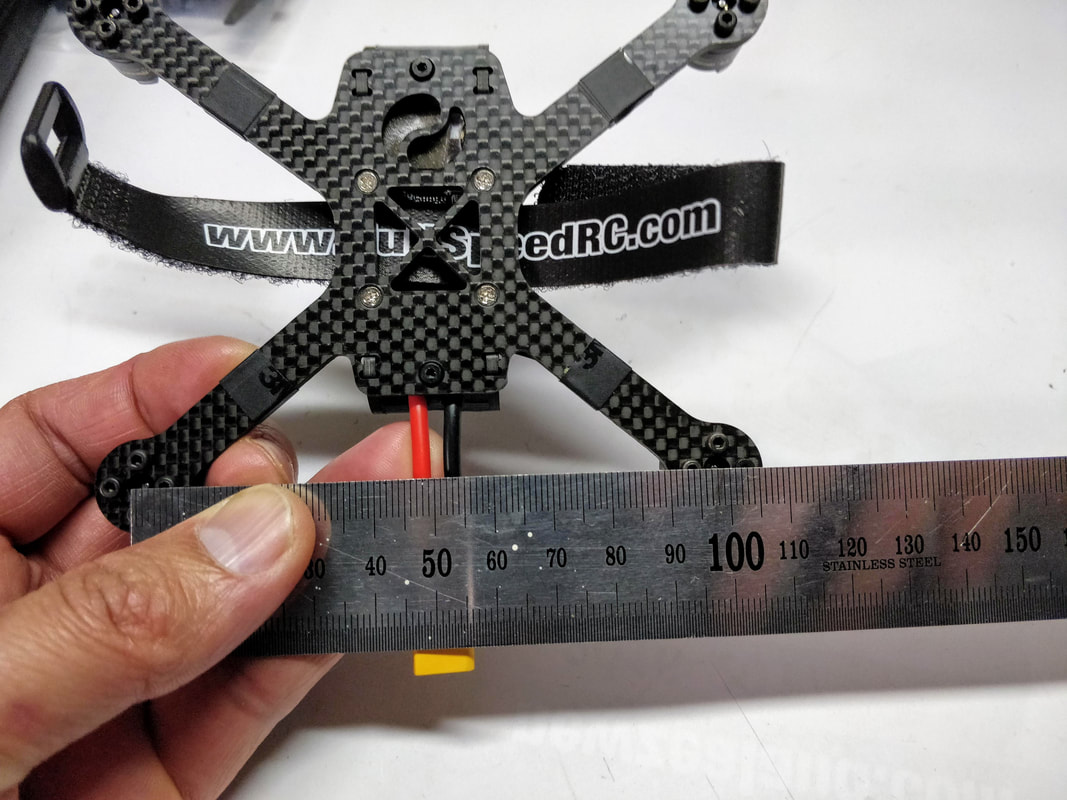
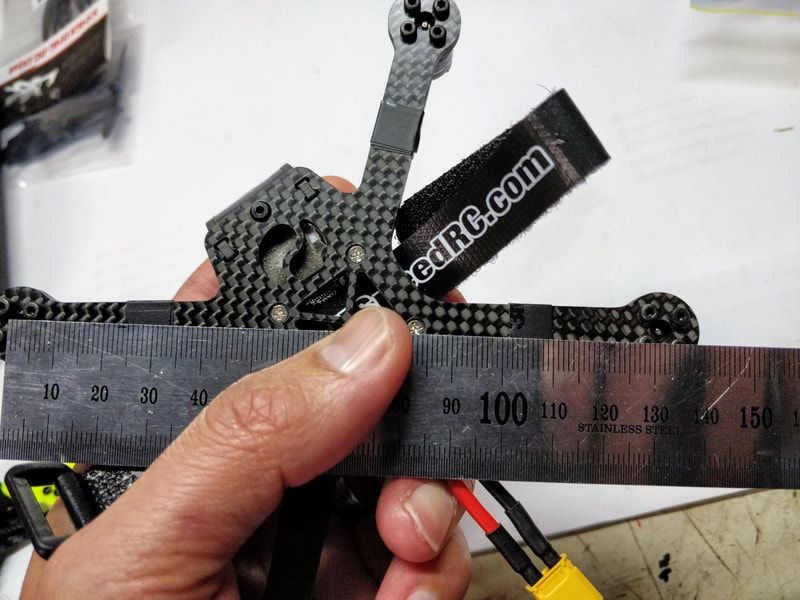
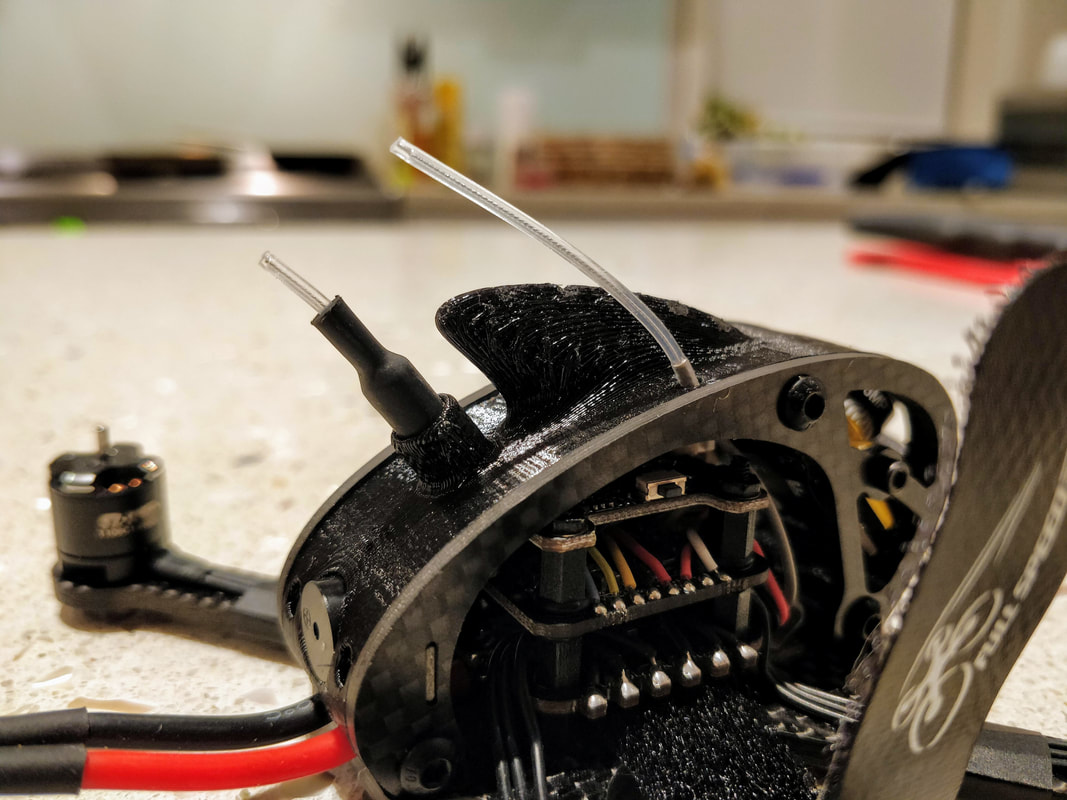

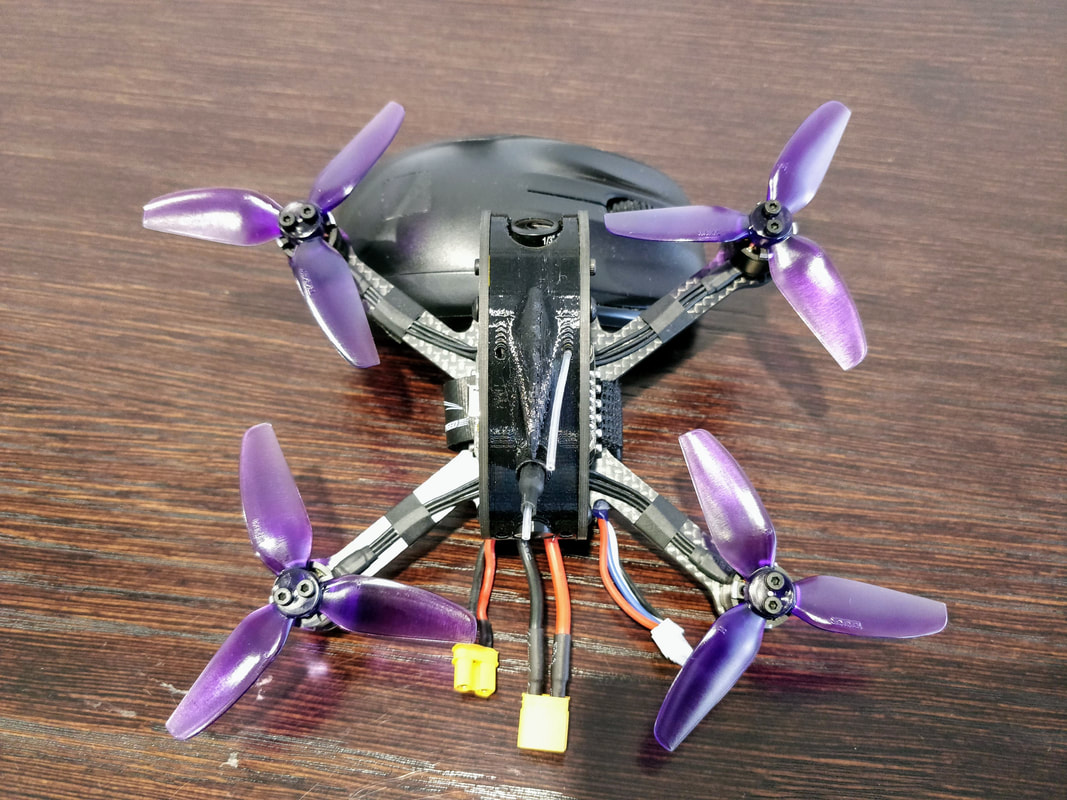
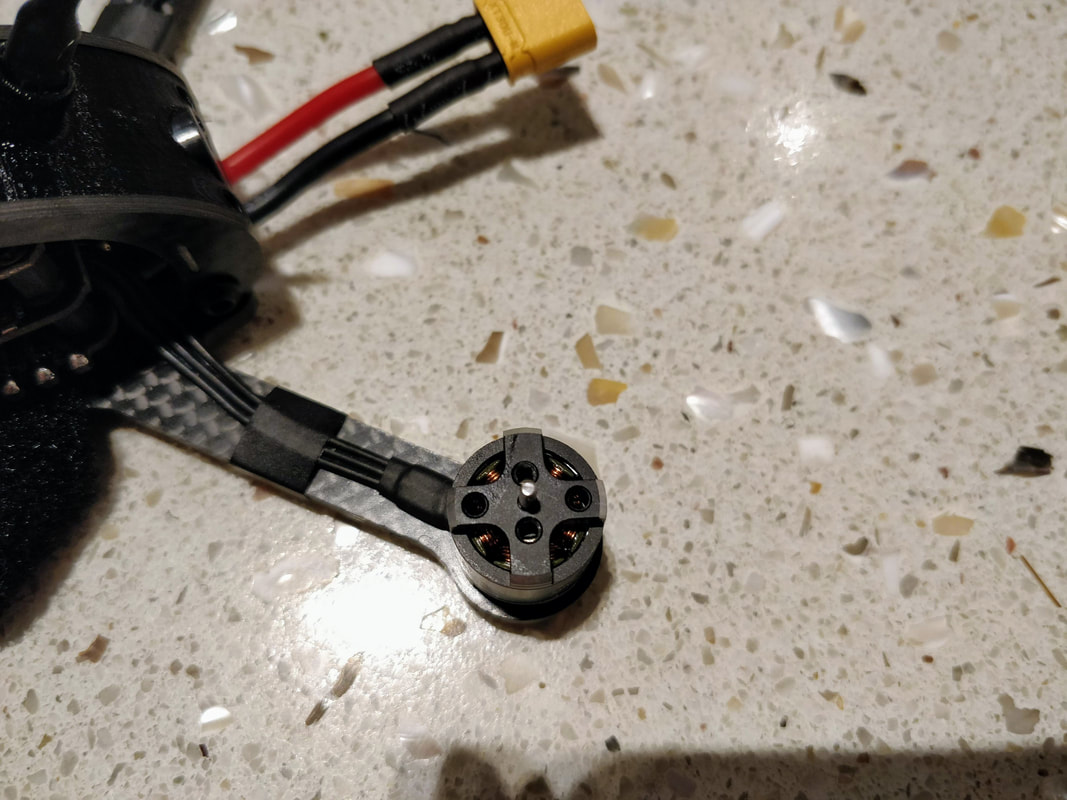
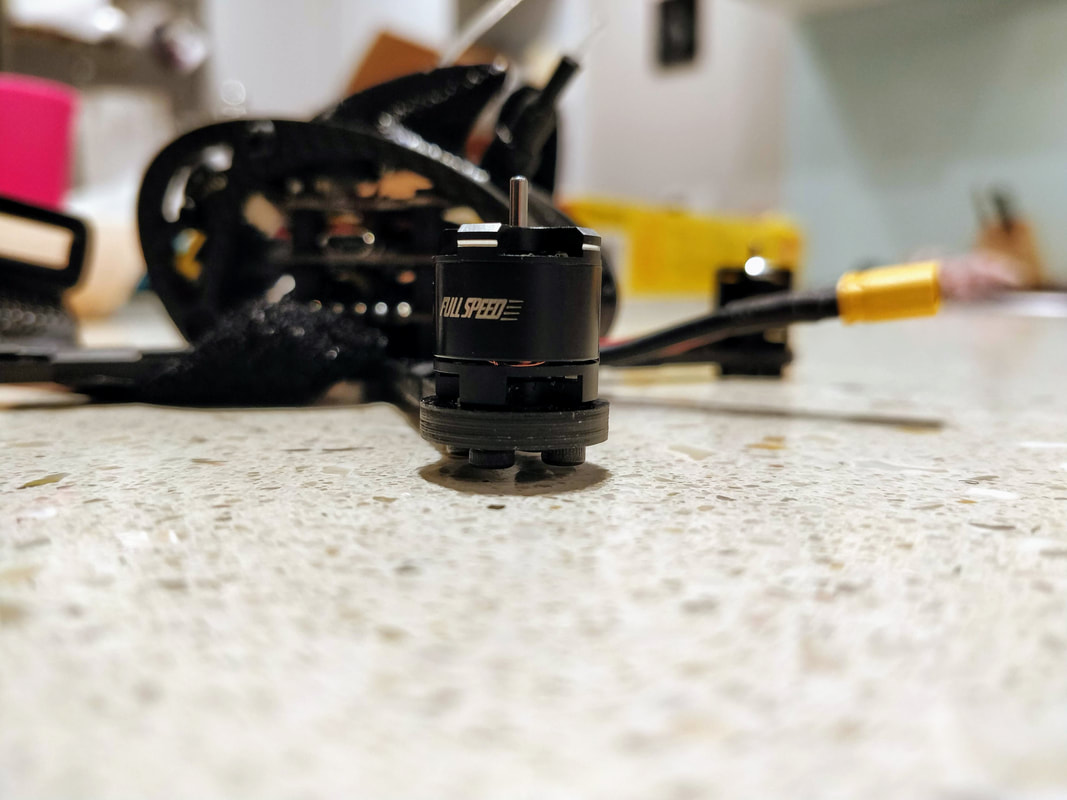
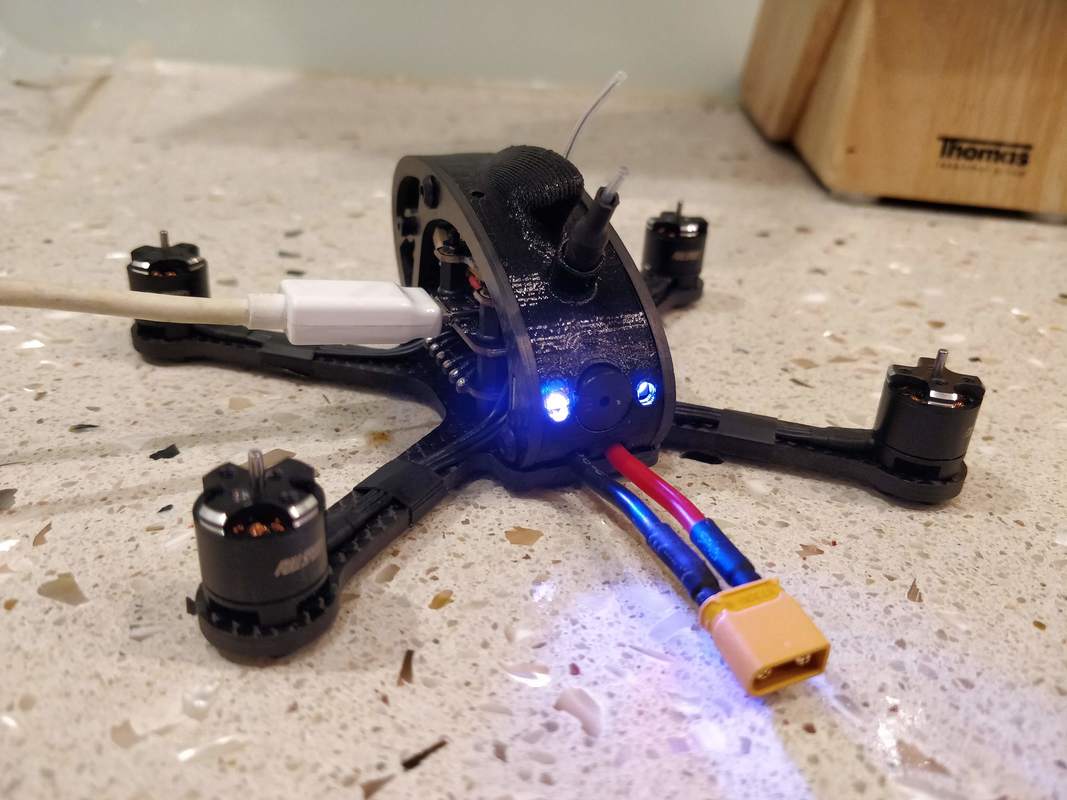
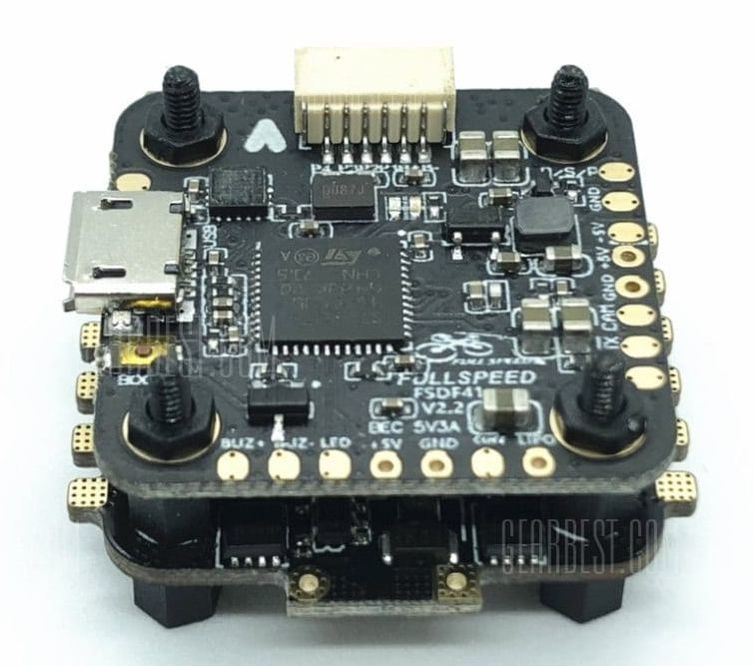
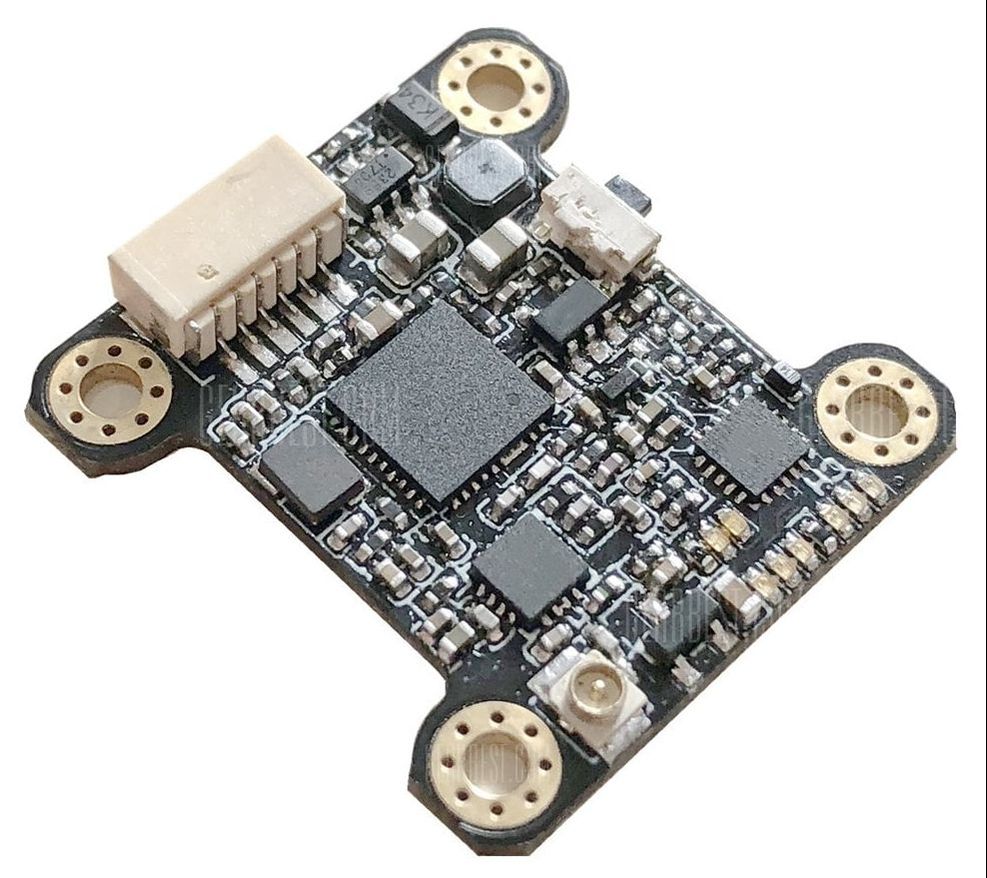

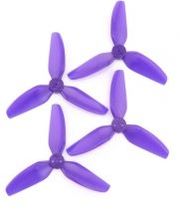
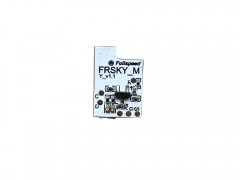
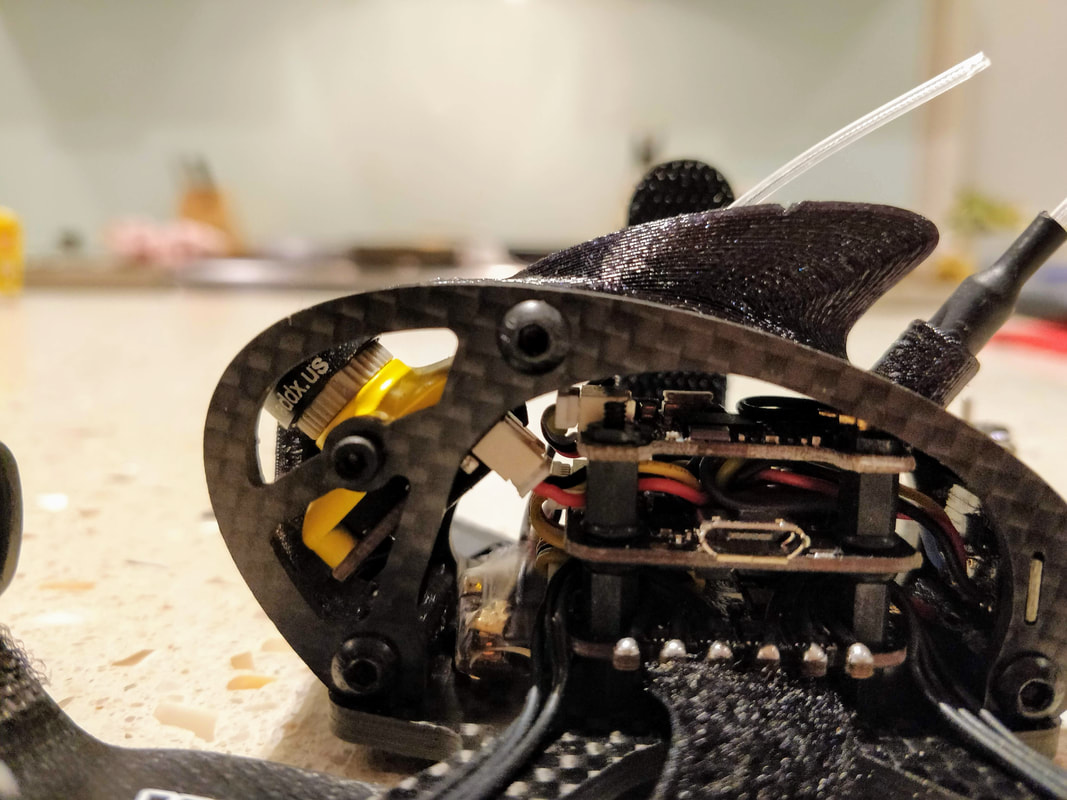
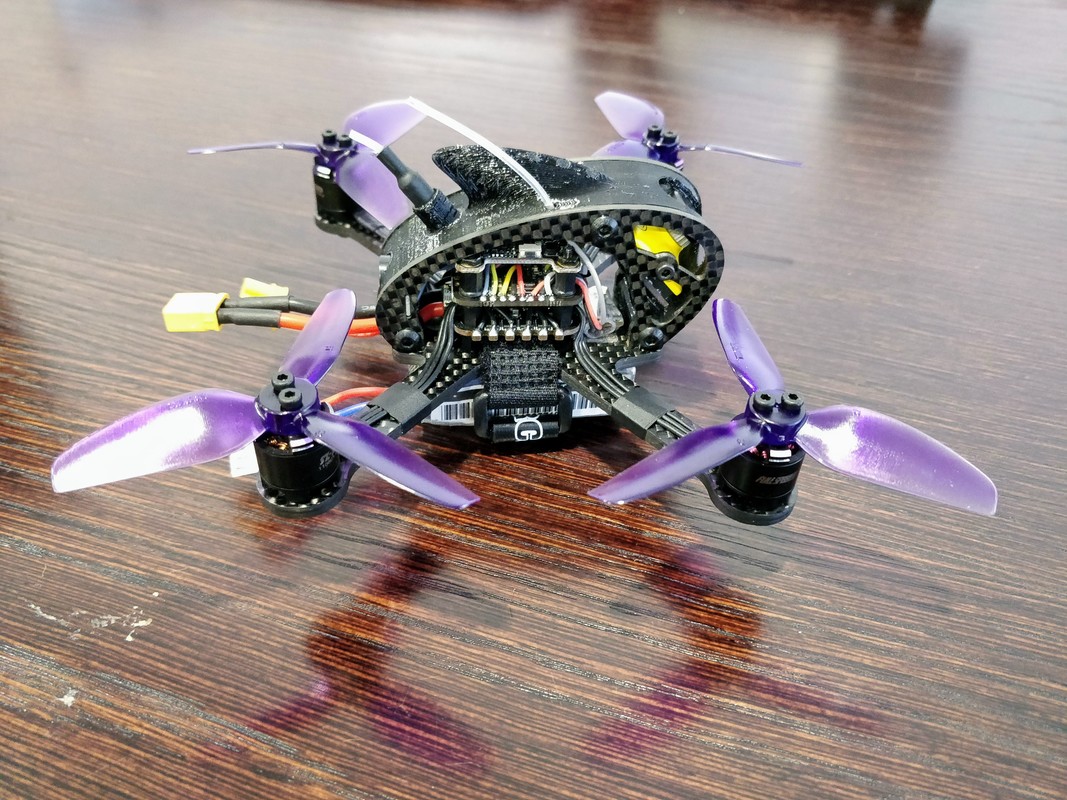

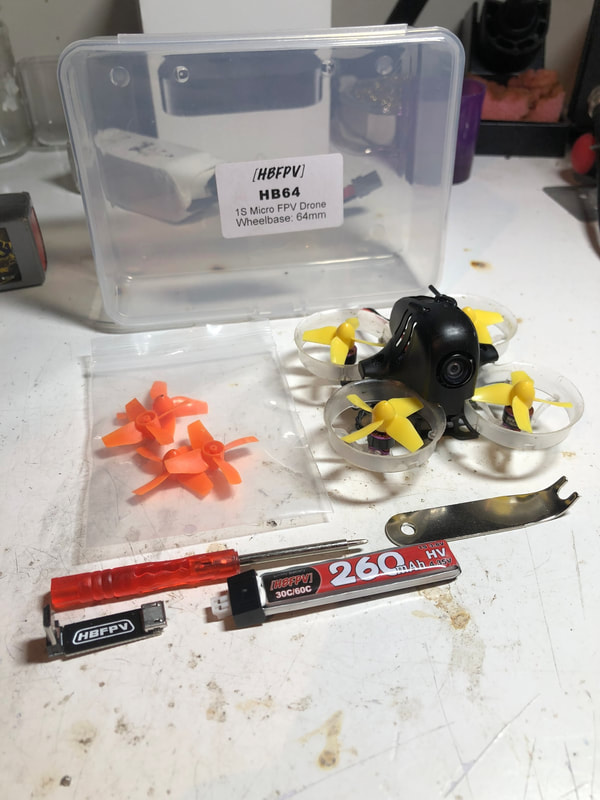
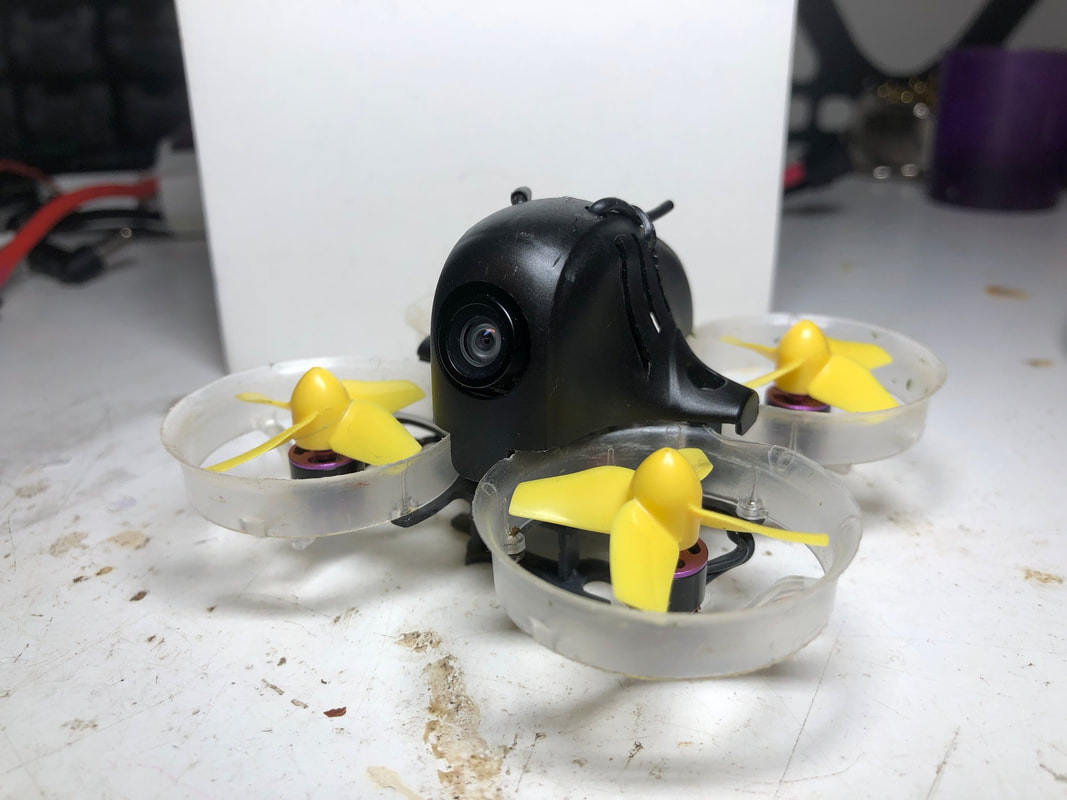
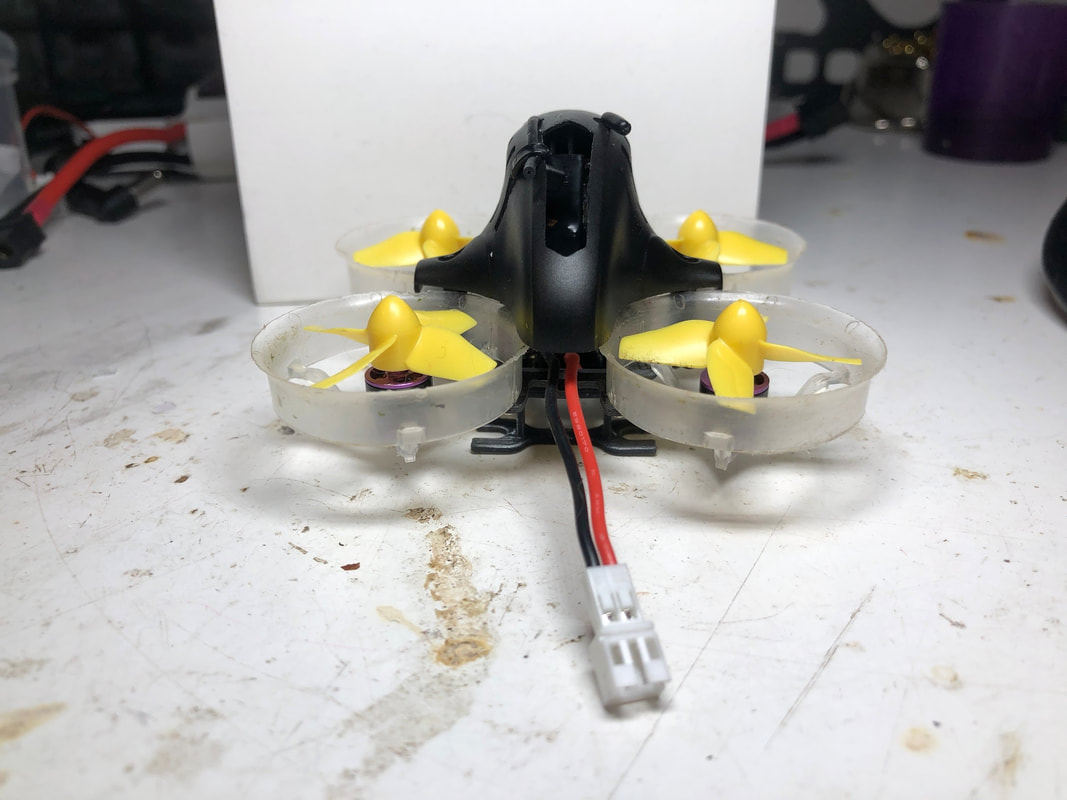
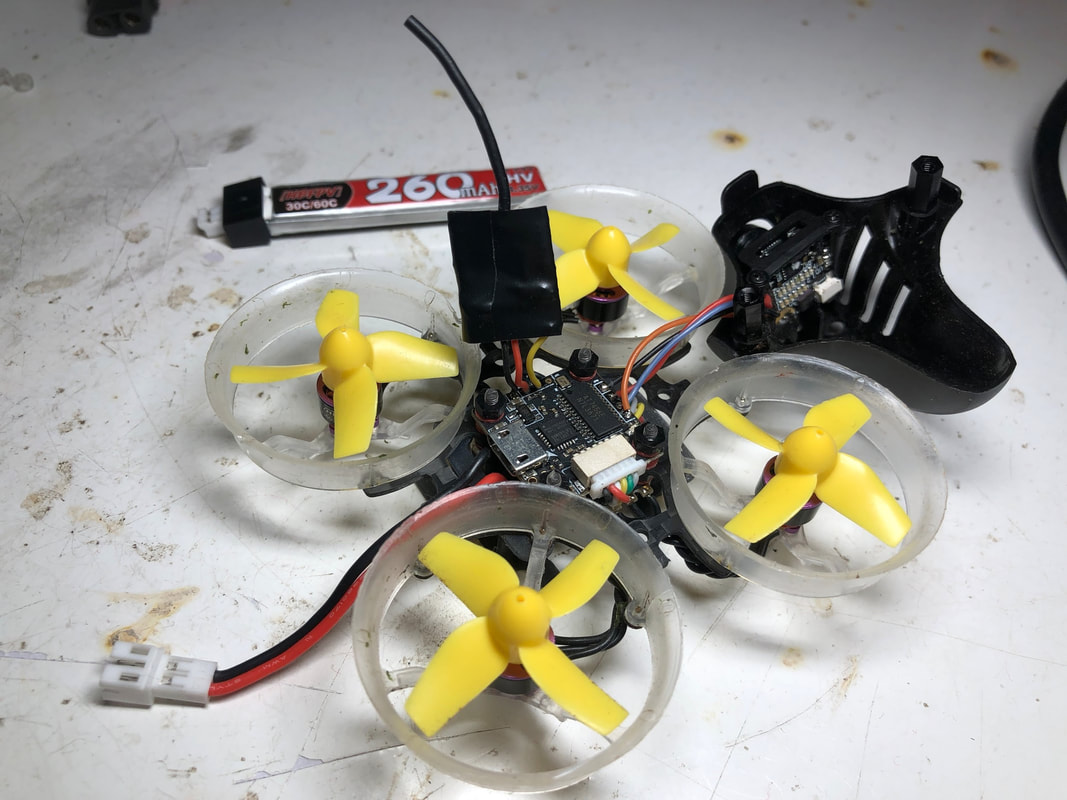
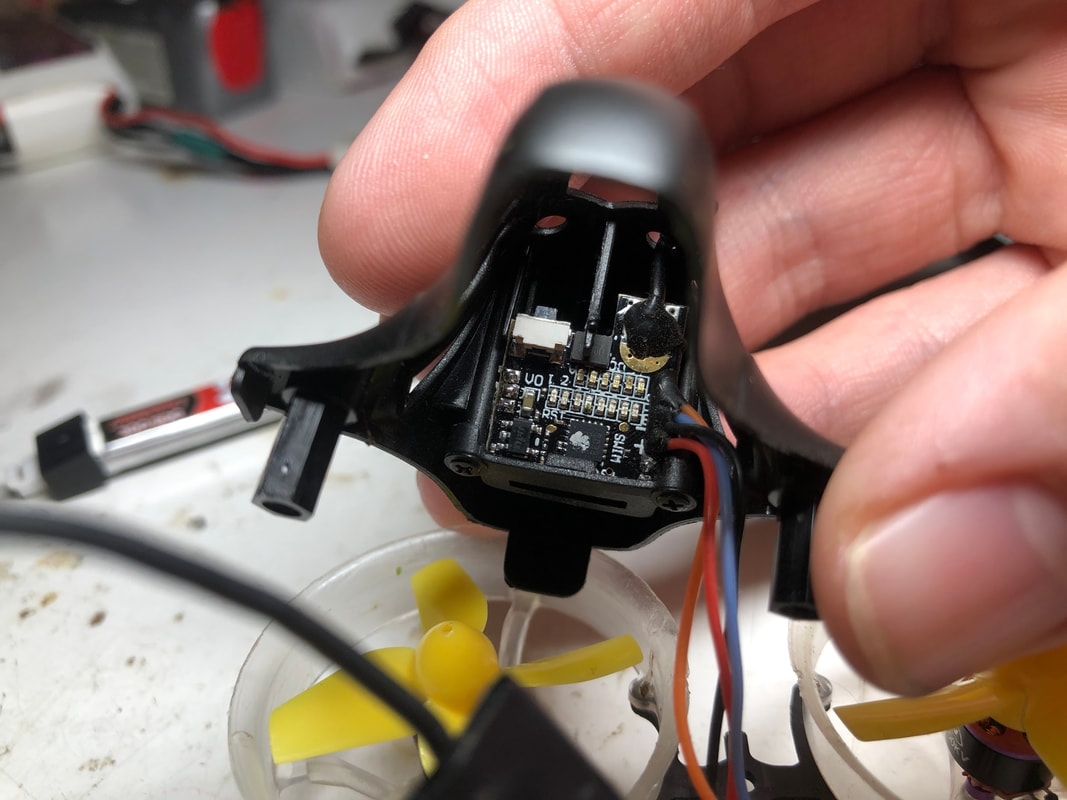
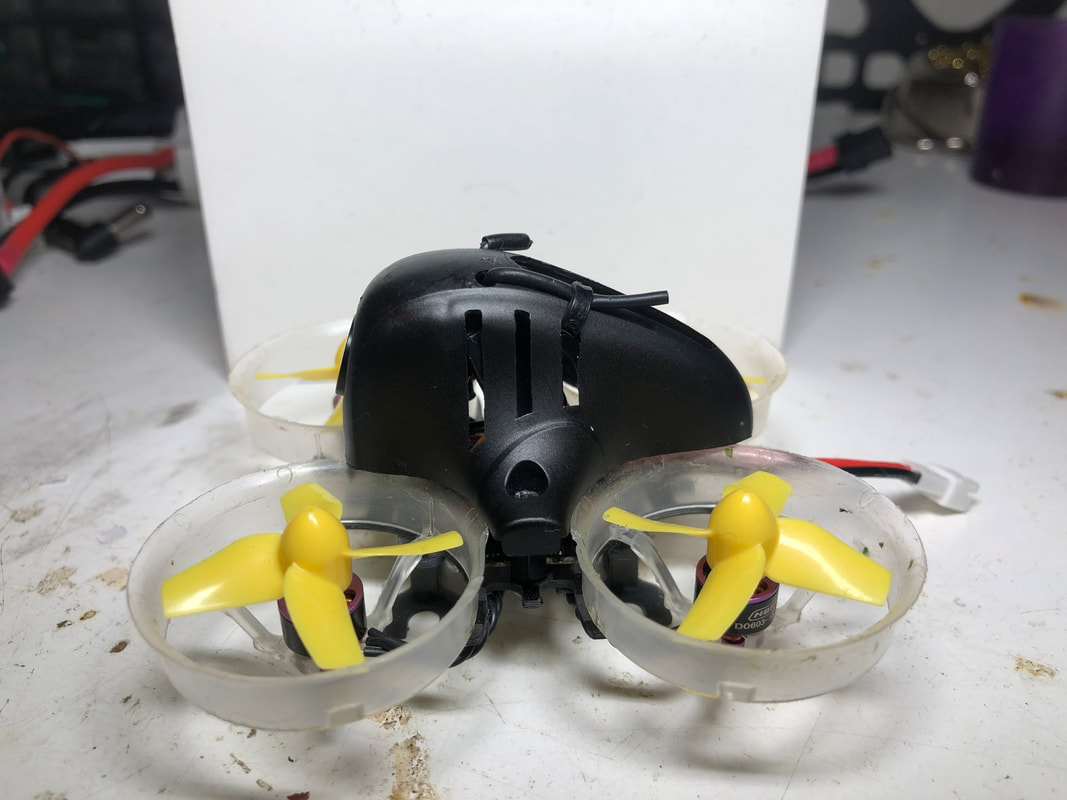
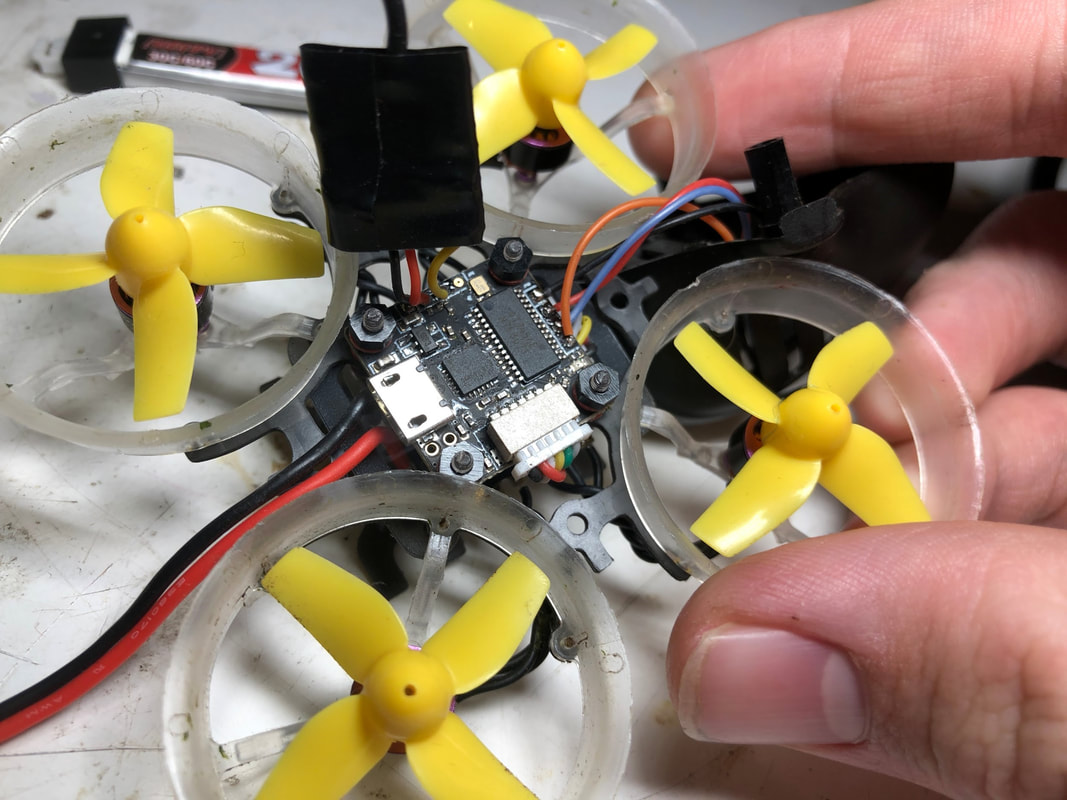
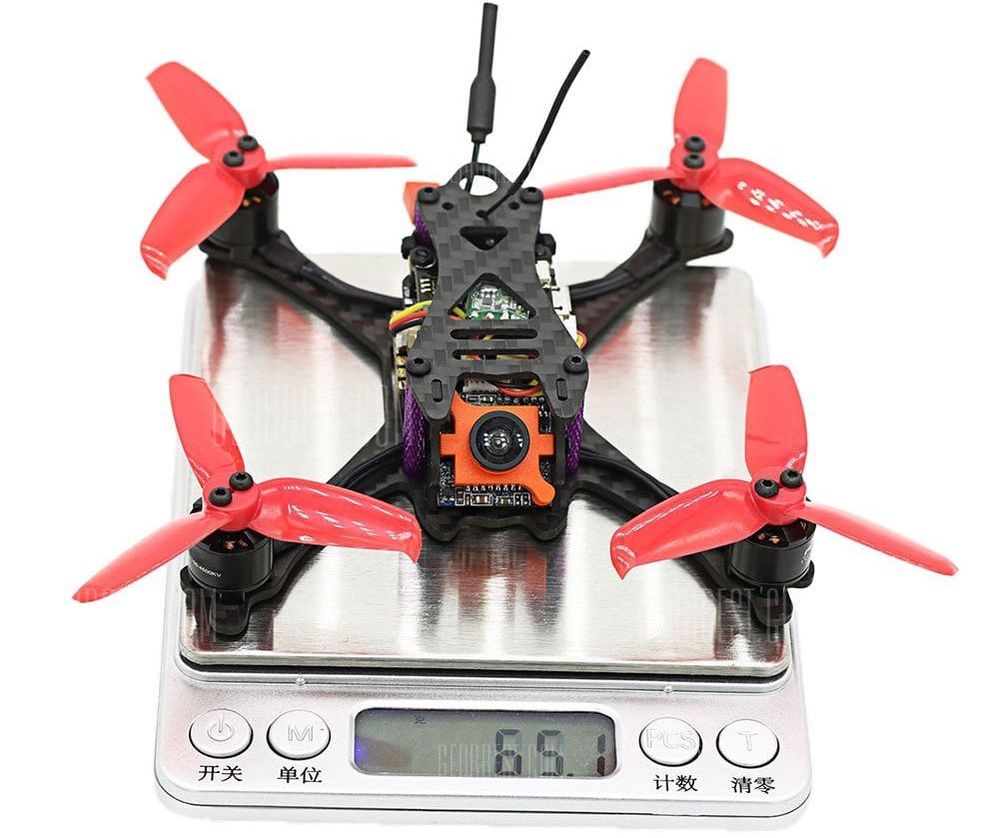


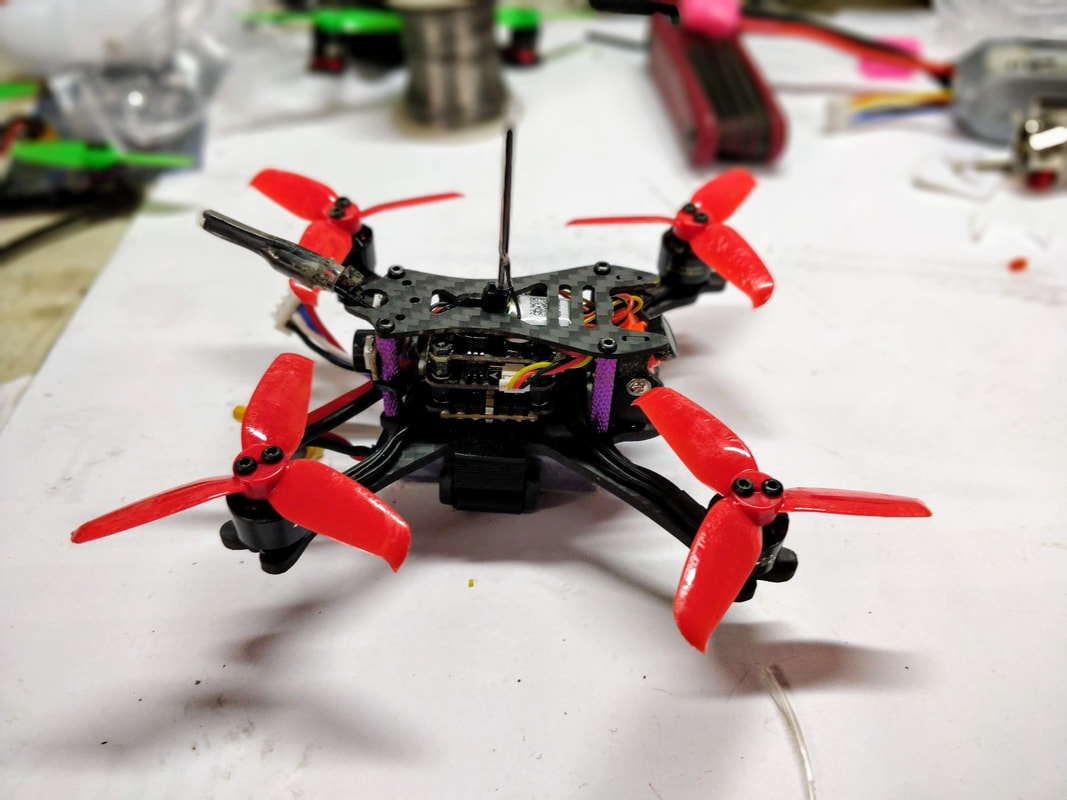
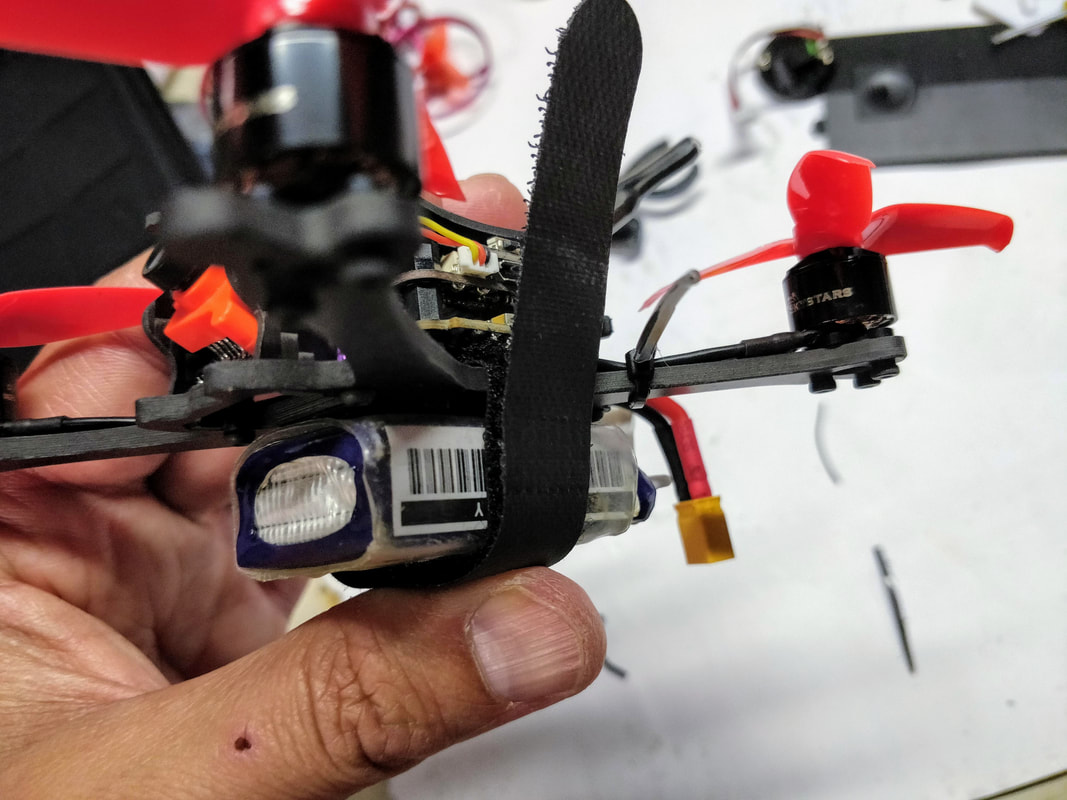
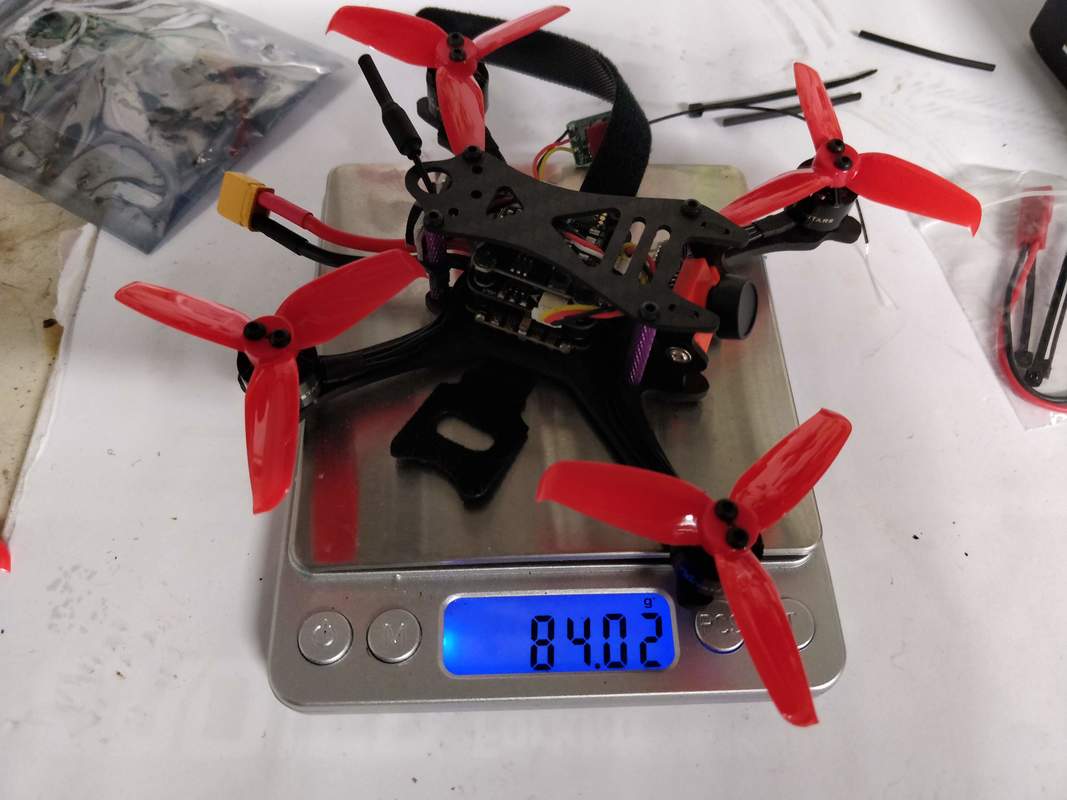
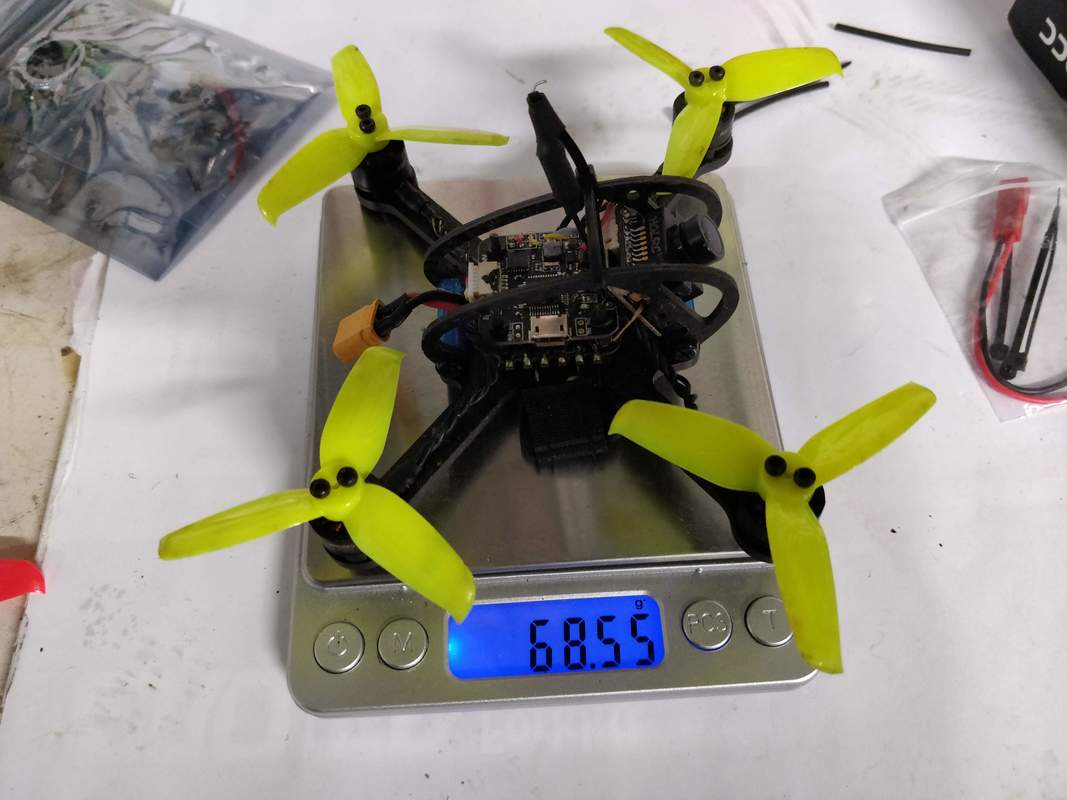


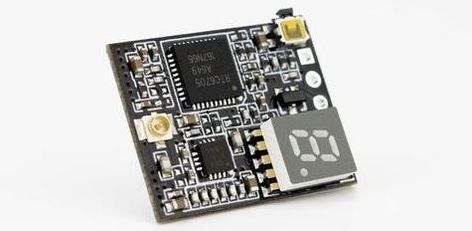
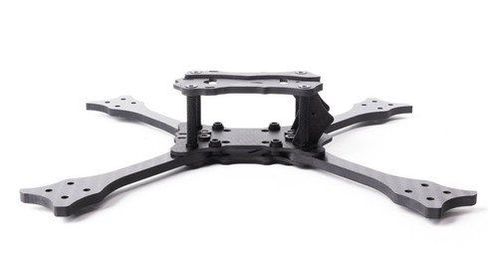
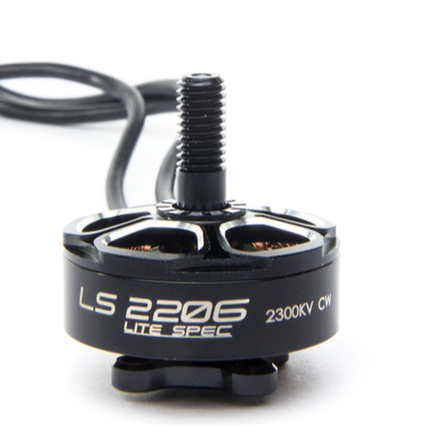

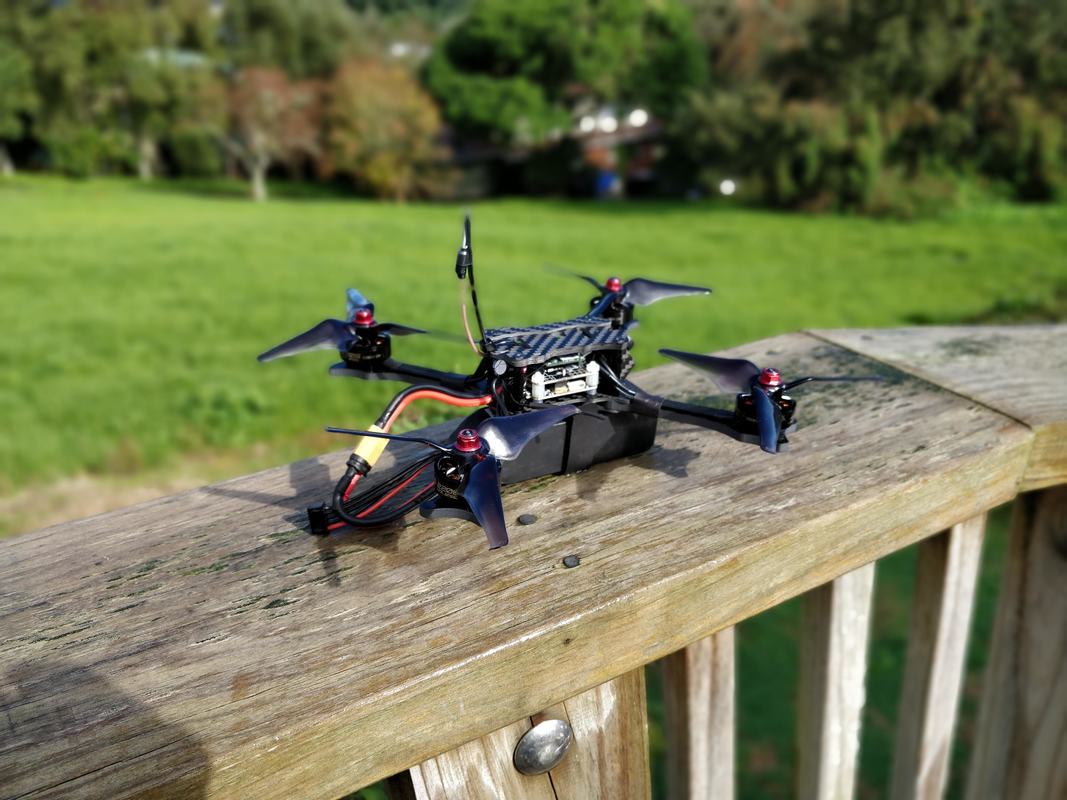
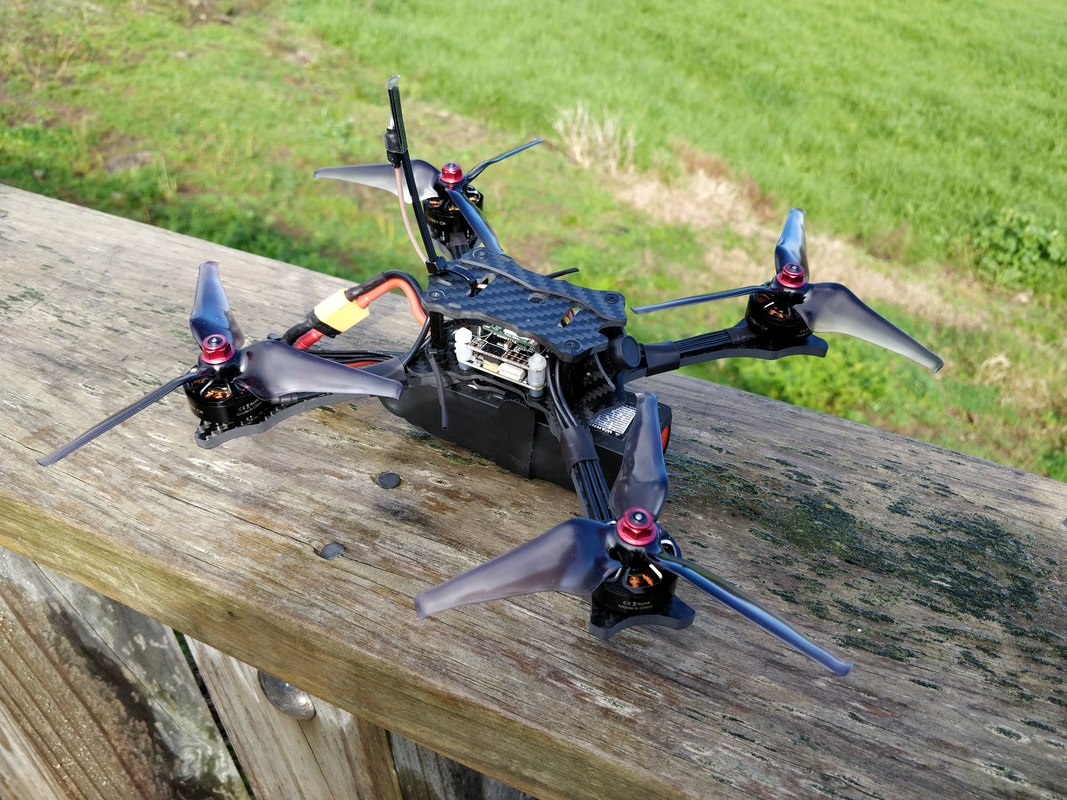
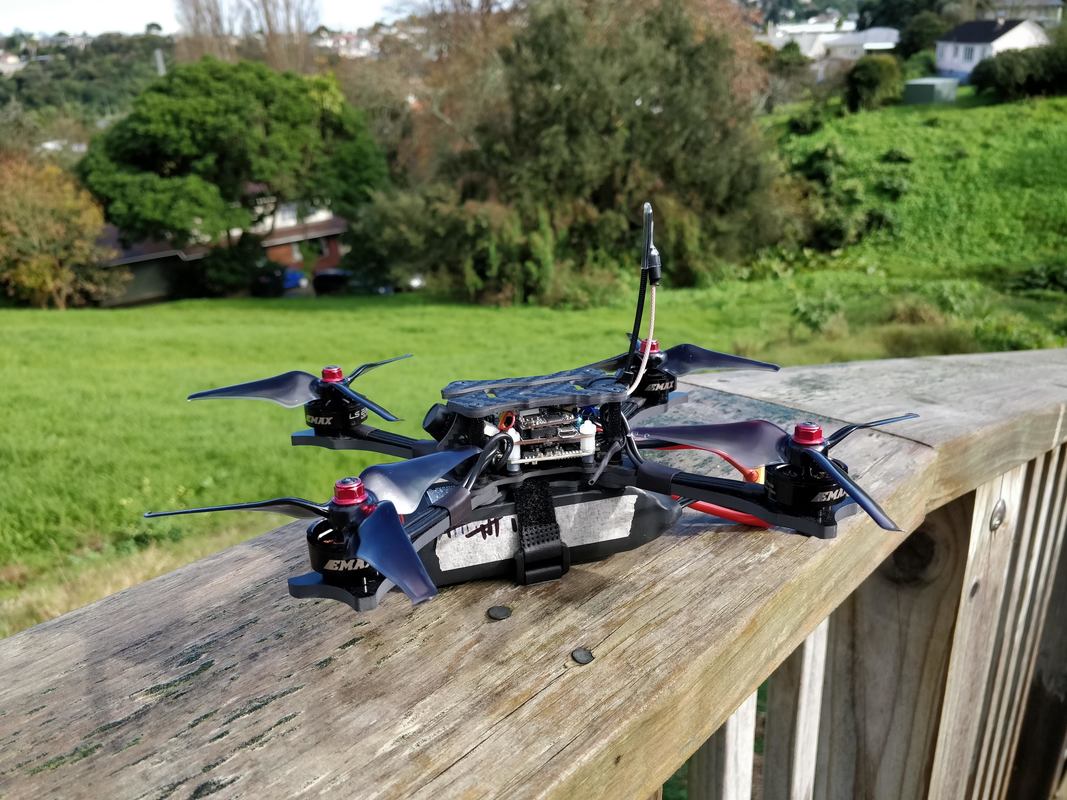
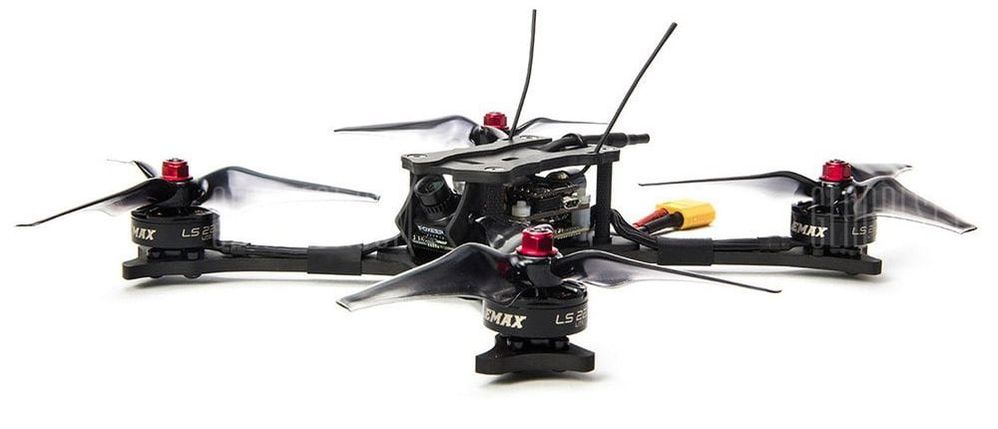

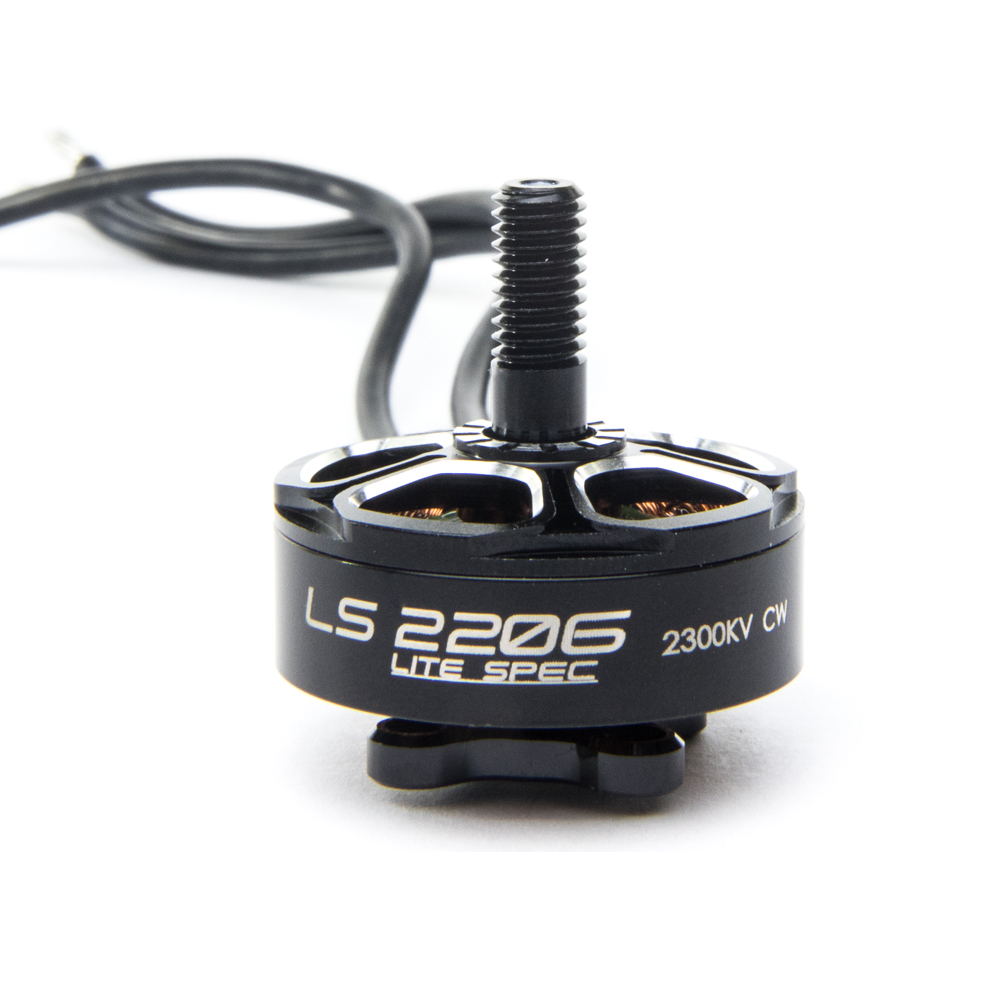
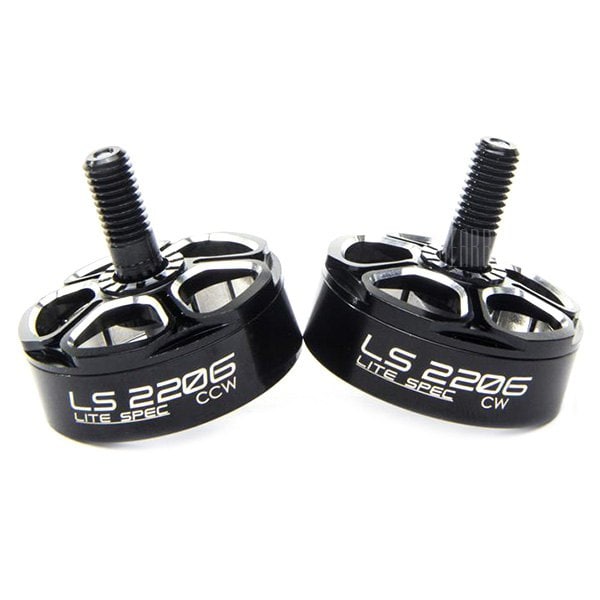
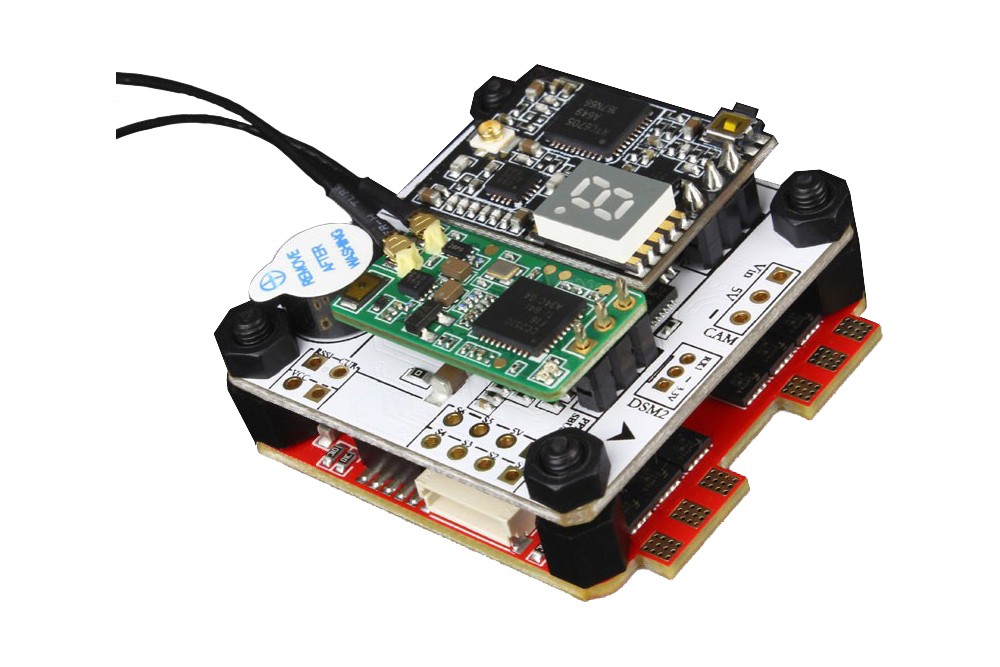
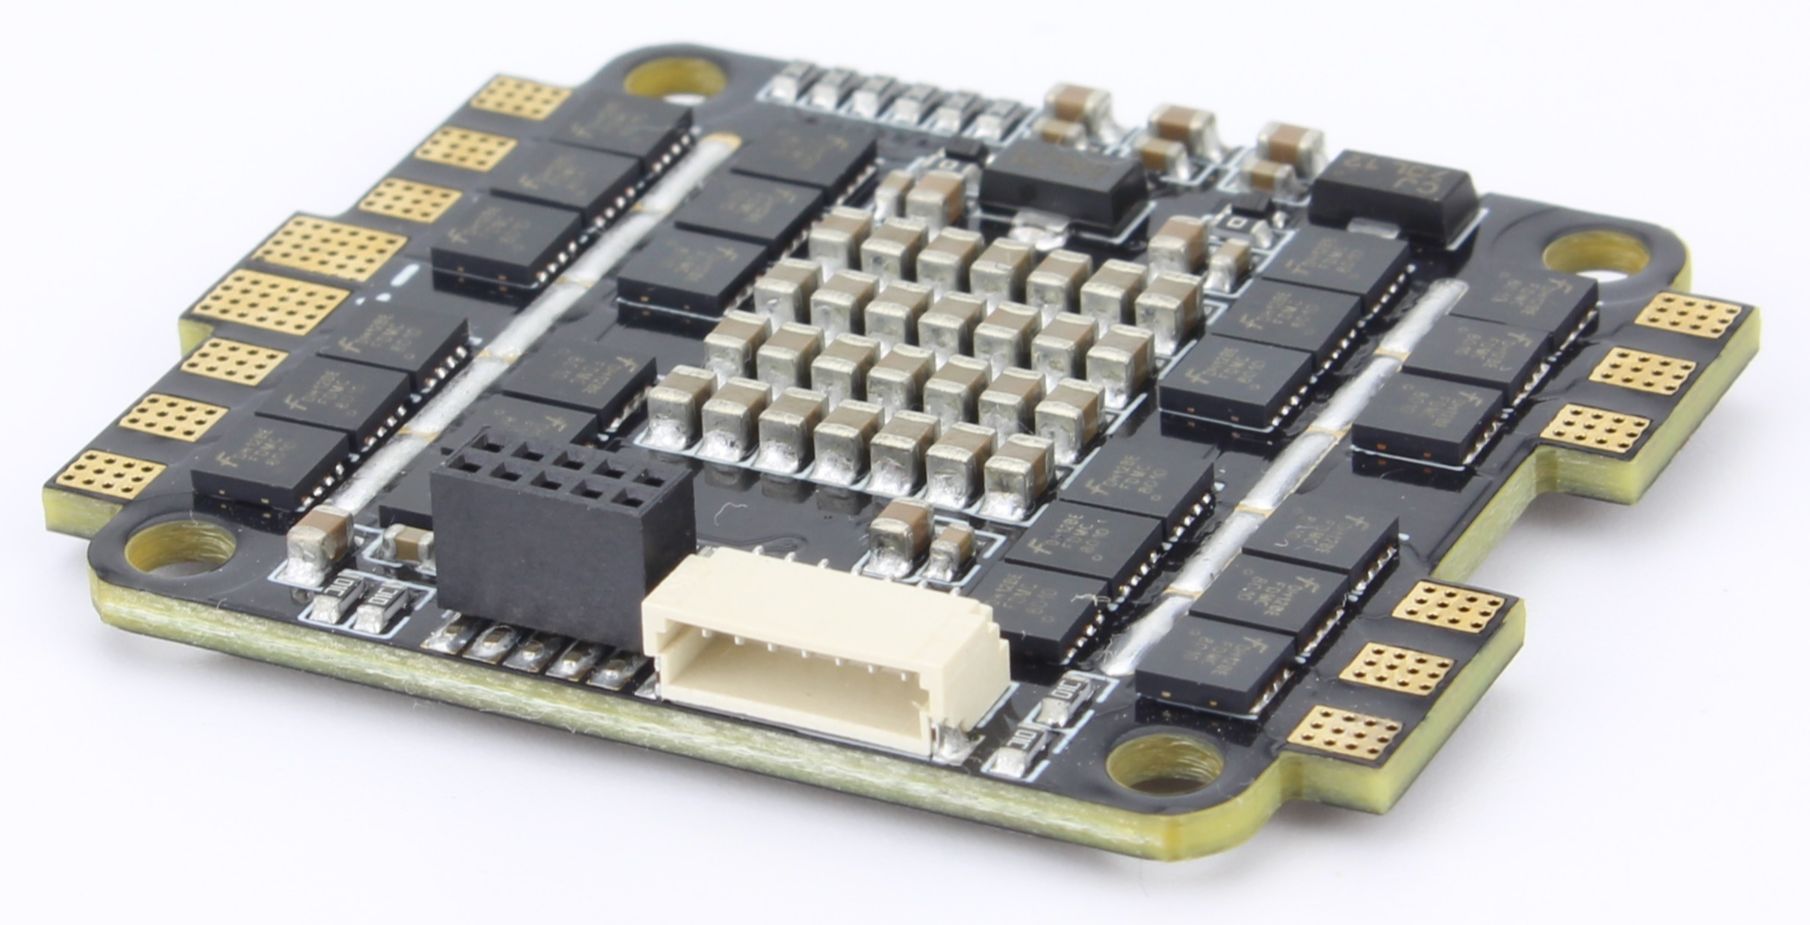
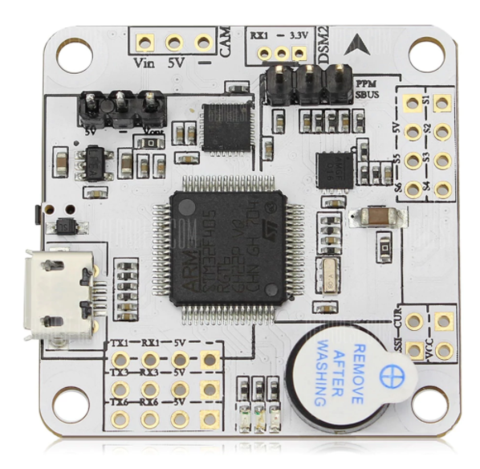


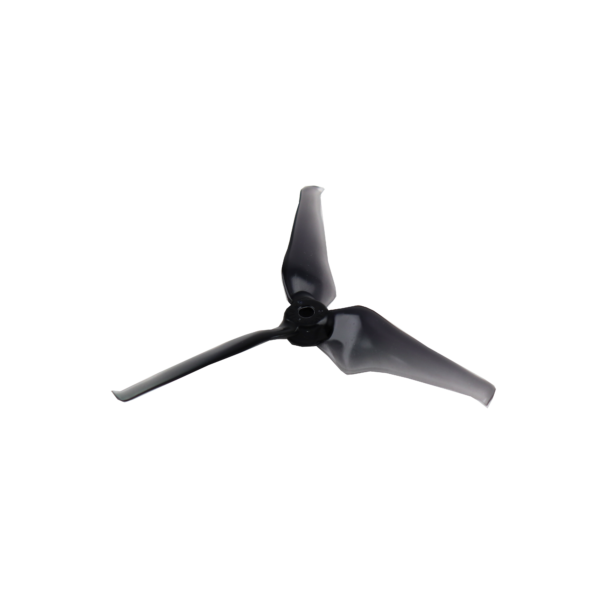
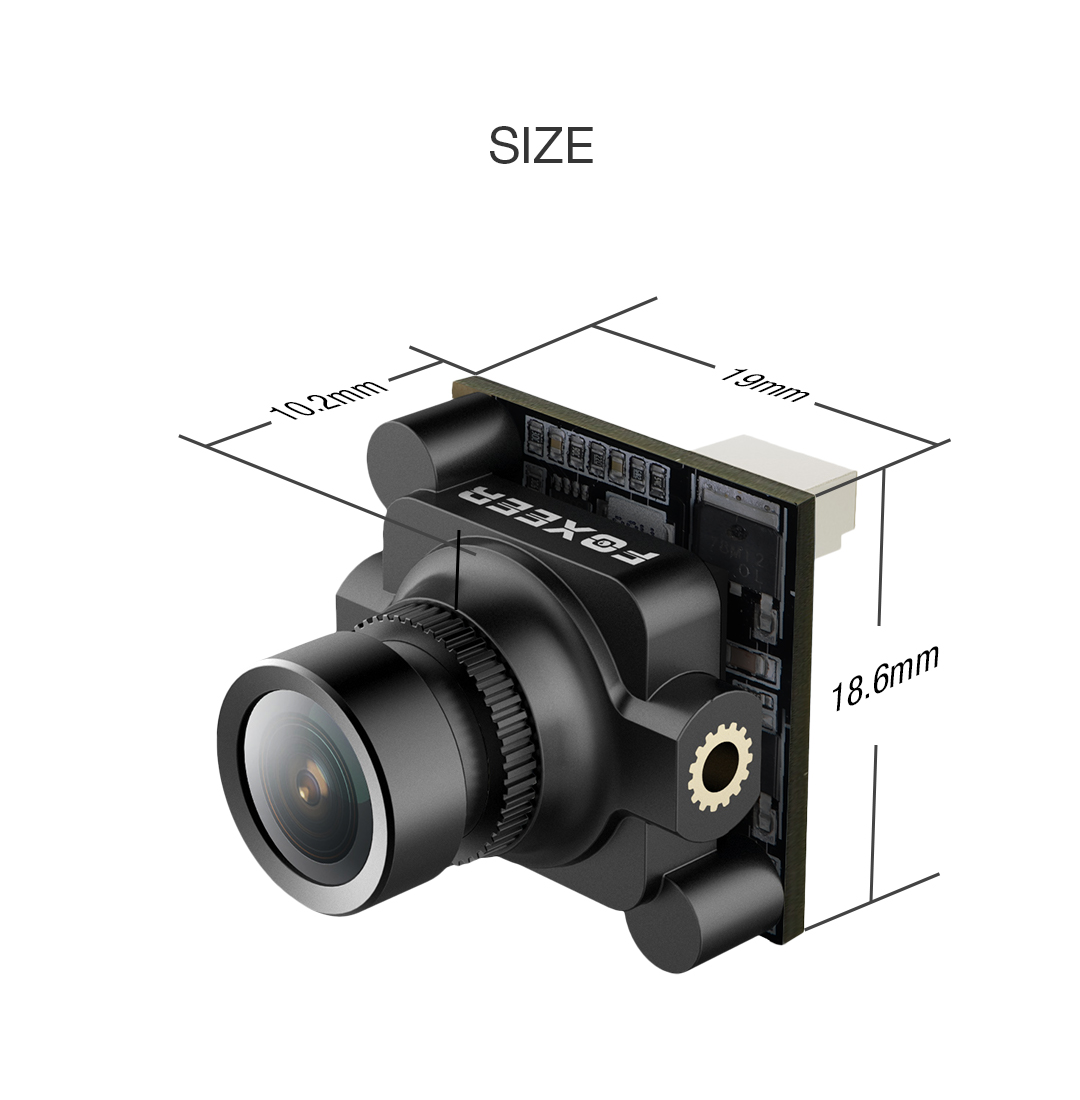

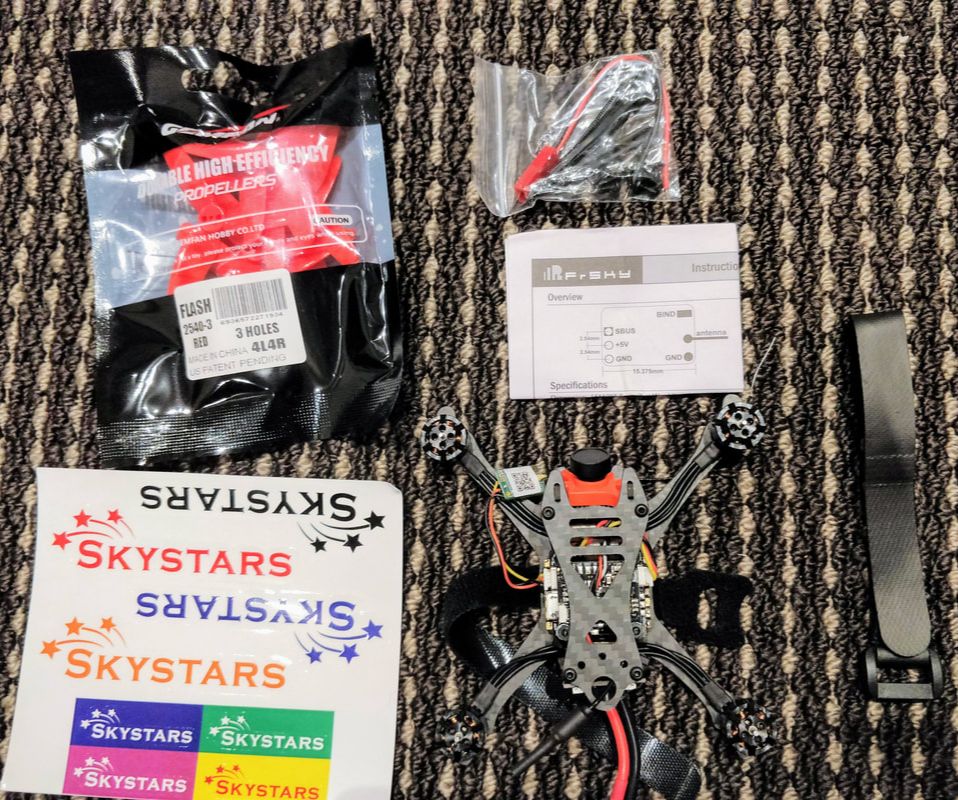
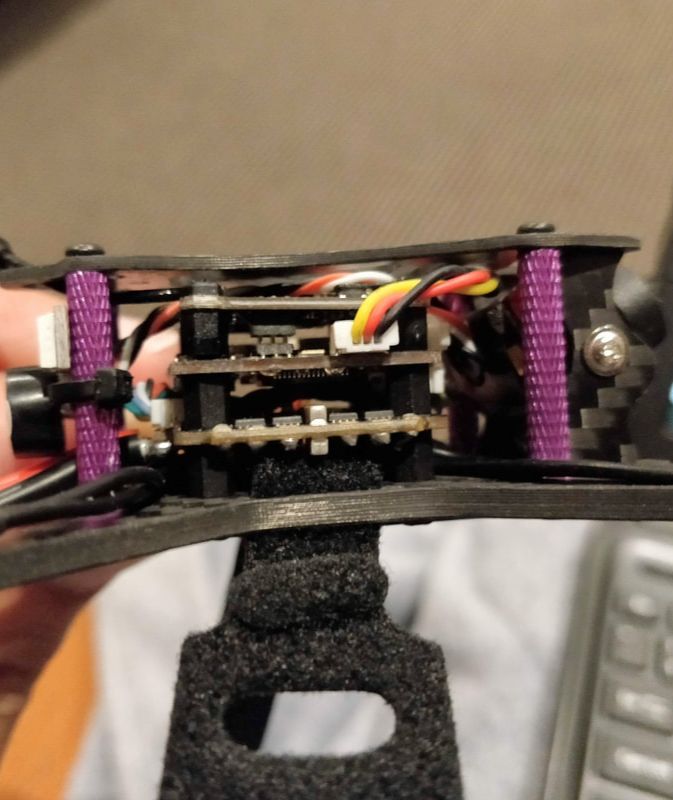
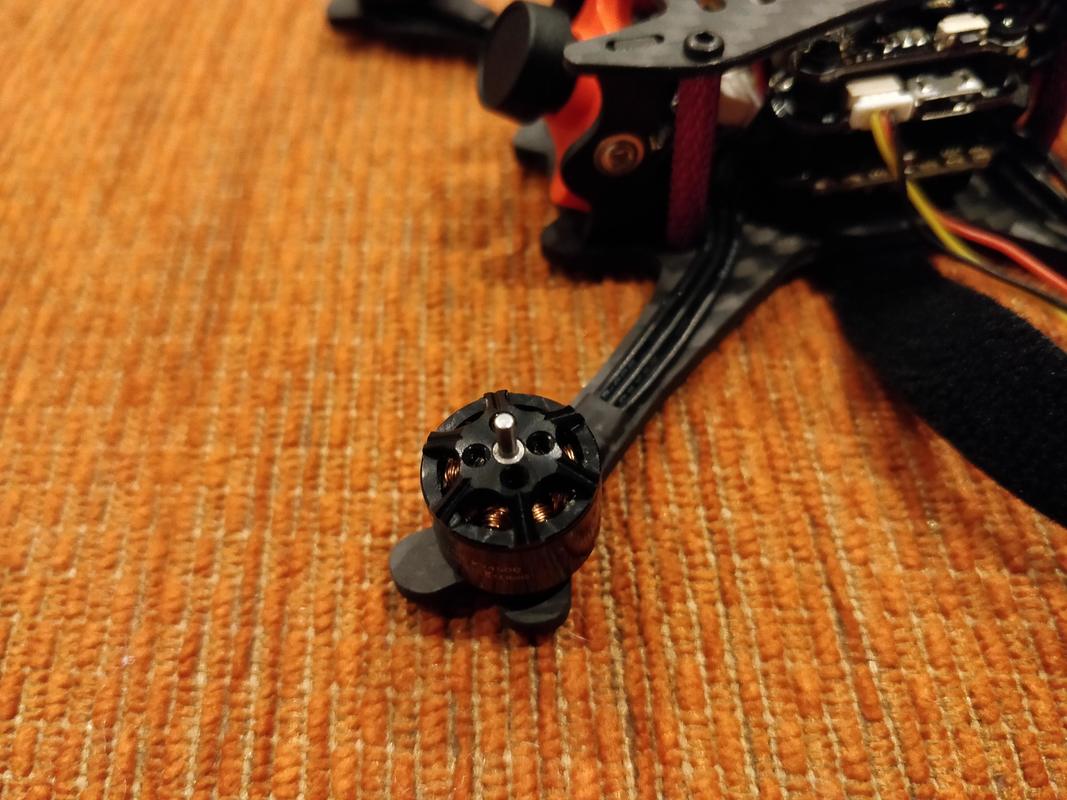
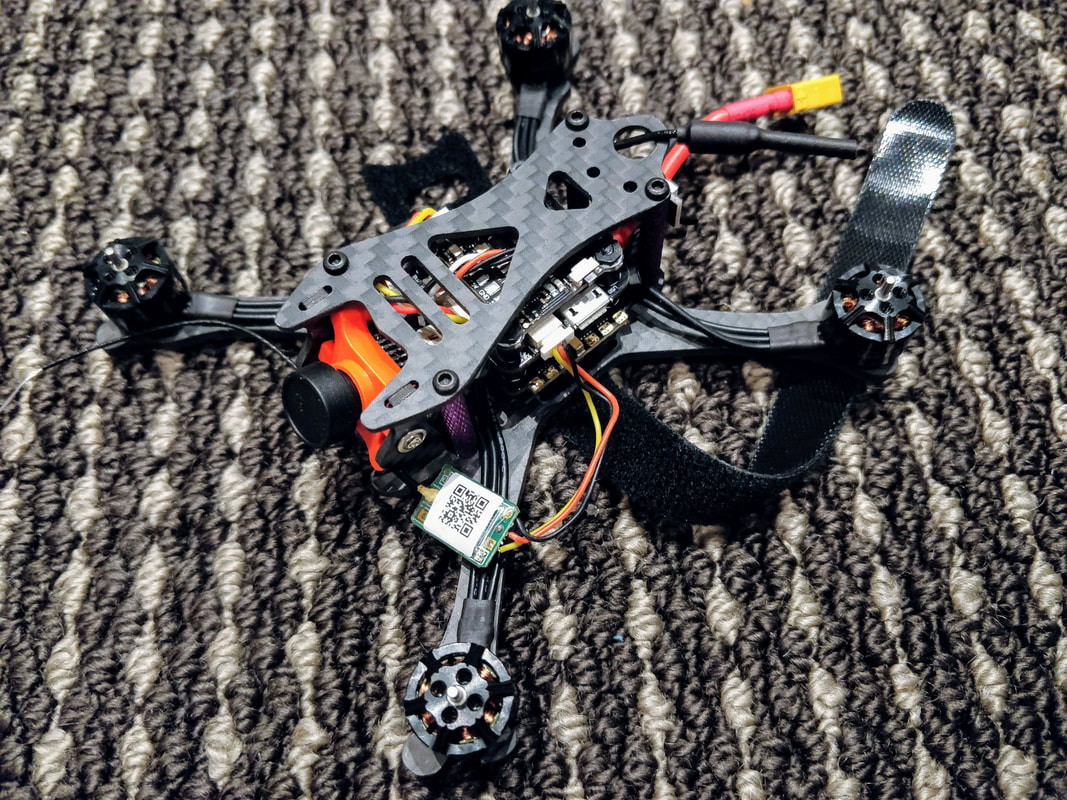
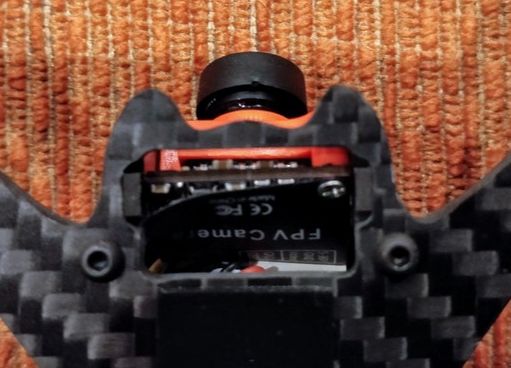
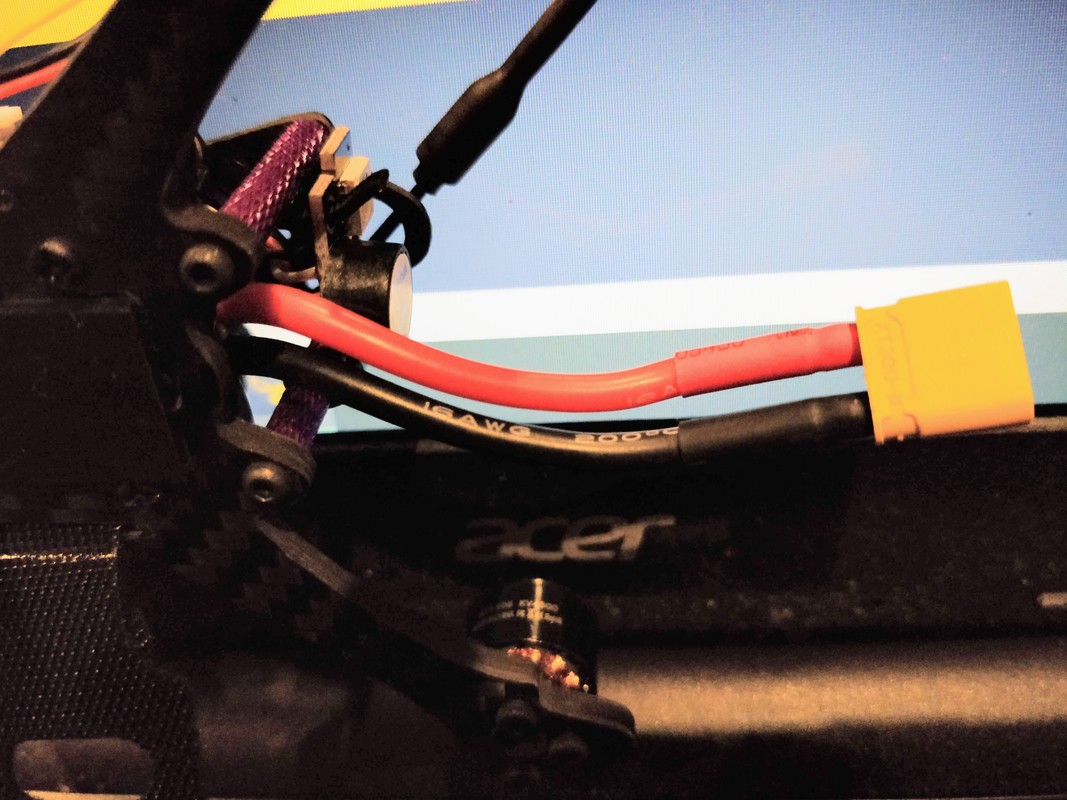
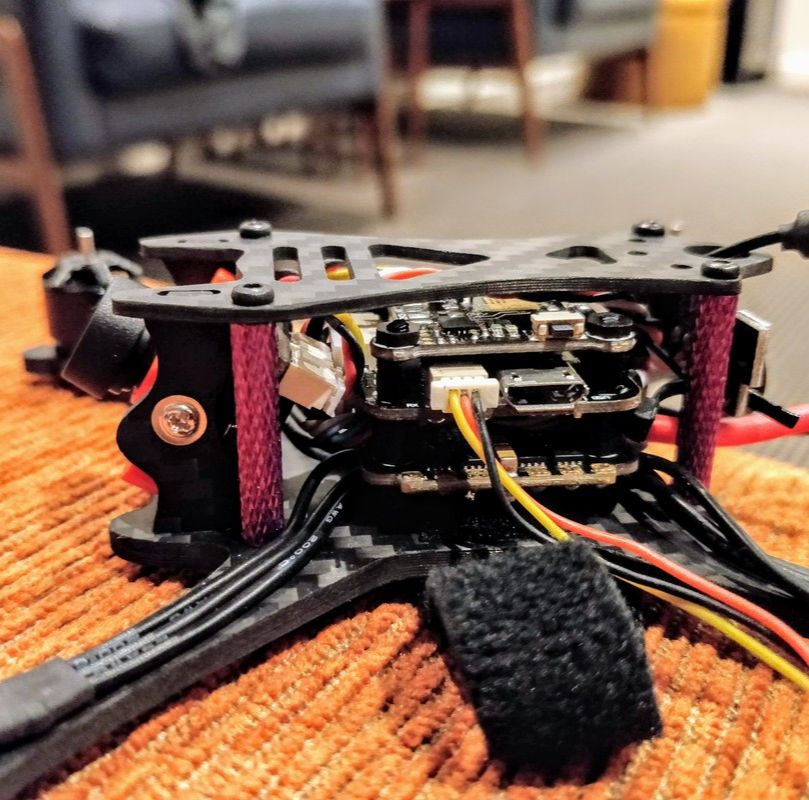
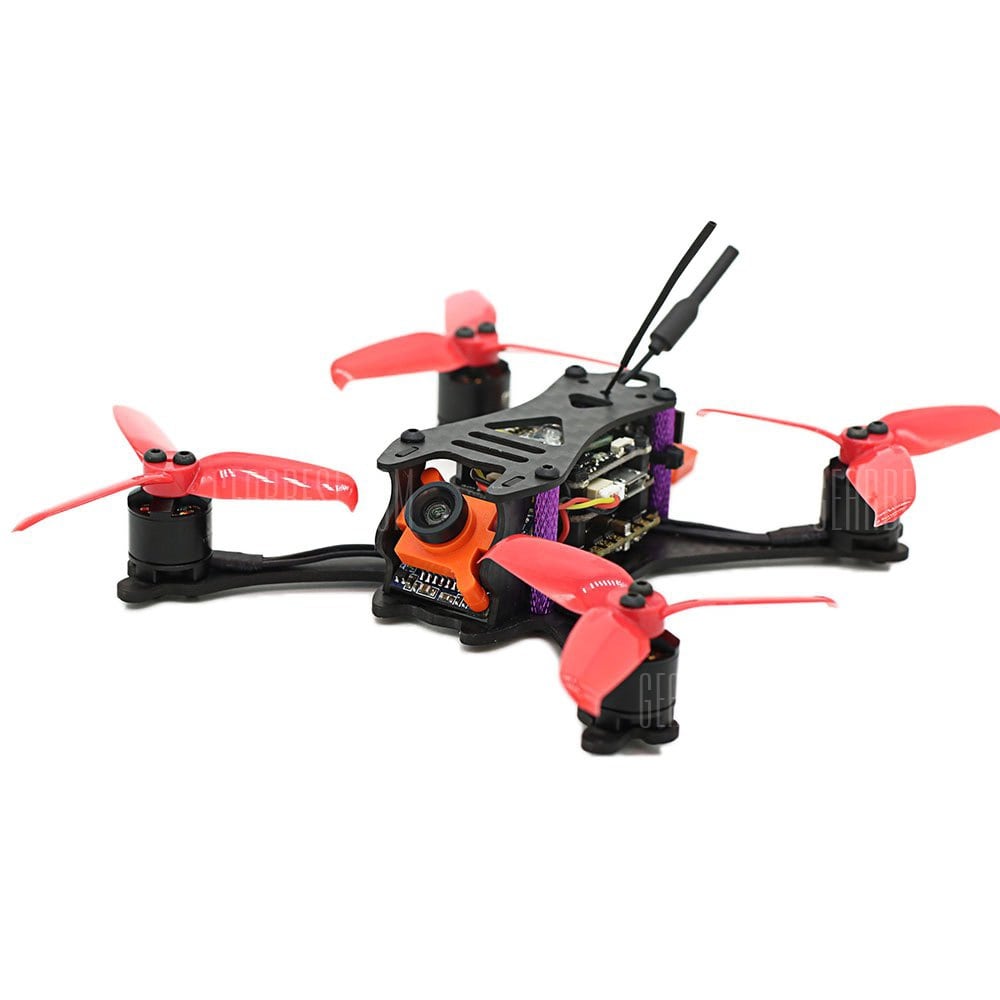
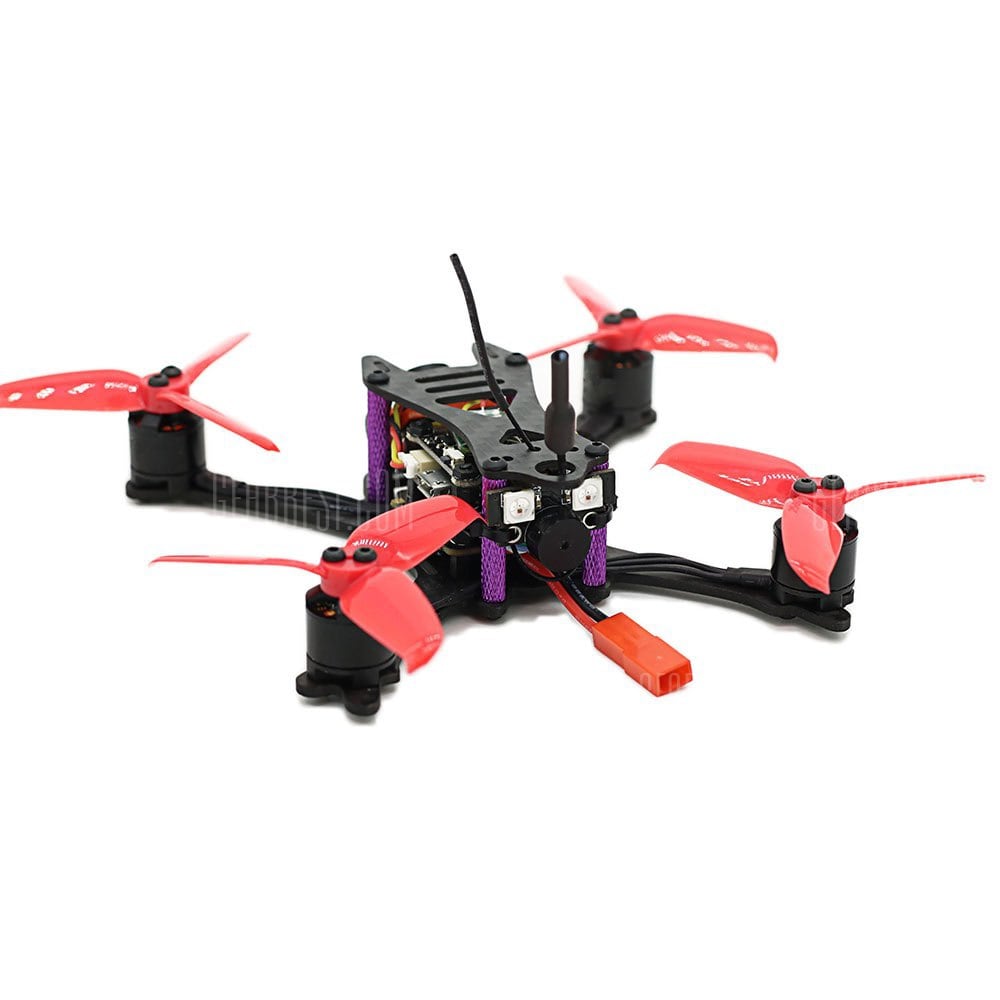
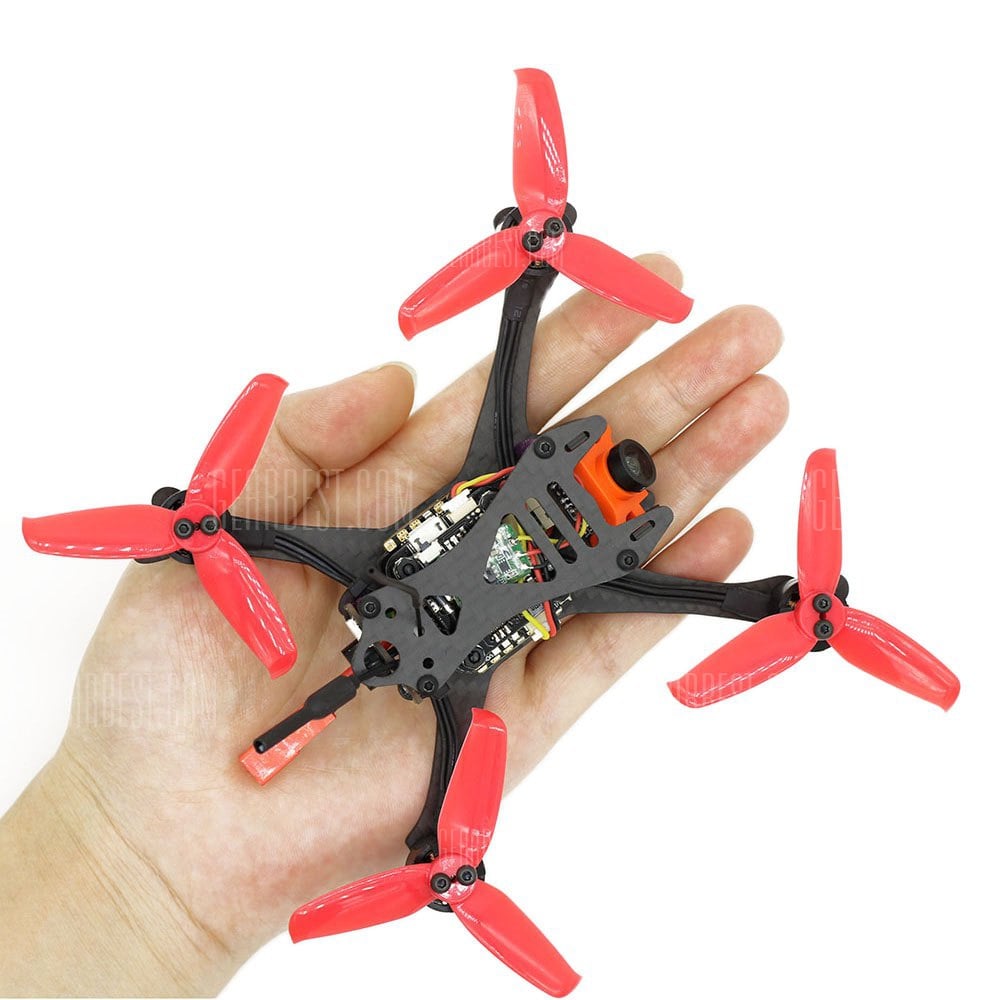
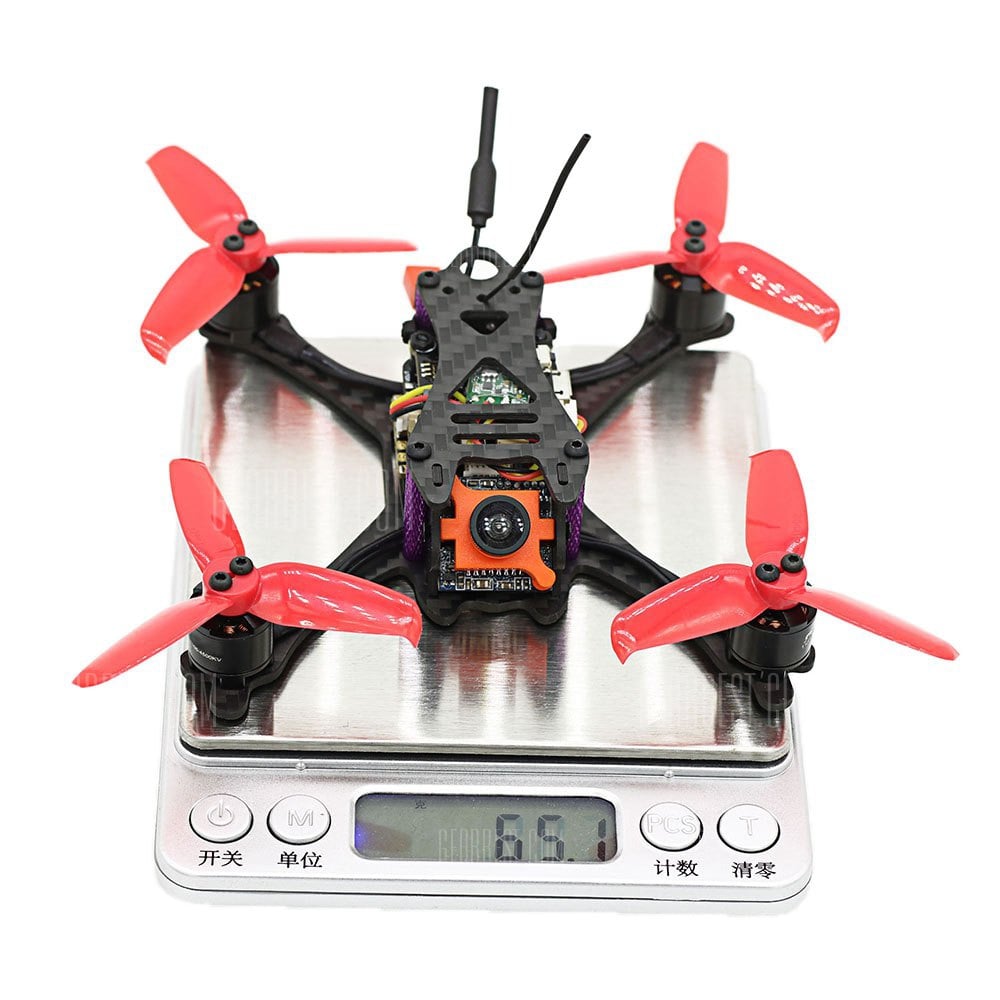
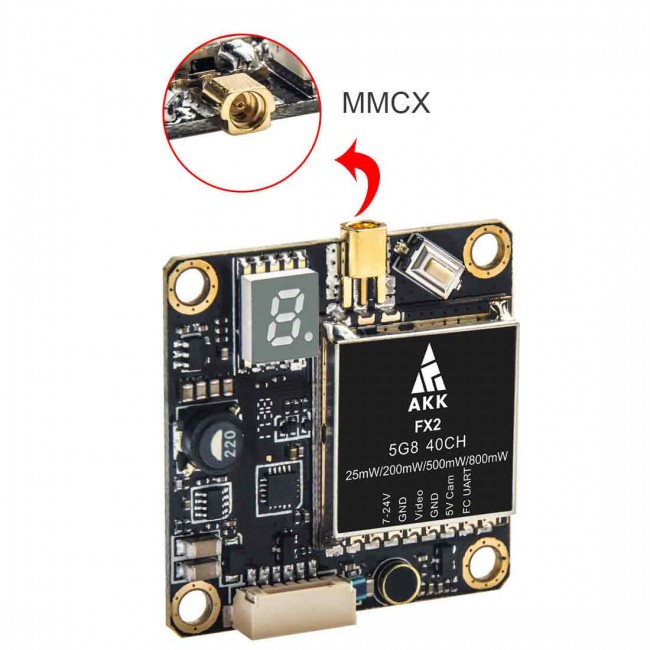
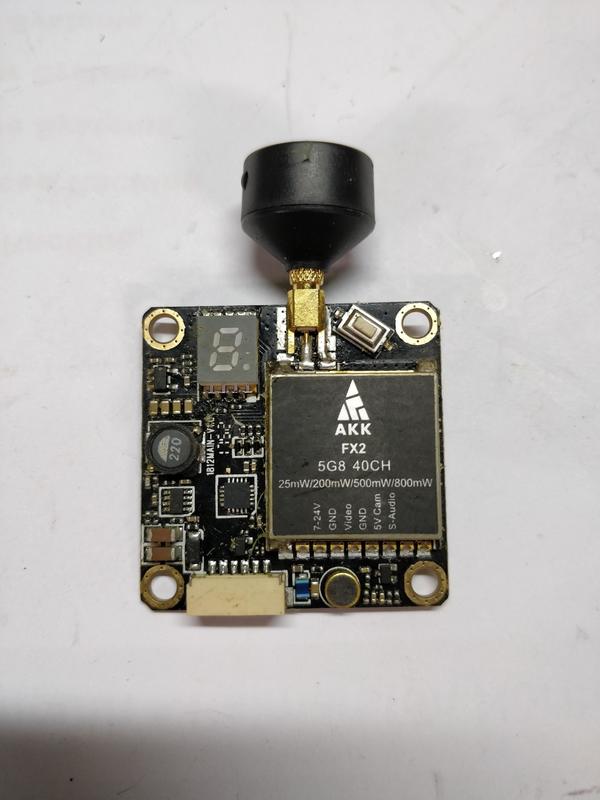
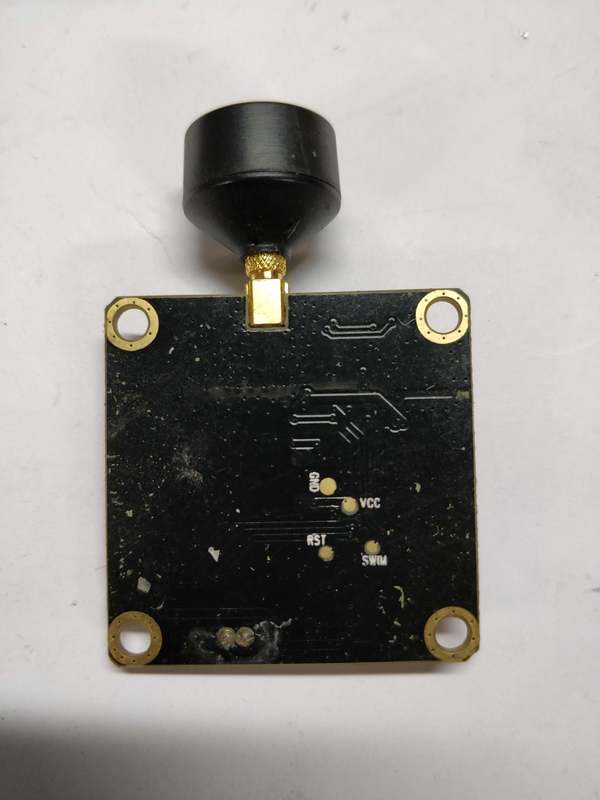
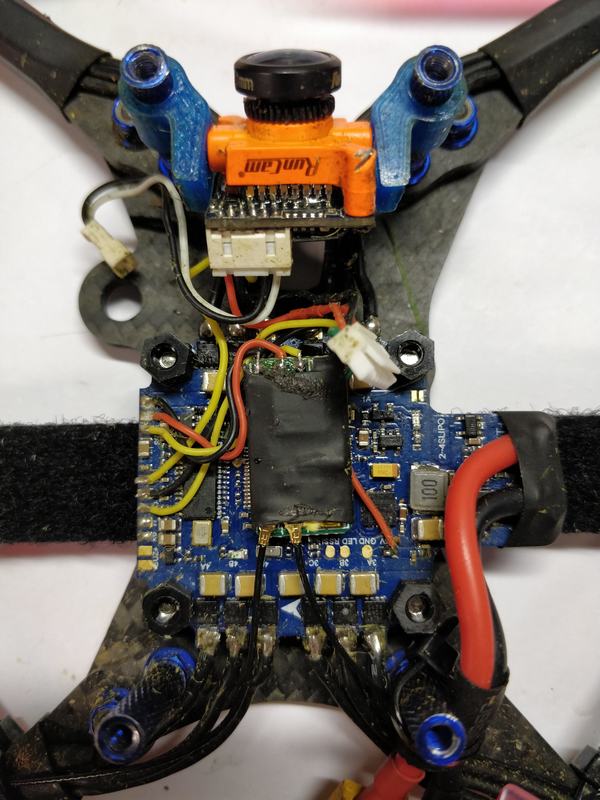
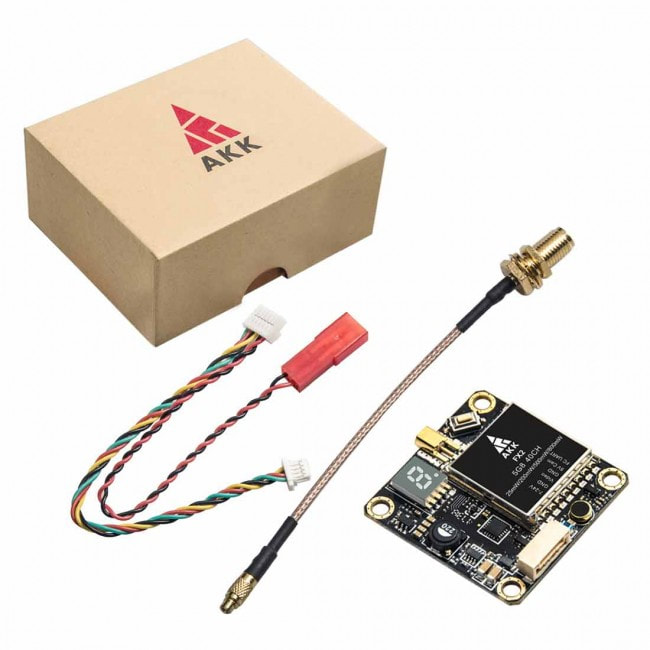
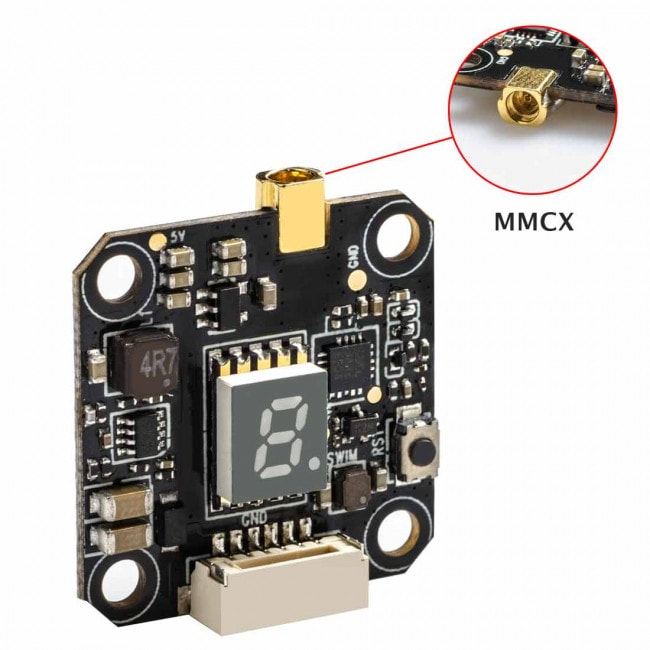
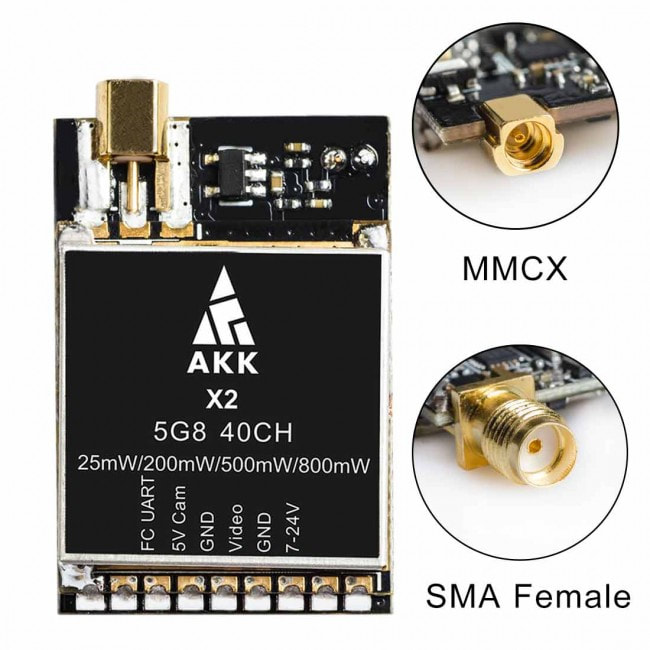
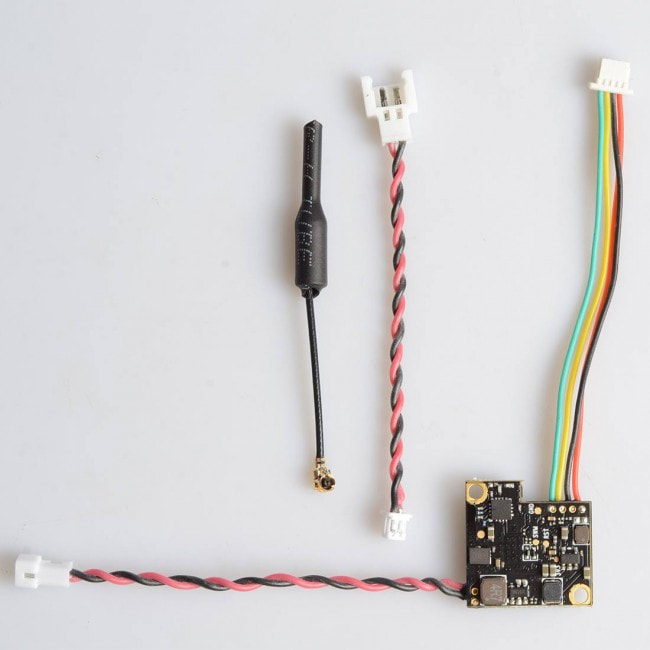
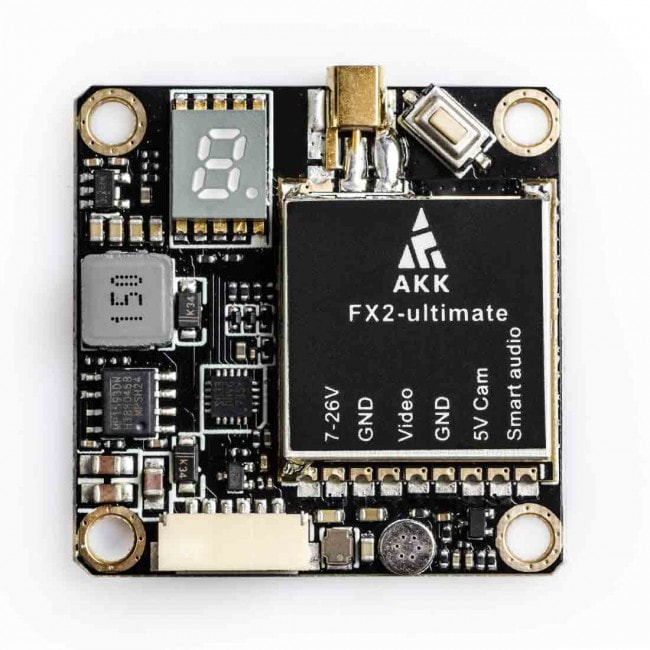
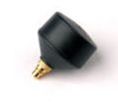

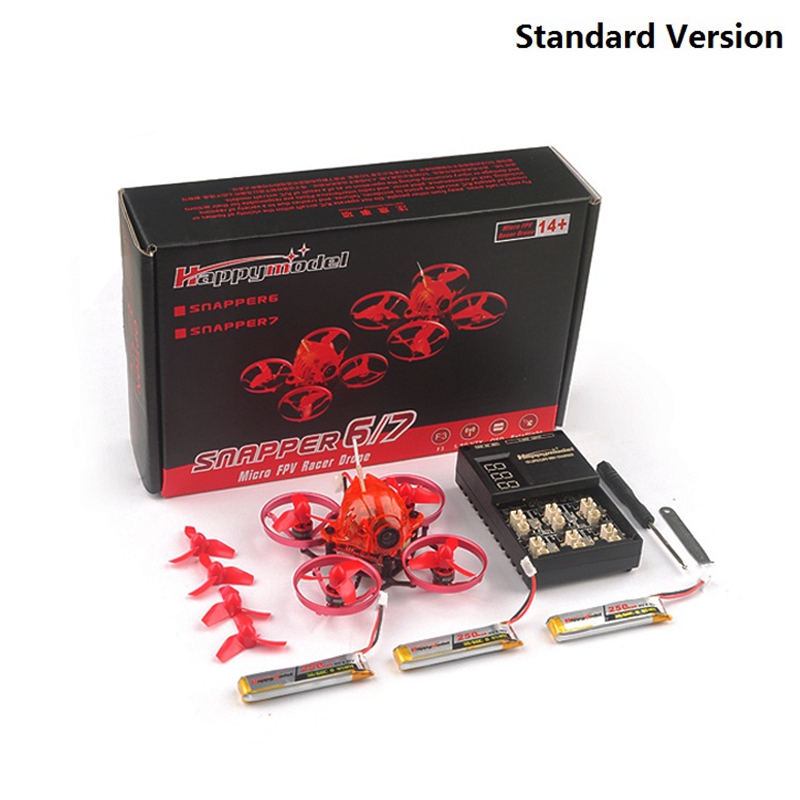
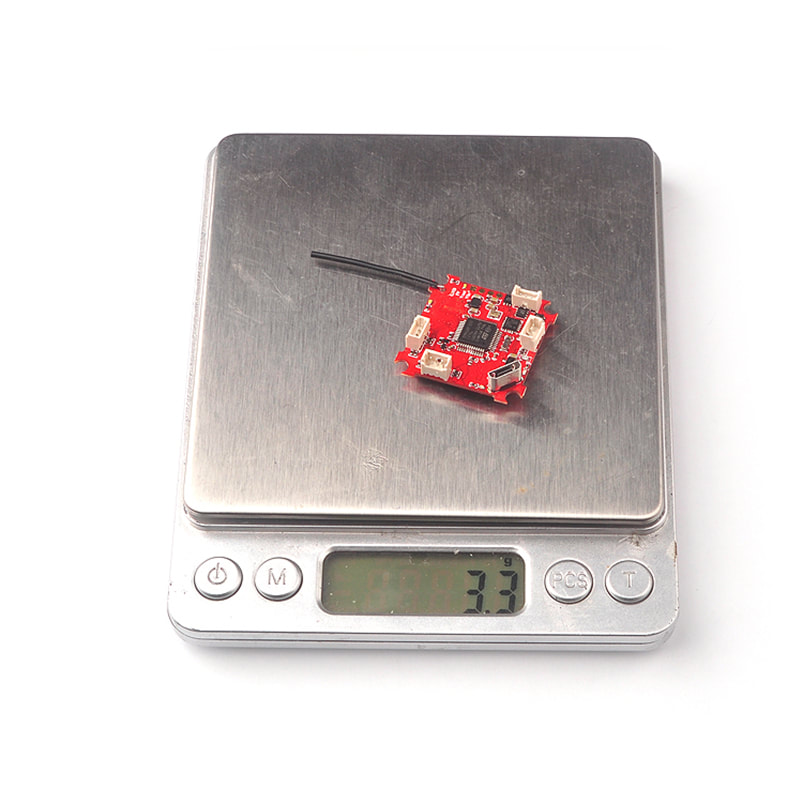

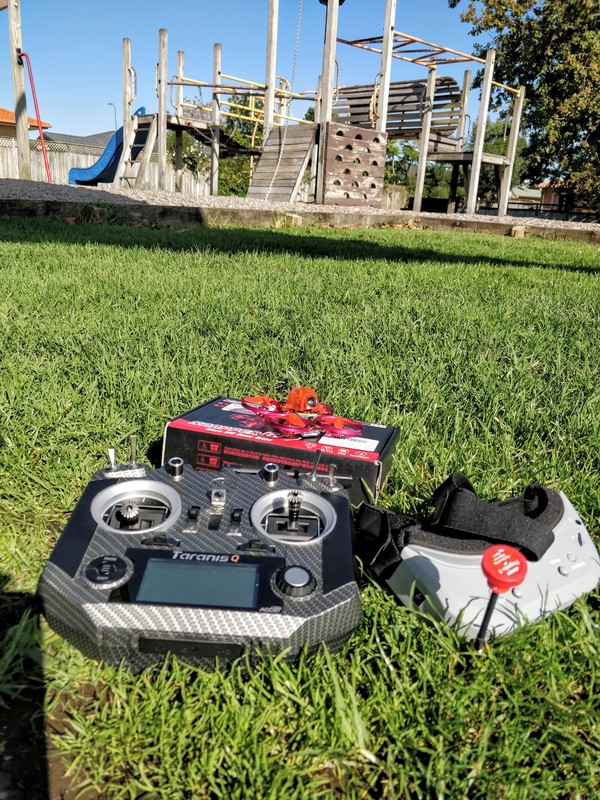
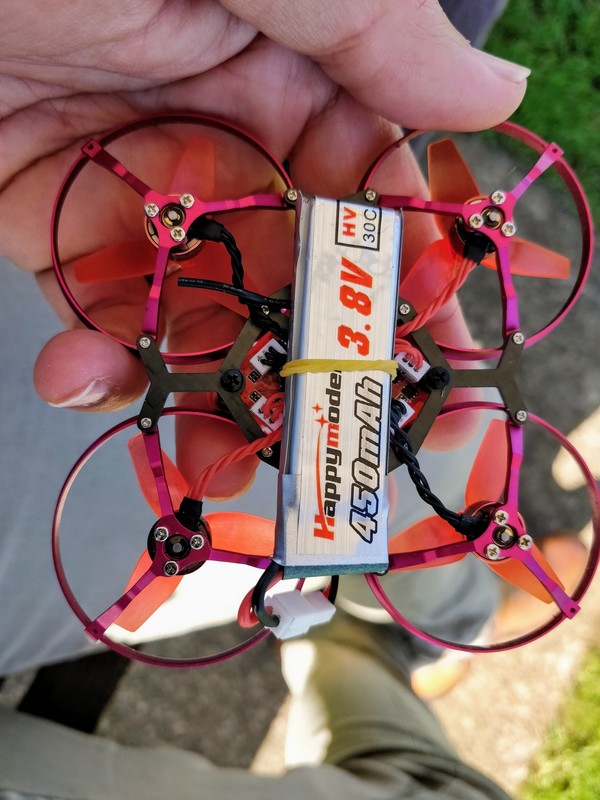
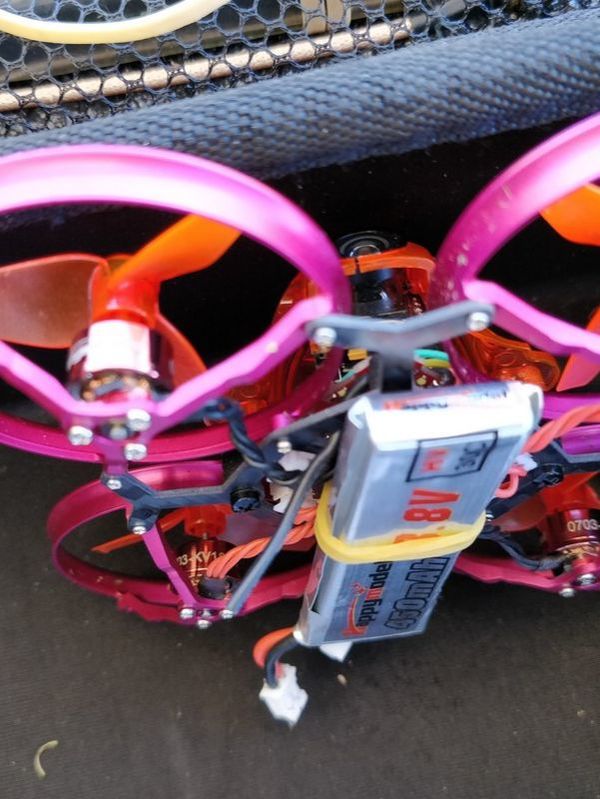
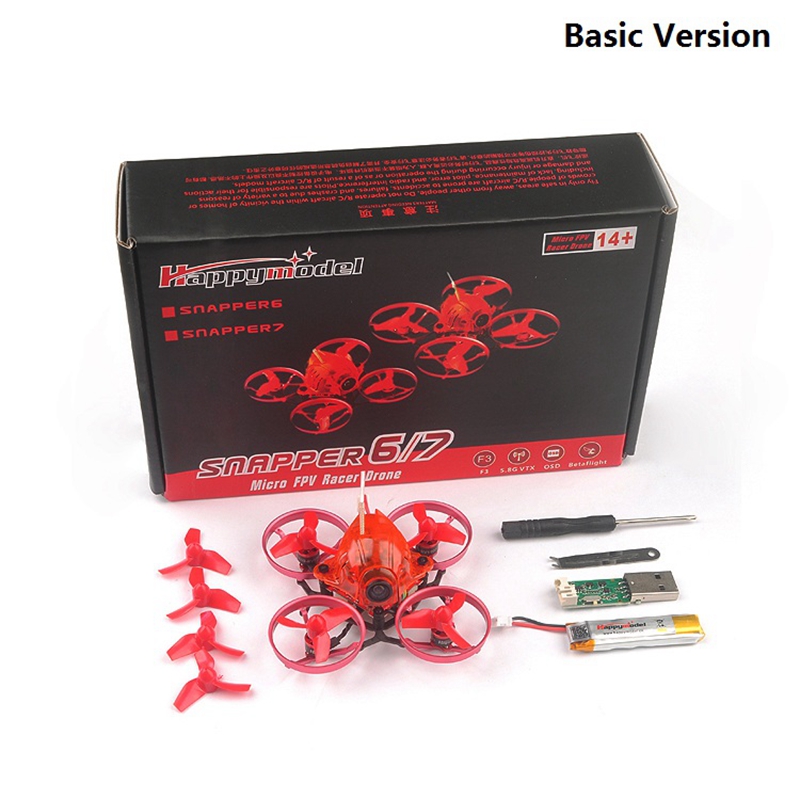

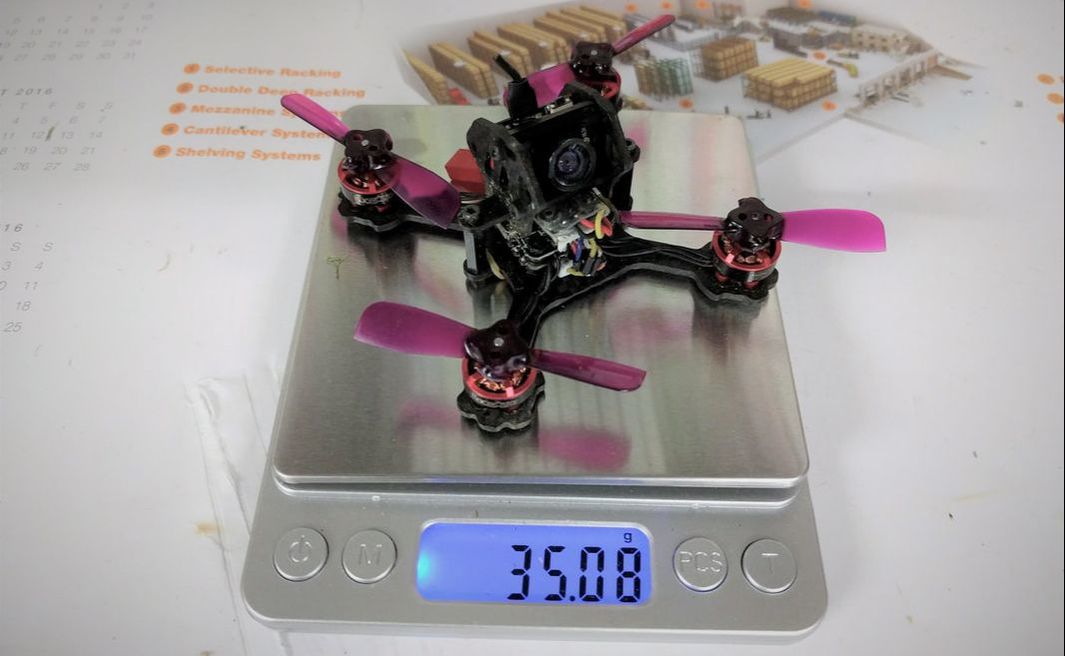
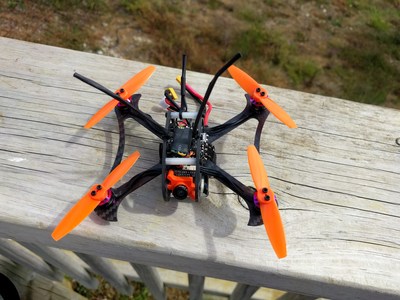
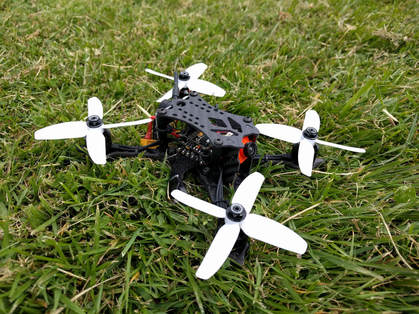
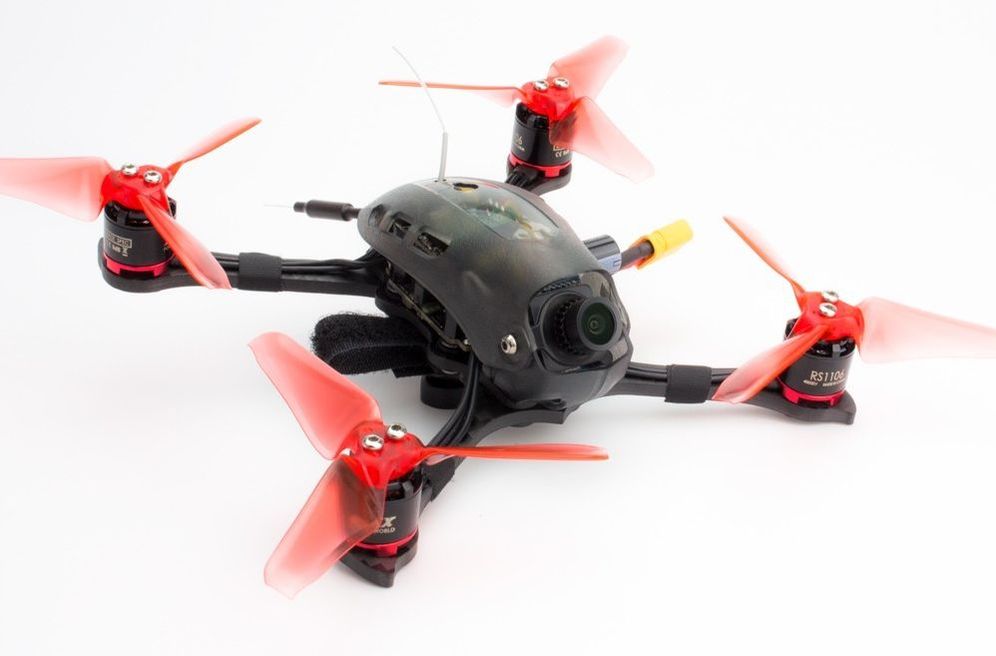

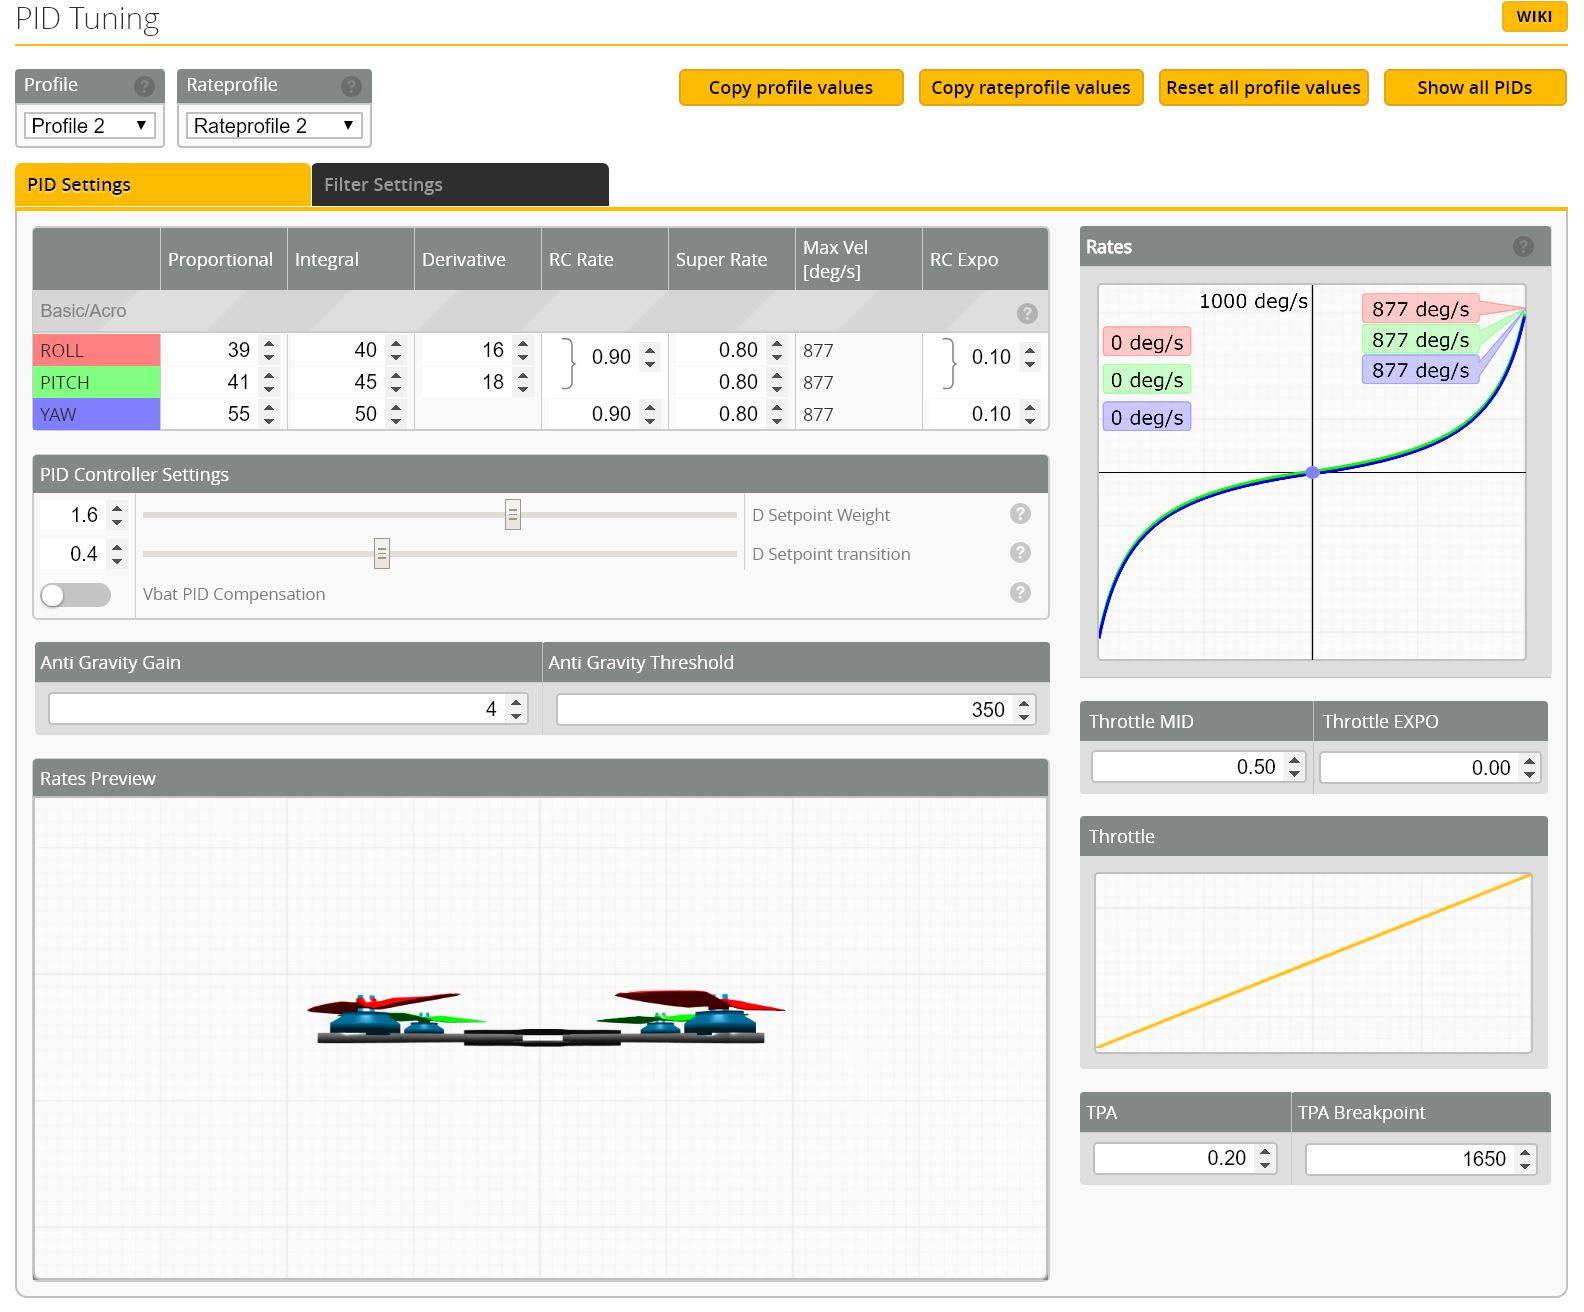
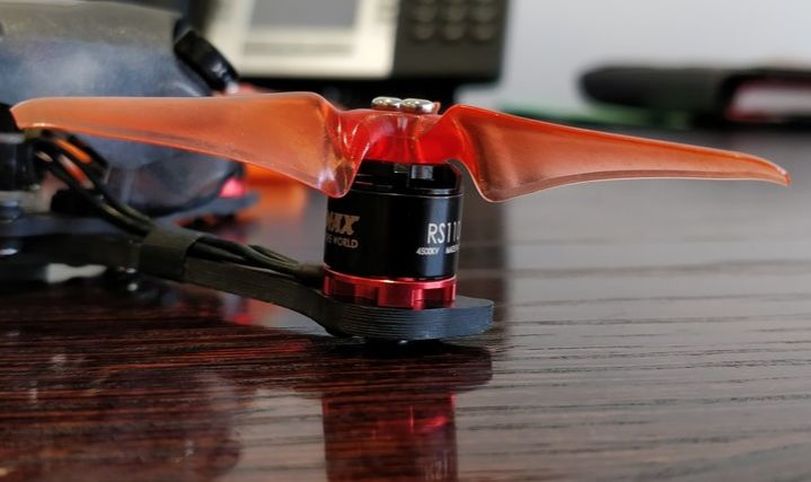
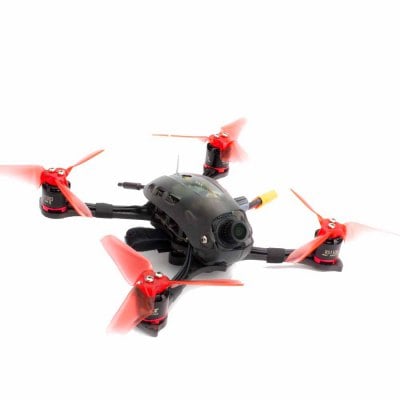

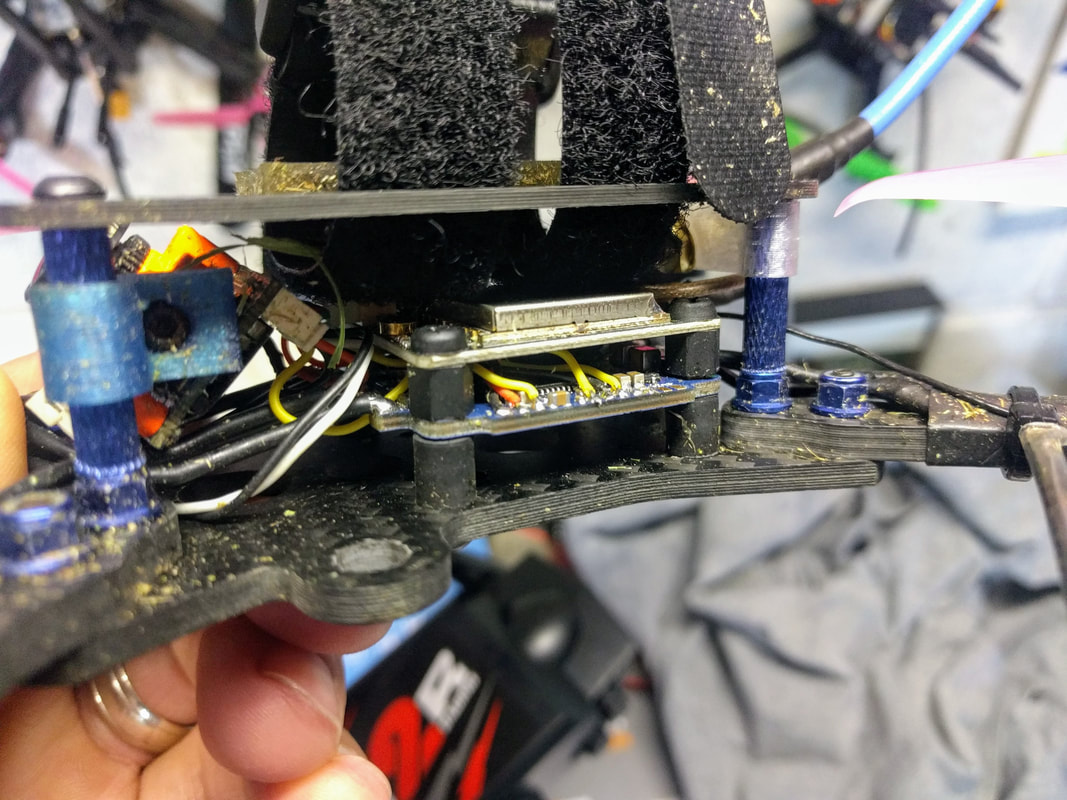
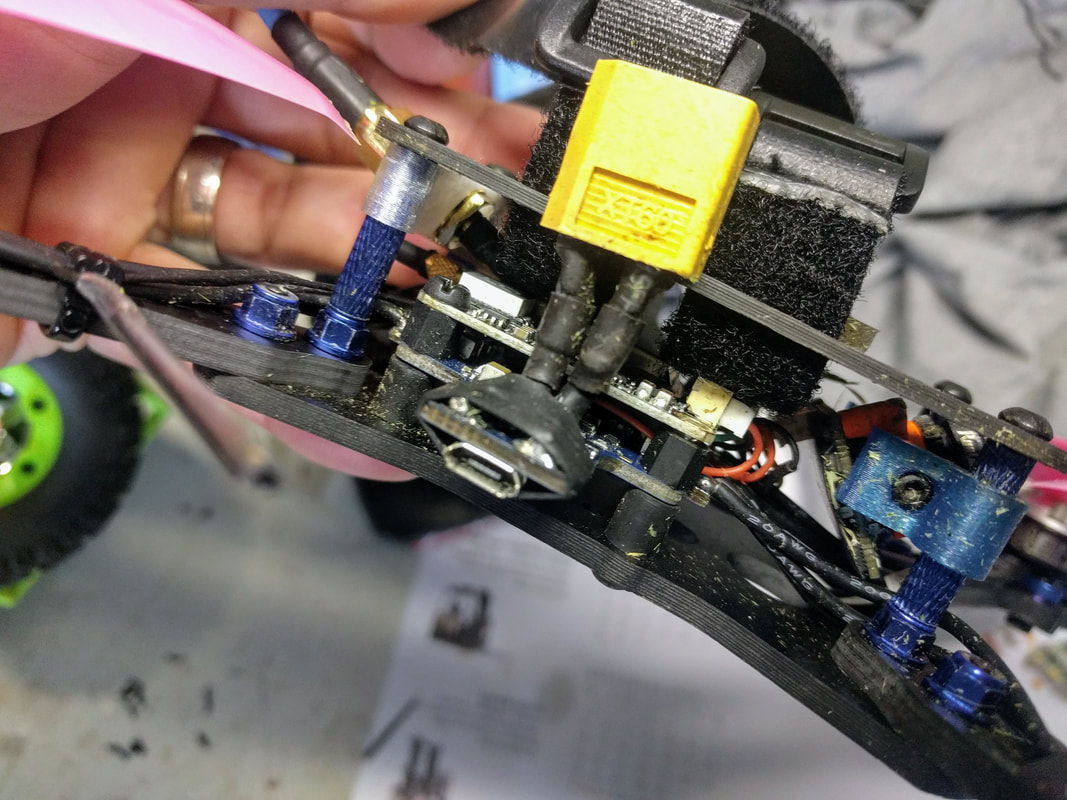
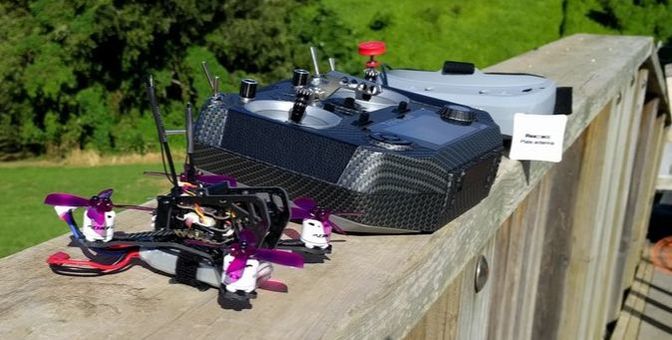
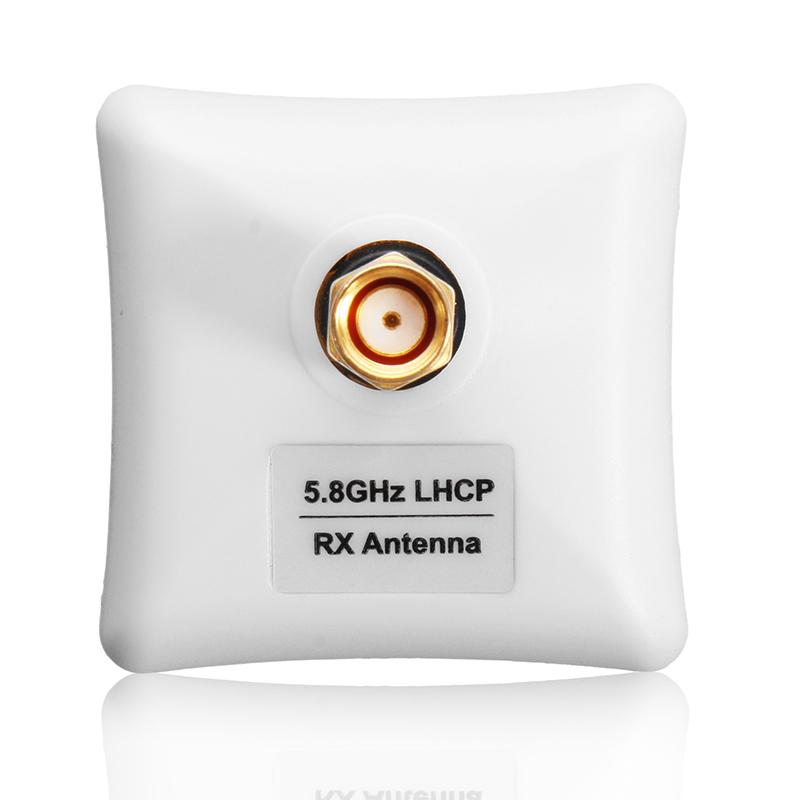
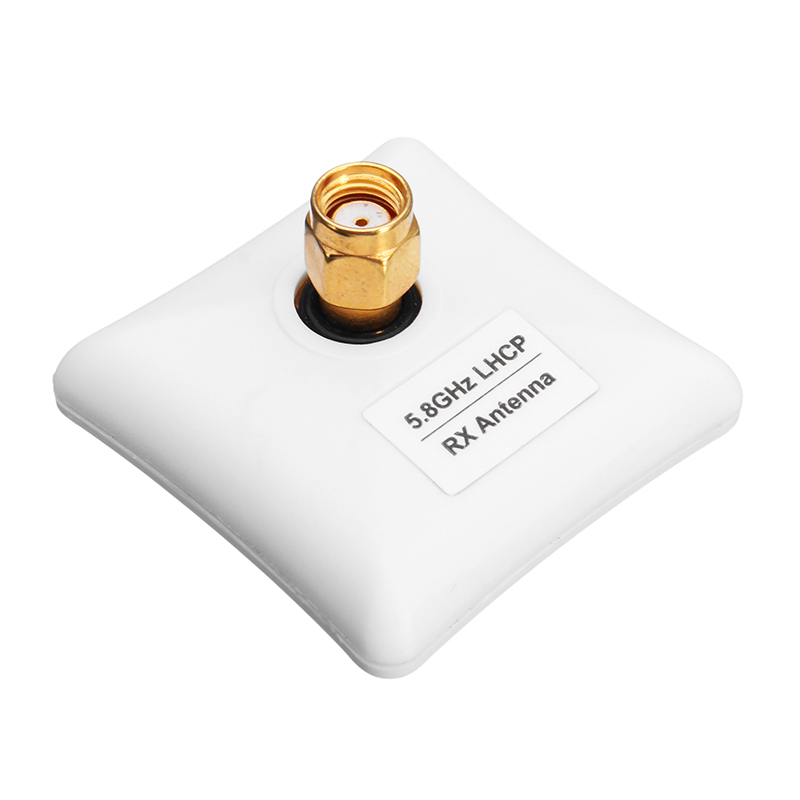

Thanks for visiting QuadifyRC.com Follow us on facebook below to get all the latest updates