QUADIFYRC.COM
  • RC Cars
  • Car of the Month
  • Quad Reviews
  • COUPONS AND DISCOUNTS
  • About & Contact

QUADIFYRC Quadcopter reviews

Hobbymate Asteroid 3 inch quadcopter: Build Tutorial and betaflight pids etc.

29/4/2019

0 Comments

 
Picture
Picture
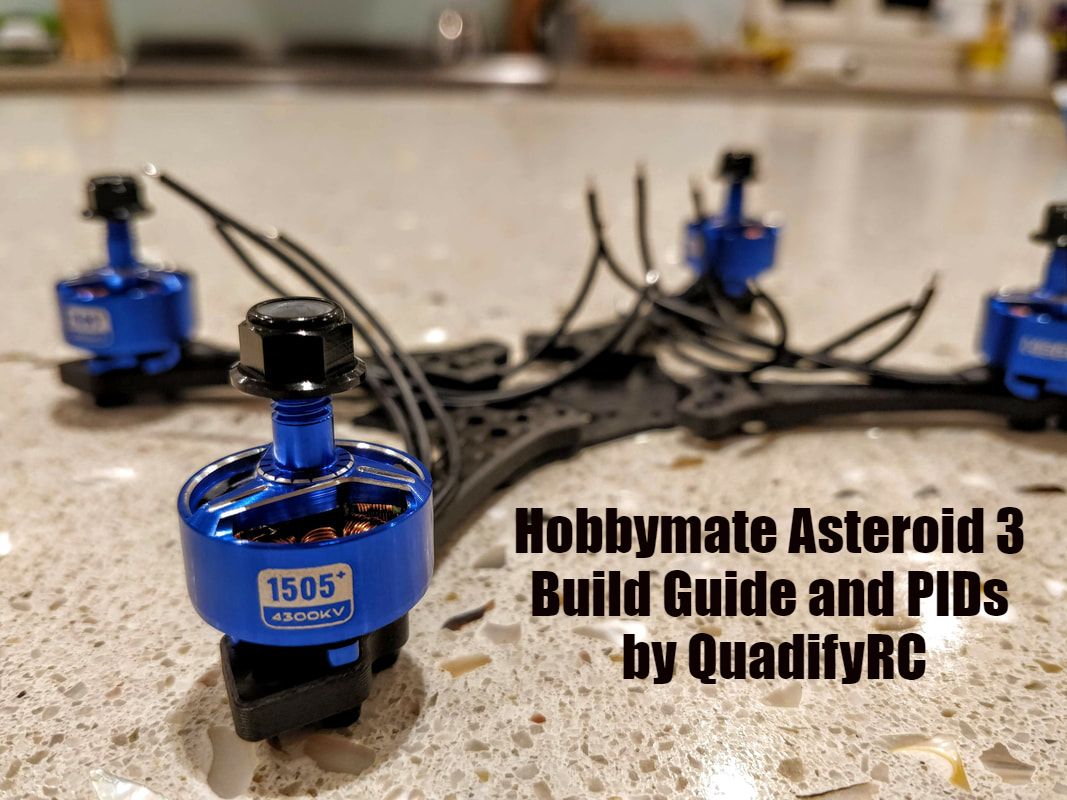
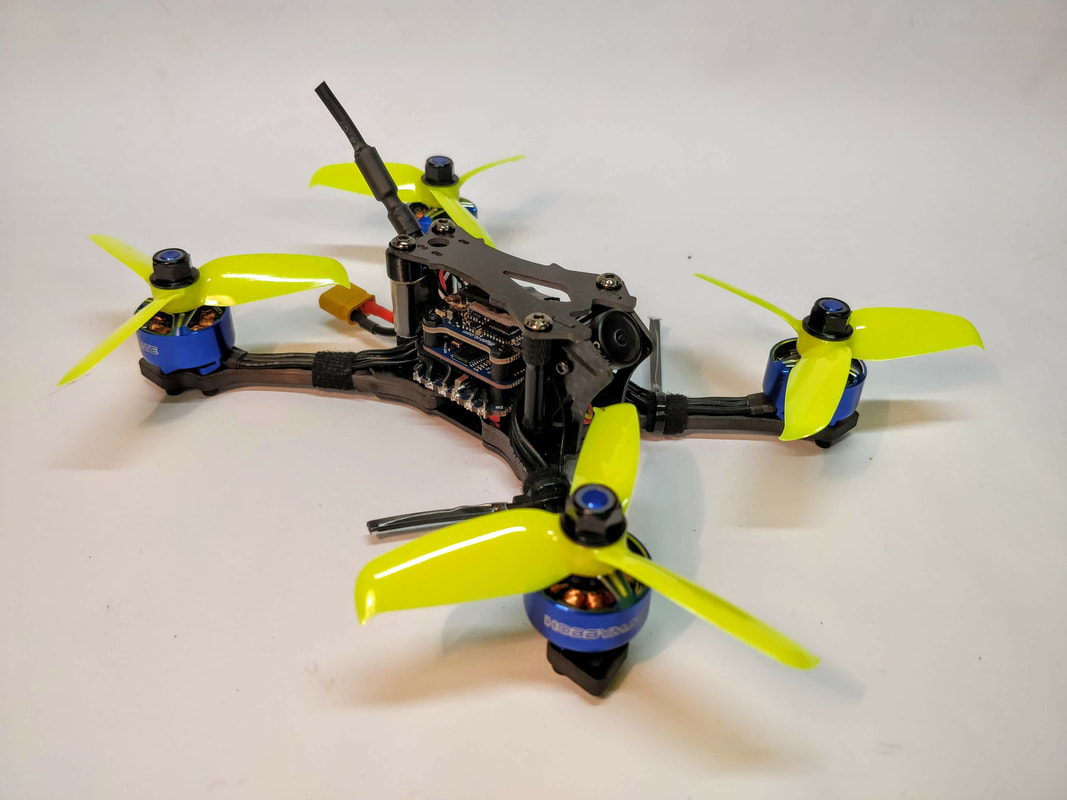
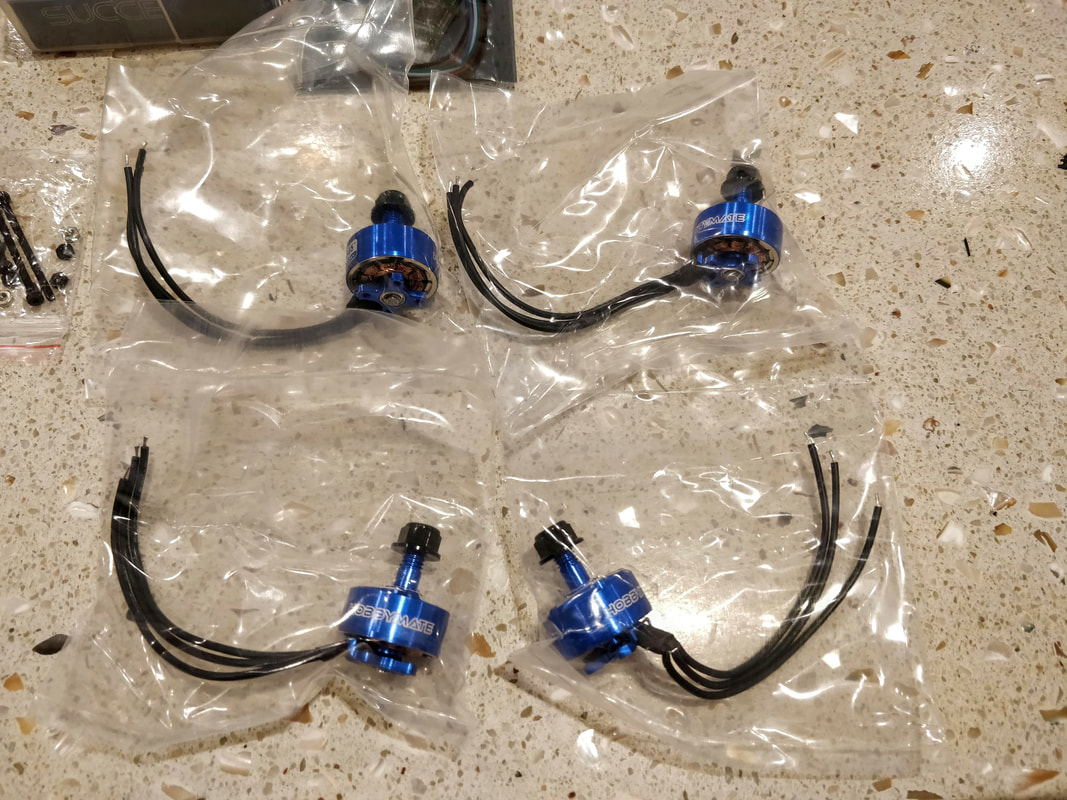
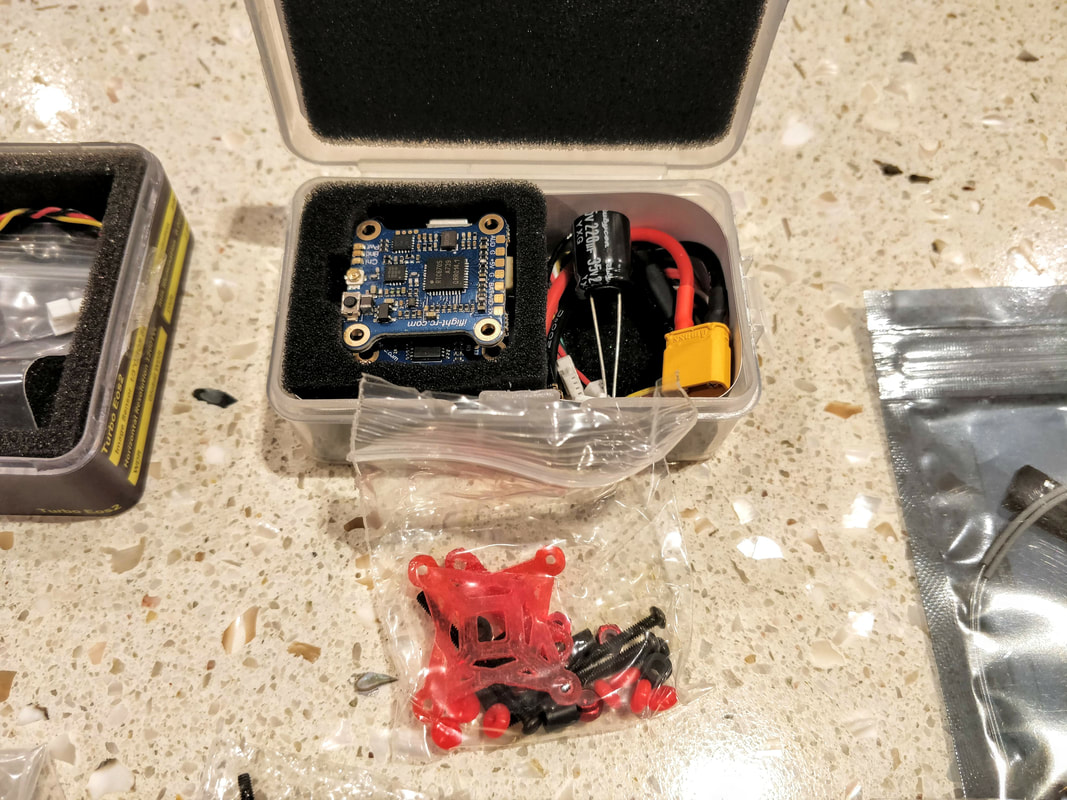
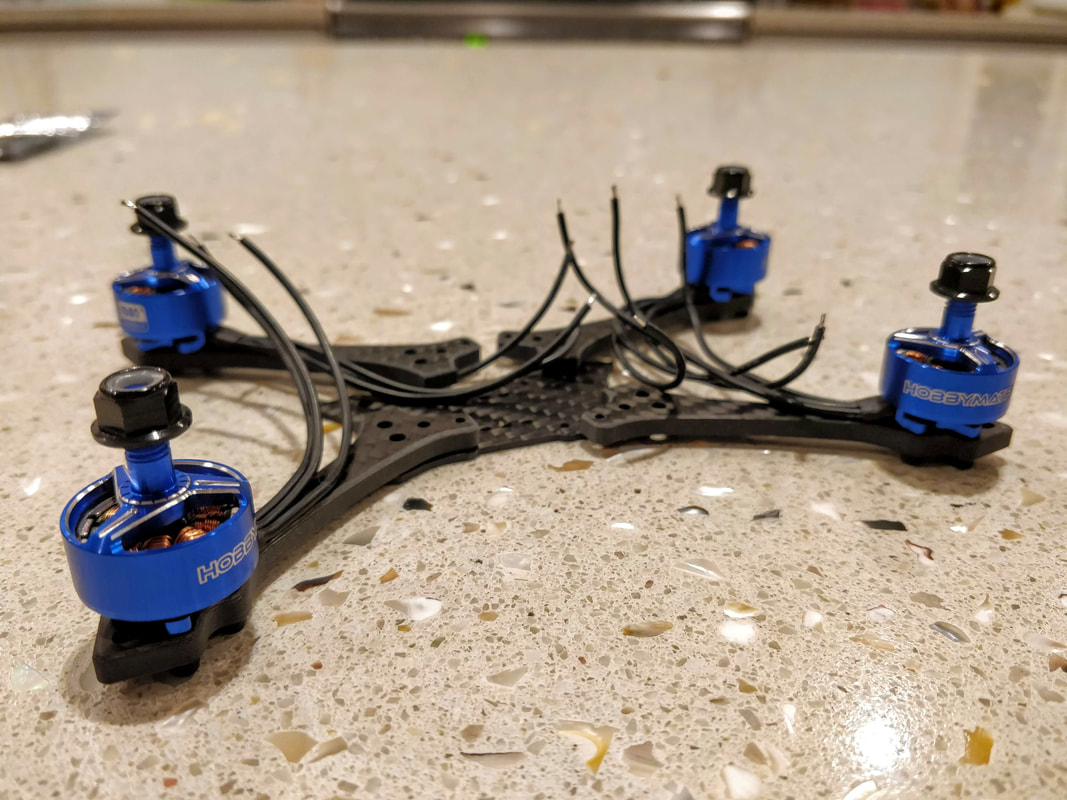
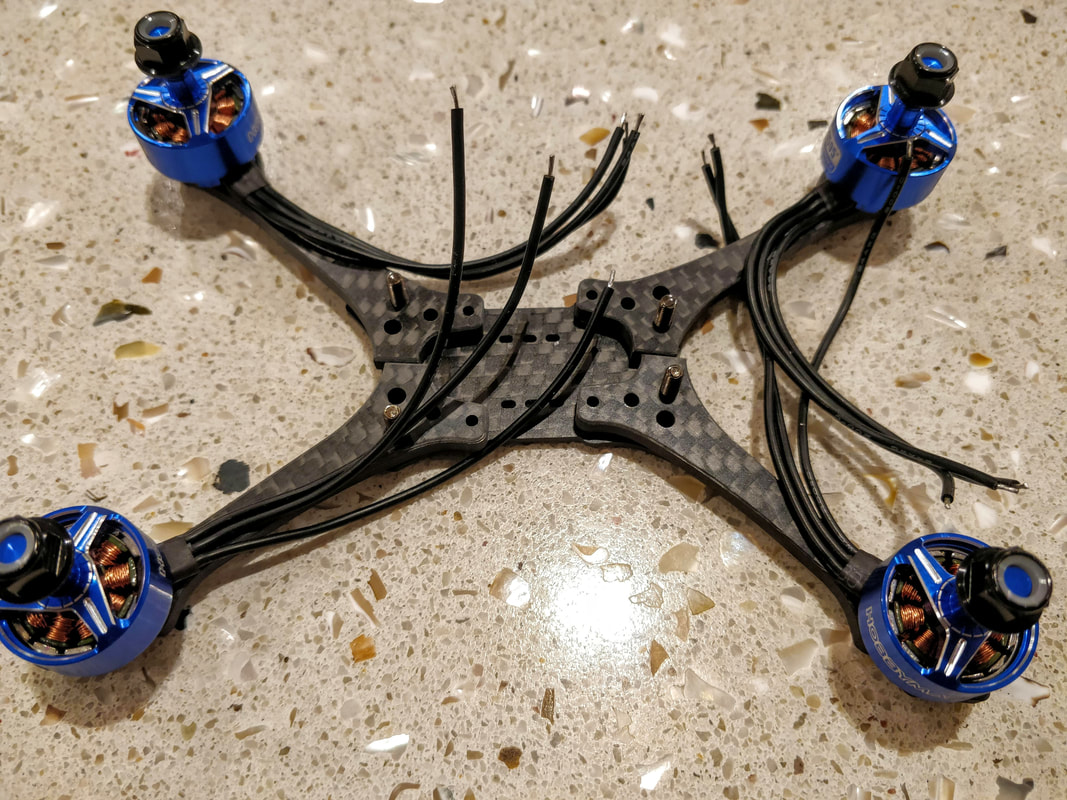
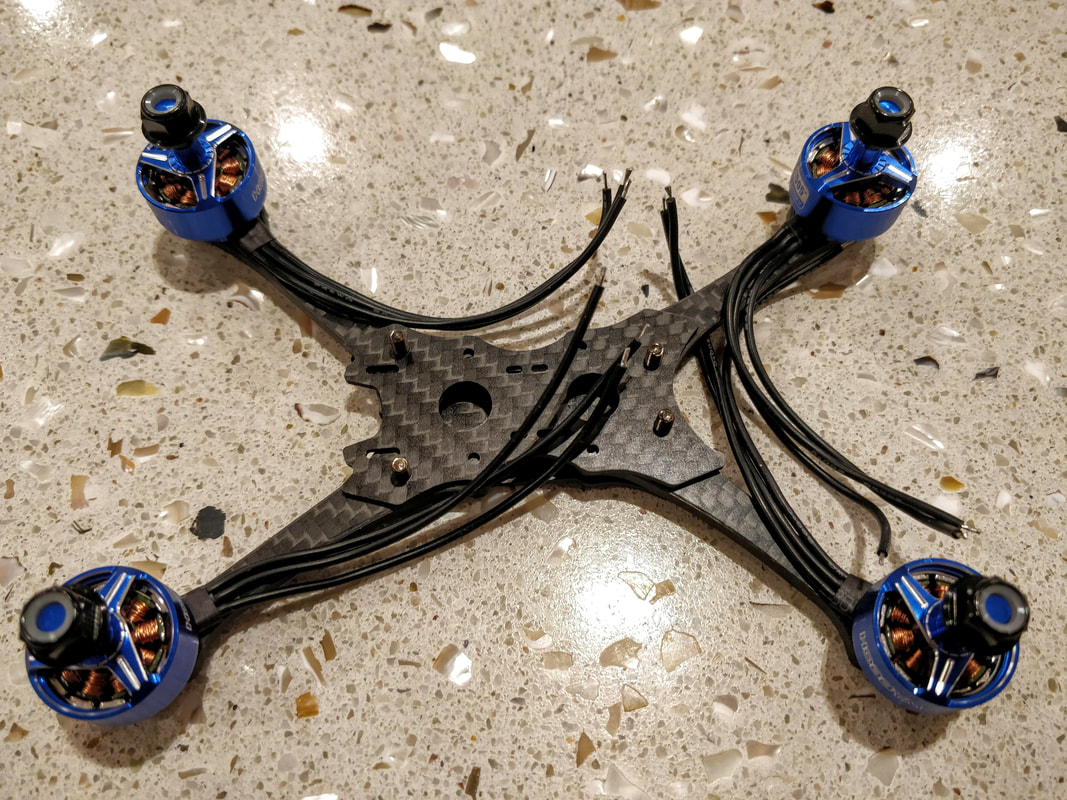
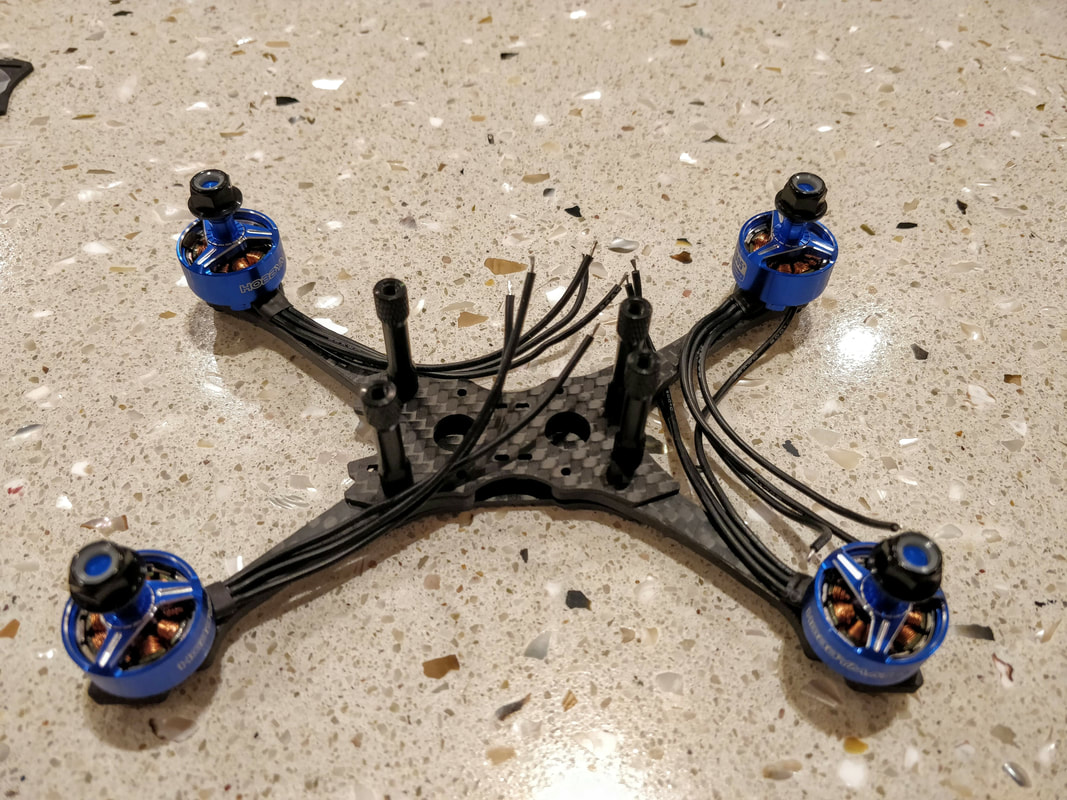
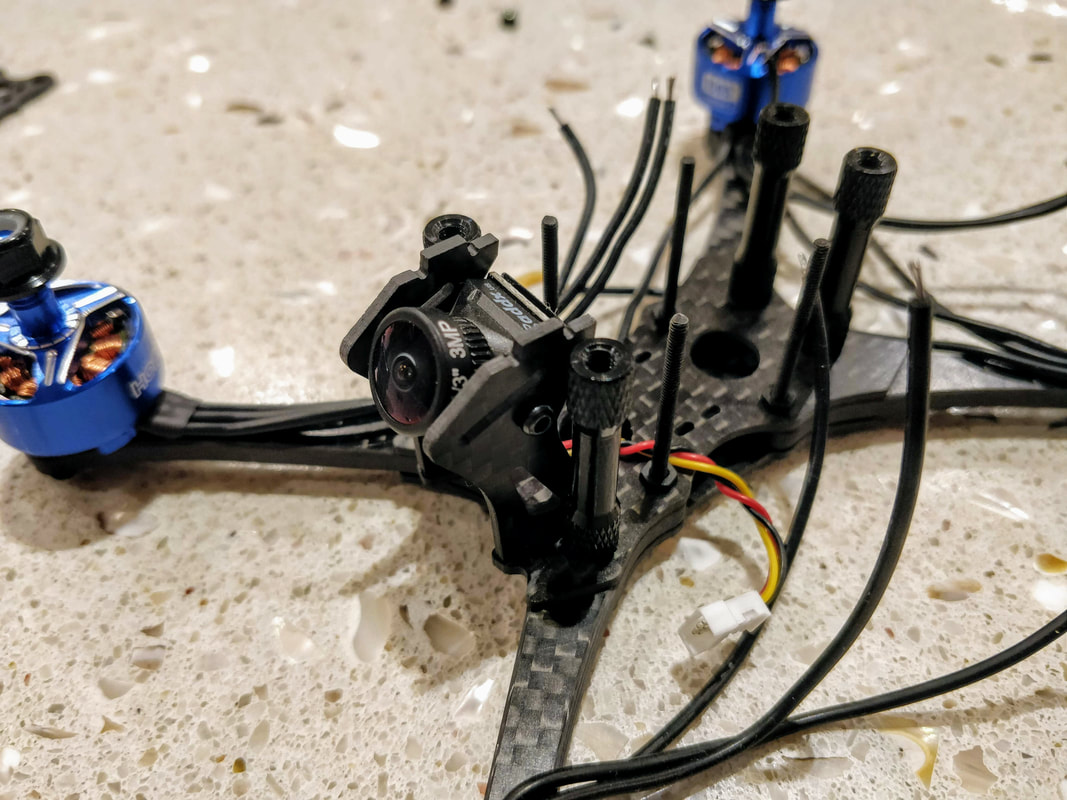
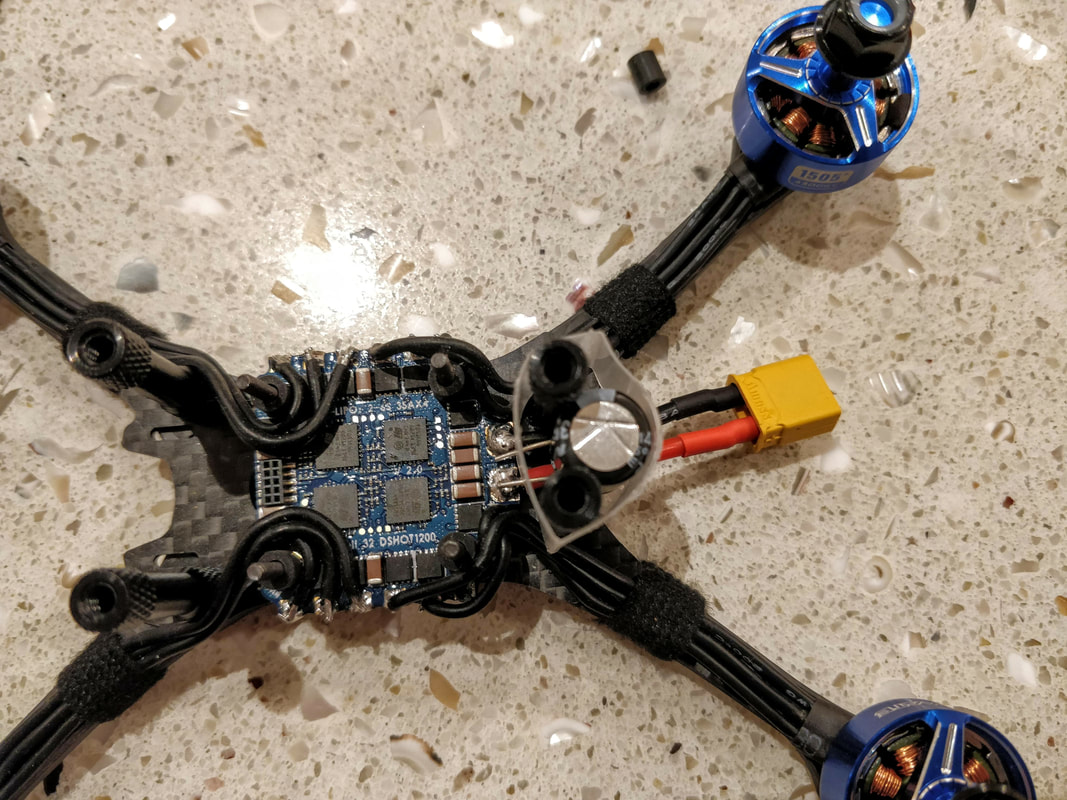
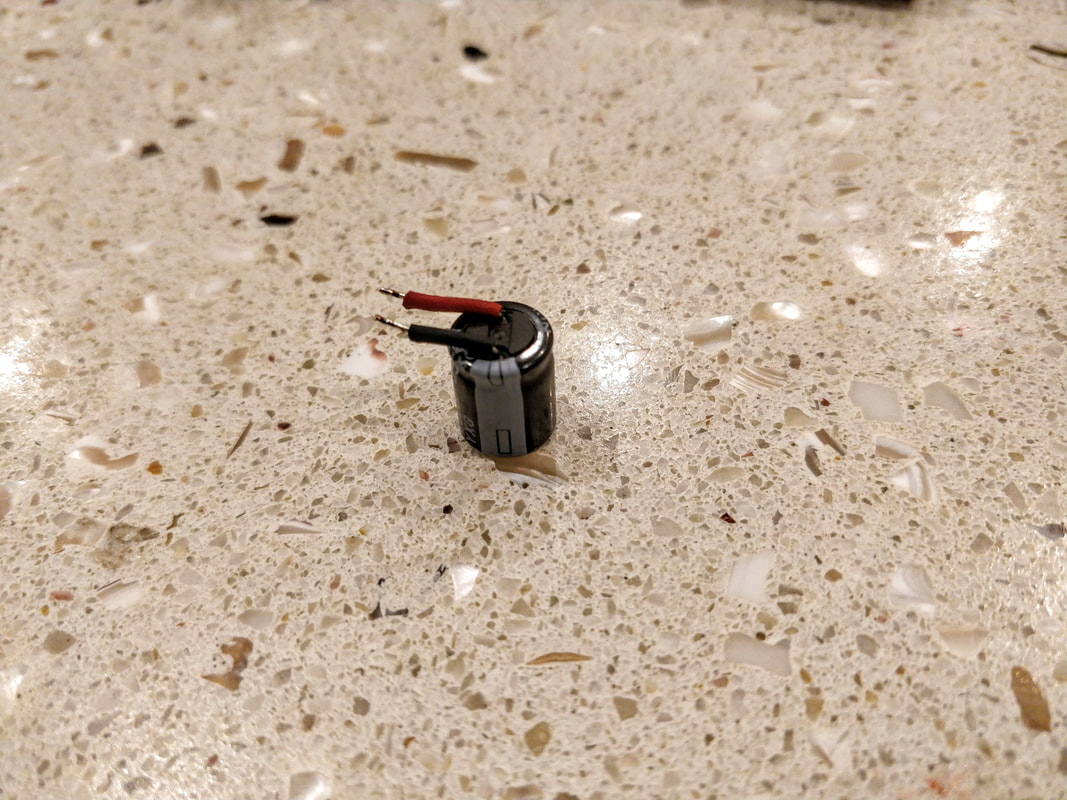
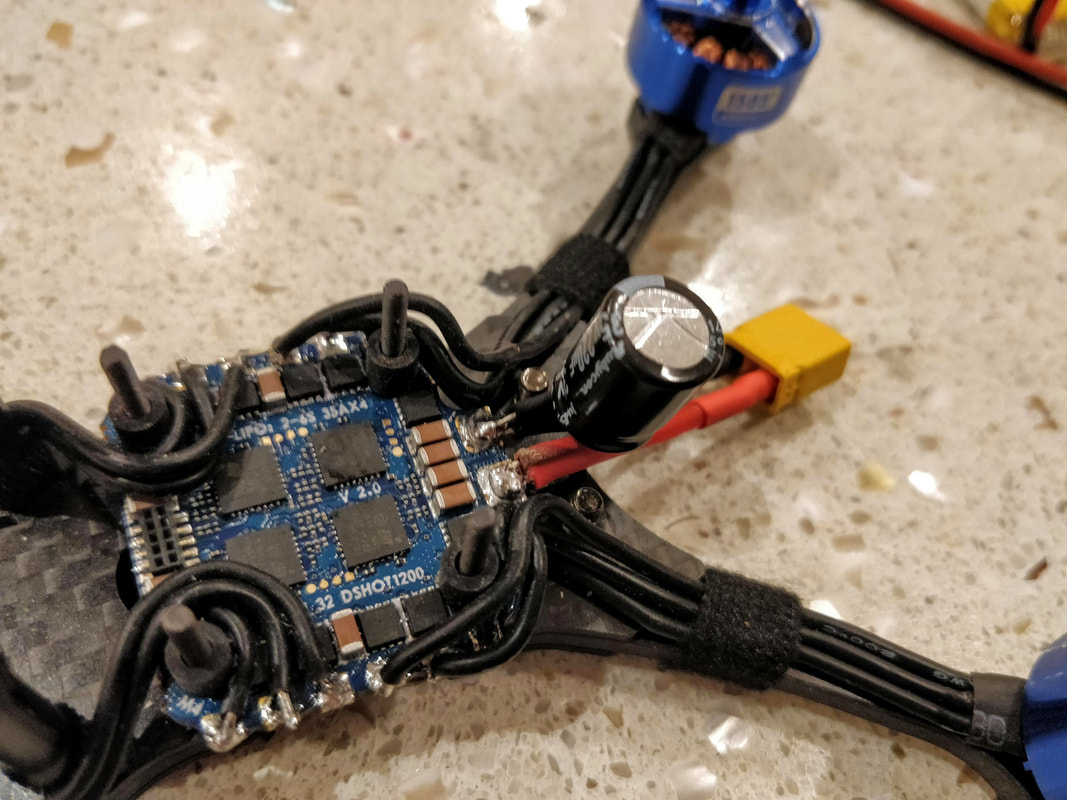
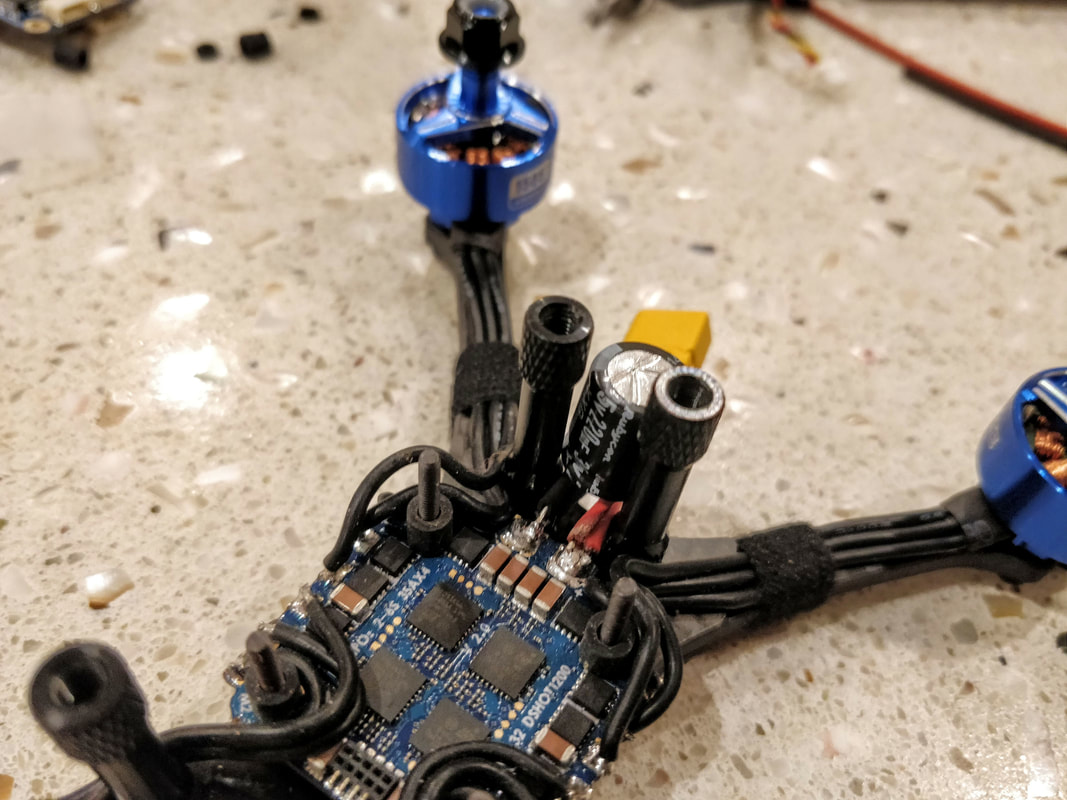
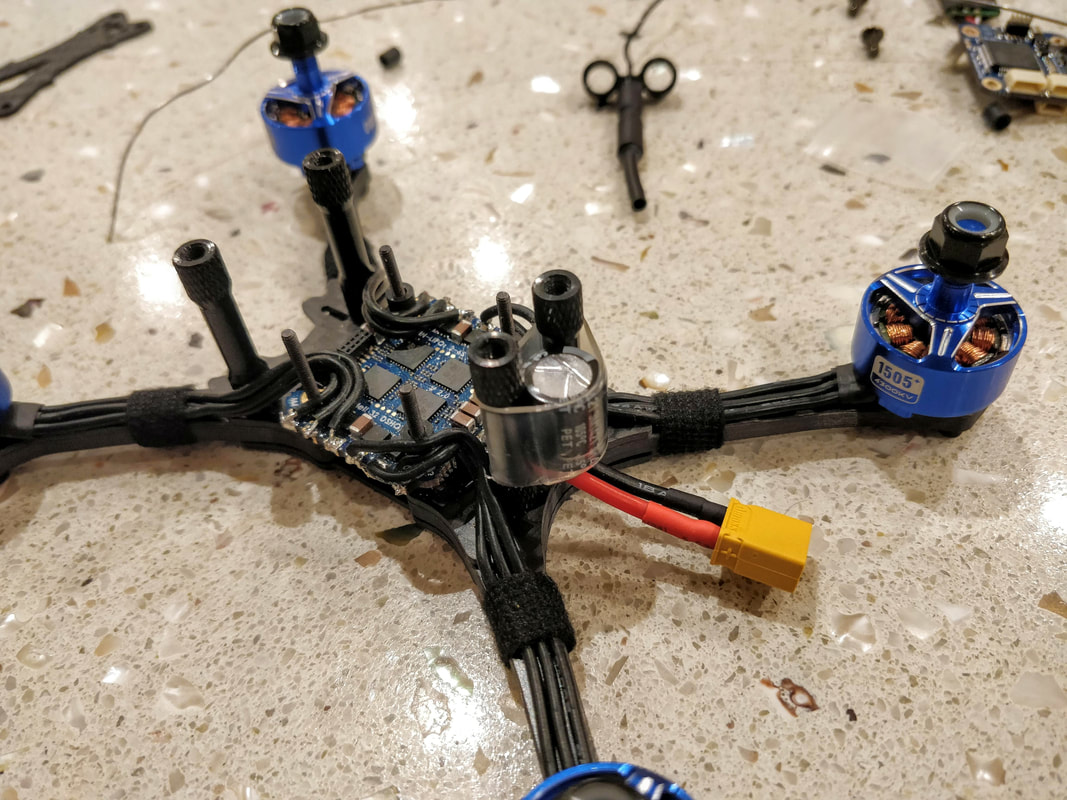
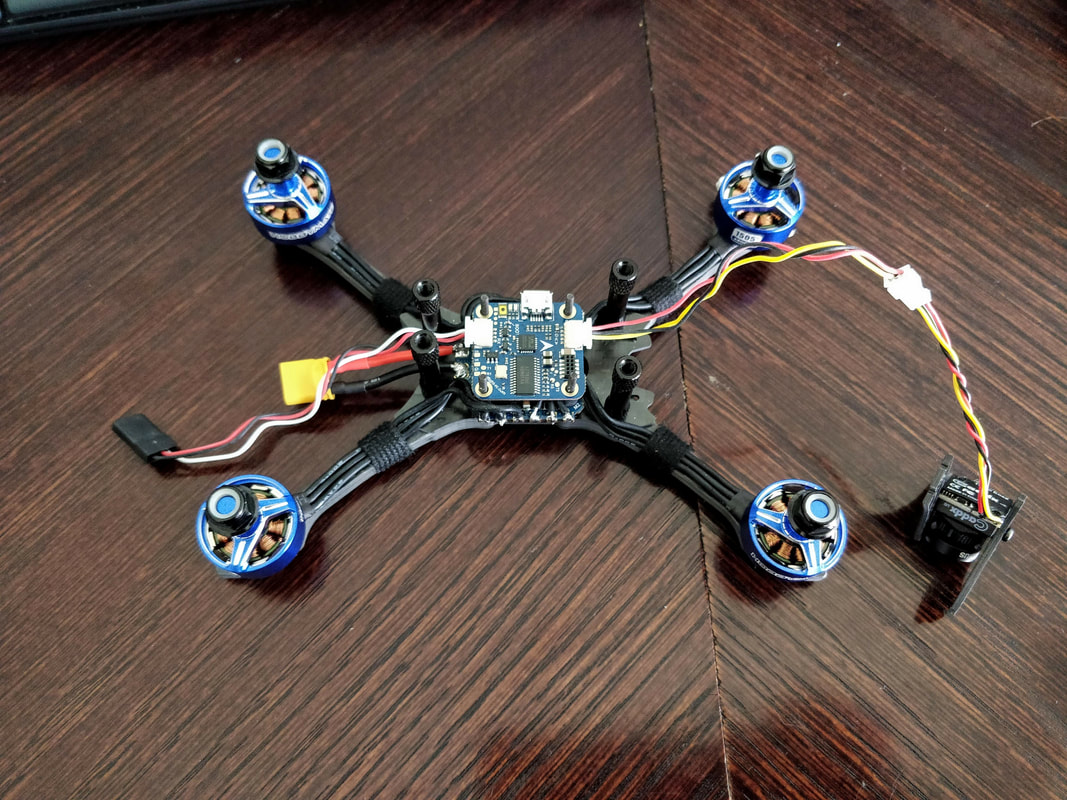
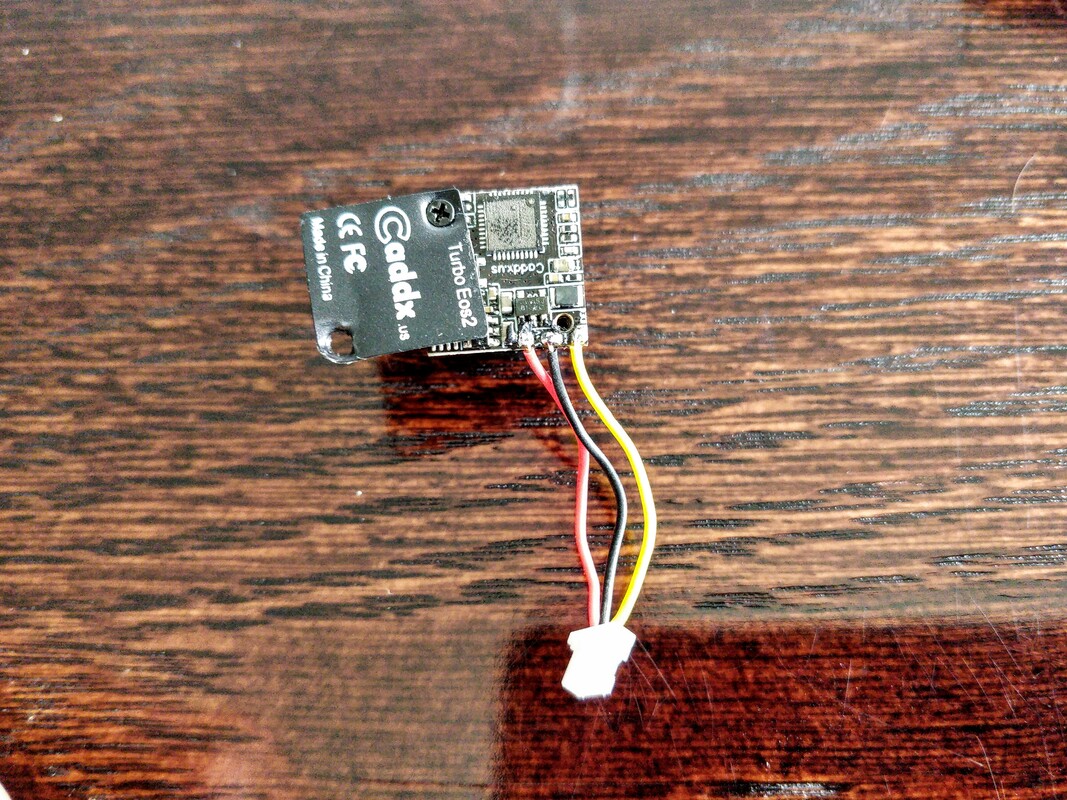
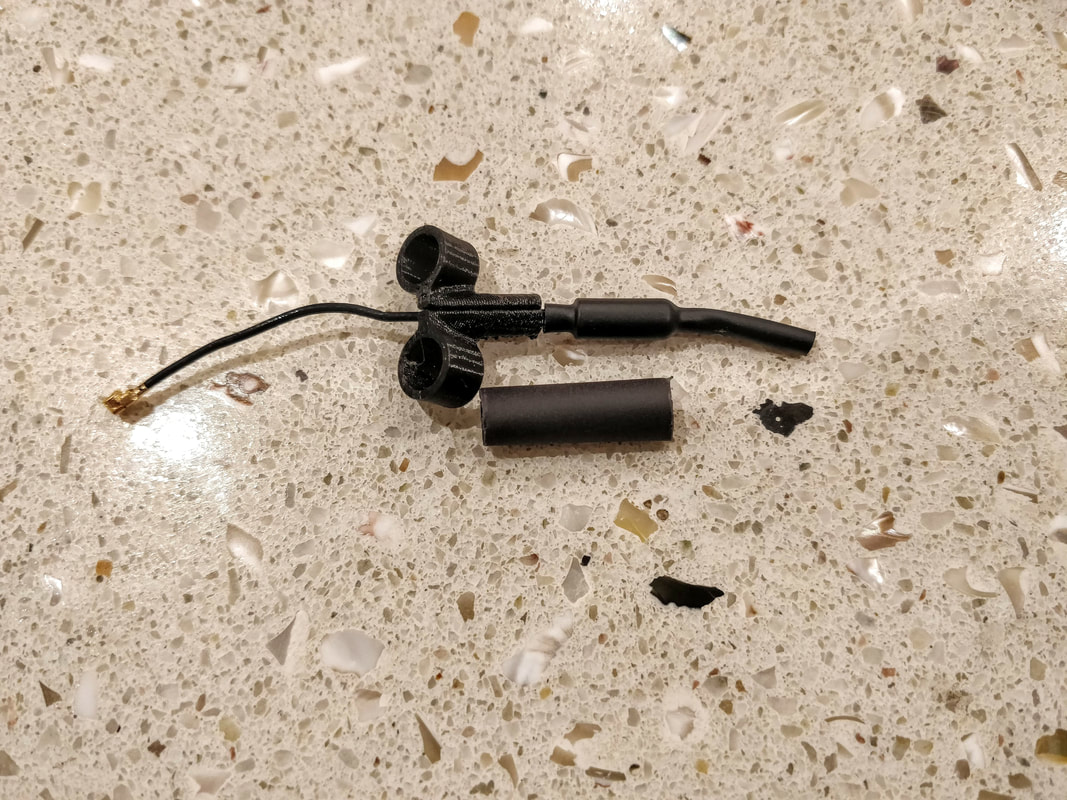
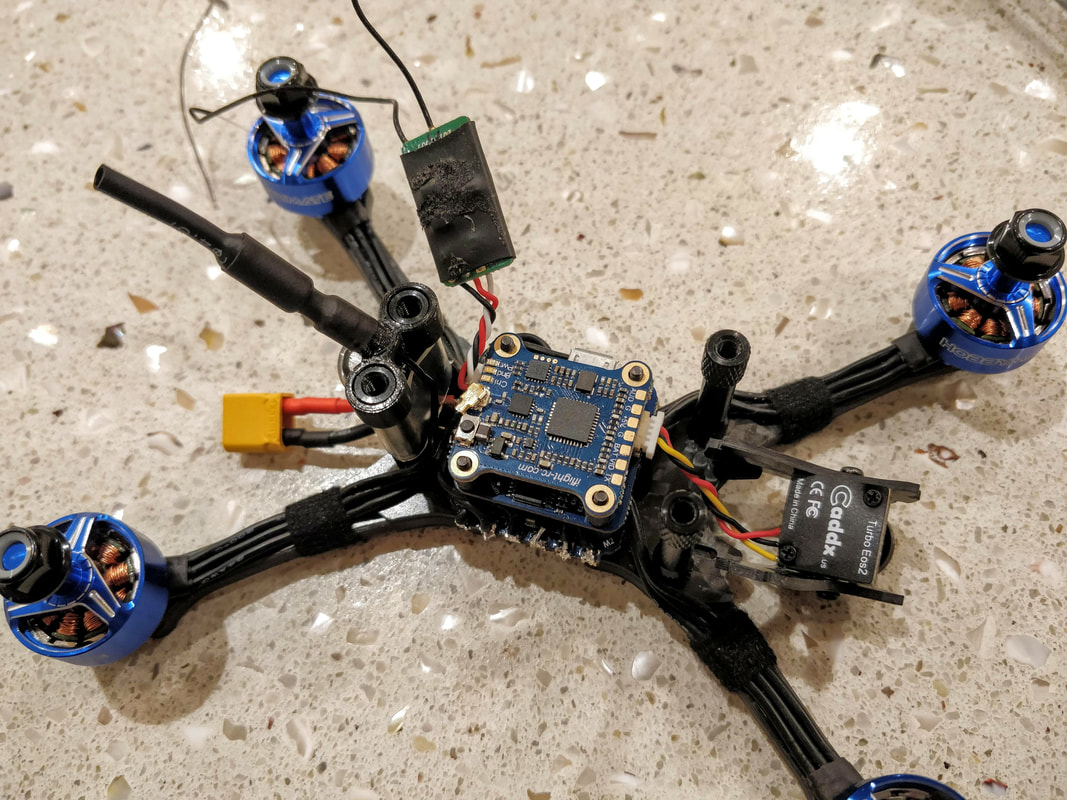
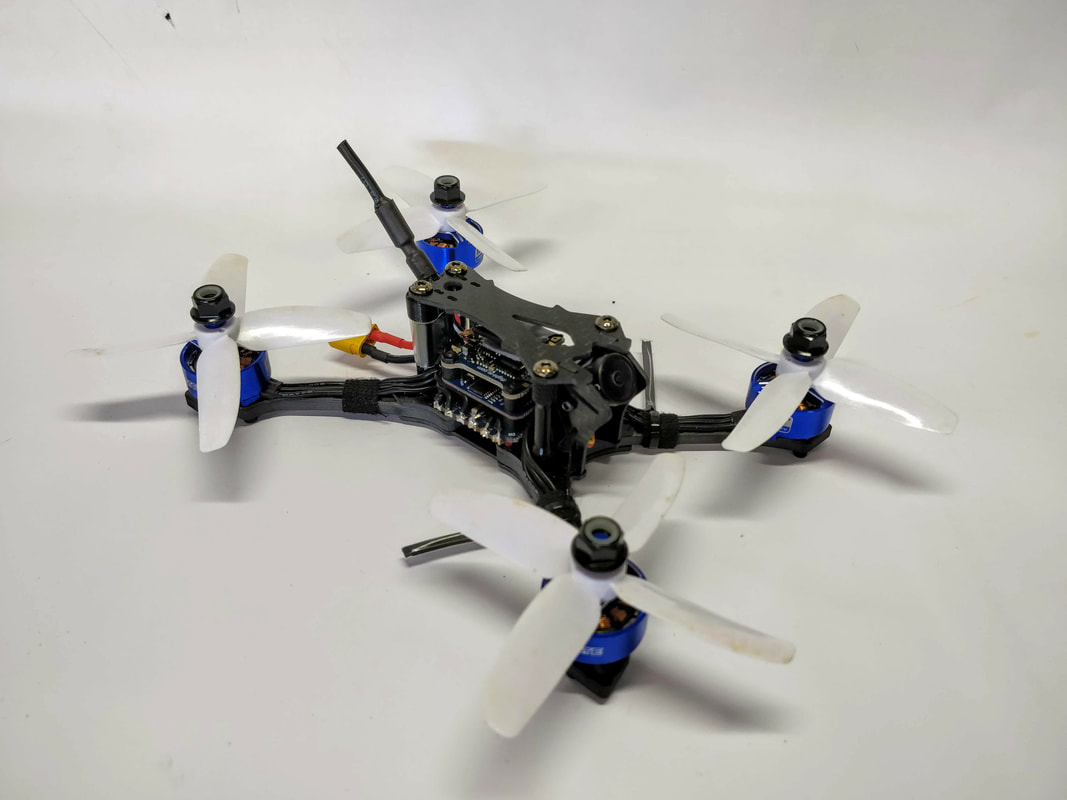
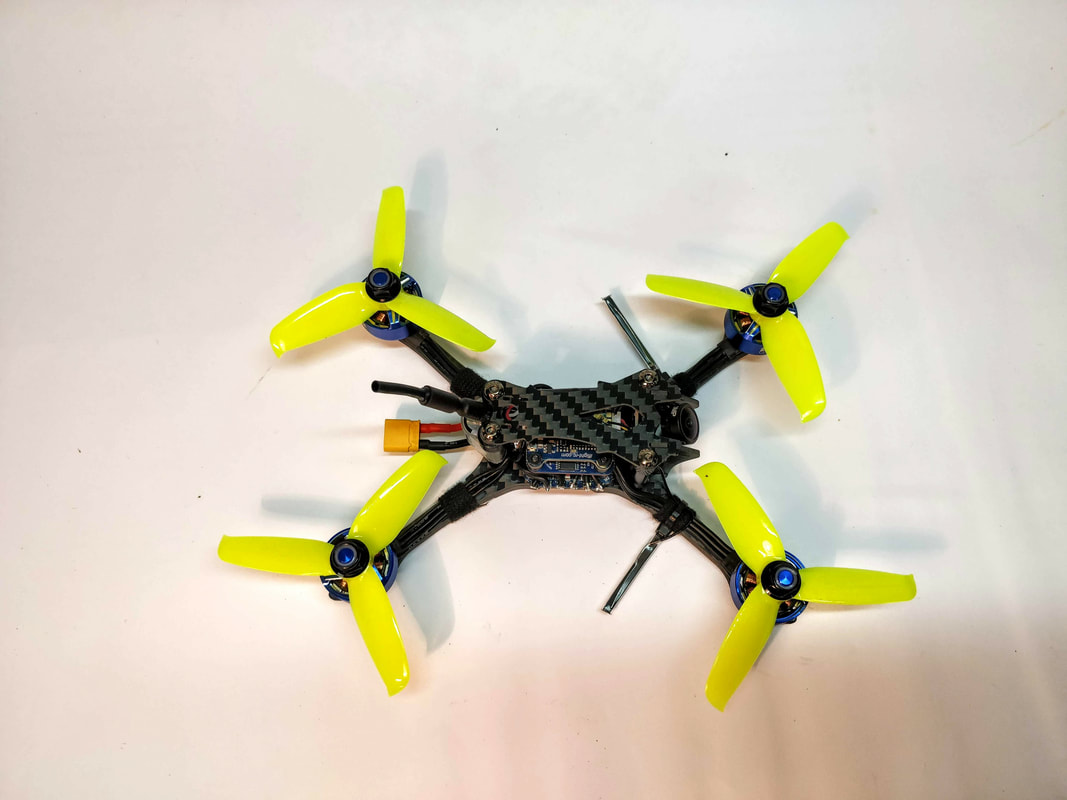
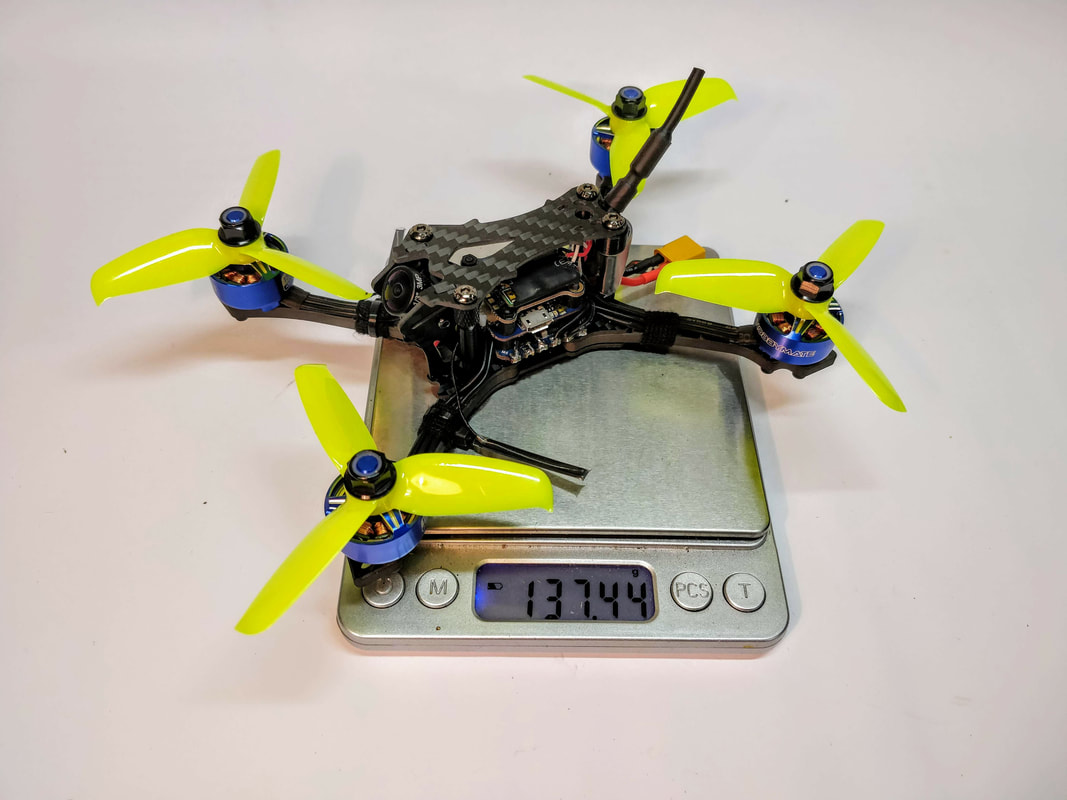
The Hobbymate Asteroid is a new 3 inch quadcopter that is available in kit, BNF or PNF formats that is available with motors and electronics suitable for 4s or 6s (!) operation. Following on from the awesome Hobbymate Comet (built here and reviewed here) this is another premium set of components at a spectacular price. It is available exclusively from HobbyCool.com here:

http://hobbycool.com/asteroid-3-mini-fpv-racing-drone-kit/
The purpose of this blog is to show how I have built in close detail and how I have set up betaflight software for optimal performance. Note you can spend an extra $30 to have this build with a FRSKY receiver but I always like to tinker and optimise my build which is why I have chosen this path. Update: review now completed here
I like to take my time on a build and ensure I have a clean well lit area. Makes things easier when I inevitably drop screws or small parts on the floor. My recommended list of budget tools is here.
Picture
1. Overview of all the parts. Components are outstanding, I will cover this more in part 2 (the review)
Picture
2. Closer look at the motors. These are more beautiful in real life with a 1 piece bell
Picture
3. This Iflight stack is compact, well desined and capable of up to 6s!
Picture
4. Lightweight Caddx EOS2 cam. This is the 4:3 version which gives a much better FOV than the 16:9 version as found on the trashcan
Picture
5. All frame components can be seen here. 4mm thick arms with sandwich plate design.
Picture
6. As you can see from this mockup the frame is a heavily stretched-x
Picture
7. Motors mounted to arms using the include m2 screws - 3 per motor. I used this cheap threadlock
Picture
8. 4 x m3 12mm screws up from the bottom plate through the arms which butt up against each other.
Picture
9. Sandwich plate over the screws from step 8
Picture
10. 4 x standoff on next
Picture
11. Next attach the EOS2 cam to the carbon side plates. I put a m2 washer between the cam and each side plate in order to stop the camera housing from fouling
Picture
12. Here the long m2 stack screws have been installed with the red iflight locknuts securing them. On this went the ESC which was soldered on. Here you can see me test fitting a unique capacitor location
Picture
13. Capcitor legs were trimmed to align with battery pad location on ESC and heatshrinked to minimise risk of shorting. I use this pack of various heat shrink
Picture
14. Capacitor soldered on. Make careful note of polarity
Picture
15. Standoffs replaced- ensure capacitor legs to not expose bare metal to frame or standoffs
Picture
16. The loose heatshrink you saw from step 12 is then heated to ensure the capacity or held tightly to the rear standoffs. This capacitor is not going anywhere! I used this skrink tube
Picture
17. FC goes on next after the black m2 4mm rubber spacers. Make sure you get the pins square. This is what the default harness looks like for receiver and battery. Yuck! lets tidy it up.
Picture
18. I used my trusty FRSKY XM+ receiver and attached the 3 pin connector that mates to the flight controller then heatshrink for safety.
Picture
19. This is why I love the EOS 2 - when you twist the rear cover way you can desolder the standard wires and attach your own. Note: never remove both screws or you will expose the sensor
Picture
20. Here you can see the stock wires desoldered and the pads exposed. Removing the conformal coating (black) is simple with the soldering iron.
Picture
21. My shortened and simplified harness soldered directly to the camera. So tidy now.
Picture
22. The 3d printed part that looks like a C&B is a nice antenna mount. Slide the coax cable through as above and cut a short piece of heatsink to fix it together.
Picture
23. With heatshrink in place this is rigid and lightweight. I woud recommend the Foxeer Lollipop UFL antenna if you wish to upgrade.
Picture
24. Receiver, camera and antenna plug connected from steps 20, 21 and 23 respectively. VTX went on after more 4mm rubber spacers. Again take care of connecter pins
Picture
25. Top plate goes on after securing the receiver to the vtx with double sided tape. I use this one. 
Picture
26. Receiver antennae come of the arms in a perpindicular manner using cable ties and fasted with heatshrink. These 4 bladed props looks and sound great but have poor top end and high current draw.
Picture
27. My real prop of choice - the Gemfan 3052. Pick some up from HobbyCool here when you order the asteroid.
Picture
28. Final weight is just under 140g. This is very light for a 3 inch with such powerful motors. It is going to be quick
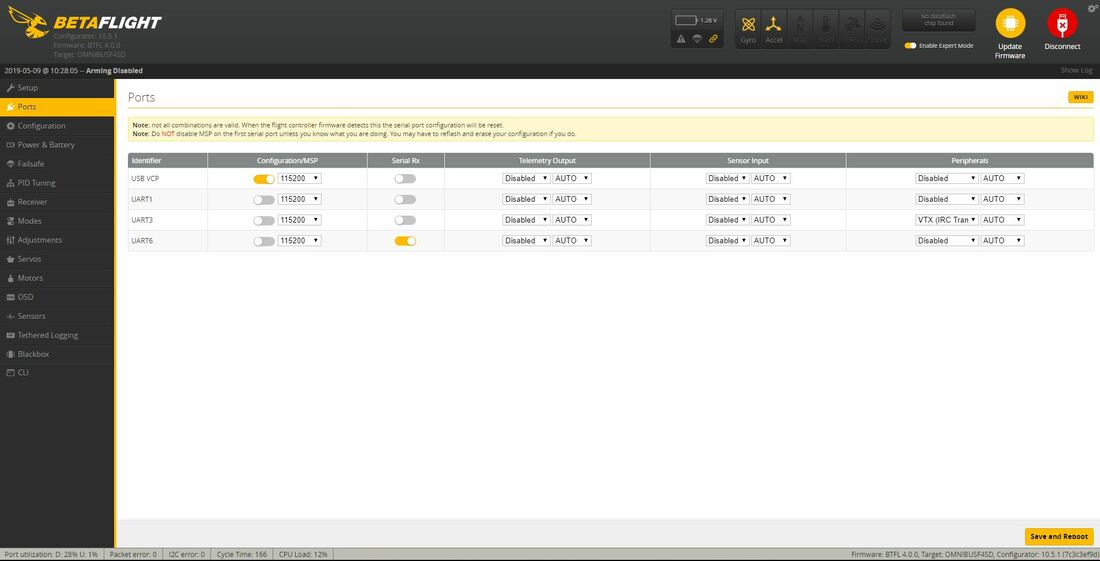
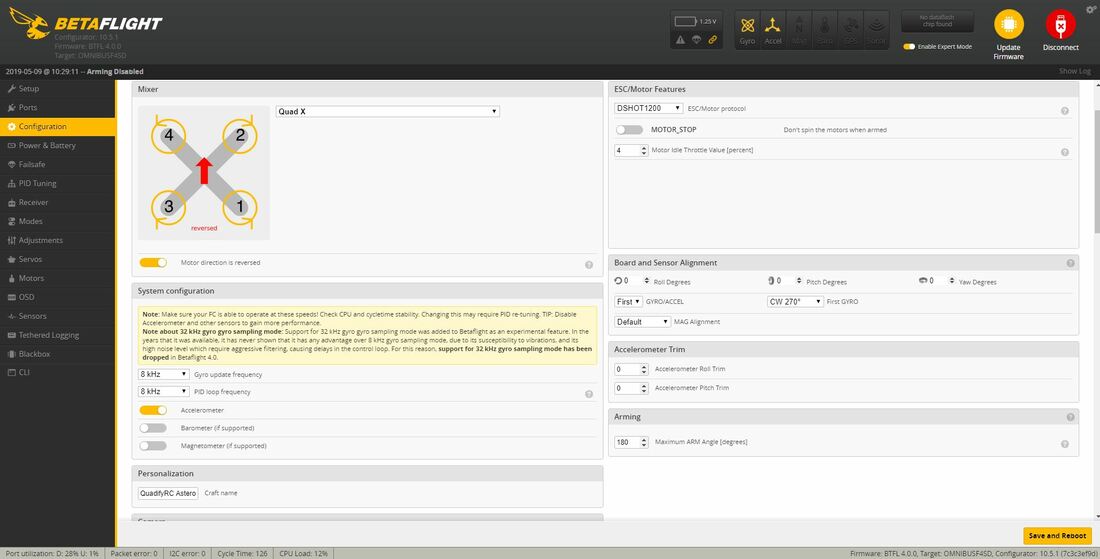
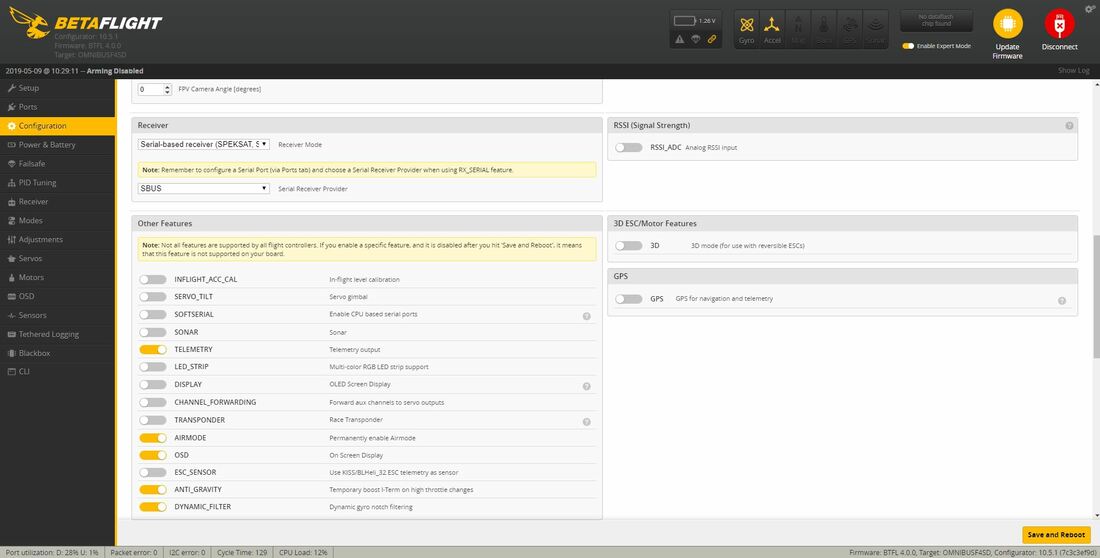
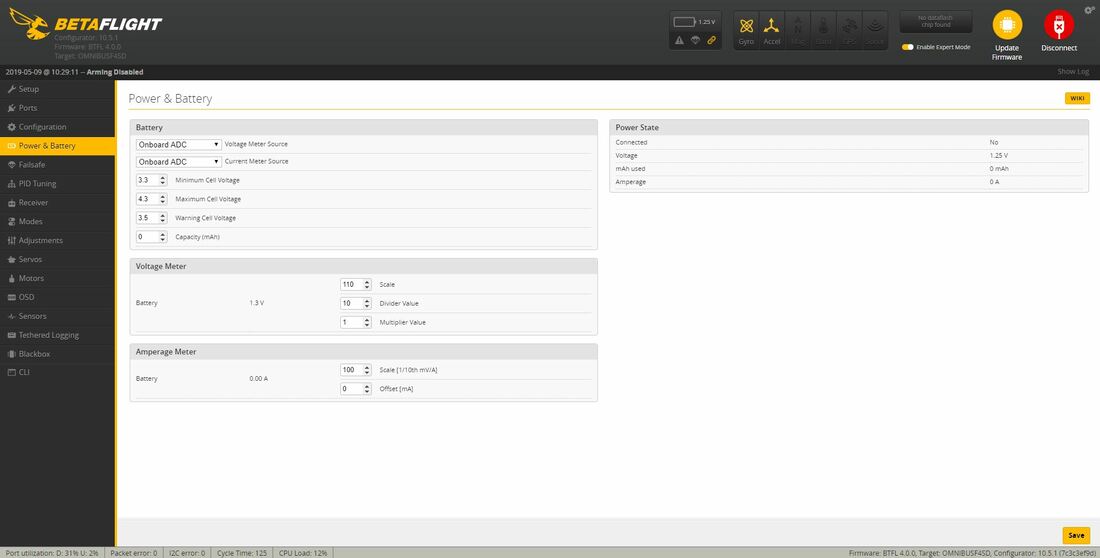
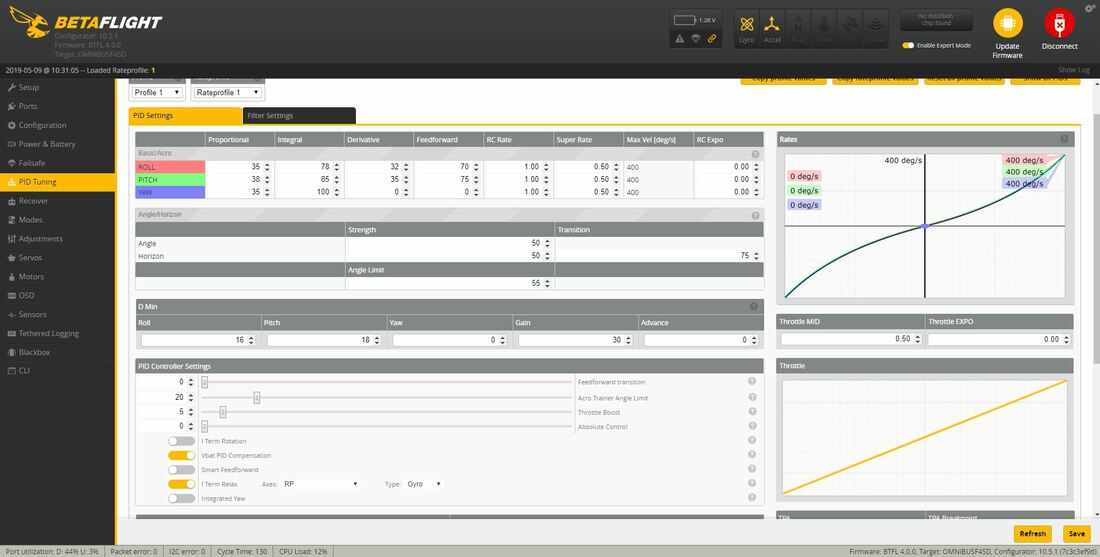
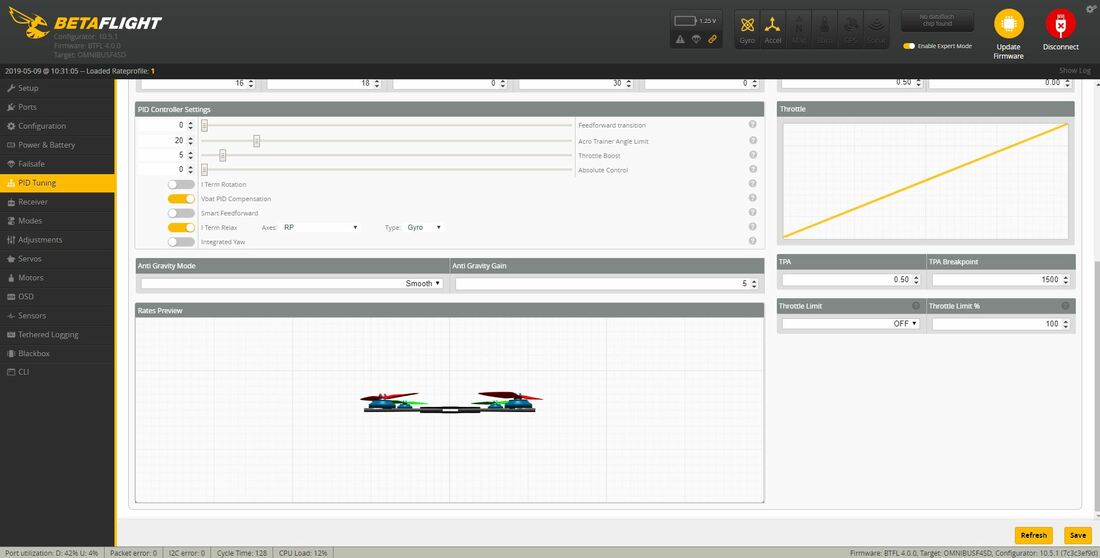
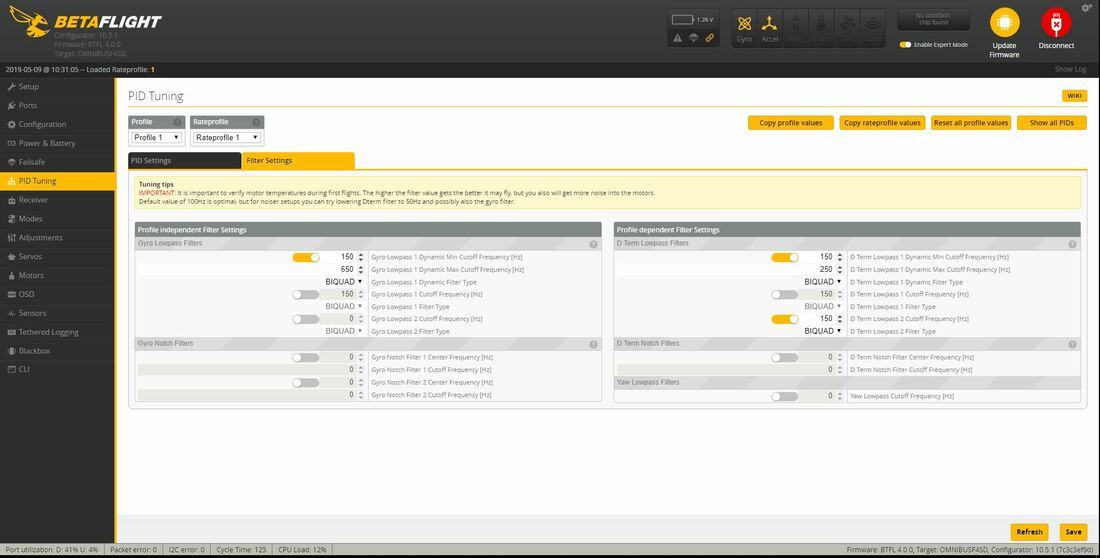
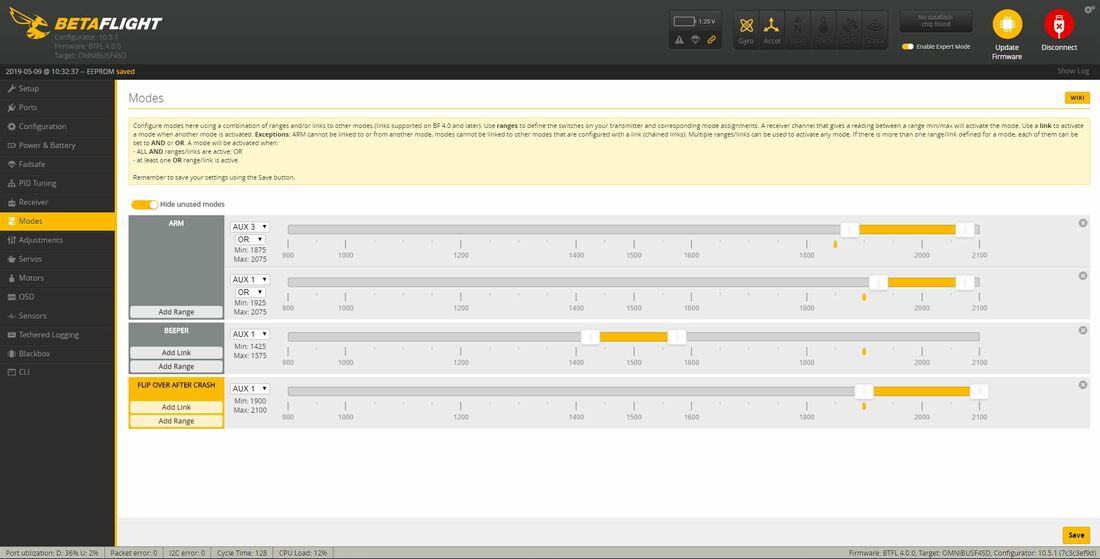
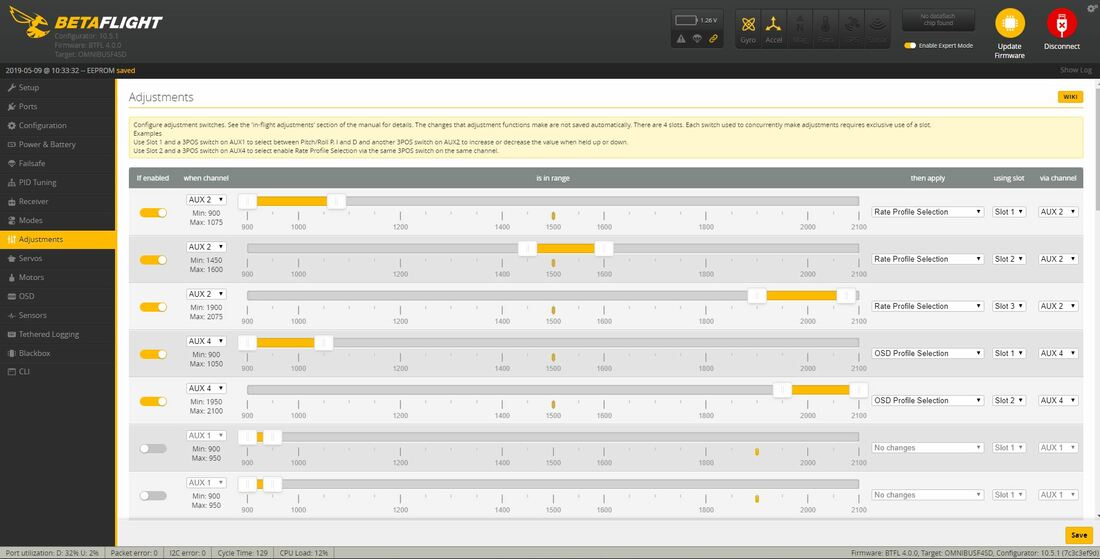
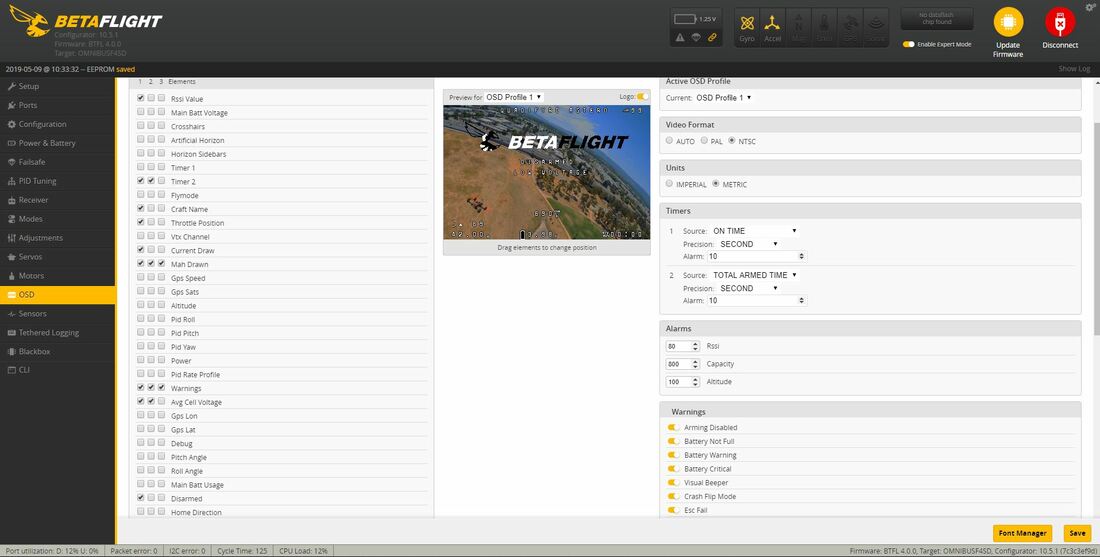
Betaflight setup
The first thing you will need to do here is update your betaflight configurator to the latest version (10.5.1 for me at time of writing) and then update your flight controller too - 4.0 at time of writing. The target as you can see below is OMNIBUSF4SD. Once I have confirmed board orientation is correct (note: it is as installed above) and motors direction is correct (I prefer props out) then we can customise. For the tune I went with the betaflight community presets as linked below; namely 3" Quad - 14xx-15xx Motors (in coordination with George Hartmann). I found this to be a great start point for PIDs and filters - much better than default which is targeted towards 5 inch.

​https://github.com/betaflight/betaflight/wiki/Community-Presets
Please see screengrabs below for customised setting or grab just use my diff file driectly below for all of my customised settings.
asteroid_4.0_diff_all.txt
File Size: 3 kb
File Type: txt
Download File

Picture
Ports set up like this. Note: I've confirmed with Iflight that this stack does not support ESC telemmetry
Picture
My config settings 1/3. Especially note board alignment (rotated 270°). 8k/8k no issue
Picture
I always run airmode, antigravity, dynamic filters.
Picture
I now recommend dshot beacon only for aux activated since loosing reception could cause motor burn
Picture
Amperage meter scale still needs a little tweaking - will update final value here as a start point
Picture
PIDs and settings here suit this quad well. There is some propwash though that could be fine-tune with D values
Picture
More PID settings - note TPA and breakpoint
Picture
Filters. This is probably more important that the PIDs and based on community presets. Motors stay cool.
Picture
My SBUS receiver settings with RSSI transmitted on channel 16 (Aux12)
Picture
My personal Aux switches - customise as you like
Picture
My personal mode switches to allow rate profile switching on a 3 way and OSD toggle on a 2 way
Picture
My OSD settings. Again a personal preference to tune to your liking. Note my camera is NTSC.
Thanks for reading, if you found this article useful please feel free to like or share, the facebook links below directly link/like this article. Links are affiliated and help me buy the bits I need to produce this type of content.
Full review has now been completed here including GPS speed runs on 3s and 4s.
0 Comments


Leave a Reply.

    Quick Access Menu

    All
    1103
    1104
    1105
    1106
    1204
    120rs
    1505
    20mm
    2207.5
    2508
    2.5 Inch
    2 Inch
    2s Whoop
    3 Inch
    4s Micro
    5 Inch
    6s
    7500kv
    7 Inch
    Action Cam
    Adapter
    AIO
    AirA
    Antenna
    Aomway Commander
    Ascent
    Asteroid
    Babyhawk R
    Battery
    Beebee 66
    Beeper
    Bench Review
    BNF
    Boldclash
    Bolt
    Brushless Whoop
    Budget
    Build
    Canopy
    Charging
    Christmas
    Cinewhoop
    Cloud 149
    CM275T
    Cobra
    Comet
    Crossfire
    Crux3
    Diatone
    Drone
    Dvr
    DYS
    Eachine
    Eachine Cvatar Cinewhoop
    Eachine Shadow Fiend
    Eachine Tyro79
    Eachine Vrd3
    Emax
    ESC
    F02h
    F3
    Fatshark
    Fatshark Attitude V5
    First Flight
    FlexRC
    Flight Controller
    Flyfox 110
    Fpv
    Frame
    Freestyle
    FRSKY
    FRSKY X-lite
    Ft5
    Full Speed
    FUS Spartan
    FUS X111 Pro
    Gemfan 2540
    Goggles
    Goggle Strap
    Happymodel
    Hawk 5
    Hawkeye Firefly 2
    HB64
    HD Footage
    HGLRC
    Hobbycool
    HobbyCool.com
    Iflight
    Isdt
    JHEMCU
    Jr Port
    Jumper T8SG
    Komori
    Lal5
    Larva-x
    Leader 120
    Leader 2.5
    Leader 3
    LED
    Long Range
    LST S2
    Micro Quad
    Mobula
    Mobula7
    Motors
    Namelessrc
    Novice-i
    Oled
    ORT Dual Shield
    PIDs
    Pnp
    Portable
    Propellers
    R249+
    Racerstar
    Radiomaster TX16s
    Ready To Fly
    Red Devil
    Review
    Roma F4
    Roma F5
    Runcam
    Runcam 5
    Rush
    Sailfly X
    Sailfly-x
    Shootout
    SKY03O
    Skystars
    Skyzone
    Smart Audio
    Snapper7
    Sweet Spot
    Taranis
    TBS Tango2
    Tinyleader
    Tiny Tank
    Tmotor
    T-motor
    Toothpick
    Toothpick Pro
    TP3
    Transmitter
    Trashcan
    Tutorial
    Twig
    TX01
    Upgrade
    V1s
    Vtx
    Whoop
    X120
    X Lite
    X-lite
    ZJWRC 115X

Thanks for visiting QuadifyRC.com Follow us on facebook below to get all the latest updates
  • RC Cars
  • Car of the Month
  • Quad Reviews
  • COUPONS AND DISCOUNTS
  • About & Contact