|
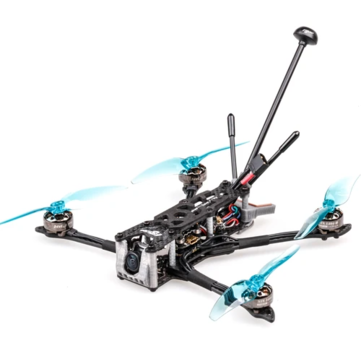
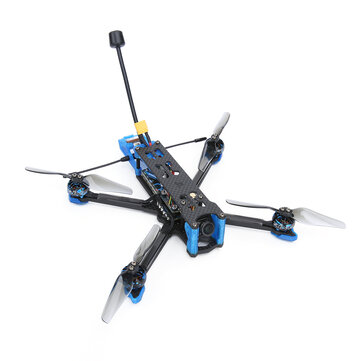
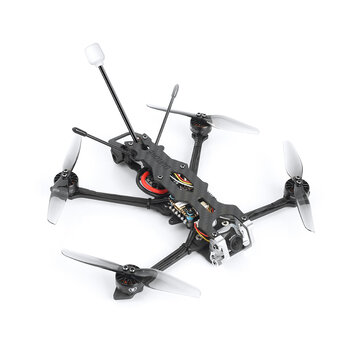
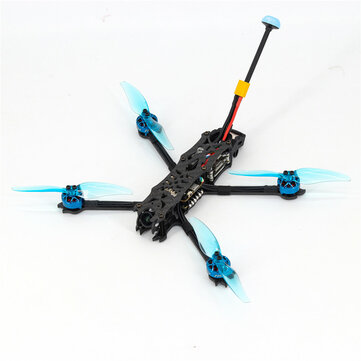
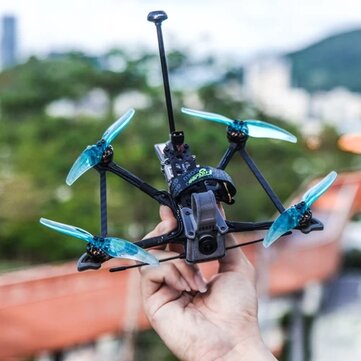
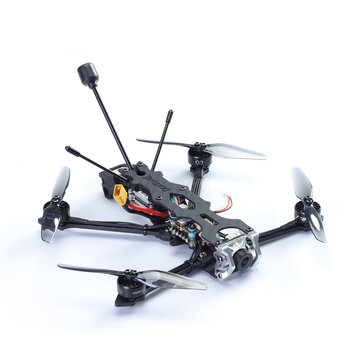
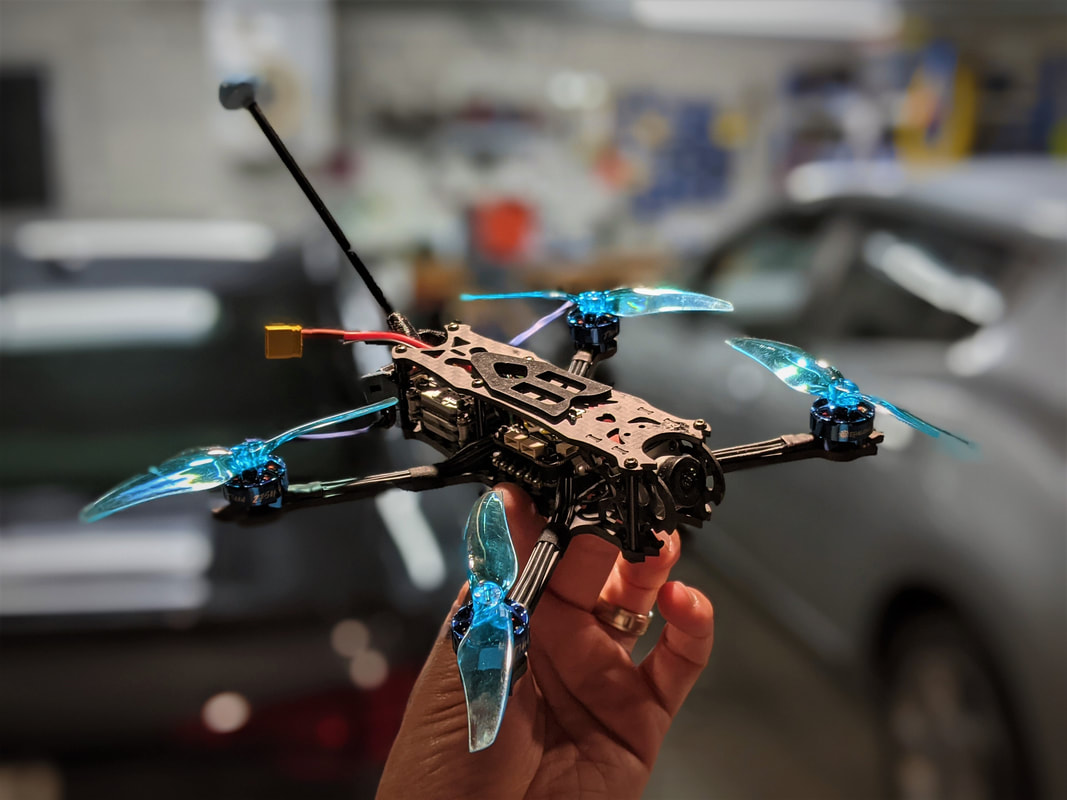
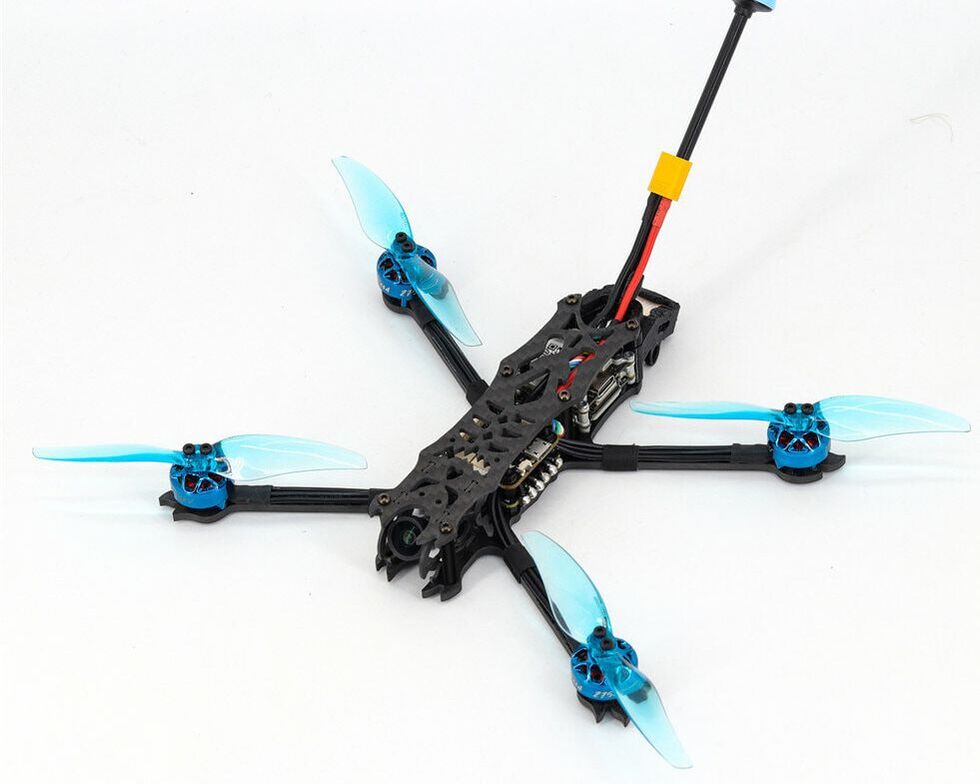
The Eachine Shadow Fiend is a lightweight 4 inch quadcopter designed for long range flights. This version I have reviewed comes with the CADDX vista which is for the DJI HD FPV system. It is also available with the CADDX Nebula and analogue versions. 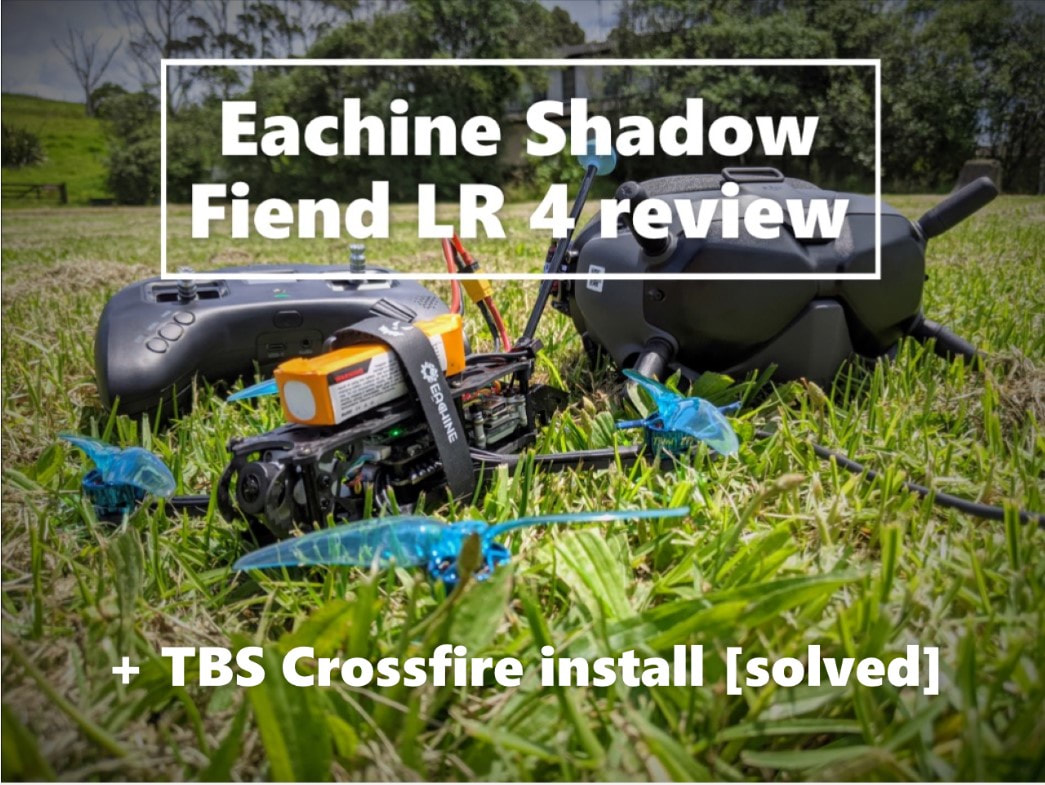 Like with all products they make, the Eachine brand is never the first to invent or innovate a category but they are more of a "me too brand" where they look to provide a comparable product to the market leader at a lower price. I'll be very clear here and say that Eachine is a brand only and not a manufacturer. Thus they can have very good products and very poor product depending on which manufacturer is used. Make no mistake though, this category was made possible by the development work completed by Dave C and then picked up with his blessing by Flywoo. Check out Dave C's excellent channel Youtube, I have been a long time fan. The Eachine Shadow Fiend is a 4 in long range lightweight quadcopter designed for endurance and effciciency rather than power for racing or freestyle and is heavily inspired but the Flywoo Explorer 4 LR, the Iflight Chimaera LR 4 and the Diatone Roma F4. All are based around a lightweight deadcat or squashed x frame, lightweight electronics, efficient 1404 motors that range from 2750 - 3500kv with lightweight 4 inch biblade props. Additionally all are available in digital FPV and analogue versions as you can see below: At time of writing I have a 15% discount code for the digital versions of the Eachine Shadow Fiend 4" LR for the first 15 people making the Nebula version $238 and the Vista version $255 - only $100 more that the Vista itself. Code and links in the conclusion at the end.
I think this is a wonderful category because long range flight was previously limited by large, heavy and expensive 7 inch rigs which although lovely to fly, can be very expensive to lose on a failed long range run. Yes these smaller rigs are more susceptible to wind more than their larger and more powerful brothers but the lower cost and the bind and fly nature of these 4 inch version has popularized this area of FPV that was previously a little mysterious and hard to attain. On paper the Eachine Shadow Fiend is very well specced so let's take a closer look:
Setup - Control Link If you are looking to use the DJI remote then you are all set up and good to go - the quad is wired with ports configured for SBUS control via the vista unit. If you wish to run FRSKY with SBUS simply desolder the vista SBUS link and wire in your FRSKY receiver instead. HOWEVER... the fairly commonly accepted standard for long range control link is Cross fire and the included instruction sheet on the product page is rubbish since it deactivates GPS in favour of crossfire which is simply unacceptably. The good news is I have found a work around to have your cake and eat it too so read on... 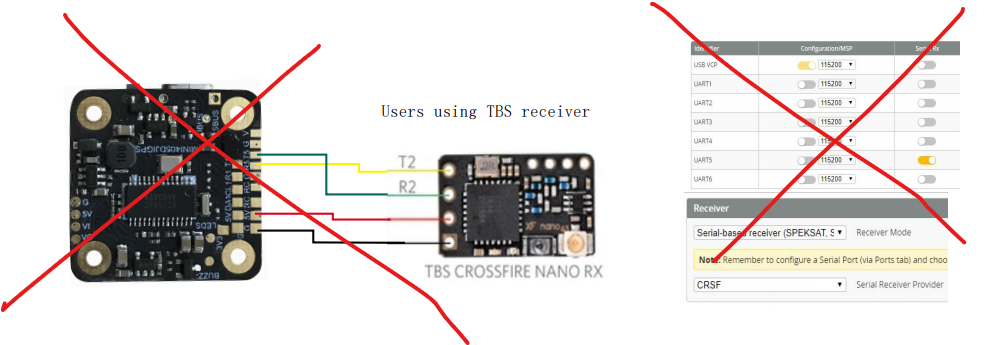 Crossfire solution for the Eachine Shadow Fiend
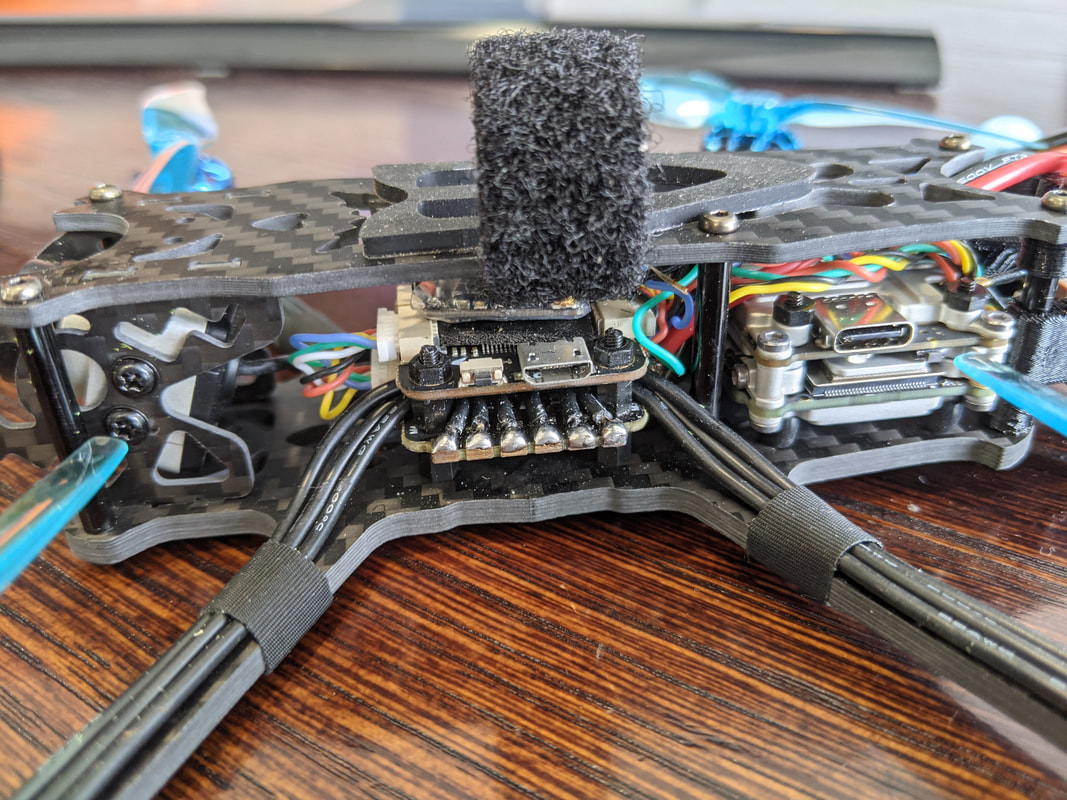
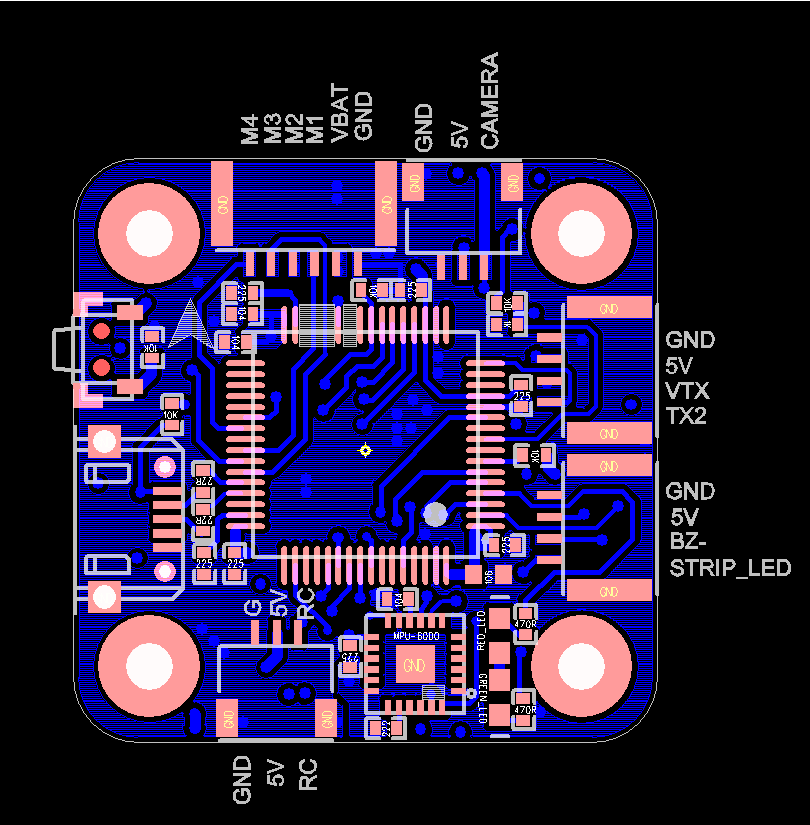
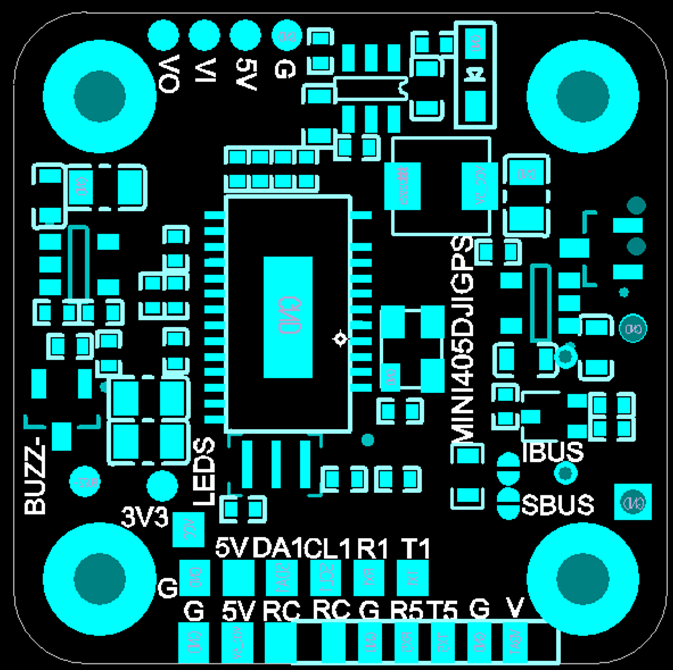
Although the software supports up to 6 UARTS there are actually only 2.5 available via pads and 2 of these are already taken up by Vista and GPS. The only remaining UART is RX only and comes out of the factory as inverted i.e. suitable for FRSKY SBUS only. After a little more discussion with my Eachine contact I received a clearer pinout diagram as below and figured out a solution.
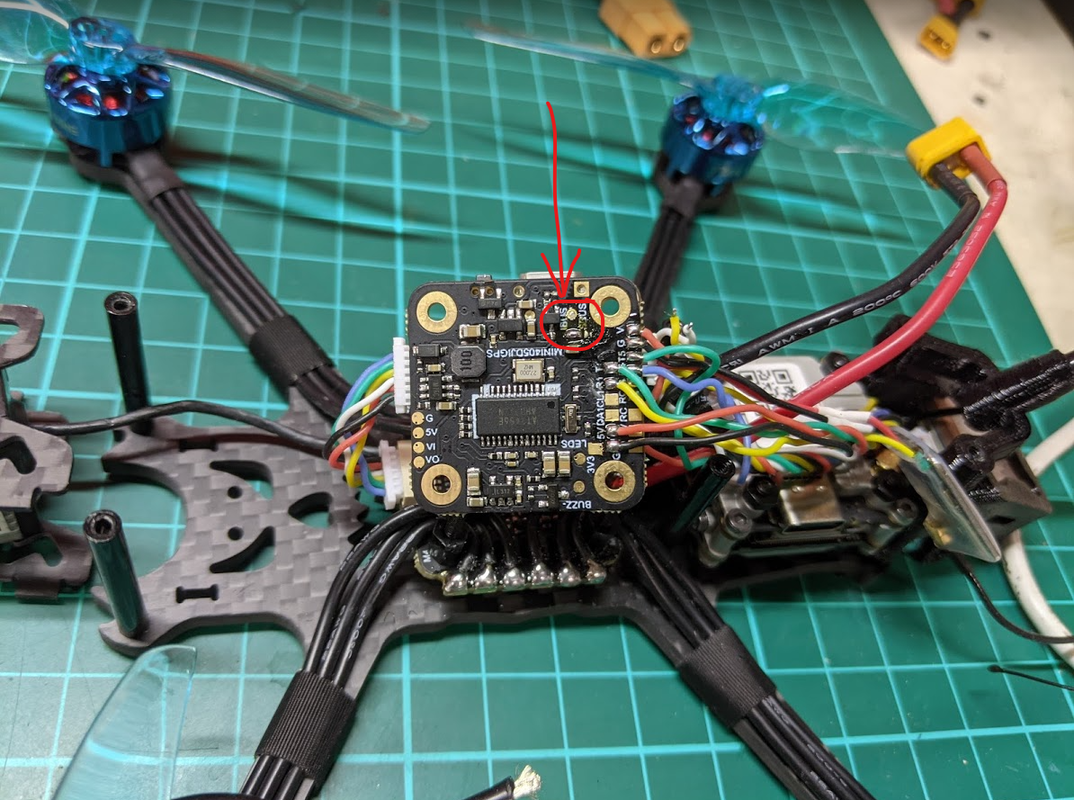
First, remove the solder that bridges the SBUS and centre pad (RC output) then solder bridge the ibus pad and the centre pad. This will mean that the RC pad will pass the uninverted ibus signal rather than the inverted SBUS signal. The IBUS signal (which is a regular UART RX) is what that crossfire receiver needs to connect in the faster and more effective CSRF mode. There is no corresponding TX port so you cannot use telemetry but with OSD this is not a big deal since all is reported in the goggles and retained on DVR.
Note: you can actually run a crossfire receiver in SBUS mode but it is inferior to running in CSRF. If you do wish to go down that path, then here are the instructions for that: www.team-blacksheep.com/tbs-crossfire-manual.pdf Setup - ESC Before I took my first flight I knew I wanted to flash the latest firmware to the ESC for two reasons:
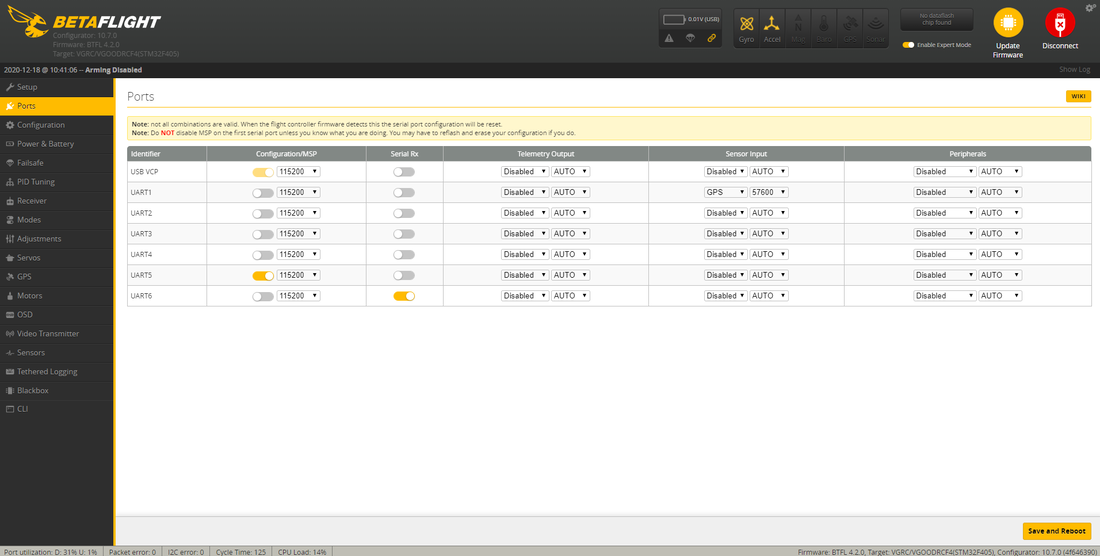
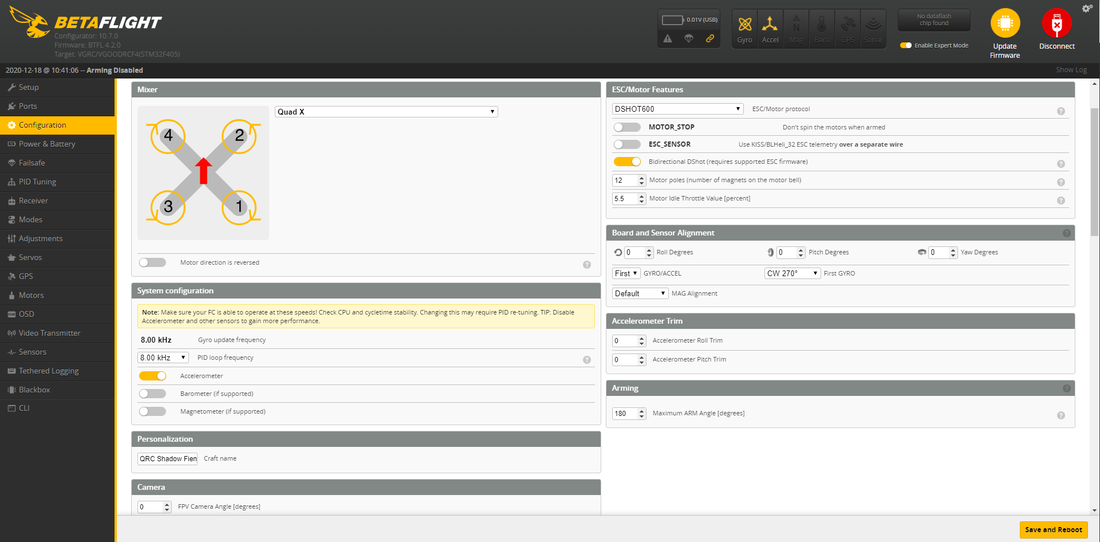
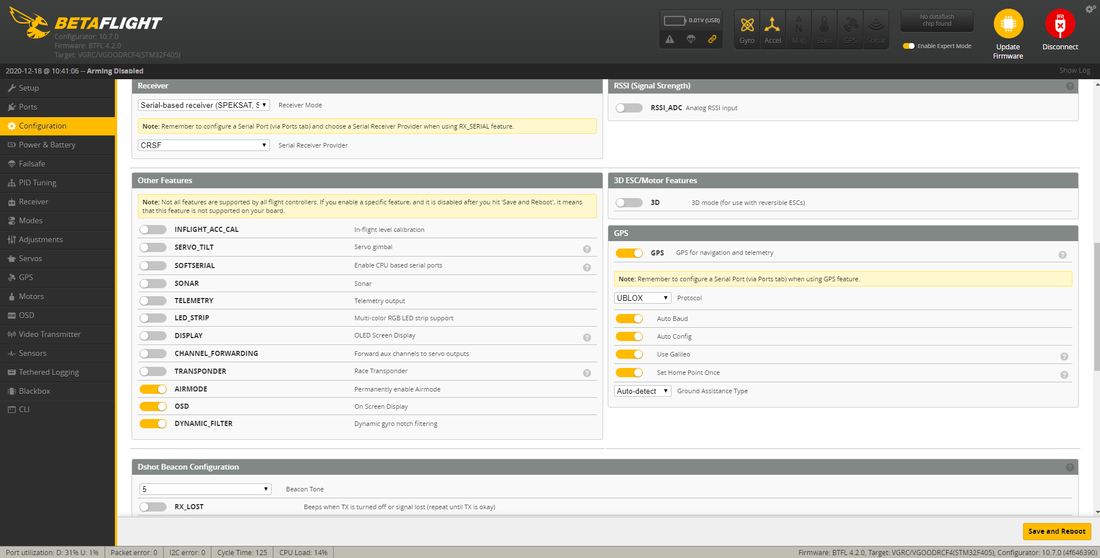
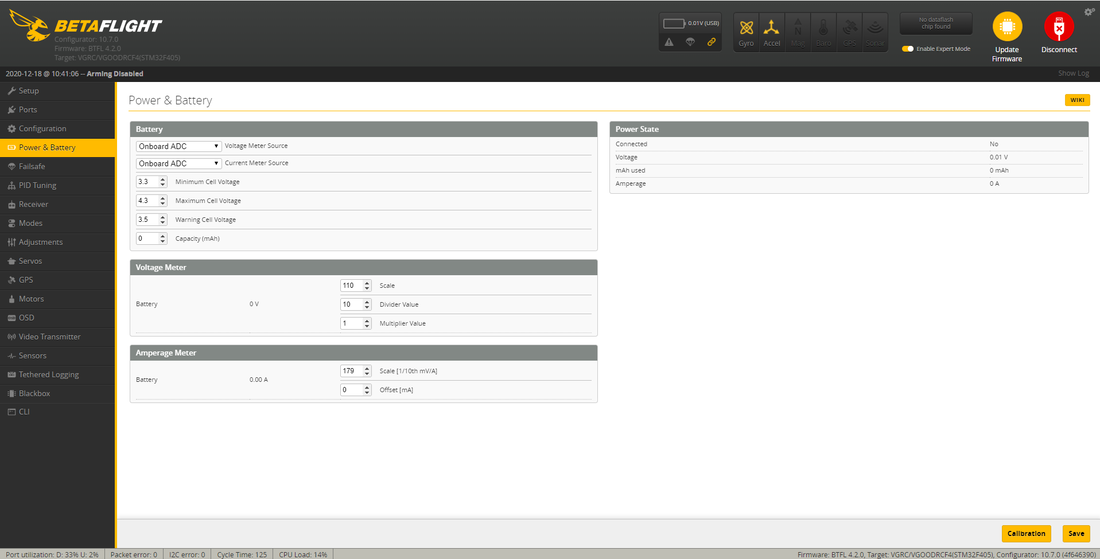
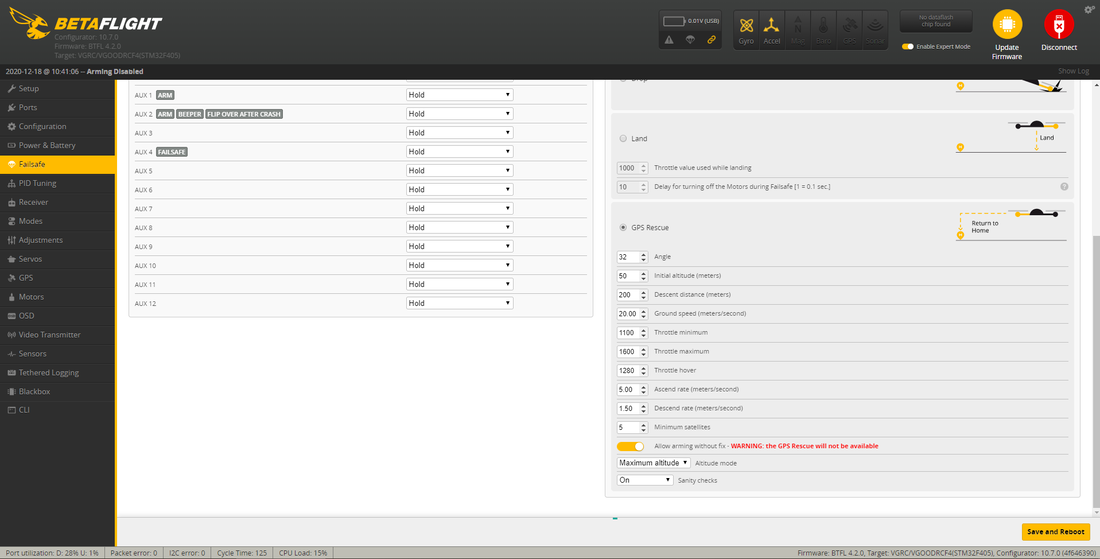
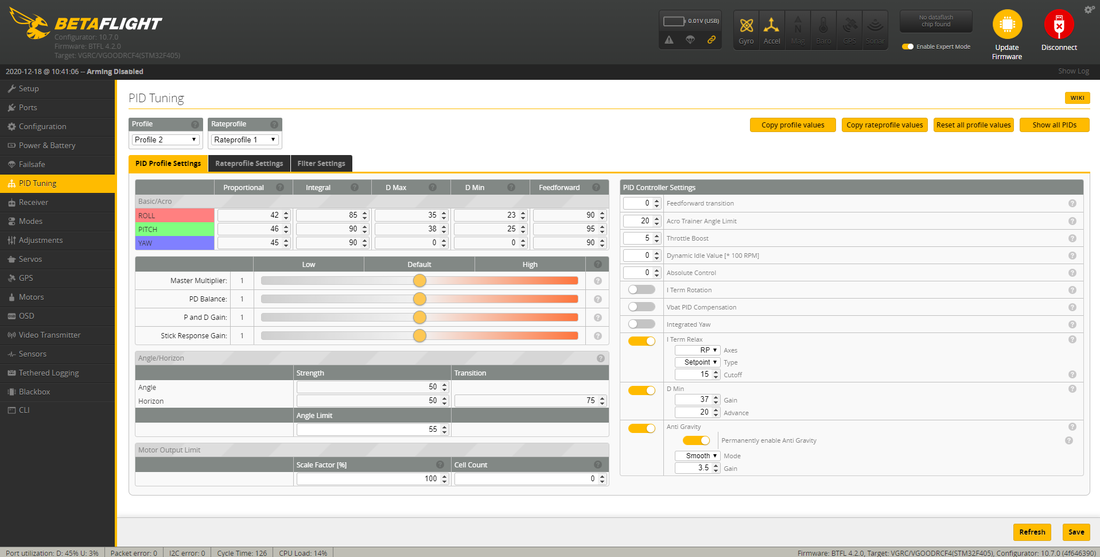
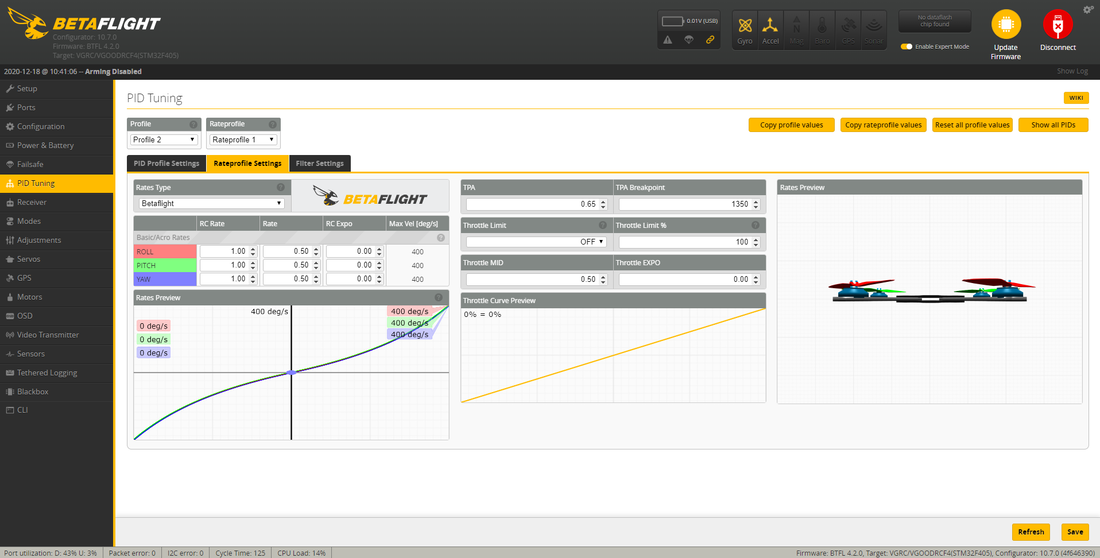
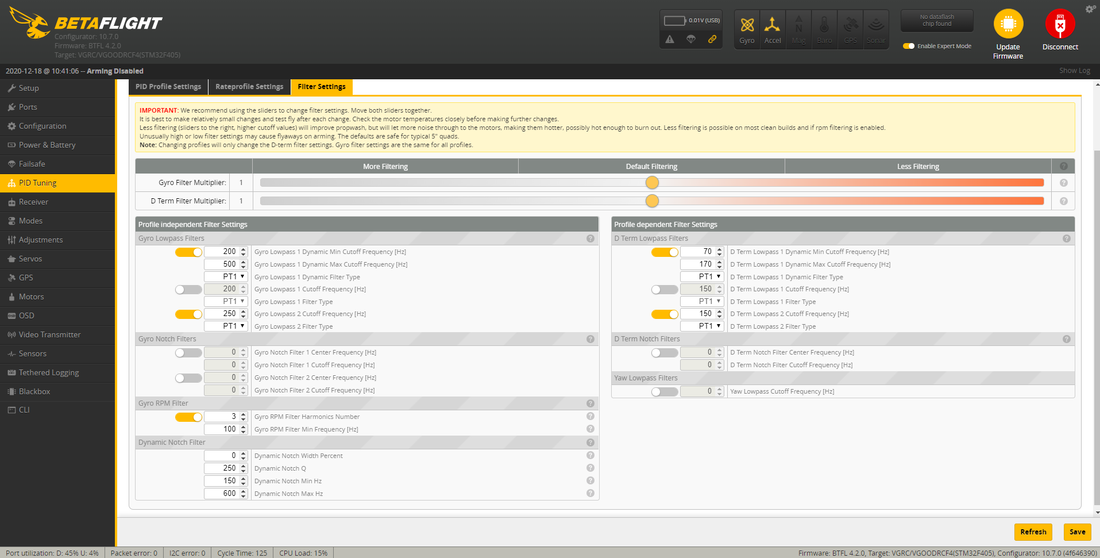
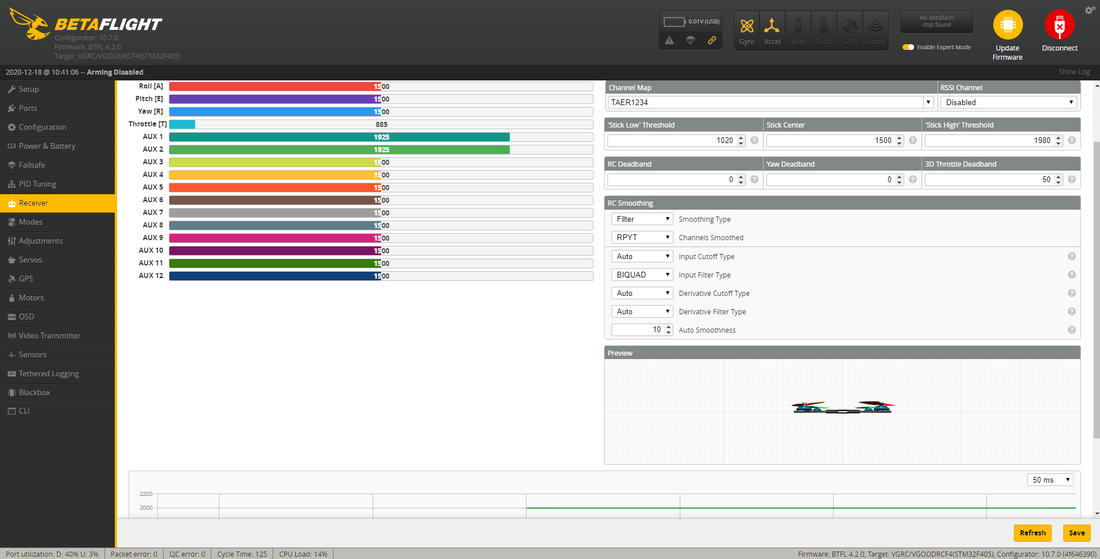
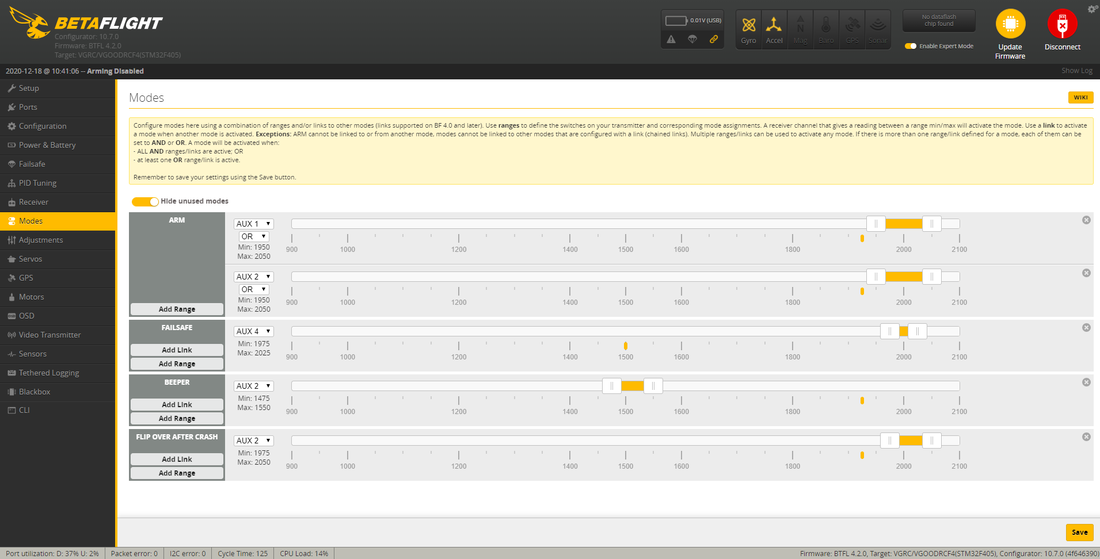
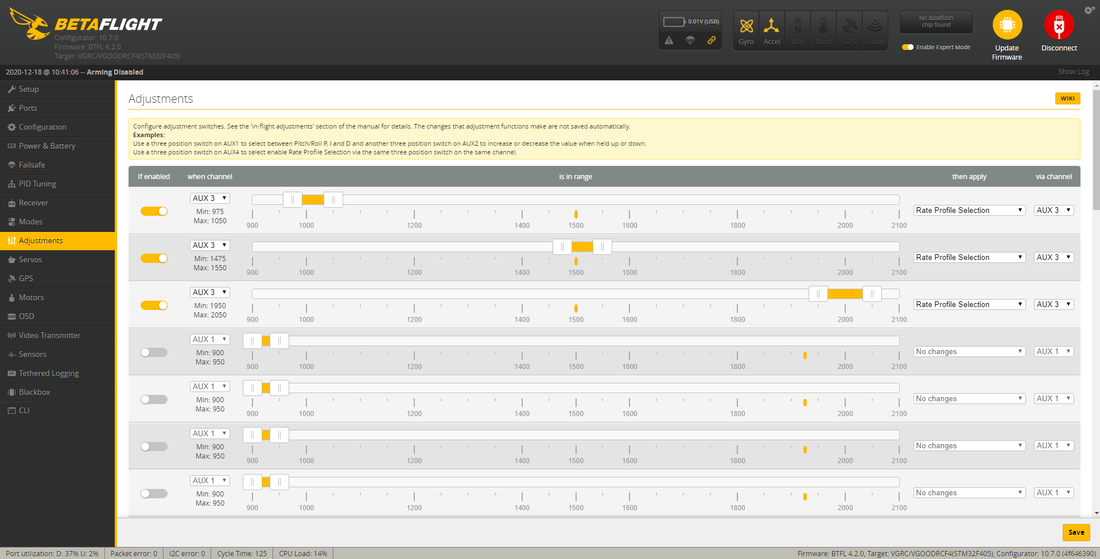
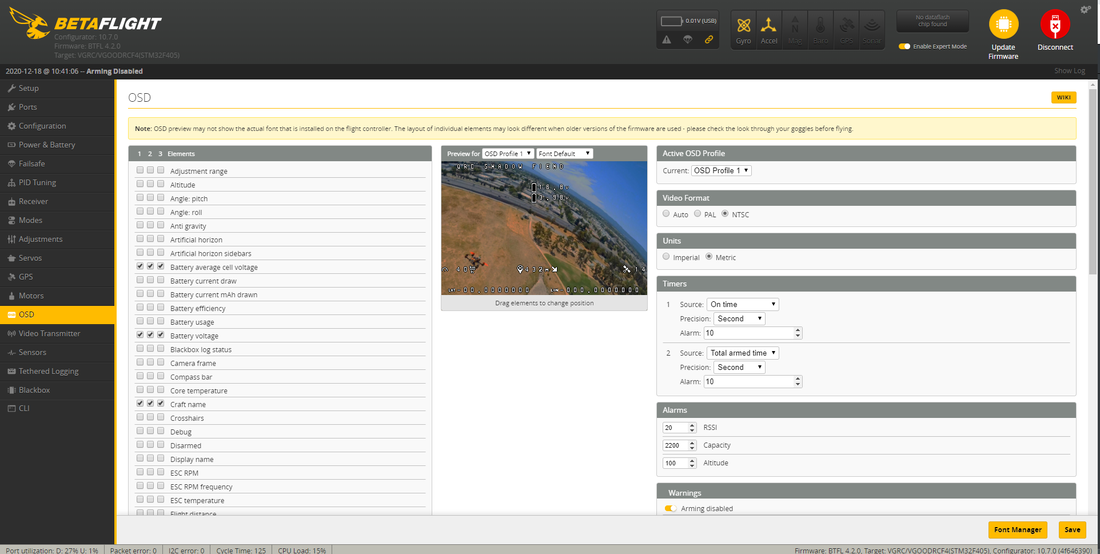
Setup - Betaflight This was more tricky than it needed to be so hopefully you can benefit from my learnings. On my initial flight (after arming) I confirmed pitch, roll and yaw were doing the right things before throttling up - yep all good. On throttling up I could only bunny-hop... a very short burst of throttle followed by a cutout. I can only assume this is some sort of runaway protection as a result of vibration causing a positive feedback loop with the gyro. Anyway this was a good excuse to then run my own settings which I've detailed below in screenshots or can be downloaded as a diff file if you wish.
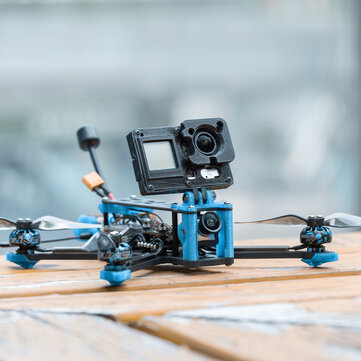
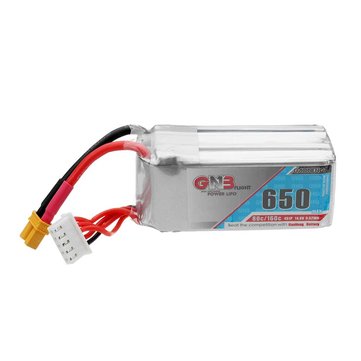
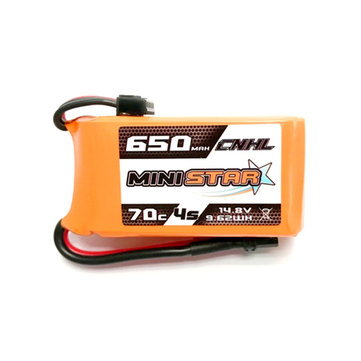
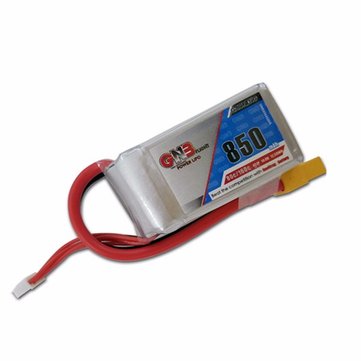
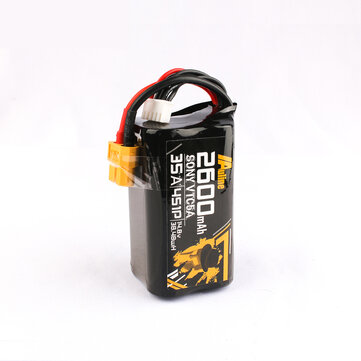
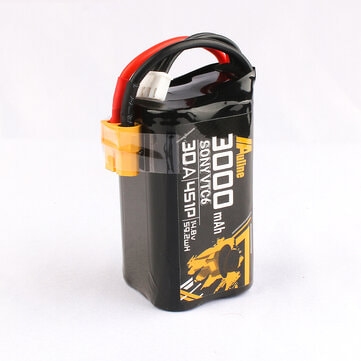
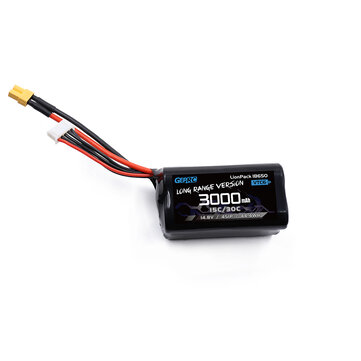
Review - video Not much to say here other than it is typical Caddx Vista which on 50Mb/s mode is just beautiful. I strongly recommend getting the full vista version with DJI camera over the nebula version because it is a superior image for just a small cost and weight penalty. I'm glad the Shadow Fiend is being offered with both variant though because the Diatone Roma F4 digital version for example is Nebula only. Review - flight performance Flight performance is typical of this class which is nothing to write home about since they are all very similarly specced. If you are new to long range it kinda feels like flying a 6s 5 inch quad on 4s for power but with a less predictable throttle - throttle response is more like a toothpick which compared to a 5 inch is not very linear. Pretty damning description for a racer or freestyle quad but this is definitely not designed with that in mind - it is designed for smooth, long range cruising which this does very well. The smallish lightweight motors help smooth out the impact of light weightiness - typical of what we usually find on a toothpick build like this. Review - efficiency and batteries Efficiency is what this quad is really about and it certainly delivers. I'd recommend starting with a conventional 650mah or 850mah 4s lipo pack if weight as a concern as both of these sizes will come in at under 250g total and offer up to 10 minutes of flight time with 4s 650mah and about 12 minutes of flight time with the 850mah. Personally I have been using 4s 650mah because 10 minutes is plenty for the type of flying I've been doing with this. My recommendation is for GNB or CNHL packs for performance and value. If you really want to max out flight time though you can switch to a Li Ion which can't deliver as much current (not that you need it on this quad) but have a much higher energy desnity. You will of course go well over the 250g mark (up to about 350g actually) but you will be able to go beyond 30 minutes of flight which is almost obscene. Make sure you charge those goggles and transmitters! AU line have made a good name for themselves with the packs below. GepRC are also offering a pack based on the recommended vtc6 cells. Click on the image below to see which is cheapest at the time
I'm not going to post my boring DVR here, lots of the youtube guys have vastly superior editing skills to me so I won't bore you with my efforts. Given this is a bind and fly there is nothing I would offer differently.  Conclusion Dave C has created a wonderful new class of quads that allow us to go for long range flights at minimum possible cost and hassle for the quad and for parts. There is a lot of competition but as usual Eachine comes in with a similarly specced product at a slightly lower cost with the Eachine Shadow Fiend LR 4. As usual with Eachine though there are some kinks that need ironing out and hopefully the guides I've included in this review will help you achieve that. You'll then be rewarded with a very capable quadcopter for smooth and efficient flight capable of travelling long distances. Like all quads in this class though don't expect very high speed nor extreme acro ability but with that in mind this will bring a lot of enjoyment. If you're already invested in the DJI HD FPV system I can strongly recommend the full vista version of the Eachine Shadow Fiend but if not the analogue version is very competitively priced at around $150. Speaking of price I have and exclusive coupon available for both of the digital version - $238 for the Nebula HD version and $255 for the full Vista version using code BGNimmaLR15. It's worth bearing in mind that this is only $100 more than the vista units themselves.... Thanks for reading, if you found this article useful please feel free to like or share, the facebook links below directly link/like this article. I don't believe in asking for money by patreon nor by paypal but if you do wish to help me, the affiliated links in these articles help me buy the bits and services I need to produce this type of content. If you are looking for RC cars, quads or parts check out my coupons and discounts page which I keep updated with only the RC cars, parts and quads I like at a proper discount
24 Comments
rcschim
29/12/2020 11:00:53 pm
Thanks for that awesome guide. I've just been searching for a FC pinout diagram to solve the issue how to connect CF. If I understood correct, I can use the JST connector (yea!) if I setup my CF RX to sbus mode (which I dont care too much if CRSF protocol or SBUS to be honest, some latency on a cruiser shouldnt be even noticeable, right?).
QuadifyRC
29/12/2020 11:31:03 pm
Hey Mario! Love your channel mate, I'm a bit of an RCSCHIM fanboy from way back ;)
Rcschim
5/1/2021 09:46:00 am
Thanks man,
David
12/1/2021 03:47:34 pm
Is there a way to hook up crossfire to the LED STRIP plug and remap betaflight to use all 4 pins and get CRSF and telemetry? I happen to have a 4 pin plug that plugs into the LED STRIP, but not one that plugs into the 3 pin plug.
rcschim
12/1/2021 07:59:19 pm
Hey David, on my review I got a comment from "Drone Pilot" (a very knowledgeable guy!) who suggested exactly what you're asking for:
QuadifyRC
15/1/2021 09:36:38 pm
Solid feedback. I thought you could only softserial via the LED strip (which isn't fast enough for a receiver) but if you can assign a full UART then bonus. I rely on OSD rather than telemmetry so not having a TX pad is not a big loss (for me).
ImpFPV
26/5/2021 11:25:45 pm
"I need to find a Drones Anonymous Group like Alcoholics Anonymous because this is a problem I think... lol""
Daniele
11/5/2021 11:28:01 pm
to solve the problem of wrong voltage I updated the firmware of the Shadow Fiend FC to the latest version.
Daniele
12/5/2021 01:57:02 am
...Version:Caddx Vista 13/4/2022 10:16:16 pm
https://kopterheld.tv/2021/06/21/eachine-shadow-fiend-lr/
Josef
17/5/2021 12:11:34 am
Hi guys, does anyone know whether it's possible to do an upgrade of this FC via Betaflight? Thanks. :)
Daniele
18/5/2021 12:48:26 am
Hello,
Daniele
18/5/2021 12:48:45 am
Hello,
Lorenz
19/5/2021 07:10:13 am
Hi Danielle, just got my shadow fiend. did a backup out of the box (txt), cli did not save everything - might work for you. Do you still need it? In any case: https://drive.google.com/file/d/1yNC2qrGVXfhWp3QHOkeZi943IFDOAYwR/view?usp=sharing
Lorenz
19/5/2021 07:13:05 am
Great work here on QUADIFYRC!
Daniele
4/6/2021 09:09:16 pm
Hi Lorenz,
Lorenz
5/6/2021 10:44:26 pm
Solved my problem. It turned out that my TBS nano RX was broken (voltage regulator defective). With the new reciever the manual above with the IBUS CRSF trick worked like a charm. Now the only thing that is bothering me is that there is no telemetry. I would like to have the gps coordinates sent to my taranis for logging in case of a lost signal/missing copter.... If anybody got the remapping of a TX-Port or softserial solution working, let me know.
Andreas
5/7/2021 11:01:12 pm
Hi, on the analog version crossfire (elrs same pins) works fine on tx/rx5
Rob
26/7/2021 04:48:03 am
The JST connector with pins labelled, GND, 5V, VTX, TX2. Is the VTX pin Video Out? And is that the only pin for TX2 on the board?
Fcustoms
17/9/2021 04:32:07 am
Crossfire or ExpressLRS EP1 can be soldered to RX (RX6) and LEDS Pad (TX6). The bridge must be re-soldered from SBUS to iBUS. Be sure to offer the two cables soldered off from the Vista module (SBUS, GND).
jok250
2/10/2021 09:04:32 pm
Just in case someone is interested, Frsky F.port works straightaway by just wiring the s.port receiver pint with the SBUS pin in the FC. There is no need to use any inverter since the FC has one built in already. You only have to choose Fport in betaflight configuration.
Impfpv
29/11/2021 09:28:03 pm
Hi,
Andrii Lys
23/8/2022 11:43:11 pm
Hello Leave a Reply. |
||||||||||||||||||||||||||||||||||||||||||


Thanks for visiting QuadifyRC.com Follow us on facebook below to get all the latest updates