QUADIFYRC MODS AND REVIEWS
  • RC Cars
  • Car of the Month
  • Quad Reviews
  • Quad Mods
  • COUPONS AND DISCOUNTS
  • Long Range
  • About & Contact

TIPS and TRICKS

USB charging for the Taranis Xlite: FullSpeed X-Charger Board install tutorial

7/4/2019

11 Comments

 
Picture
With USB charging I will never be taking those funny batteries out again
The X-lite has been a very popular controller ever since launch (you can see why in my review here). For me there were two key shortcomings:
  1. It used a proprietary docking port meaning you couldn't fit the crossfire module. This is since been solved with a simple adapter that I reviewed
  2. There was no onboard charger to charge the unique 18500 sized batteries.
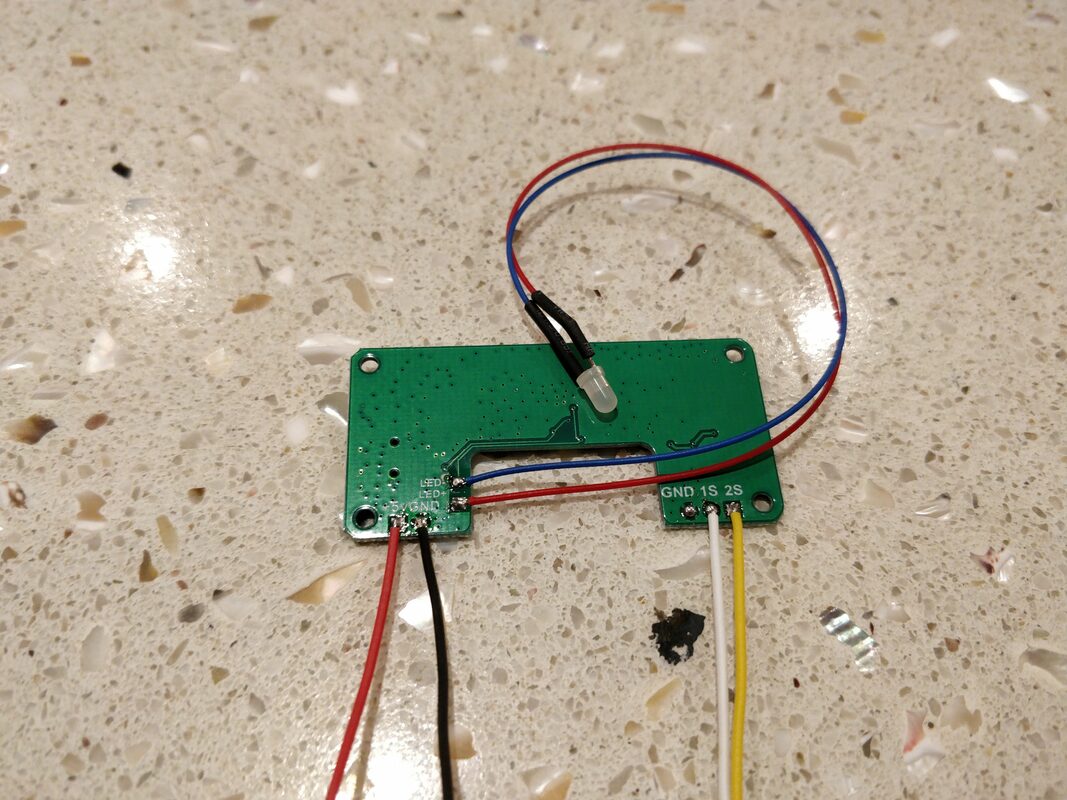
In order to solve the charging issue FullspeedRC (yes the same ones that launched the Leader series of micro quads) have released a simple board that allows the batteries to be balance charge using the existing USB port. It can be bought for around $10 at the following retailers:
​
  • Xlite Charging Module @ FullspeedRC.com
  • Xlite Charging Module @ Banggood
  • Xlite Charging Module @ Gearbest
​
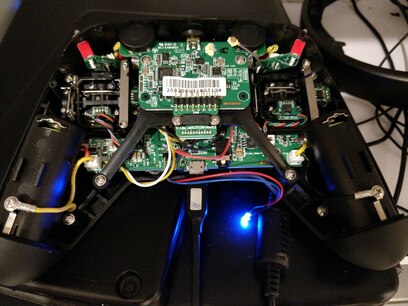
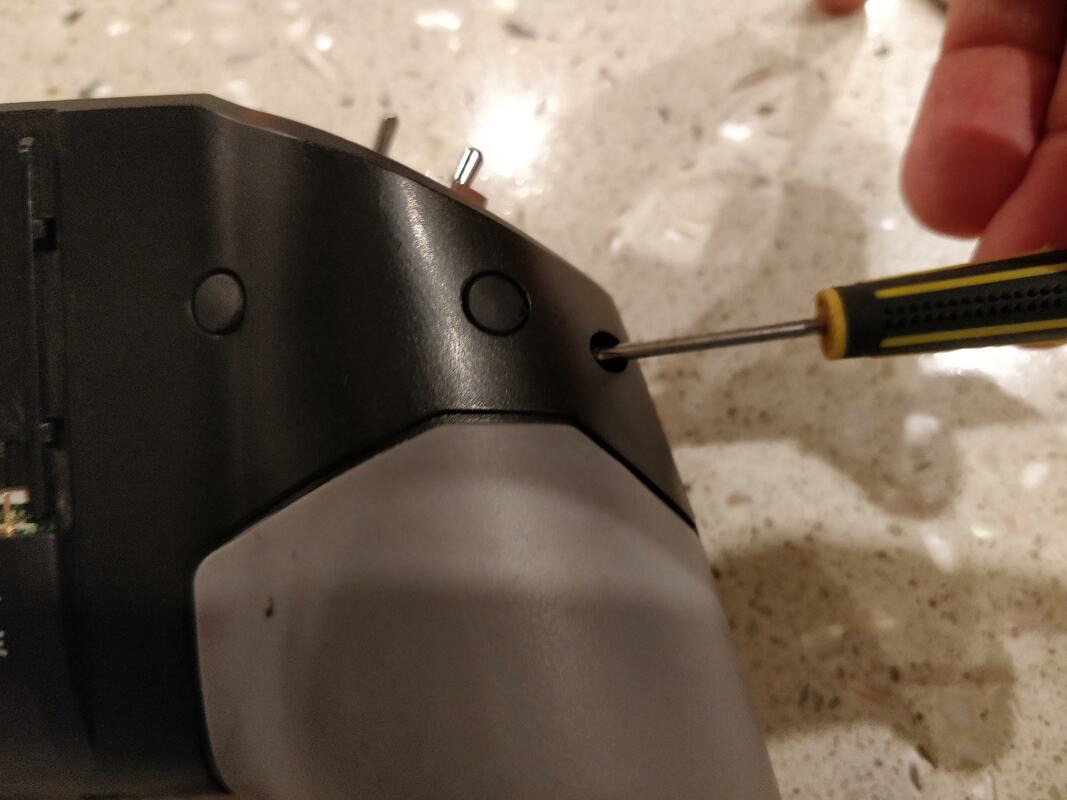
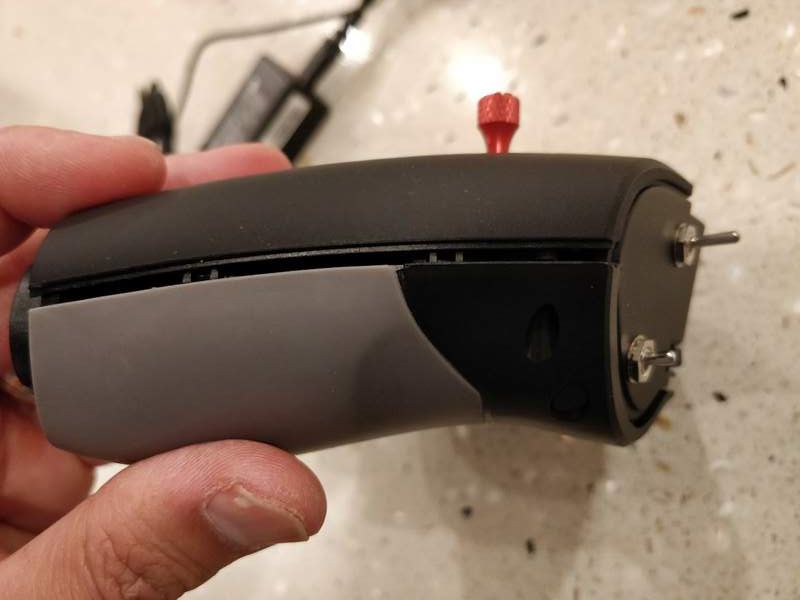
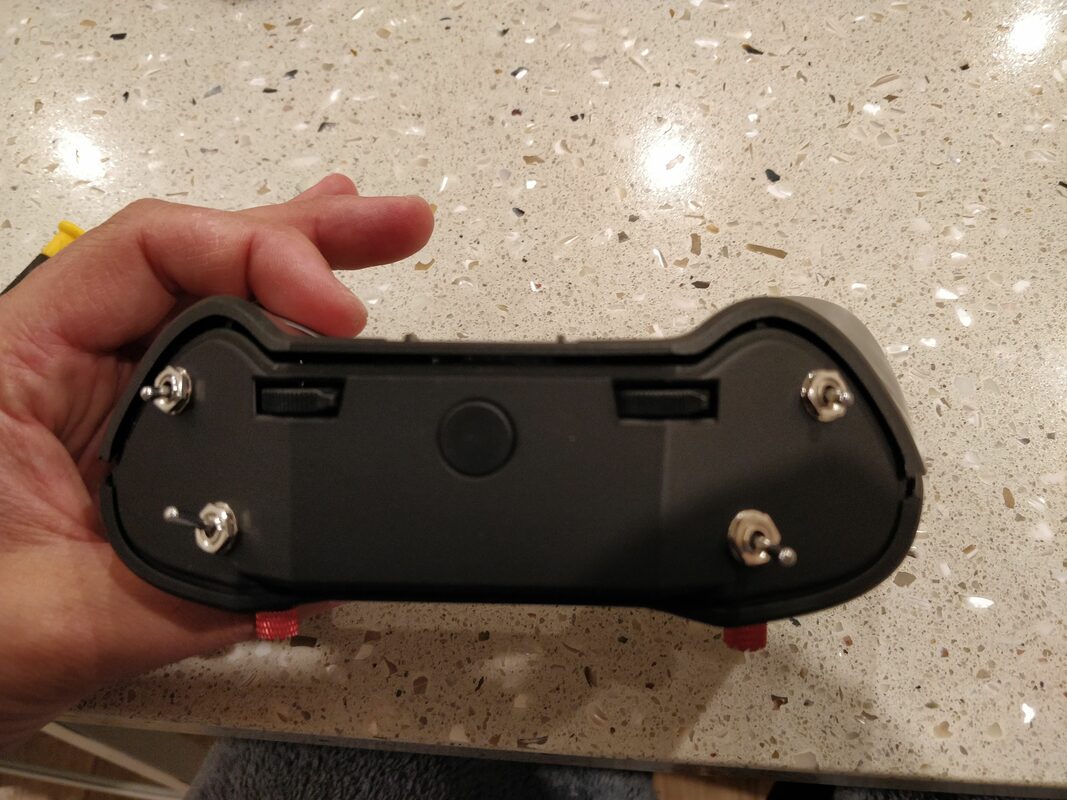
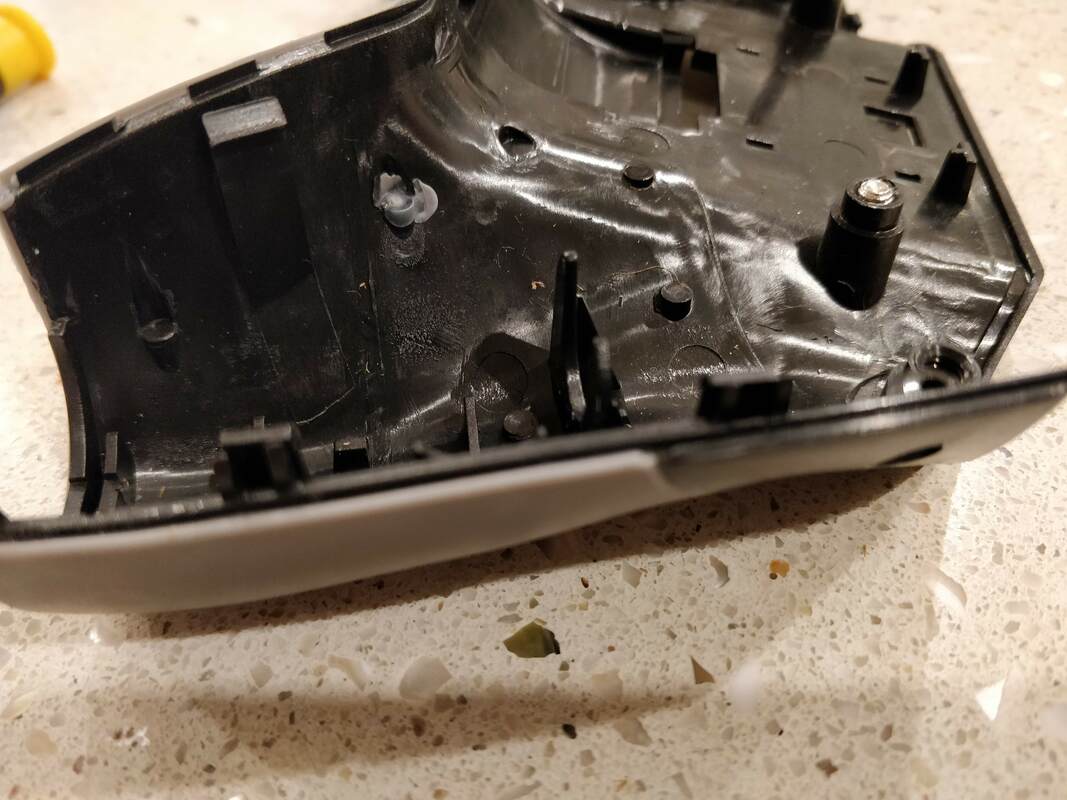
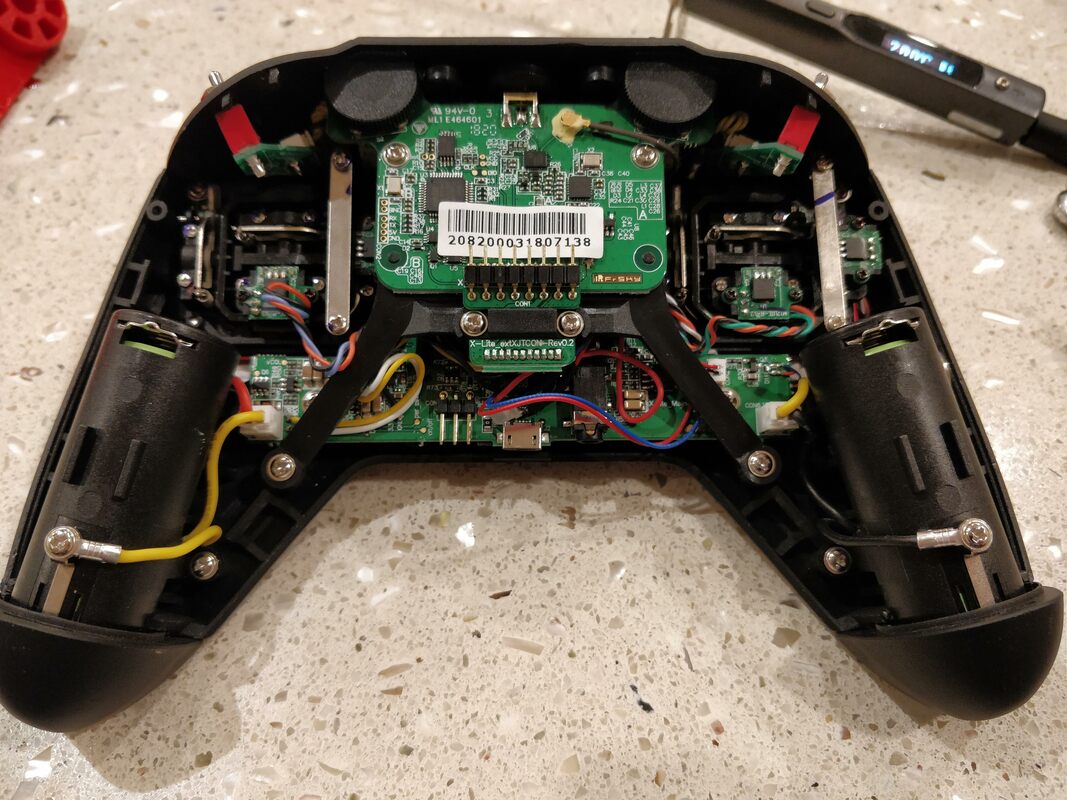
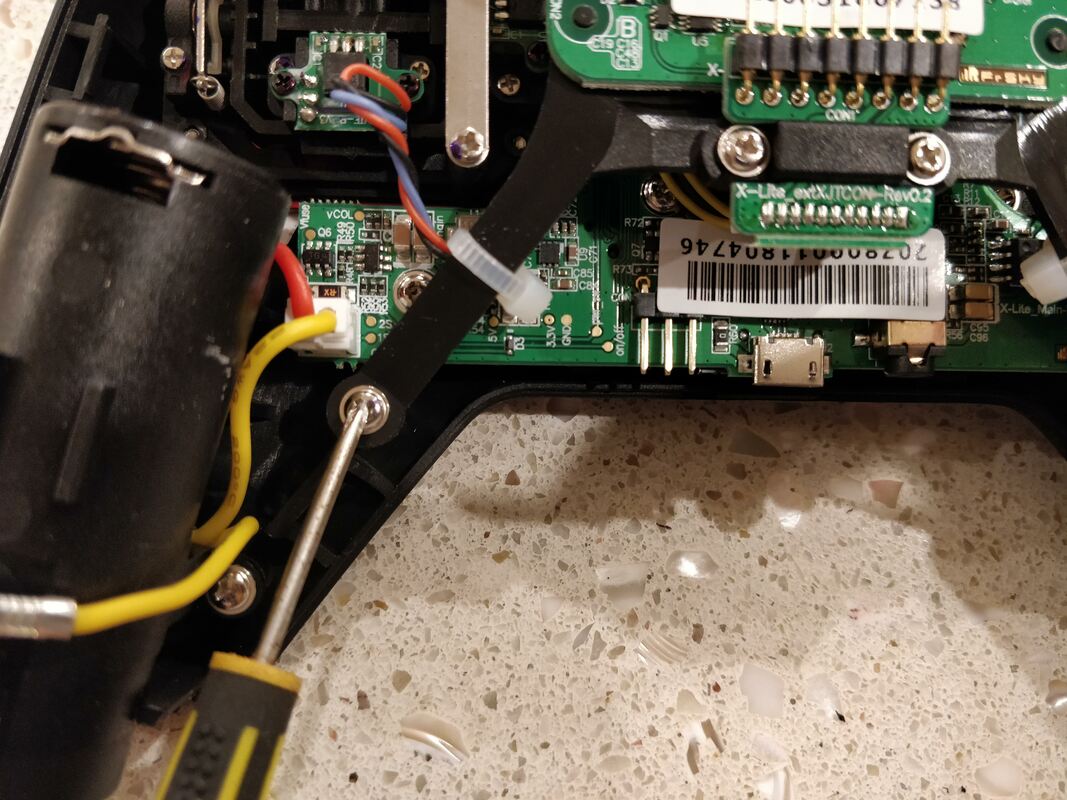
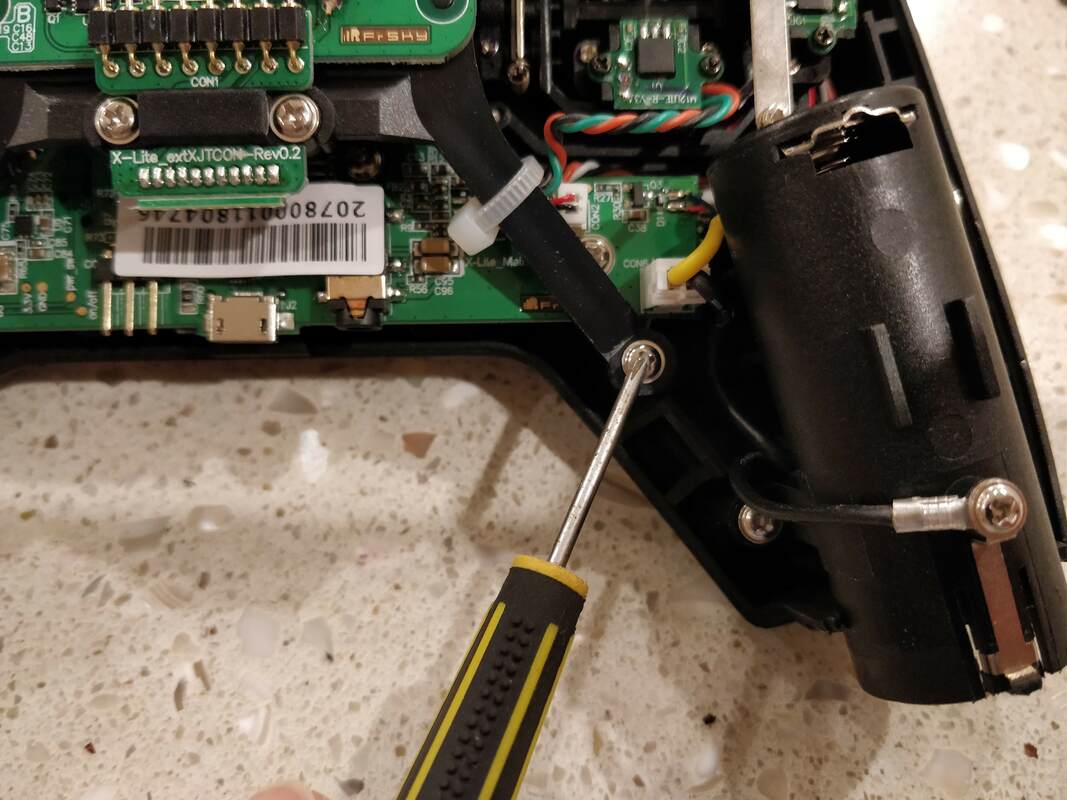
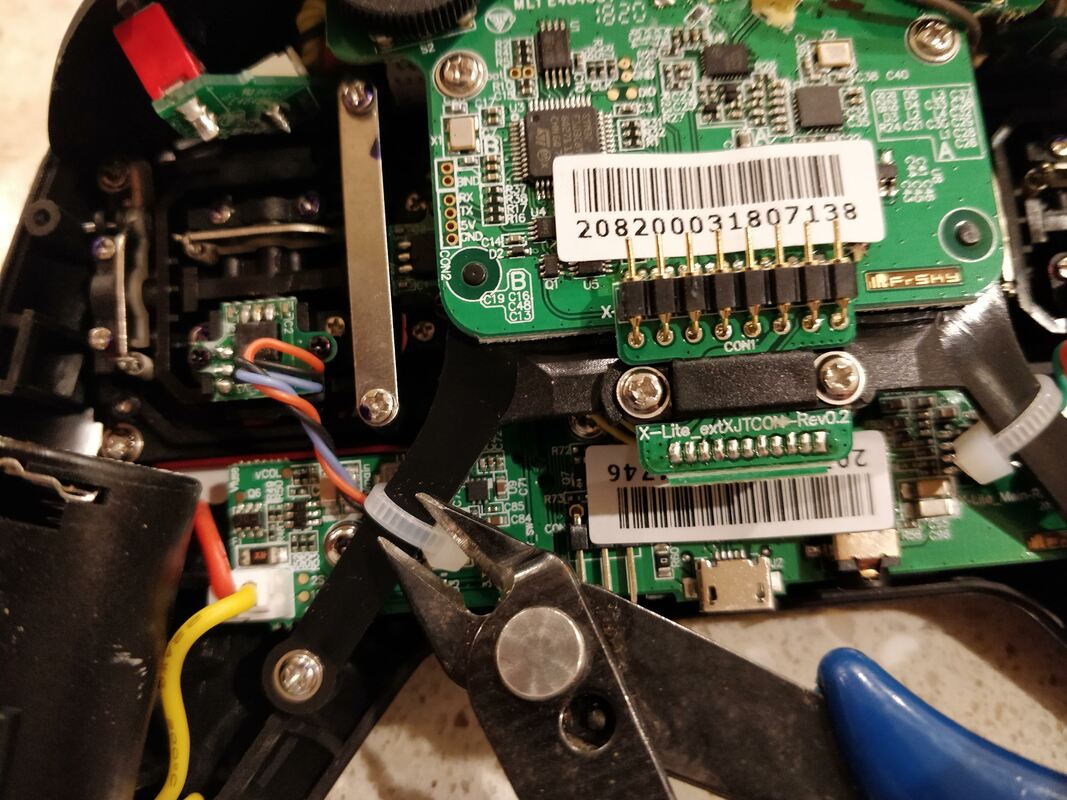
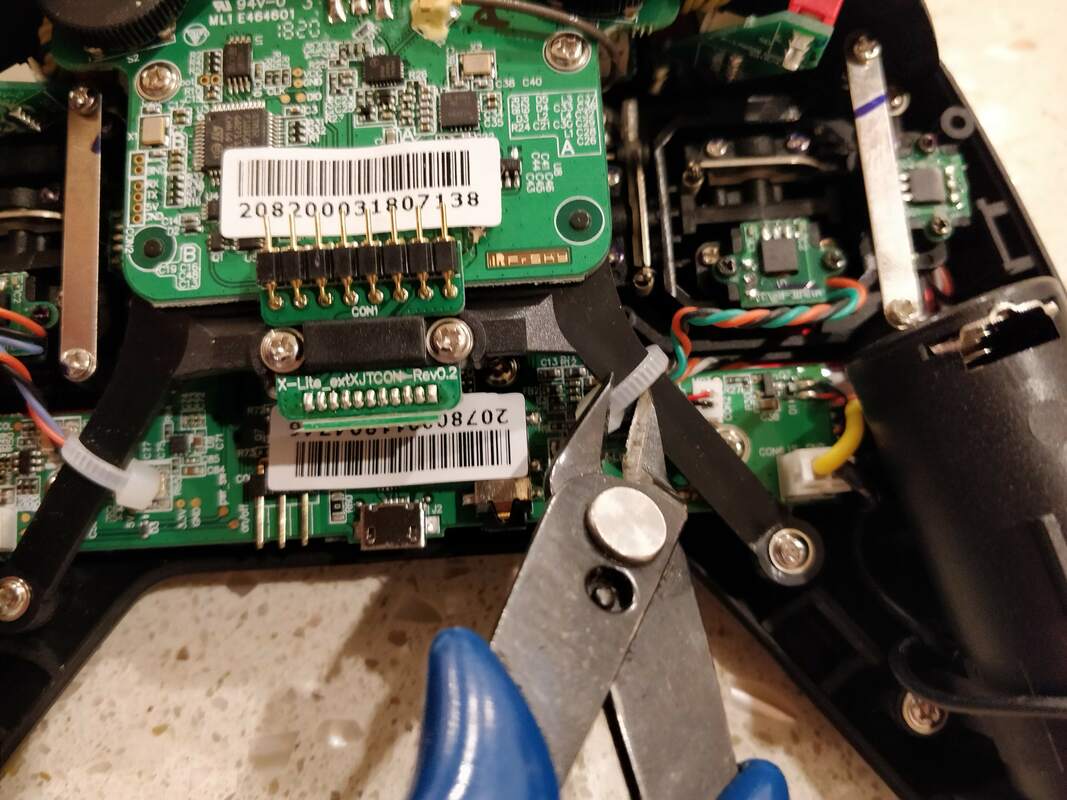
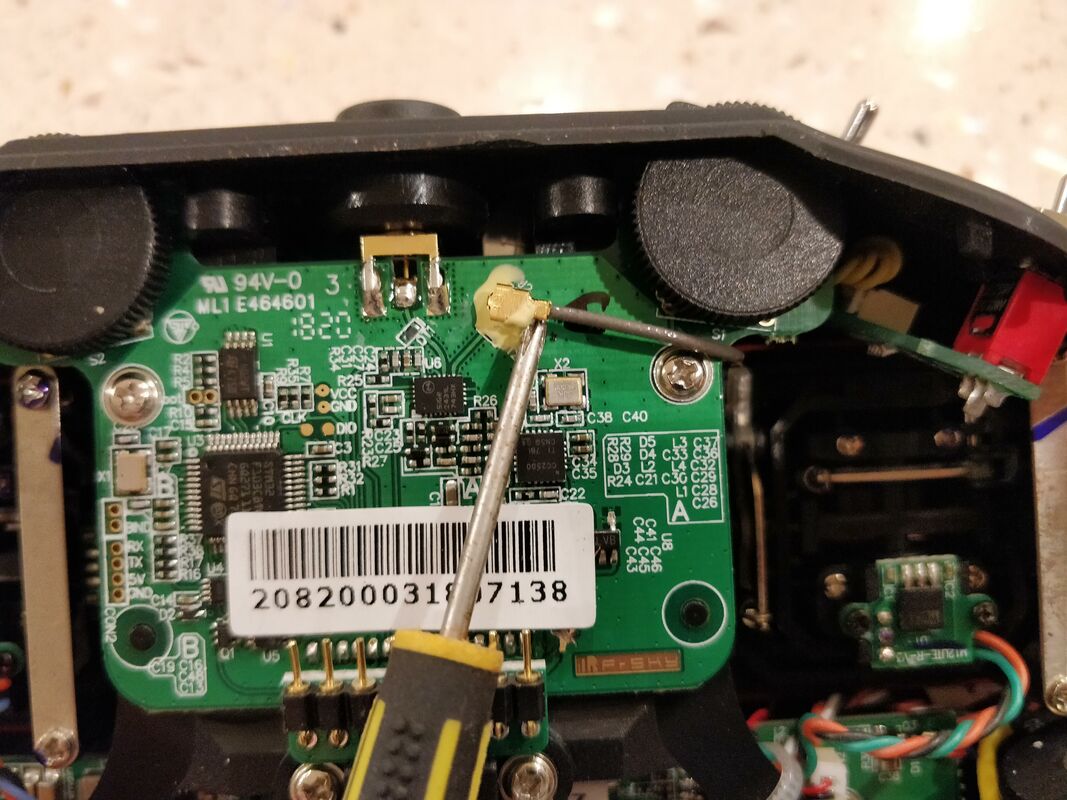
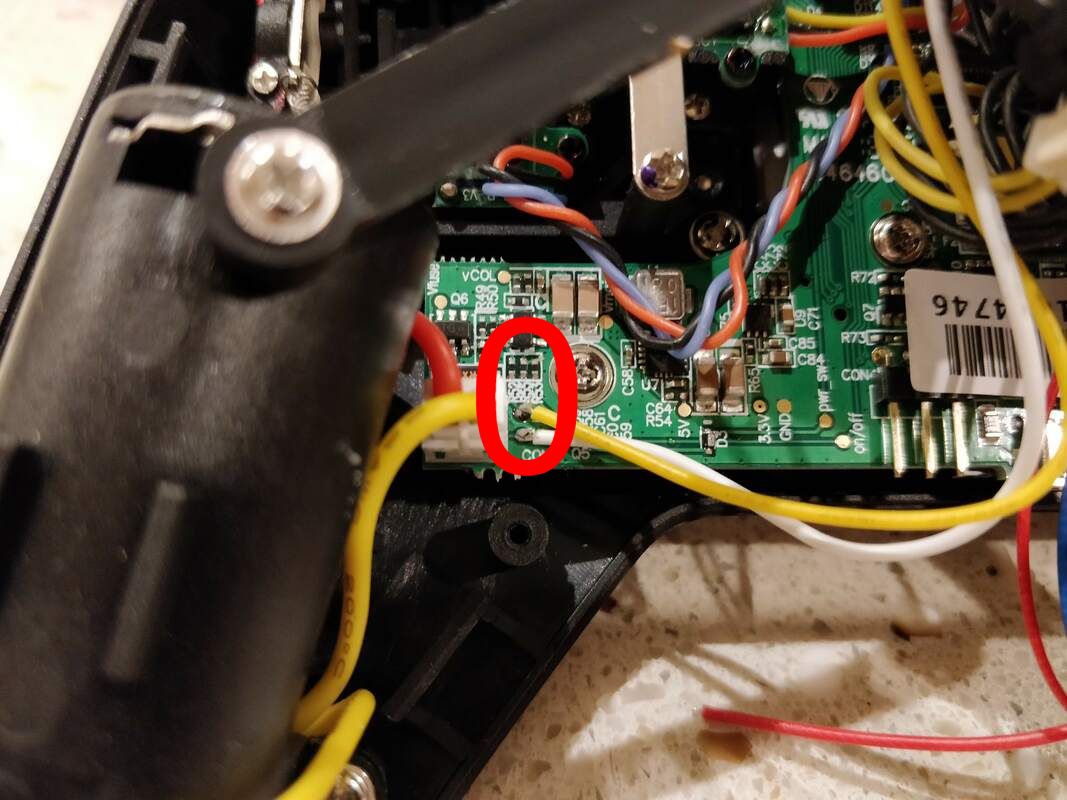
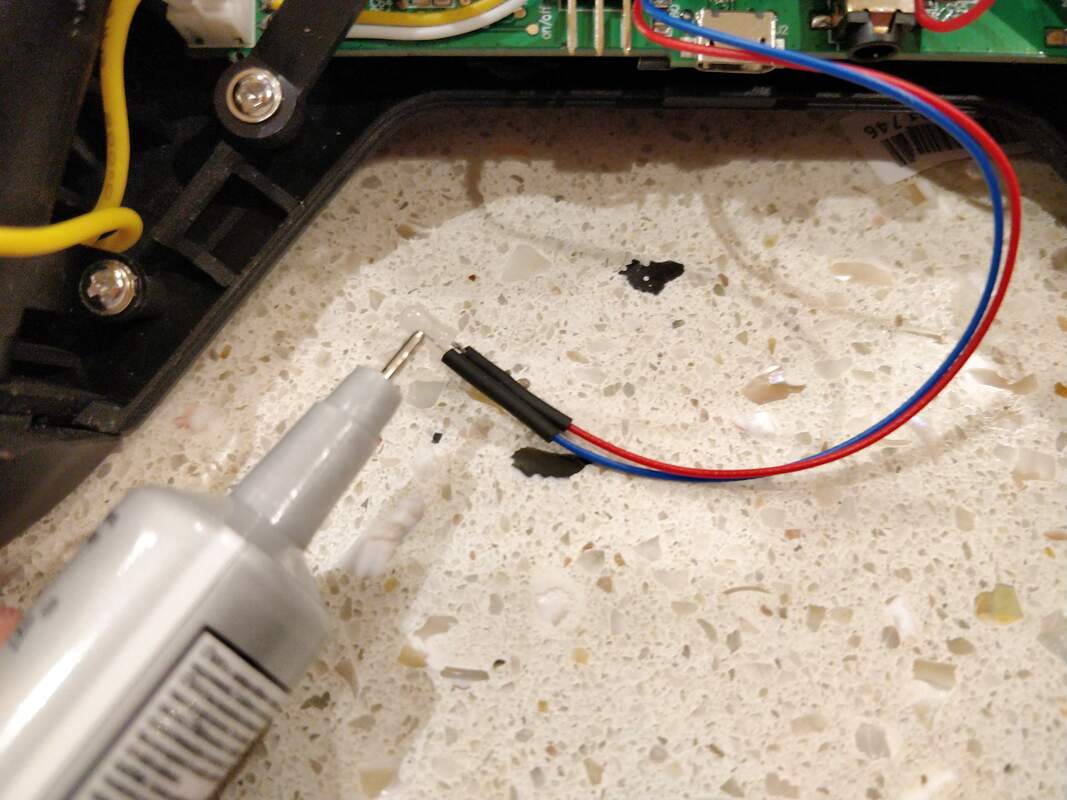
Please note this is not a beginner install but if you can solder a FPV cam and vtx to a flight controller you can probably do this. I've put in a LOT of photos and steps in below to make it as straightforward as possible since Fullspeed's manual is accurate but overly short. As usual click any image below to embiggen.
Tools I recommend for this job:
  • Small Phillips screwdriver e.g. something like this
  • Good soldering iron with small tip. Strongly recommend the TS100
  • Side cutters. I have been using these cheap Daniu ones for about a year now
  • Hot glue gun. This is optional to insulated new solder joints and provide a stronger fix for the antenna UFL connection. I've been using this one for about 6 months.
Picture
1. Remove the rubber caps on the far left and right on the back of the controller. Also remove the battery holders and SDCard
Picture
2. Remove the small philips head screw left...
Picture
3. ...and right
Picture
4. GENTLY pry open the case. Use a plastic electronics opener like this one if you have it. The only clips on the case are these ones on each side.
Picture
5. Gently pry the case open bottom...
Picture
6. ...And top
Picture
7. The rear of the case should come off completely as nothing is attached to it. You can see the tabs more closely here
Picture
8. He is how it should look with the rear cover removed
Picture
Picture
9. Remove the 2 screw shown above
Picture
Picture
10. Cut the 2 cable ties shown above being careful not to snip any wires. I just use these cheap side cutters
Picture
11. Gently py off the internal antenna connection and remove the rubber bung that covers the external antenna
Picture
12. Now you should be able to lift up the daughterboard but note it is still attached by 2 bundles of cables. Do not discnnect these
Picture
13. In the middle of the image above you can see a capacitor lying flat against the board. It is installed like this in all but the very first review versions of the X-Lite as NJTech found in his excellent video here. If your capacitor is standing up you'll need to see his video for the fix.
Picture
14. Solder the included wires and LED to the board as shown above. You must use a fine tipped soldering iron. I used the TS100 which is excellent
Picture
15. Mine included 3 screws not 4? Weird, Never mind, 3 is fine
Picture
16. Use those screws to attach the new board to the rear of the daughterboard as above
Picture
17. Carefully solder the yellow and white wires (1s, 2s) to the x-lite as circled above
Picture
18. Remove the sticker as shown to access the 5v and ground source from the USB
Picture
19. Solder 5v and ground as above. The 5v supply is the single most difficult soldering job here. Take your time. Look at the fullspeed manual here if you need a clearer image
Picture
20. Gently move the bundle of wires away from the base of the daughterboard in order to re-attach.
Picture
21. Reinstall screws, cableties and antenna UFL and external antenna bung in reverse of steps 9, 10, 11. Put the battery covers on, plug in a USB cable and cross your fingers! If it's all wired correctly the LED lit like this shown the batteries are charging. Now you can tuck loose cables away too.
Picture
22. I used E6000 glue to stick the LED to the board near the smartport pins but hot glue is probably better as it sets more quickly
Picture
22. This is how mine looked with cables tidied away before in put the rear cover back on.
Picture
23. The rear cover was much easier to re-install than it was to remove. Make sure you put the screws back in and the rubber caps back on. You can see mine charging here with the pale blue light coming from the smartport.
Picture
24. After the LED went off on its own the 2 cells are reading a perfect 8.4v i.e. 4.2v per cell. Just right!
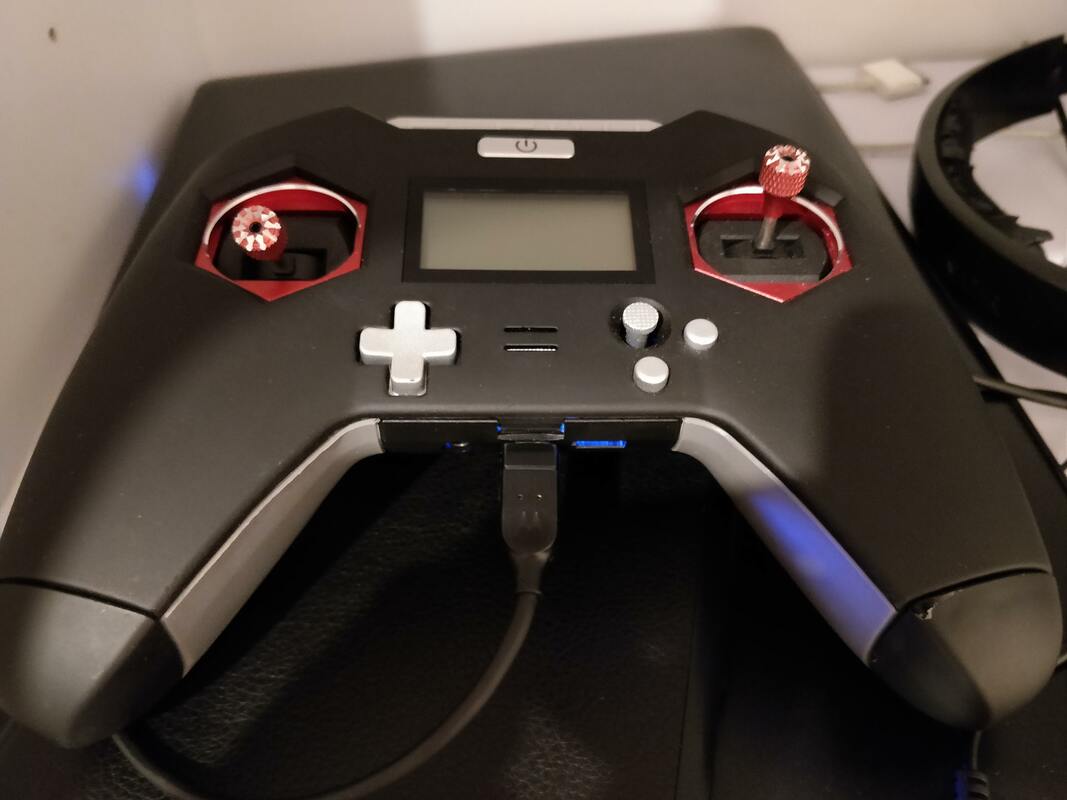
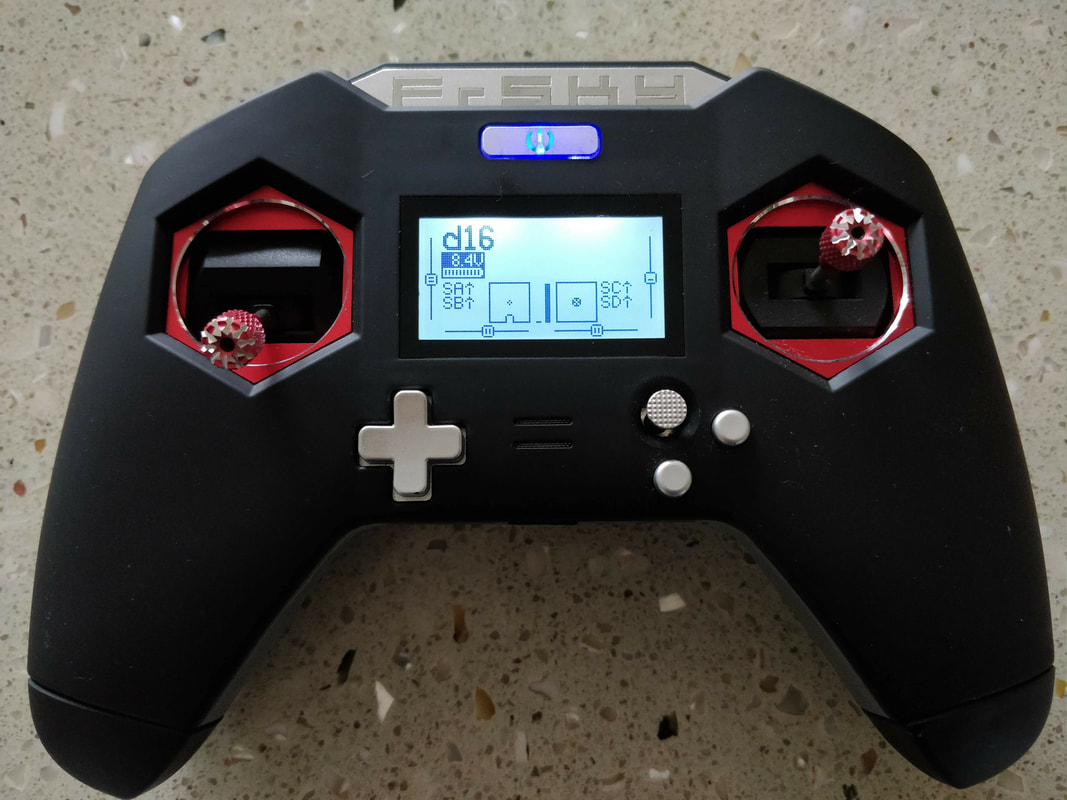
So how does it go? It's works exactly as you would hope. You plug it in, it starts charging and it turns off when it's done. It charges up to 4.2v per cell which just right for a Li-Ion cell. It's a shame it didn't come like this from the factory but I'm glad fullspeed had the vision to come up with a solution.

Update: FRSKY have just announced 2 new x-lite variants (X-lite pro and X-lite s that do have USB charging as standard). These are more expensive than the base models of which there are a LOT in circulation. Now that mine has USB charging I personally see no reason to update for what I need from a controller.
Thanks for reading, if you found this article useful please feel free to like or share, the facebook links below directly link/like this article. Links are affiliated and help me buy the bits I need to produce this type of content. I don't have a Patreon and never will, this is a hobby for me and not a source of income.
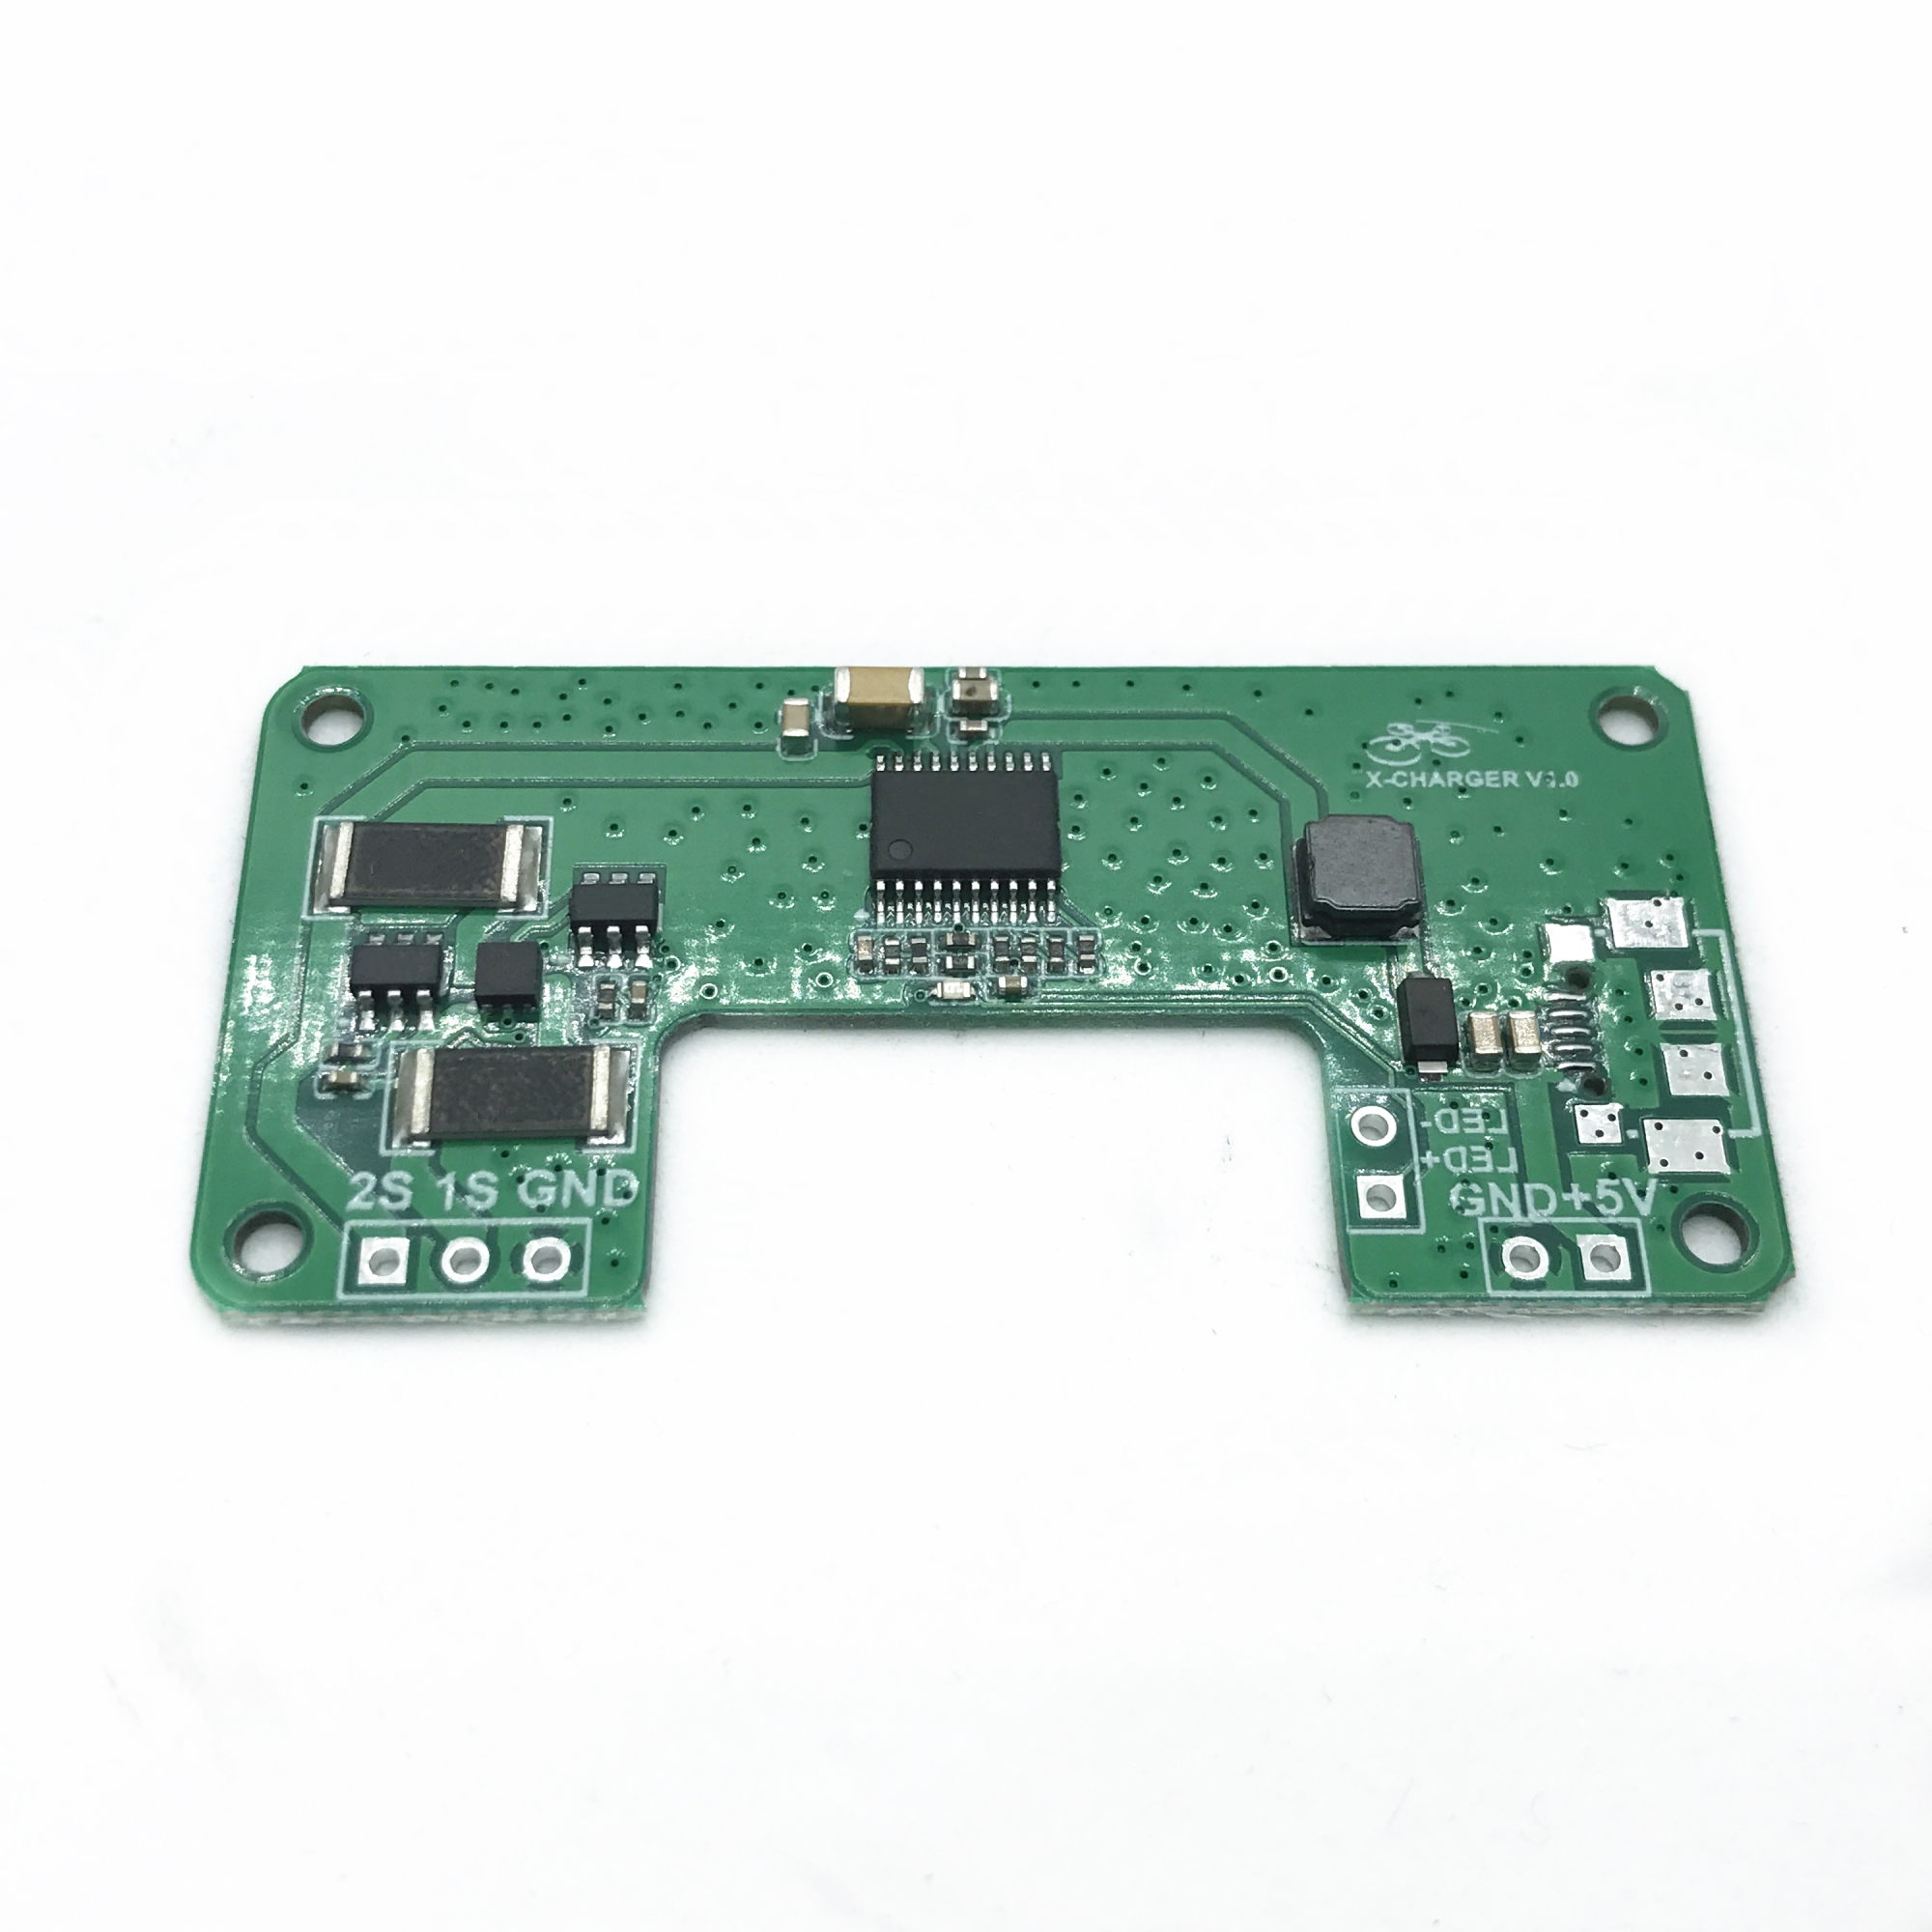
Picture
11 Comments
Fahmi Alias
10/5/2019 09:28:59 am

Hi. They stated in the manual that you have to select 'USB mass storage' to charge in ON state. Does is affect the 'USB mass storage' function itself?

Reply
QuadifyRC
16/5/2019 09:35:33 am

Had a quick check on mine and mass storage still working fine.

Reply
Fahmi Alias
16/5/2019 11:41:22 pm

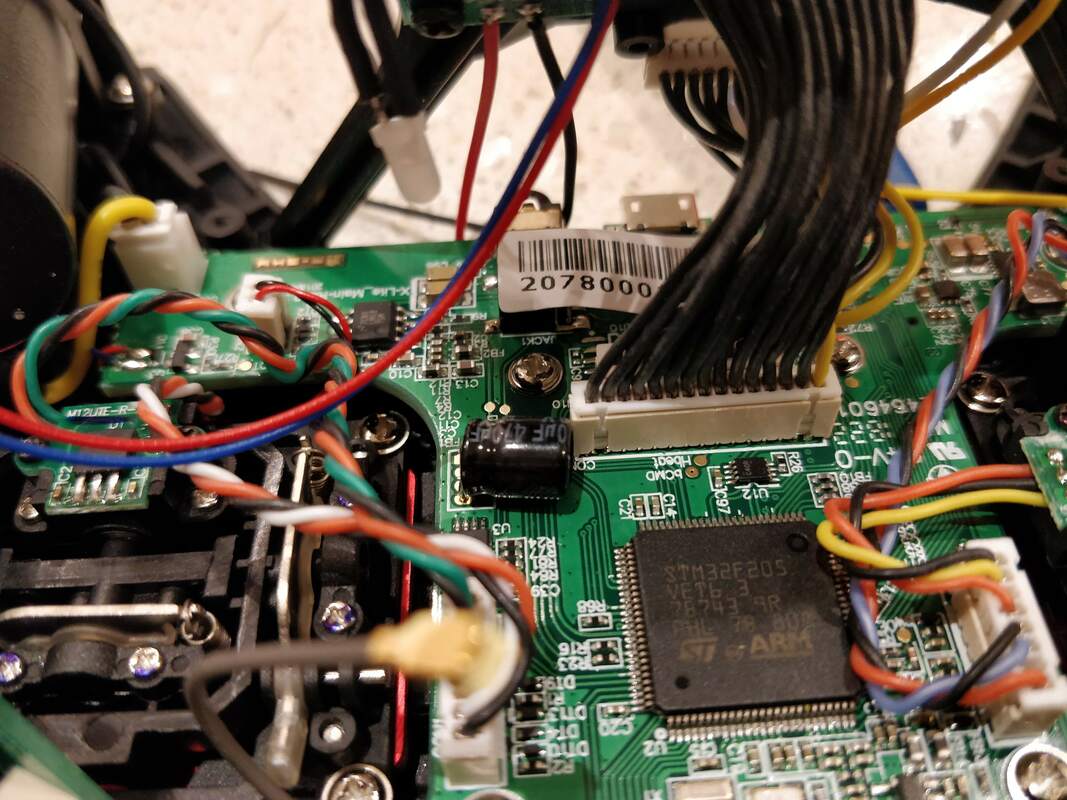
Thank you. Just installed the module. I got my capacitor lying flat but its bigger than yours. Had to resolder it with wire extension. But thanks to this guide everything is working fine

Ingo
16/5/2019 03:16:54 am

hi, while soldering the wires to the mainboard I messed up the soldering pad S1.... is there any other place to where I can solder the S1 wire on the TX board?

best regards
Ingo

Reply
QuadifyRC
16/5/2019 09:49:43 am

Hmm that is tricky. I'd recommend using a digital multimeter to trace which cell the working pad refers. Then get the same signal on the opposite cell - my guess is the positive terminal. Only do this if you are confident in this kind of fault finding - you could do more harm than good. It may be best to cut your losses and leave the charging board out.

Reply
Antonio
27/4/2020 02:52:25 pm

Hi, I wonder if the usb port can be used to connect to PC. My original USB is broken.

Reply
Fahmi Alias
27/4/2020 04:57:56 pm

The board doesnt have separate usb port on it. It charges using the usb port on the radio itself. If your connector is broken, this mod is useless.

Reply
Quadify RC
28/4/2020 08:44:17 am

Thanks Fahmi, couldn't have said it better myself.

Mie
21/9/2021 06:52:22 pm

I was wondering if you had another schematic for the x-lite pro? My board looks a little different and I do not have a S1 and S2. I can see there's a S2 pad but it's on the opposite side of the board compared to where its showing the S1 &S2 pad on your diagram.

Reply
QuadifyRC
22/9/2021 12:58:27 pm

Sorry I don't have the pro version so cannot comment

Reply
Fahmi Alias
22/9/2021 06:32:21 pm

Are you doing this mod on X-lite Pro. Doesn’t it already have USB Charging?

Reply


Leave a Reply.

    Archives

    November 2020
    July 2020
    January 2020
    December 2019
    October 2019
    September 2019
    August 2019
    July 2019
    June 2019
    May 2019
    April 2019
    March 2019
    February 2019
    January 2019
    December 2018
    November 2018
    September 2018
    August 2018
    July 2018
    June 2018
    May 2018
    February 2018
    December 2017
    November 2017
    October 2017
    September 2017

    Categories

    All
    1.9 Inch
    2 Inch
    2s Whoop
    3.4.0
    3.5
    3d Printing
    5.8GHz
    6 Inch
    6s
    AKK
    AKK Infinite
    Antenna
    Attitude V5
    Battery Pad
    Beeper
    Betaflight
    Brushless Whoop
    Cheap Mods
    Dji Fpv
    Dshot
    DVR
    Eachine
    Eachine Trashcan
    Emax
    Fatshark
    Fullspeed
    Furibee X140
    Goggles
    Happymodel
    Hawk 5
    Hawk 6
    Headstrap
    Hq Props
    Iflight
    Jello
    King Kong Fly Egg
    Larva X
    Larva-x
    Leader 120
    Lightweight
    Micro Brushless
    Micro CCD
    Micro Quad
    Mobula
    Mobula6
    Mobula7
    Mobula7 Upgrade
    Omnibus
    OSD
    Pids
    Propellers
    Red Devil
    Repair
    Runcam Nano 2
    Sailfly X Upgrade
    Sailfly-x Upgrade
    T65mm
    Throttle
    Throttle Limit
    Thrust
    Tinyhawk
    Tinyleader
    Trashcan
    Upgrade
    USB Charger
    VTX
    Walkthrough
    X2 Elf
    Xlite

    RSS Feed

    follow us in feedly
Thanks for visiting QuadifyRC.com Follow us on facebook below to get all the latest updates
  • RC Cars
  • Car of the Month
  • Quad Reviews
  • Quad Mods
  • COUPONS AND DISCOUNTS
  • Long Range
  • About & Contact