|
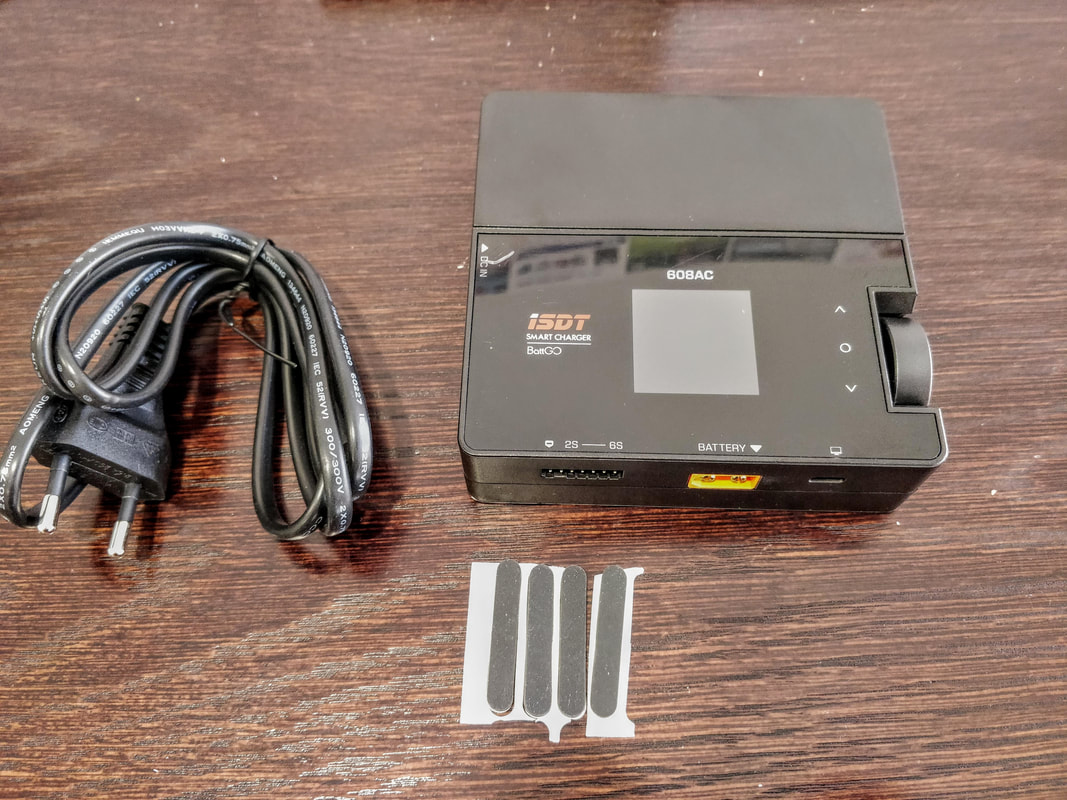
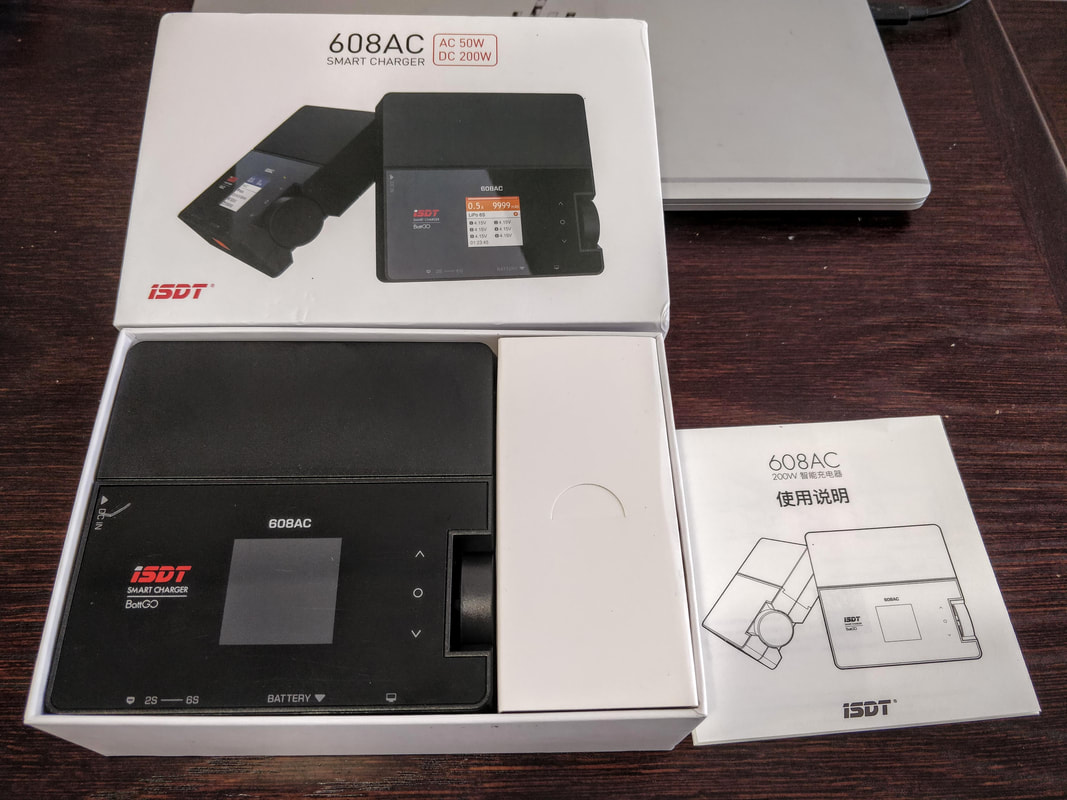
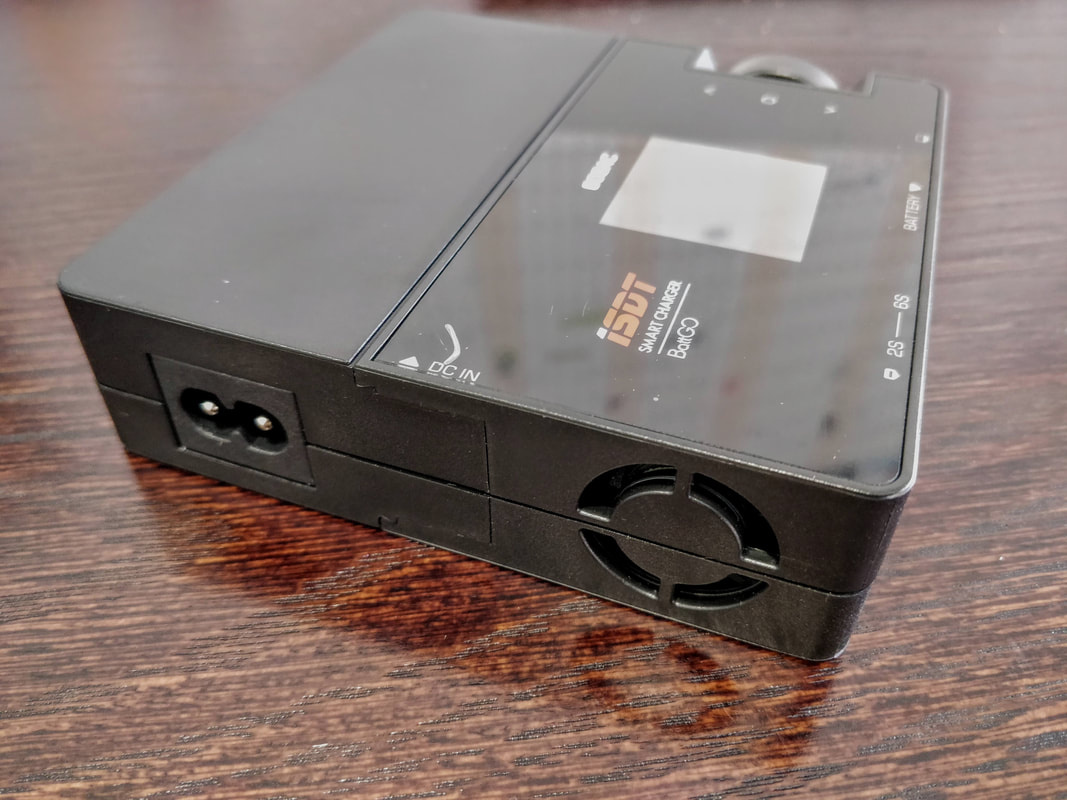
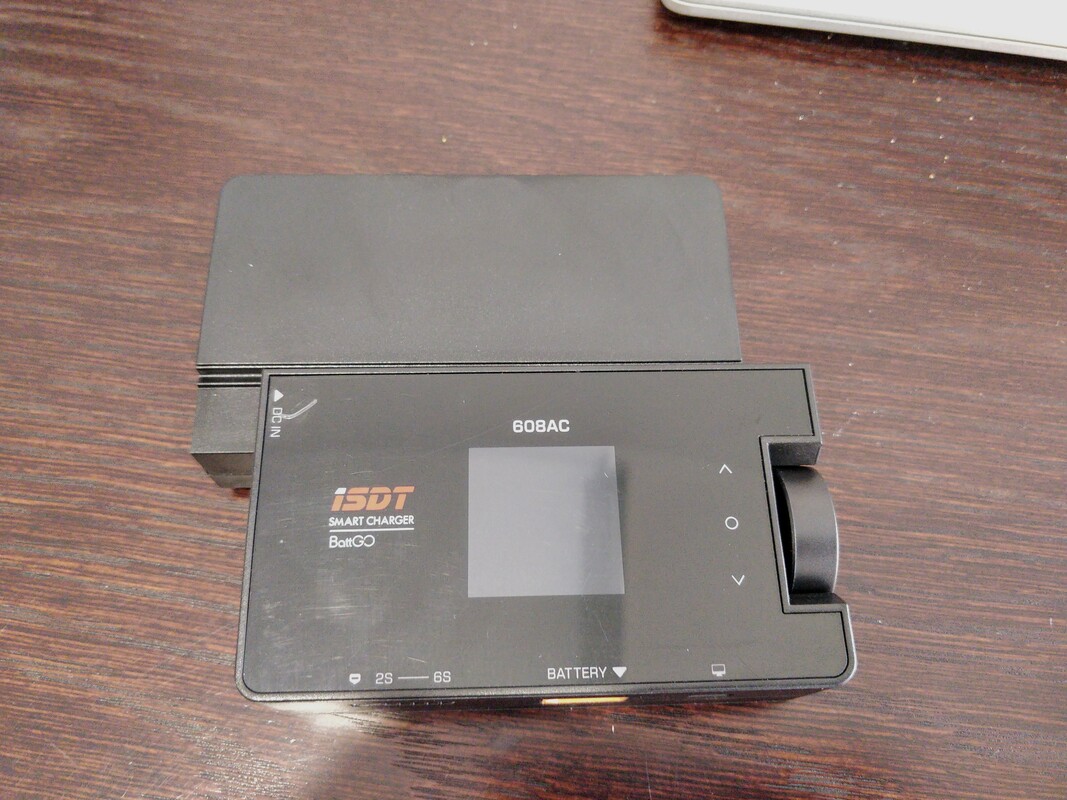
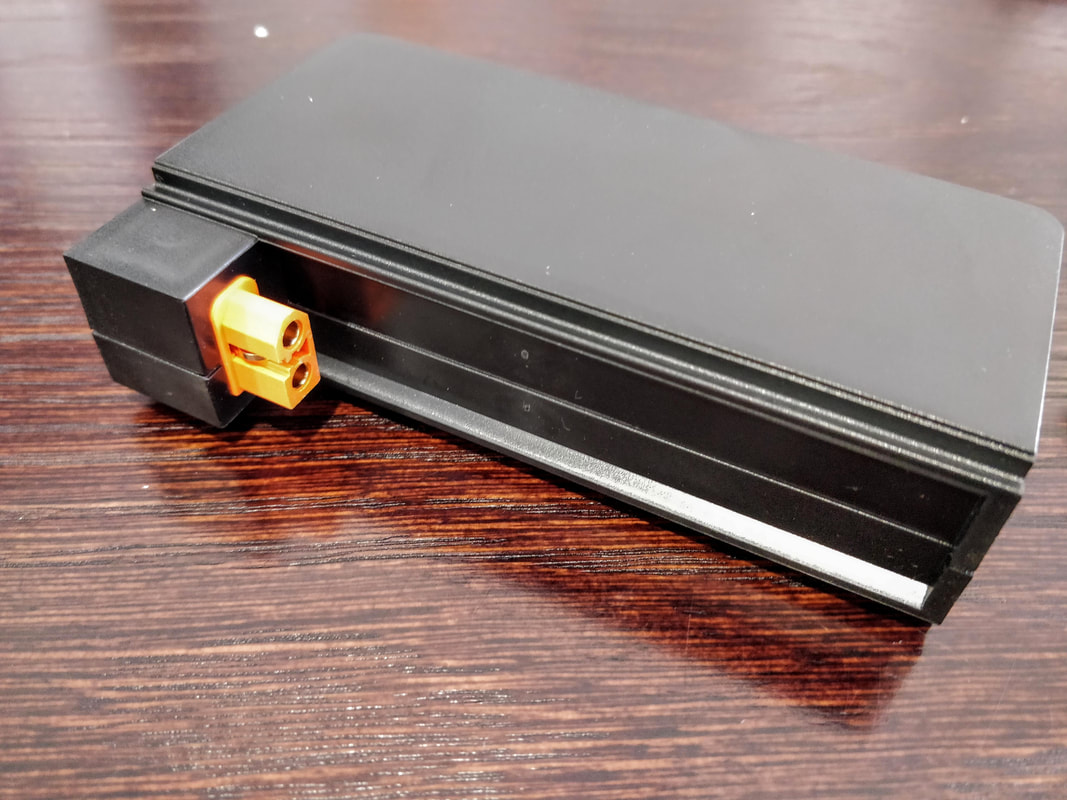
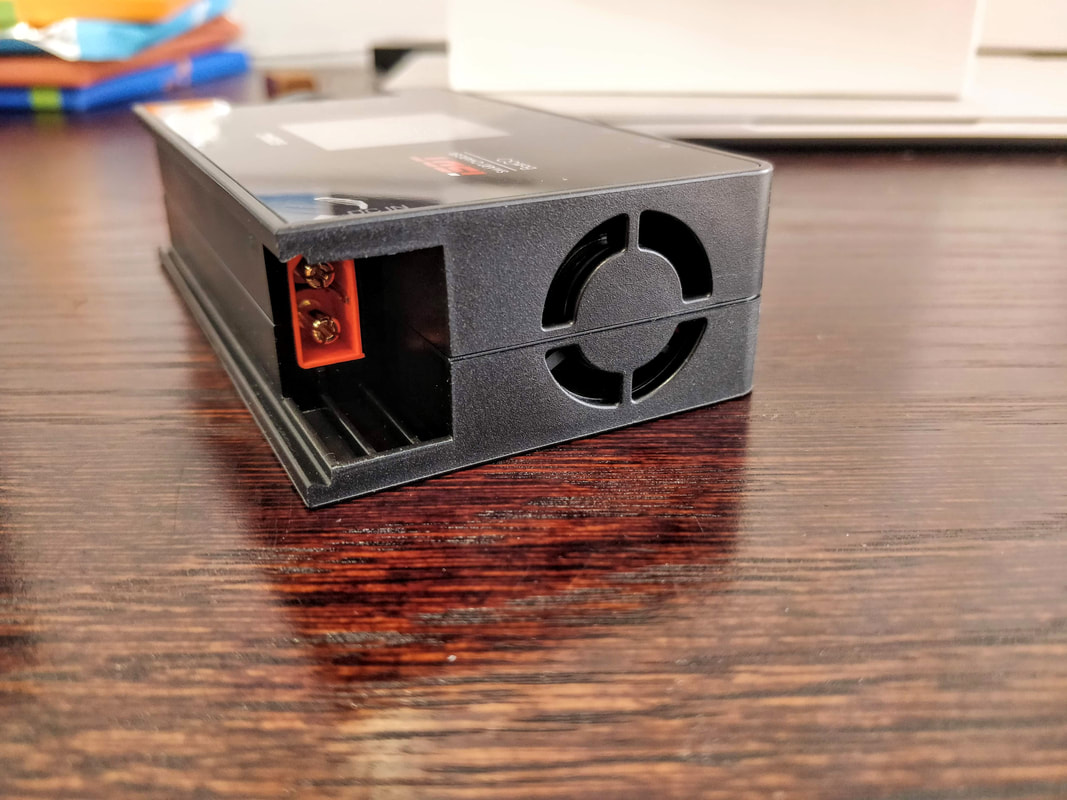
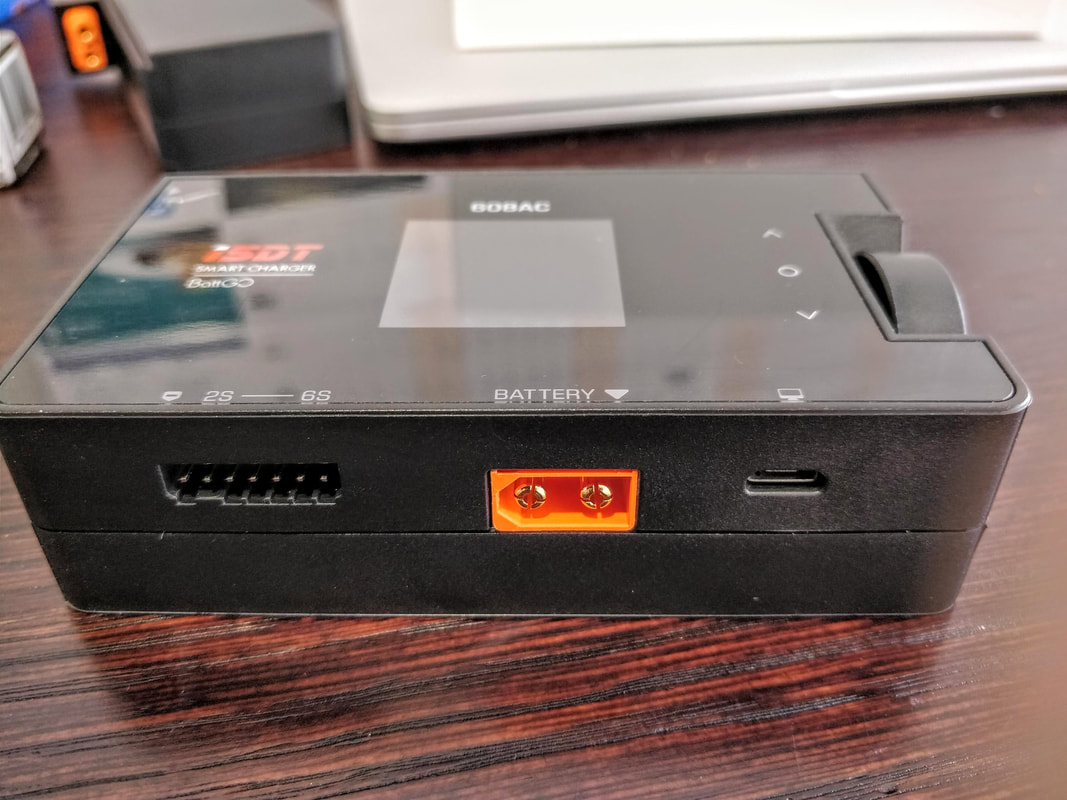
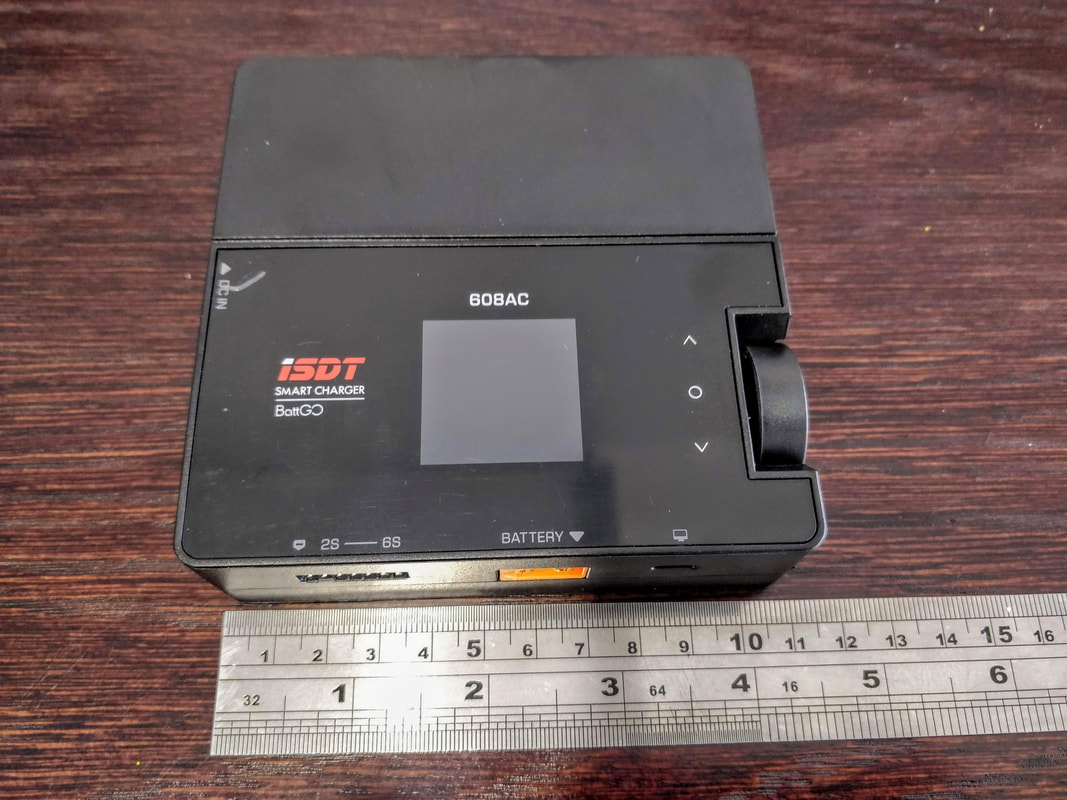
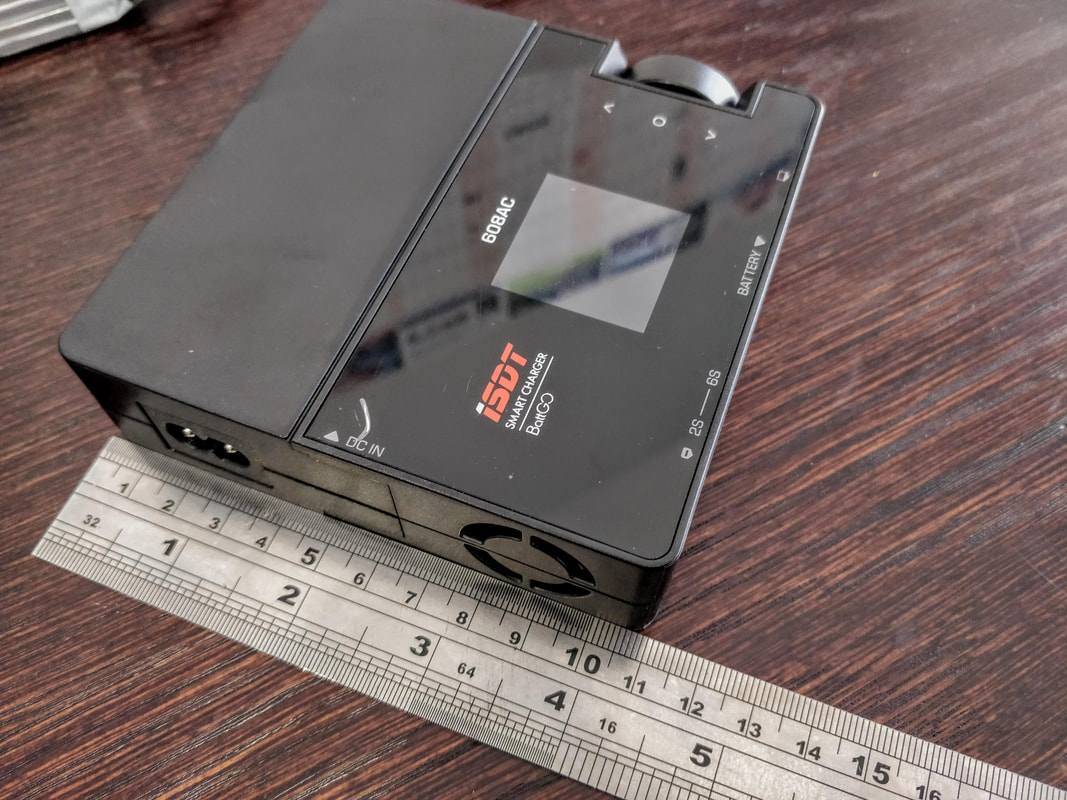
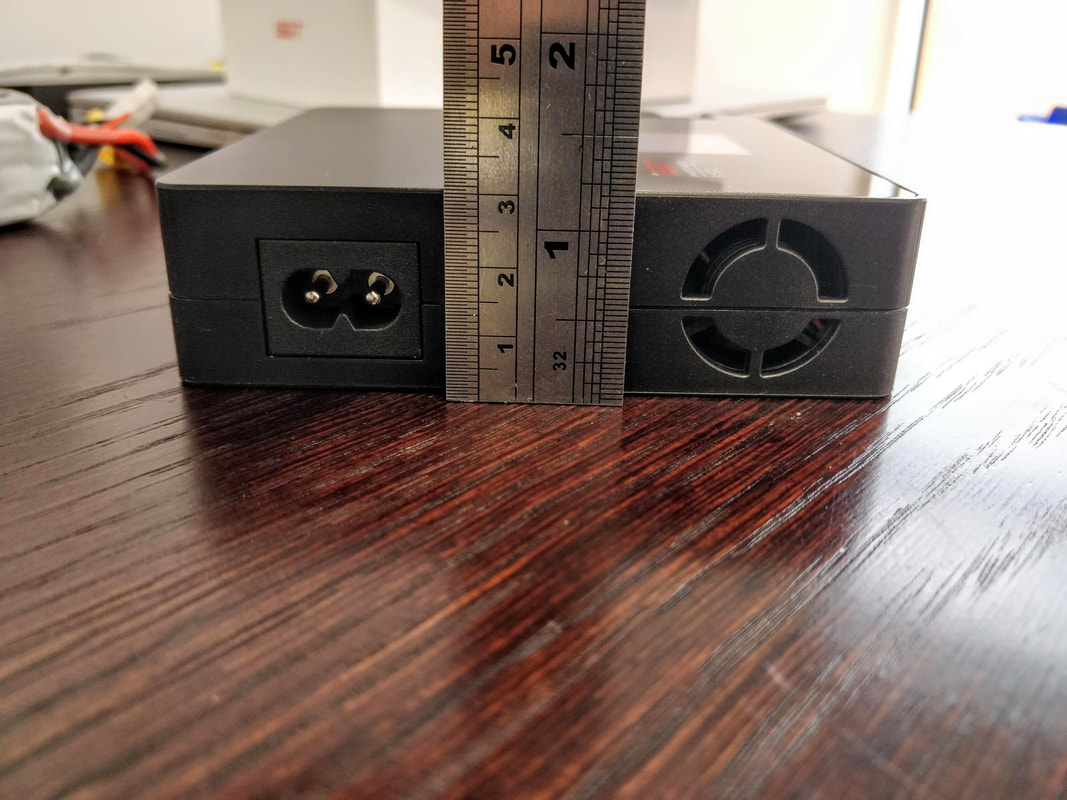
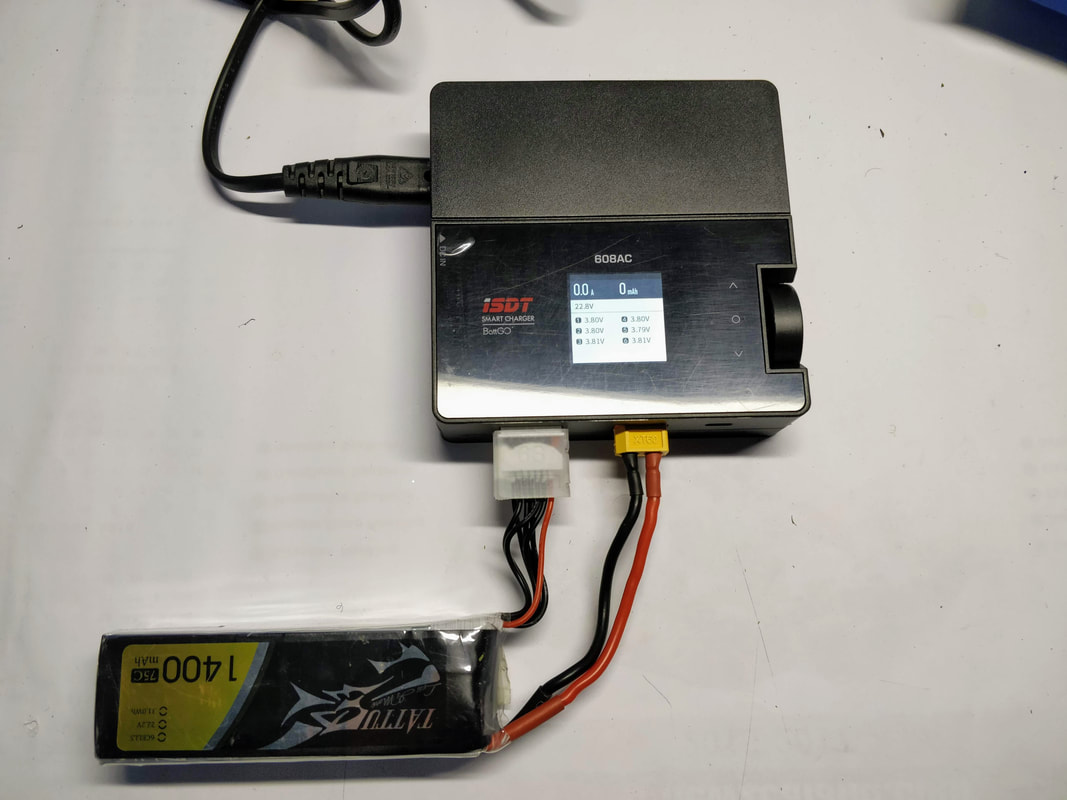
Introduction The ISDT 608AC Smart Charger with Detachable Power Supply is a new entry-level LiPo battery charger from ISDT, the most consistently high quality charger manufacturer in the business. It has the capability of taking power supply from both AC (mains) and DC (battery) power which is usually a feature of the more expensive chargers and also offers a first in that the AC adaptor is a modular detachable unit. This is a full review and operation overview of the ISDT 608AC charger as it relates to use for quadcopters. 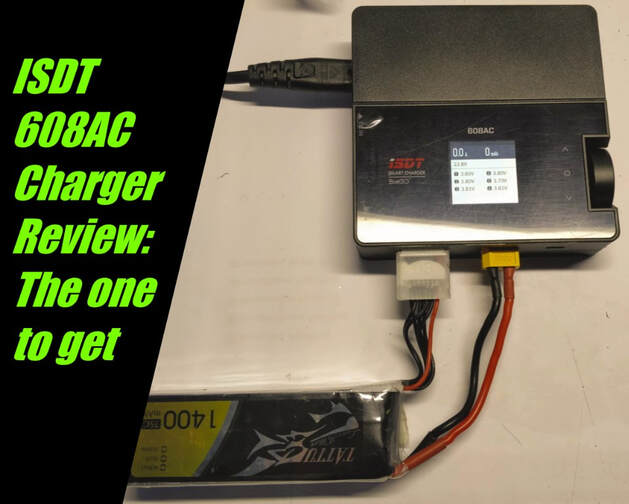 Lipo charging background Charging is perhaps the least exciting topic in the world of quads but very important; safe, reliable chargers are hugely under-appreciated... until you have an accident. If you are new to the hobby you'll probably want to spend the minimum on the charger possible which tends to point you in the direction of DC chargers that require an additional power adaptor. I remember there being a bit of a minefield of choosing the charger but more so the adaptor that you needed to use; do you run it of mains power? What voltage? What power rating? What plug size? After all this you still don't know the quality of the power pack and I have certainly seen some dodgy ones. When you have a dodgy power pack pulling upwards of 5 amps (and often a lot more) it is a distinct risk. Until now, if you wanted a charger with a built in AC power supply you have needed to spend more, Like the Hota/Hobbymate D6 Pro Duo (reviewed here) or the ISDT D2 which are both well upwards of $100. The new ISDT 608AC is a DC charger at heart with a very nice slide on modular DC adapter that comes included. Since ISDT is perhaps the best charger manufacturer out there, the implication is that this power supply is of the same high quality and just as importantly you can guarantee it is correctly rated. What's included?, build and dimensions Captioned pictures do the best job here. As usual, click to embiggen.
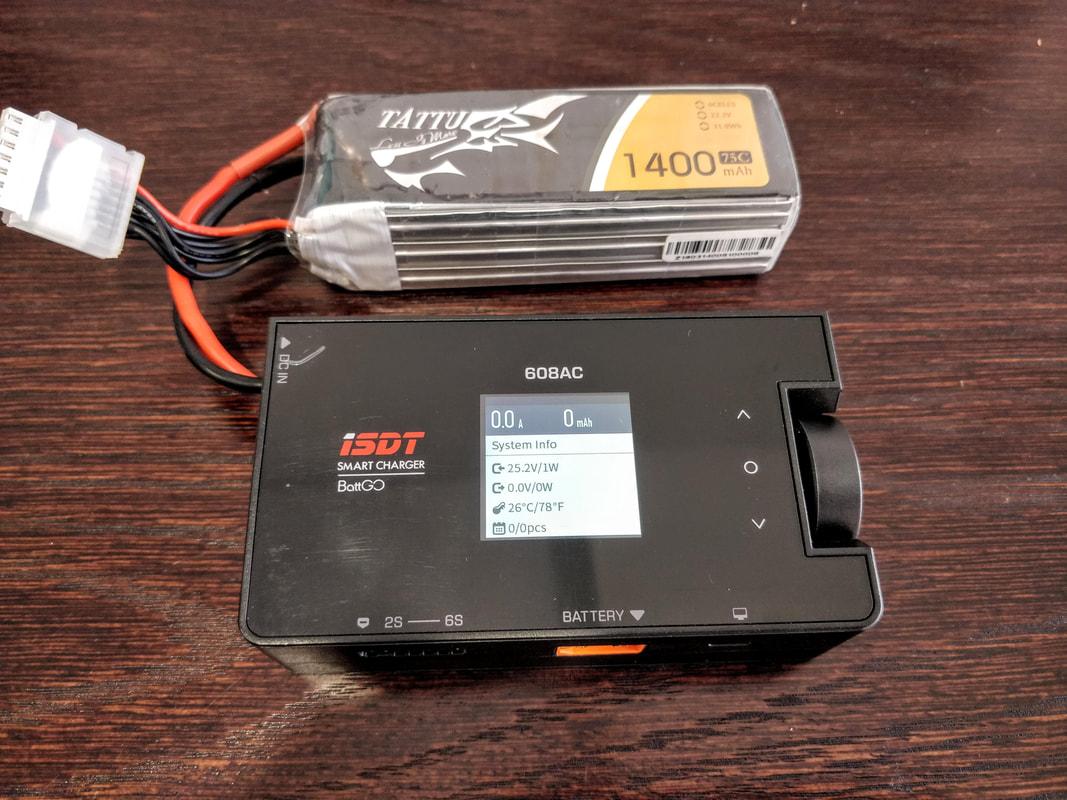
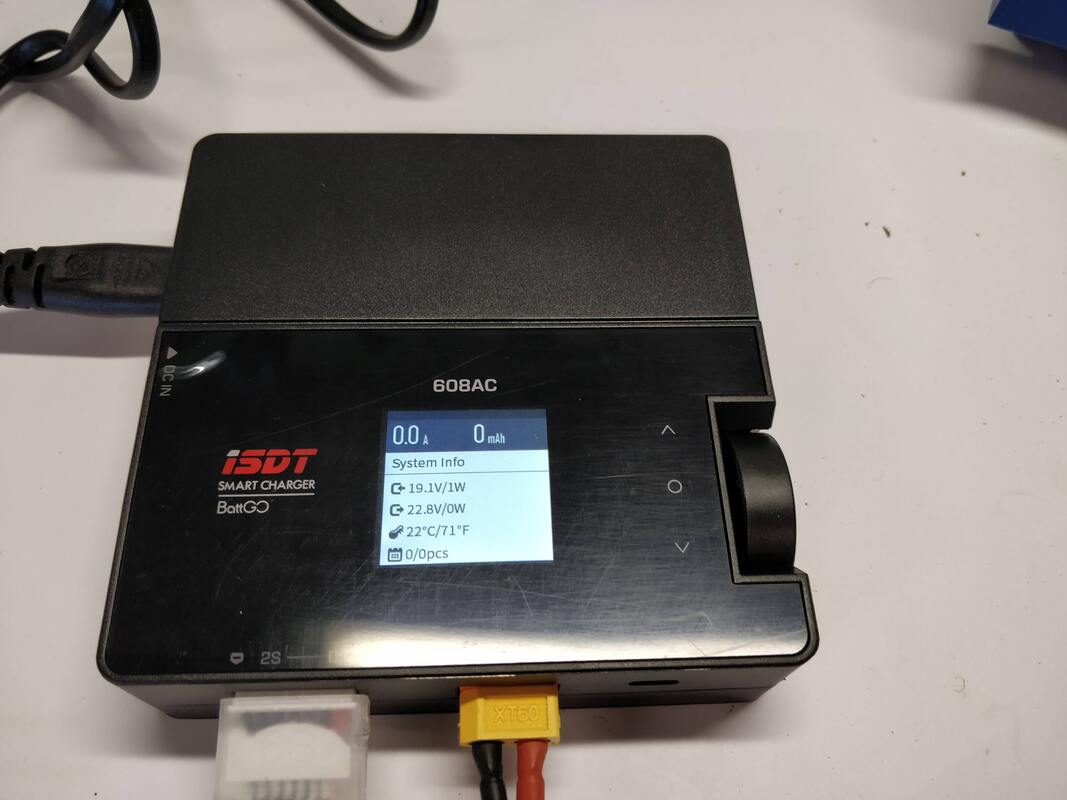
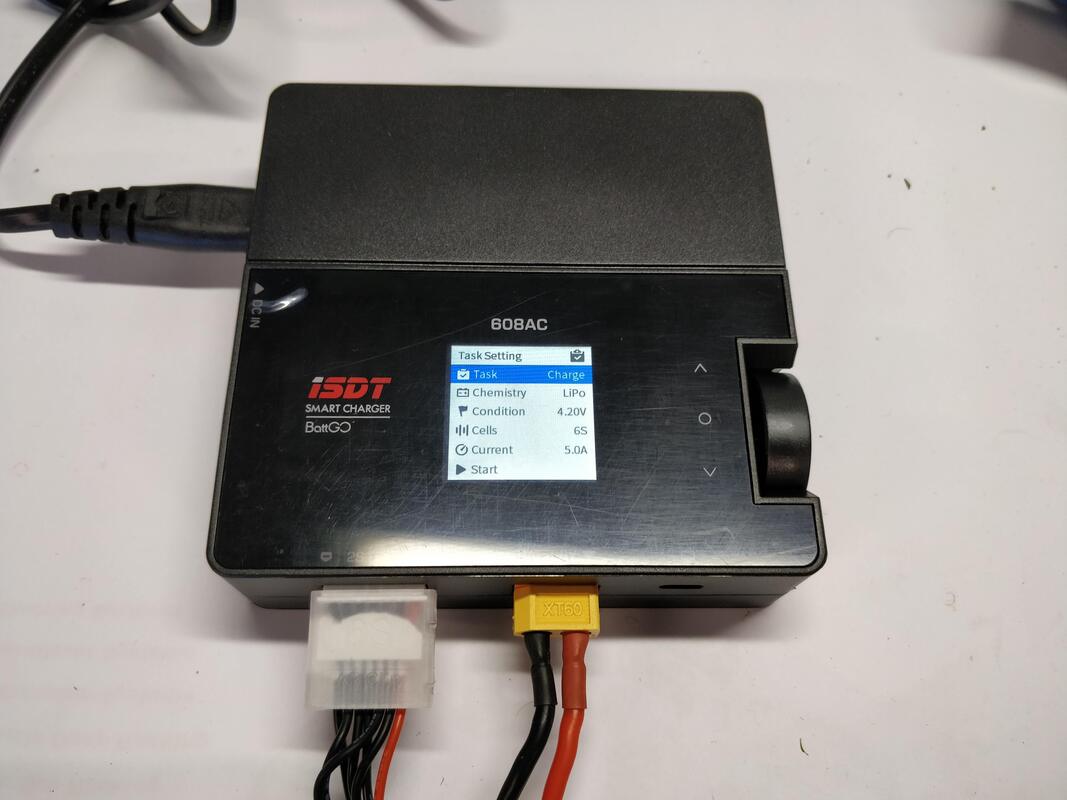
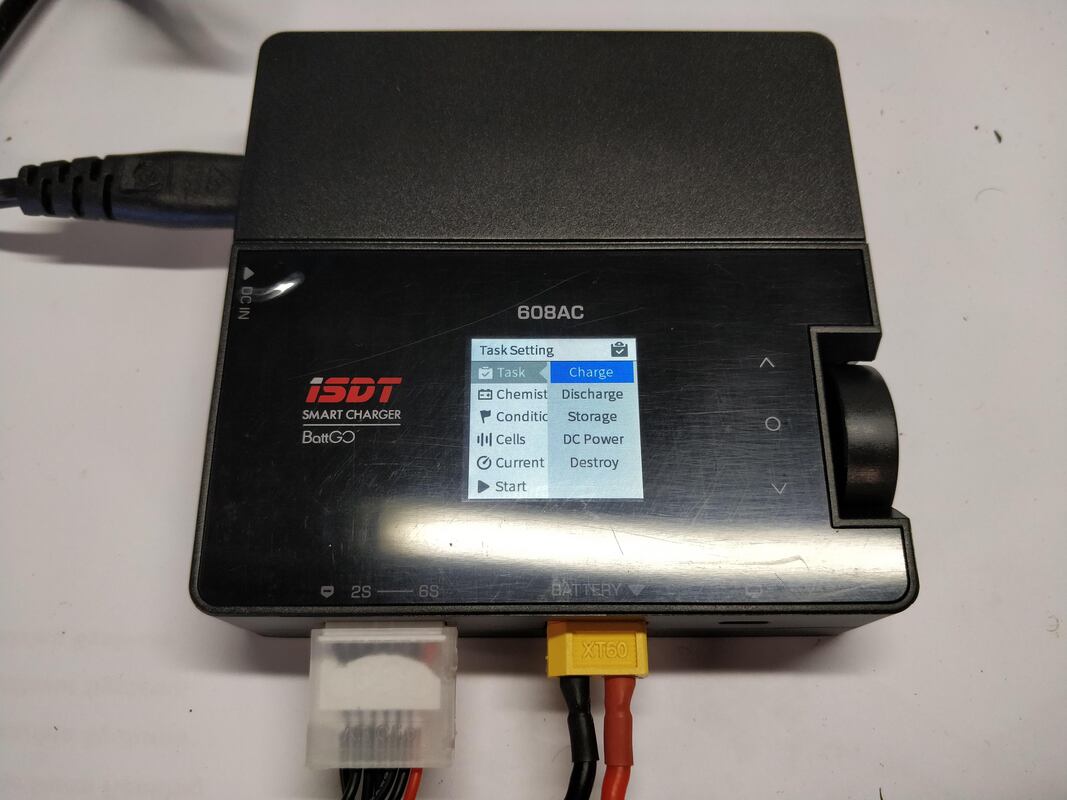
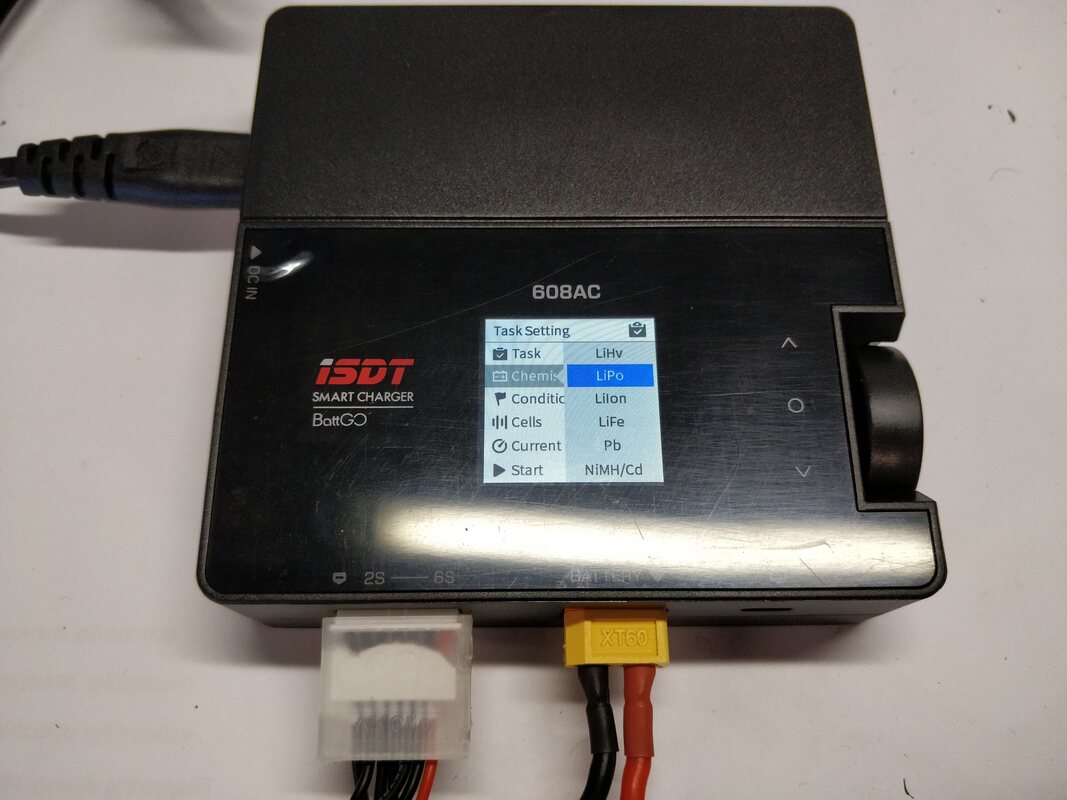
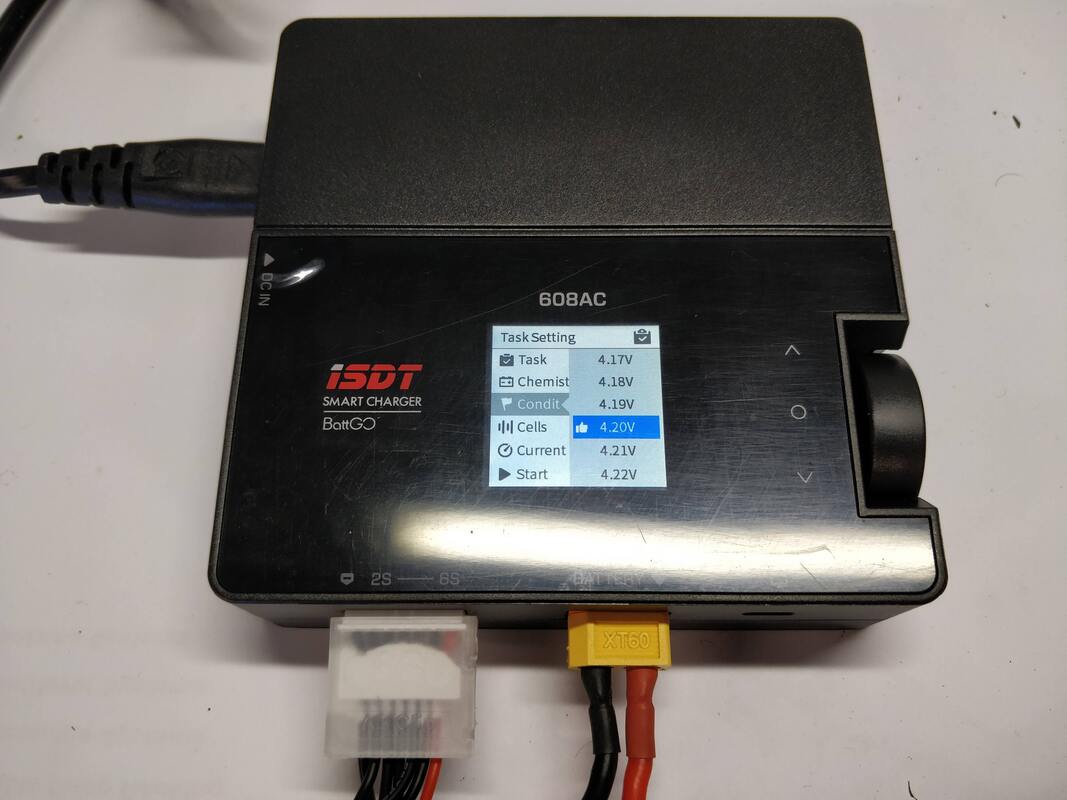
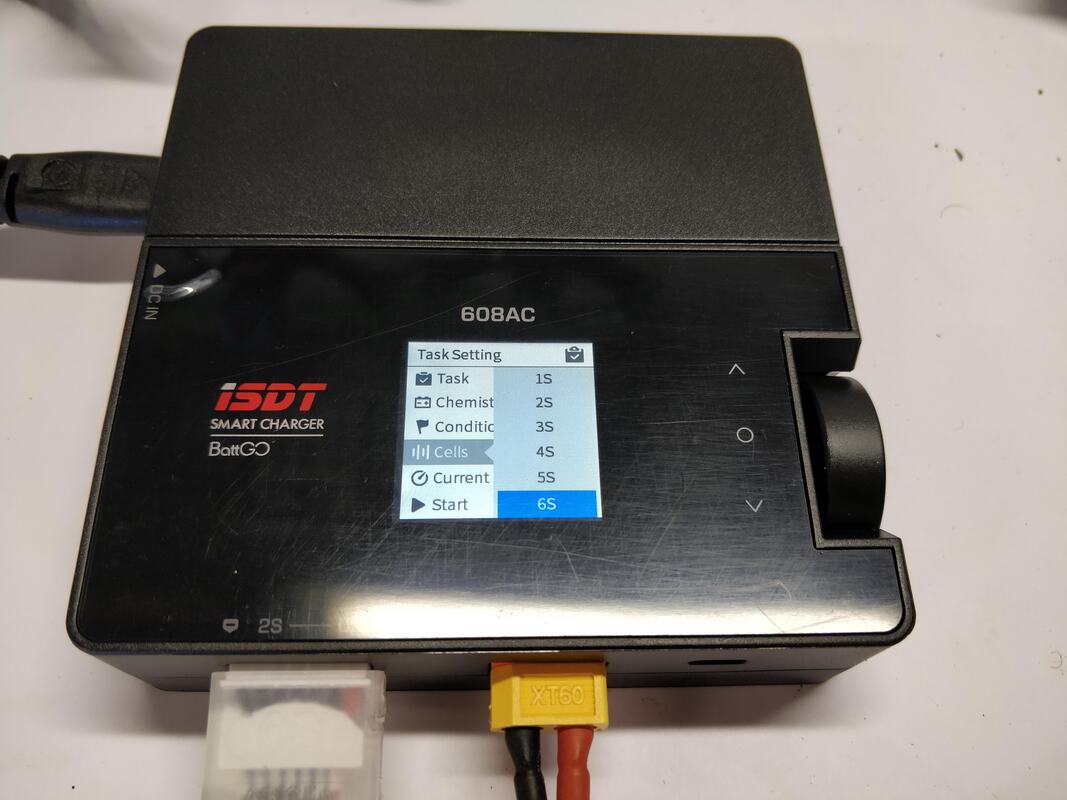
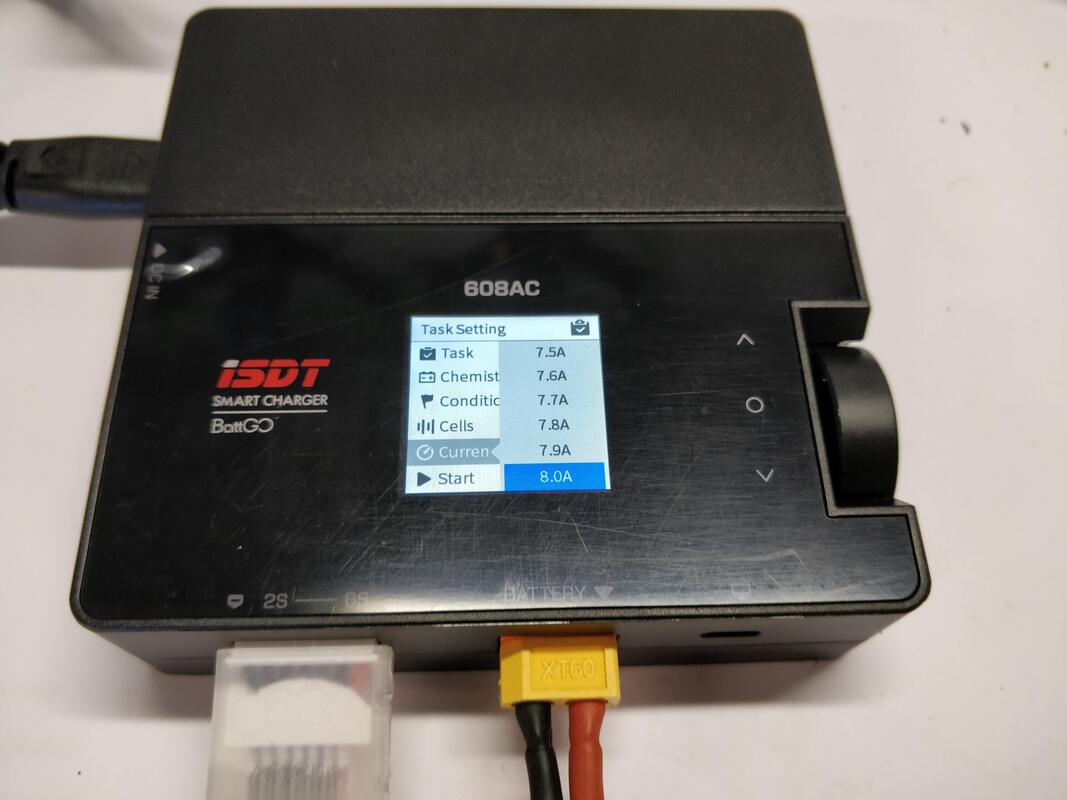
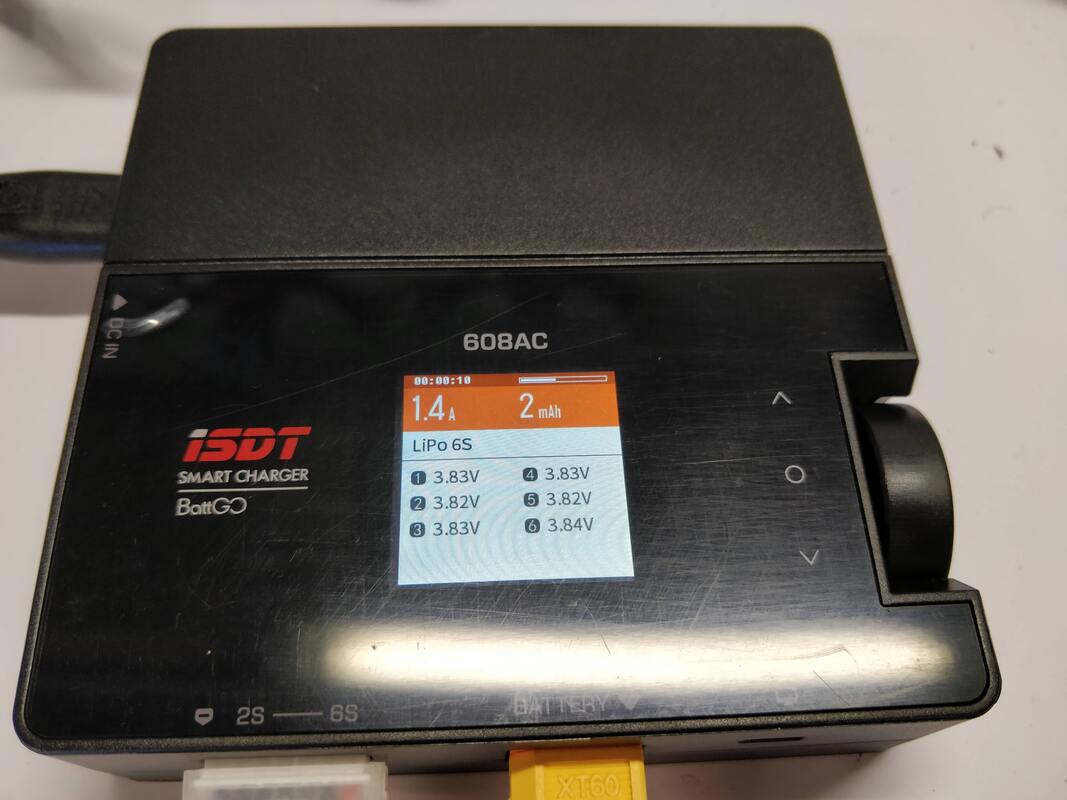
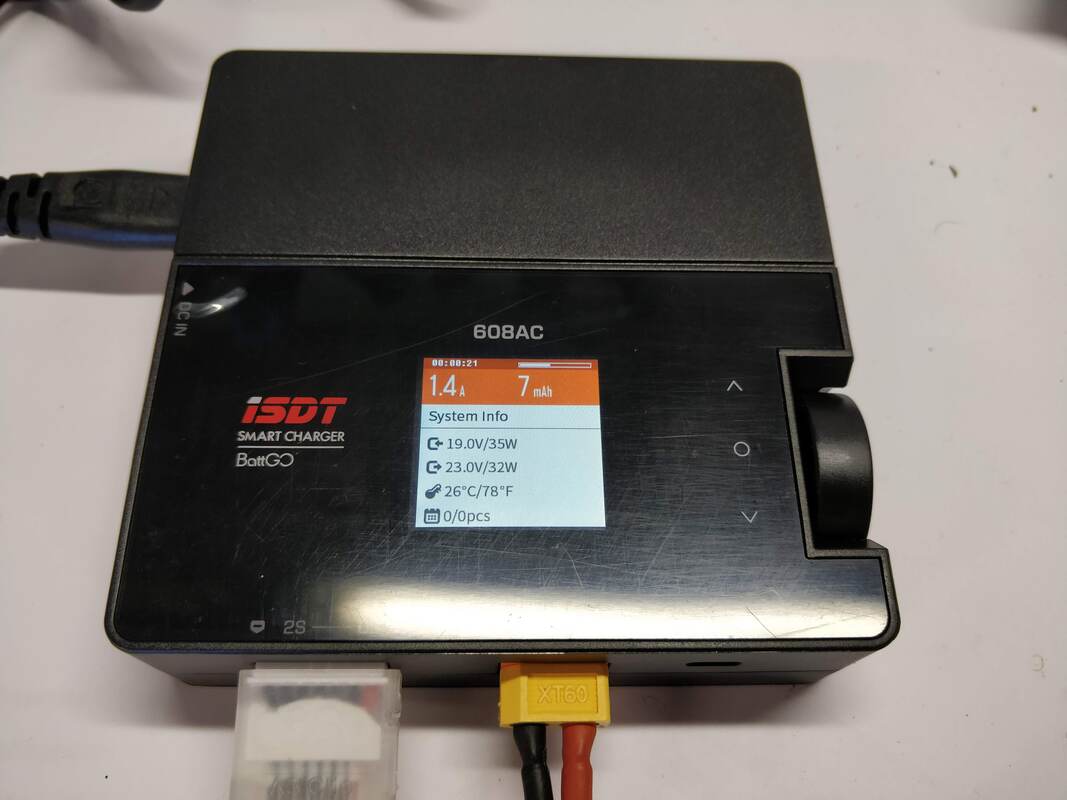
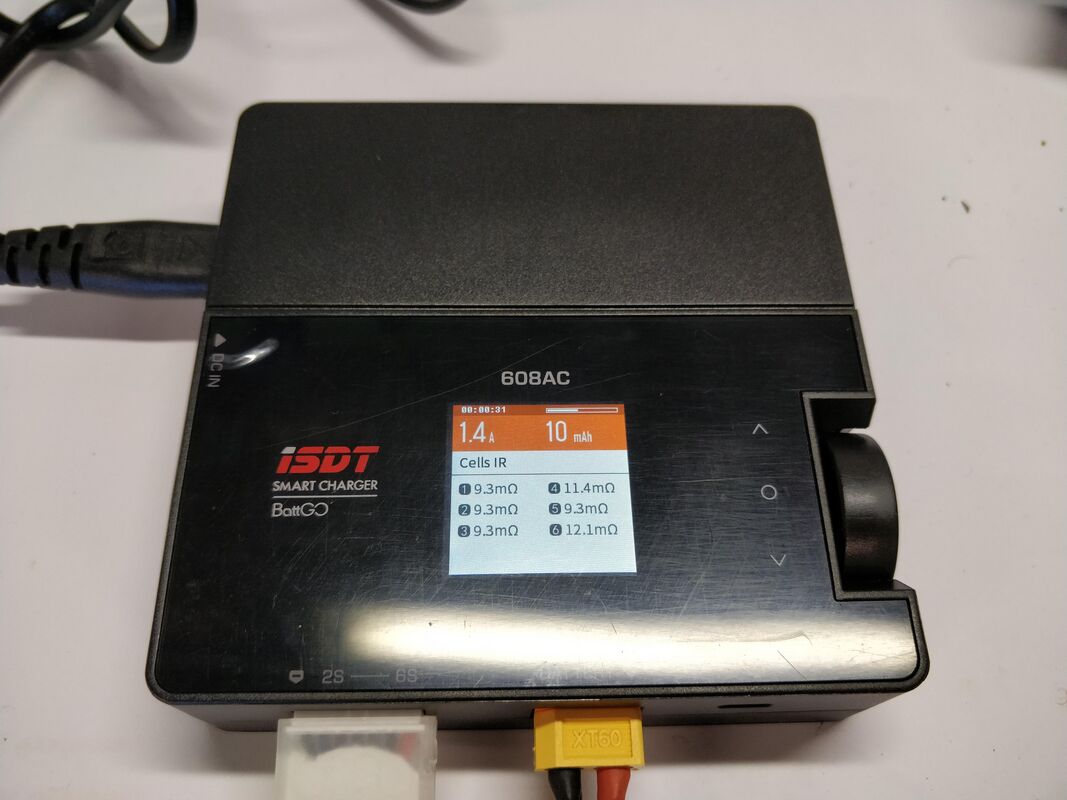
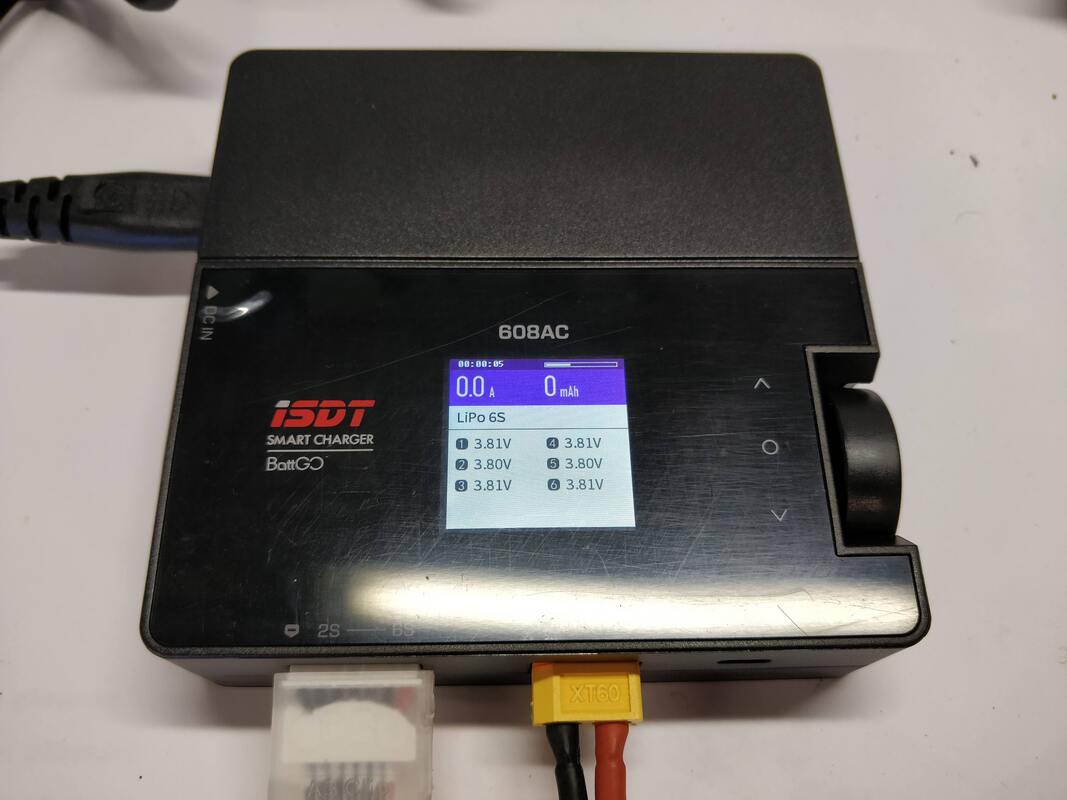
Interface ISDT quite simply have the best interfaces about - a basic click wheel allows you to easily navigate through the well laid out bright and colourful menus. All adjustments are available and firmware can be upgraded through the USB port if needed. Charger operation Pictures to the best talking here - see below for all of the key screens and captions that discuss what's going on in each
Limitations The included AC adaptor is limited to 60W meaning you can charge at a maximum of about 3.5A for 4s or 2A for 6s. Personally I believe this is plenty for packs that are used on 2-6 inch quads. The only time you are likely to find this inconvenient is for very rapid parallel charging and rapid charging of large packs for 7" and larger long-range rigs. Even then you can get a larger power supply (up to 200W) that will allow you to charge at 10A+ for 4a and 7A+ for 6s. In summary - more than enough power to start on and easy upgradability if you are doing some fairly high-level charging. Like pretty much every other charger under $100 this charger has only one channel. My daily charger is the ISDT D2 which has 2 channels meaning I can be charging larger batteries on one side and small on another but then again I have a fairly unique set of requirements as a reviewer. Probably not fair to call this a limitation at this price point (especially when most charger have only one channel) but something you should be aware of. Don't forget you can still parallel charge if you want using a board like this one that can do both XT60 and XT30. Summary and Recommendations I'll keep this short. The ISDT 608AC reviewed here is simply the best complete charge for a beginner and intermediate user. The whole system is of very high quality and the user interface is the best available. Now, with the AC adaptor included this is the most simple yet versatile system out. Only those who need multiple channels or extremely high charging currents will look elsewhere but if you buy this as your first (or second or third charger) it is highly unlikely you'll sell it because it is that good. If you are considering buying a charger at any level, you must AT LEAST consider this one, it is a real gem and can typically be had for $50-$60. Thanks for reading, if you found this article useful please feel free to like or share, the facebook links below directly link/like this article. Links are affiliated and help me buy the bits I need to produce this type of content. If you are looking for quads or parts check out my coupons and discounts page which I keep updated with only the parts and quads I like at a proper discount
35 Comments
Guest
10/1/2020 08:45:31 am
Hey, but right on the box the AC limit is 50W, and on the one of promotional images on the official page 50W/150W
Quadify RC
14/1/2020 04:09:44 pm
If it's not clear, the included modular ac adaptor can do 50W maximum however the charger itself can do up to 150W meaning if you get a bigger AC adaptor, you can charge at higher current.
Neo
9/3/2020 12:40:07 pm
I have 2 luminear battery Do you have to plug the other end of the battery to the charger. On The luminear battery the plug is smaller than what the charger comes with ?
Quadify RC
9/3/2020 01:24:40 pm
I'm not entirely sure the question you are answering but the charger uses XT60 battery connectors which is the standard for quadcopters. Not sure what lumineer battery you are using but most of these would be XT60 considering that Lumineer is a quadcopter brand. The AC adaptor takes care of the input and you plug the battery into the output - same as any other charger.
Brandon
21/4/2020 07:44:31 am
PLEASE HELP! I just received this charger in the mail and attempting to charge my 1500mah 4s batteries. When I plug in the balance lead, I'm getting voltage reading on 6 cells, with the 3rd and 4th being much lower. (3.5v, 4.6v, 1.3v, 1.3v, 5.2v, 5.4v). After plugging in the main lead, only the first two cells give voltage reading (now 4.9V and 5.5V). For reference, I checked this battery on a capacity checker and it's reading just about 3.8 V per cell, says 58% charged. I am hesitant to try and start the charging process, given the charger is only identifying the 4s as 6s with only the balance lead in, and then 2s with the balance and main lead. I am so confused and just want to get the batteries charged so I can start flying fpv :(
Quadify RC
21/4/2020 08:39:24 am
Something weird is going on if you are getting reading for 6 cells when you are plugging in a 4 cell battery. Do not try to charge until it is reading correctly (it probably won't let you anyway)
Jodybon Coronel
1/5/2020 11:38:48 am
I just bought this recently and got it delivered today.. I wanted to charge my stock LiPo battery that came with the Heng Long tanks.. I have one LiPo battery that has a balancer and tamiya plug connector and one with just the tamiya plug..
Quadify RC
29/5/2020 05:13:39 pm
Sorry thought I'd already responded. You'll need an XT60 to tamiya converter, same as you'd need for any other charger other than the outdated NIMH only chargers
Paul Adamson
24/6/2020 07:09:11 am
I just picked up this charger for my 7.2 and 8.4 NiMH batteries. I can't figure out how to use it properly. The manual is incredibly sparse.
Quadify RC
24/6/2020 09:21:15 am
Hi Paul
Stephen Leach
21/10/2020 07:00:18 pm
Hi,
QuadifyRC
21/10/2020 10:58:53 pm
Cheers Stephen! I'd stick with the deans/t-plug connectors to be honest, xt60 are a little too big. This one will work perfectly https://bit.ly/2TbnvrN. Please read up on parallel boards before using one though, cells need to be within about 0.1v before plugged into the same board. With that said they are very handy.
Stephen Leach
22/10/2020 03:21:55 pm
Thanks for the advice.
Mark
9/12/2020 04:42:16 am
NOOB Question. I'm looking for a charger to replace the small USB charger that came with RC kit. The battery(s) are SF1865ONRH 15, 7.4 1500mAH LiION. The batts have 2 connectors, one is a small 3 pin connector used by the USB charger, the second is a large T connector used to power the RC. My question is, if I buy the ISDT 608AC , I would need to also purchase an adapter to mate the T connector to the charger XT60 for charging, and then do I simply NOT connect anything to the small 3 pin connector ? Thanks
QuadifyRC
9/12/2020 09:39:06 am
Turns out you're not such a noob after all, you are dead right. The little 3 pin plug is called the balance connector. They are a common standard and will plug in directly to the charger.
Mark
10/12/2020 10:18:07 am
First of all thanks for the quick reply. I climbed the learning curve "after" I posted the question, what was confusing me was the balance connector and how its used on the larger multi cell batt packs. Very cool connector style in that one multi-pin receptacle can accept mating connectors of different pin counts, yet still keep it indexed in terms pin1, pin2, etc.....
QuadifyRC
10/12/2020 10:41:37 am
Hey Mark
Stephen Leach
16/12/2020 11:40:13 am
Hi Quadify,
QuadifyRC
9/3/2021 12:42:40 am
Sorry I missed this question but a week is fine @ storage charge
Hans
7/3/2021 05:26:54 am
Hi, unfortunately it is not possible to charge via the balanceplug only. I am asking my self why. I have a small battery for a plane and the small usb charger that came with it only charges via balance plug.
QuadifyRC
9/3/2021 12:46:11 am
This is typical of all decent lipo charges as a safety feature as the amount of current you can pass through as JST balance plug is very limited.
Eduardo
24/3/2021 10:27:02 am
Hi! After reading your review, went and bought it. My question is, how do I set it up to charge de WL 124109 battery? I keep getting an error message.
QuadifyRC
24/3/2021 10:58:02 am
Great, I think you'll live it. You need to plug the balance connector into the balance port and the battery into the xt60 discharge port via tplug to xt60 adaptor.
Eduardo
21/4/2021 11:41:11 am
I got the adaptor and once I try to start charging I get a "Abormal Battery Connection" message. Don't know what to do next. Hope you can help me figure it out. Thanks!
QuadifyRC
21/4/2021 01:38:11 pm
Unfortunately this is hard to tell without images. First I'd start with the instruction but if you are still confused you can put a post up on my facebook group: https://www.facebook.com/groups/quadifyrc
Shahar
29/8/2021 06:29:57 am
Hi, I like the review, thank you. Would you consider the isdt D1 a better choice than the 608ac for a noob with only HBX 16889a Pro and currently 3 batteries which might grow to 5 , considering it cost only 10$ more?
QuadifyRC
31/8/2021 12:14:18 am
Hi Shahar
Shahar
30/8/2021 04:00:51 pm
There is another cheaper option - the isdt Q6 nano with toolkitrc power supply ADP100, this bundle cost about 10$ less than the 608, how do they compare?
QuadifyRC
31/8/2021 12:14:49 am
This over the Q6 nano, the integrated power supply makes it much tidier.
James
26/11/2021 02:20:52 pm
I have a 142018 ready for Christmas(first RC car) and i am now looking for a charger
QuadifyRC
29/11/2021 04:38:59 pm
I strongly recommend this one of the IMAX - the IMAX is very old technology. This one has a vastly better interface and safety features.
James
29/11/2021 04:47:09 pm
I went with the ISDT,
Iain Langley
23/2/2022 09:39:49 am
Hi,
Mark
6/1/2022 07:01:30 am
Love your website !
Jimbo
28/2/2024 09:47:50 pm
Hi Sir, Leave a Reply. |
Thanks for visiting QuadifyRC.com Follow us on facebook below to get all the latest updates