|
Of all the WLToys cars, the 144010 and 124017 are my favourite and embody all of the incremental improvements over the hugely popular original 144001 they have made over the years. You can see my review for the 144010 here which is essentially the same as the 124017. At this price point they have their downsides but they are fast, efficient, handle well and have a wealth of options for modification. They do run well out of the box but I thought I'd share the budget mods I personally use to help you with your own decisions around upgrades. 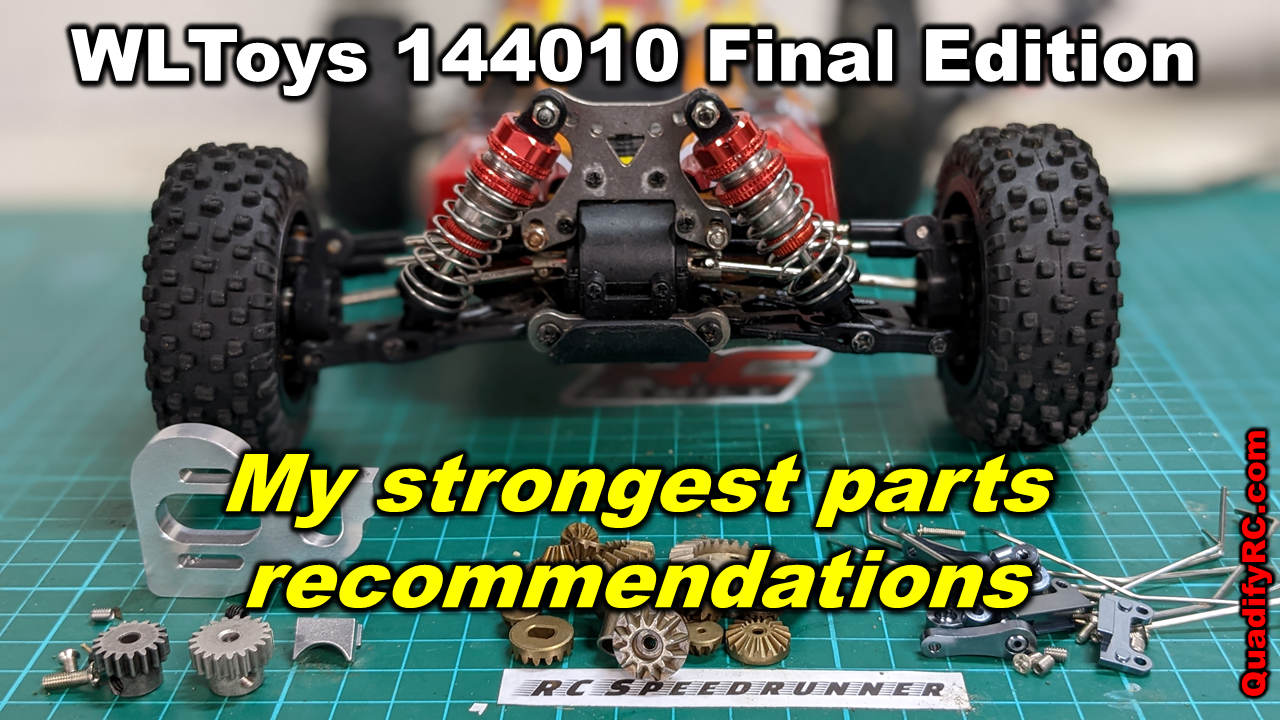 As a start point I have chosen to use my WLToys 144010 as reviewed here. It is already very quick but I wanted to make this a better general purpose car that can be adapted to any situation. Do the free and cheap stuff first Before you spend money on it though, I highly recommend considering these free (or next to free) mods to get it setup up correctly as a good start point.
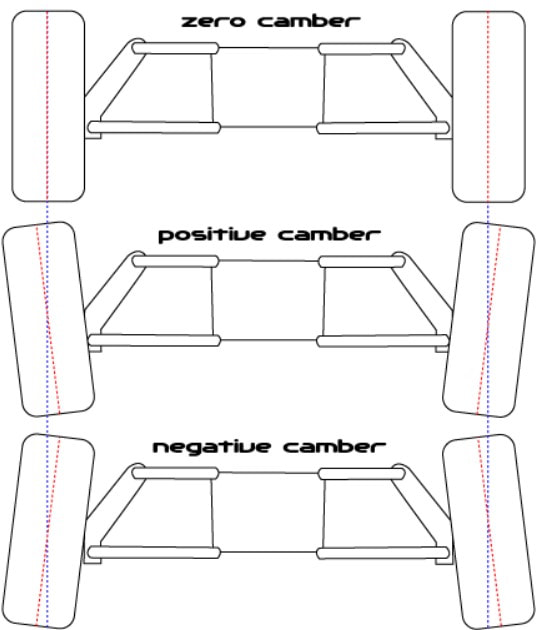
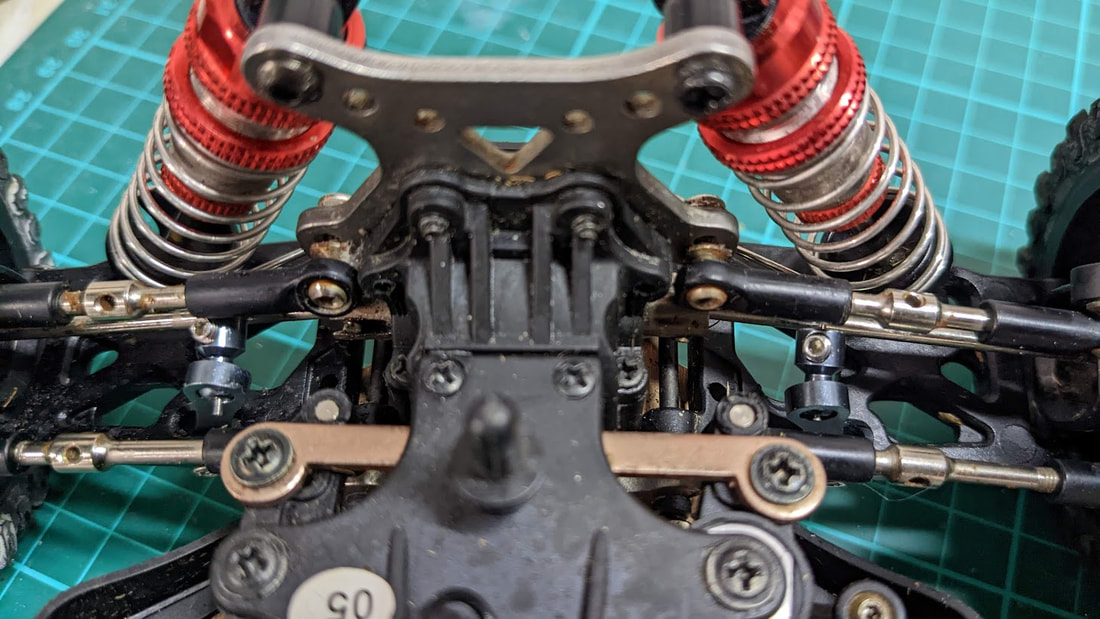
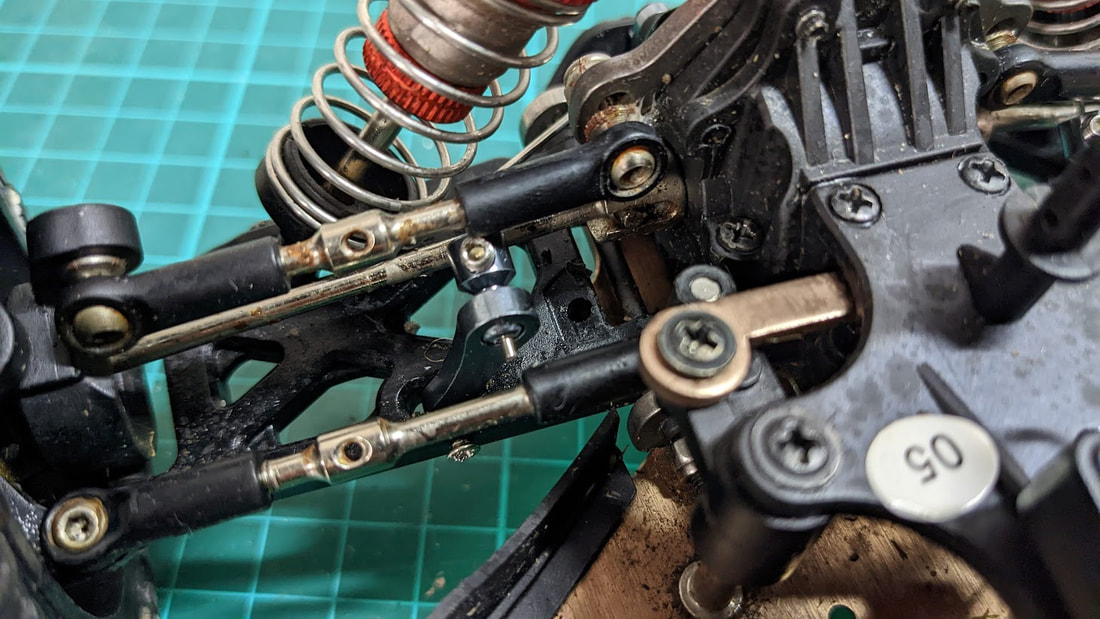
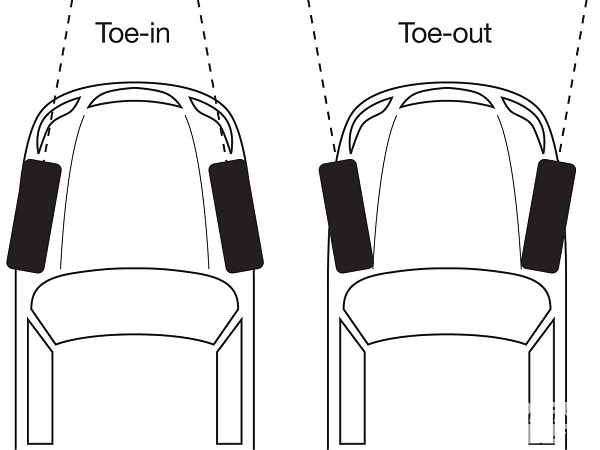 Steering Toe. The steering toe is the amount the front (or rear) wheels point inwards or outwards. Steering tie rods on my WLToys cars have always been poorly adjusted and so you can get a good improvement by bringing to a more neutral toe in/out. Being a 4wd means you can use a little toe out on the front (since the front drive moves the wheels forward from the slop in the steering train) but targeting zero is usually easiest. The rear has negative toe in by default which helps with steering turn in however you can reduce this to zero to help you get a little extra speed for straight line runs as per this guide.
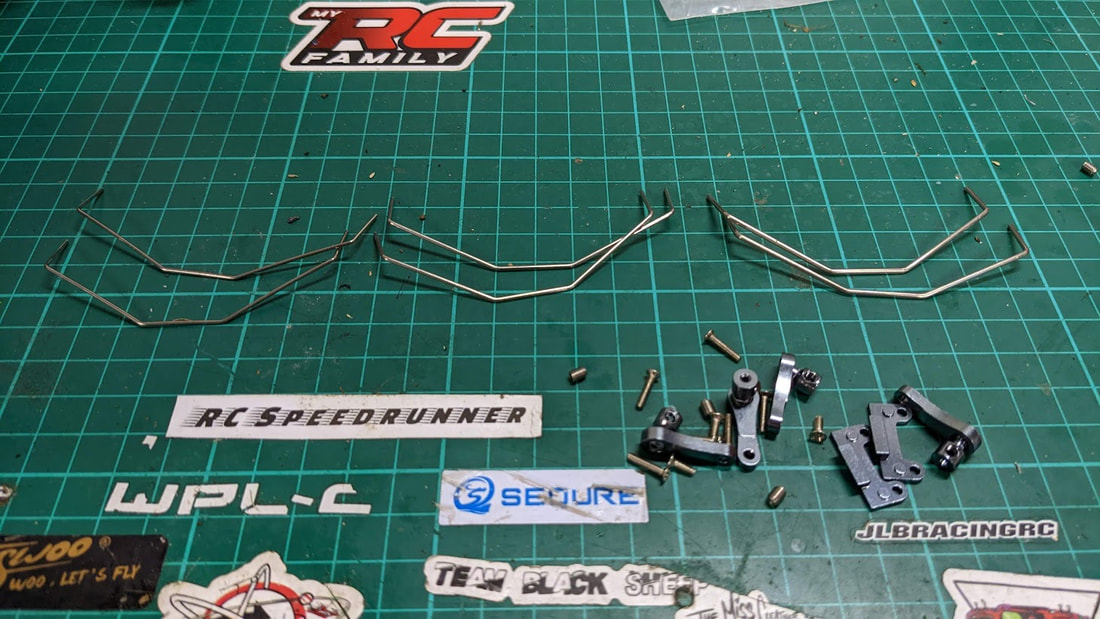
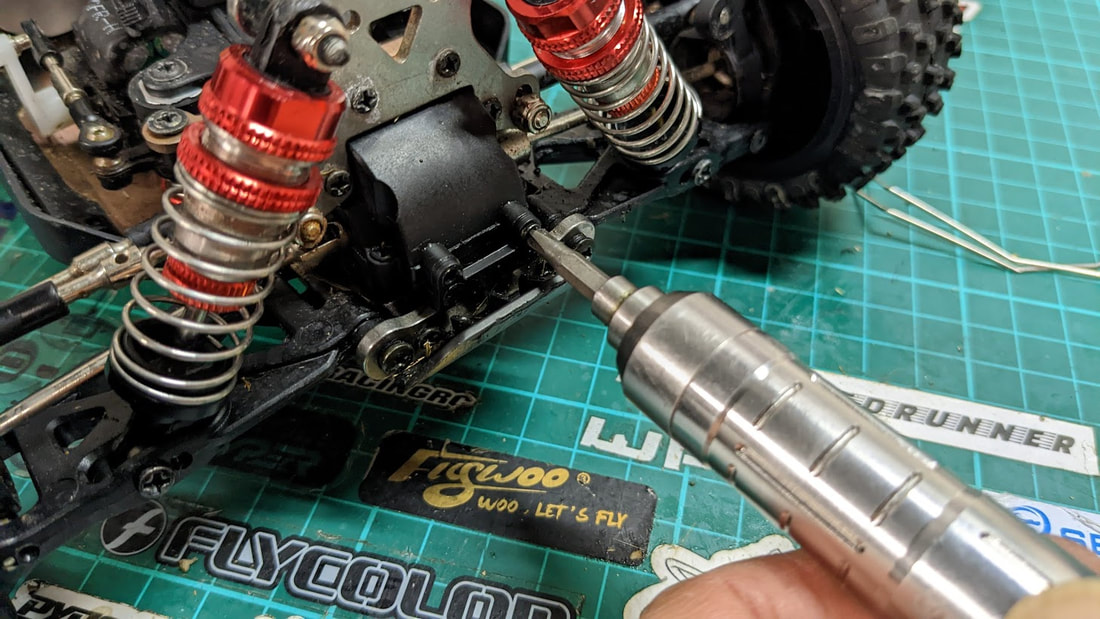
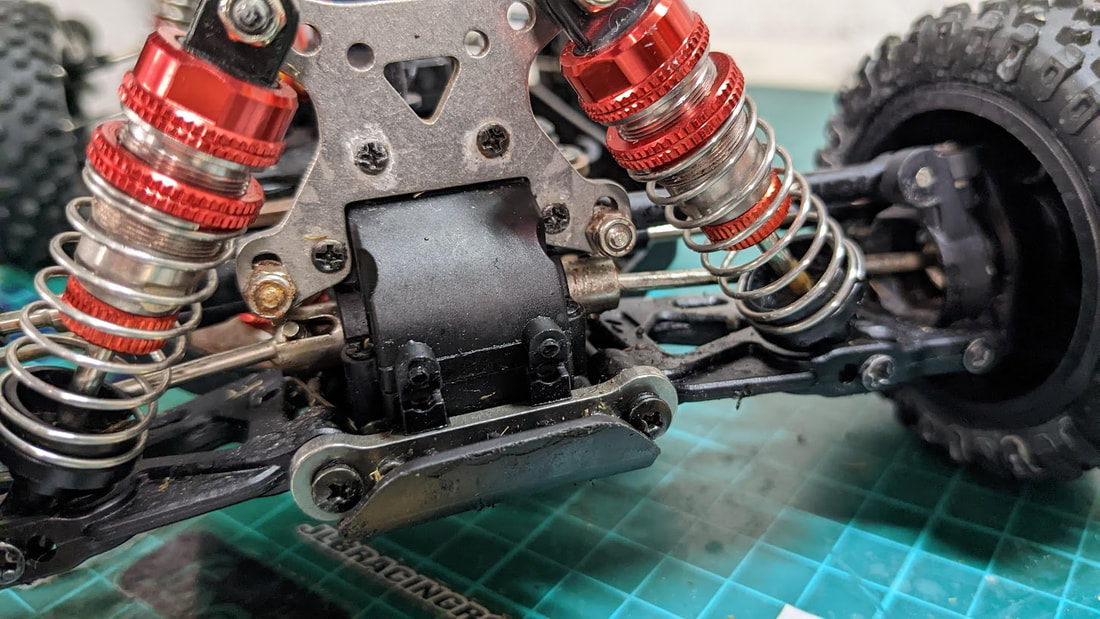
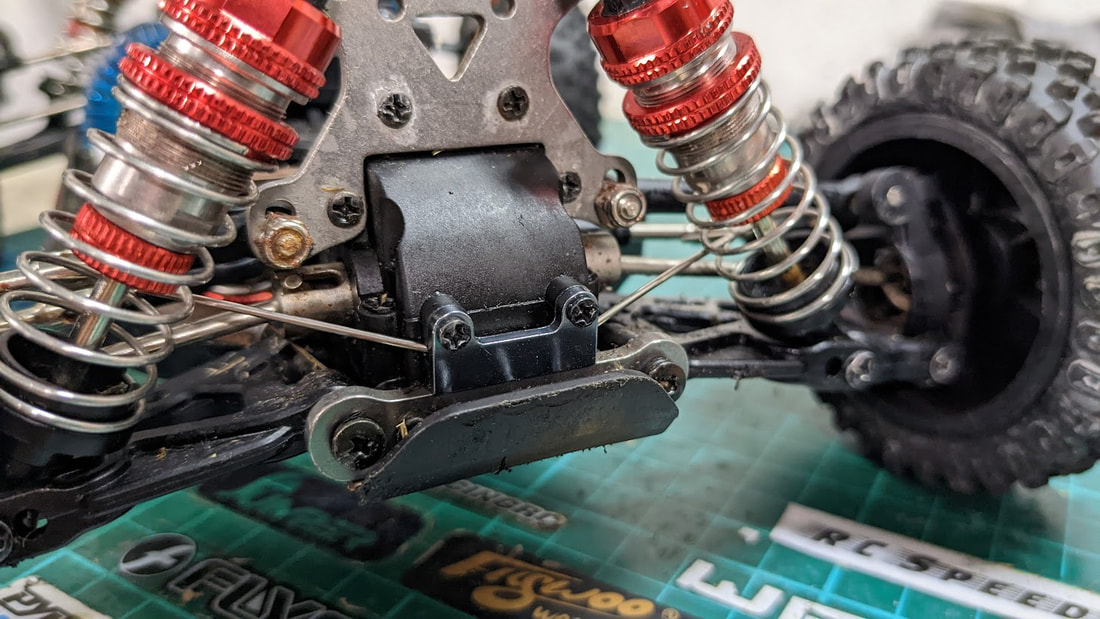
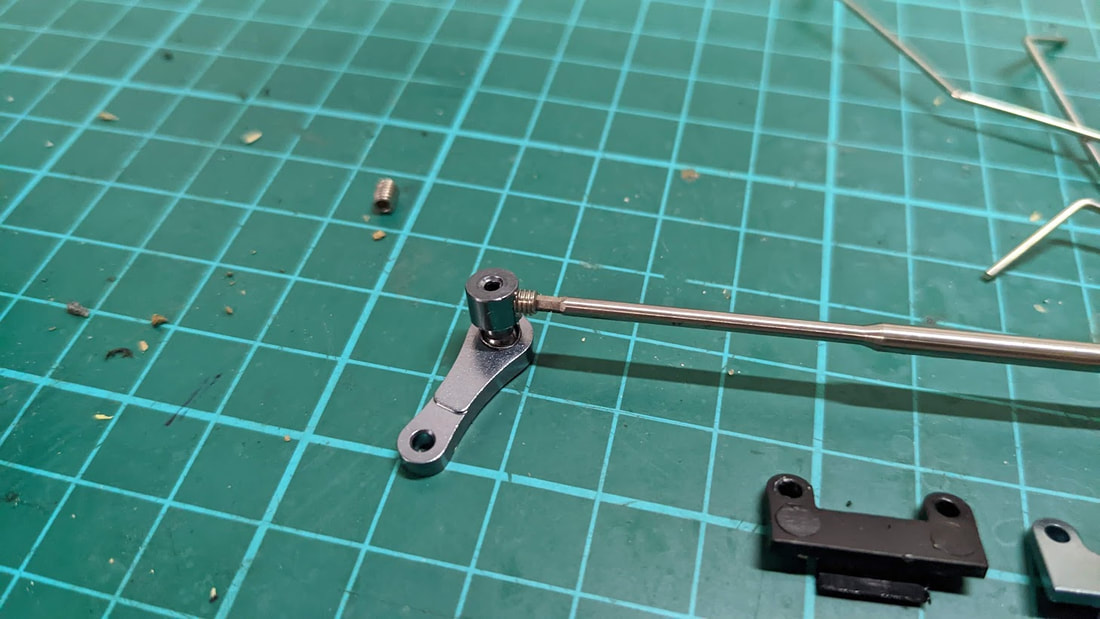
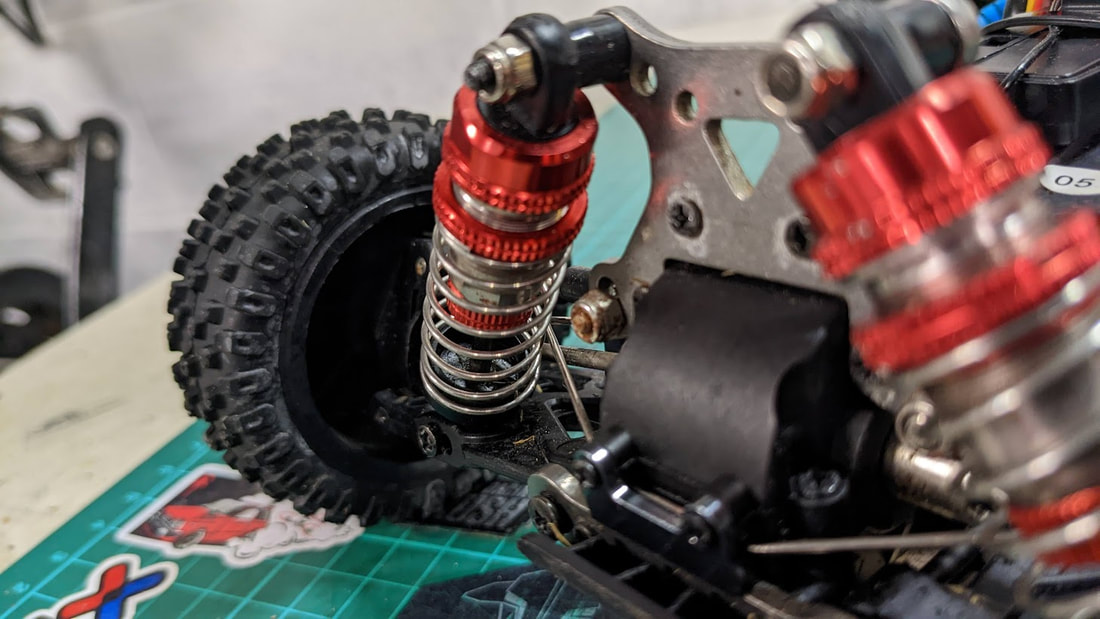
Mods for my 144010 final version Next lets look at the budget mods that have made the biggest difference for me in the way this car performs. GEMRC Antiroll bars. The suspension in this car is actually really good from the factory, especially if the oil is filled correctly. At speed and on surfaces with decent grip you can get a reasonable amount of body roll though and cornering can become less predictable. In that past I've recommended LC Racing anti-roll bars but the GEM RC store on aliexpress has recently come out with a more cost effective version that is just as easy to install and work just as well. See below for the full install instructions. If you want to see more details of the mechanics of anti roll bars then check out this more fleshed out article here
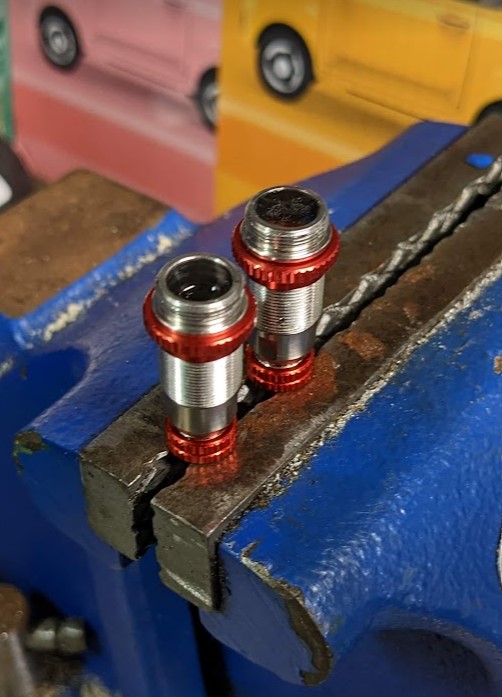
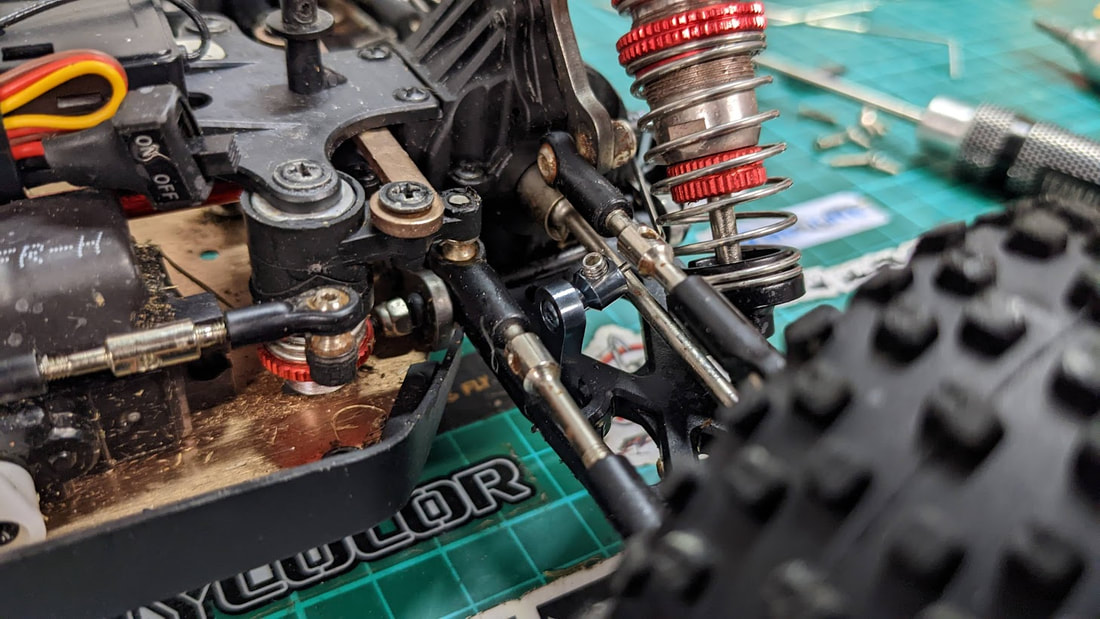
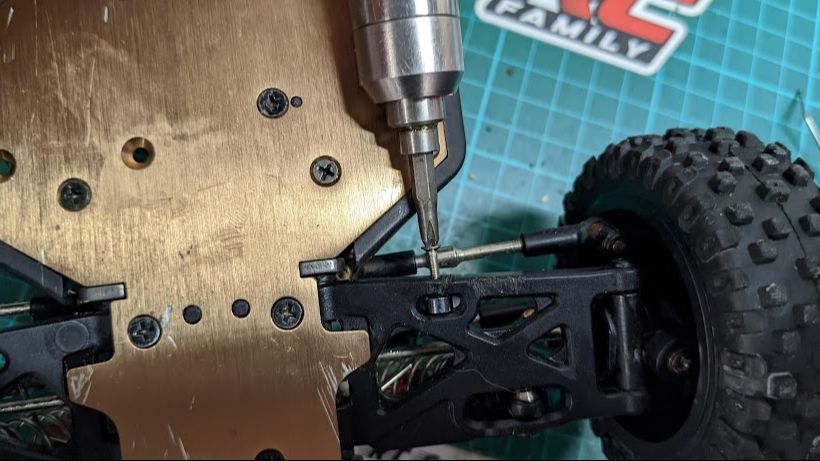
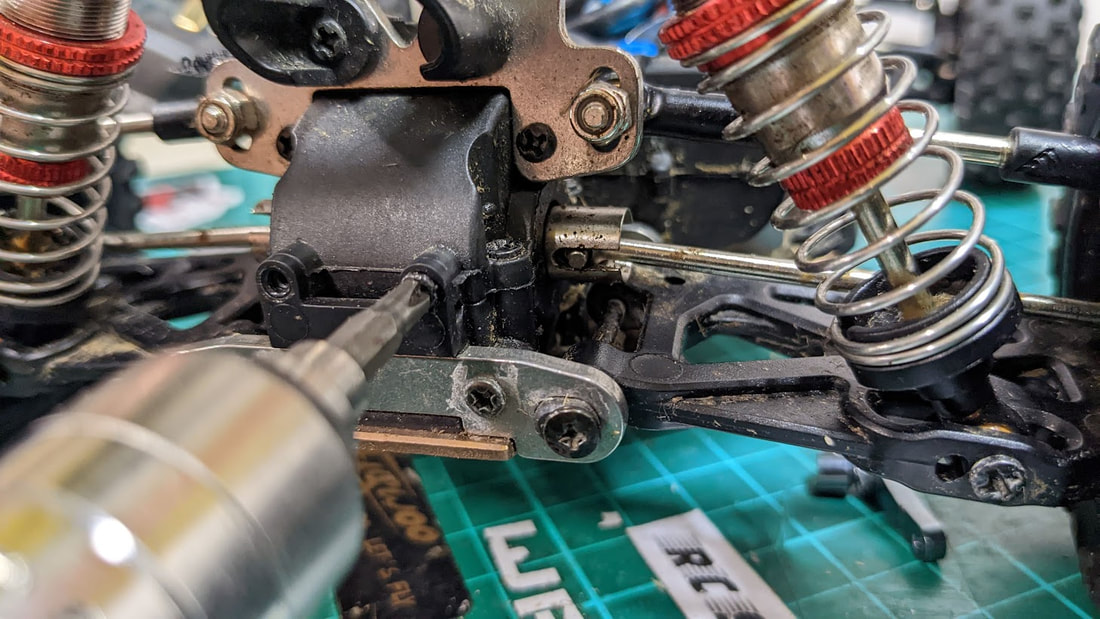
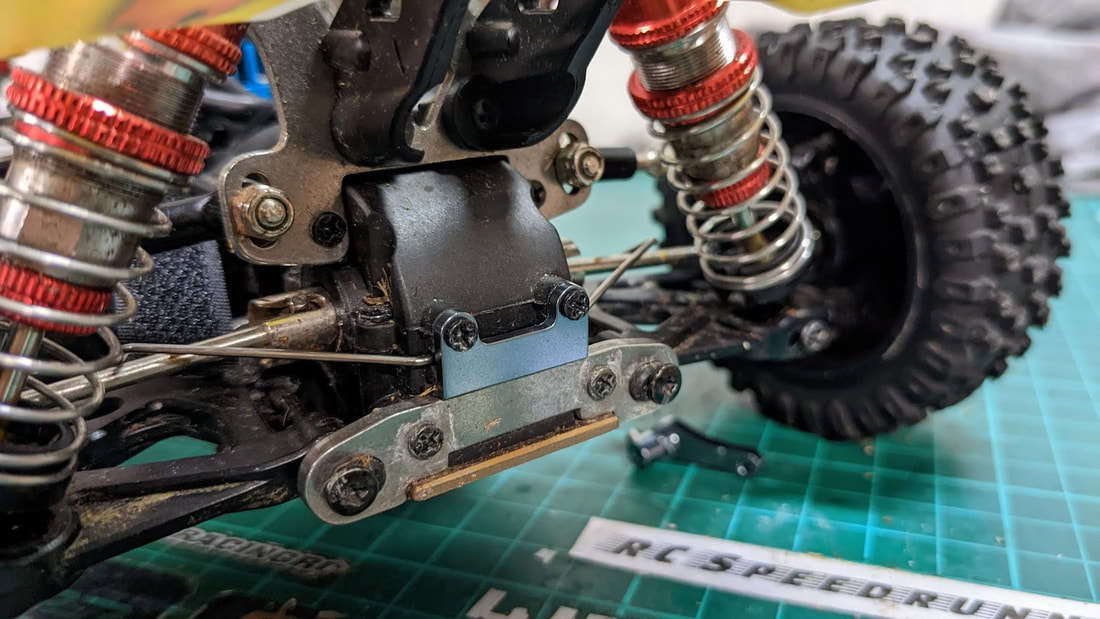
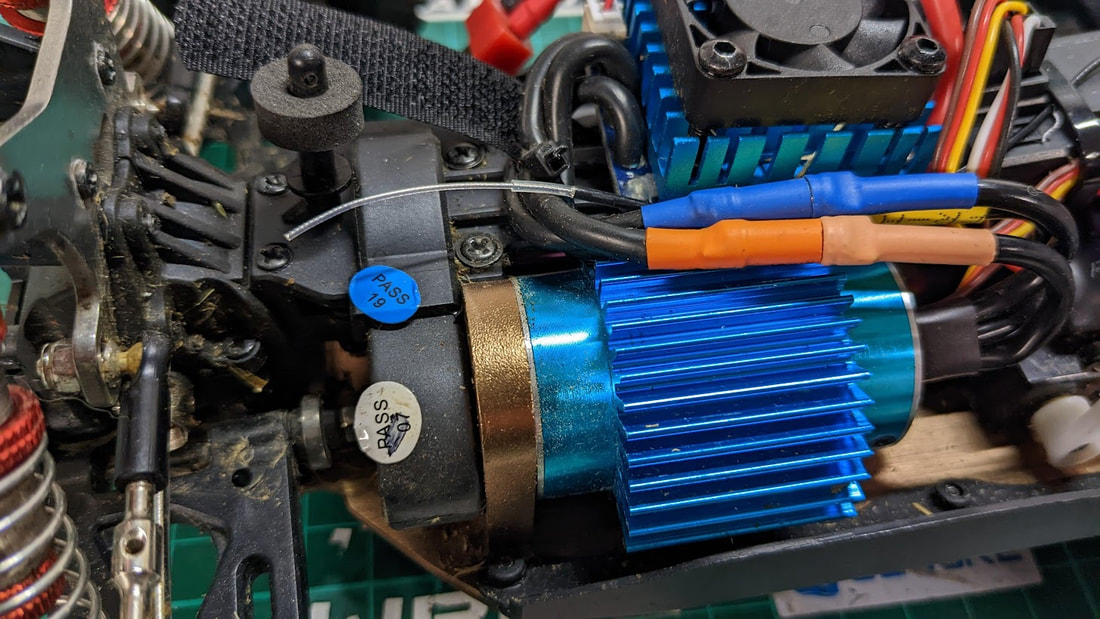
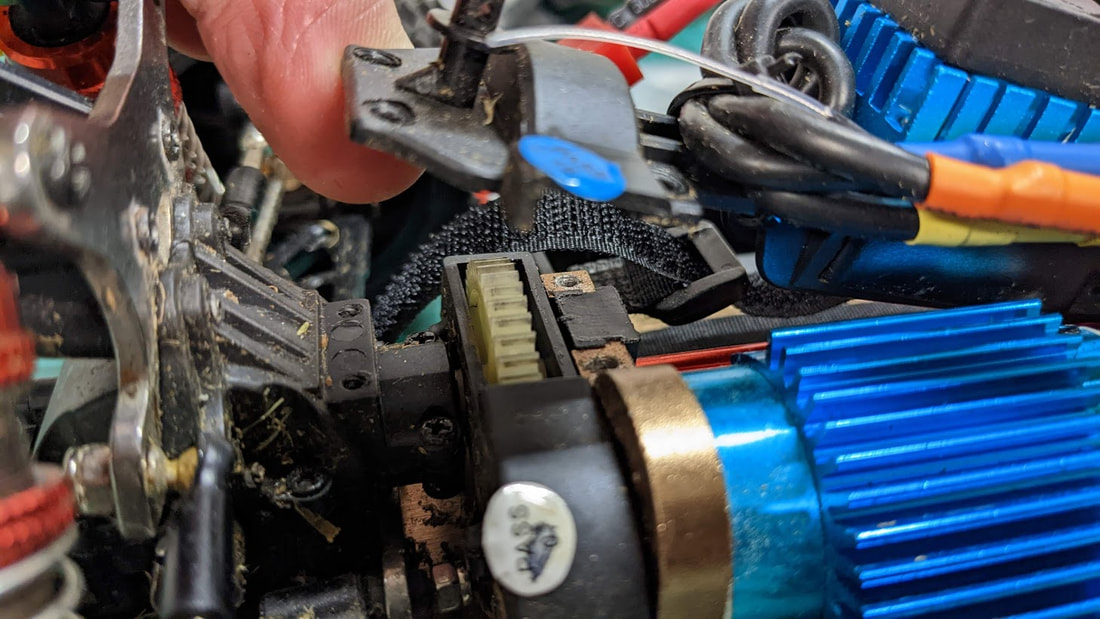
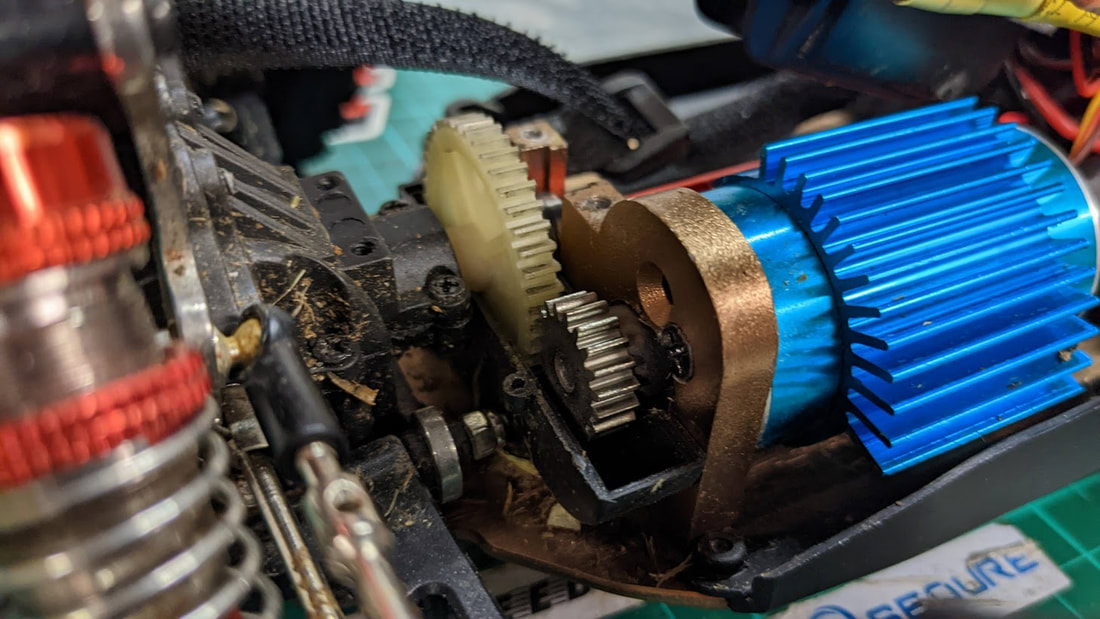
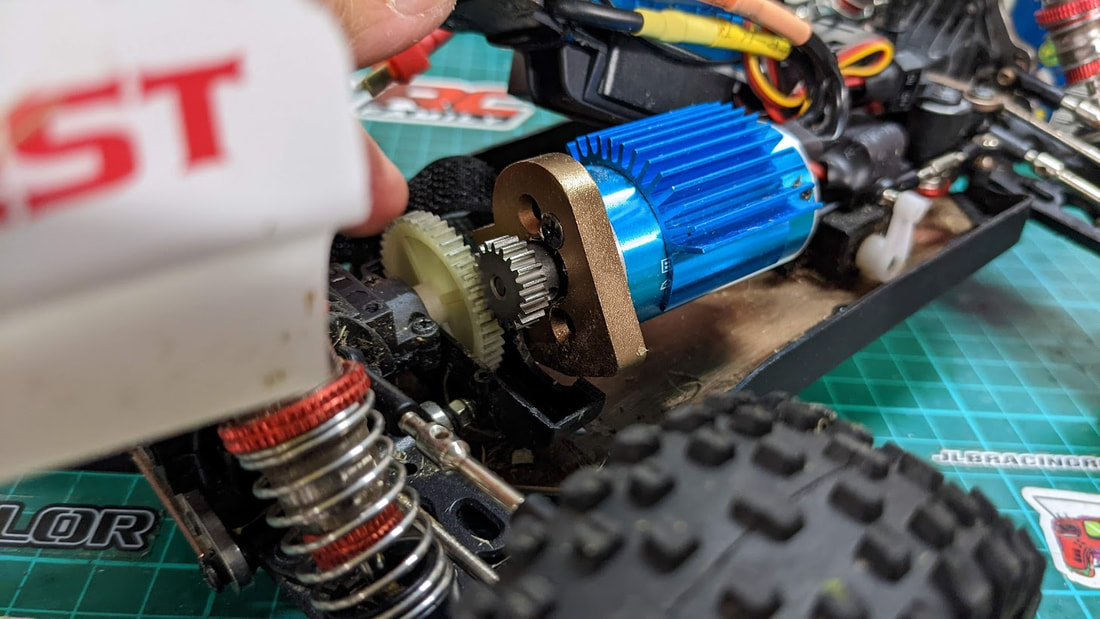
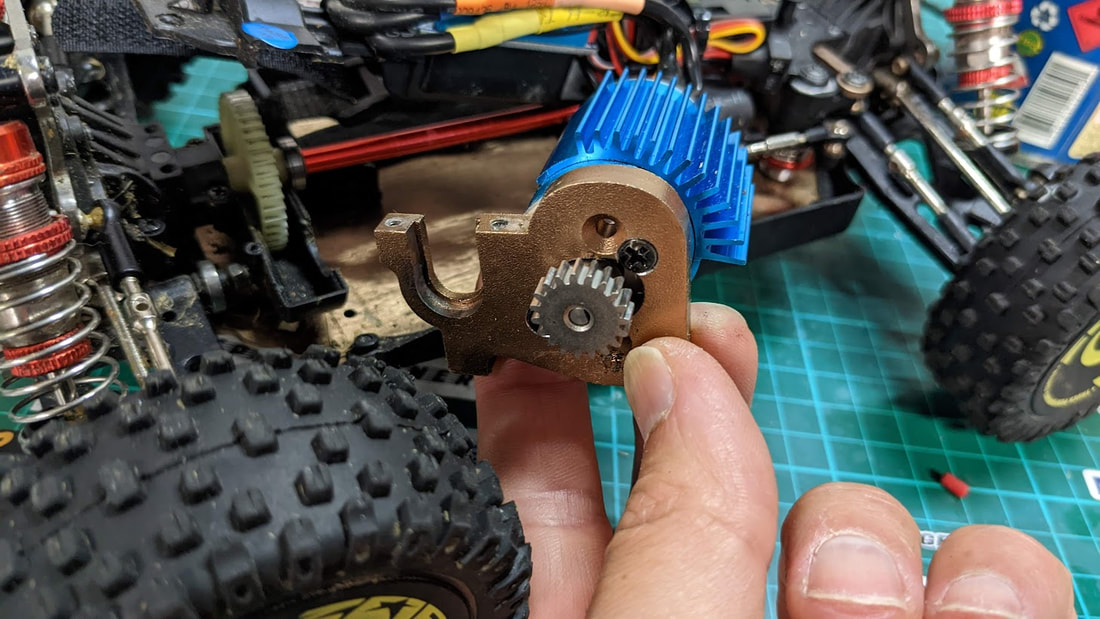
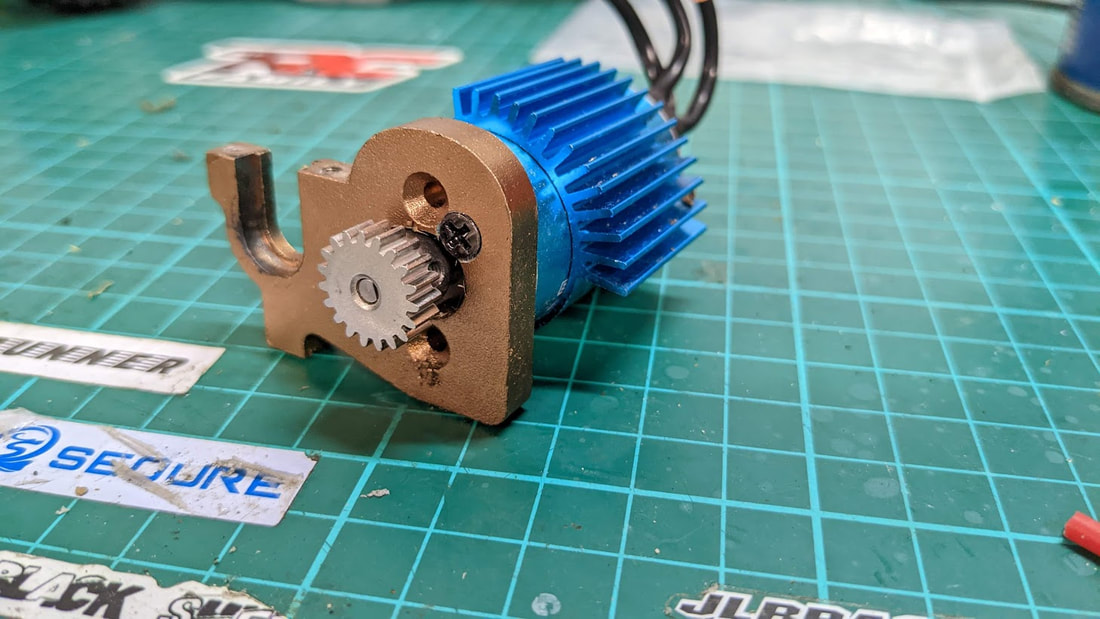
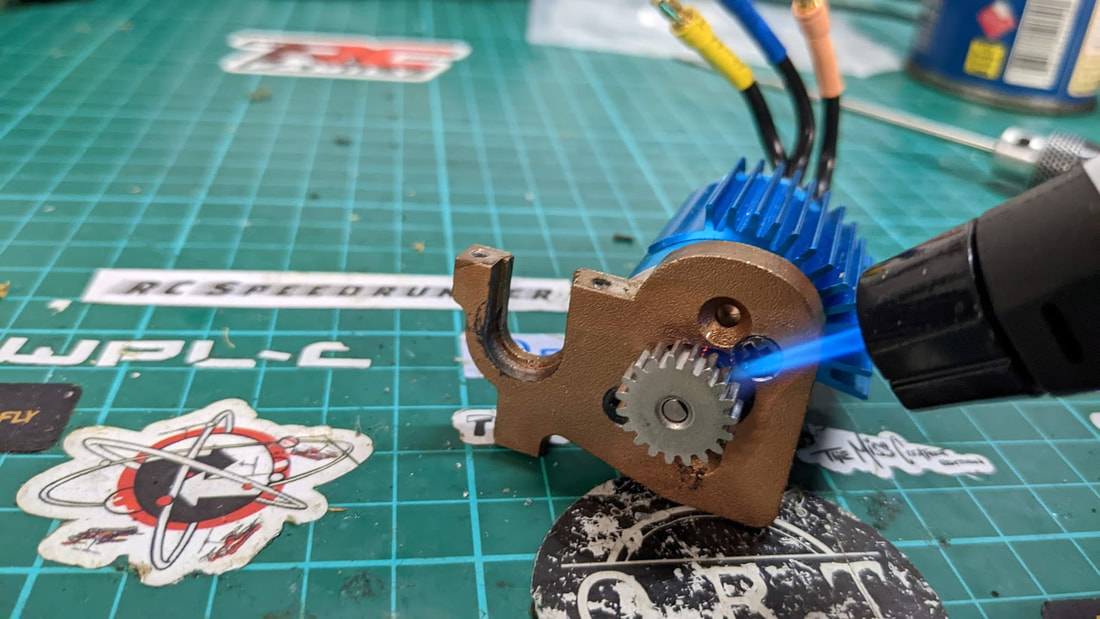
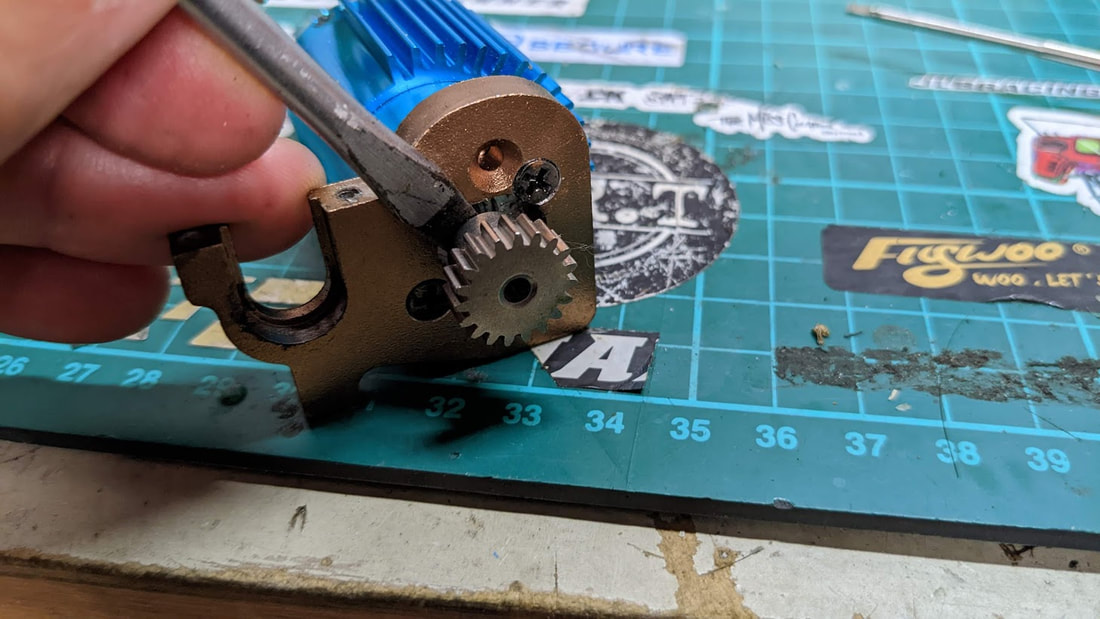
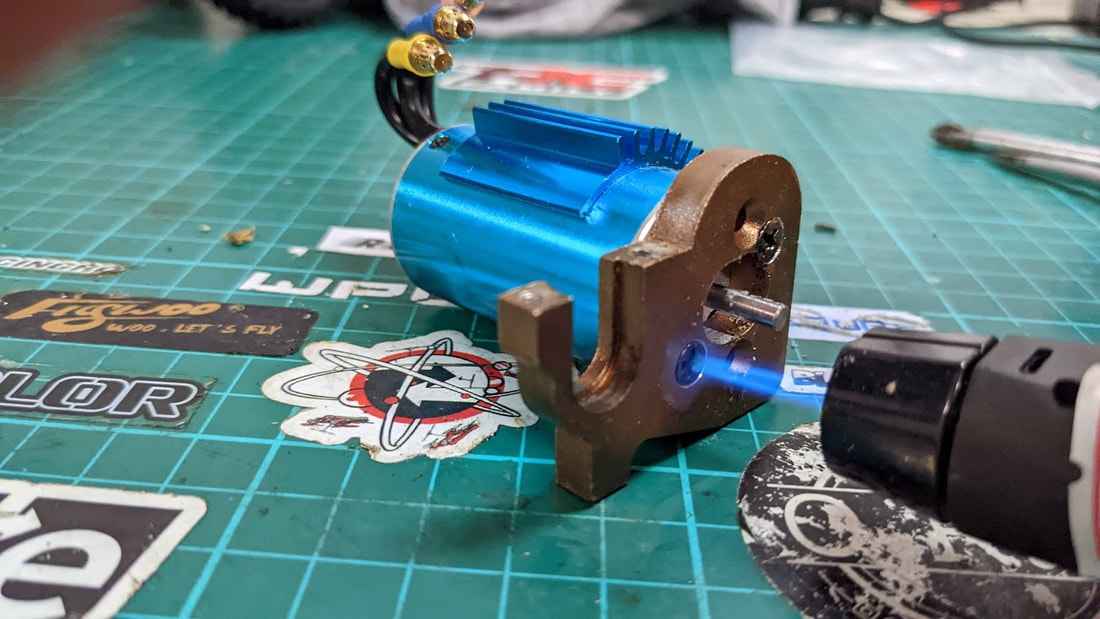
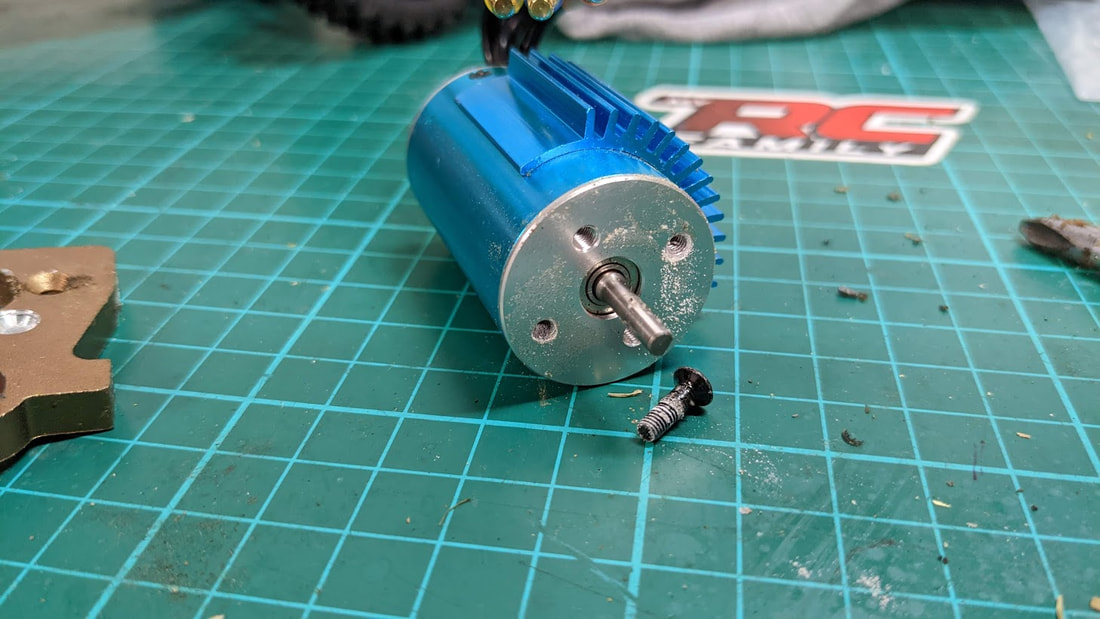
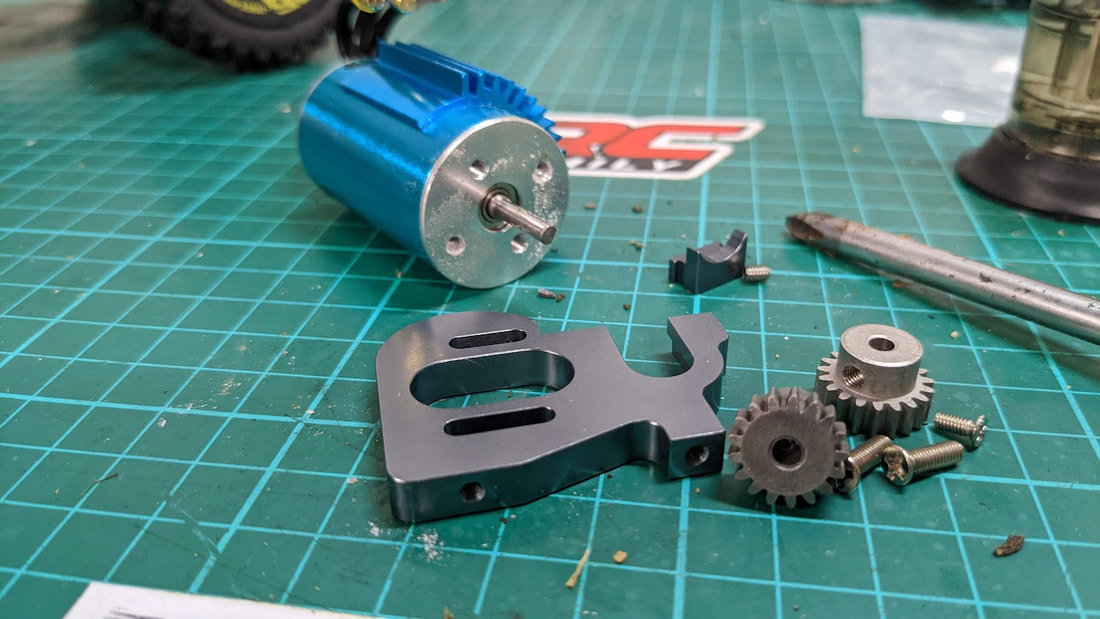
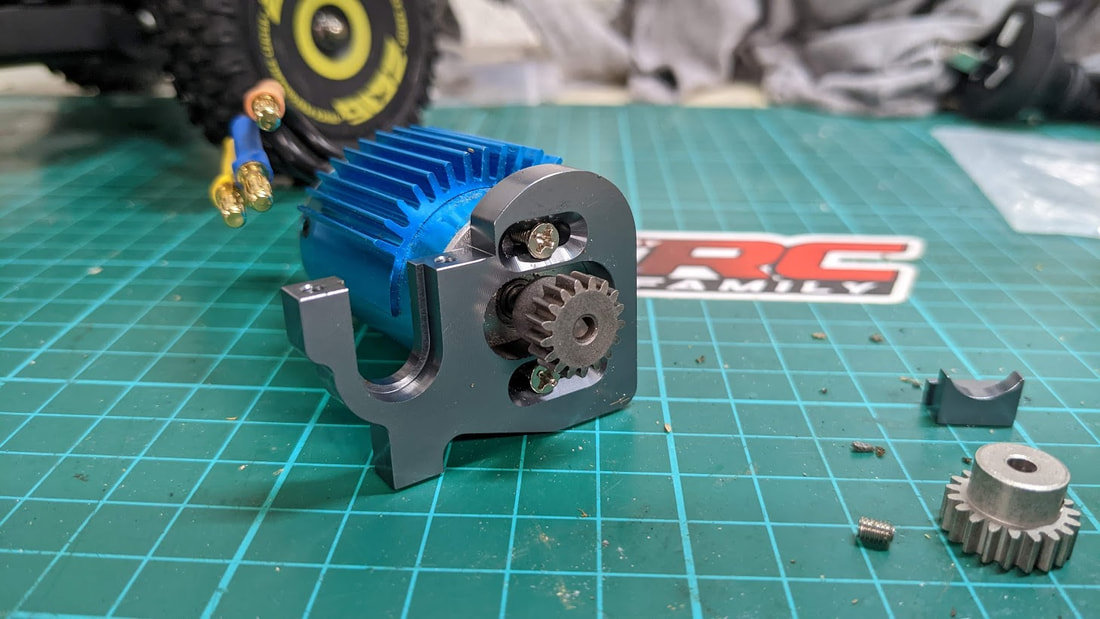
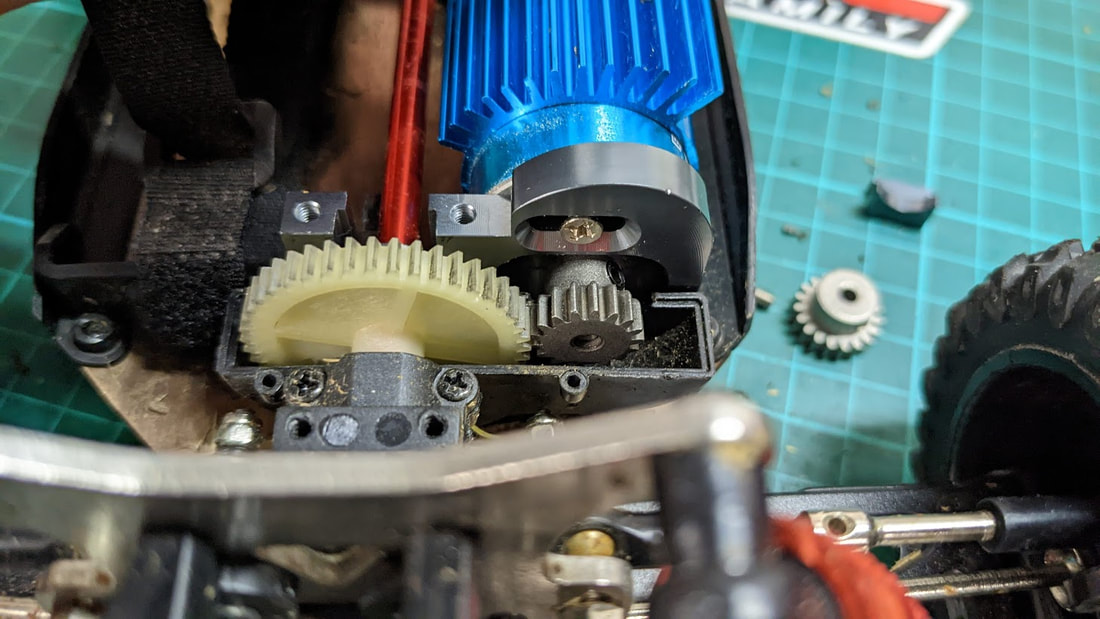
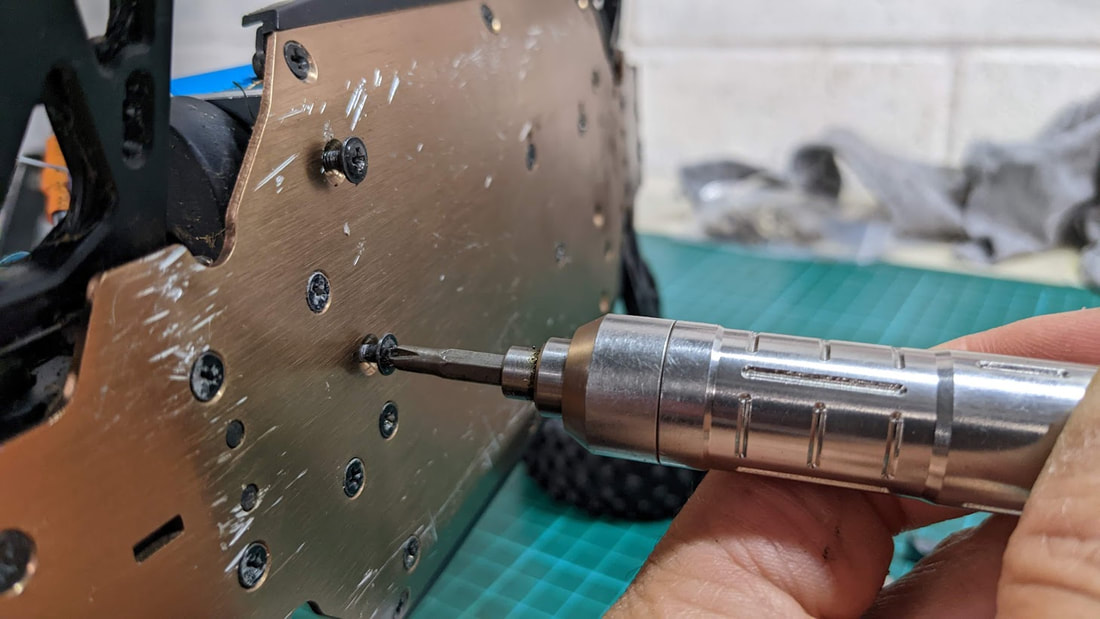
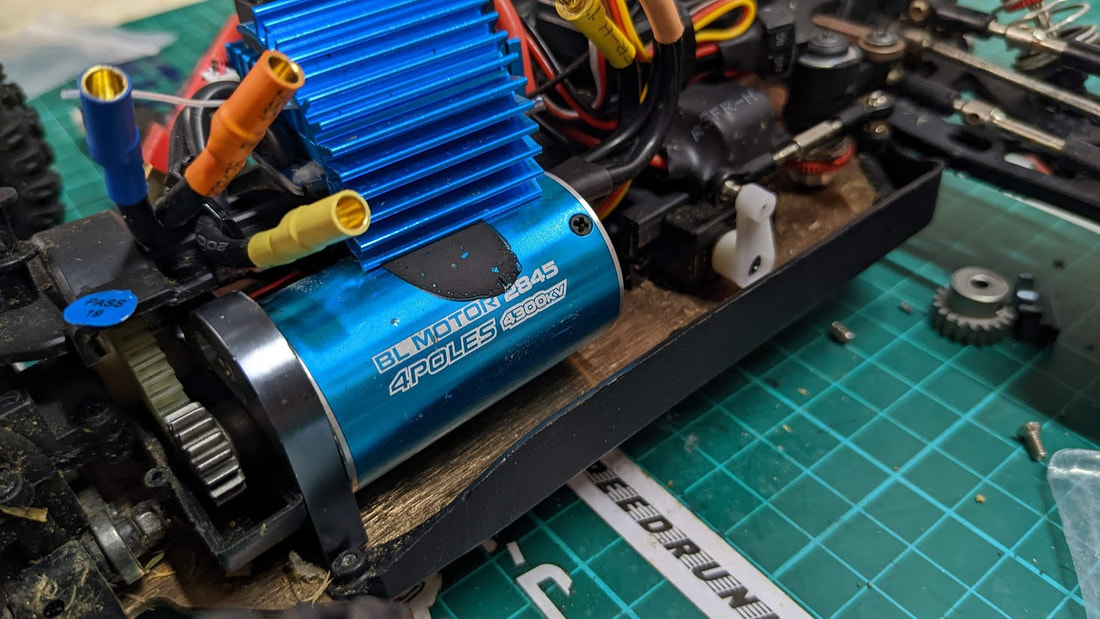
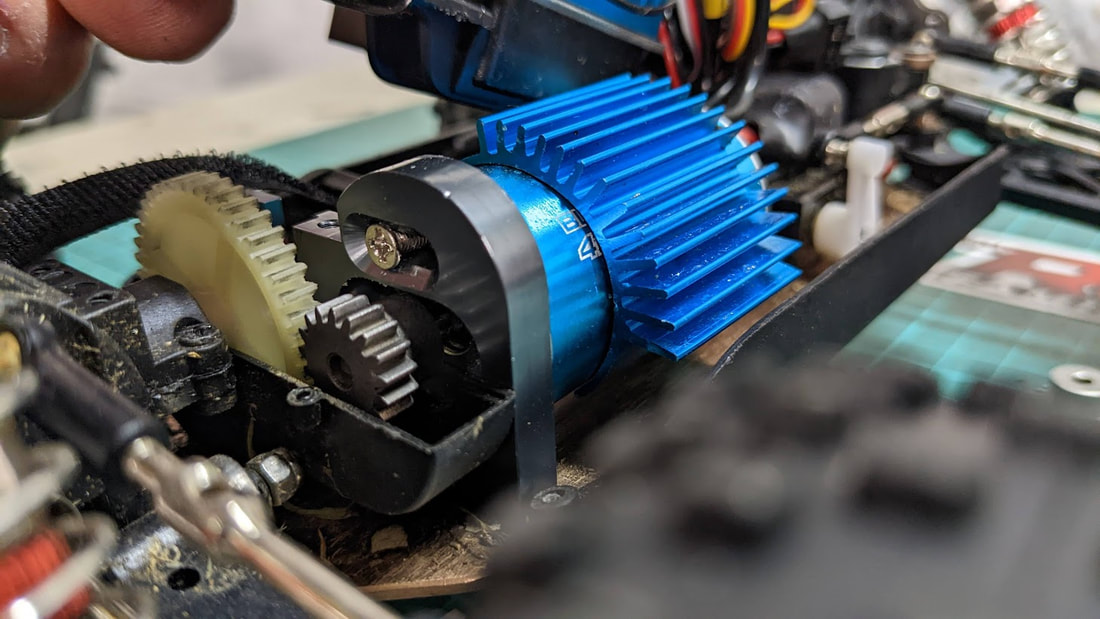
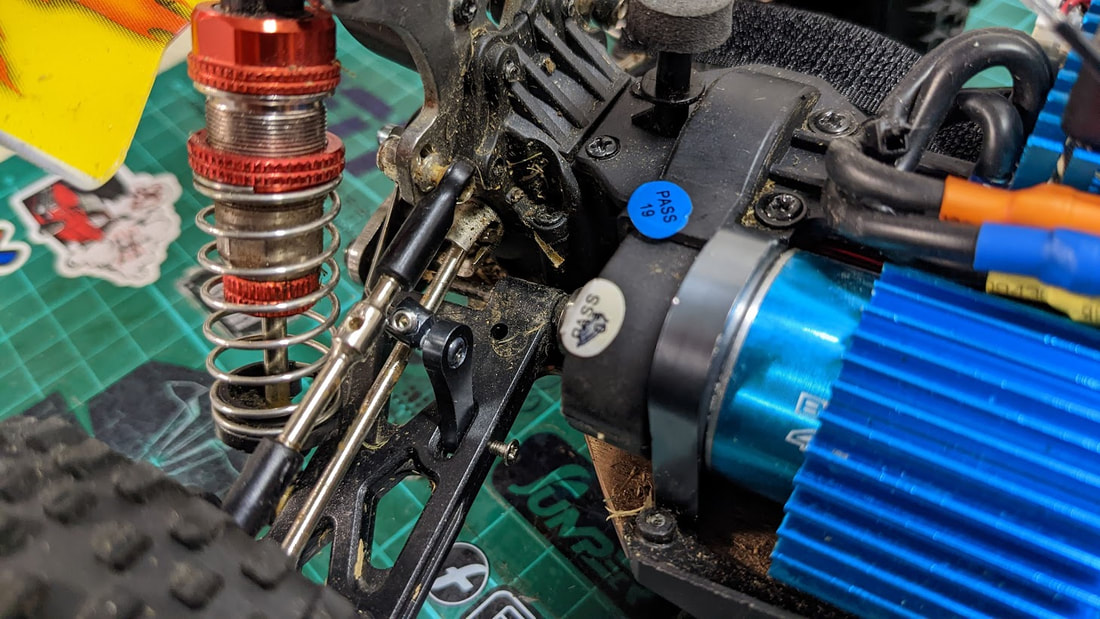 Complete the linkages like you did on the front although you may not need to feed them through as far before you tighten the grub screw 17t no-drill pinion and adjustable mount. The 19t pinion / 4300kv motor combo used in the 144010 and 124017 V2 is clearly a large improvement over the original 124017 and Eachine EAT14 although it still does compromise acceleration and battery life for a high top speed more than I'd like. A car this size that goes 75km/h is not to be sneezed at but if you want to corner, jump, crash or do anything else at this speed, you are going to place stress on the power train and on the durability. This is why for my final edition I have chosen to gear this down to a 17t pinion, which coincidentally is my favourite motor/gear combo right back to my very first brushless modified 144001 guide here. This will give a top speed of around 68km/h but more importantly will improve acceleration, battery life and heat control/long term durability. Installing a 17t pinion used to involve drilling and slotting a 144001 motor mount and carefully drilling out a 17t pinion that was only available in a 2.3mm shaft size. What makes this viable now is that GEM RC have also released an adjustable motor mount and 3.2mm bore sized 17t pinion gear as a very inexpensive kit. I bought 2 kits immediately and have since installed it and it works just as I'd hoped. Check out my install notes below.
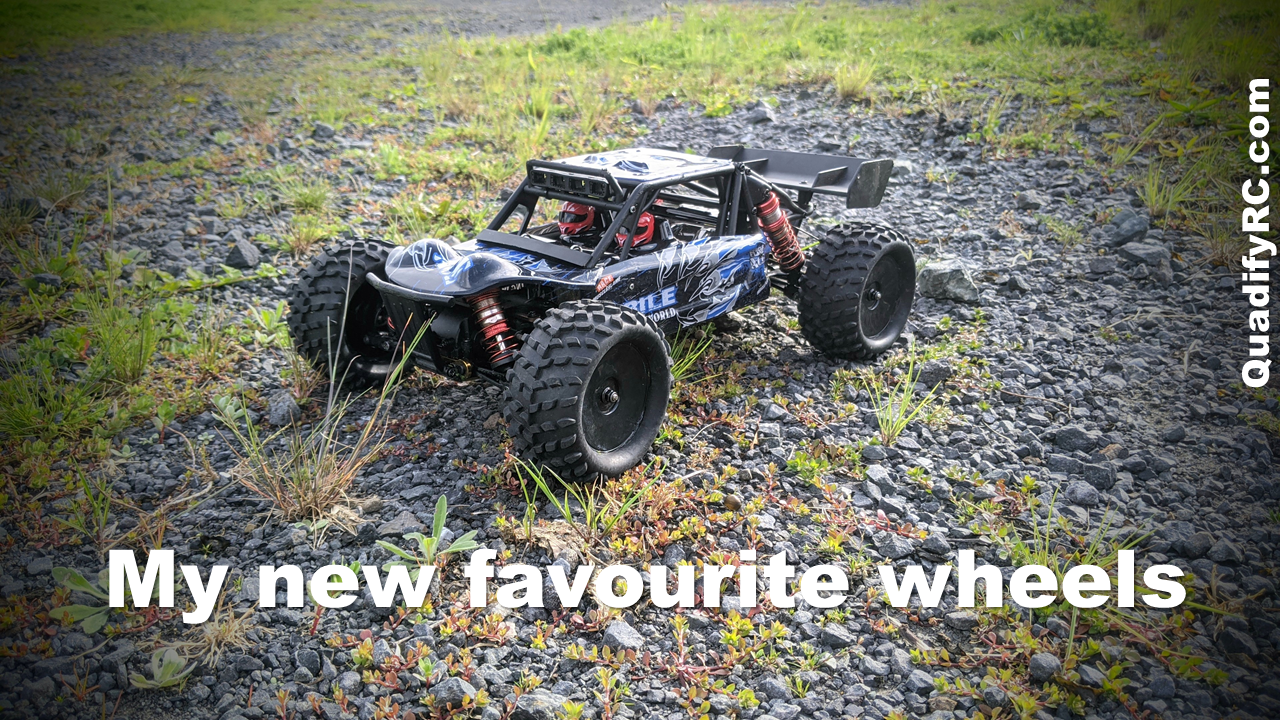
Hardened Differential Gears. Although I've personally never had an issue with the durability with stock diffs on this car I know others have either had an issue or at least have been sufficiently concerned. I've tried many time in the past to buy upgrade gears for these cars but have at best received stock replacement and at worst received smaller, finer gears that are actually for a completely different WLToys model (on several occasions). The good news is that GEM RC stock the correct gears for these cars in a well cast hardened metal and like other parts from them, they are cheap. Unfortunately I do not have pictures of these as I was in too much of a rush to install however the same rules apply - use a blow torch to heat up screws that attach to a metal part. Also, don't forget to add thick grease or a 20,000wt + diff fluid to your diffs while you are in there. 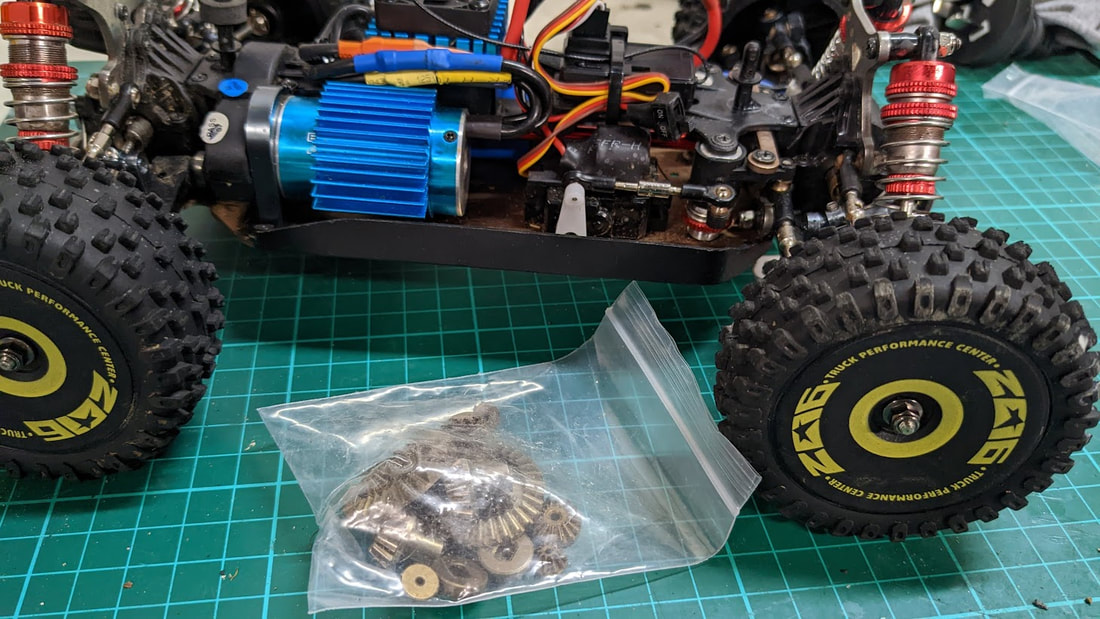 These diff gears are well made and will make a good replacement which I will do when the stock ones wear out. Always replace a full set of gears to get the right wear pattern Since this is a general purpose basher for me I plan to leave this as is... close to stock. However, here are some other customizations to consider, depending on the upgrade path you want to go down. Better Offroad Tyres. Stock wheels and tyres are actually pretty good on the 144010 and 124017, a big improvement over the 144001 and 124019 so I'll be leaving as is but it is always easy to recommend the Remo P6973 wheels and tyre set as a strong option in the correct size that will grip well in any condition. If you are strictly looking at offroad, the 1822 set is a good option as well. Long time QuadifyRC friend Geoffrey Chan reckons there is not much that can touch these on a snow track either!
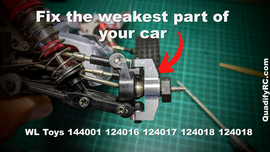 Metal parts where it counts. Being a buggy design with little to no protection on wheels mean that front suspension arms and knuckles are at risk of damage in crashes. Of all parts I personally tend to break these the most. I recommend these cheap aluminium knuckles and these hardened LC racing arms as a good durability upgrade without braking the bank. Here is the article I wrote specifically on this: FIXING THE WEAKEST PART OF THE WL TOYS 144001 124016 124017 124018 124018 - NEW METAL HUBS
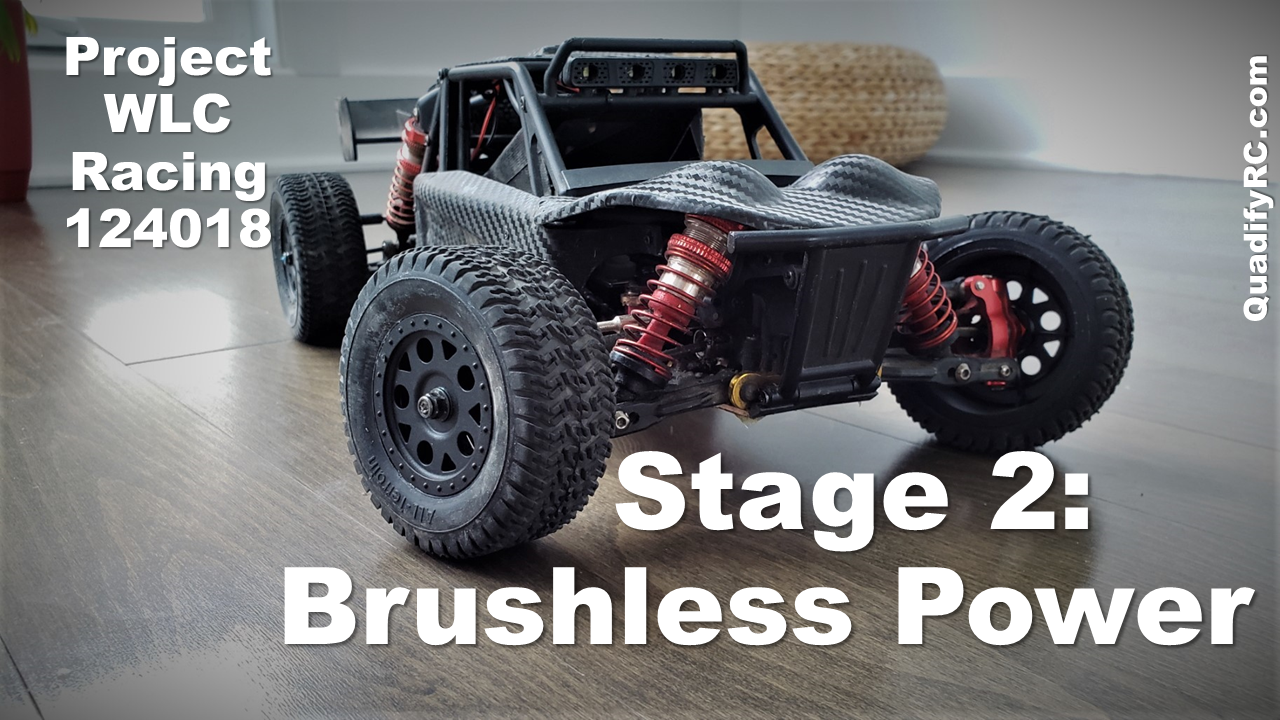
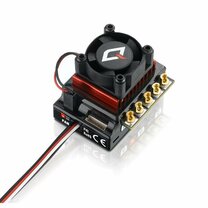 A more responsive ESC. The one real remaining weakpoint of this car is the ESC. To be clear it has proven highly durable , even on 3s but the delay is really unpleasant. After having lived with it for months I now believe WL Toys have asked their ESC supplier to include a very conservative firmware that minimises current draw. Great for eliminating early ESC death but not for response time. Unfortunately I don't have a like for like replacement recommendation at the moment - the Hobbywing 16BL30 is a perfect size but just a little small. The 10BL120 offers great functionality but is a little more expensive and requires some soldering so this is my default pick at the moment. I have a feeling that WLToys may have asked Surpass Hobby (their ESC provider) to improve the response on this ESC which is what I believe I am seeing on newer iterations like on the 104072 hoonitruck although I need to do some more testing to confirm. If this is true and if this ESC can be reliably purchased, then this may be the easiest drop in cheap and convenient replacement. So many other customisation options Well that about rounds out my core other options but don't forget, this versatile chassis makes for heaps of other options - turning it into a monster truck, a speed run weapon, a budget on road basher and much more. If you need more inspiration you can check out previous car of the month builds here or if you want to go super premium. check out Geoffrey Chan's beautiful Project WLC Racing 124018 build series that starts here.
Remember buying from any of these links in my review/guide supports my page without any cost to you and is appreciated especially since I don't ask for money via patreon and the like. If you want to get involved in this discussion, feel free to join the QuadifyRC Facebook Group Here or like my Facebook page below ↓ ↓ ↓
|
Categories
All
|


 RSS Feed
Thanks for visiting QuadifyRC.com Follow us on facebook below to get all the latest updates