|
Of all the WLToys cars, the 144010 and 124017 are my favourite and embody all of the incremental improvements over the hugely popular original 144001 they have made over the years. You can see my review for the 144010 here which is essentially the same as the 124017. At this price point they have their downsides but they are fast, efficient, handle well and have a wealth of options for modification. They do run well out of the box but I thought I'd share the budget mods I personally use to help you with your own decisions around upgrades. 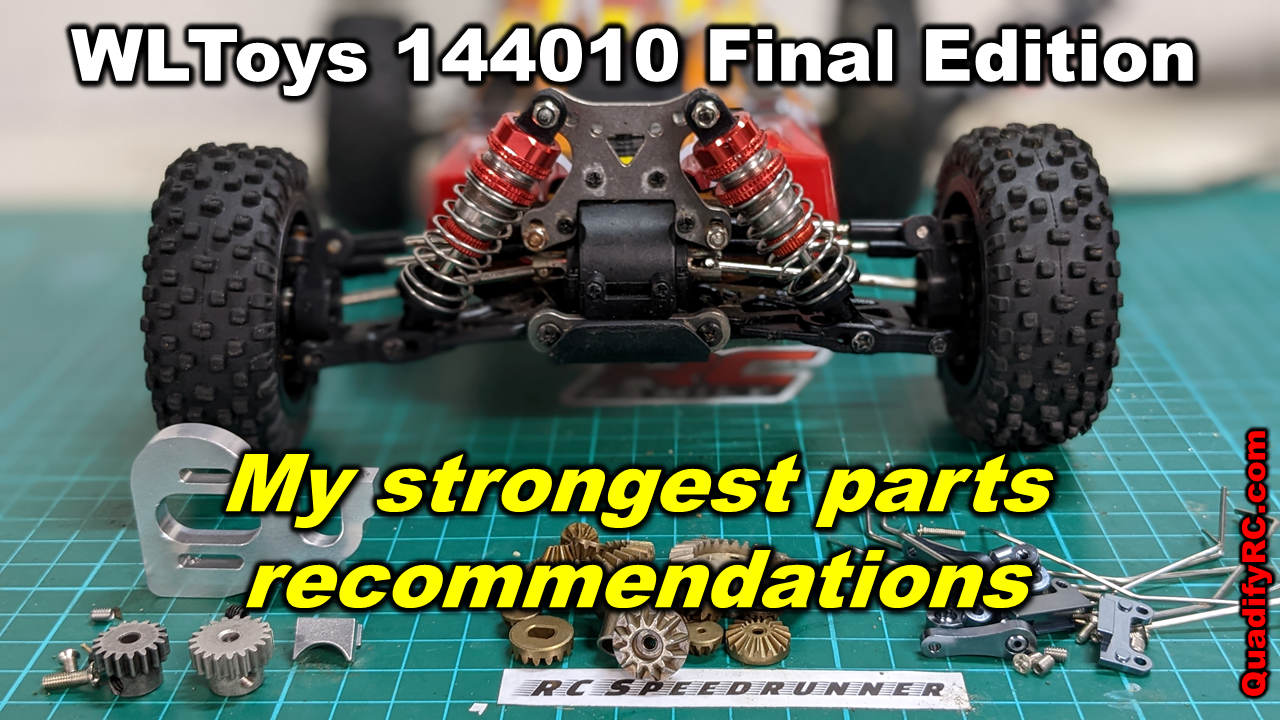 As a start point I have chosen to use my WLToys 144010 as reviewed here. It is already very quick but I wanted to make this a better general purpose car that can be adapted to any situation.
WLTOys 184016 vs 144010 and 144001: Which parts are Compatible and why you might want to swap.2/11/2022 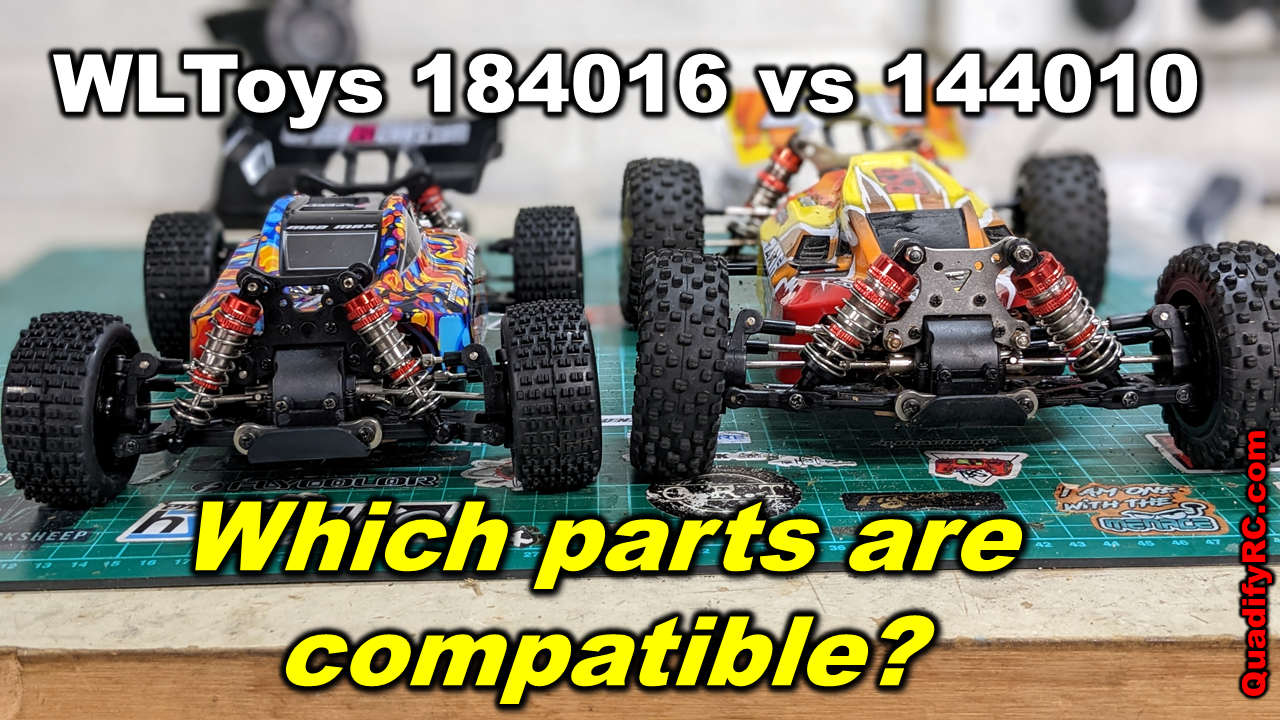 The WLToys 184016 is a small scale brushless RC car from WL Toys. It is clear on closer inspection that rather than being an updated version of the poorly-designed A959, it is in fact a compact version of the widely known 1/14 scale 144001 and 144010. I say compact rather than shrunk because it shares all the main parts from the driveline and suspension setup albeit with a smaller track and shorter wheelbase. My full review will follow soon but for now please read on for which parts you can swap between the two cars (and why you might want to do this).
EACHINE EAT14 Review: Brushless 144001 out of the box with more improvements than you'd realise29/9/2021 The Eachine EAT14 is 1/14 scale brushless 4wd RC buggy. This car is made by WL Toys for Bangood under their Eachine Brand and is based on their hugely popular 144001 car but with a upgrade to brushless power and discrete electronics as well as a raft of other improvements. I will cover the spec, build quality and of course performance of this car as a stand alone review here rather than focusing to heavily on the obvious comparisons. This car is also practically identical to the WL toys 124016 and 124017 except for a slightly smaller wheel base so the findings here apply to those cars as well. 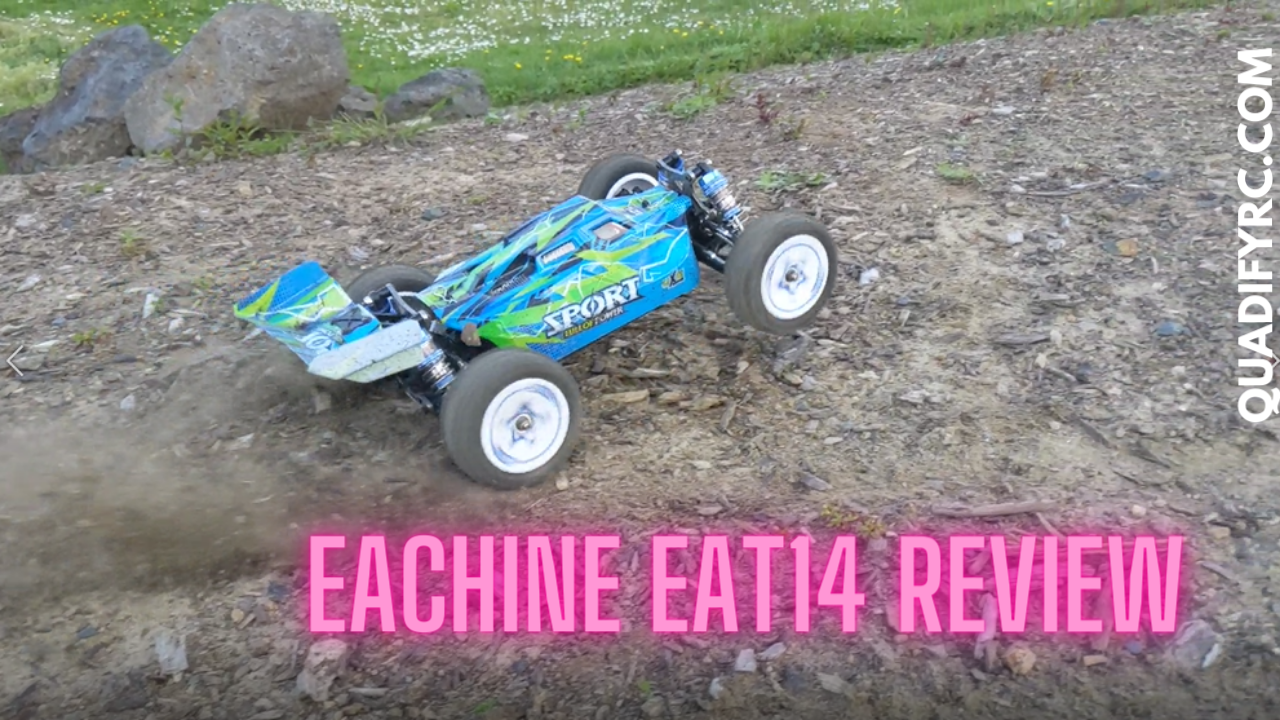 Just to be very clear, Eachine is not a manufacturer. They are a brand only which is exclusive to Banggood which they use for RC products. The brand managers at Banggood relabels products from their key suppliers, in this case, WL toys. Thus, so for all intents and purposes, the Eachine EAT14 is an RC Car designed and made by WL Toys. A closer look at specs and build Now that we have that out the way, let's take a closer look at the car, including the specifications and how it has been put together. This car is based on the WL toys 144001 which as mentioned before is a hugely successful car and a product I consider myself to be an expert on - I have written over 30 reviews and upgrade guides on this car which you can find here. The key difference of the Eachine EAT14 to that base model is the brushless power system but there are a raft of other obvious and not so obvious improvements which I'll cover in detail here.
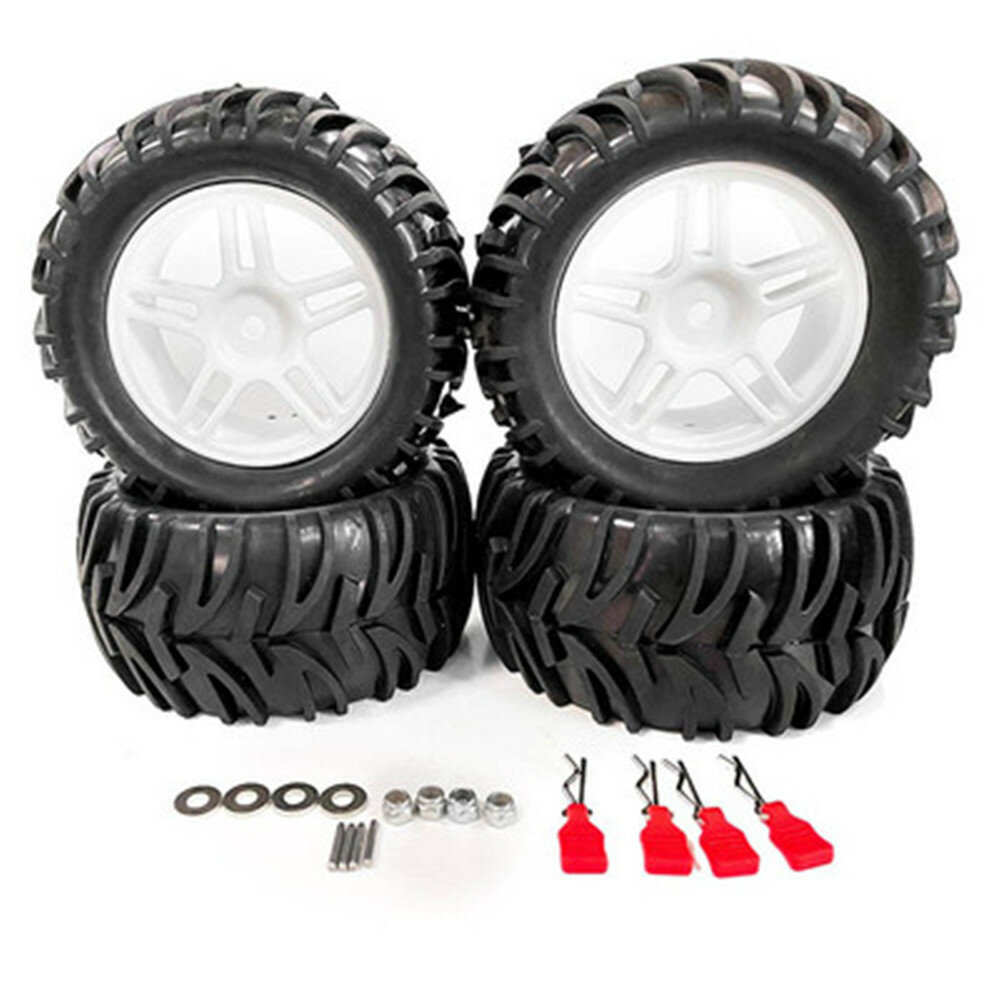
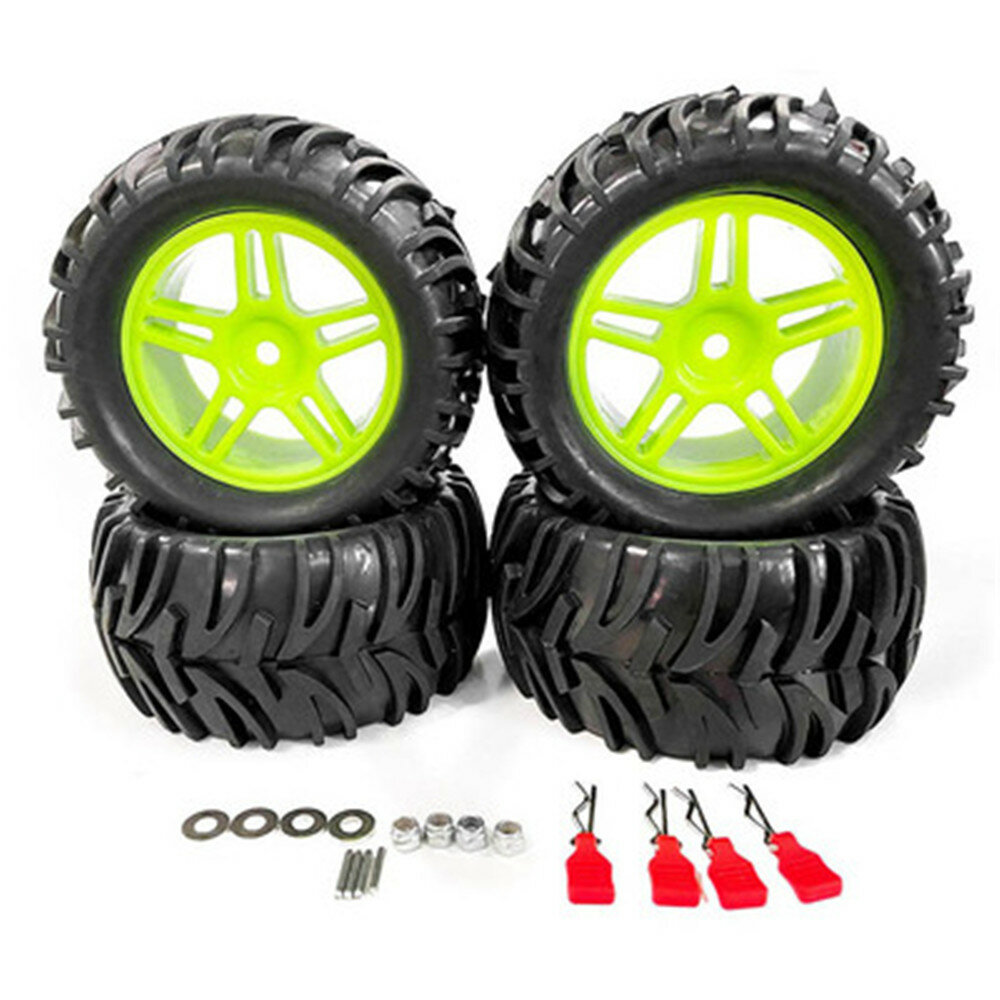
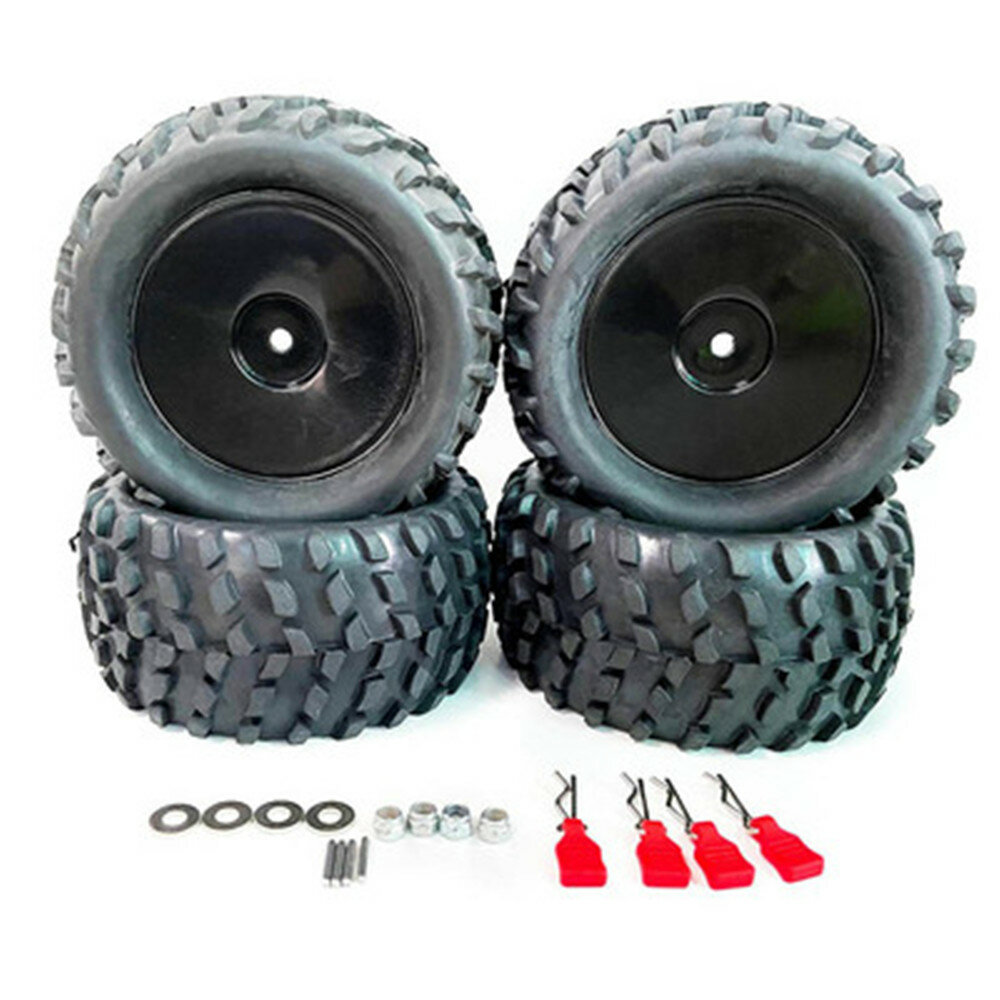
The 1/14 and 1/12 scale WL toys cars (144001, 124018, 124019) are rightly very popular cars due to their competitive price for a platform that is extremely versatile and lends itself well to upgrade - I have over 30 articles here that prove it. Although on road wheel options are easily accessible, this is less the case with off road options other than the Remo P6973 (reviewed here) which have been the gold standard. I've now found a wheel and tyre set I find to be even better offroad so long as specific conditions are met: 4PCS Upgraded Larger Tires Wheels 12mm Hex for Wltoys 144001 124018 124019 RC Car Vehicles Model Parts - 1822G-A. Read on to find more about their good, and bad points to see if they are right for you. 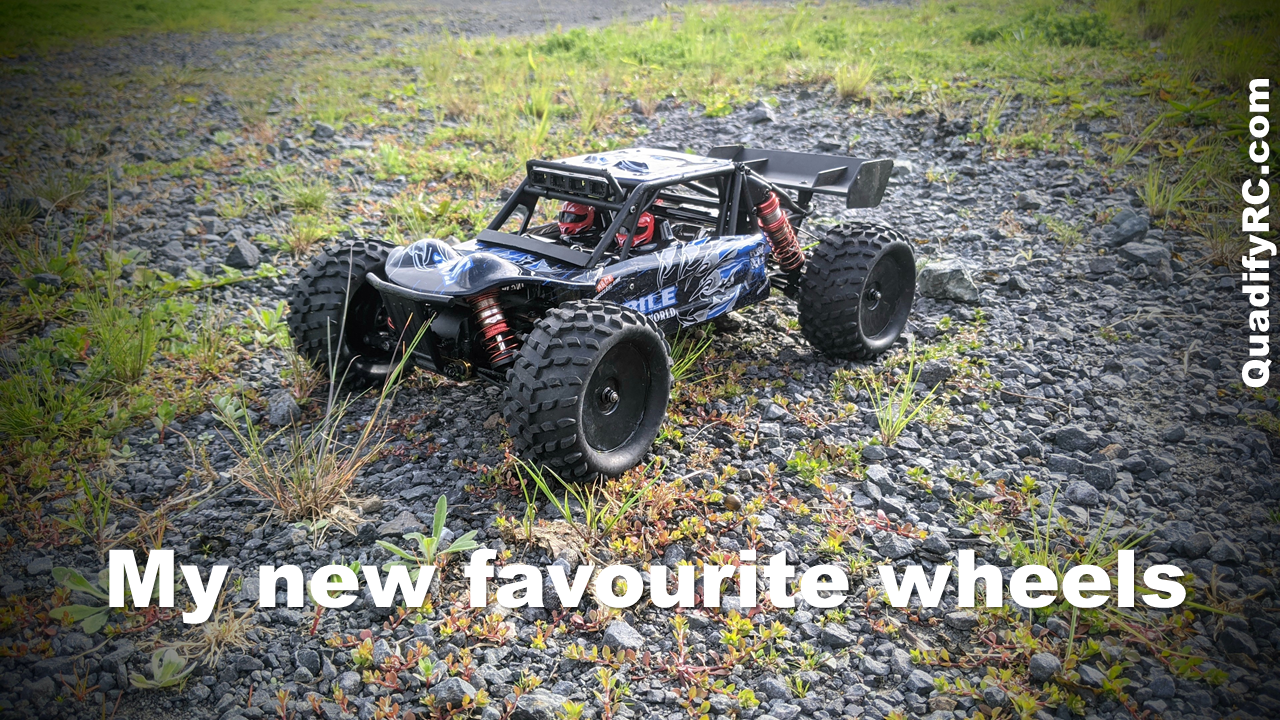 Wheel Style. These new wheels/tyres which I will refer to from here as the 1822 have options for either solid disc or spoked wheels in black, white and neon green. They come in a set of 4 with a set of foam inners and of course the tyres. Tyres come in one of two pattern styles, one I would call a paddle style and the other a knobbly style.
The WL toys 124019 and 144001 are budget 4wd on/off road RC cars that have great handling due to the fact they were essentially copied from the LC Racing EMB-1 and EMB-TG. With that said like many cars the are susceptible to body roll making handling less than idea on high speed corners particularly where grip is good. In this article I'll show you the LC Racing anti-roll bars that will cure this body roll and how to fit and give you feedback on how it improves handling (spoiler: it's a big improvement). This mod is not suitable for the 124018 nor the 124016  The suspension in these WL Toys cars is very good from the factory but from time to time needs the suspension oil filled to the correct level which I show you how to do here. I found that replacing the very heavy brushed 550 motor with a much lighter system like my drop in brushless upgrade or cheapest brushless upgrade improved handling further thanks to the more even weight distribution and better loading on the springs.
The common platform shared by the WL Toys 144001, 144010, 124016, 124017, 124018 and 124019 is a generally robust one but it does tend to have a common weak point - the front hub carrier AKA front wheel seat. I'm happy to say I've found a cheap, strong and well-made metal alternative and in this article I'll show you why they are only now worth getting and of course how to fit them 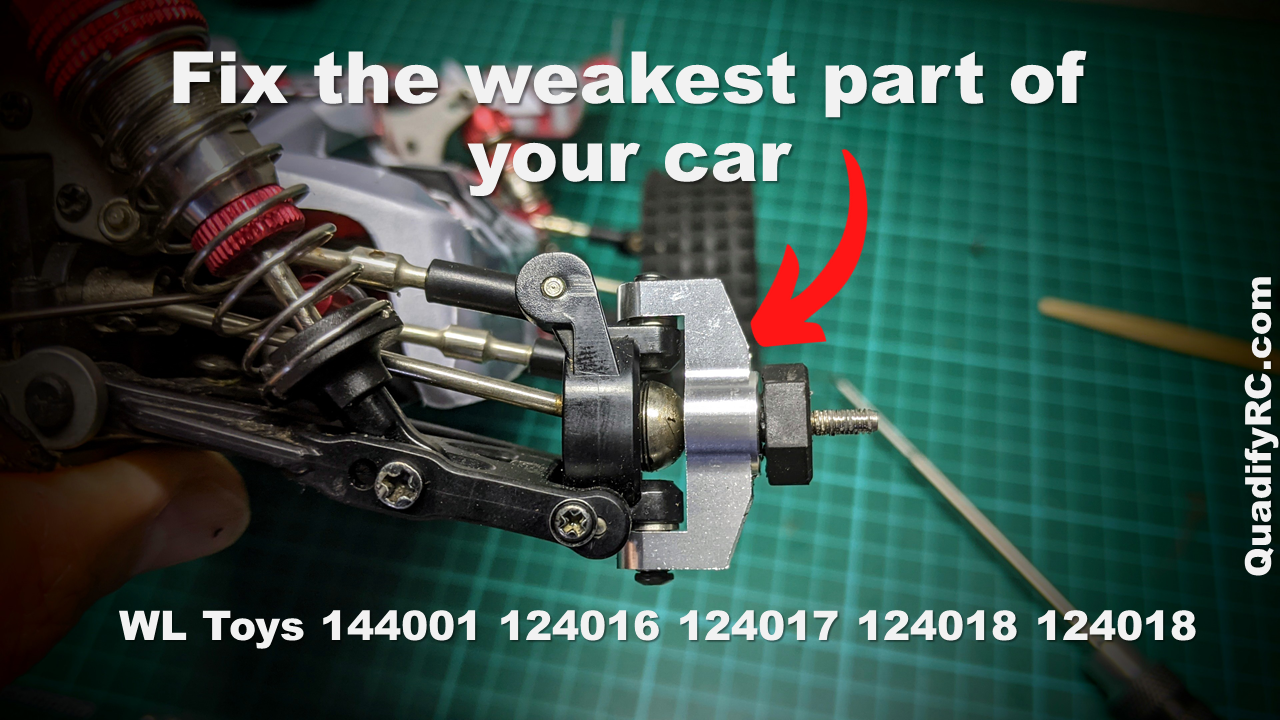 When you have been lurking around in Facebook groups, RC Groups, Reddit and other forums dedicated to the WL toys cars as long as I have you tend to pick up on common threads, especially when users share their disappointment over broken parts. Sure, individuals drive in different ways which can put certain components at more or less risk but a very common breakage I see is of the plastic front hub carriers. Standard replacement are not expensive but often have to come from China meaning you can be without a running car for up to several weeks. Previously I've looked a metal replacement parts by WL Toys however early designs were more "agricultural" in style and meant the wheels like my favourite Remo P6973 (reviewed here) couldn't be fitted.
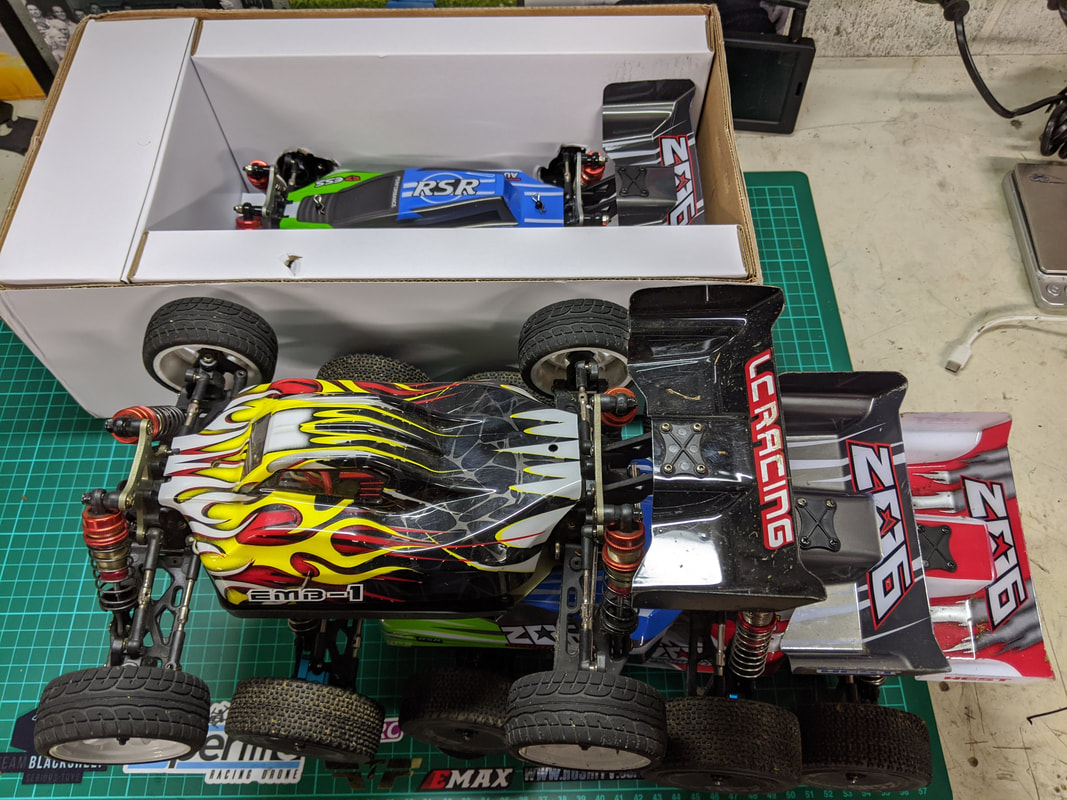
144001/124018/124019 - Every one of my Upgrade guides And Review here plus parts I Would buy2/8/2021 I've now built up quite a library of articles for the WL Toys 144001 (and 124019 / 124018) and thought I would use this page to share them. As of 3 August 2021 I've finally done a bit of an overhaul to make sure all articles are included and have added some new categories plus reviews. Enjoy! 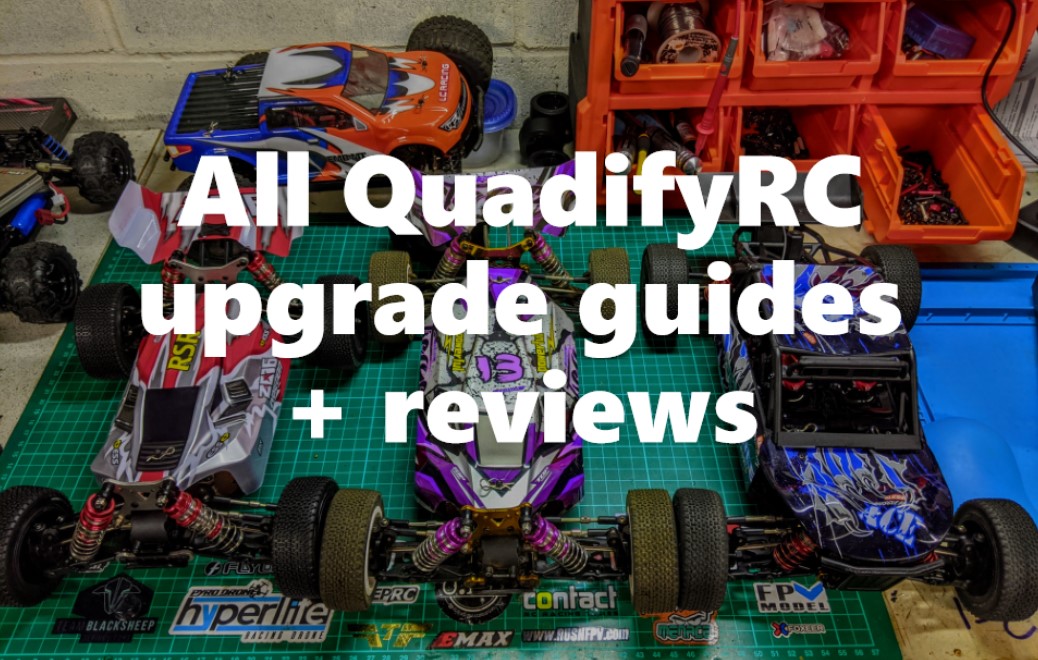 As we all know by now the WL Toys 144001 (and 124018 / 124019 by extension) is a budget copy of LC Racing EMB-1 that utilises cheaper materials and electrical components to make it a lower cost offering. LC Racing spares for the EMB series are surprisingly cheap - often cheaper than the WL toys parts. In the list below I've made it clear which parts are a direct fit and which parts will fit with a little modification.
Link below are to the AliExpress store that I trust - they have been running successfully for over 7 years and will ship worldwide. You may of course have other options locally like Troy Remy in Canada (find him in the QuadifyRC Group), Warren RC in USA, RCMart out of Hong Kong and direct from LC Racing themselves.
The WL Toys 144001 is a great car for the money and pretty durable but certainly not the toughest thing out - for my money that goes to the SG 1601 / HBX 16889 (long term review here). I have however found an tested a few direct bolt on parts that you can install in about 20 minutes to make this way more resilient to crashes than stock 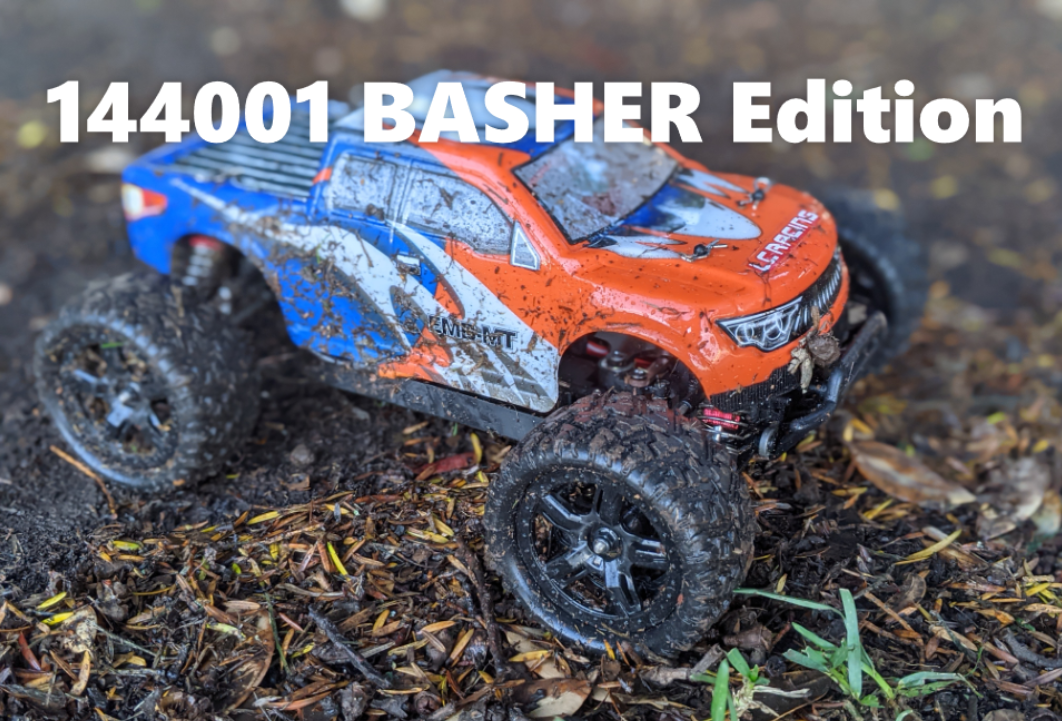 By now I've made a number of brushless upgrades to the WL Toys 144001 which I've documented, each with a different objective in mind. All of these offer an improvement over stock which, depending on option offer an improvement of speed, acceleration, weight, balance and efficiency over stock. The objective of this brushless upgrade is simple - the cheapest brushless setup worth having for bashing 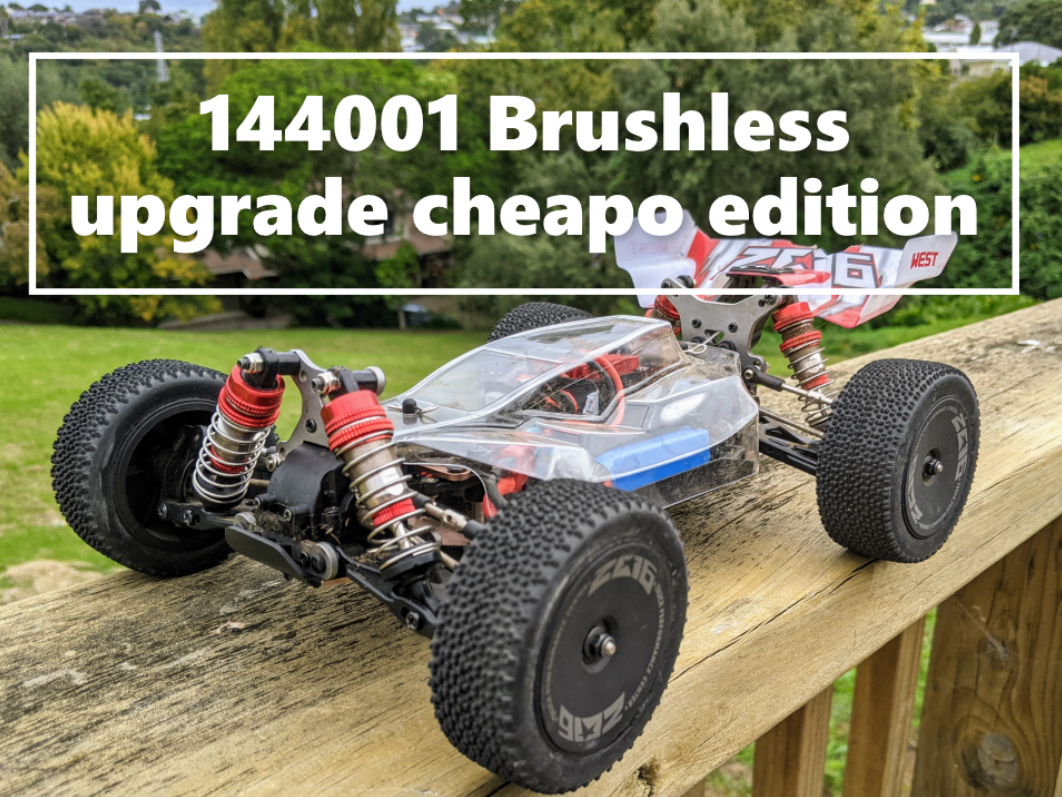 |
Categories
All
|

 RSS Feed
Thanks for visiting QuadifyRC.com Follow us on facebook below to get all the latest updates