QUADIFYRC MODS AND REVIEWS
  • RC Cars
  • Car of the Month
  • Quad Reviews
  • Quad Mods
  • COUPONS AND DISCOUNTS
  • Long Range
  • About & Contact

QUADIFYRC RC Car Review and Upgrade Guides

WL ToyS 144001 / 124018 / 124019 Upgrade: Metal Part Upgrades And REview

3/7/2020

22 Comments

 
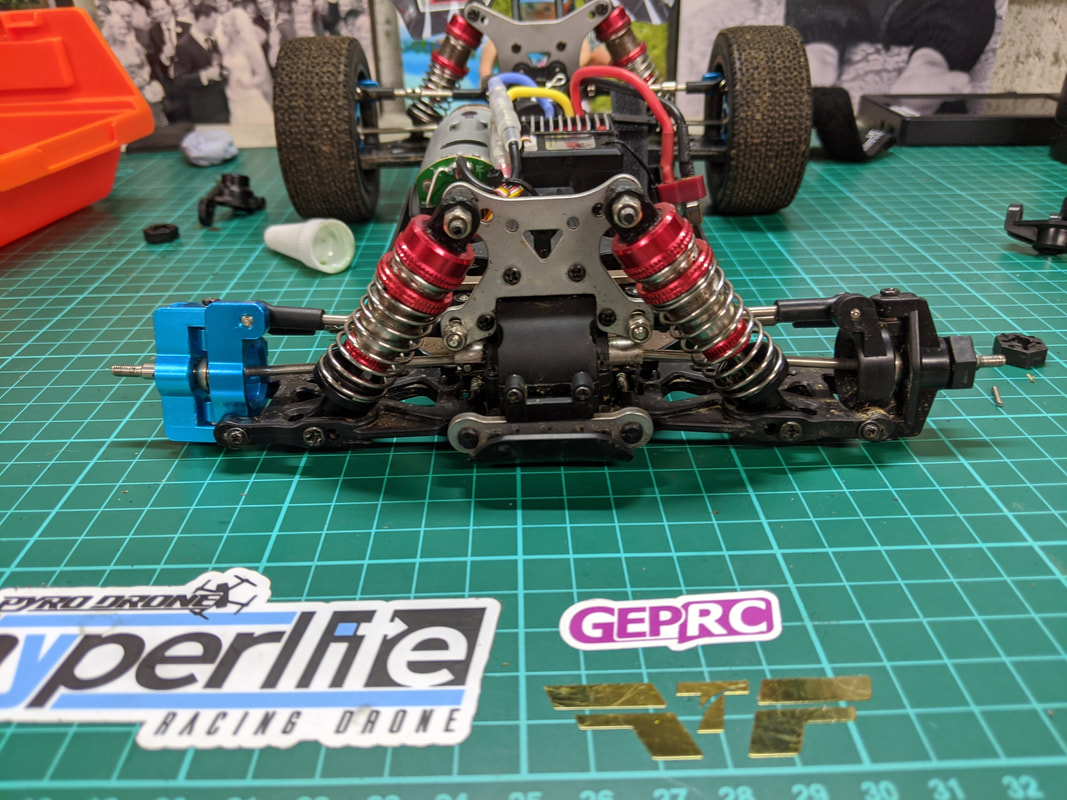
With the boom in popularity of the WL Toys 144001 1/14 scale RC buggy, there are a lot of aftermarket parts available now, all of which are currently available at here. For this article I'll be looking at why I chose the metal upgrade parts I did, how to install and my thoughts on the parts I did install. These upgrades are also applicable to the extended wheelbase 124019 which is identical other than the length
Picture
Don't forget to check out the other guides and reviews I've already written for the 144001:
  • 3 simple mods before you turn it on to improve performance and running life
  • The next 3 cheap or free upgrades
  • Full brushless motor/ESC install guide
The first thing you probably think of with metal parts is that they will be stronger than the plastic parts they replace. Although this is true, strictly speaking, the stock plastic pieces do have advantages in some situations, specifically -
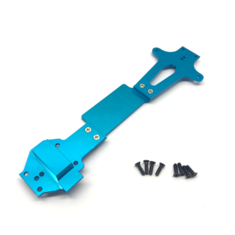
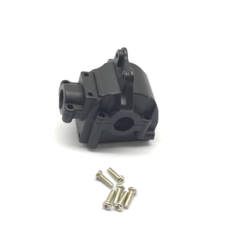
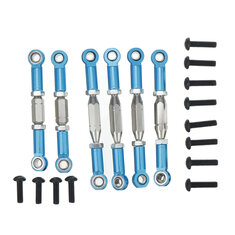
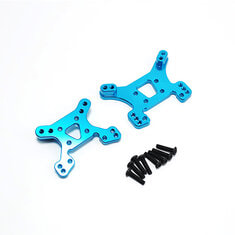
  1. They are more flexible
  2. Have a better bite with screws
  3. Can sacrifice a cheaper more easily replaceable part rather than transfer force to a more complex, more expensive or more difficult to replace part
Because of this some parts are well suited to be replaced with metal and some are not. I've chosen the below components to be replaced with metal parts to improve the durability of the car. All parts are available in several colours: Blue, Red, Pink, Gold, Silver, Black.
Just a quick note that Banggood have started their "summer prime" sale which runs July 3 - 24. It's usually around halfway through that they share their best discounts on around 100 of their better selling products which usually includes the 144001 RTR buggy - I'd recommend waiting if you are planning on making a purchase. Here is the link to their sale page where there is supposedly $1m worth of discounts 🤷. Sounds like a bit of a line but I've put their here. These sales events are usually pretty good and I'll pick the best coupon codes and be sure to have them up on my coupons and discount page
Recommended parts:
Picture
Rear hub carriers. Typically a little more durable than front knuckles and castor blocks but still a common weak point so worth going metal
Picture
Front Steering Knuckles. Commonly a weak point on many cars so worth considering here
Picture
Front Caster Blocks. These are a weak point on many cars so worth considering
Picture
Steering Cranks. May help stiffen steering link. Less critical but worth a go.
Picture
Hex drives 12mm. I've installed but do not like at all, more below
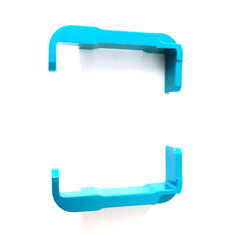
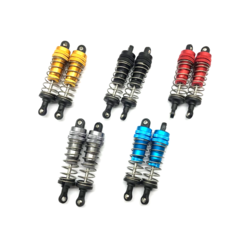
I've specifically avoided these parts below because I think they will reduce net durability for reasons explained underneath the images. If you are just going for looks however they do still look great!
Parts I recommend against:
Picture
Arms front or rear. Unless you need bling avoid - although stronger they put stress on hinge pins and gearbox mounts. plastic suspension arms are very strong.
Picture
Battery seat. Going metal here offers no performance benefit, just weight
Picture
Spur and pinion. The spur is definitely more durable but adds a lot of rotational mass and reduces performance. I'd prefer lighter, cheaper stock spurs.
Picture
Top deck. Given the design I think it may add weight rather than stiffness
Picture
Gearbox. Jury is out on this one for me just because I don't feel the gearbox is prone to damage
Plus other parts available with my comments
Part I don't have a strong opinion on:
Picture
Tie Rods. Although the ball joint cannot pop off on these types of tie rods the are more susceptible to loosening with vibration. I will only install if the stock ones keep popping off.
Picture
Motor mount. Colour match by all means but performance is same as stock mount which is cheaper
Picture
Shock towers. These definitely have more material so should be more resistant to damage. Probably worth a go, I might order some.
Picture
Shock absorbers. Same price as stock but you can colour match if you wish. No performance improvement

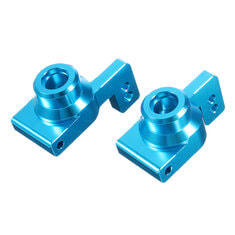
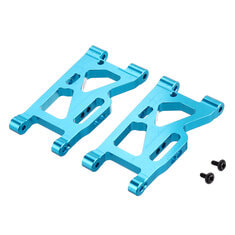
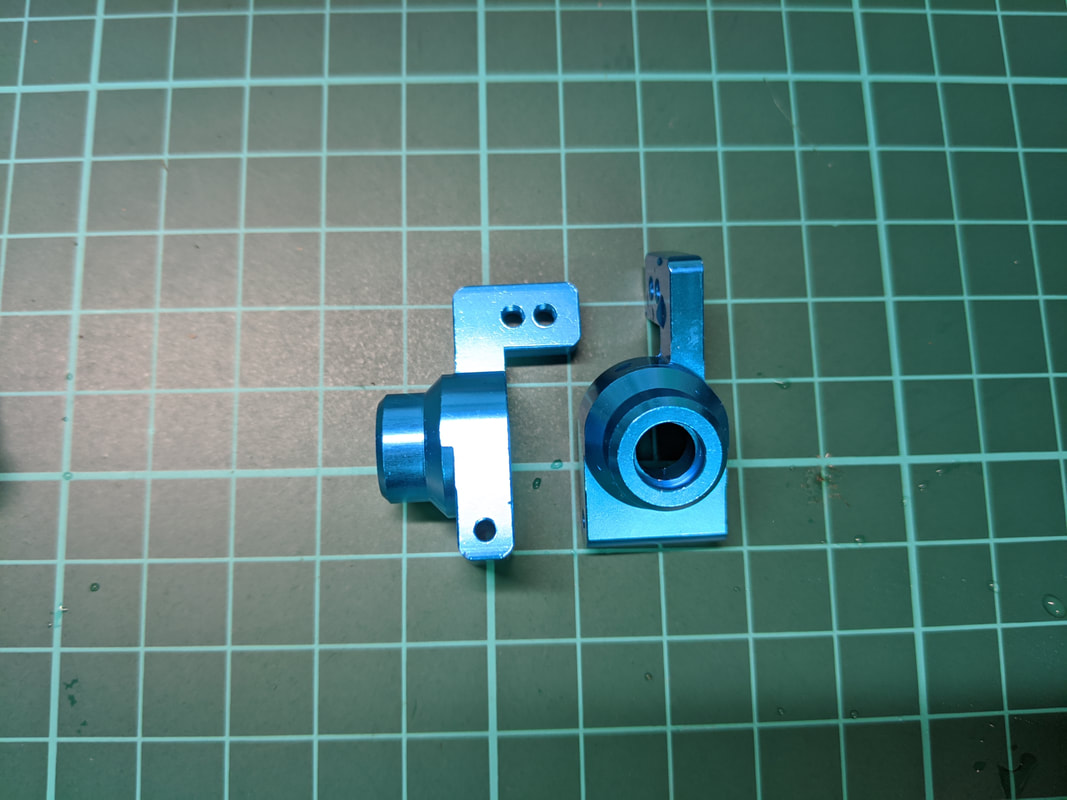
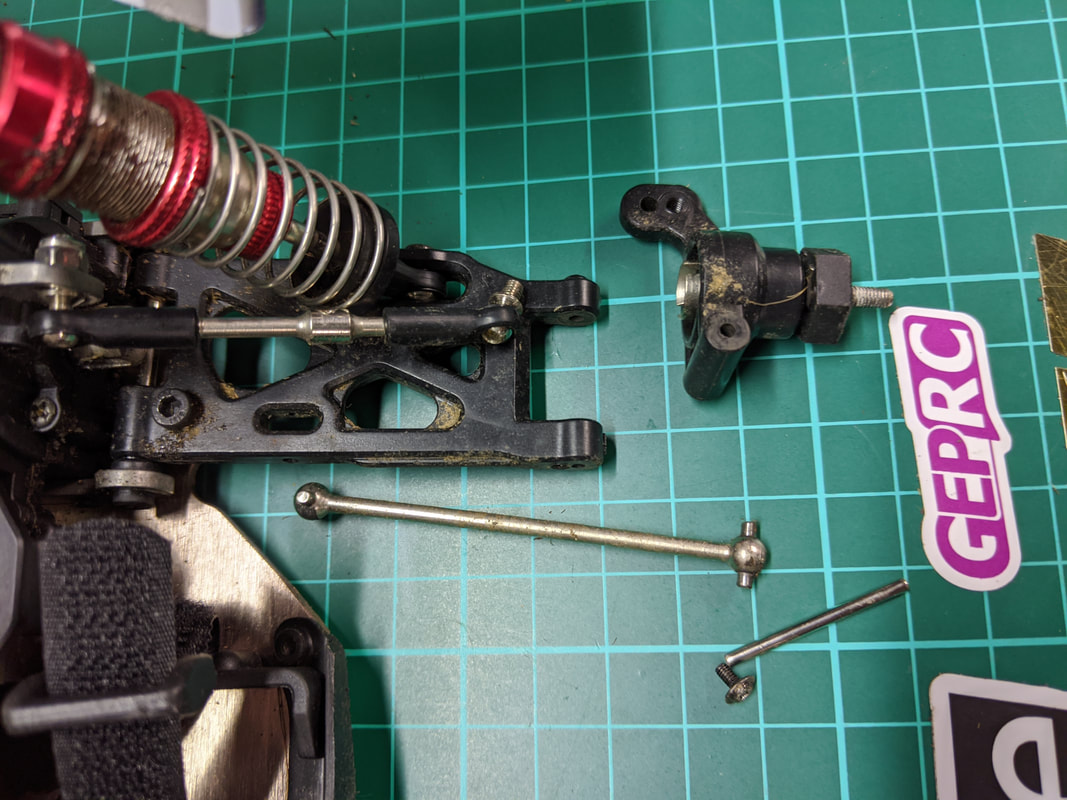
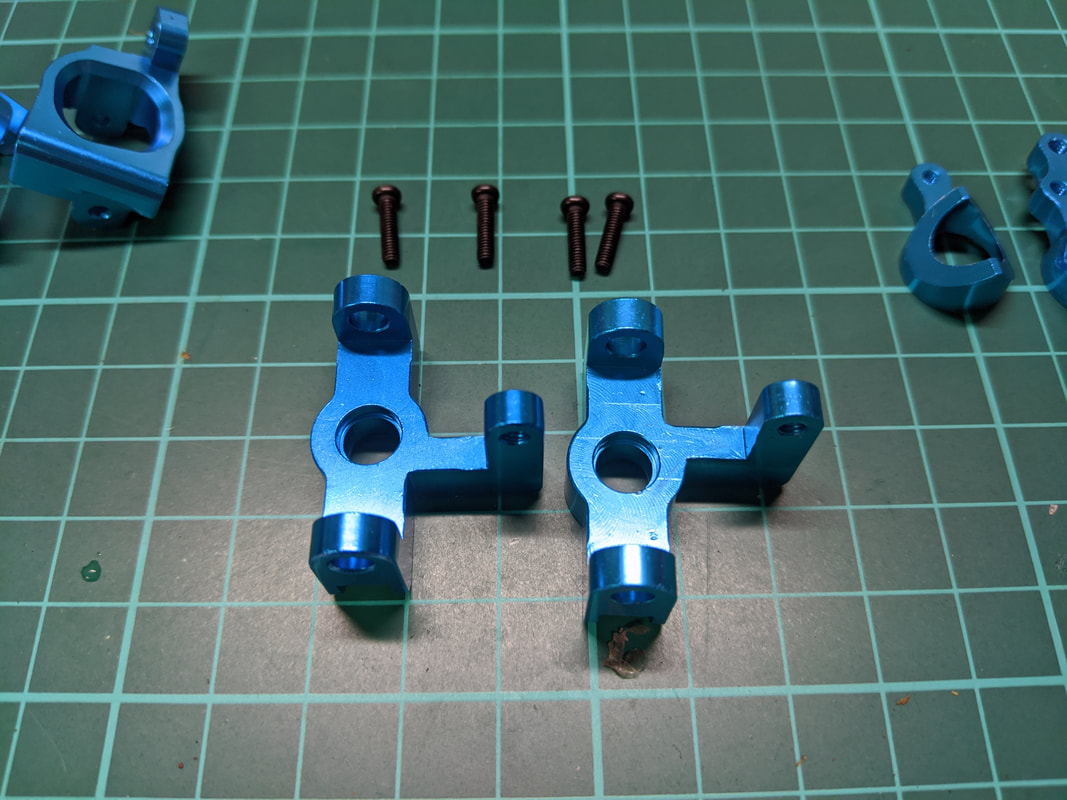
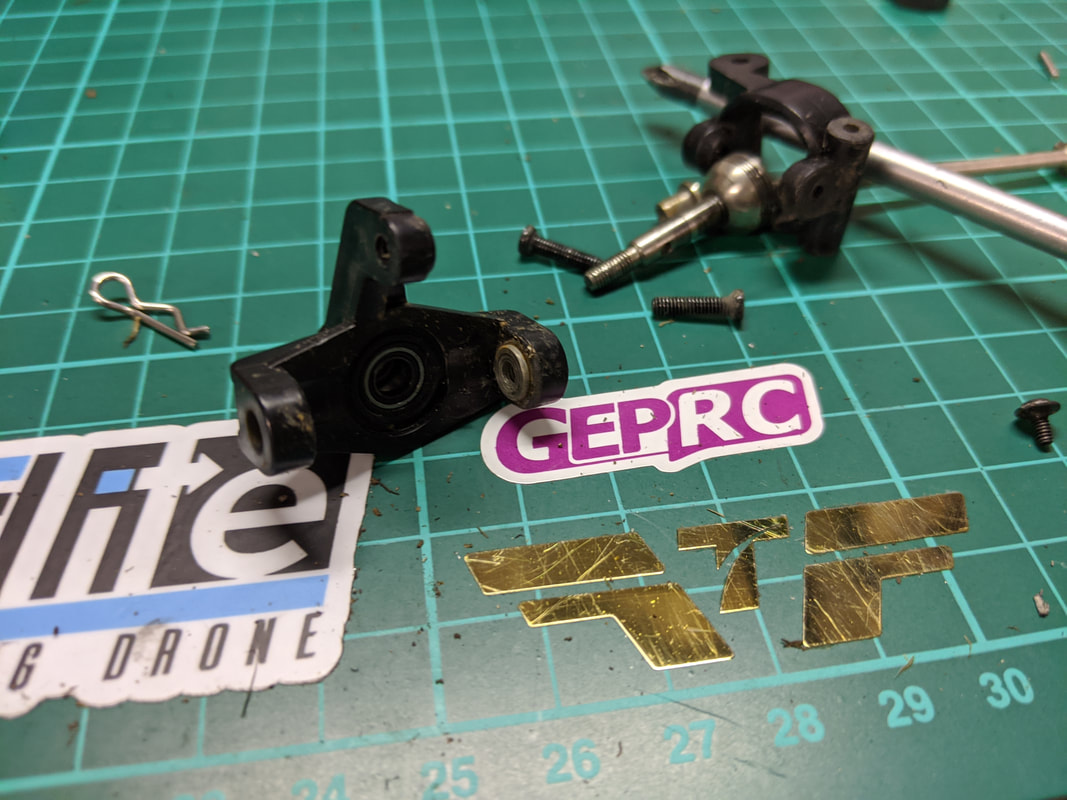
Rear hub carrier install
As always click on any picture to embiggen (yes it is in the dictionary)
Picture
Pack includes left and right rear hub carriers
Picture
Different mould shape but same geometry as stock
Picture
A closer look at shape difference
Picture
Remove top 2.0mm hex ball joint for castor tie rod and small phillips screw that holds the outer hinge pin in
Picture
Push hinge pin in from other side and remove as above, Dogbone drive shaft can be put aside.
Picture
Use the above image to guide you to use the correct hub carrier and replace hinge pin and screw
Picture
Remove plastic hex and drive pin and then hub will slide out
Picture
Remove both bearings in the hub carrier
Picture
Transfer bearings to new hub carrier, seat correctly and slide in the hub.
Picture
Replace drive pin and hex (I used the metal hex here)
Picture
Add blue threadlocker to tie-rod ball screw thread and screw in to the outer hole. Don't forget the dog bone drive shaft
Picture
Should finish up looking like this, now repeat for the other side.
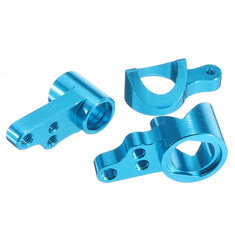
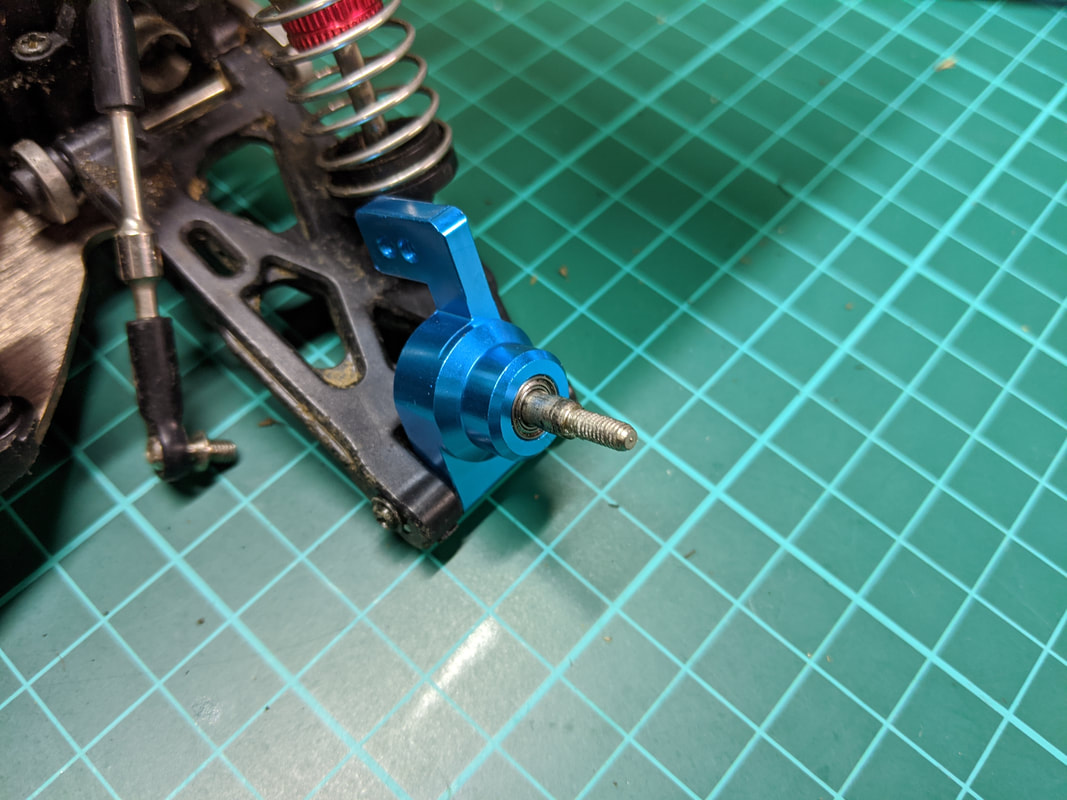
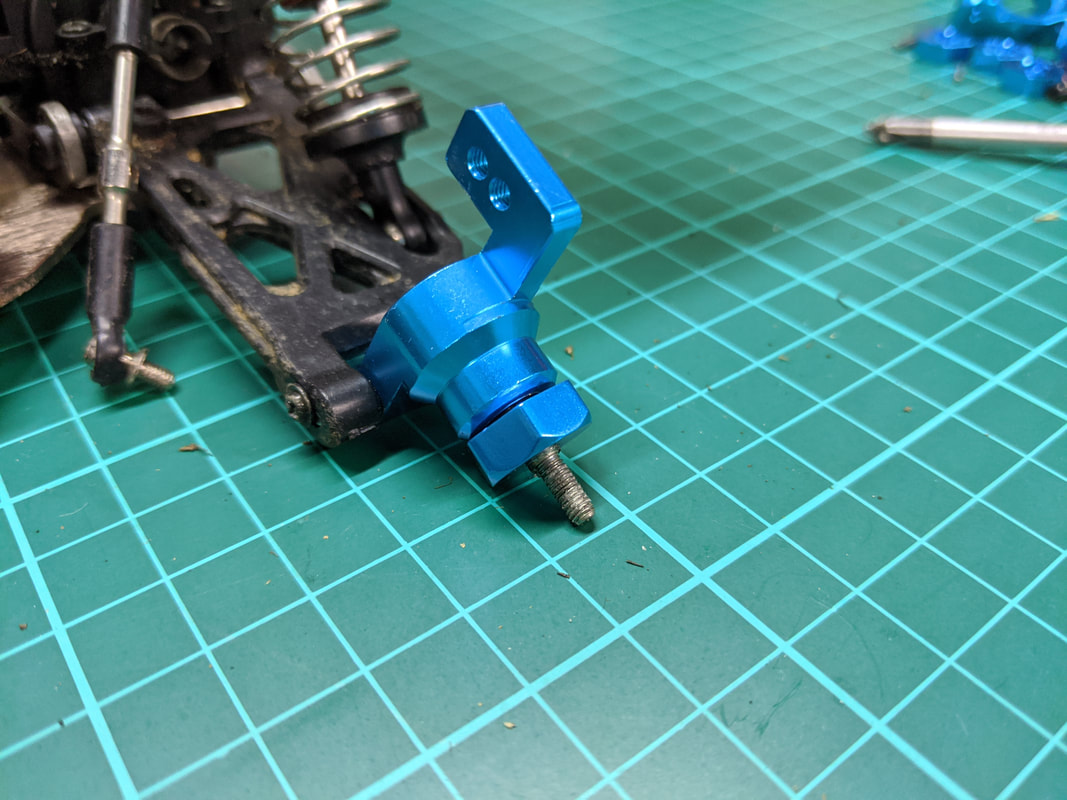
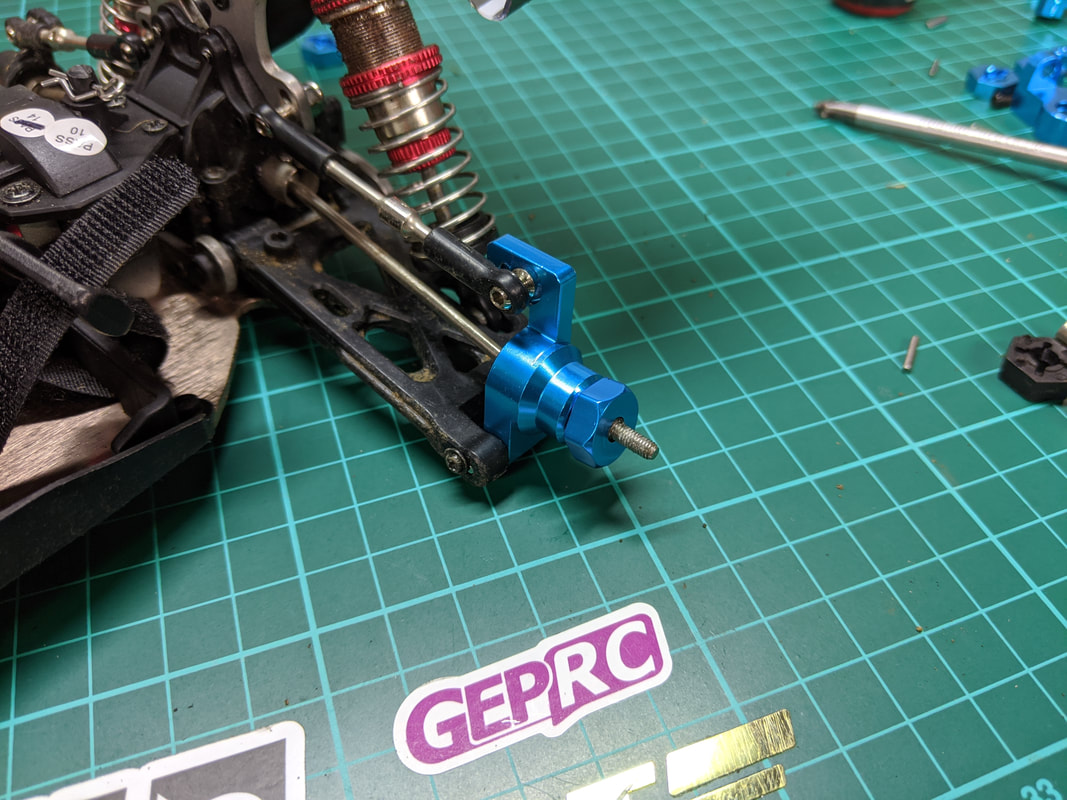
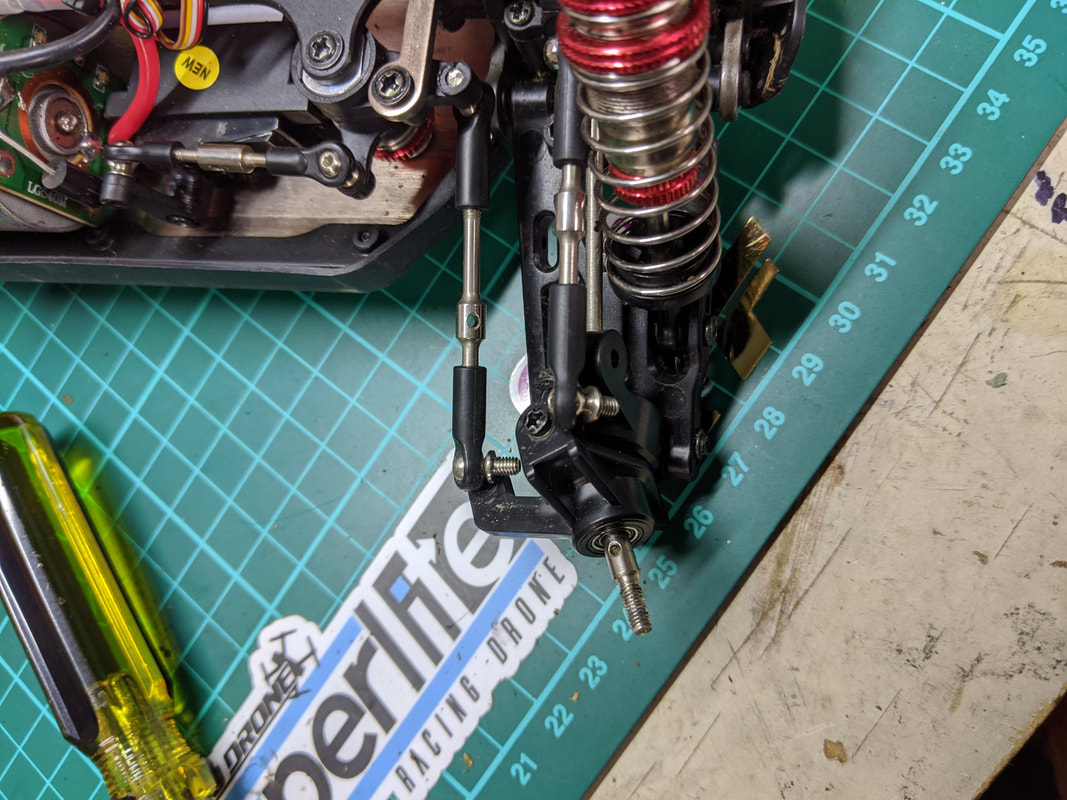
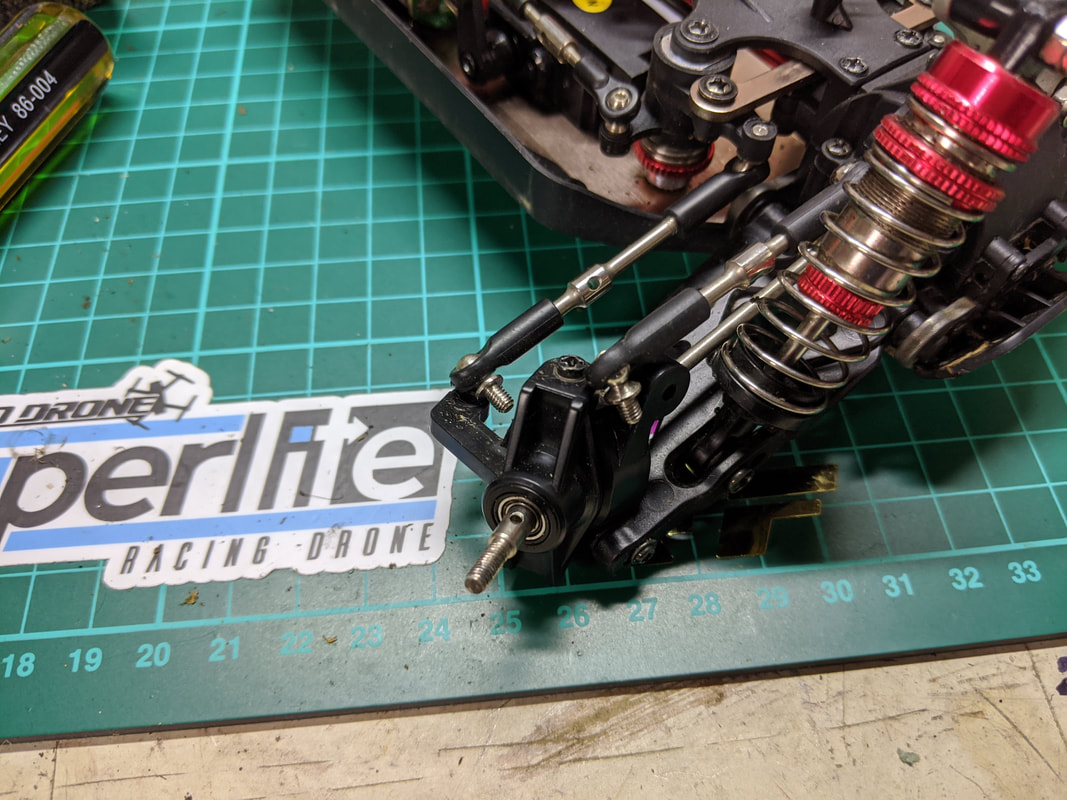
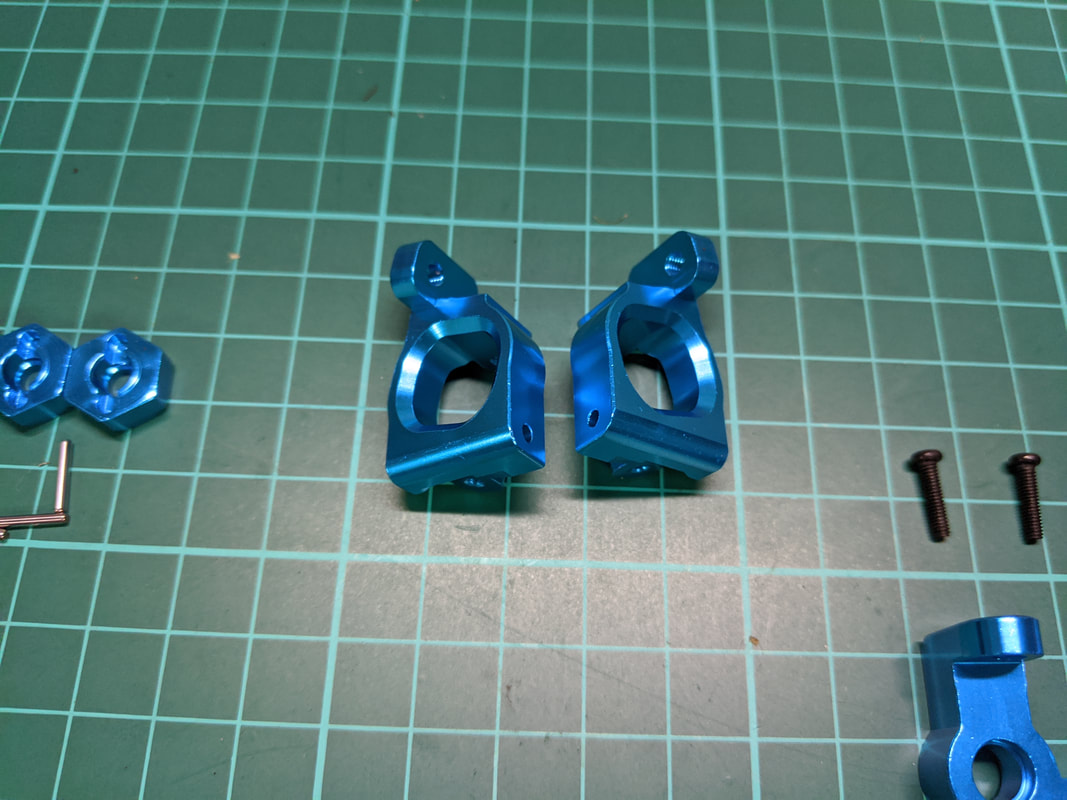
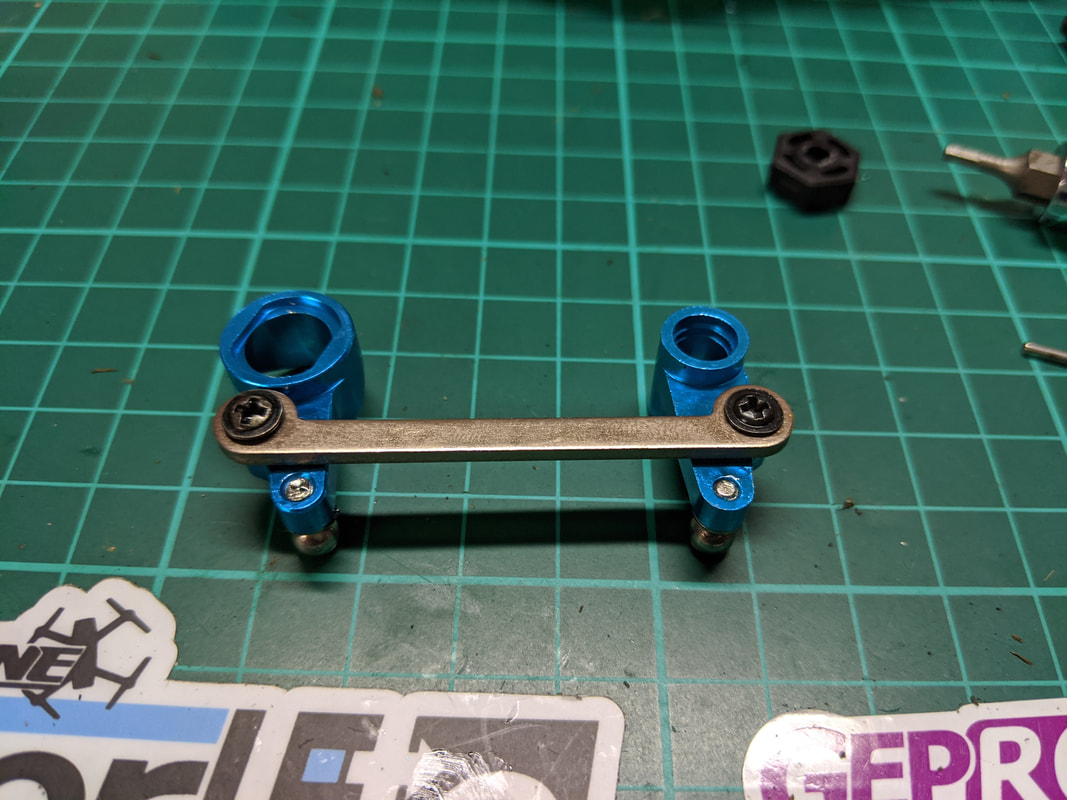
(Front) Steering knuckle install
Picture
Front steering knuckles come with left and right units and extra screws
Picture
Remove ball tie-rod ball screws for steering and camber as above with 2.0mm hex driver
Picture
Remove wheel hex drive and pin, remove philip screw that holds the outer hinge pin in and remove hinge pin.
Picture
Remove the above assembly which includes caster block, knuckle and driveshaft (CVD in the front)
Picture
Remove upper and lower screws that connect knuckle to caster block. Noth the collars in the knuckle
Picture
Transfer bearings and driveshaft to the new knuckle.
Picture
Insert collars from your original plastic knuckle as above
Picture
Blue loctite screw threads and screw new knuckle to new caster blocks
Picture
Knuckle should be able to swivel freely in relation to caster block
Picture
Outer hinge pin and fastening screw back in. blue threadlocker the ball screws and tighten. Check the driveshaft is in properly and pop the tie rods back on the ball mounts
Picture
One side completed above. You shouldn't need to re-adjust the tie rods.
Picture
Complete for both sides, replace drive pins, then drive hexs and then wheels.
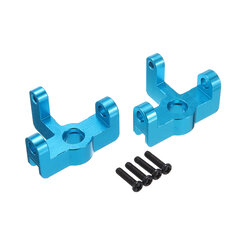
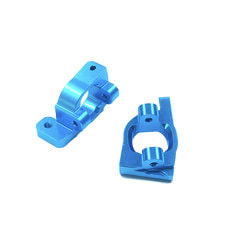
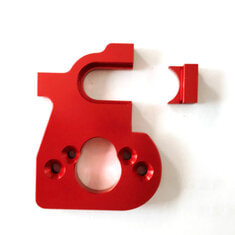
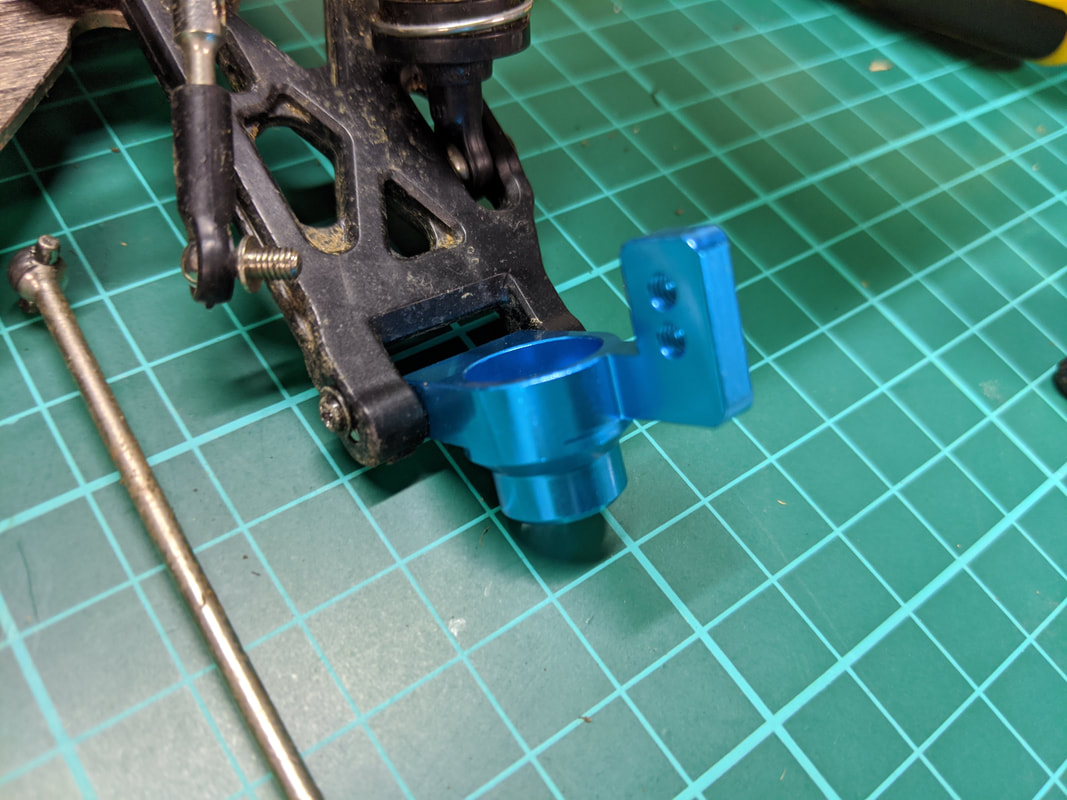
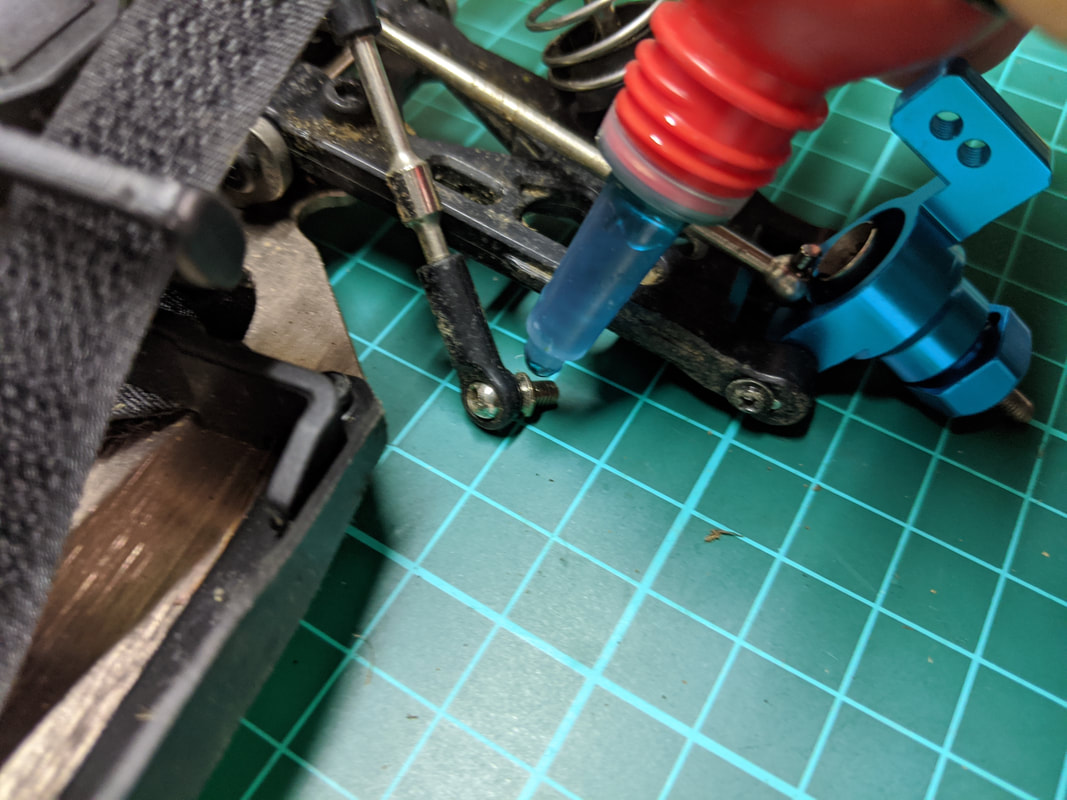
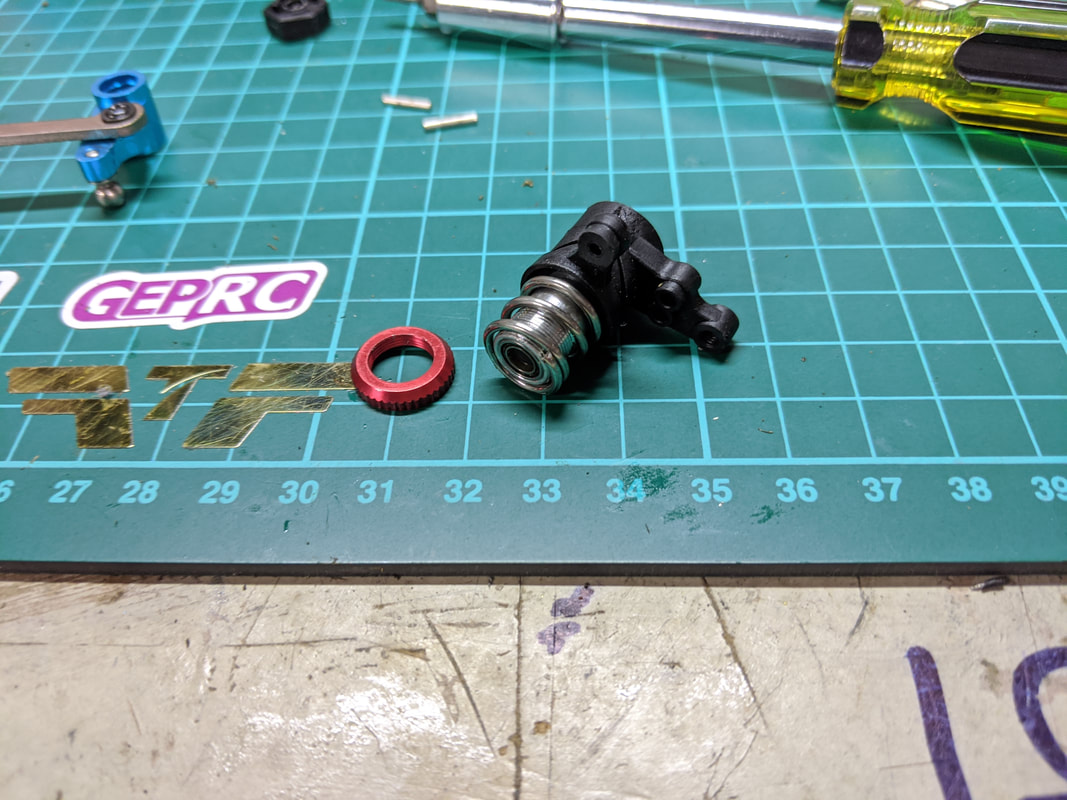
(Front) Castor block install
Picture
See above - this is covered as part of the front knuckle install
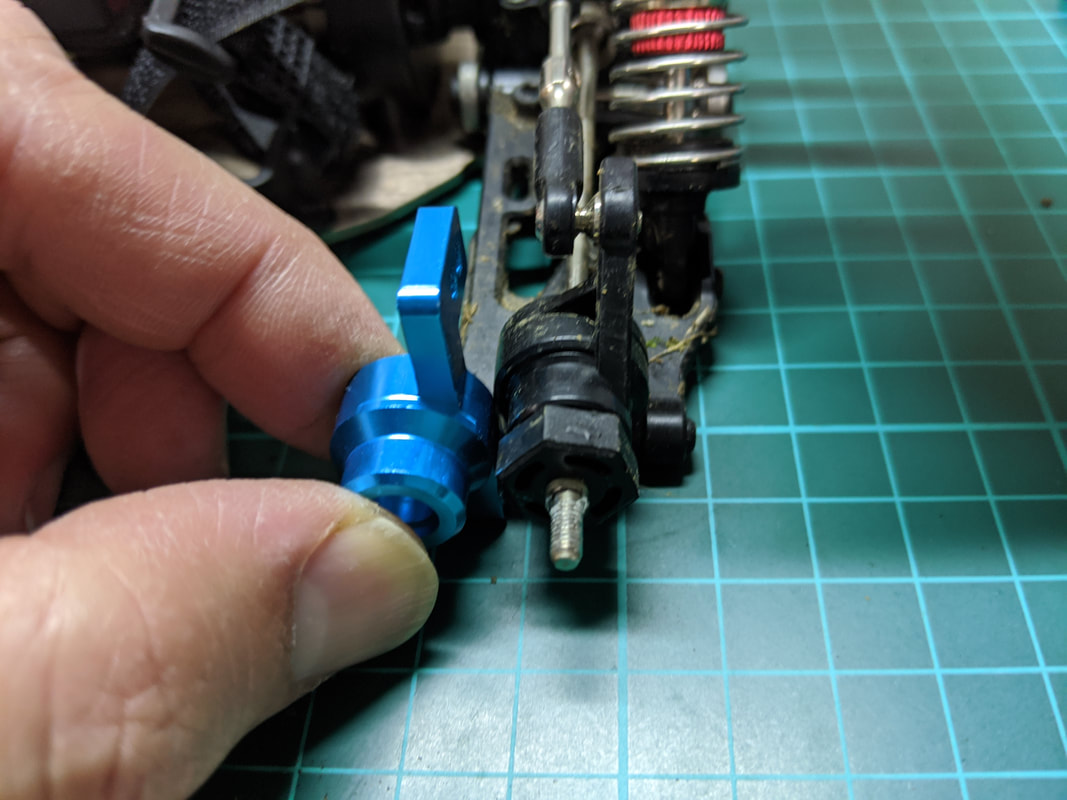
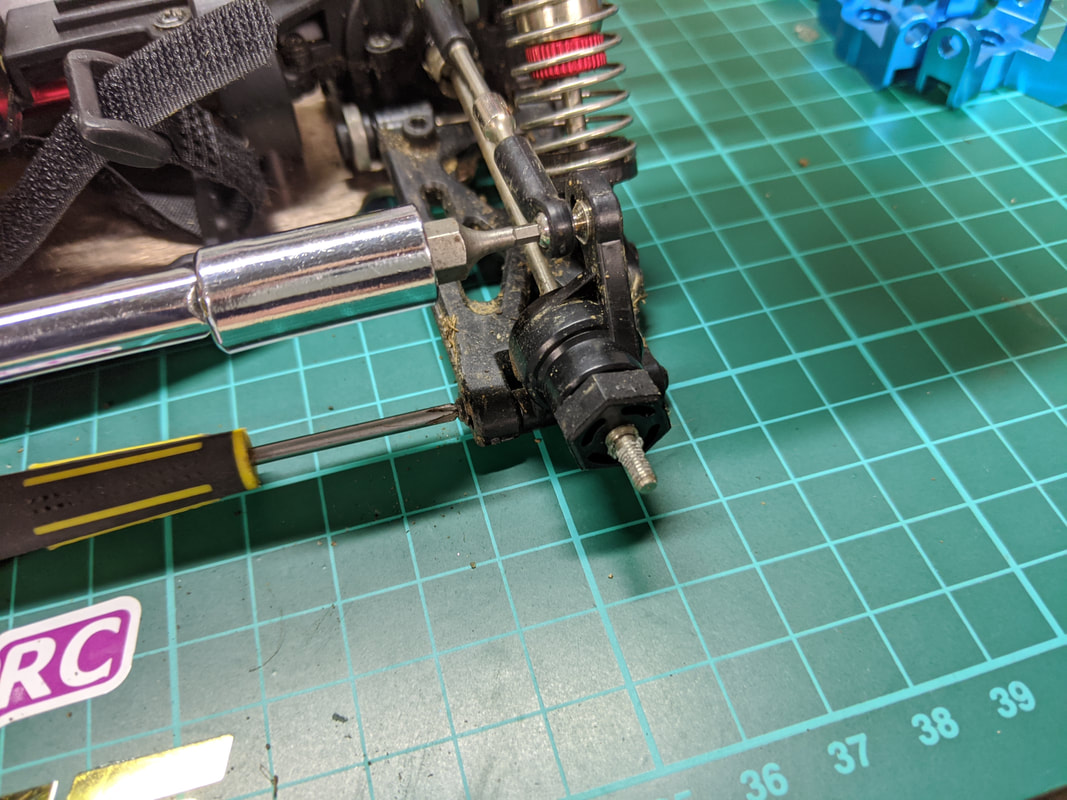
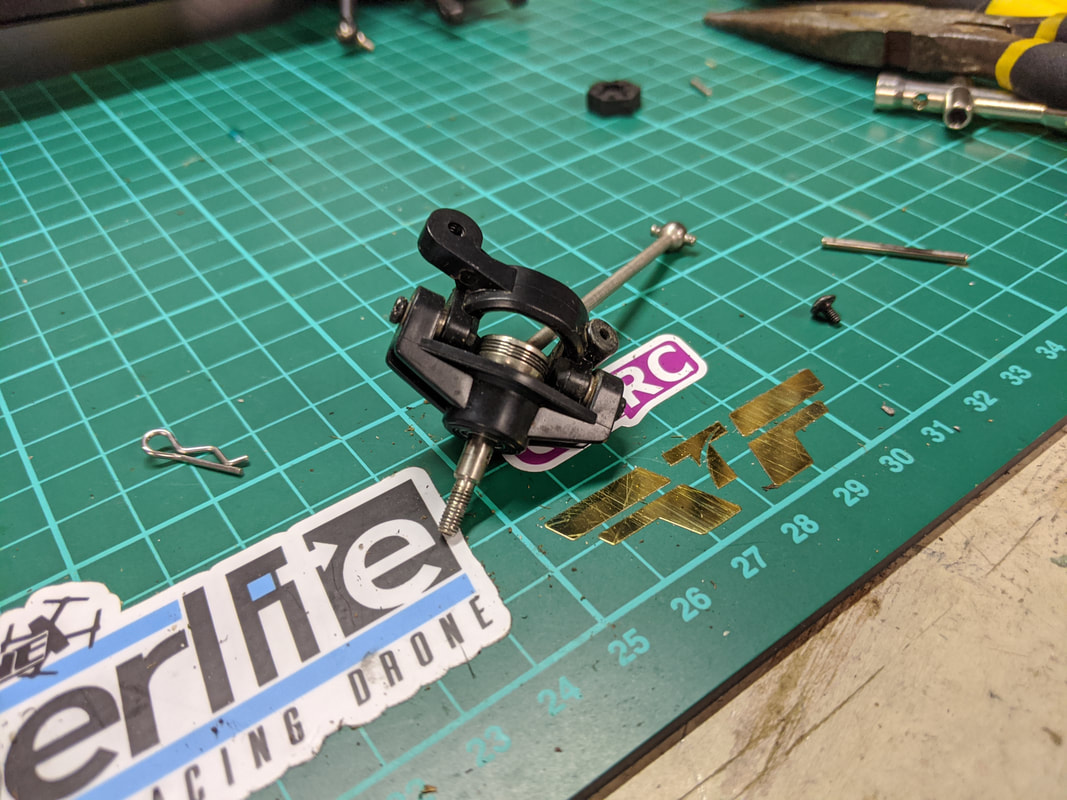
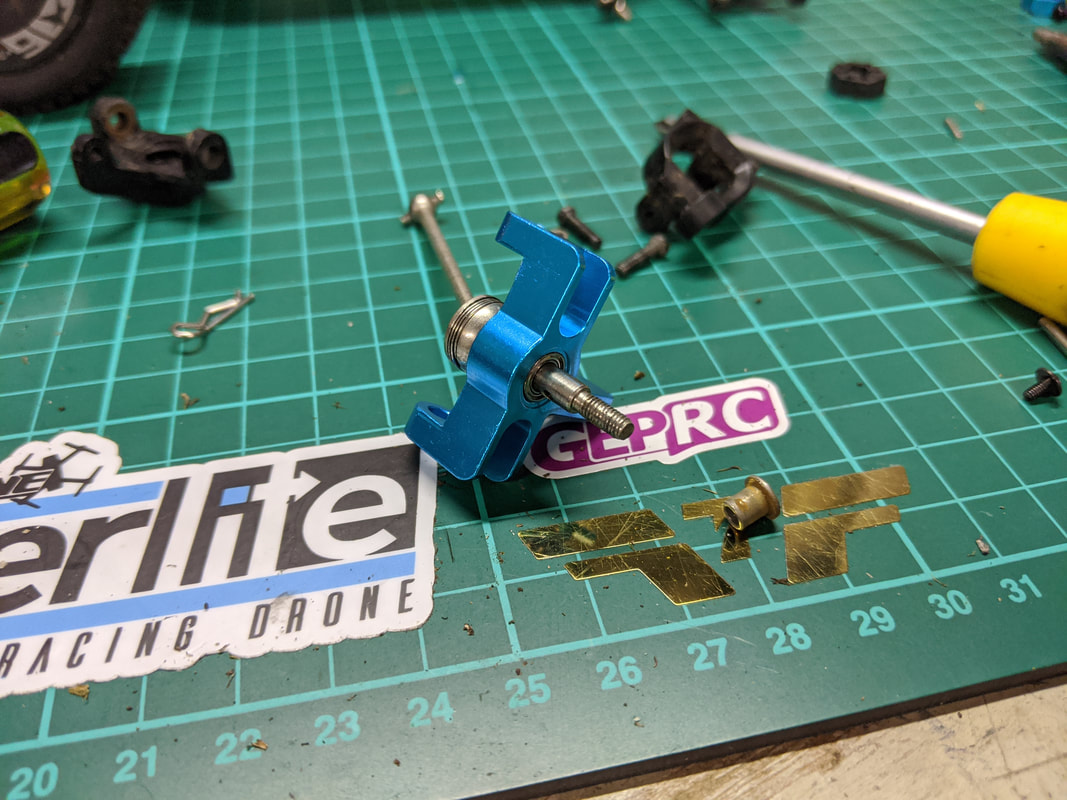
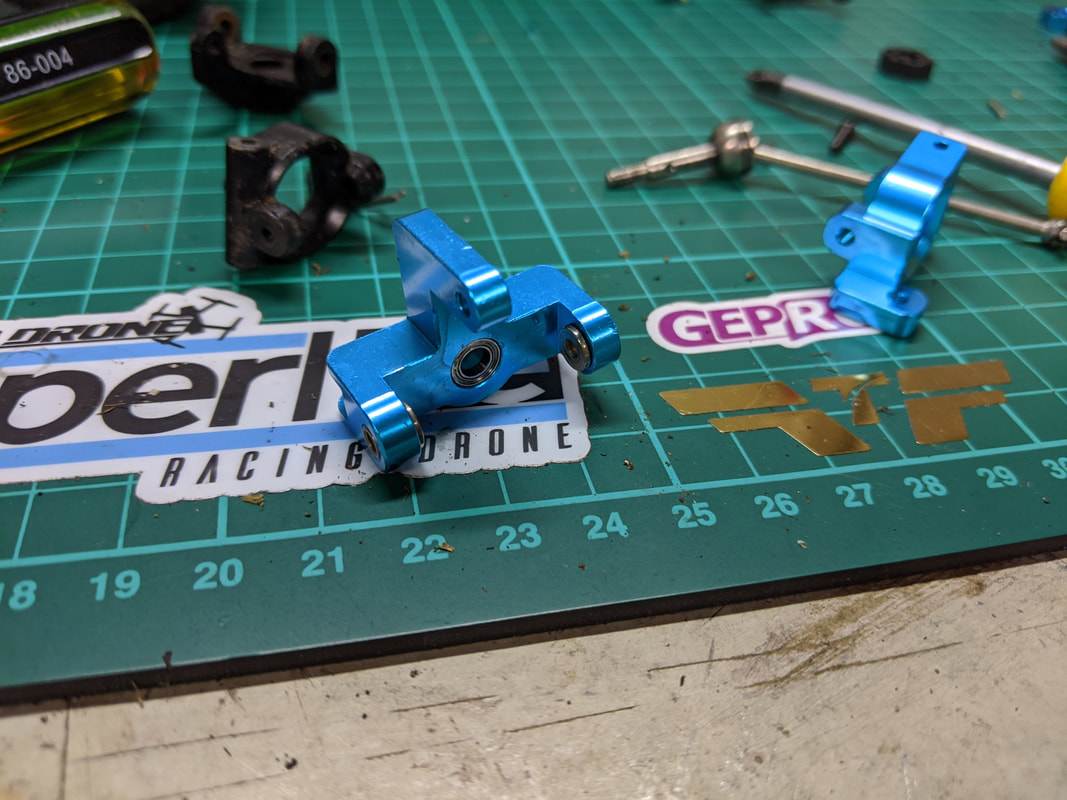
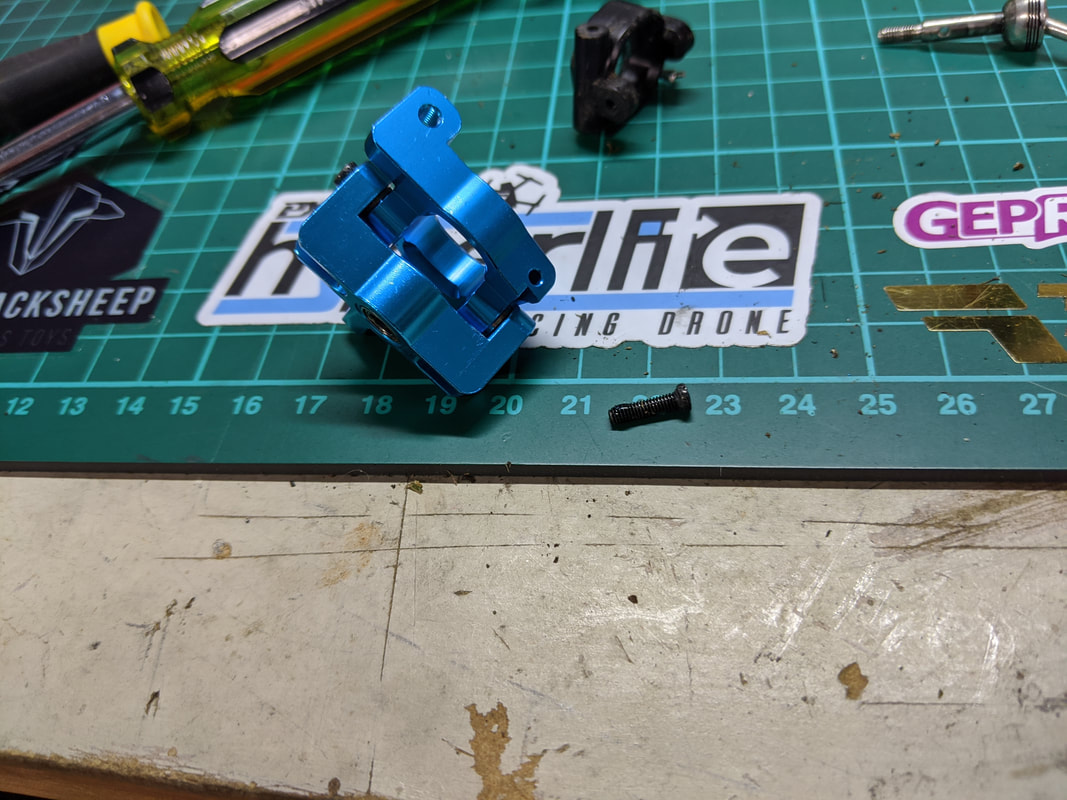
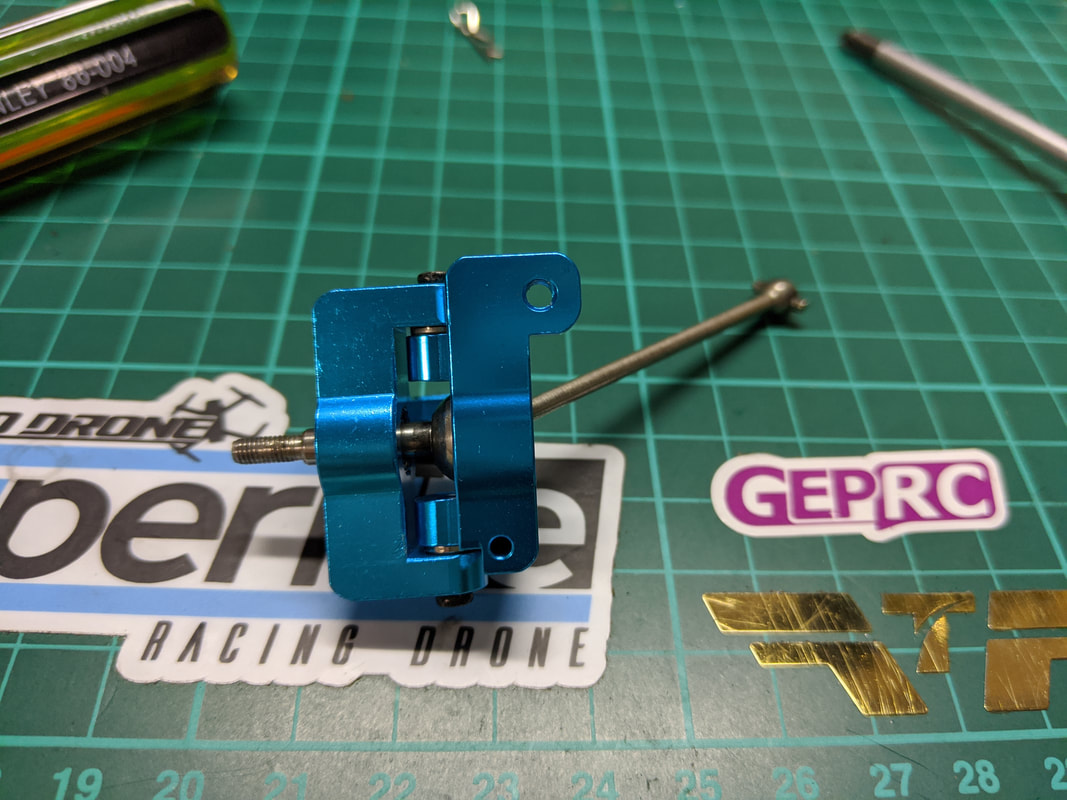
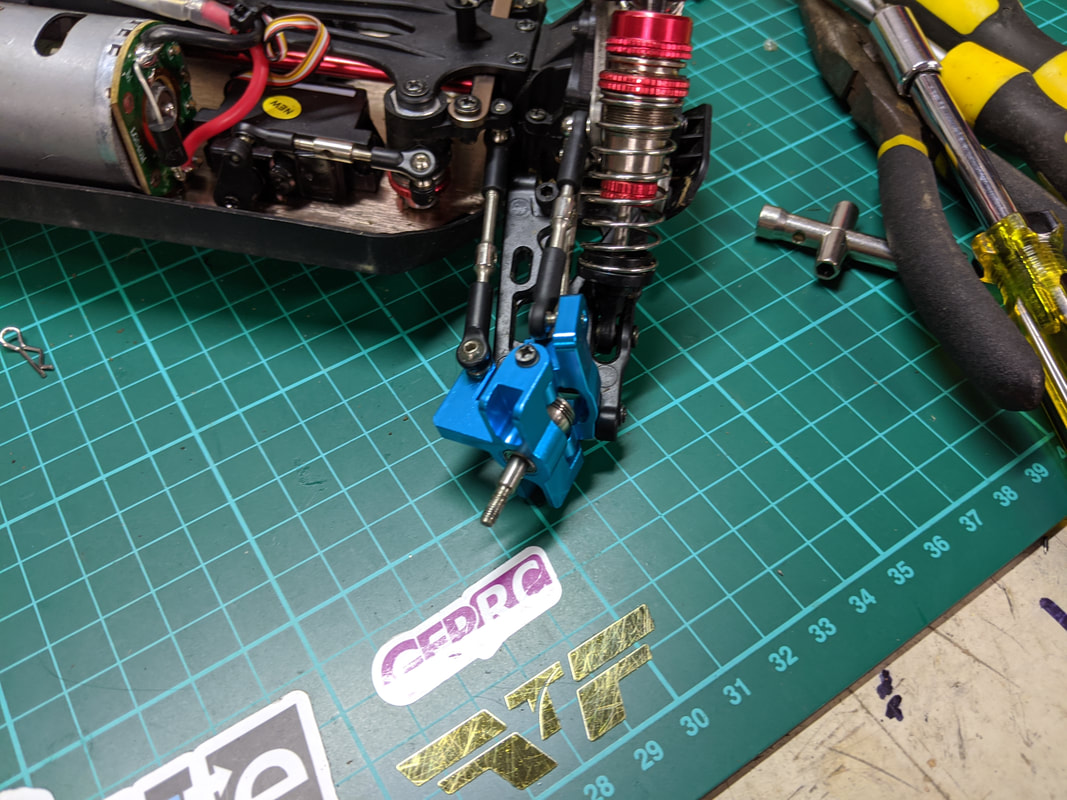
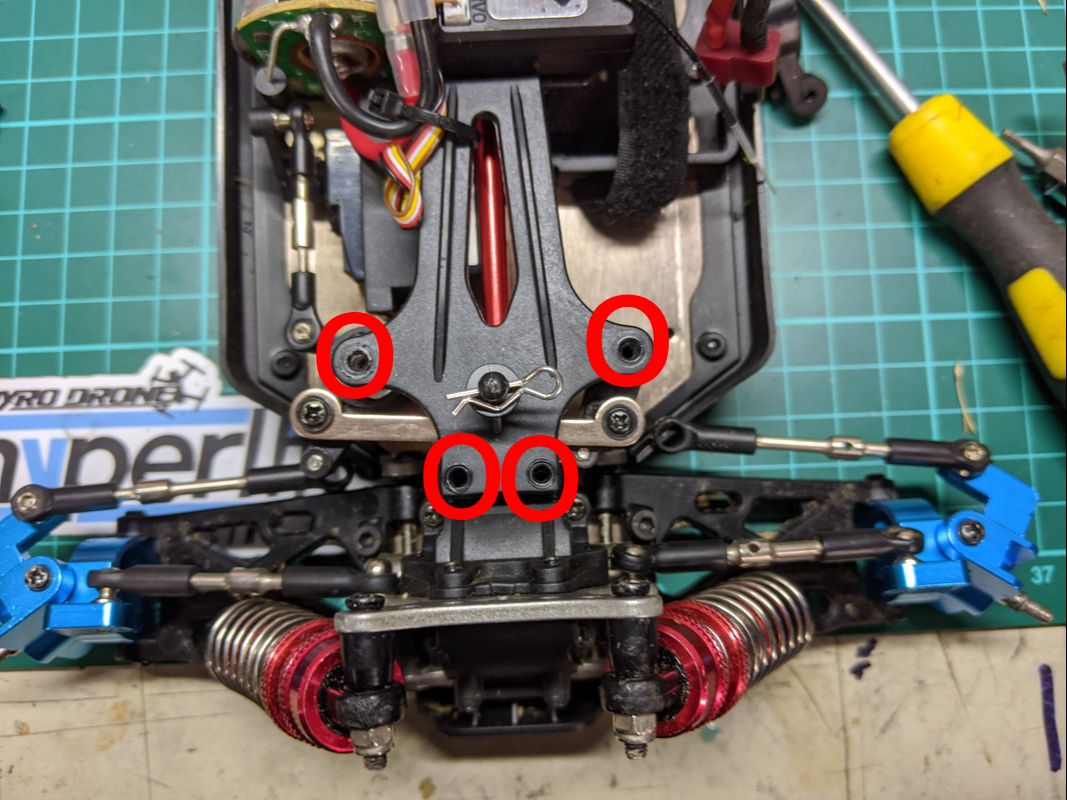
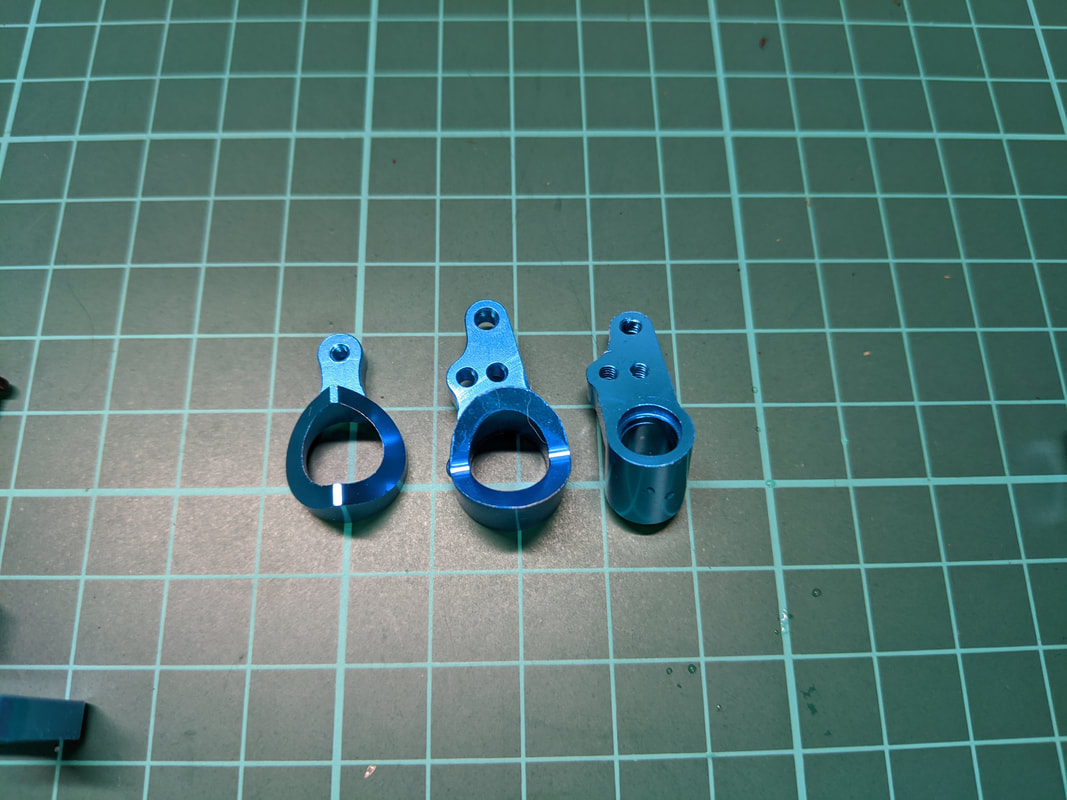
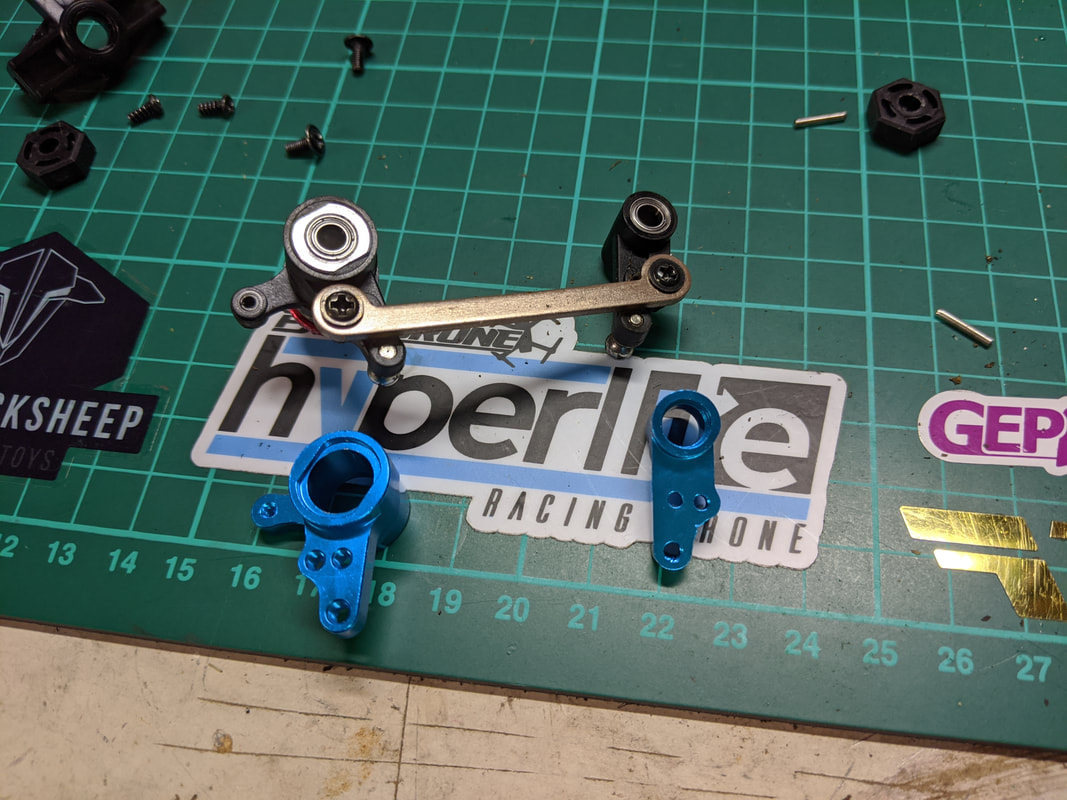
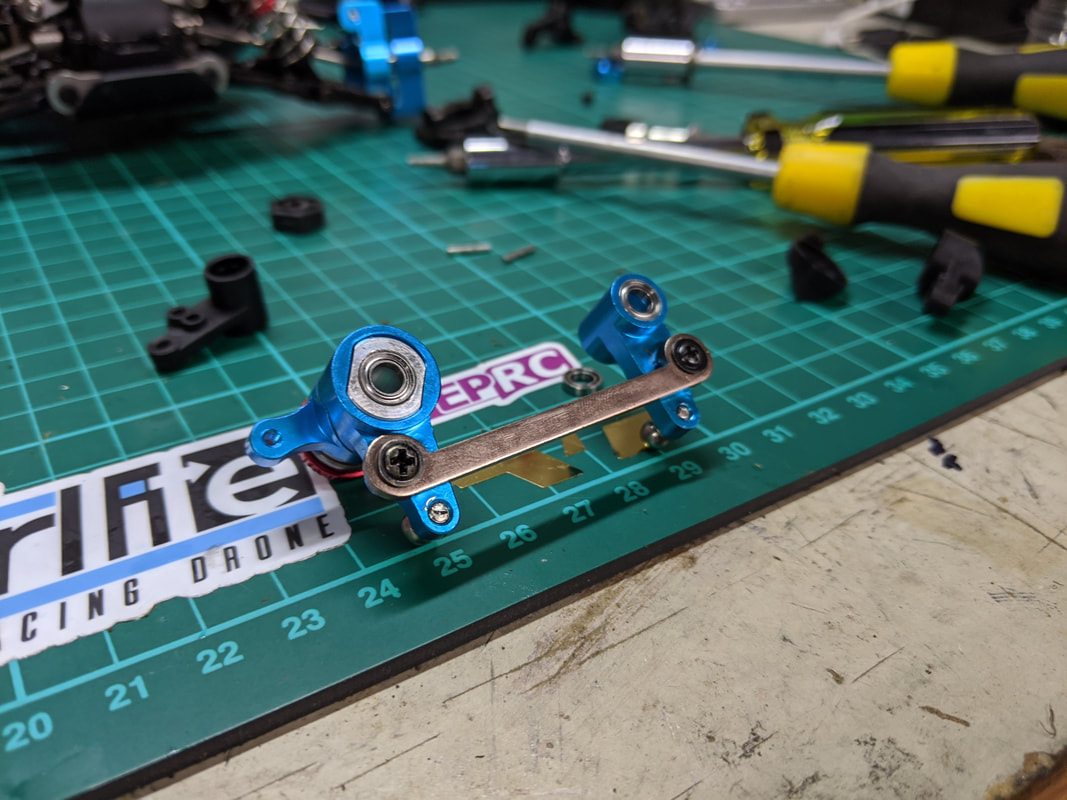
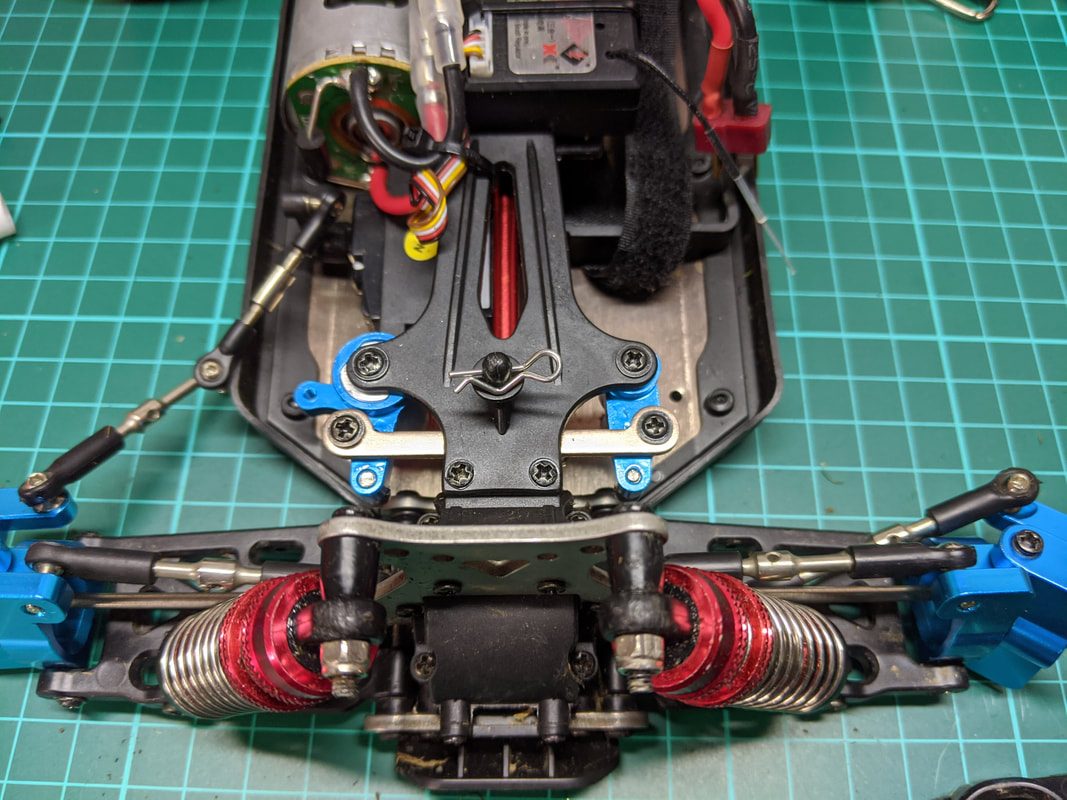
Steering crank install
Picture
3 parts included in the kit
Picture
Remove the screws circled above. Pop off the tie rods connecting the rack to the steering knuckles. Unscrew the ball screw the connects the servo tie rod.
Picture
Lift out the steering assembly as above
Picture
Unscrew the drag bar and reinstall on the new crank arms. Don't forget the collars.
Picture
Unscrew the red thumb ring from the servo saver and slide out the mandrel (including bearings) from the stock servo saver 
Picture
Install the mandrel and bearings in the new servo saver, don't forget the lower arm of the servo saver. Lightly lubricate the curved servo saver mounting surface. Replace the spring and tighten the red thumb ring very lightly
Picture
Reinstall the steering assembly and screw the top place back on.
Picture
Move all ball screws to the new steering rack using blue threadlocker on the threads. You shouldn't need to readjust any of the tie rods if you use the same holes as above.
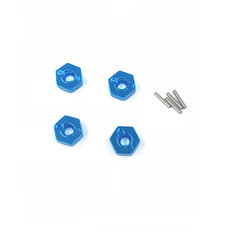
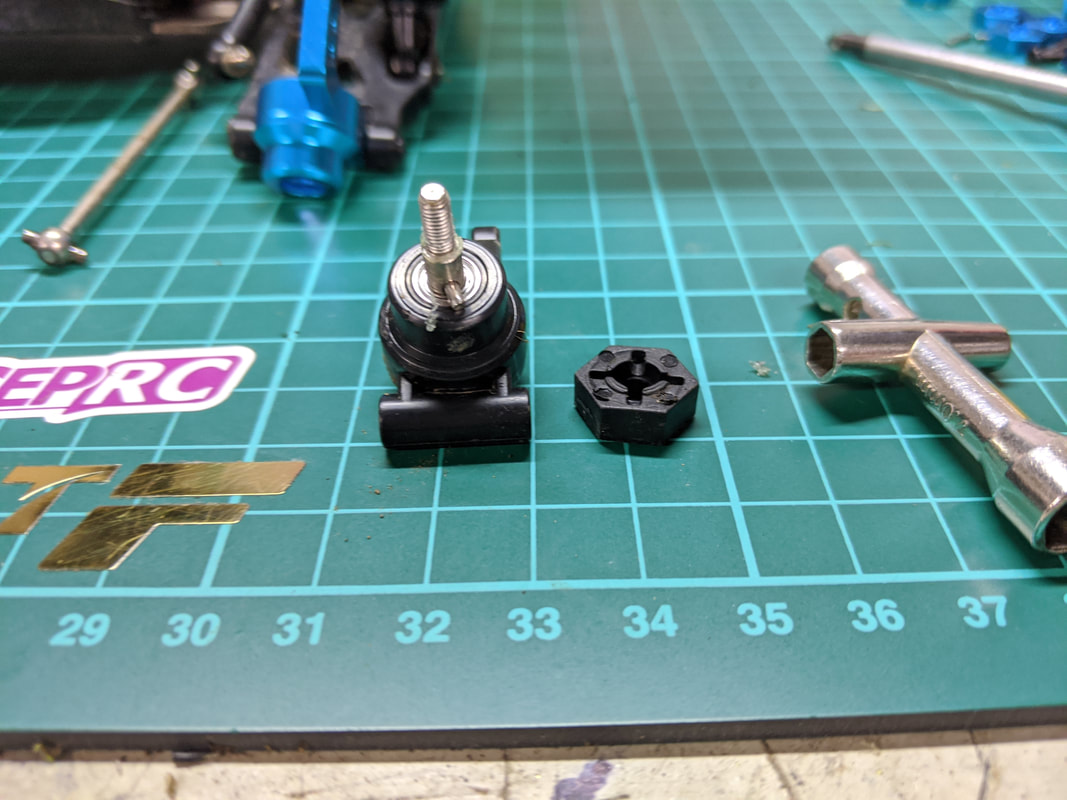
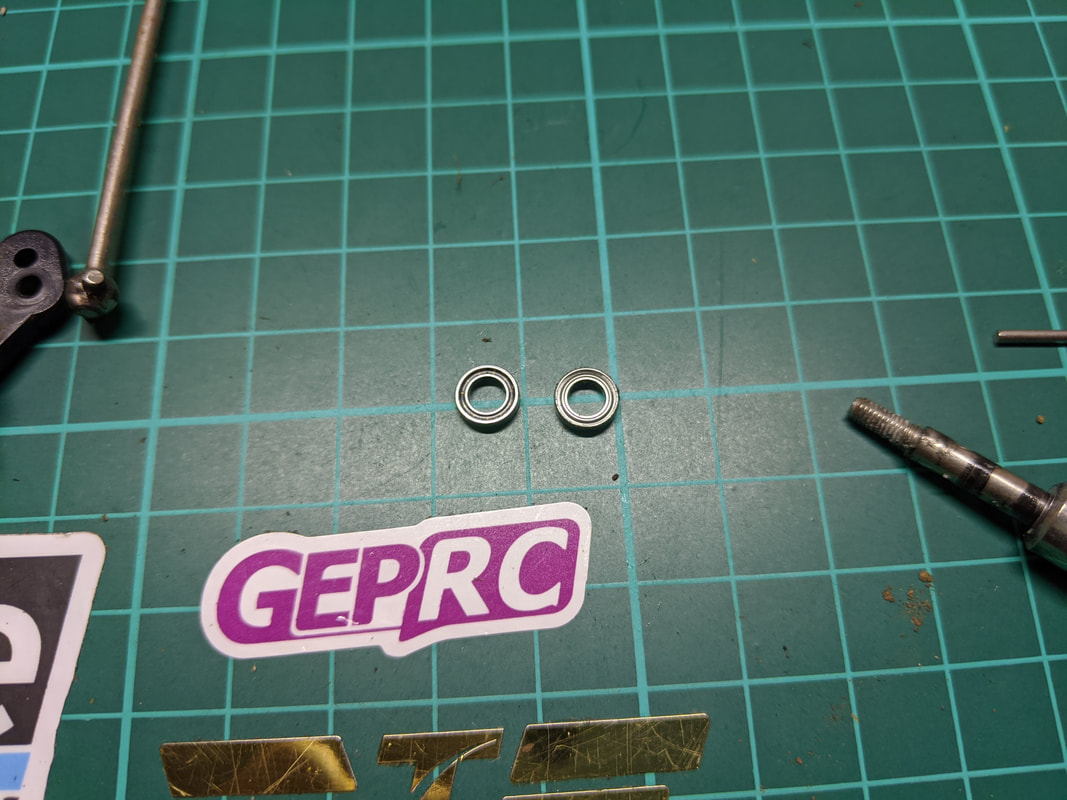
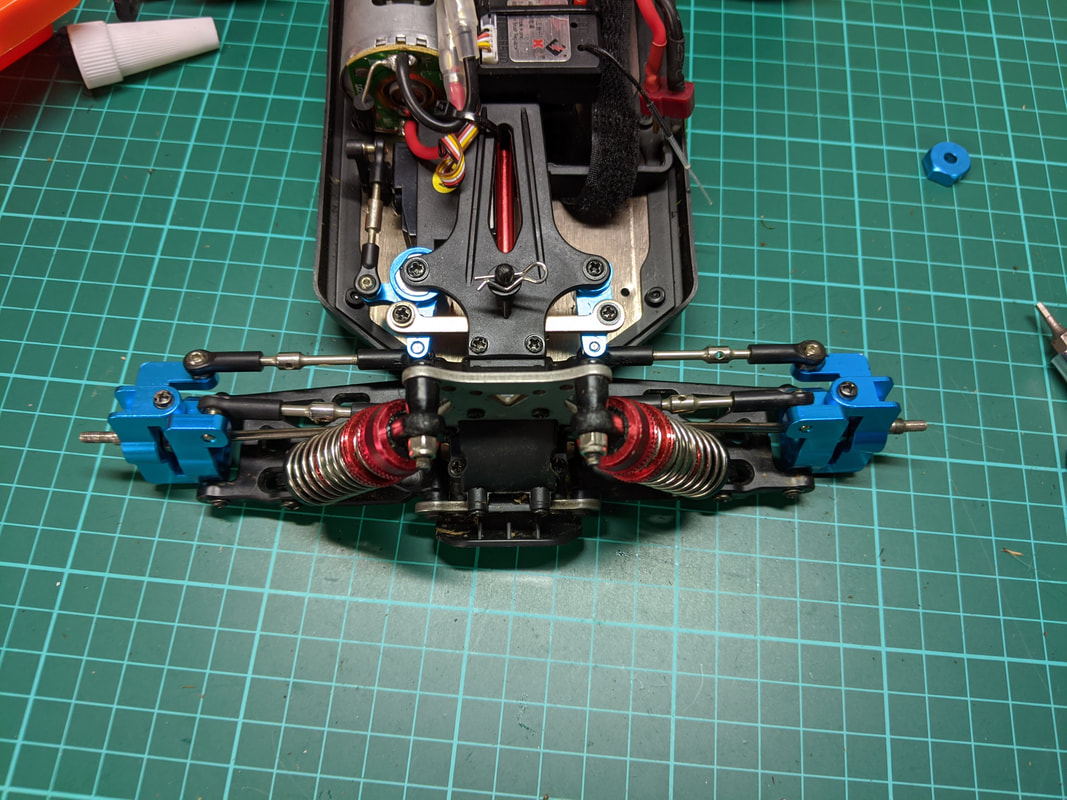
Hex drives (12mm) install
Picture
Pack includes 4 x 12mm drive hexes and drive pins
Picture
Remove stock plastic hexes and pins
Picture
Install new hexes and pins. Yes, the hexes are lose and annoyingly these drop pins with regularity.
My final recommendations
Install for all parts were very straightforward, as per my notes I definitely recommend loctite any where a screw is going into a tapped metal piece. In order of prioritising metal parts for durability I'd go for the front caster blocks and knuckles first followed by the rear hub carriers and steering cranks. Avoid the 12mm hex drives for sure as they offer no durability benefit, allow the pin to fall out easier and bind up when the wheel nut is tightened too much.

Of course feel free to ignore this if you are more about looks, the colour options and range of parts mean you can really dress the car up if you want.
Picture
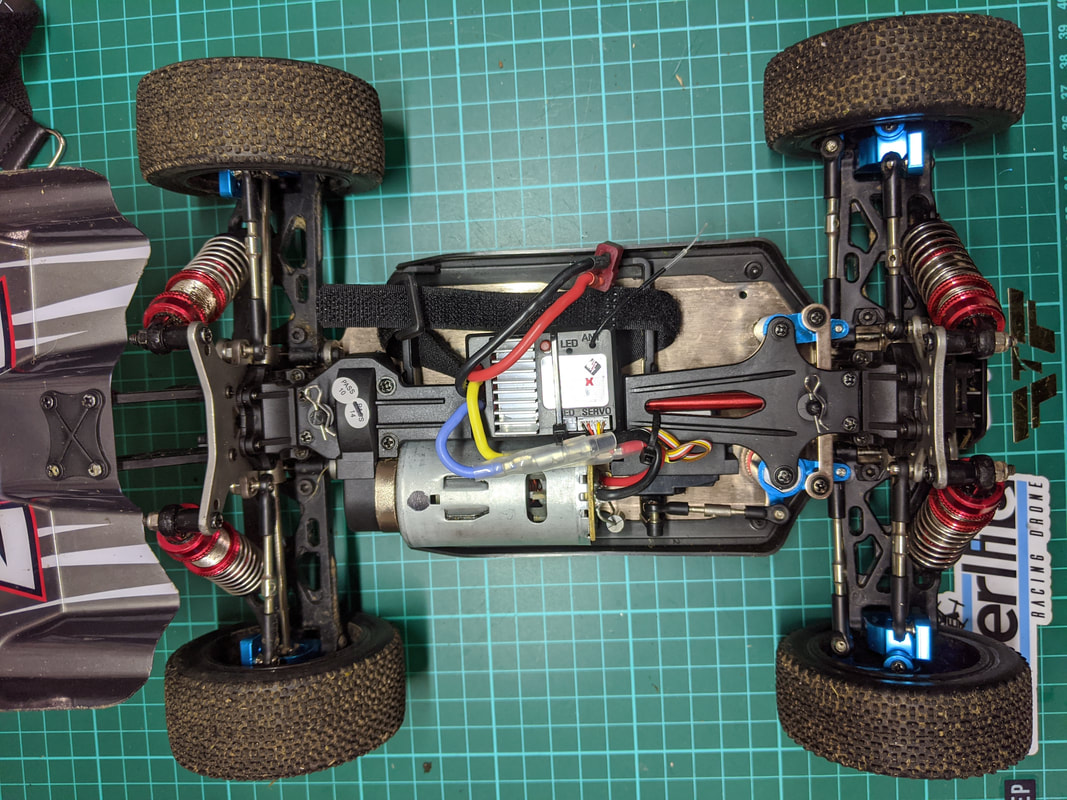
You can see some of the upgraded blue parts here on an otherwise stock car that I am keeping this way for general bashing. On the second car I've installed a small, well balanced 2838 brushless motor for off-road racing performance in this article and for the 3rd car I'll be building an on-road only speed run machine. This to follow in a later article.
Thanks for reading, if you found this article useful please feel free to like or share, the facebook links below directly link/like this article. Links are affiliated and help me buy the bits I need to produce this type of content. If you are looking for RC ​cars, quads or parts check out my coupons and discounts page which I keep updated with only the RC cars, parts and quads I like at a proper discount
​Thanks for checking out my article and please let me know on my facebook page or in the 144001 group if it worked out for you. I've created a reference page below for all of the 144001 articles I've published here:
144001 UPGRADES - EVERY ONE OF MY GUIDES HERE.
22 Comments
Wayne link
15/7/2020 06:07:27 pm

Great

Reply
Matt Chase
29/3/2022 01:42:10 pm

I appreciate all the time you took to make all information available for the public. Very helpful and much appreciated

Reply
Michael link
10/10/2020 07:27:37 am

I bought these wheels for my grand daughter and can't figure out how to assemble them. Where to put the washer, the o-ring, and the tube?

Any input would be greatly appreciated.
Regards
Michael

Reply
QuadifyRC
14/10/2020 09:19:32 am

Hi Michael

Sorry for not responding here, I see your question was answered comprehensively on RC groups which was made easier with the posting of the picture. Hope you have fun with your grand daughter racing the car around :)

Reply
Michael
14/10/2020 09:23:54 am

No worries, I am greatful when somebody answers the same year.
I grew up writing letters😁

Keep up the great work keeping us motivated to go beyond stock😄

Chu
14/10/2020 09:08:45 am

I follow you on facebook as well, and see you contribute on the 144001 groups. Thanks for the wonderful, detailed writeups. I've noticed that the stock steering is quite sloppy. When adding the aluminum parts, did the steering get more precise? Thanks

Reply
QuadifyRC
14/10/2020 09:22:57 am

Hey there, thanks for the kind feedback, the writing and sharing is part of the hobby I also enjoy so glad some people find it of use!

Yes there is a bit of slop in the steering which comes from 2 places - the small amount of flex in the plastic and the combined gaps in the ball joints and linkages. The aluminium obviously reduces the plastic flex but does little to fix the linkage play. Looks bad when you run the car with wheels off the ground but when loaded up on the ground it does run true. There is a custom ball bearing drag link that was originally designed for the LC racing cars that fits but I personally think it is overkill for this car.

Reply
Mike S
31/7/2021 10:23:05 pm

Are stock LC Racing tie rods any better than stock 144001 tie rods? My original 144001 tie rods all have noticeable clearance slop onto the ball pivots even though I never pop the tie rods off the ball pivots (I am wary of it stretching the tie rod ends and making the problem worse), and I am hoping that the LC Racing parts are a better alternative to metal parts.

Thanks

Mike
16/10/2020 09:11:12 pm

My ball links rub on the front aluminum caster blocks at the ball end near the wheels. Have you seen this happen? I feel like I would have to grind away some metal to get them to not rub. Im not sure what to do.

Reply
Ronald
14/1/2021 09:35:34 pm

Great website with very helpful content for all 144001 owners! Thank you for sharing all your exeriences with this great little car.

About steering:
As we know the steering mechanic works fine in this car. Aluminium parts makes it even better but in my opinion the servoarm is a weak point for precision. It is made of relatively soft plastic and twists even with low loads.
Do you know if there are aluminium servo arms available on banggood whitch fit on the standard servo? I'm sure this would be a great improvement.

Reply
Chris link
2/2/2021 05:28:02 am

I've been trying to find parts to color-match the purple that the 124019 comes with. I happen to love purple.

Besides eBay, I've only found sketchy websites that offer the different colors. Are the eBay stores safe to order from or am I better off looking somewhere else. I've only seen the blue color on Banggood.

Thanks for any feedback. My car gets here today!

Reply
QuadifyRC
2/2/2021 09:27:33 am

Problem is with ebay is that the service is only as good as the seller of which you don't have a lot of controller over. Aliexpress is slightly better. If they are on other sites they will end up on Banggood. How about another colour to complement the purple?

Have fun :)

Reply
Miguel
3/4/2021 05:24:17 am

Hi,
I have just isntalled an aluminium kit and I realized that wheels/axle slack os Wilder than i expected, between the front caster blocks and sterring inicies.
Hace you has dame problem? How had you solve It?

Sorry about poor and Direct English.

I am very pleased with your tutorials because is much more helpfull than YouTube Channels.

Reply
QuadifyRC
5/4/2021 10:42:06 pm

Hi Miguel, unfortunately there can be slop although mine weren't to bad. If you are really worried then you can use m3 shims to take the slack out. Good luck and thanks for the kind words

Reply
Mugyely
6/4/2021 08:26:40 am

Thank you so much for you quick answer and overall for you blog,
is the Bible for the beginners.
Very nice job.

See you!!!

Munch
4/4/2021 12:31:13 pm

Had mine for a few weeks now, curious about the metal suspension arms, as I only had maybe 4 minor crashes and right front arm cracked right off the inner mounting point, Ill glue it for now, but ordered metal set to test. At worst ill have to order a plastic set in the future. Here's to hoping, ill report back after receiving and testing the arms.

Reply
QuadifyRC
5/4/2021 10:40:40 pm

To be honest I'd rather replace $3 arms that are relatively painless rather than diff housings and other parts but that's my take on it.

Reply
Marco
31/5/2021 09:25:29 pm

Best,

When I tighten the nuts completely with Remo 6973 wheels, the wheels turn very heavily, what can I do about this?
I replaced the bearings for 2.5mm and the front steering knuckles are original.

thanks in advance for your answer

Sincerely,
Marco

Reply
QuadifyRC
1/6/2021 10:24:29 am

Hi Marco

This is difficult for me to answer but it sounds like it's binding. Try go back to the stock bearings?

Reply
PC
2/6/2021 03:40:56 am

Just FYI - My son was driving the 124019, made a sharp turn, car took a flip (this is just on flat pavement), hit the shock towers and chipped off a huge chunk of the front gearbox. There is a big hole thru the gearbox. And just for that, I am going to get the metal gearbox, and the thicker shock towers. I can't drive the car until the new gearbox arrives. I think it's worth getting the metal gearbox, at least for the front.

Reply
QuadifyRC
1/10/2021 11:58:56 pm

I'm not a big fan of the metal boxes because of the tolerances, I prefer the plastic ones but you may have more success than me

Reply
Idan Harel
29/9/2021 08:44:07 pm

Two suggestions.
1. The swingarm holder, OG it comes with rubber holders for the swing arm bar, well, those are getting destroyed like every accident.
so i think you should consider adding this part to the list.
https://www.aliexpress.com/item/1005001908854004.html?spm=a2g0s.9042311.0.0.28f24c4dRR59so

2. you talked about the metal gearbox, well because of section (1).
my swingarm cannot hold because the screws that goes through it to the gearbox case are loose, so i think going to metal gearbox will make the screw thread stronger.

Reply


Leave a Reply.

    Archives

    November 2022
    October 2022
    September 2022
    August 2022
    July 2022
    June 2022
    May 2022
    April 2022
    March 2022
    February 2022
    January 2022
    December 2021
    November 2021
    October 2021
    September 2021
    August 2021
    July 2021
    June 2021
    May 2021
    April 2021
    March 2021
    February 2021
    January 2021
    December 2020
    November 2020
    October 2020
    September 2020
    August 2020
    July 2020
    June 2020
    May 2020
    April 2020
    March 2020
    February 2020

    Categories

    All
    104001
    104002
    104009
    104072
    1/10
    124016
    124017
    124018
    124019
    144001
    144002
    144010
    16886
    16889a Pro
    184016
    284131
    4s
    4 Things
    Anti Roll Bars
    Balance
    Basher
    Battery
    Brushless
    C24
    Charging
    Cogging
    Crawler
    D22
    D32
    Diatone
    Diatone Q25
    Drift
    Drop In
    Dumborc
    Eachine EAT14
    Eachine EC30
    Eachine EC30B
    EMB-MT
    Ex07
    Ex16
    Flyhal
    Flysky FS-G7P
    Flysky Noble Pro
    FMS
    FPV Car
    Goolrc
    Guide
    Gyro
    HBX
    Hbx 901a
    HS10422
    K989
    LC12B1
    LC Racing
    Lipo
    Metal Parts
    Micro
    MJX Hyper Go
    Monster Truck
    Mx-07
    Pinion
    Preview
    Program Card
    Project WLCRacing
    Q33
    Racerstar
    Radiolink RC6GS V3
    RC Boat
    Review
    ROCHobby
    Setup
    Sg 1602
    SG 1603
    SG 1604
    Soldering
    Spectre
    Speed Run
    Stance
    Surpass Hobby
    Timing
    Transmitter
    Tuning
    Tyres
    Upgrade
    Vinyl
    Wheels
    WL916
    Wltoys
    WL Toys
    Wpl
    Zd Racing

    RSS Feed

Thanks for visiting QuadifyRC.com Follow us on facebook below to get all the latest updates
  • RC Cars
  • Car of the Month
  • Quad Reviews
  • Quad Mods
  • COUPONS AND DISCOUNTS
  • Long Range
  • About & Contact