|
WL toys have had a series of hits with the 1/14 scale 144001 and now more recently with the 1/12 scale 124019 and 124018 - same car just a little longer. In order to hit their price point though they have had to compromise on the power train - opting for brushed motor technology that although surprisingly fast offers poor long term durability and even worse efficiency leading short running times. Upgrading to brushless is a solid option but has required hacks and workarounds in the past to get anything other than basic speed run builds. This new guide aims to be drop in solution with no mechanical modification required. 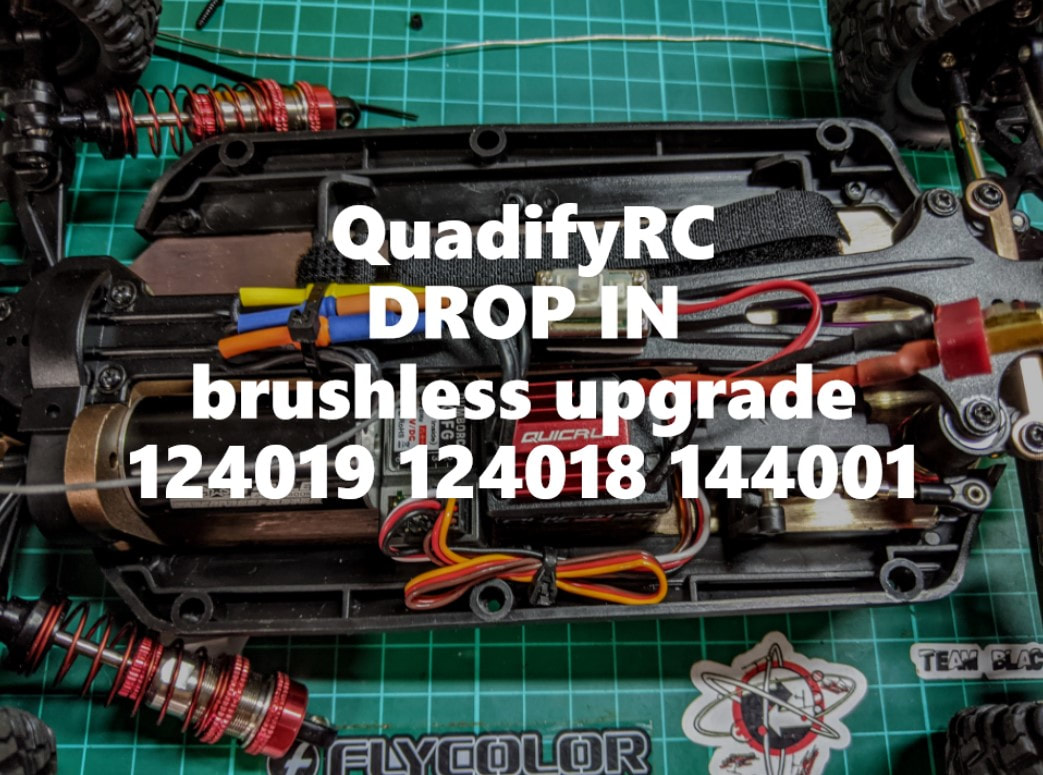 Just to recap I've already made 3 brushless builds. If you have the ability I still highly rate the ultimate brushless upgrade as I believe the motor and gear combination is perfect for fast, reliable and efficient 2s running.
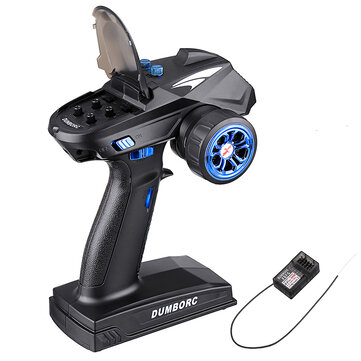
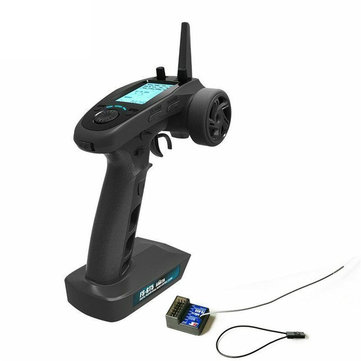
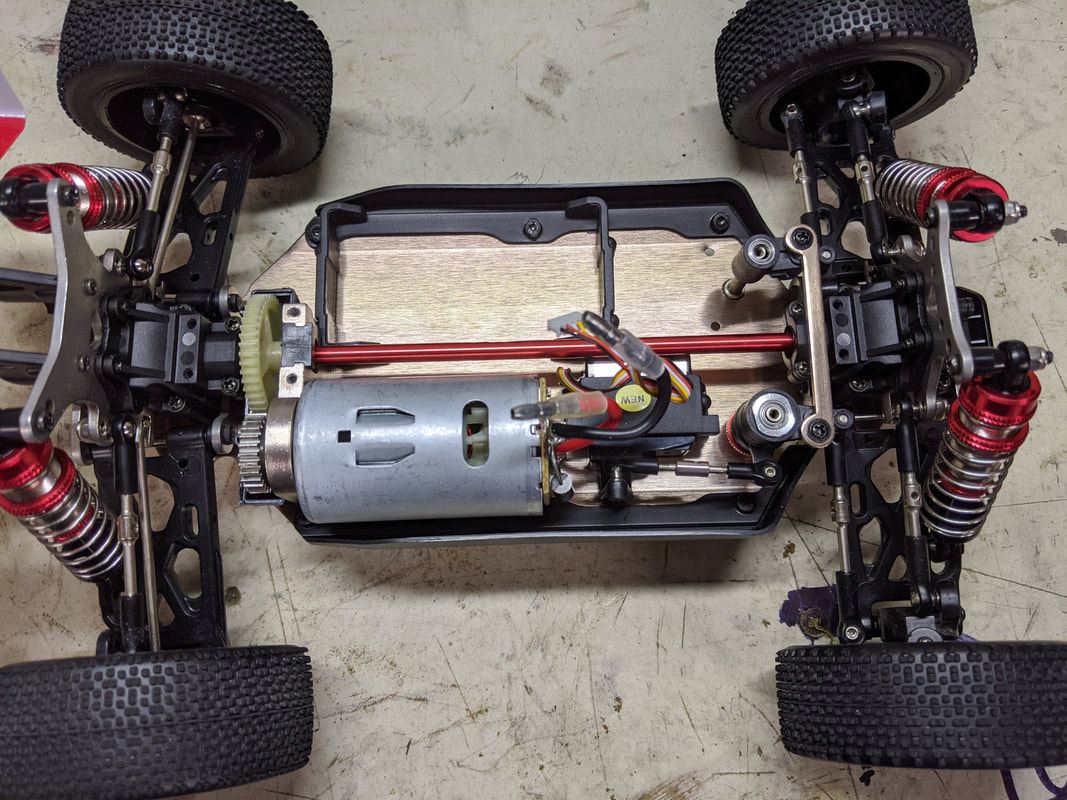
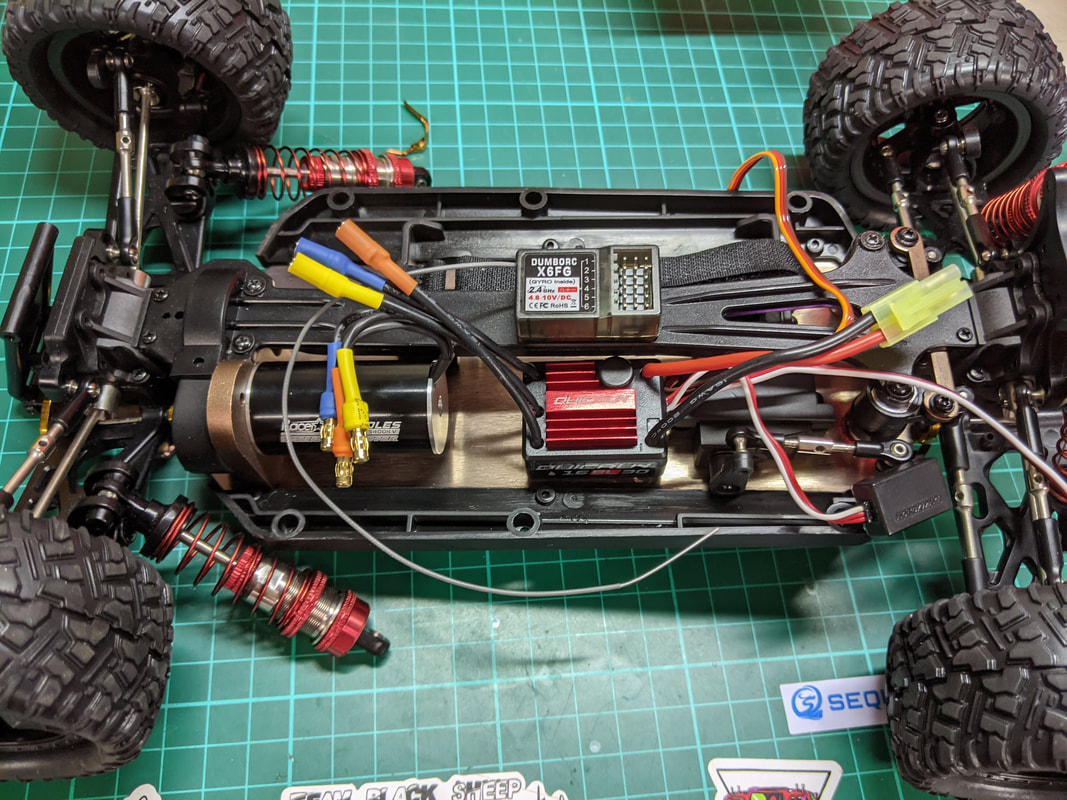
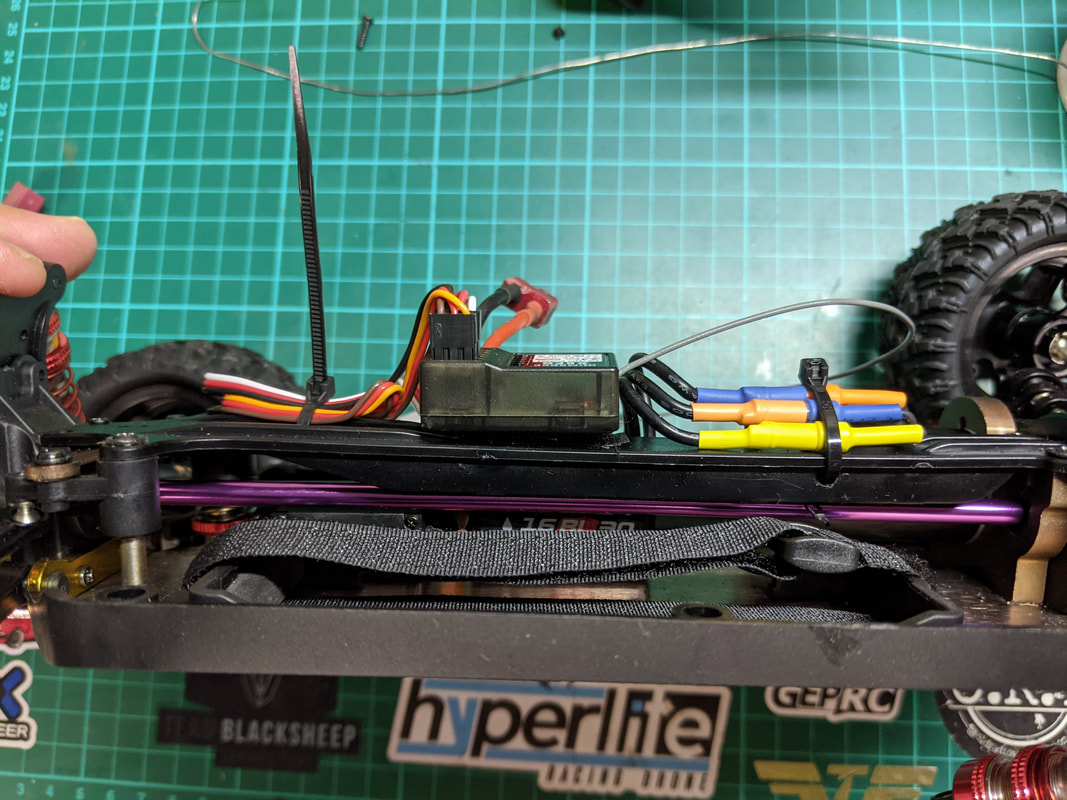
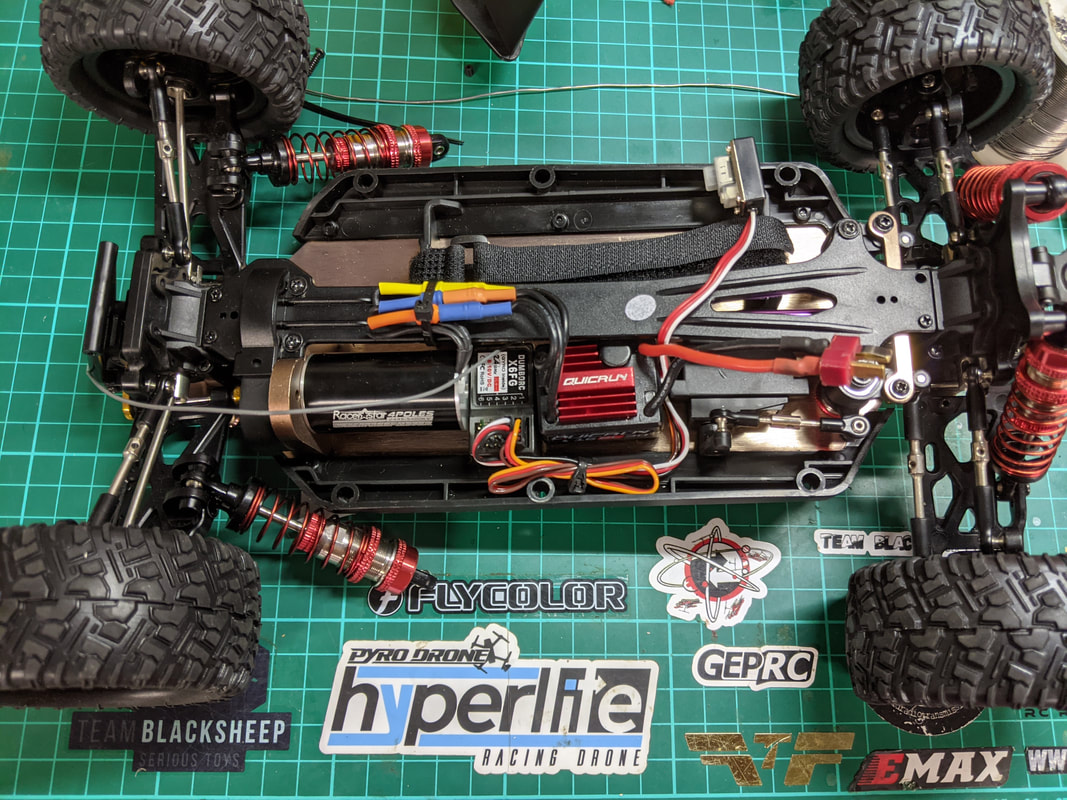
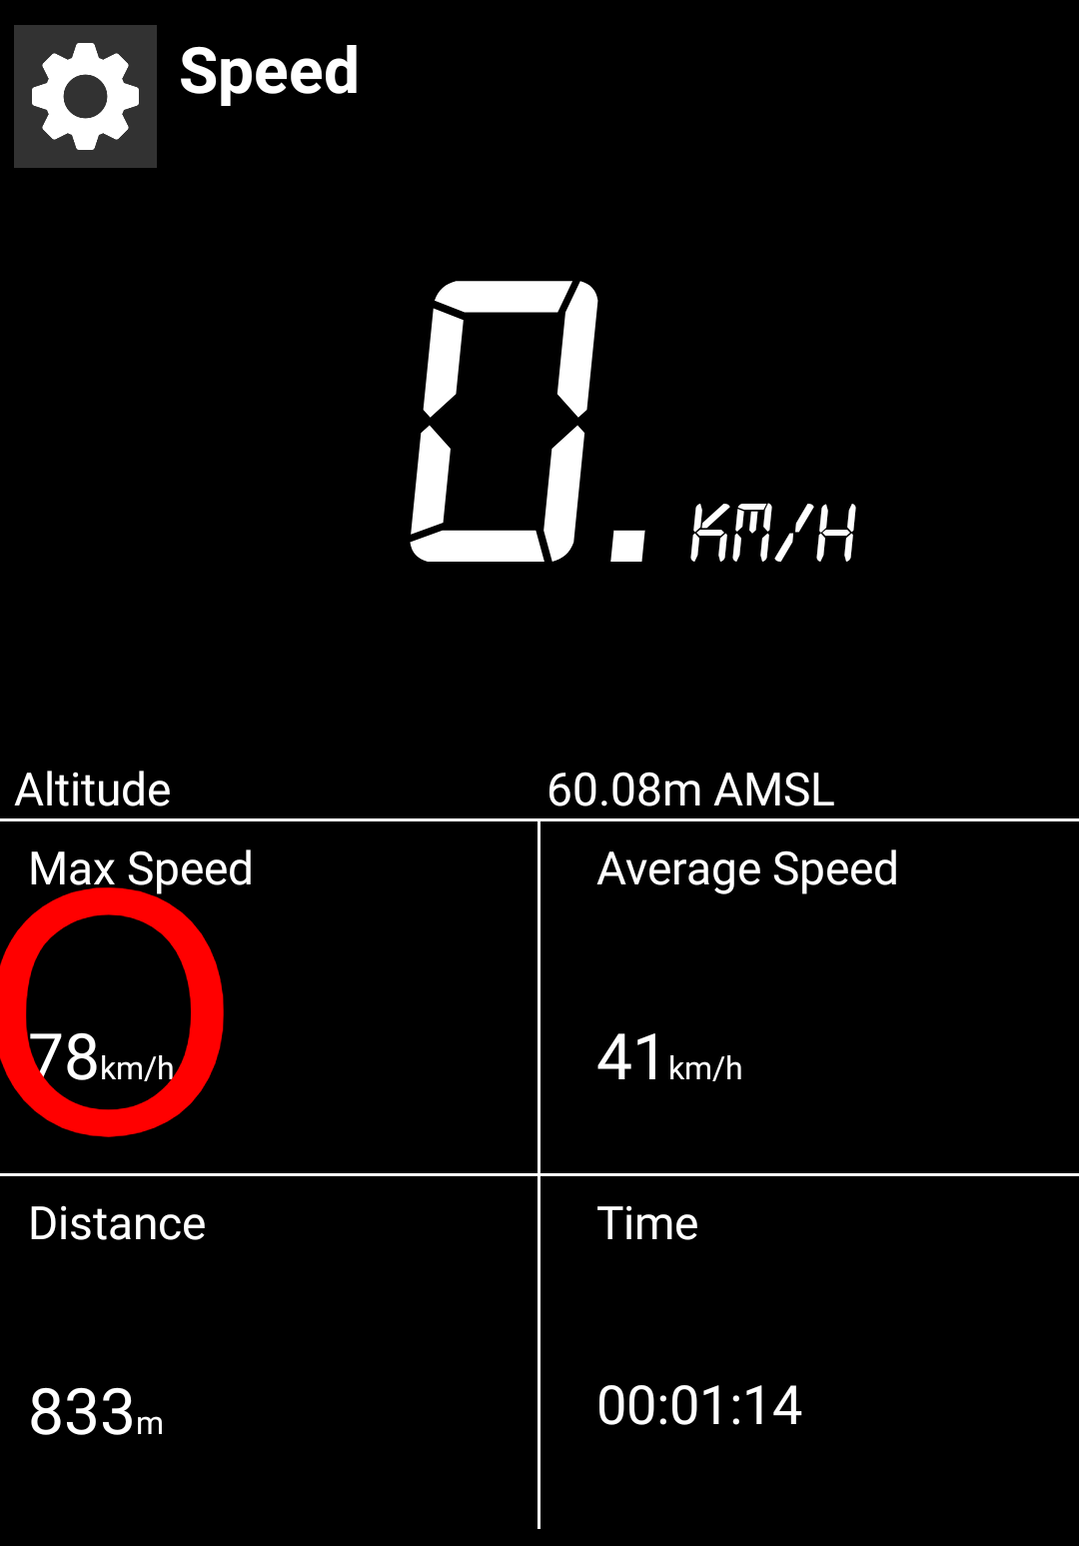
Build objective The core objective for this build is to make the process as simple as possible - servos, receivers, motors, gears all bolt up directly without having to re-drill, slot or fabricate anything. For full disclosure the ONLY cutting that is required is removing a little of the thin plastic on the motor shroud - purely cosmetic and can be done easily with a craft knife or nail scissors. The end result of a car that is very quick (48mph/78kph on 2s and 68mph/109kph on 3s) and has superior handling due to reduced weight that is suitable for on road and offroad with markedly improved battery life 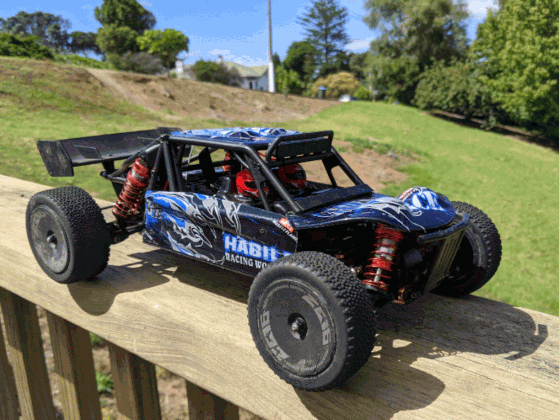 Competed build - I've installed in the 124018 but it would work as well as or even better in the 124019 or 144001 Parts I used plus alternatives All parts are listed below. I've listed alternative items with same or similar specs should there be stock issues. Radio Radio will need to be replaced, you cannot use the stock item for a brushless upgrade. DumboRC make an excellent budget model or you can upgrade to the FlyskyFS-GT5
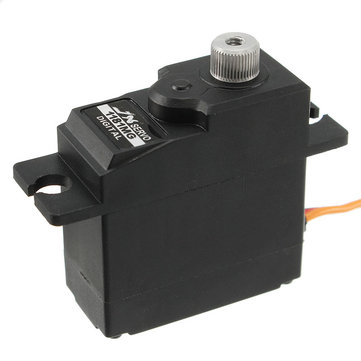
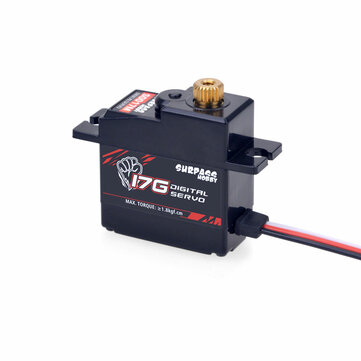
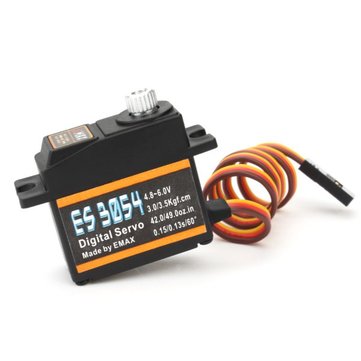
Servo The stock servo will need to be replaced with a 3 wire servo. I recommend the reliable PDI-1181MG but it is often out of stock. The Emax ES3054 is a good replacement as is the newly released surpass hobby 17g metal servo
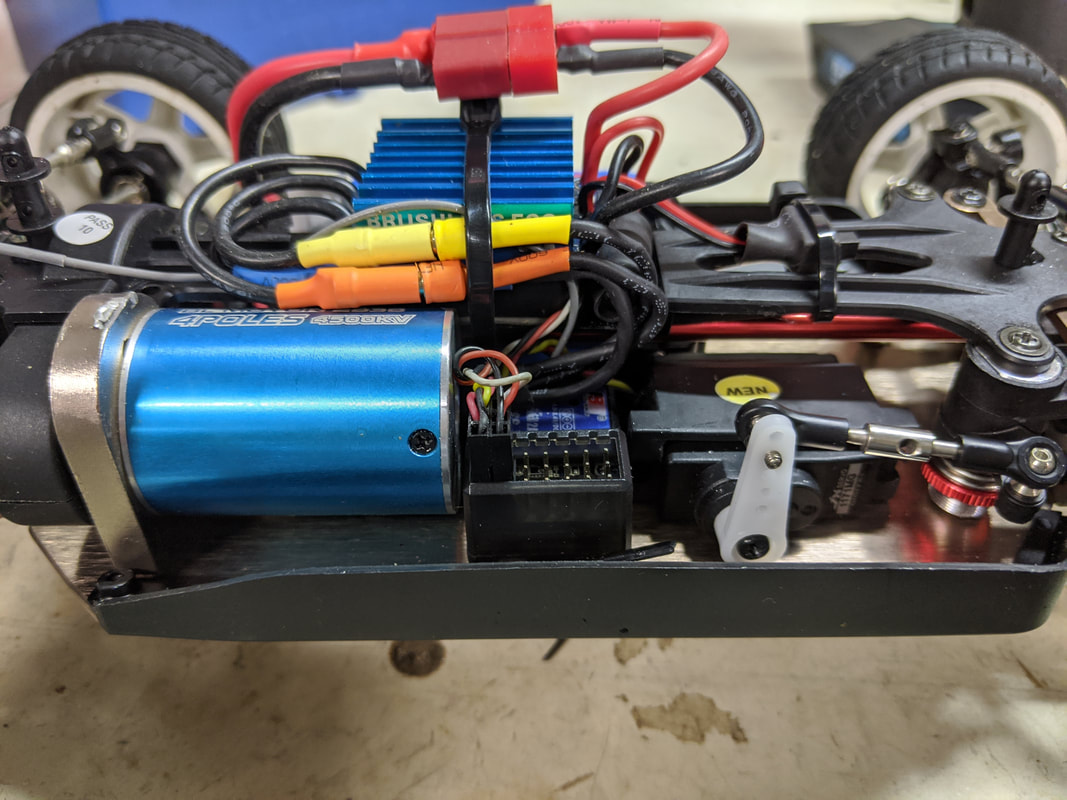
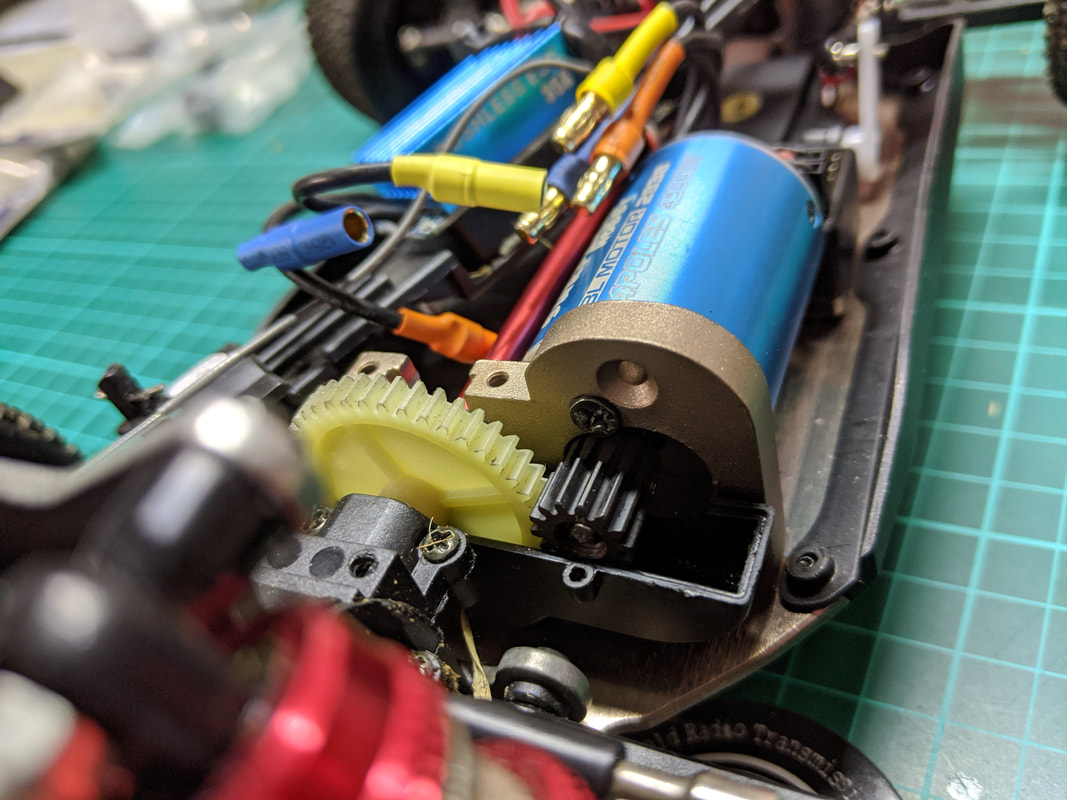
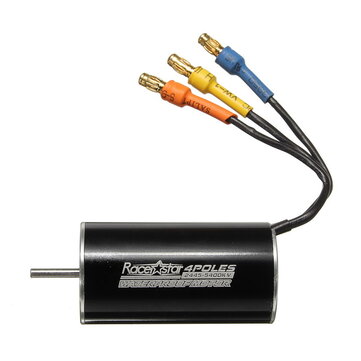
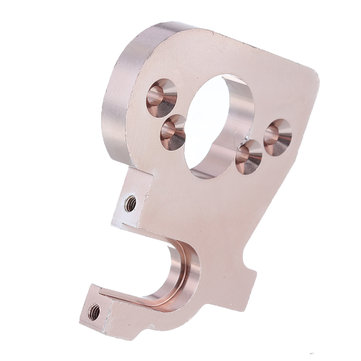
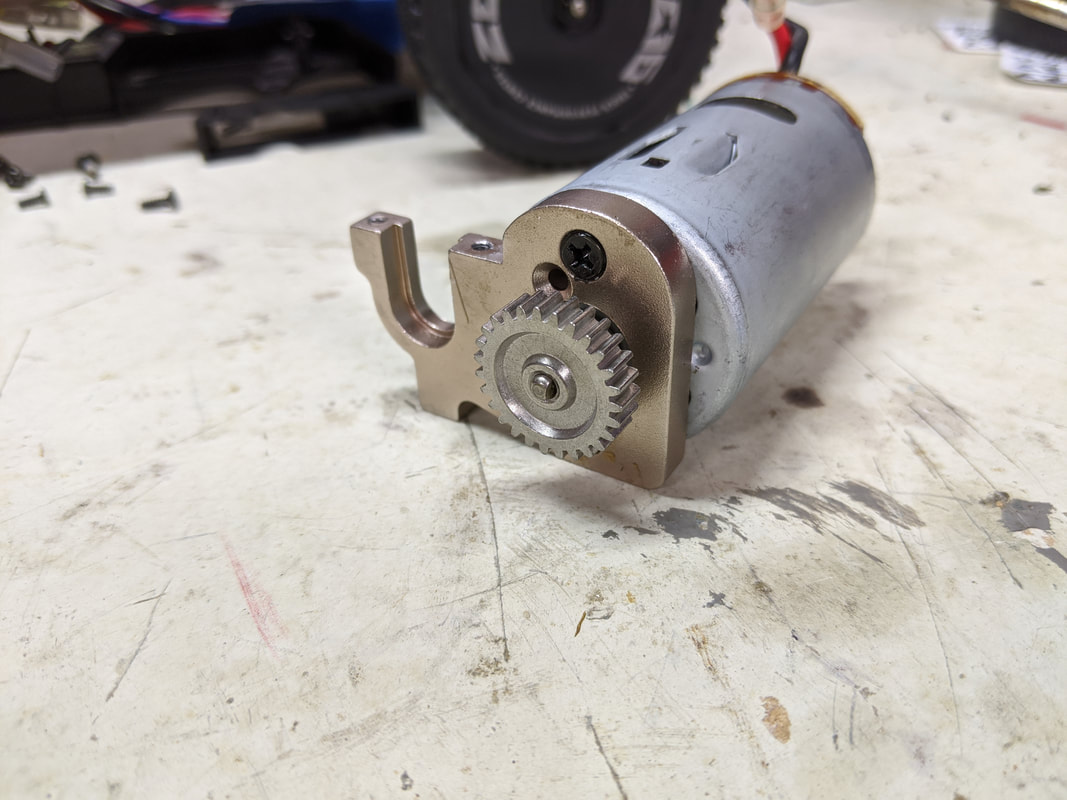
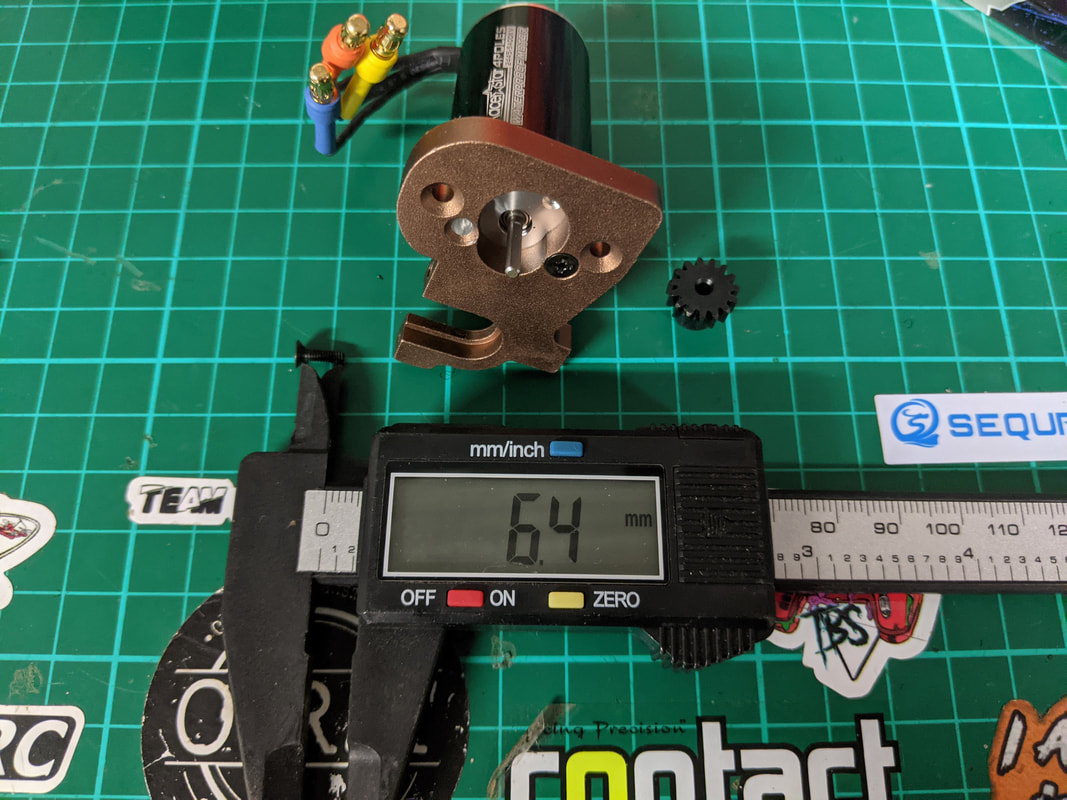
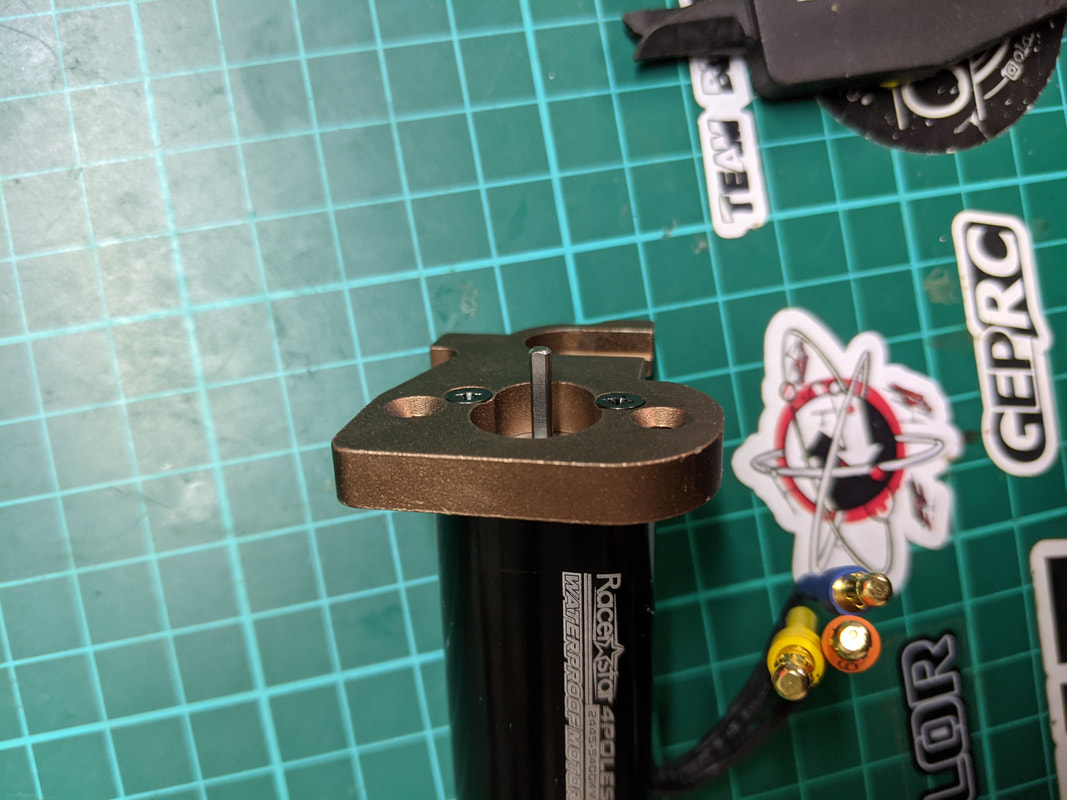
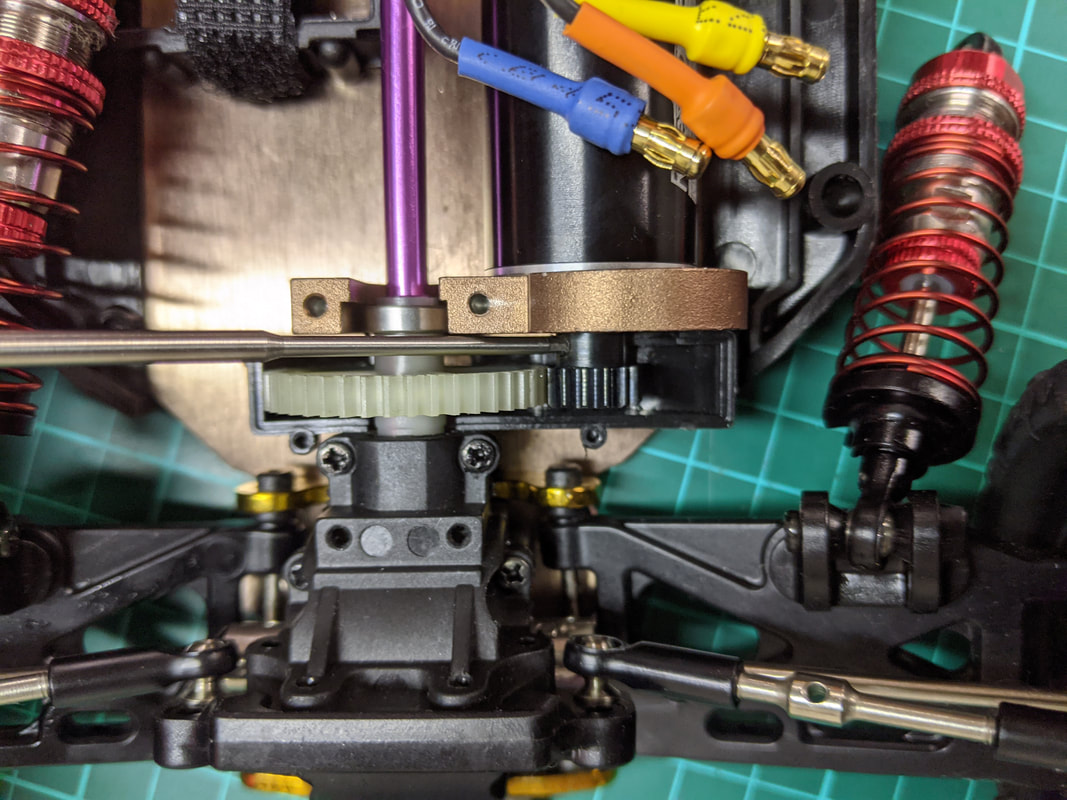
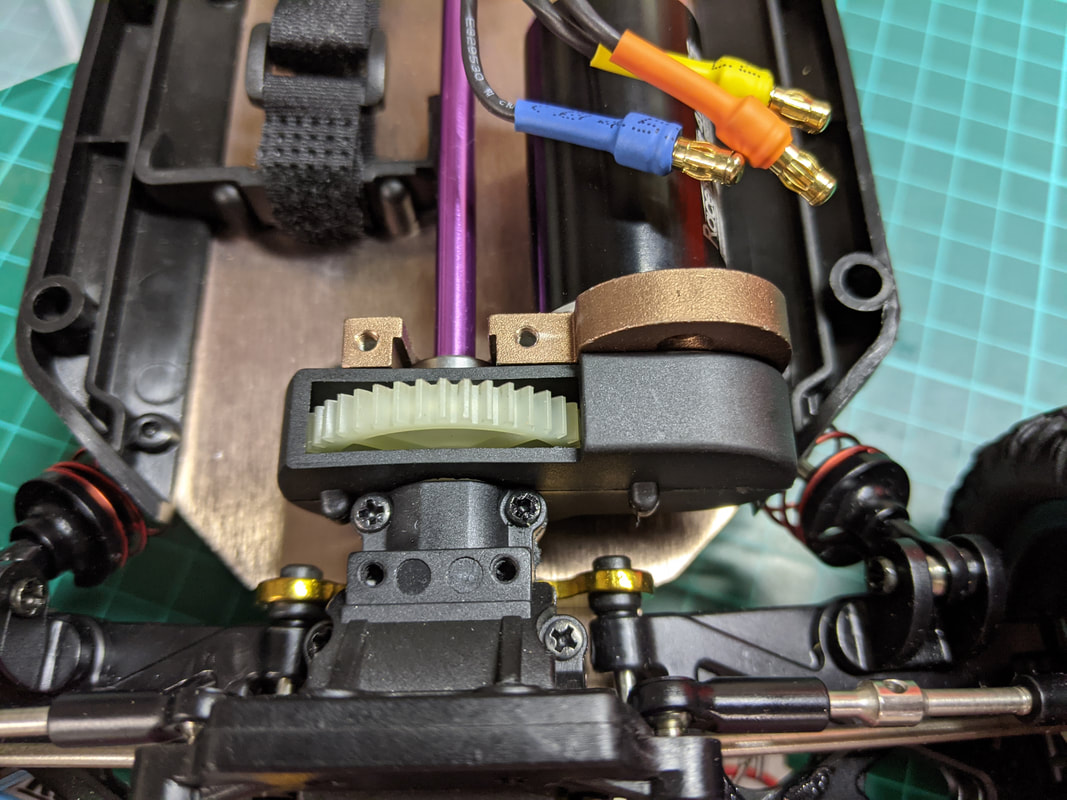
Motor On to the fun stuff! The motor is the most unique part for this build. For size I've chosen the 2445 as the longest barrel 24xx motor available. It has the correct mounting points for the stock bracket and importantly has m2.5 mounting screws (no drilling of the motor mount) and a 2.3mm motor shaft meaning no re-boring of the 15t pinion gear. Ideally I would have liked 4500kv but have gone with 5400kv and will use exclusively on 2s. Consider 3500kV as a milder option that is capable of running 3s quite happily
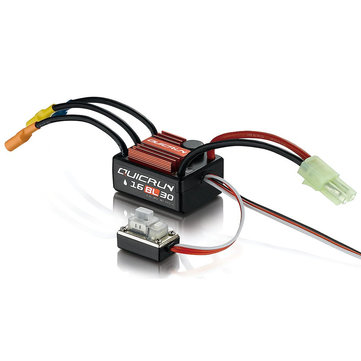
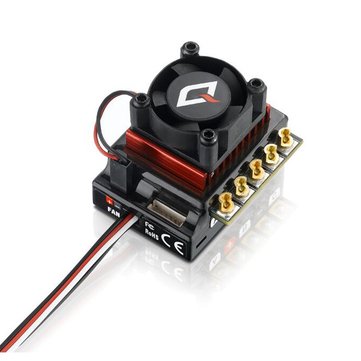
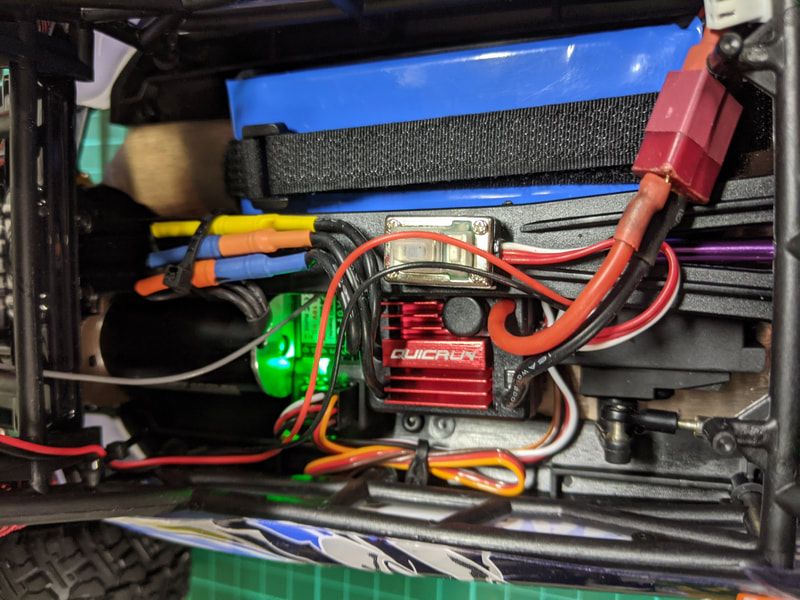
Brushless ESC I don't think anyone will question my use of a premium hobbywing ESC (such is their quality and performance) but I know I will ruffle a few feathers by recommending the 30A 16BL30 model. My reasoning is simple. This is the unit that is OEM'd for the LC racing EMB series which run 2838, 2938 and 2850 motors ranging from 4500-5000kv on 2s AND 3s. These are well made cars and have shipped with these ESCs for years with little to no complaint on the ESCS even on 3s. I've also listed a budget surpass equivalent but strongly recommend the 16BL30. If you remain unconvinced, consider the 120A Hobbywing 10BL120 as an overkill ESC that has a massive amount of overhead yet remains highly compact for a simple build.
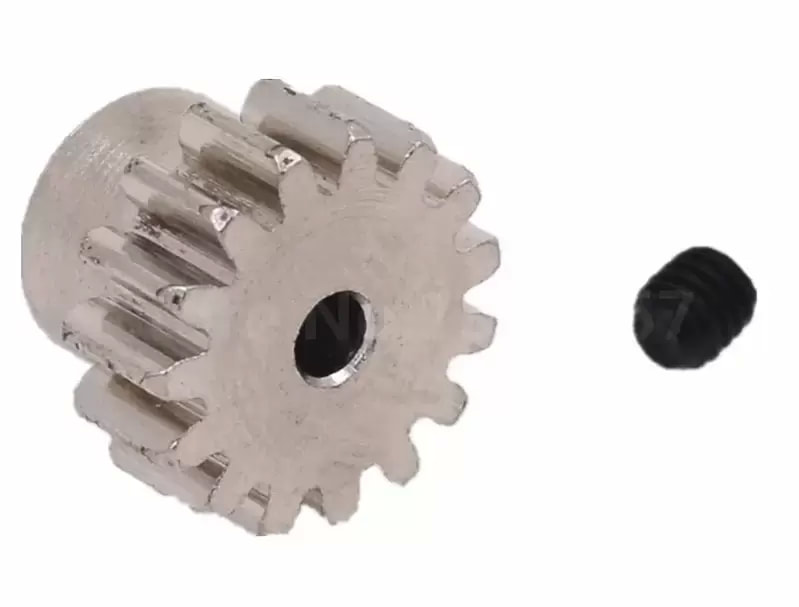
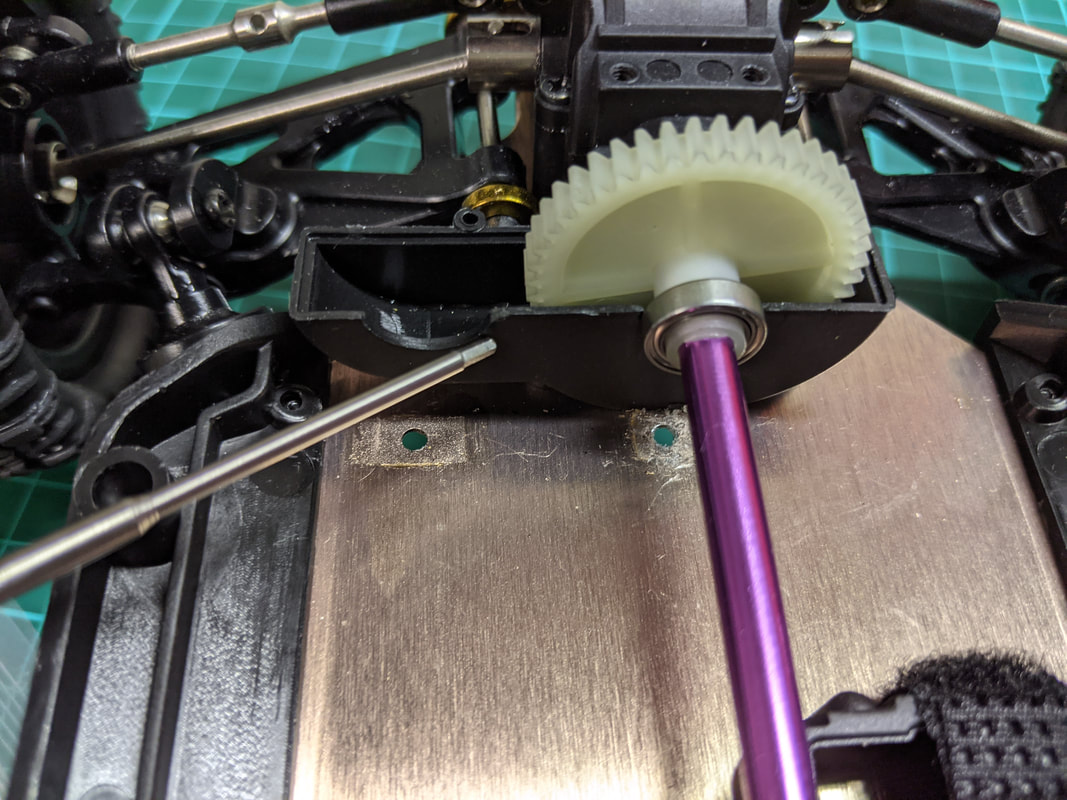
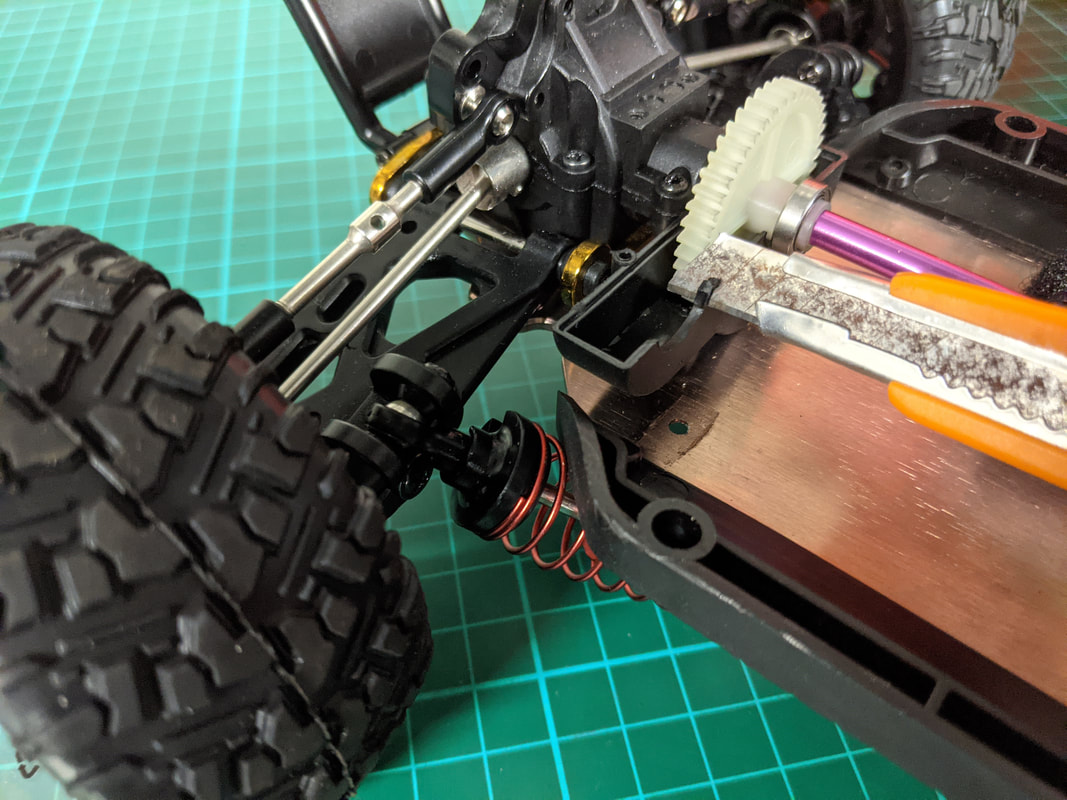
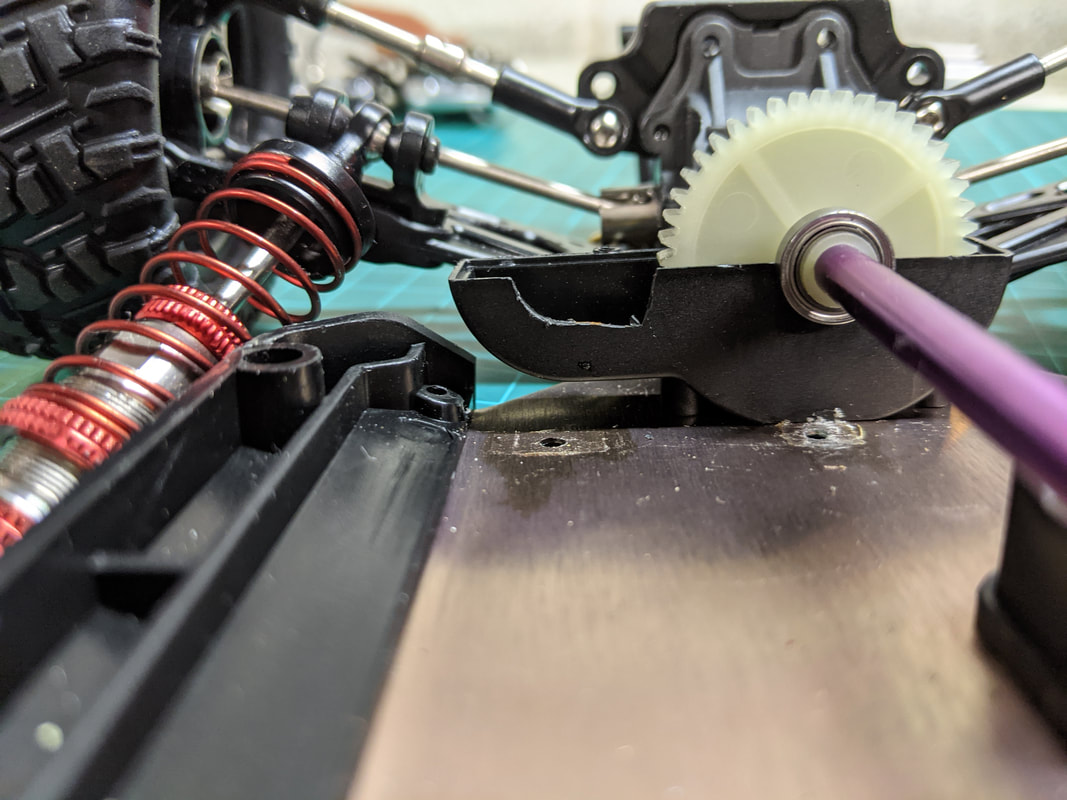
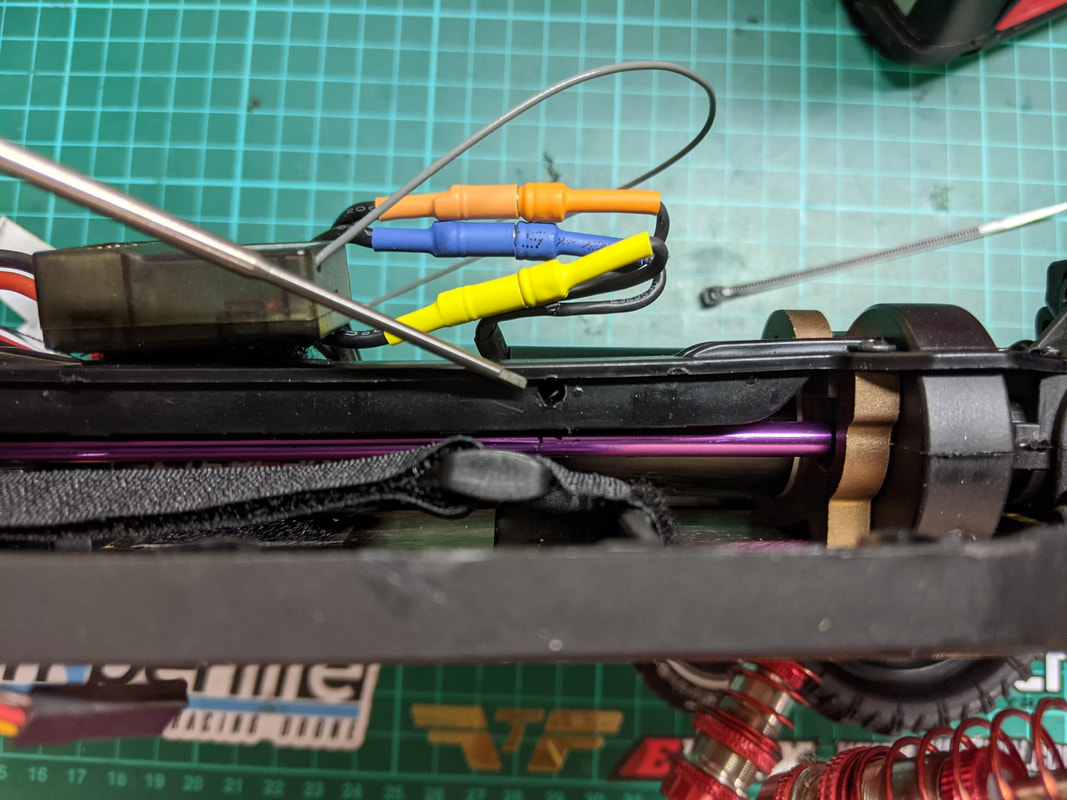
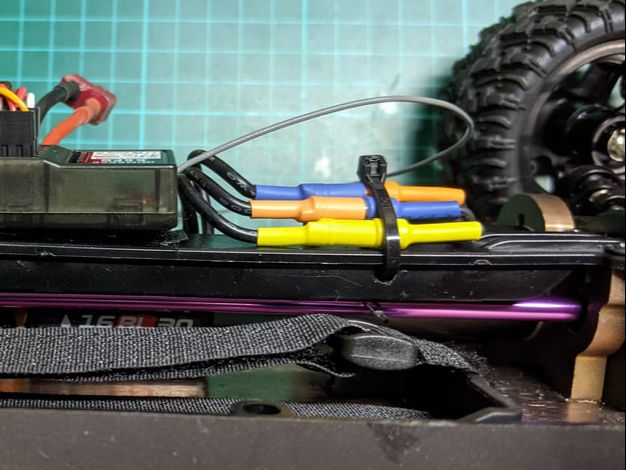
Other parts These are the must-have other parts needed for the upgrade. Not sexy but crucial - especially the unicorn pinion that I found after a months of searching and testing.
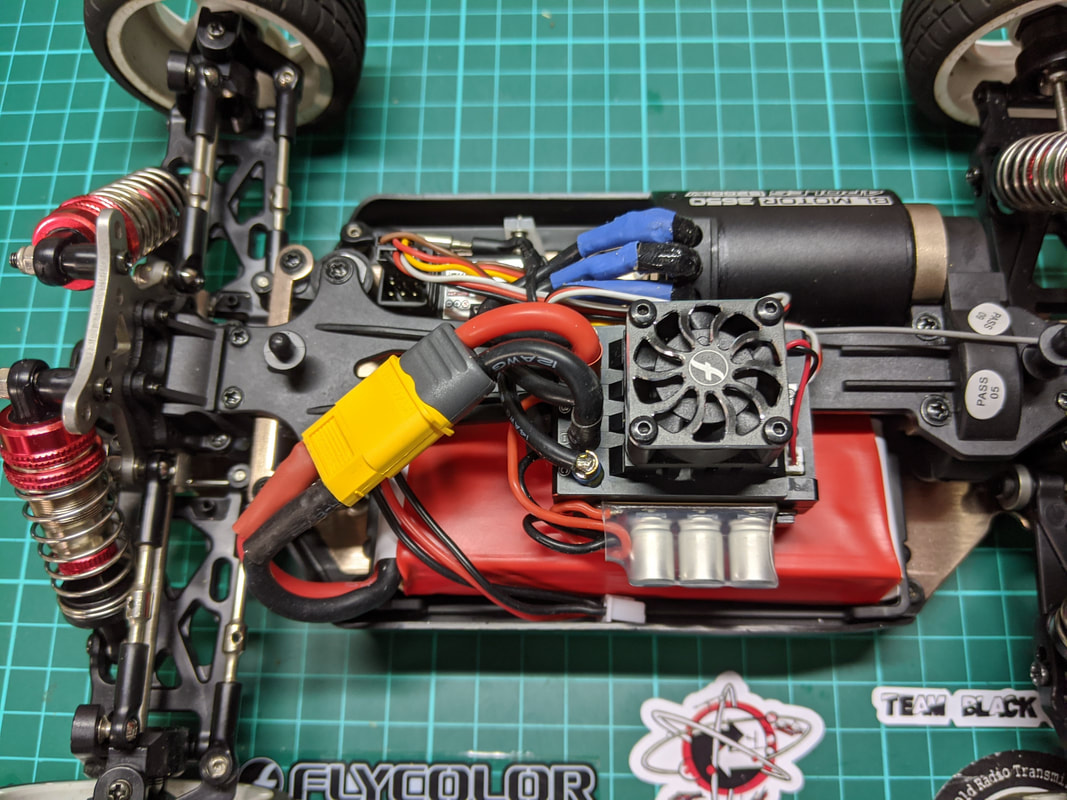
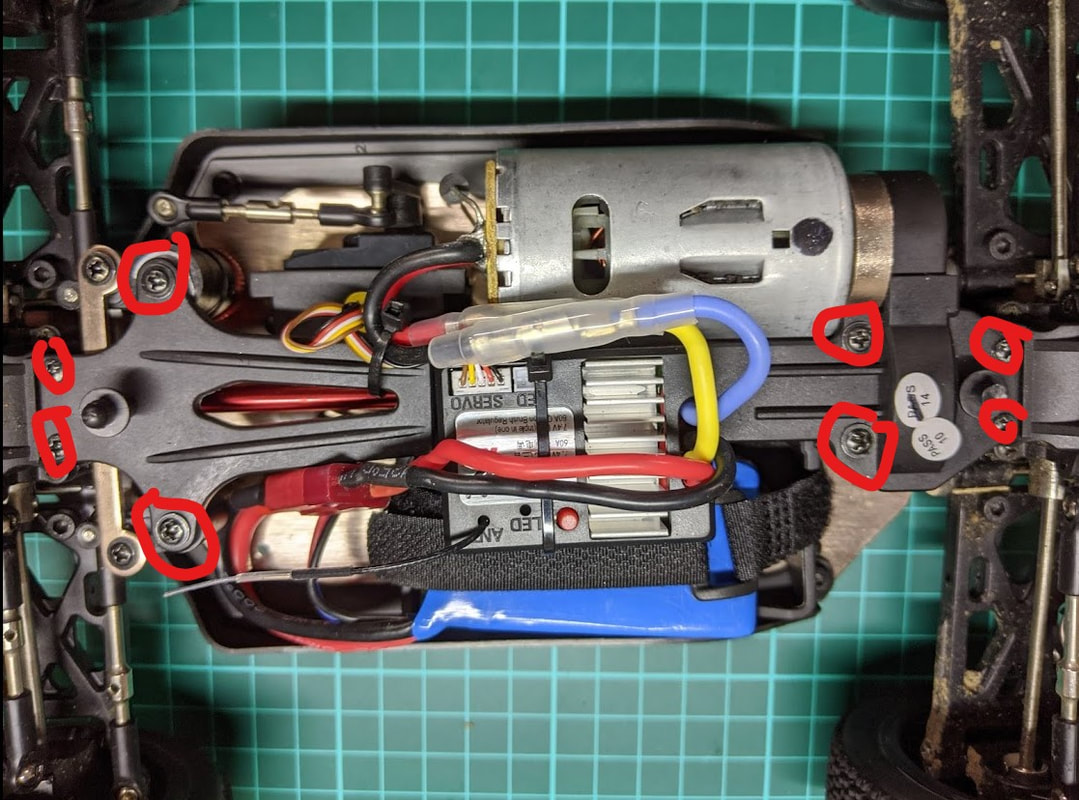
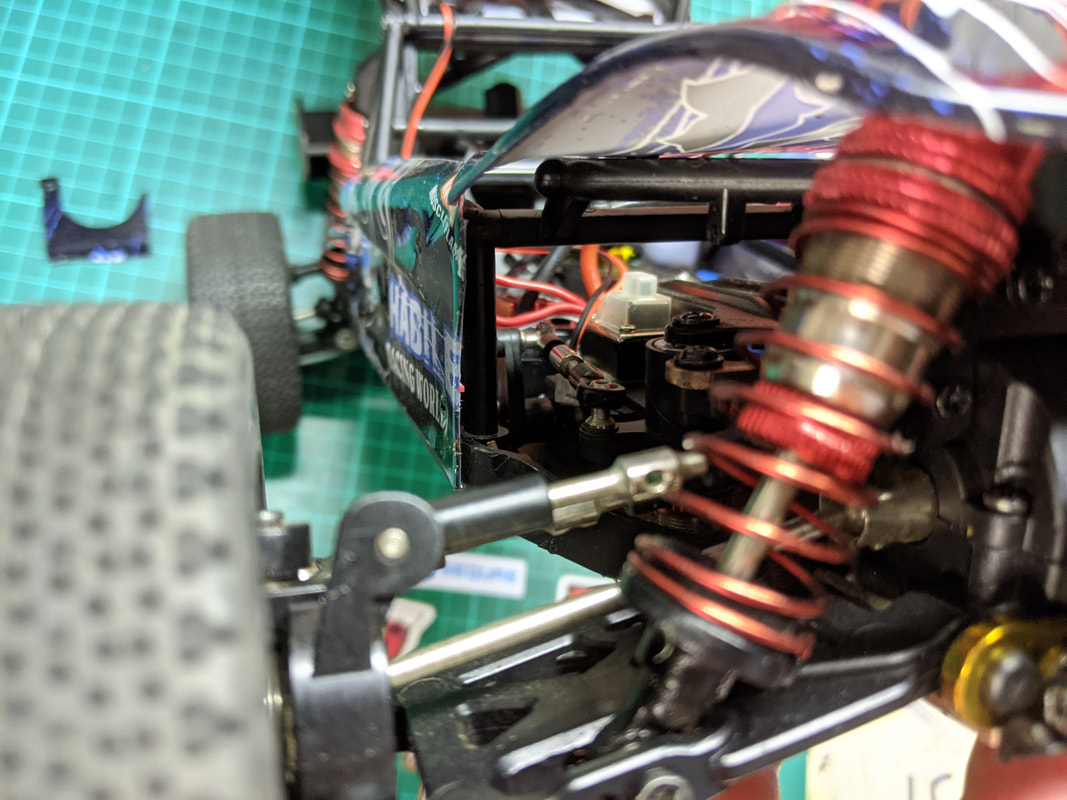
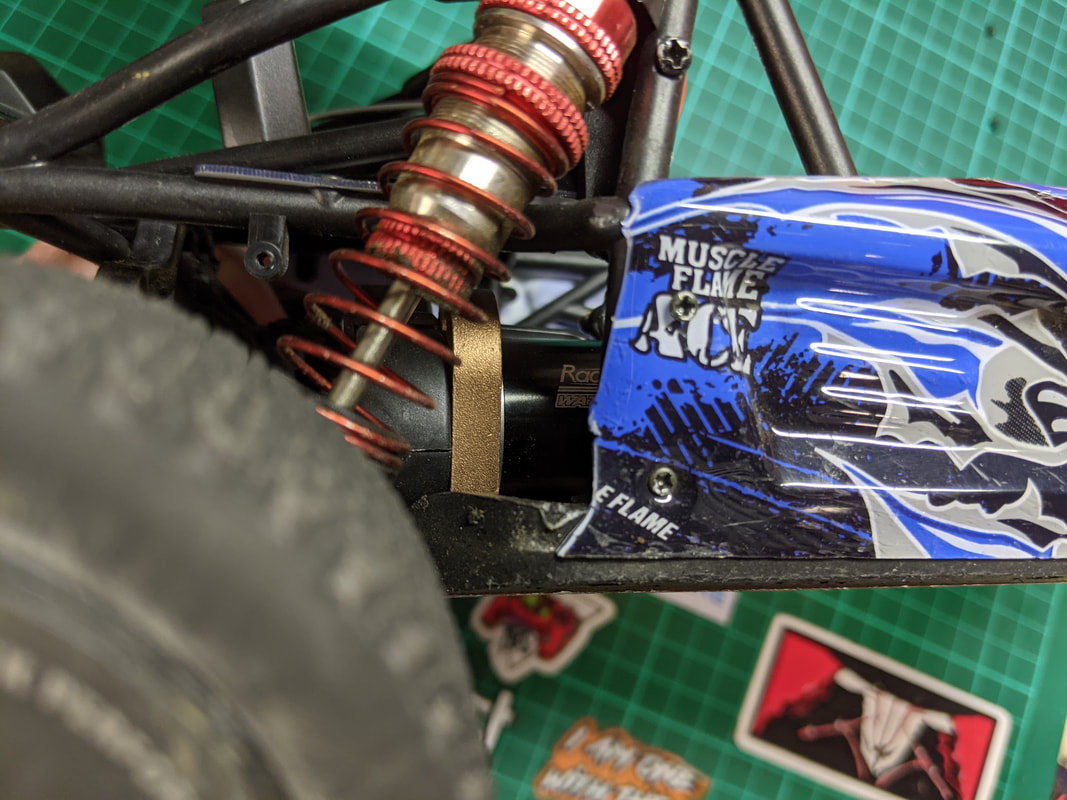
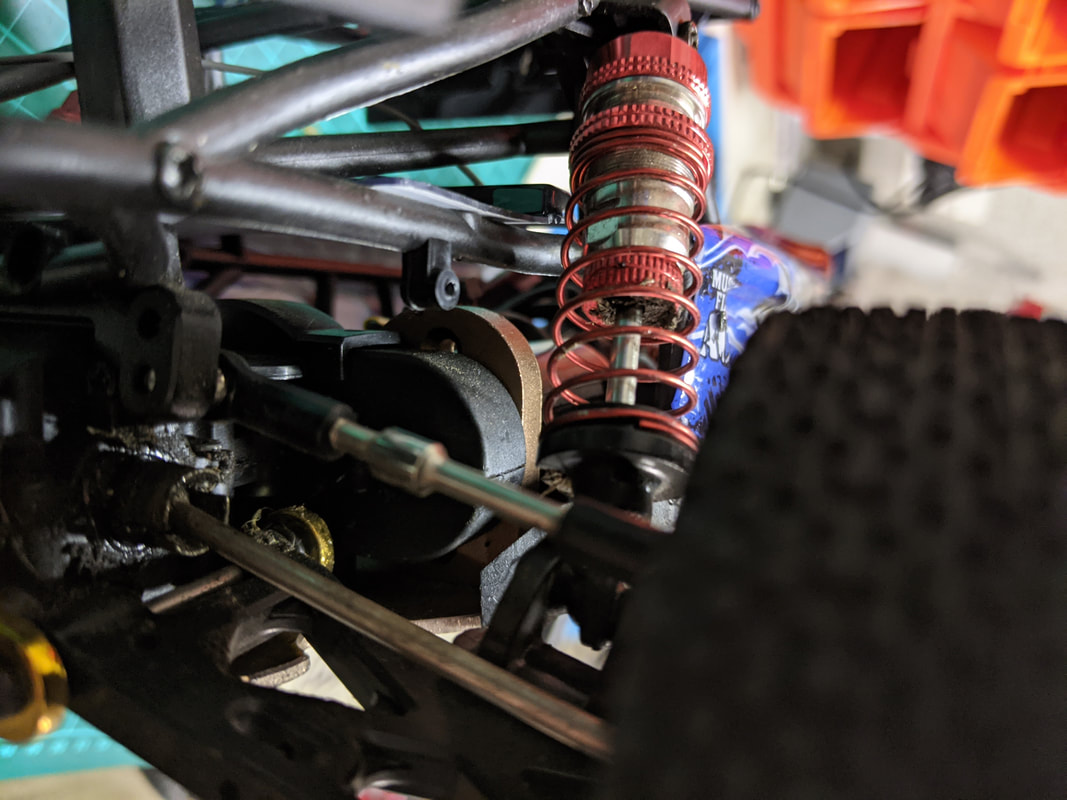
Install Guide Now that you have all the parts it's time to put it all together. I've installed in a 124018 here but images are the same for 124019 and 144001 as well.
Performance results For those that follow me on facebook (here if you want: Quadifyrc on facebook) you'll know that I've been testing this for about 2-3 months at time of writing in order to give you the best possible view rather than slapping it together and hoping for the best. Weight and weight distribution Moving to this setup will save you weight (130g to be specific) in all the right places, namely the rear of the car. This will be a minor improvement to the balance of the 124019 and 124018 given the longer chassis length and a major improvement for the 144001. This will make the car more balanced through corners and a lot more even over jumps. It will also make the suspension much easier to dial in,making the rear springs a little more suitable given they are not carrying excess weight.
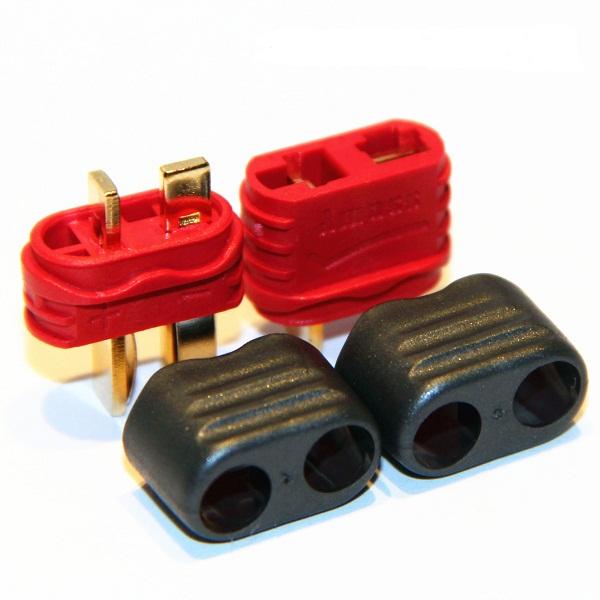
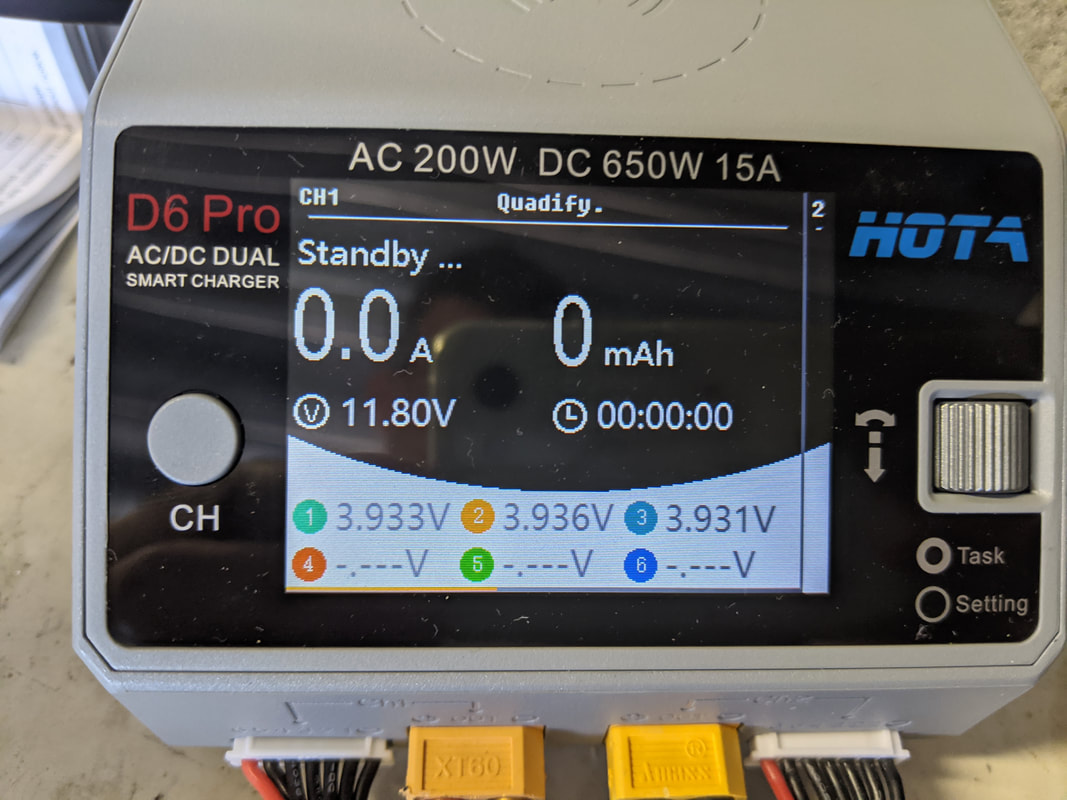
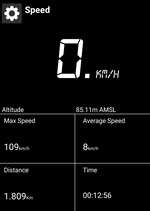
Update: On 3s I got a whopping 109km/h (68mph) - more than I was expecting! The cooling mod I mentioned below has really helped and was happy with motor and ESC temperature. Perhaps even more amazing was the battery pack voltage after a down of these passes. I was expecting it to be near depleted but look what I got below... Just to be clear, I got this speed using a 30A ESC and 30A Xt30 connectors. I may have found a new niche class - efficient speed runs 🤣
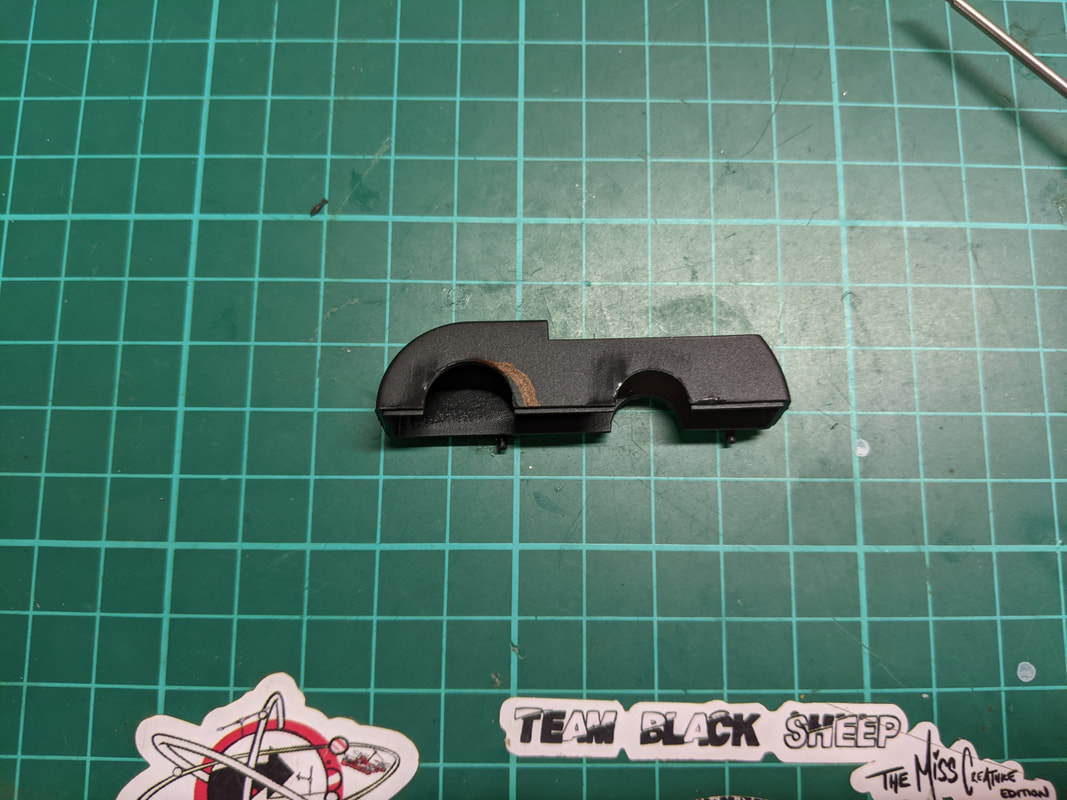
The issues I've found + solutions Just to show you I'm not trying to shove this upgrade down your throat it isn't all rosy though. This combo does seem to run hotter on 2s compared to the 2838 upgrade and that makes sense - a side effect of the faster, higher kV (5400 vs the 4500kV 2838) means that it does produce more heat. In fact during my torture testing with the bigger P6973 tyres on thick grass with the 124018 chassis, I managed to get the thermal cut off on the Hobbywing 16BL30 ESC to kick in - lucky it has one and certainly a reason why I like this ESC. I haven't had this kick in since though just something to bear in mind. In order to balance this argument though the 124018 is the worst car for cooling - all gear is housed tightly under the canopy with very little airflow - I suspect this would be much better on the 144001 and 124018. Also it is the middle of summer here and was around 25°C during my testing. Efficiency and battery life Based on the above it is understandable that power consumption was up on the 2838 4500kv, with the stock 2200mah battery lasting around 15 minutes on the 2445 5400kv. Although an improvement over the stock motor's 10 minutes, the 2838 would probably run about 20 minutes on the same pack. After a full run I found the battery is only just warm, a good sign that the power drain is not so high as to stress that battery. Venting I've written a brief article here (article to come soon - pics below for now) to greatly increase cooling without use of fans or additional heatsinks. This solution is only suitable for driving in conditions that are not muddy nor dusty. Here is the link to this breakout article which is applicable to the 124018, 124019 and 144001. I've found this change has been really effective, even with ambient temps of 22-25°C
Reducing timing via ESC settings Another option to use instead or as well as the extra venting is changing some of the ESC settings (namely timing). Since the 16BL30 used here and the 10BL120 is fully programmable directly from the ESC as supplied you can easily turn back timing from the stock value of 11.25°. I haven't done this because I don't feel it necessary but if you do experiment with the lower values to see what works best for you. Remember, more timing = more power and more heat and vice versa 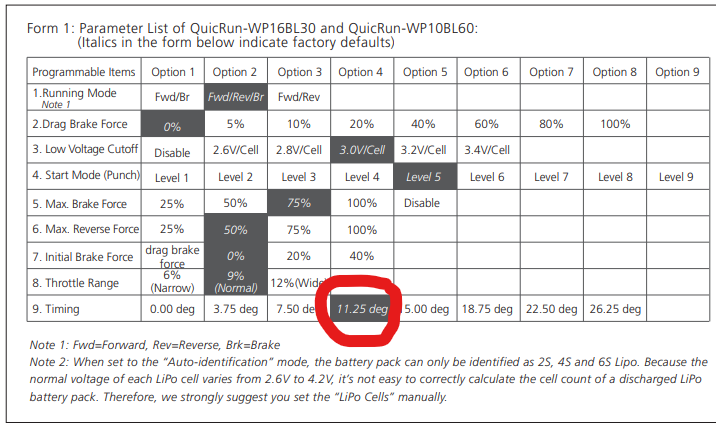
Update! Reducing the timing can definitely help get the heat under control if needed, see my new article on timing specifically for this setup here: https://www.quadifyrc.com/rccarreviews/brushless-motor-theory-adjust-esc-timing-to-control-power-and-heat Reducing motor kV Sadly the next step down in 2445 sized motors is only 3600kV and think this is a little low for 2s operation but would be good for 3s. I have ordered one to try for completeness and will report back on comparison to my expectations here with recorded speed. You will note that the 2440 motor is available in 4600kv but my genuine opinion is that this stator is just too small - more than 10% less volume than the 2445. UPDATE: I've tried the 3600kv and actually really like it on 2s and 3s. This motor is now my preference for bashing and keeping temps under control. See this article for more detail RC CAR THEORY: 2S VS. 3S, HIGH KV VS. LOW KV Update! I've done extensive testing on the 5400kv AND 3600kv motors now for speed, heat and battery life on 2s and 3s. All the results, a whole lot of theory and my conclusions/ recommendations are here: https://www.quadifyrc.com/rccarreviews/drop-in-brushless-upgrade-guide-for-wl-toys-144001-124018-and-124019-quadifyrc A riddle solved When I set out on my 144001 journey, the motor mount with alternative mounting points always perplexed me. Why would they go to the effort of putting specific mounting holes in the mount if they weren't going to use them? - they obviously had something in mind. Weird thing was though that nothing was ever released to take advantage of them. Now that I've used the 2445 motor with 15t though pinion I do think this was the original objective - it just fits so easily and perfectly that I think this was the upgrade path that was planned all along. Recommendations If you want a simple a straightforward brushless upgrade suitable for on and offroad for the 124019, 124018 or 144001 with no extra drilling or cutting then I strongly suggest that this is the mod for you. Yes, a 3650 brushless motor with stock pinion will also drop straight in but I stand by my opinion that I believe these are only suitable for straight line on road cars; the weight makes them corner and jump poorly plus the heat buildup is significant, even on lower kV motors. Cogging is also an issue with the tall stock gears on 3650 motors. I have tried to make this guide as complete as possible with all of the parts and options clearly laid out so that you can swap if there are stock or pricing issues or even upgrade spec if you wish. You can of course use other parts but I've specifically mentioned products here that I have direct experience with that have held up to my testing. Banggood do have all of these available except for the 15t pinion gear which I'm working on (Hao, if you are reading this 😉). There are of course compromises that have been made to bring you a drop in solution such as a slightly higher kv motor than desired but you will still have a fast and reliable car as a result that is easy to build. If you are more of a tinkerer though I still rate my ultimate brushless build for the 144001, 124019 and 124018 as not the fastest but the most well balanced build. Exact parts I used in this upgrade:
Hopefully you have found this article useful, I'm focusing on making my guides and testing more technical and exhaustive so the choice is made easier for you. If you purchase via the links here or on any of my pages I receive a small commission at no cost to you which is enough to help my cover my hosting fees and other expenses related to quadifyrc.com - thanks!
|
Categories
All
|
||||||||||||||||||||||||||||||||||||||||||||||||||


 RSS Feed
Thanks for visiting QuadifyRC.com Follow us on facebook below to get all the latest updates