QUADIFYRC MODS AND REVIEWS
  • RC Cars
  • Car of the Month
  • Quad Reviews
  • Quad Mods
  • COUPONS AND DISCOUNTS
  • Long Range
  • About & Contact

QUADIFYRC RC Car Review and Upgrade Guides

WL TOys 144001 Upgrade: WHeelbase Extension for High Speed Stability

19/8/2020

29 Comments

 
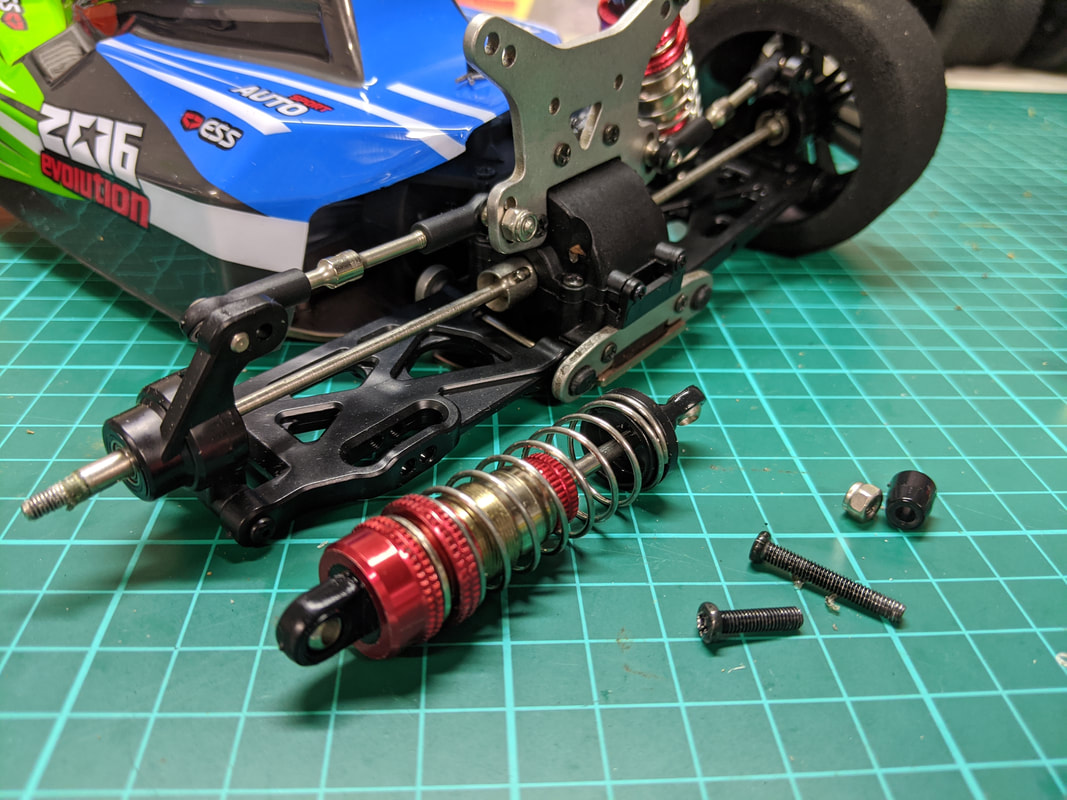
Extending the wheelbase on RC cars is nothing new but I've yet to see anyone document this for the WL Toys 144001 Thus, I've written this article to show you how to do it step by step. There are a number of benefits, not least of which is straight line stability. The good news is that this requires no extra parts and it only takes about 10 minutes
Picture
Basic theory for extending wheelbase
Changing wheelbases has long been something you could do with race-spec RC cars in order to adjust for track conditions. Generally speaking short wheelbases allow for faster turning (sharp corners in particular) and longer wheel bases allow for better straight line stability. The 144001 is overpowered for such a small car (especially if you upgrade to brushless) that any increase in wheelbase is welcomed ESPECIALLY if you are looking at speed runs where straight line stability is crucial.
Picture
My first proper race car was the Kyosho Turbo Optima Mid and that has a VERY short wheelbase. Damn I miss that car
Picture
This is the ARRMA Infraction which is made for high speed road bashing. See long the wheelbase is in relation to the wheel track and this size of the wheels. There are very stable at speeds in a straight line
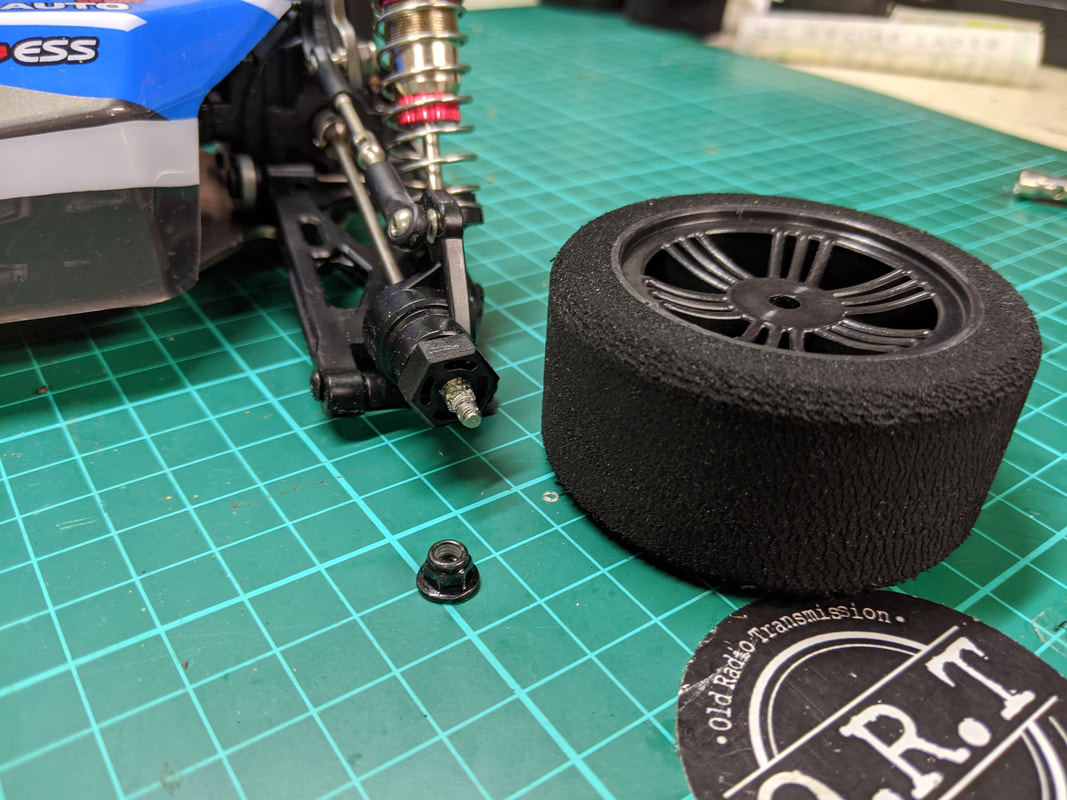
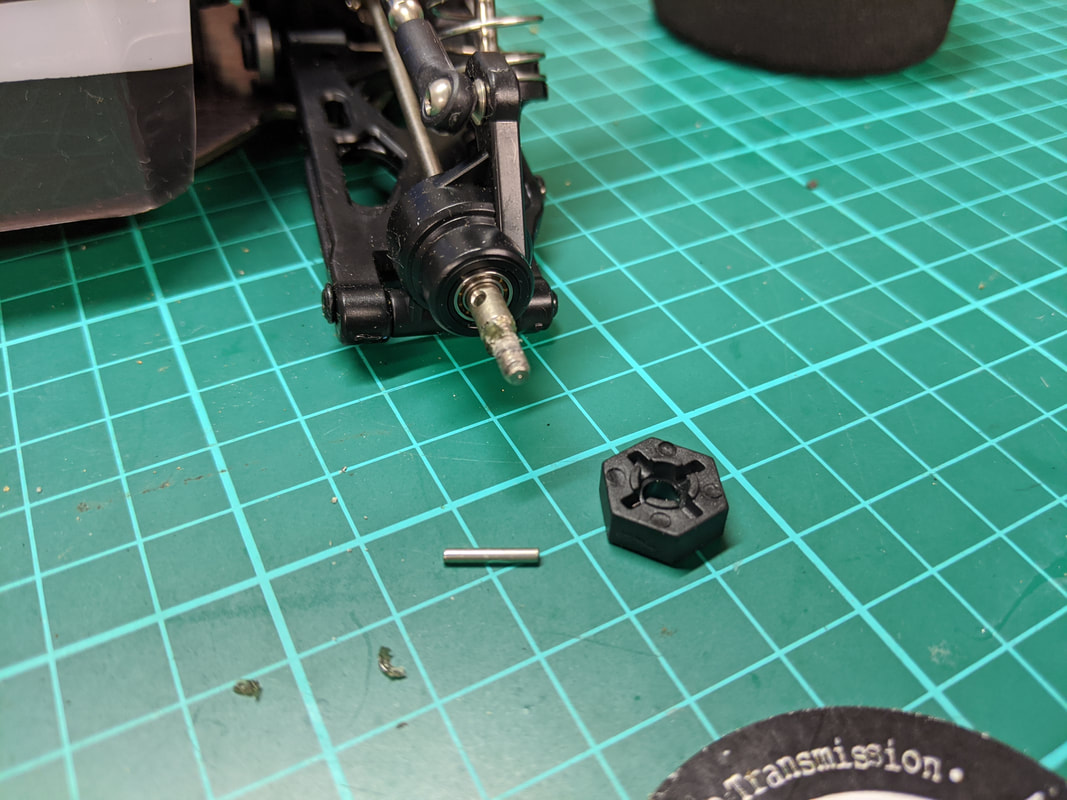
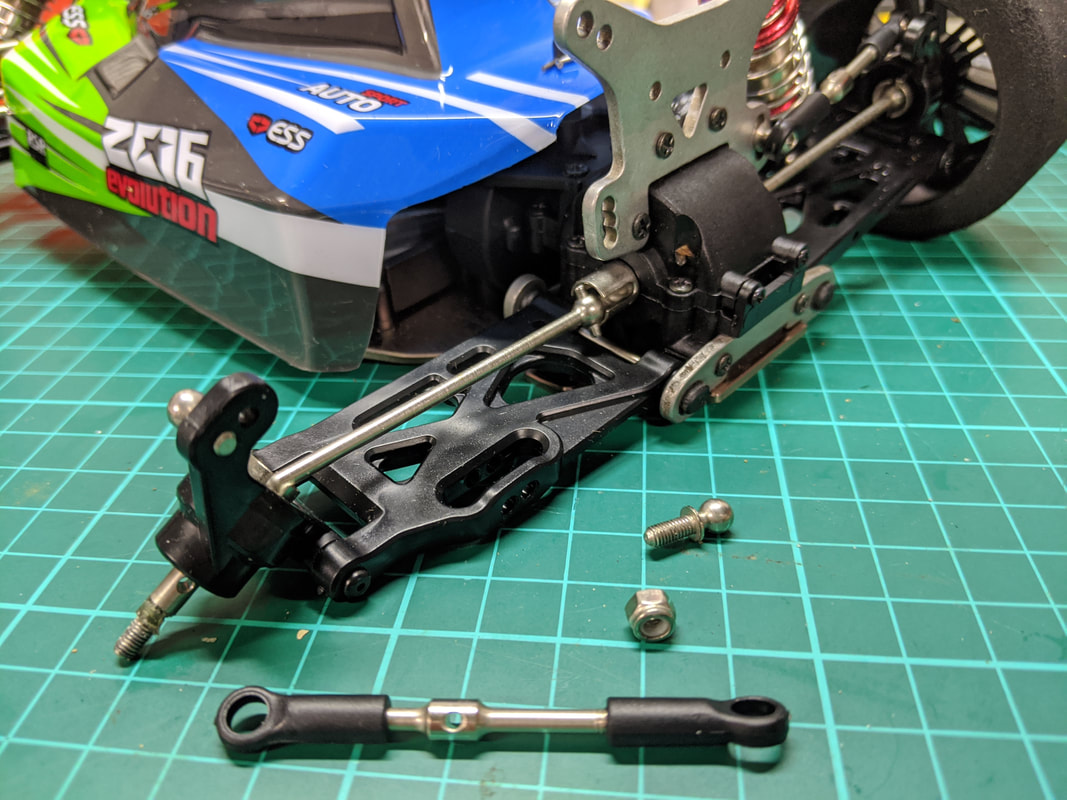
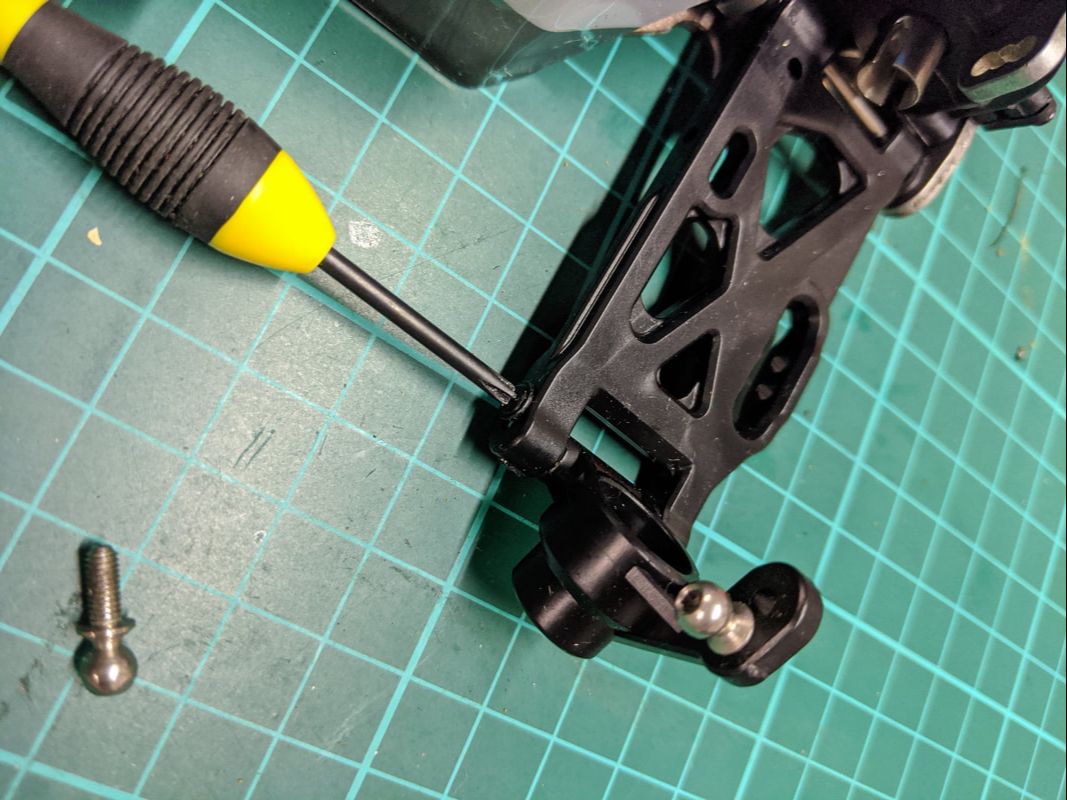
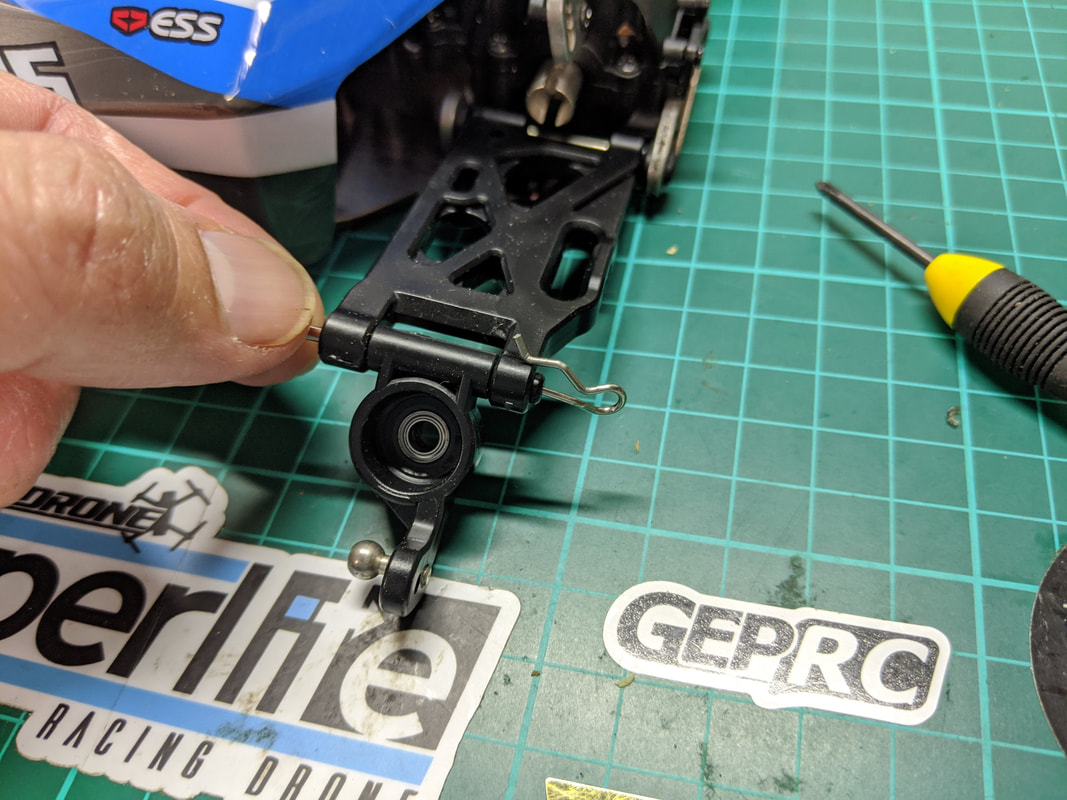
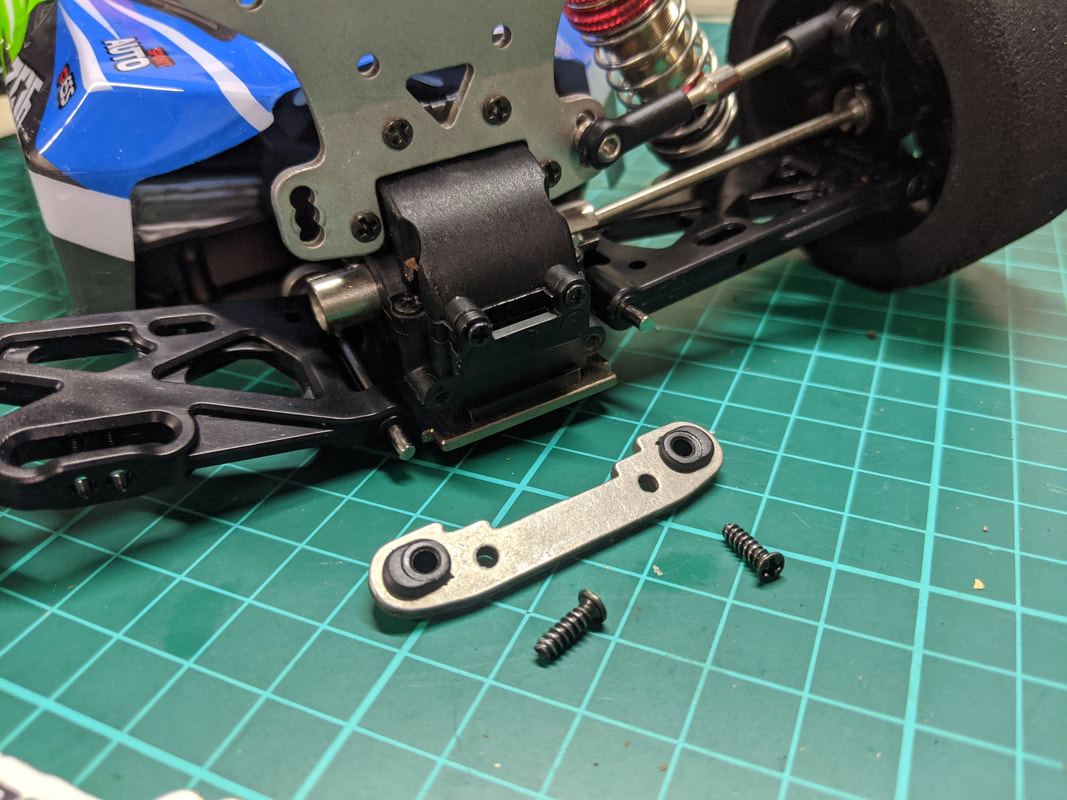
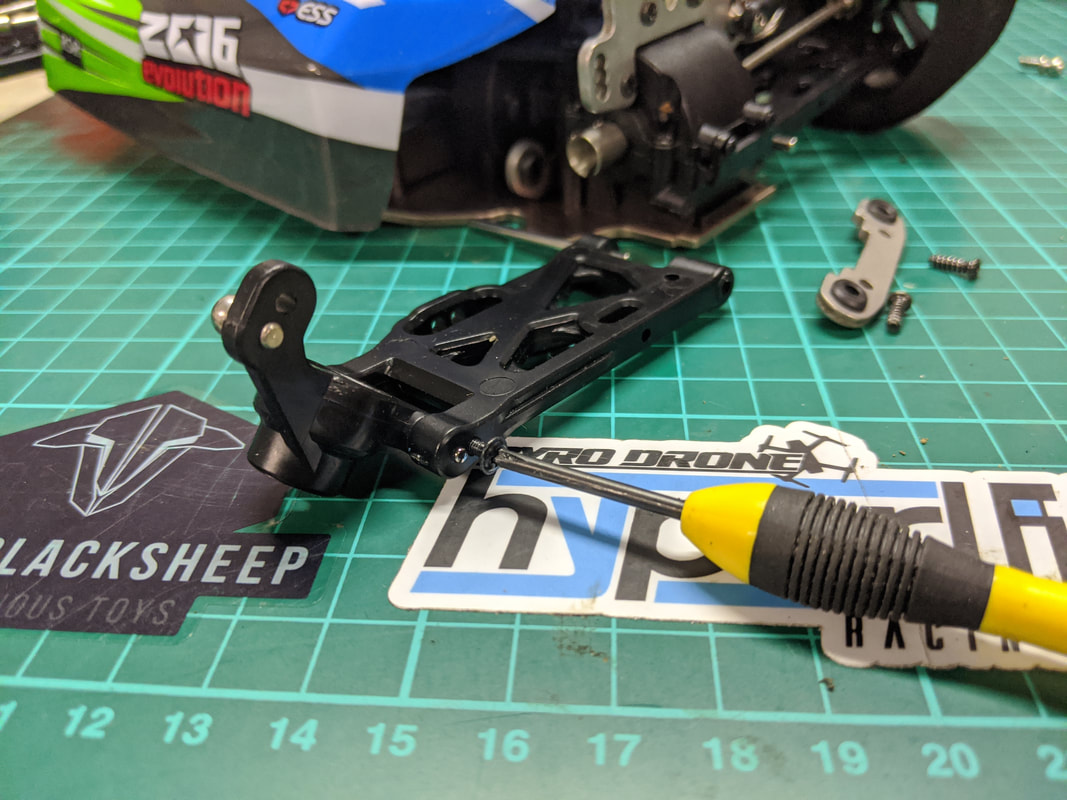
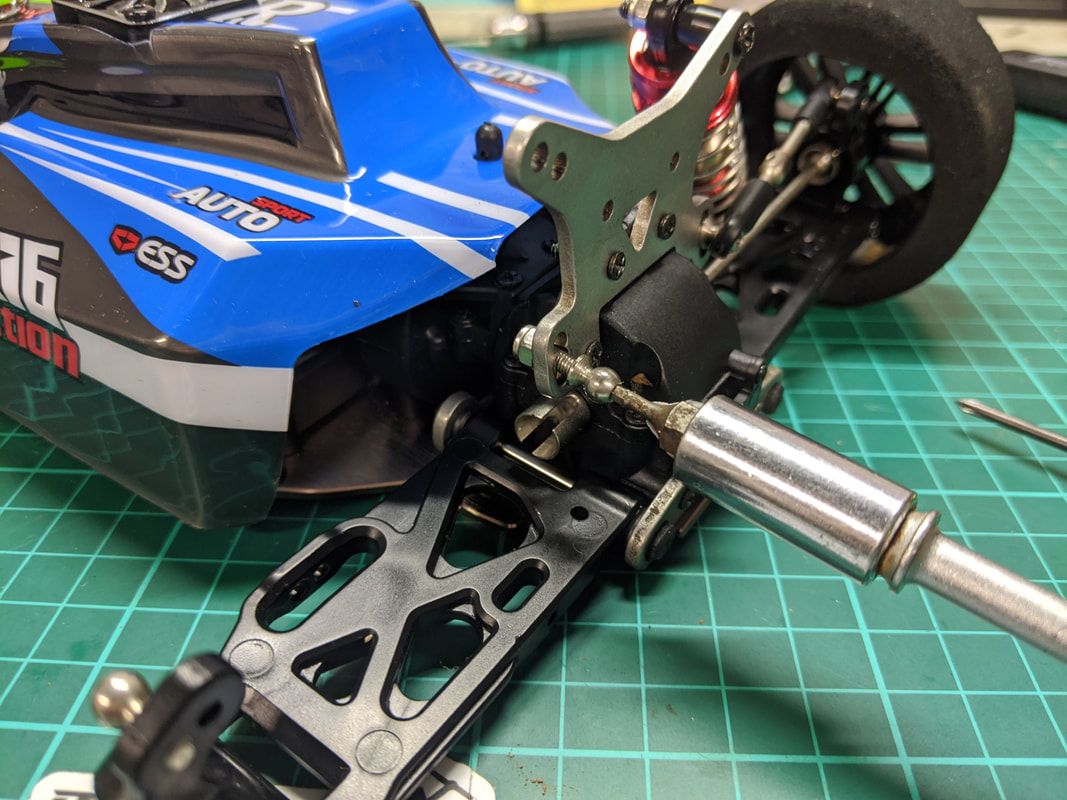
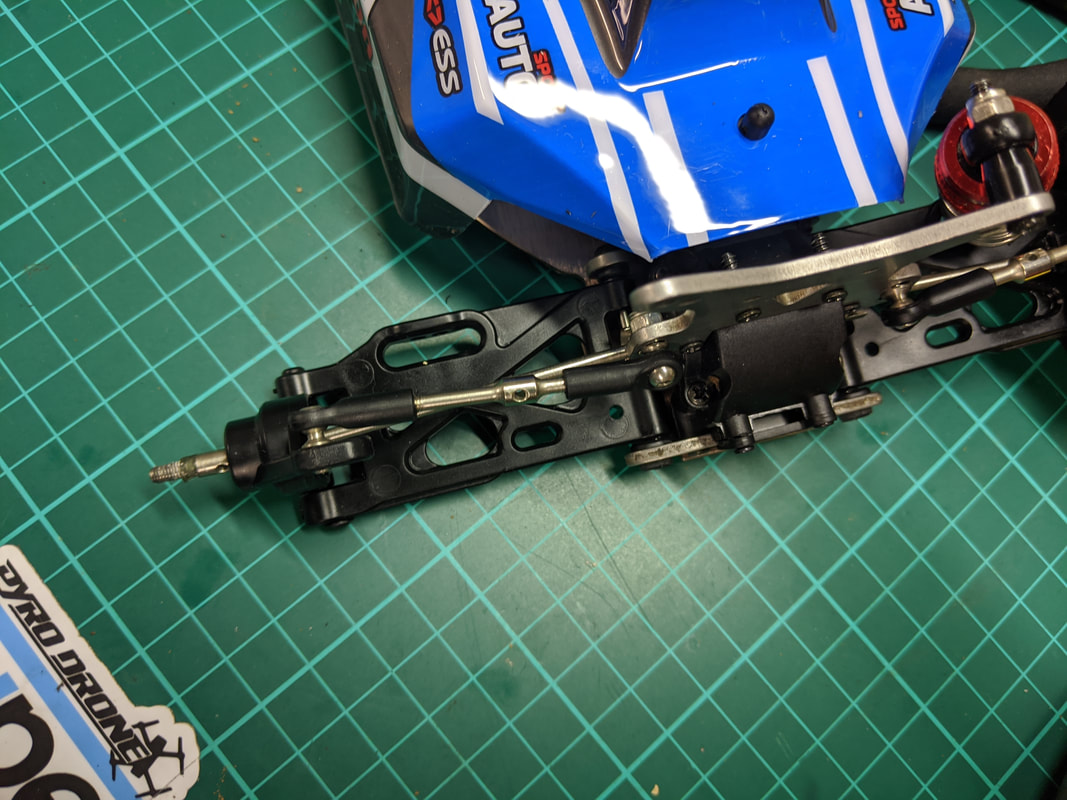
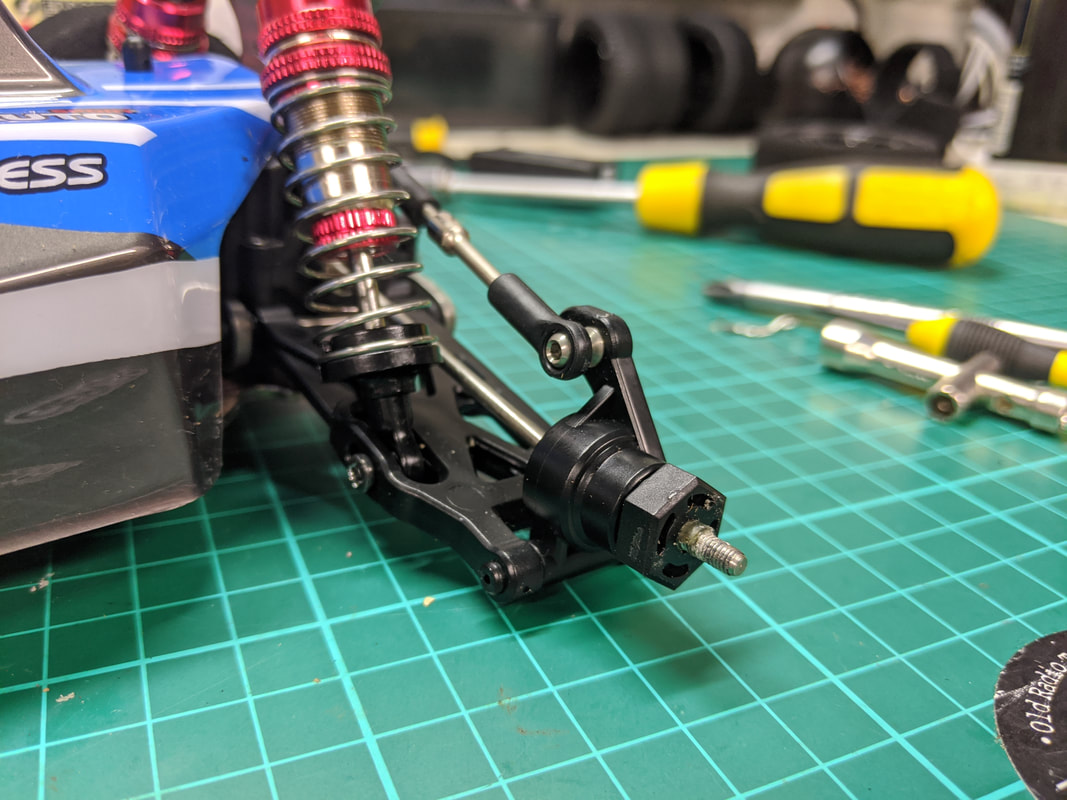
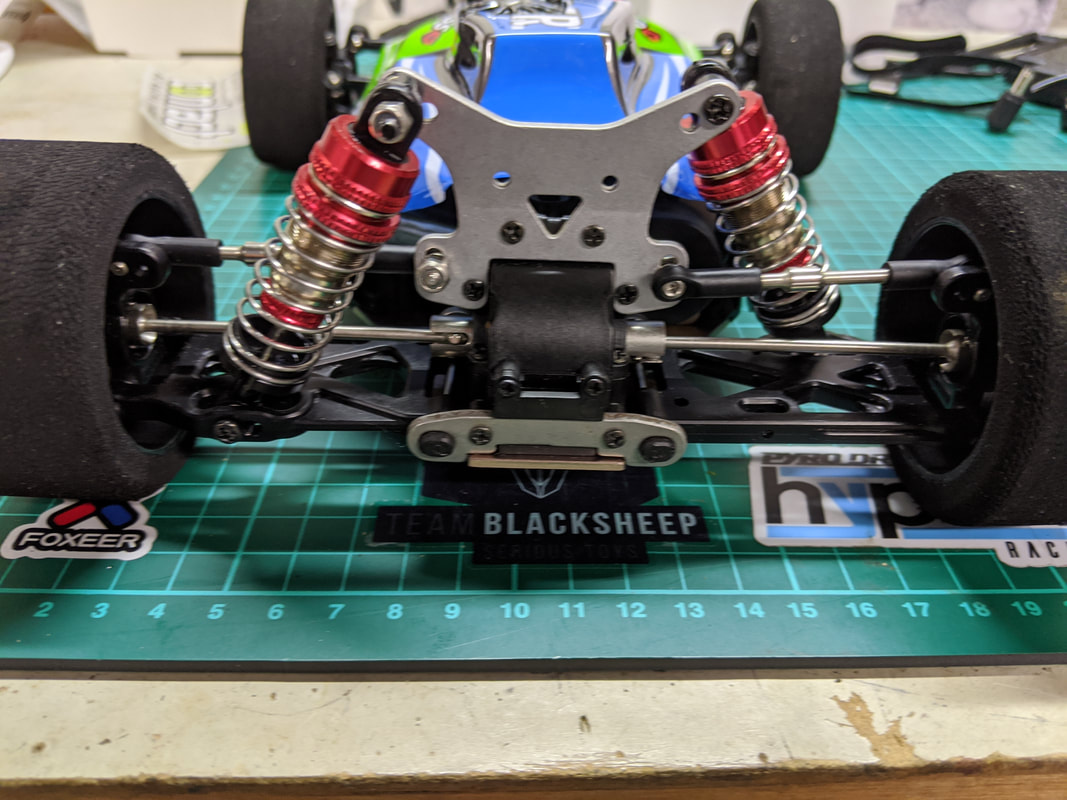
Extending the wheelbase on a WL Toys 144001
The good news is this is very simple on the 144001 and it's free - no new parts are needed and so far as I can tell there are no compromises to the car. In fact there are slightly more benefits than I first thought:
  1. More straight line stability as already mentioned
  2. Weight balanced shifted forward slightly which is a good thing given the rear bias with the big motor
  3. Reduced chance of wheelies during speed run
Anyway on to the guide:
Picture
Remove wheels, tyres
Picture
Remove drive hexes and pins
Picture
Remove shocks and retaining hardware. If you haven't already adjust the shock fluid level please do so by reading this article
Picture
Remove upper tie rods and the ball mount from the shock tower
Picture
Undo the small screw that retains the other hinge pin 
Picture
Remove the pin by pushing from the other side with a body clip as shown above
Picture
Remove the rear arm pin carrier. Use this opportunity to decrease rear toe in as per this article if you haven't already done so
Picture
Flip the arm over and reinstate the hub carrier, hinge pin and retaining screw. If you want to upgrade to metal hub carriers check out this article
Picture
Reinstall the tie rod ball mount on the other site (facing backward). Use the same middle hole as this is nice and neutral
Picture
Seat the dogbone drive shaft in the diff outdrive and hub.
Picture
Clip the tierod in. It should look like the above image
Picture
Reinstall the shock but facing forward this time as per the above image
Picture
Reinstall the drive pin and hex drive
Picture
Reinstall the wheel. Job done!
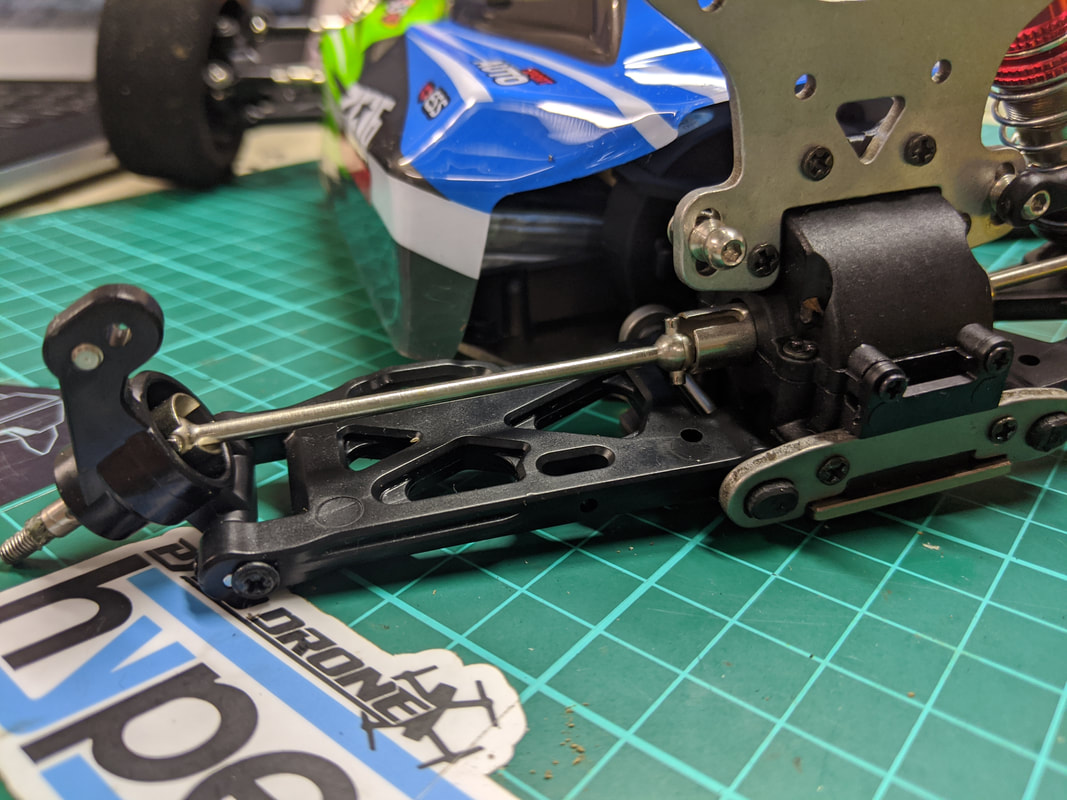
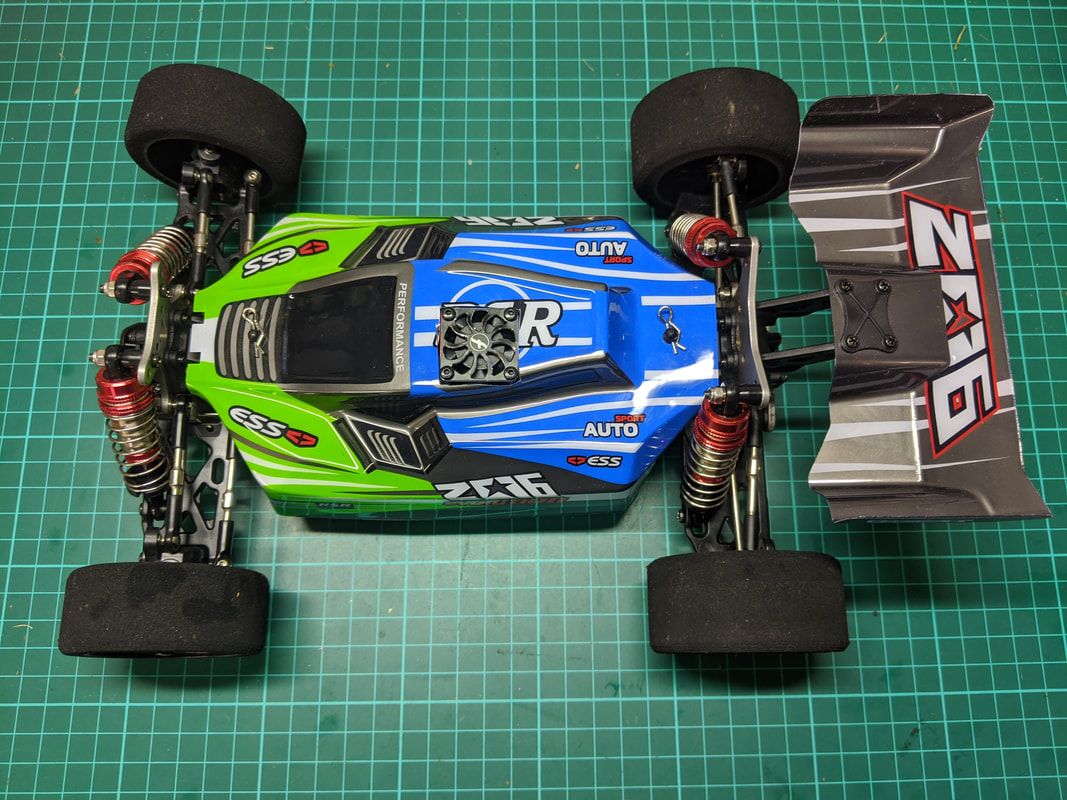
Easy right?! I've checked over the alignment and everything seems to be fine - the shock sits square and doesn't foul on anything and the dynamic suspension geometry remains nice and neutral. The only disadvantage I can see is that you can no longer fit an LC Racing Anti Roll Bar. This is a fairly minor disadvantage - anti roll bars are typically only used for track racing. This mod will add an extra 5 to 10 mm of extra wheelbase which is small but significant. But for a fast and free mod? I'll take it.

For those keen eyed readers you can probably figure these changes have been made for my new speed run car, however I will roll out to my other cars in time as the benefits well and truly outweigh the disadvantages on these small cars.
Picture
Looks like just under 10mm increase in wheelbase over stock? Maybe the rear shocks in front of the arm will give me a small aero advantage ​😂
Picture
Another angle for the contrast between standard setup (left) and extended wheel base setup (right)
Picture
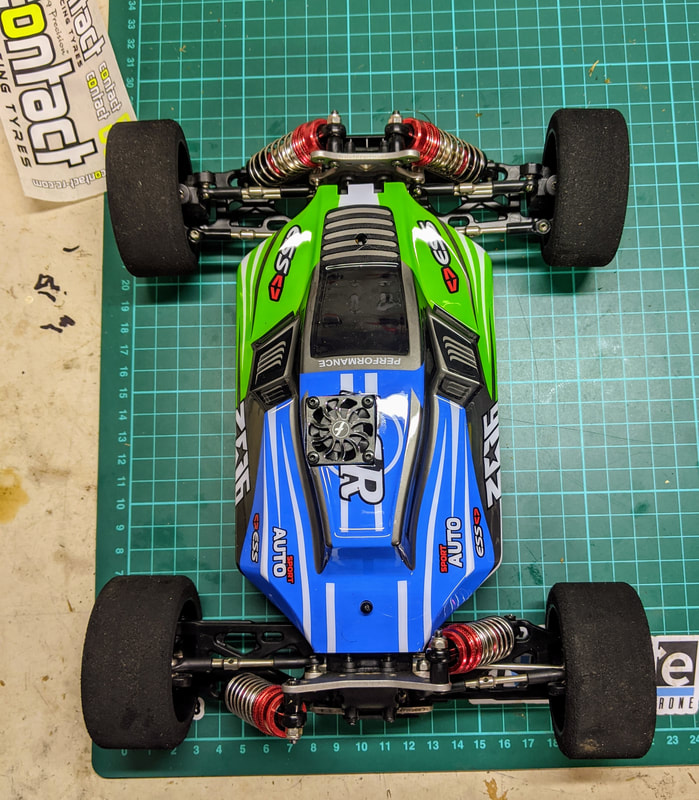
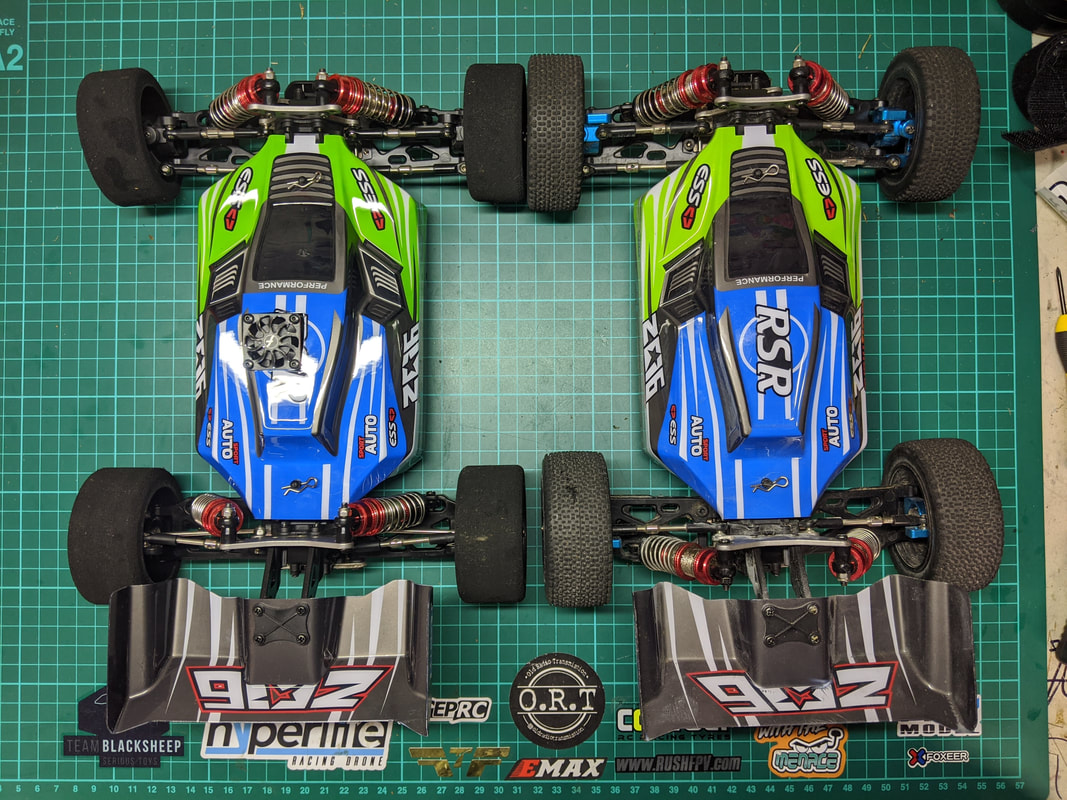
Comparison of stock setting (right) vs extended wheel base (left). The different sized wheels makes it hard to tell but the extension is between 5 and 10mm
Thanks for checking out my article and please let me know on my facebook page or in the 144001 group if it worked out for you. I've created a reference page below for all of the 144001 articles I've published here:
144001 UPGRADES - EVERY ONE OF MY GUIDES HERE.
Thanks for reading, if you found this article useful please feel free to like or share, the facebook links below directly link/like this article. Links are affiliated and help me buy the bits I need to produce this type of content. If you are looking for RC ​cars, quads or parts check out my coupons and discounts page which I keep updated with only the RC cars, parts and quads I like at a proper discount
29 Comments
Martin
28/8/2020 05:55:43 am

Very cool guide as always! Can I have name of them foam wheels?

Reply
Quadify RC
28/8/2020 10:16:06 am

Thanks Martin. I bought from Amain Hobbies but they are widely available:

Contact 26mm 1/10 Nitro Sedan Foam Front Tires (2) (37 Shore)

Contact 30mm 1/10 Nitro Sedan Foam Rear Tires (2) (37 Shore)

Reply
Hazza
22/9/2020 08:46:56 am

Great guides as always and I have done both the part 1 and part 2 changes already. With regards to this one is it still a benefit for a basher, not going to be doing big speed runs so just wondering if it's still worth doing?

Thanks

Reply
QuadifyRC
29/9/2020 09:35:20 pm

Cheers Hazza

I'd prefer the droop screw mod rather than extended wheel base for bashing which you lose if you do this mod.

Reply
Hazza
29/9/2020 09:37:50 pm

I'll have to look at the droop adjustment again as I couldn't really work it out. I got the screw kit but the grub screws seem very short to to anything

Markus
22/9/2020 08:07:37 pm

As far as I can see this changes the geometry for the dogbones. They are slightly angled afterwards, which _may_ cause issues. The dogbones have to bridge a bit more distance between the drive cups, which _may_ cause the dogbones to slip out.
In the best case it will put more stress on the drive as the dogbones are not seatet perfectly anymore.

But I'm tempted to test ist out myself to see if this is even the case and if the benefits ourweigh the risks.

Reply
QuadifyRC
29/9/2020 09:36:30 pm

Let us know how you got on. All my gear was stolen last week so sadly my testing has stopped until my new orders arrive :(

Reply
Markus
4/4/2021 04:42:11 am

Other projects got in the way, but I have just done the swap and also changed the outer wheel bearings to slightly wider ones to minimize slop. I have to wait for better weather to try the car. As I use 85mm wheels I suspect to curb the tendency to wheelie a tiny bit, as also more mass is put towards the center of the car. Not that the featherweight shocks mounted 2cm more towards the center will make a huge difference, but every tiny bit counts 😄

QuadifyRC
5/4/2021 10:45:57 pm

Nothing wrong with a good wheelie! Have fun

Reply
Paul
28/9/2020 05:50:36 am

You need to drill the droop holes again with this change too.
But for a free upgrade, I will take it !

Reply
QuadifyRC
29/9/2020 09:37:47 pm

Hey Paul. Would love to have my cake and eat it too but I'm too nervous to drill a 3mm hole in a skinny little arm! Would be cool if it works. Something for me to try when I get replacement gear in.

Reply
Jean-Michel
11/12/2020 06:13:58 am

Hey
I failed to do it
Impossible to take her out
It has to be stuck to the end because the rest is moving.
Too bad I won't be able to increase the wheelbase.
Remove the pin by pushing from the other side with a body clip as shown above

Reply
Johan Bogg
30/12/2020 11:12:34 pm

You do realize you could have achieved the same by just swapping the left and right side? That way you wouldn’t have needed to turn the hub or removed the shock or the tie rod from the arm.

Saves a lot of time and is the exact same operation

Reply
QuadifyRC
31/12/2020 08:26:12 pm

Hub orientation is wrong if you do it that way though

Reply
Johan Bogg
1/1/2021 05:37:14 am

Well, the only thing that is reversed is the mount for the tie rod, can’t see how that would affect anything really?

phil
4/2/2021 04:33:45 am

what are cons of swapping the arms to keep the droop grub screws?
i want to extend wheelbase, but still limit droop. afraid if i drill the plastic it will break at the drilled hole easier. thanks for your great info!

QuadifyRC
4/1/2021 10:12:58 pm

It does actually, the suspension geometry changes and you'll need to readjust your camber. That's not "exactly the same operation" in my books but if you want to do that I won't be standing in your way!

Reply
Johan Bogg
4/1/2021 10:39:56 pm

Well, personally I thought the tie rod was at a more “straight” angle towards the hub in this direction.
But sure, it might change the camber a few tenths of a degree

Jason
14/1/2021 06:59:38 am

It looks like from the before and after that the Track has been extended (widened), but the wheelbase remains the same (distance from front lug to rear lug). Also do you have the measure in MM for this distance?

Reply
QuadifyRC
4/2/2021 08:50:41 am

Hi Jason

Its around an 8mm increase - hard to capture in an image.

Reply
Alex
21/1/2021 10:02:41 am

Hi,

Thanks for this nice and precise guide as always.

Would you also recommend extending the wheelbase on 124019 (which already have longer wheelbase)?
I think I prefer to keep droop adjustment.

Reply
QuadifyRC
4/2/2021 08:49:34 am

Thanks Alex. I agree with you, on the 124019 the wheelbase is long enough already and I'd much rather have droop adjustment

Reply
David Giles
16/2/2021 09:10:49 am

Hi,
What’s the longevity like using these tyres? From reading your other guides you mentioned damaging the motor if the diameters of tyres were much different from stock. These foams look quite a bit smaller?
I run mostly on smooth tarmac so looking for some foam tyres.
Thanks for all the useful guides.

Reply
Johnny
16/2/2021 09:33:52 am

The problem occurs when going to bigger tyres as that will make the motor work harder to achieve the same rpm, more torque is needed with same gearing if going up in tyre size.
Smaller tyres will have the opposite effect, reducing torque needed to spin the wheels. End result is faster acceleration but lower top speed due to the smaller circumference of the wheel.

Hope that helps

Reply
QuadifyRC
16/2/2021 10:58:11 am

Thanks Johnny, perfect explanation

QuadifyRC
16/2/2021 11:01:51 am

Hi David

Sadly the car with foam tyres on was stolen before I got to run it for any length of time so can comment on longevity but they are crazy smooth. As Johnny rightly said, going smaller puts less stress on the motor and drops down top speed a little. Thats why the speed run guys that use these tend to go for higher kv motors.

Reply
Daniel
18/4/2021 09:31:00 pm

Great mod!

A piece of advice:

Instead of removing the hub carriers, I just swapped the hub carrier complete with wishbone from Left to Right (and vice-versa). This way the tie-rods are straight in top view because they are coming out of the rear part of the hub carrier to the rear of the shock tower.

Reply
Markus
18/4/2021 09:46:20 pm

I‘ve done it exactly like that. Worked like a charm. Car drives well and won‘t wheely that much anymore 😄

Reply
tim
15/2/2022 07:33:44 pm

hi are my front wheels supposed to go opposite directions when i turn it with my hands?

Reply


Leave a Reply.

    Archives

    March 2022
    February 2022
    January 2022
    December 2021
    November 2021
    October 2021
    September 2021
    August 2021
    July 2021
    June 2021
    May 2021
    April 2021
    March 2021
    February 2021
    January 2021
    December 2020
    November 2020
    October 2020
    September 2020
    August 2020
    July 2020
    June 2020
    May 2020
    April 2020
    March 2020
    February 2020

    Categories

    All
    104001
    104009
    1/10
    124016
    124017
    124018
    124019
    144001
    16886
    16889a Pro
    284131
    4s
    4 Things
    Anti Roll Bars
    Balance
    Basher
    Battery
    Brushless
    C24
    Charging
    Cogging
    Crawler
    Diatone
    Drift
    Drop In
    Dumborc
    Eachine EAT14
    EMB-MT
    Ex07
    Flyhal
    Flysky Noble Pro
    Goolrc
    Guide
    Gyro
    HBX
    Hbx 901a
    HS10422
    K989
    LC12B1
    LC Racing
    Lipo
    Metal Parts
    Micro
    Monster Truck
    Pinion
    Preview
    Program Card
    Project WLCRacing
    Q33
    Racerstar
    Review
    Setup
    Sg 1602
    SG 1603
    SG 1604
    Soldering
    Spectre
    Speed Run
    Stance
    Surpass Hobby
    Timing
    Transmitter
    Tuning
    Tyres
    Upgrade
    Vinyl
    Wheels
    Wltoys
    WL Toys
    Wpl
    Zd Racing

    RSS Feed

Thanks for visiting QuadifyRC.com Follow us on facebook below to get all the latest updates
  • RC Cars
  • Car of the Month
  • Quad Reviews
  • Quad Mods
  • COUPONS AND DISCOUNTS
  • Long Range
  • About & Contact