|
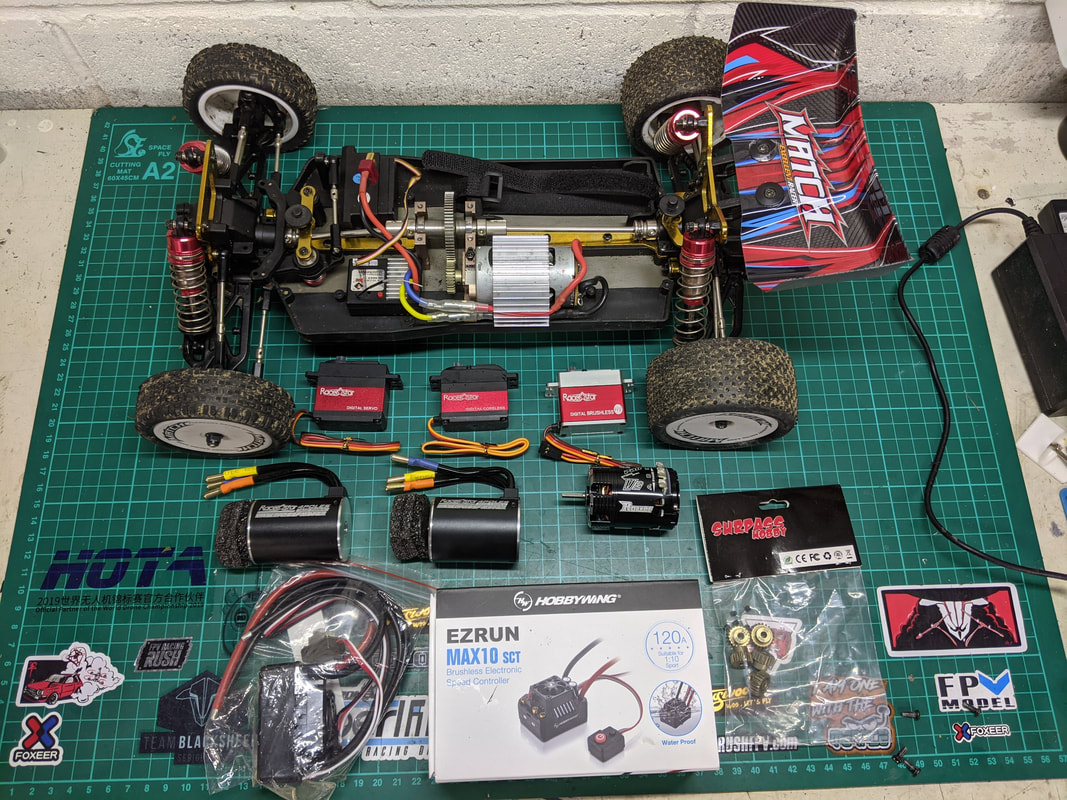
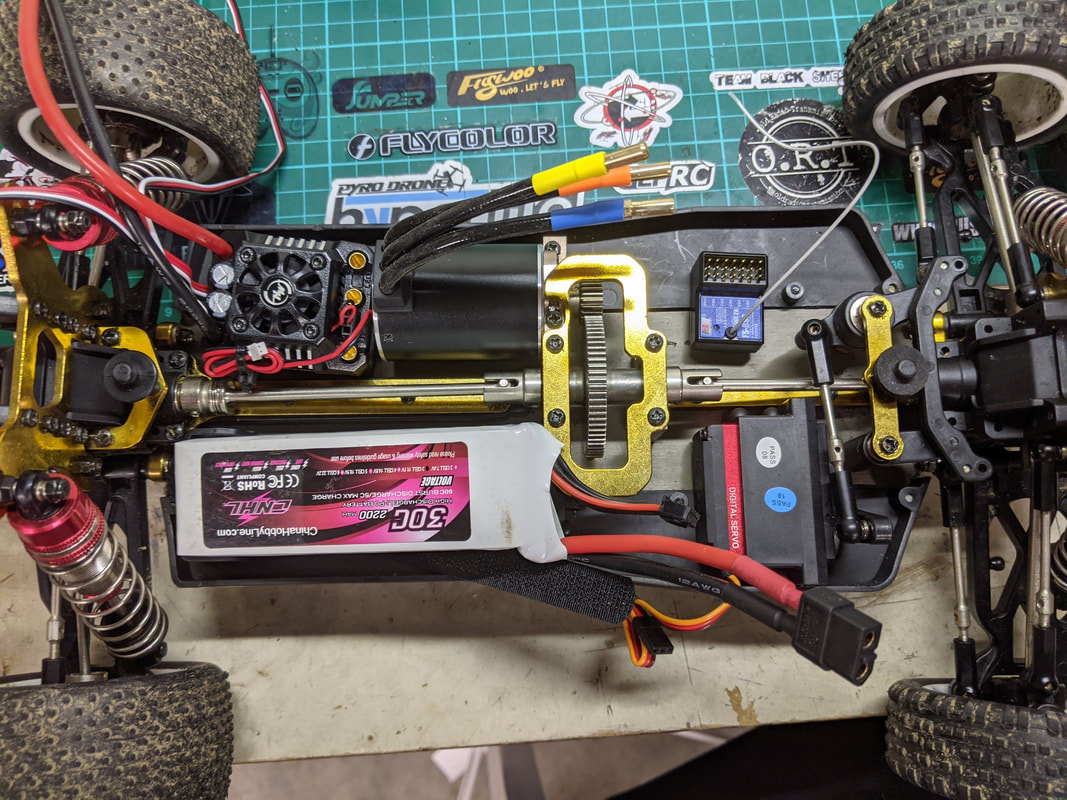
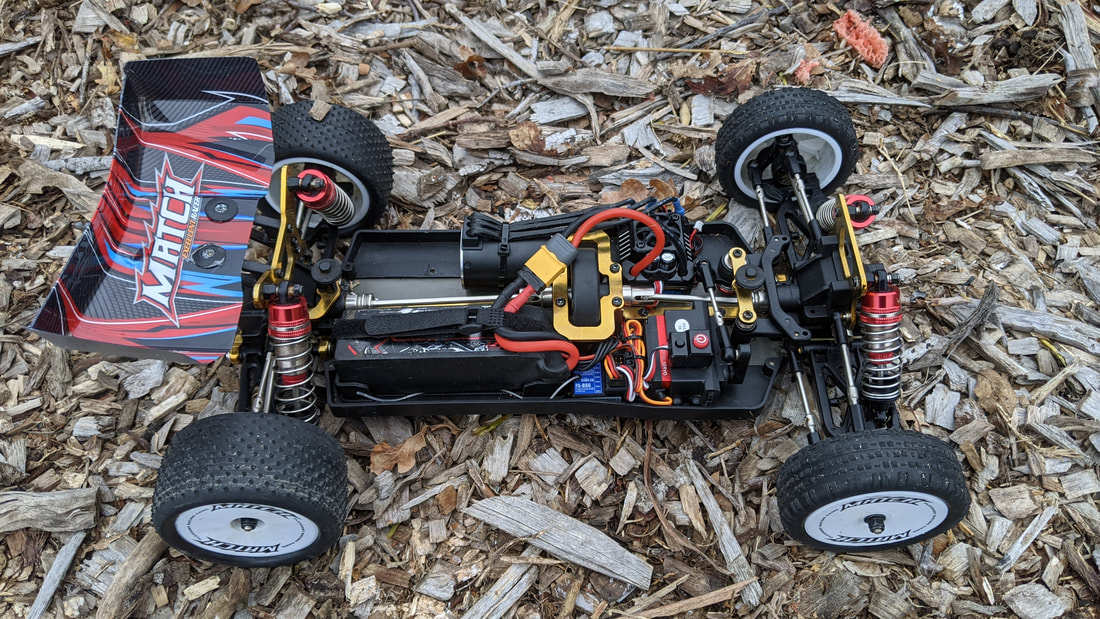
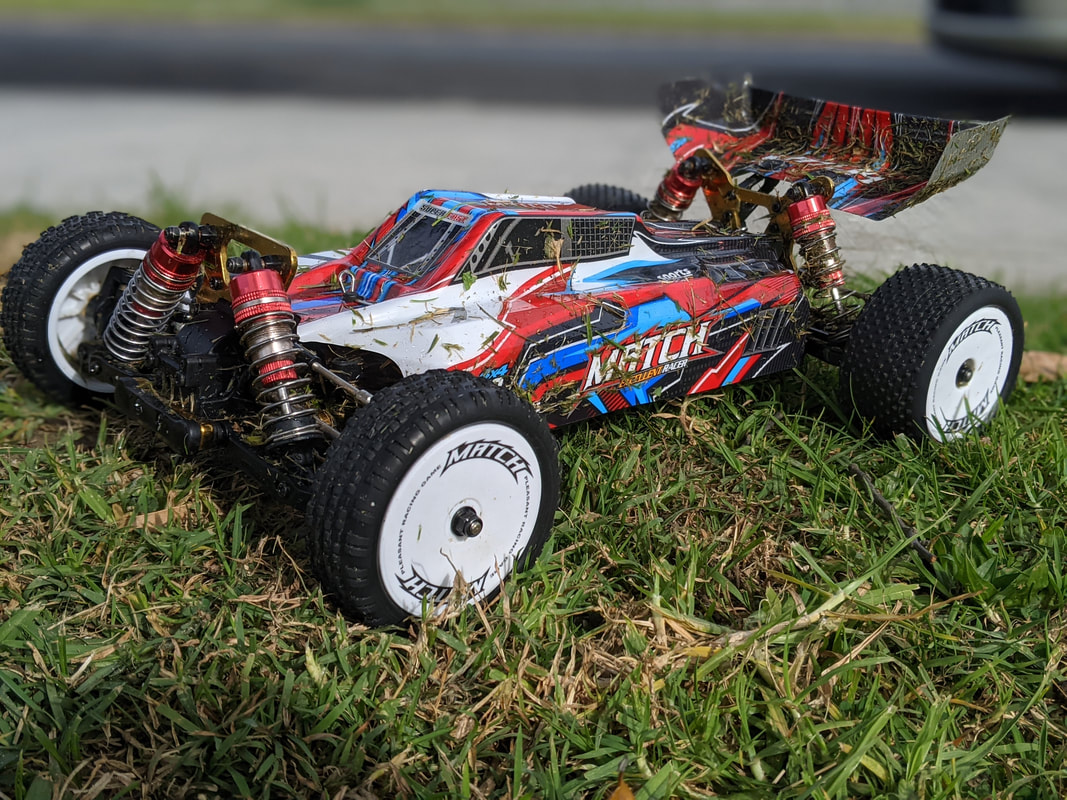
The WL Toys 104001 is an all new 1/10 scale 4WD offroad RC Buggy that was released in 2021 and you can find my full review of the 104001 here. I found this to be a great handling car but felt a little on the slow side. I was able to get some more speed out of it for very little money by increasing the size of the pinion gear here but performance is still a little on the lack-lustre side. Clearly this car is crying out for a brushless upgrade so it's my pleasure to present the one I have put together and have been testing over the last few months and I'll call the 104001 big brushless upgrade. 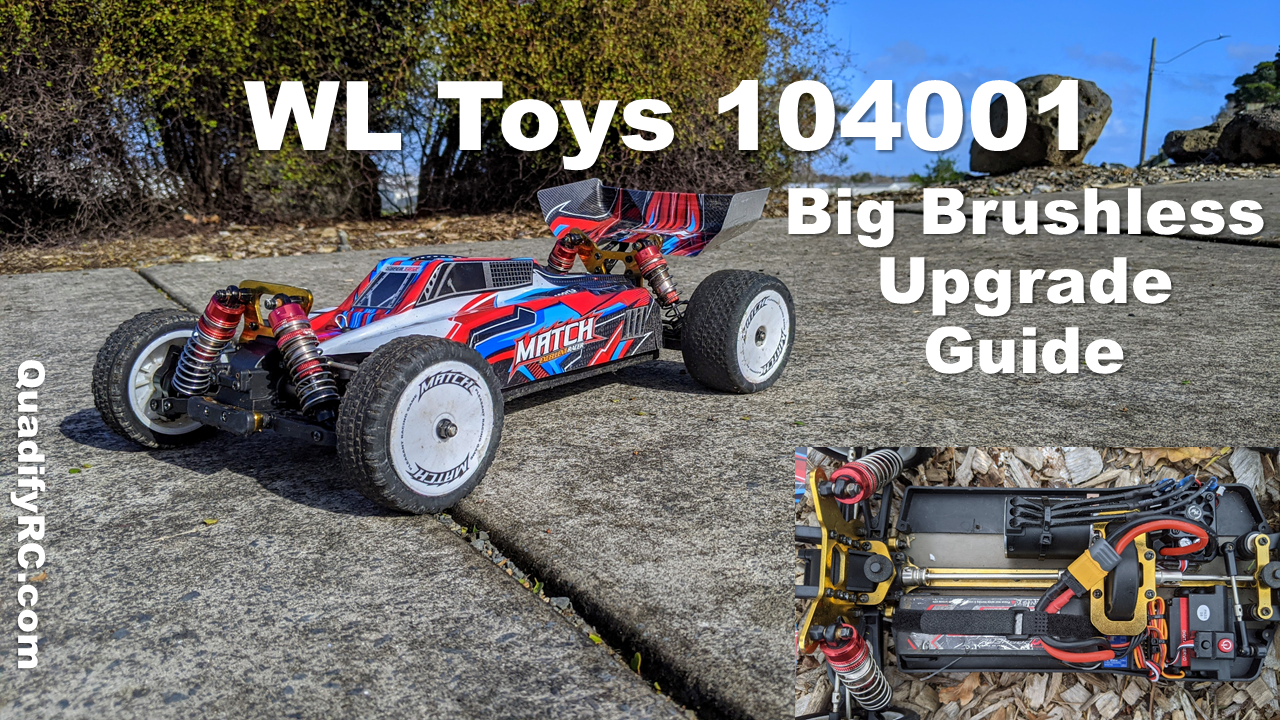 Before you increase the power of the car, make sure it is well setup and tuned first. Follow this guide for the full detail: WL TOYS 104001 BEGINNERS GUIDE: 4 THINGS YOU MUST DO I've specified, tested and written about no less than 5 brushless upgrades for the 144001/124019 spec of cars and these have been a great success, bringing drivers more speed and acceleration but importantly better handling and battery life as well. So it's fair to say I am fairly well experienced in this area. Being larger with better gearing options makes the 104001 less bound by the constraints of the smaller cars so on my first brushless upgrade on this car, I have decided to go BIG. The stock electronics of the 104001 are based on a brushed ESC that is integrated with the receiver and sends signals to a 5-wire servo, much like the smaller 144001 and 124019. Because all of these components are only compatible with one another, all need to be replaced. I'll these one by one - some of the options available that I like and also which I've chosen for this car (and why). It's worth bearing in mind that I'll always save a buck where I can but spend where it's of most use. So the systems I will cover are:
If you are looking for a cheaper upgrade option then check out my 104001 budget brushless upgrade here ESC As I've learnt from more recent builds, the best place to spend your money is your ESC. This is because you want the piece of mind that it is made to the rated spec accurately and will be reliable plus it is able to run the right cell count for your application. I knew that from the outset that I wanted to be able to run 4S in this car for a number of reasons:
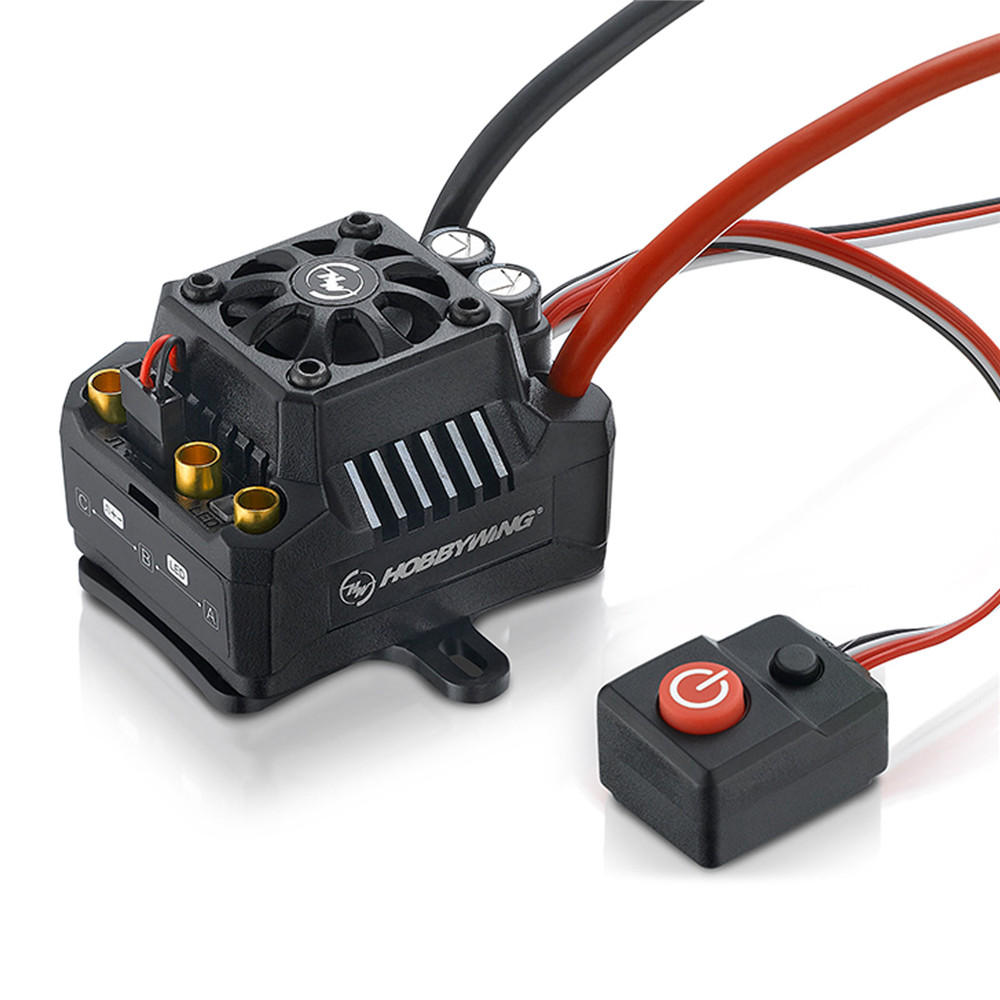
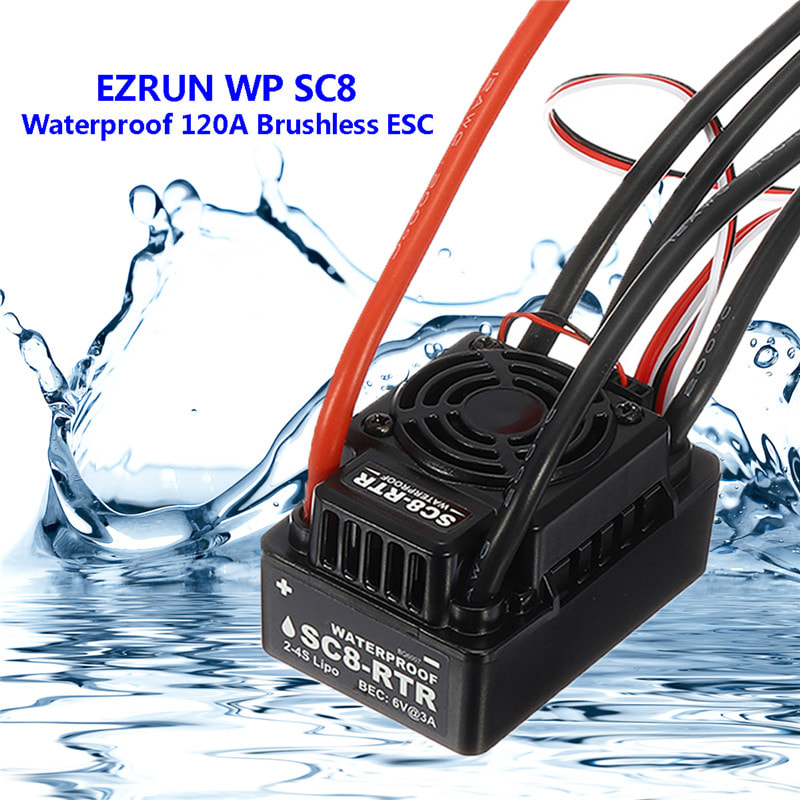
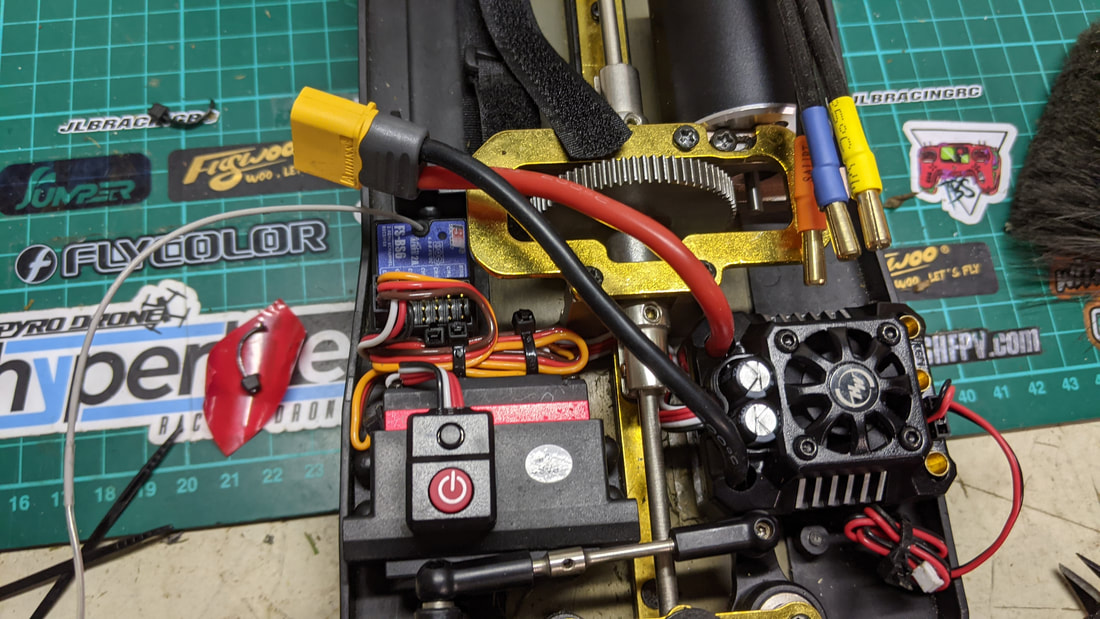
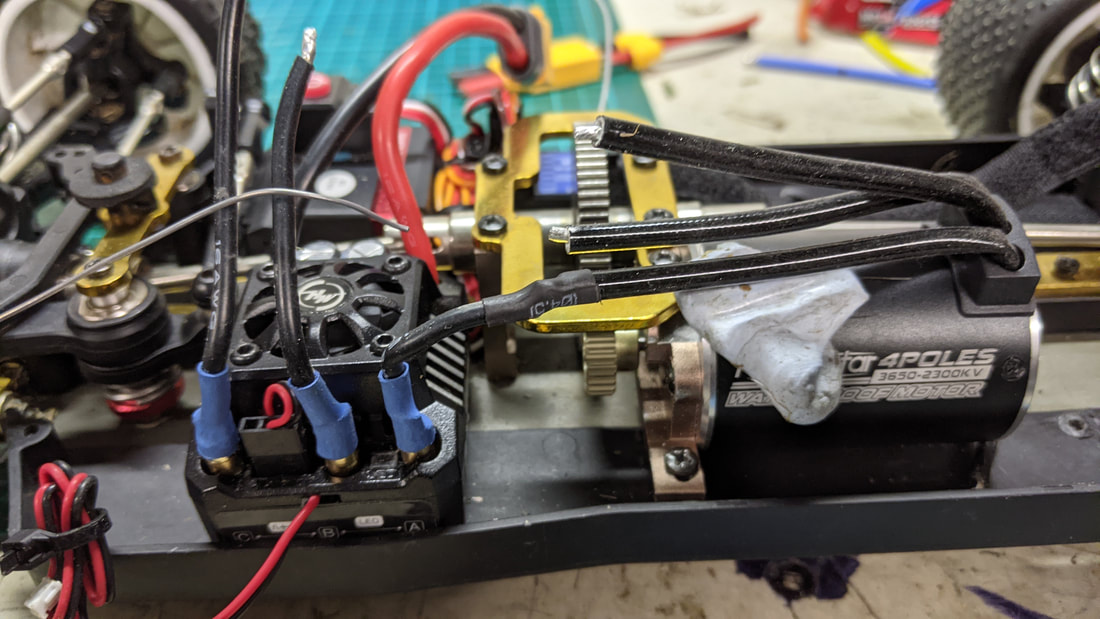
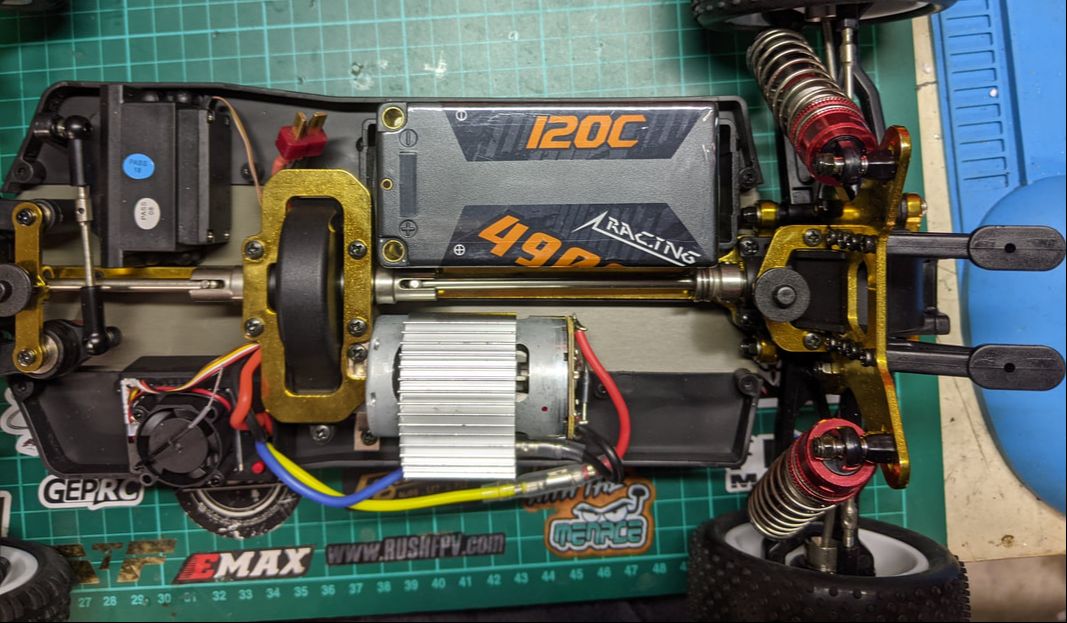
Although I've had success with cheap ESCs like this one and this one in the past, I've seen many others that haven't and so have decided to go with the bashers' ESC of choice: Hobbywing. I wanted something that would last so I settled on the EZRUN MAX10 SCT model. This unit is 2s-4s capable and is rated for a rather large 120A. Interesting fact: 120A on 4s is about 2.5hp. This is one of the newer line of waterproof Hobbywing models but do also consider the older SC8 RTR 120A 4s ESC which is also good but a little cheaper. As a reference point the SC8 RTR ESC powers my large 1/8 scale JLB Cheetah monster truck on 4s so the ESC I've chosen for this car will have a very easy ride - I'm expecting it to run extremely cool.
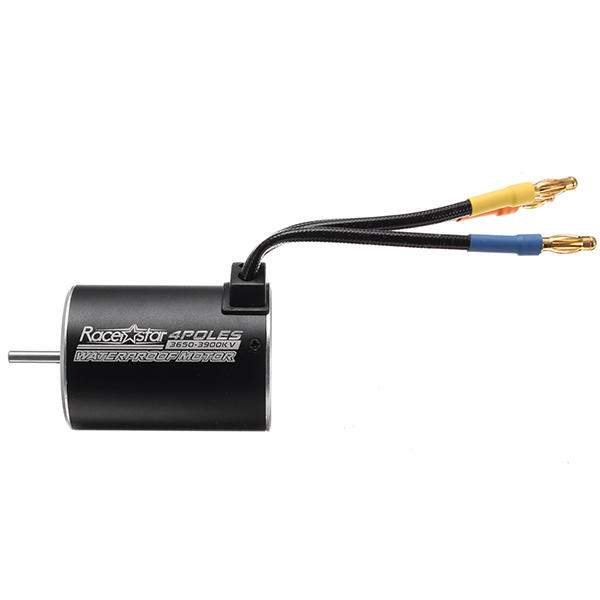
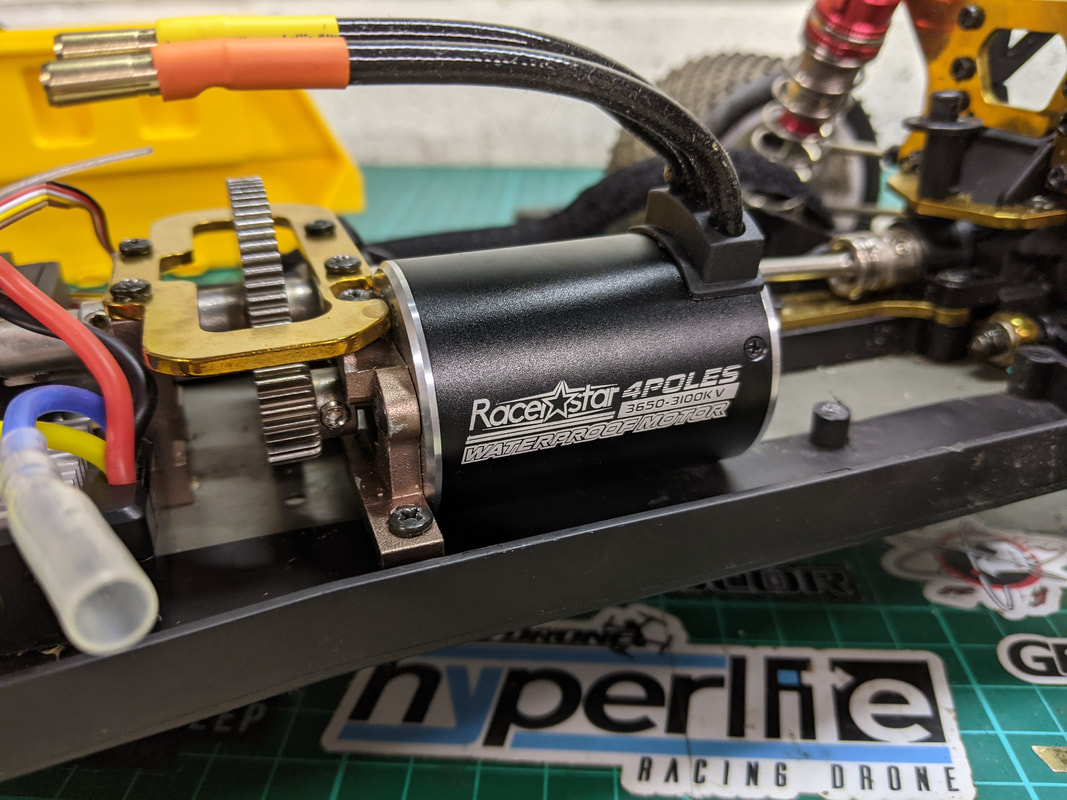
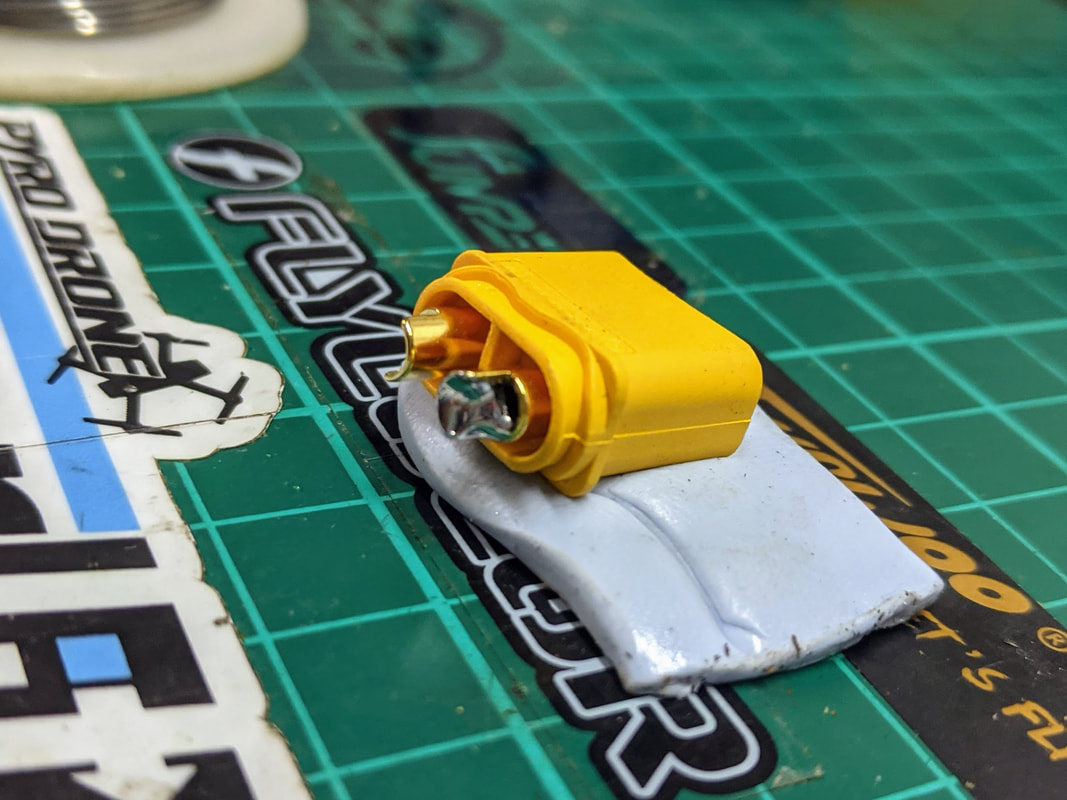
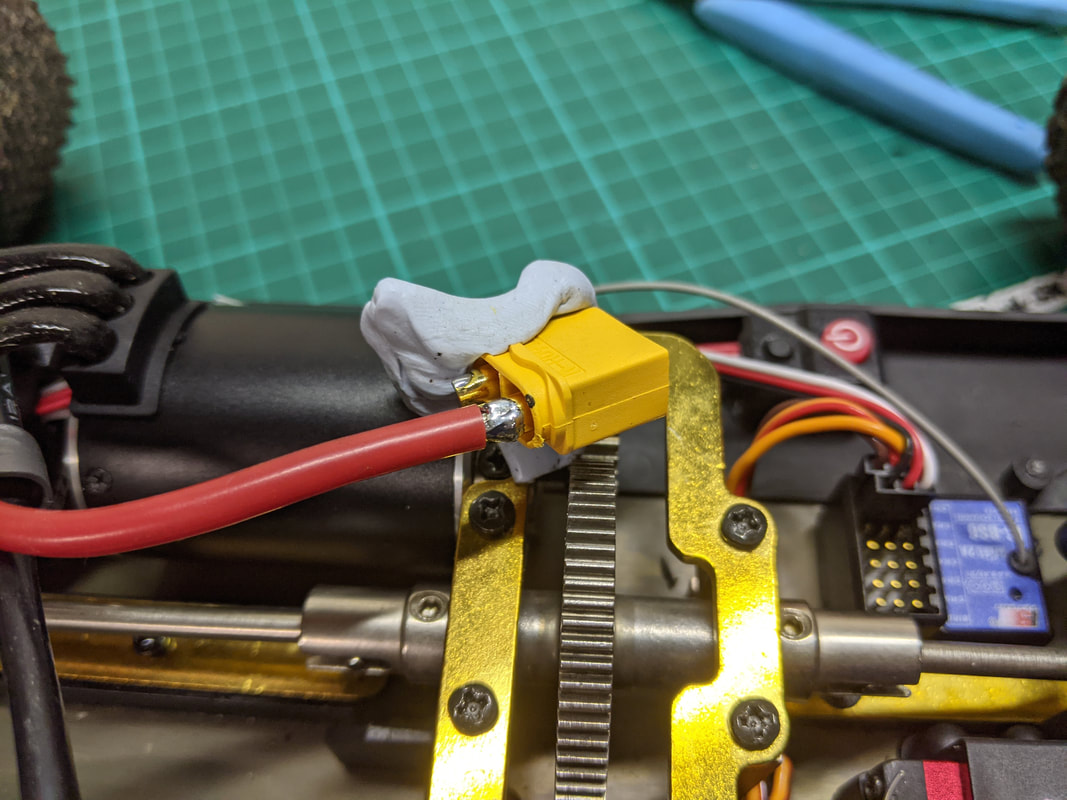
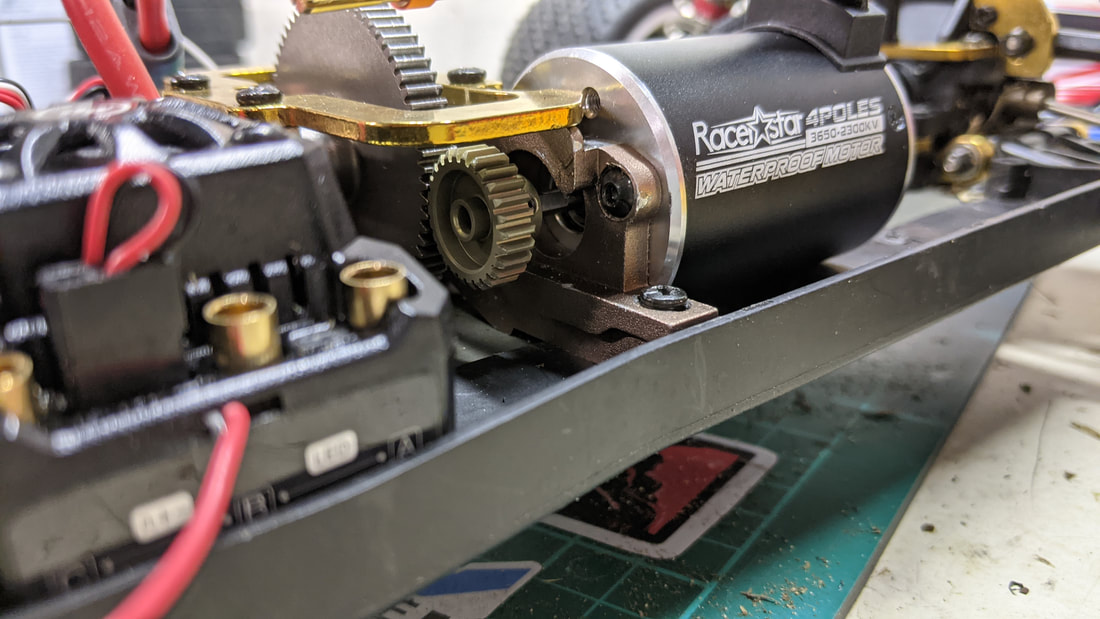
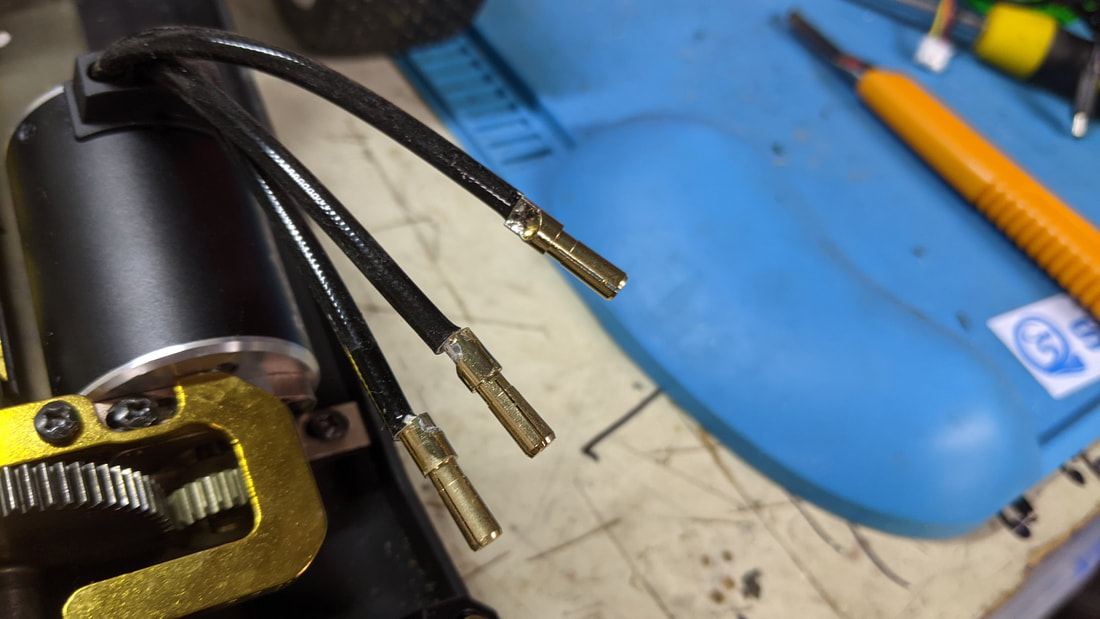
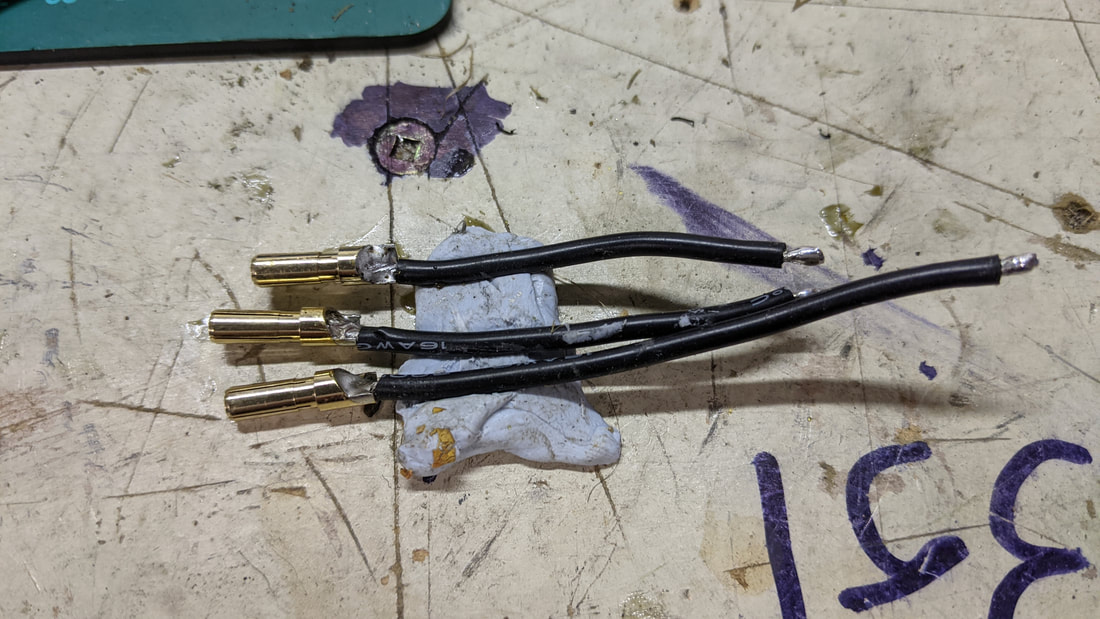
The ESC itself ships in a nice box with full instructions and plenty of wire. Mine shipped with the large XT90 connector but I changed this for an XT60 when I trimmed the wires to length. The ESC accepts 4.0mm bullet connectors for the motor so you can plug the motor in directly or with the included extension wires/connectors. See further down for the installation, I've had a few goes at to get the spot that suits me best. Motor 3650 is the right motor size for this 1/10 scale car that should provide a good balance of power and weight. From my experience with other builds I've found that 4500kv with a 2s battery and the right gearing gives a good mix of acceleration, power, efficiency (battery life) and heat control. This is scalable to other battery cell counts as well i.e.
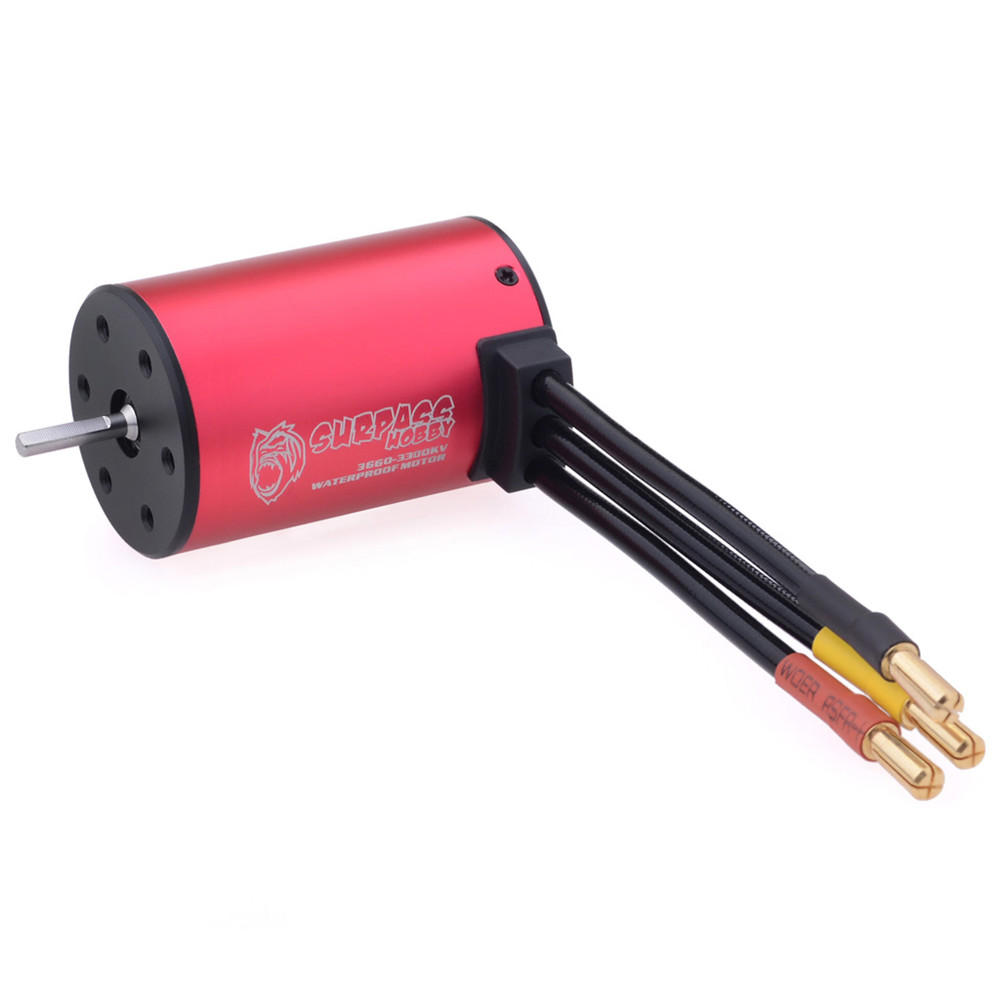
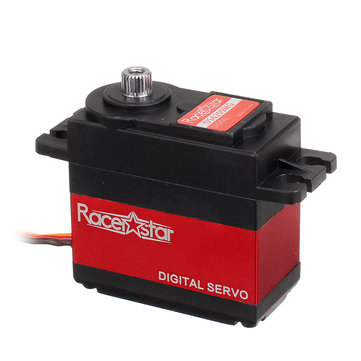
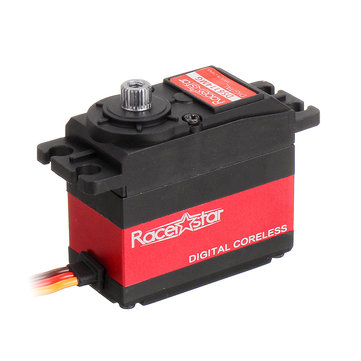
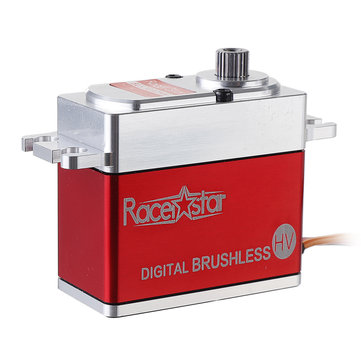
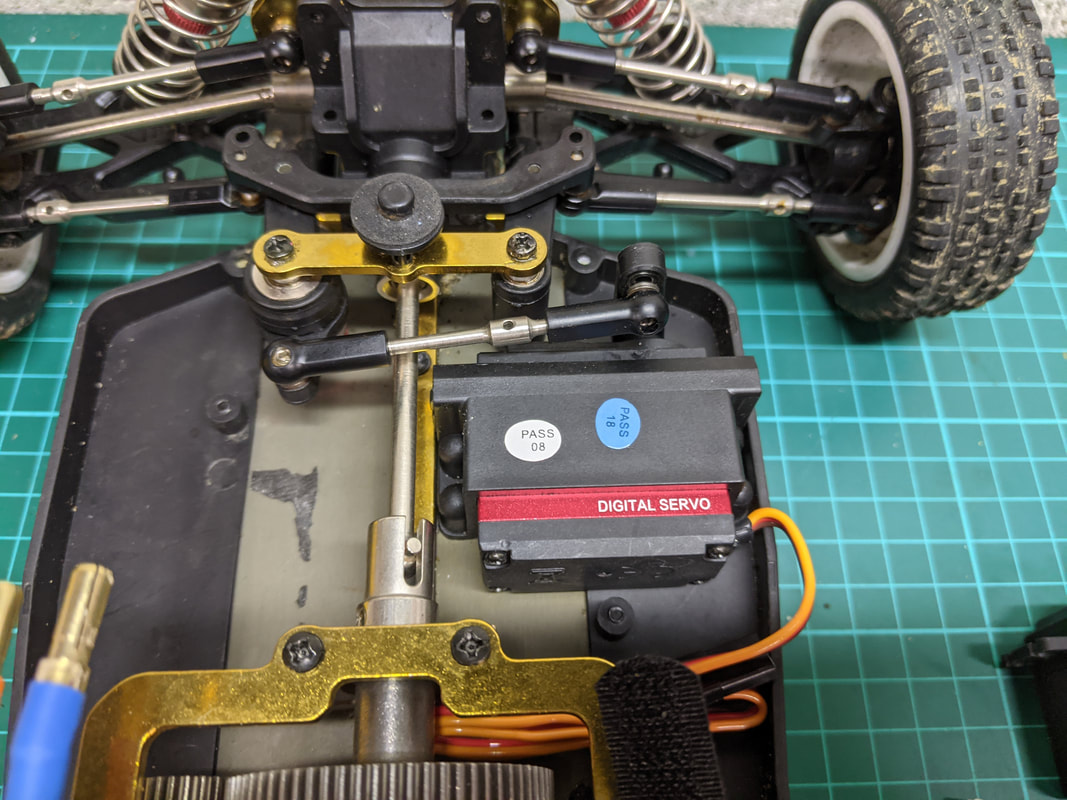
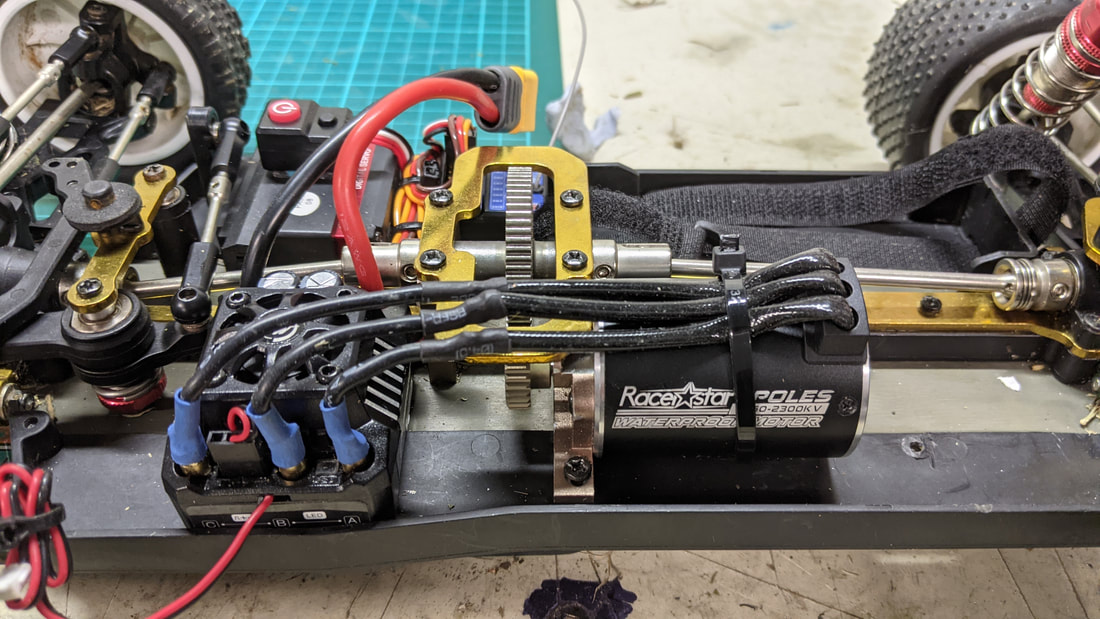
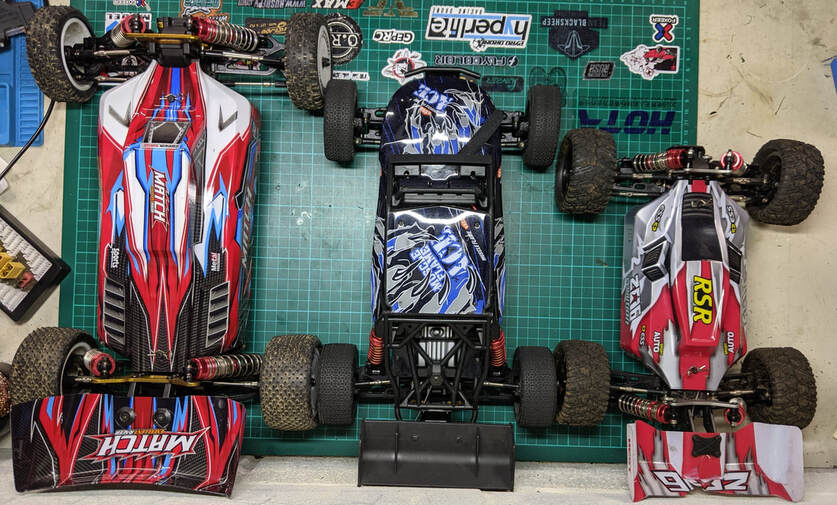 The 104001 is substantially bigger than the 124018 and 144001 shown here. This means it is a lot less twitchy and speed and why the 3650 motor is a more appropriate size. Although you need to spend money on an ESC if you want reliability, the same is NOT true with motors; even cheap units have powered speed run cars from WL Toys to world records in excess of 100mph. One series of low price motors that have proven themselves to be reliable are the Surpass / Racerstar range (Racerstar is a rebranded surpass motor). I've used several different sizes in my brushless upgrade builds and they have yet to let me down. The Racerstar 3650 and Surpass 3650 motors are available in a lot of kV options : 2050kV, 2300kV, 3100kV, 3900kV, 4300kV, 5200kV and 5900kV. I've chosen to go with 2300kV on 4s for this build. This is because the higher the voltage (i.e. cell count) the lower the current needed to achieve the same power. In short, less demand and stress on the entire electrical system. If you want to see a further explanation on low voltage high kv vs high voltage, have a read of this article: RC CAR THEORY: 2S VS. 3S, HIGH KV VS. LOW KV As an aside I've also bought a 3100kv to try on 3s and a 4300kv for 2s later on down the track. Just a quick note that there is also a Surpass 3660 motor with 10mm longer stator but still with the 3.2mm shaft available from Surpass if you want a little more power and some different kV options. Note it is pretty rare to find a 3660 motor with 3.2mm shaft, they usually jump up to 5mm. Servo As mentioned above a servo change is mandatory here since the stock 5 wire servo is incompatible with regular receivers which require a 3-wire unit. On the smaller 144001 / 124019 cars we were limited to 3 or 4 17g sized servos which actually made it easy to choose but on this larger car we have a plethora of options available since the servo is recognised as a regular 1/10 servo. In order to keep things simple I've chosen to again go with Racerstar as they have some well priced options available that perform well and all are made with metal gears. I've bought a servo from each of their tiers as I'll by using one for this car, one to upgrade my JLB Cheetah and one for my big ZD Racing EX-07, namely:
I've immediately ruled the brushless servo for the 104001 out as it's just too expensive plus it is more about torque than speed; the opposite of what we need for this car with the small buggy wheels. For this reason I've saved the brushless servo to help turn the massive heavy wheels on my JLB Cheetah instead.
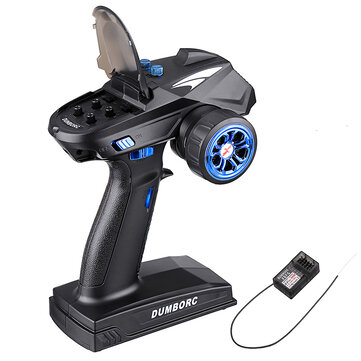
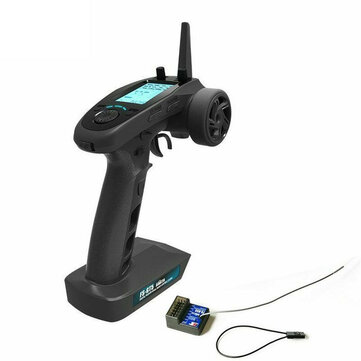
Installation of the servo is simply a case of one out, one in and it mates up perfectly to the stock bracket. It's really easy to install but picture are below in the install section if needed. Radio Gear You will of course need a transmitter and receiver as part of the brushless upgrade. You can use any aftermarket gear here. If you have a favourite use that but if you are yet to decide there are two fairly clear options for me.
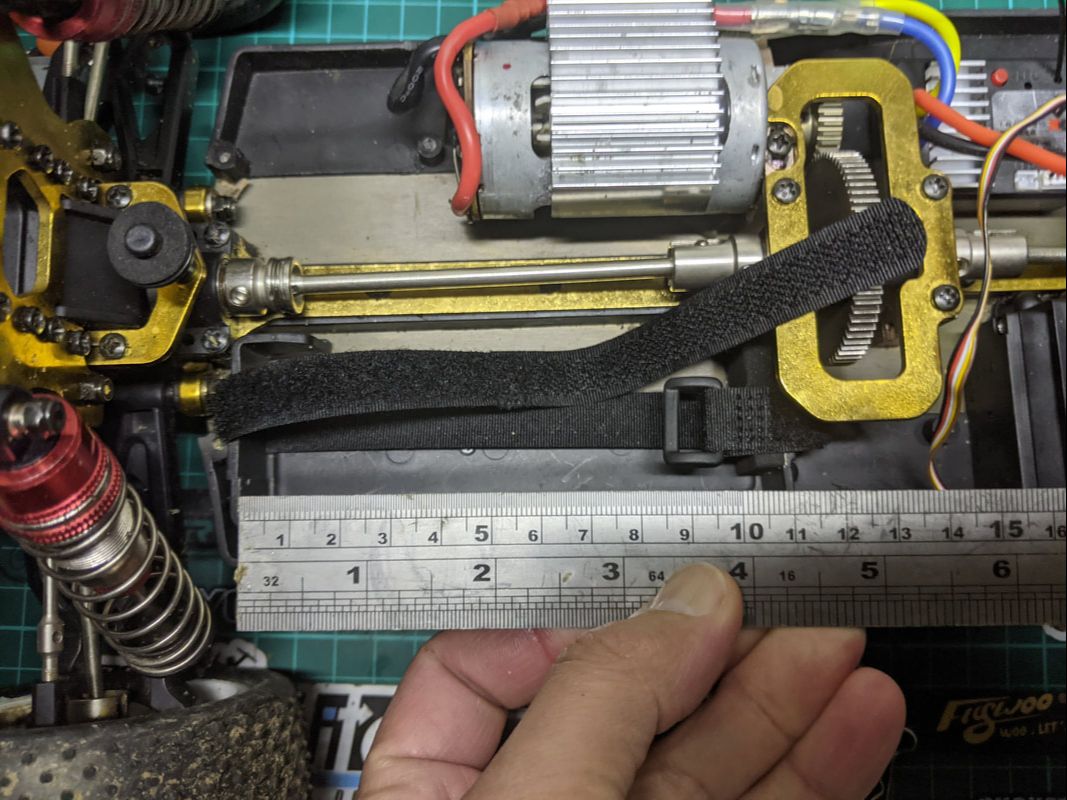
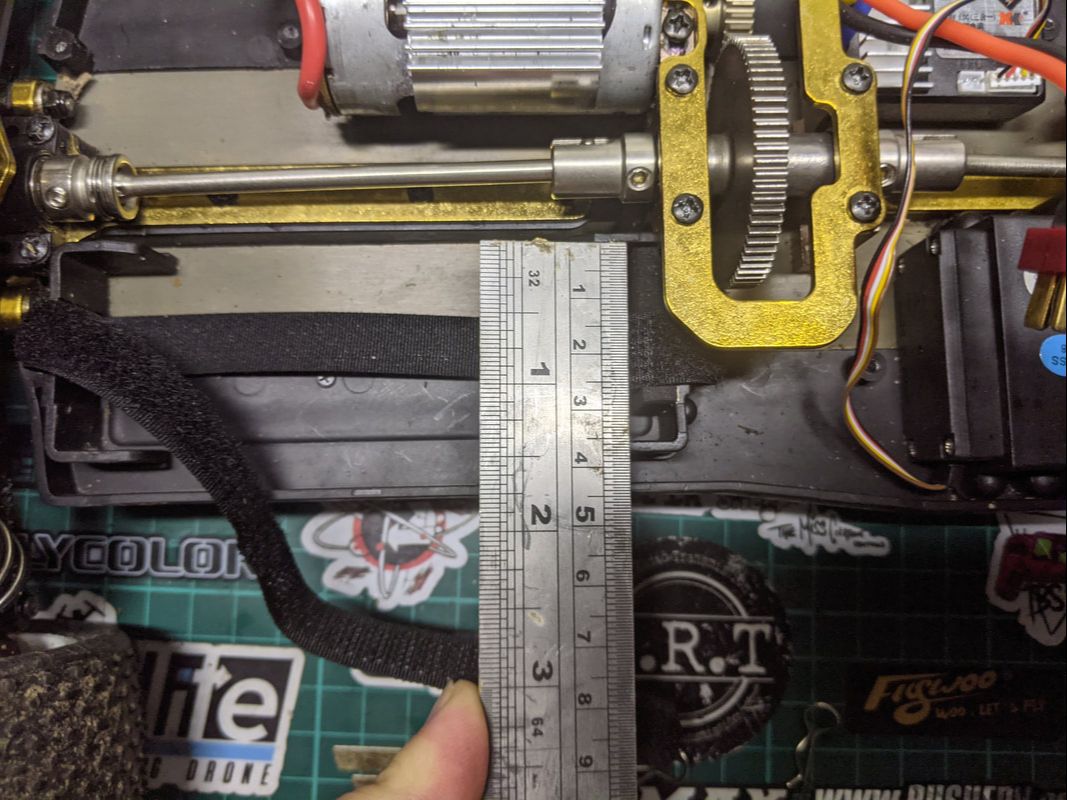
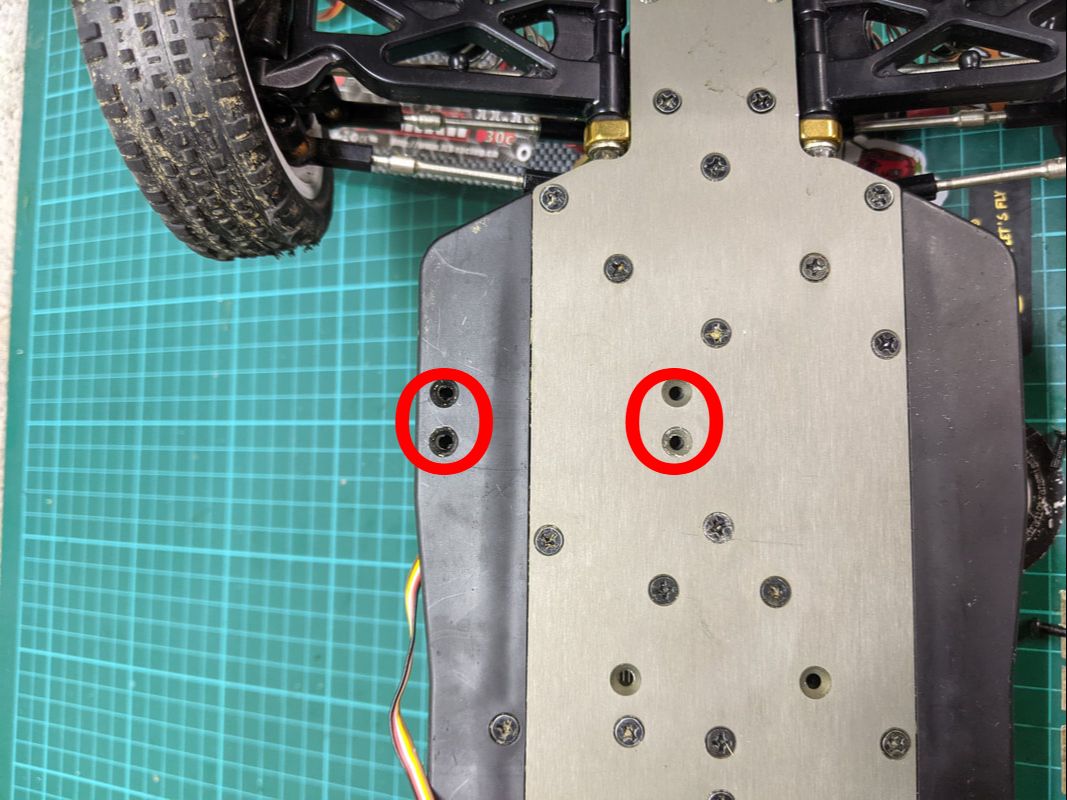
Battery You can't go to a 4s system without getting a 4s battery. I've chosen to go with a 4s 1500mah battery as it is what I have left from my quads but if buying new I'd recommend a 4s 1800mah or 2200mah which should fit in the stock battery tray. Remember a 4s 1500 mah has the same amount of electrical energy as a 2s 3000mah pack and 4s 2200mah has the same energy as a 2s 4400mah pack - you get the picture. I recommend buying ChinaHobbyLine batteries straight from the source. They have free shipping for orders over $80 but most importantly that make great, inexpensive batteries and have good support. If these aren't available to you, try these ones from Banggood as an alternative. See below for battery tray dimensions to make sure you get something in the correct size
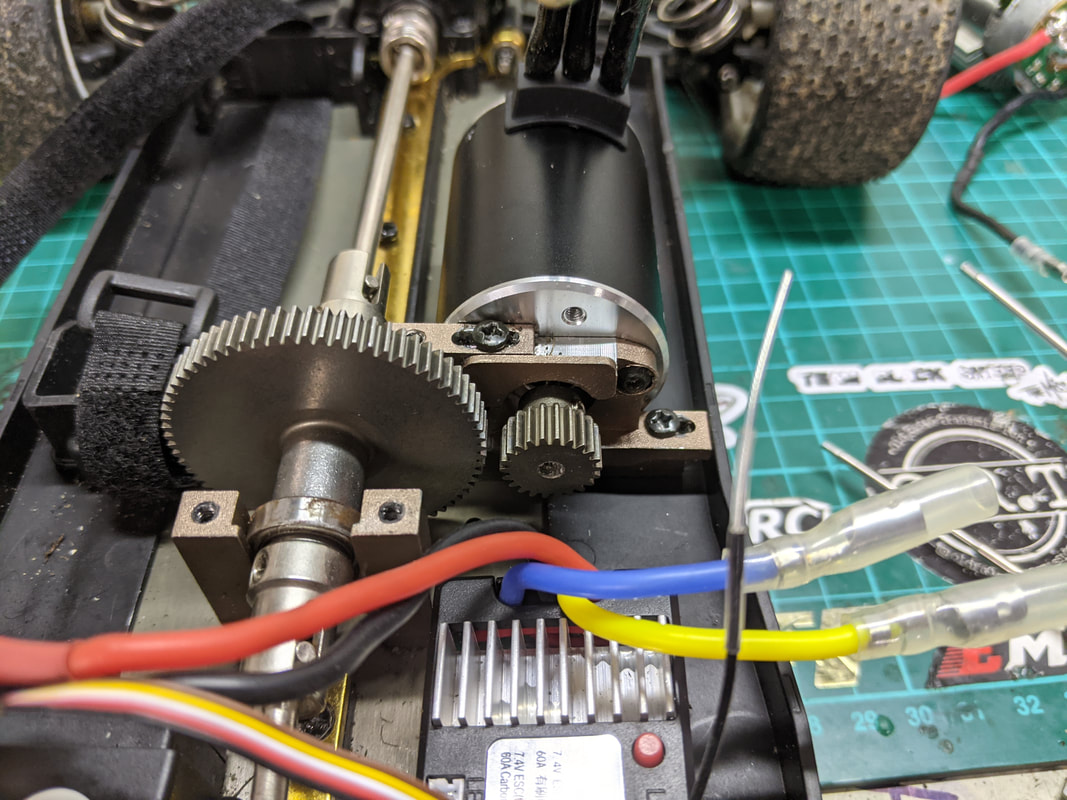
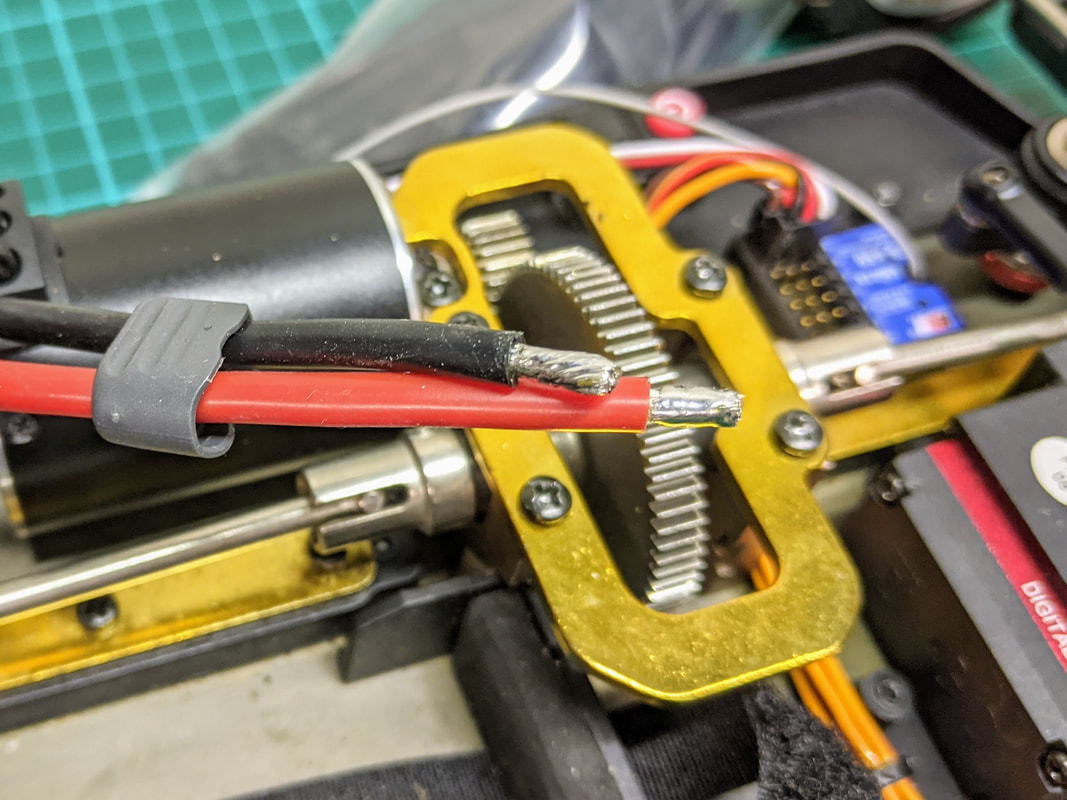
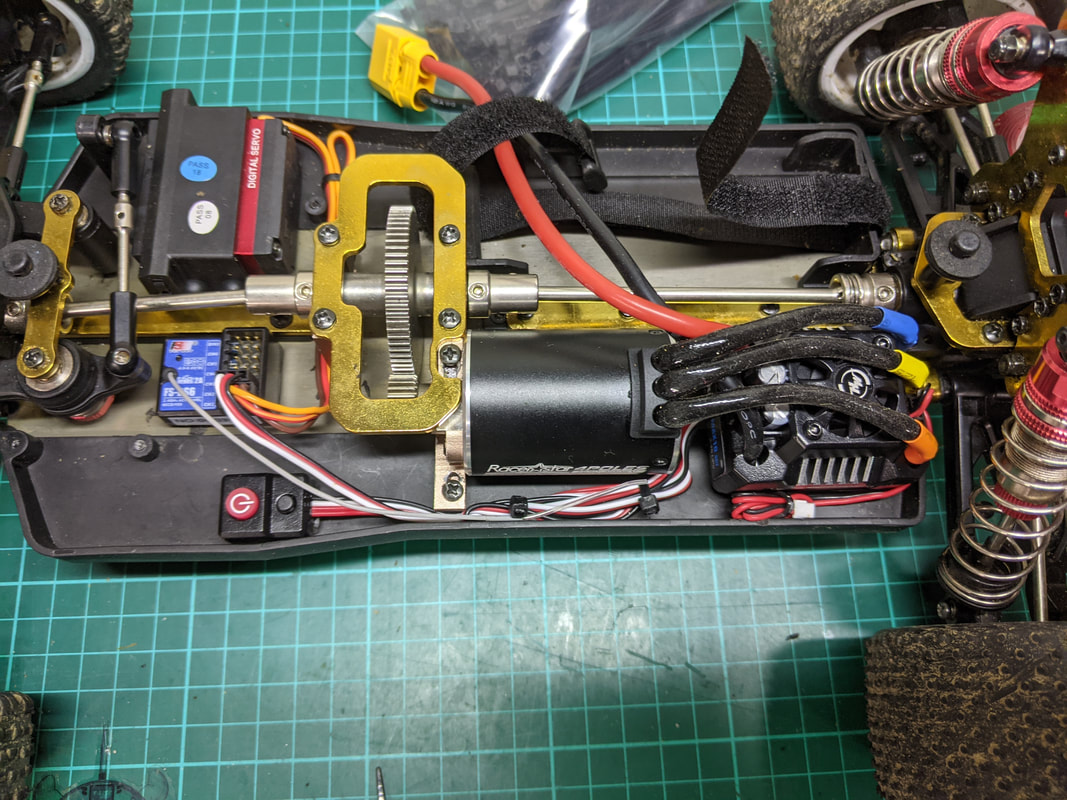
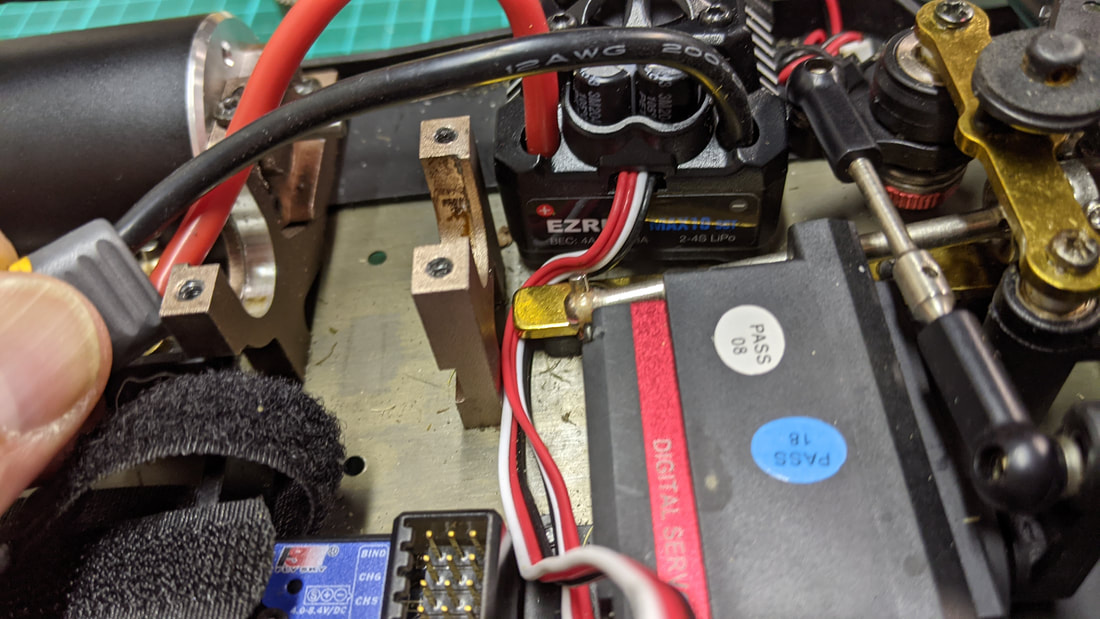
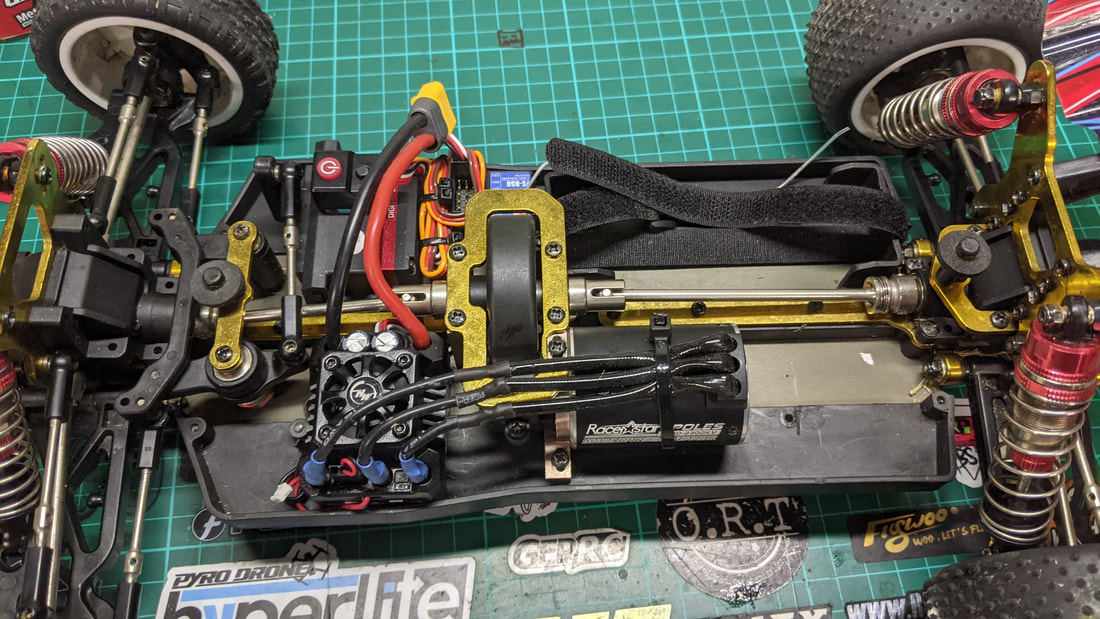
Installation Compared with the smaller WL cars there is a lot more room for installation and so you have options for where you place ESC and receiver. I've had a couple of attempts and ended up with the ESC in the front, opposite the servo. Although the motor wires are less convinient the weight balance is much better.
 LESSGO! Gearing
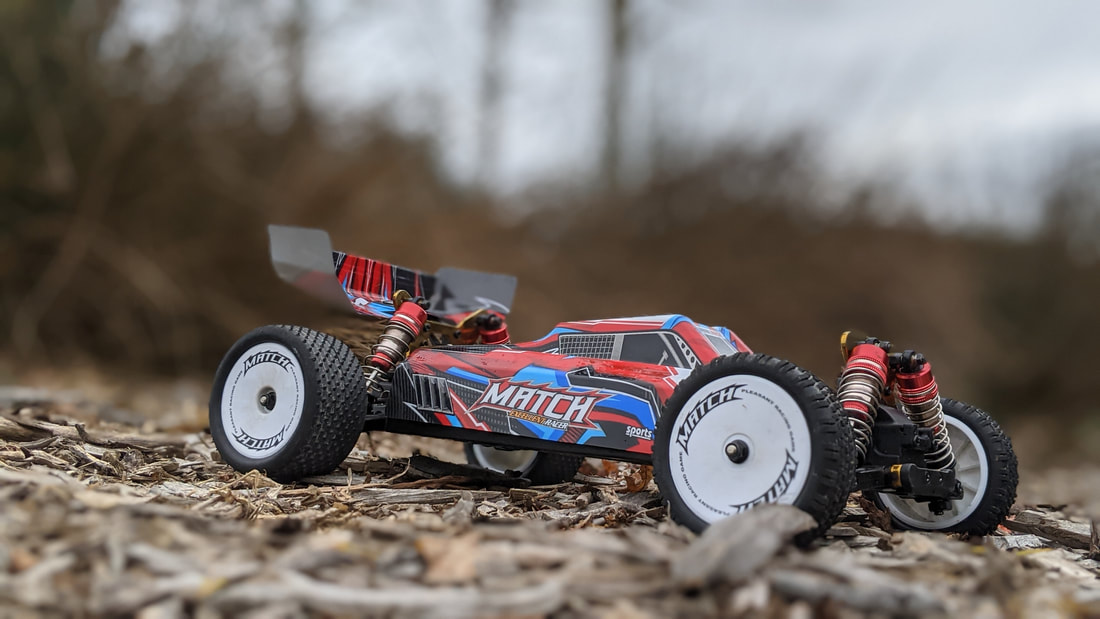
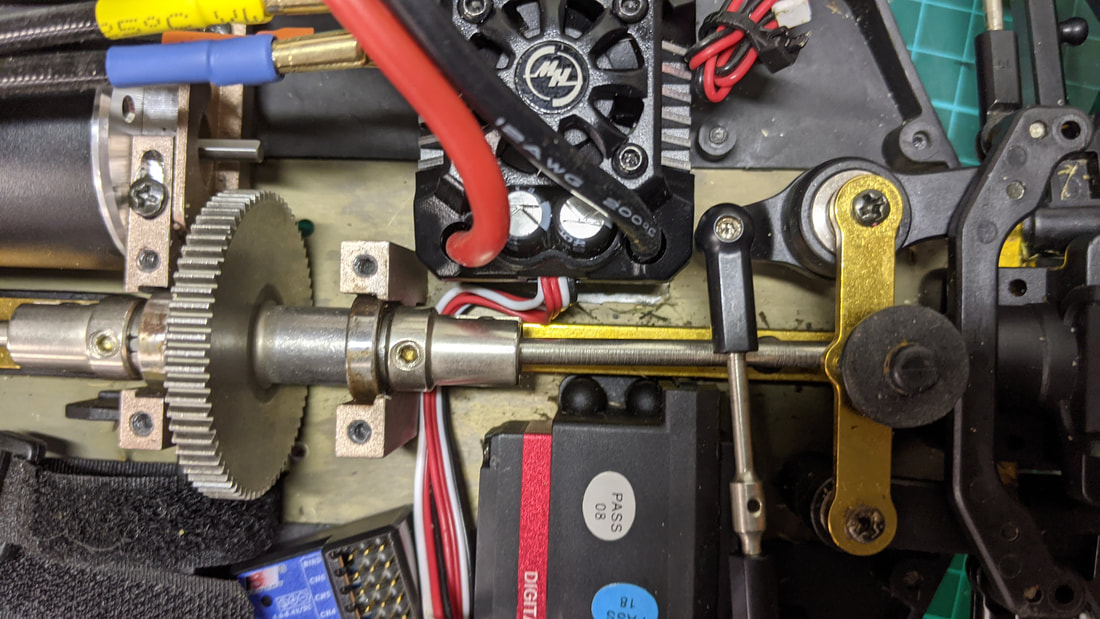
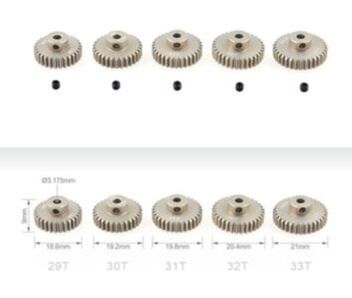
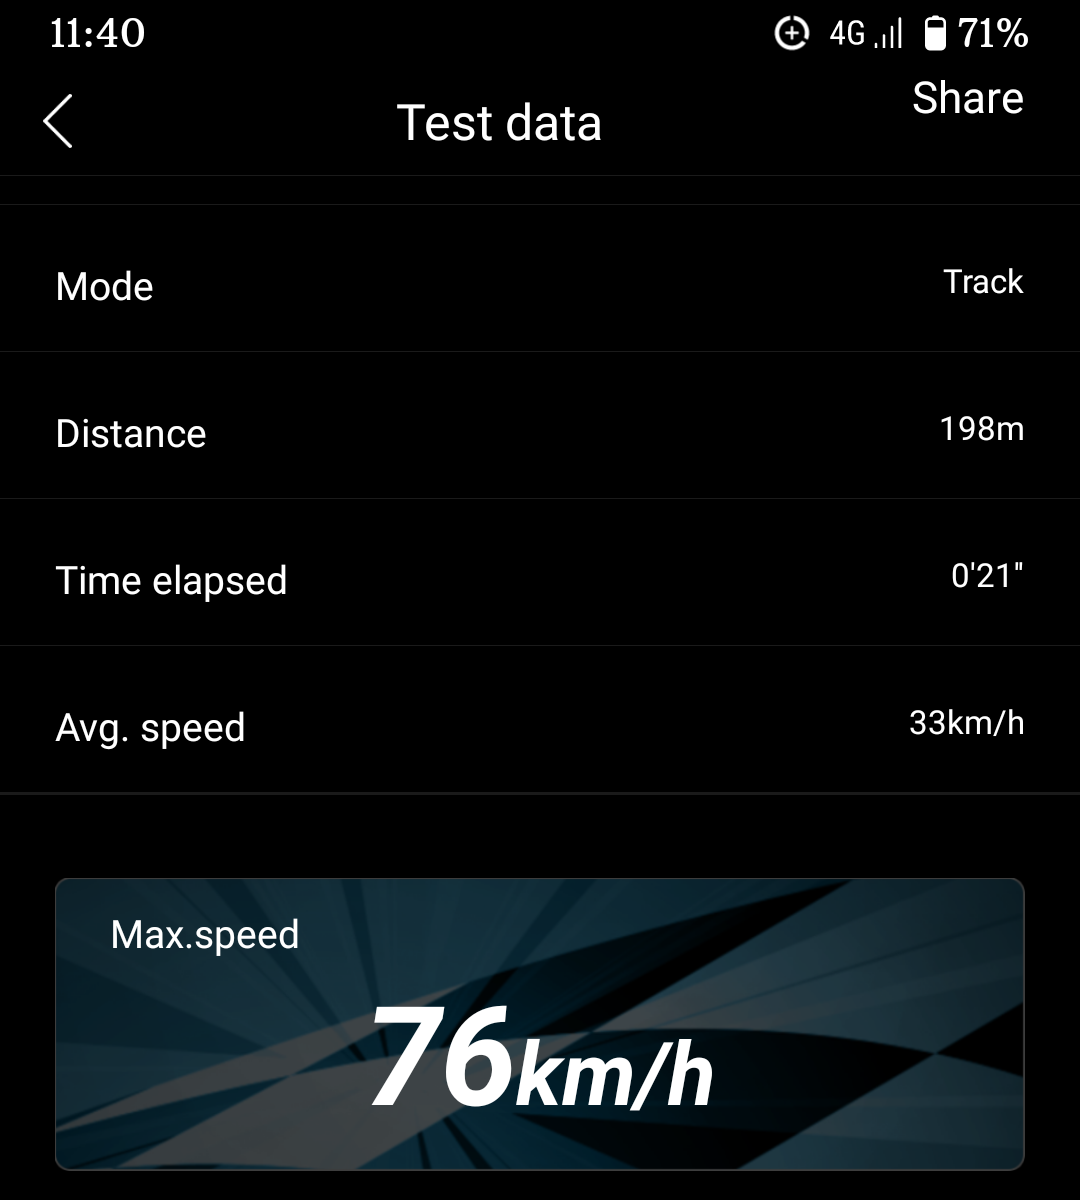
My favourite setup was the 144001 running a 4500kv motor with 17t pinion gear on stock 72mm wheels as I wrote about in the Ultimate 144001 brushless upgrade guide here. Key details for gearing on that car are: 17t pinion, 44t spur, 12t bevel pinion to 30t diff crown gear, 72mm diameter wheels. All of this combined means that the car will move 35mm forward for every turn of the motor. Now, the 104001 uses as similar motor peak RPM but uses a 22t pinion on a 70t spur gear with a 14t bevel pinion on a 40t diff crown gear with 80mm diameter wheels. This will make it travel 27mm with each turn of the motor. In order to achieve the same distance travelled per turn of the motor, I need to multiply the stock pinion x 35mm/27mm = 28.5. So, in this case I need a 28 or 29t pinion gear. This is just a start point, keeping an eye on speed, motor and ESC temp will all need to be considered when testing. Performance The difference in performance is night and day, this car simply must be experienced with a brushless power train. Clearly the stock car is completely under powered which is really exaggerated because of the great handling. This more powerful system makes much better use of the handling and in my opinion how it always should have been. It's no surprise that the stock brushed system was only chosen to keep this car at a price point. I'm really happy with this gearing using the 28t pinion as a start point. The car feels quick but not uncontrollably so and just feels powerful due no doubt the the acceleration this setup offers. The 1500mah 4s pack lasts for about 15 minutes before I noticed a drop off in power as the voltage drops. After running the motor is warm only and the ESC barely lukewarm although bear in mind it is winter where I am and about 12 degrees C. It does feel like you could go taller on gearing but i like a basher with conservative gearing so that regardless of how I push it on what terrain, I know it won't put any of the components under too much stress. With further ado, speed tests are below:
For now, I will continue to run this car on 4s with the 2300kv motor but soon I'll be looking at changing back to 3s 3100kv for similar performance with the option of running 4s 3100kv for speed runs, I'm expecting around 100km/h with that setup. Lastly I want to try the 4300kv motor out on 2s because I really like the look of how a 2s 5000mah shorty hard pack fits in the car and this better simulates the cheaper ESCs that run 2s and 3s only. I’ve had success in the past with the Surpass Hobby 60a ESC and 3650 motor combo as reviewed in this article so that will probably be my next step. Actually this combo here looks to be better value and a more suitable motor kv for 2s: Surpass Hobby Waterproof 3650 4300KV Brushless RC Car Motor With 60A ESC If you think this might be useful, please let me know on the QuadifyRC Facebook group here. Once I have completed this follow up I'll be sure to post the link here and share with you.
Conclusion Due to the ESC this is not a cheap build but it is super reliable. I'm yet to decide if this Hobbywing MAx10 SCT 120A ESC is an overkill but I know I'll be able to re-use in anything up to 1/8 scale in future without issue. I will be trying some other lower cost combos in future and will link here when I do. Parts used for this Build
Thanks for reading, if you found this article useful please feel free to like or share, the facebook links below directly link/like this article. I don't believe in asking for money by patreon nor by paypal but if you do wish to help me, the affiliated links in these articles help me buy the bits and services I need to produce this type of content. If you are looking for RC cars, quads or parts check out my coupons and discounts page which I keep updated with only the RC cars, parts and quads I like at a proper discount
|
Categories
All
|


 RSS Feed
Thanks for visiting QuadifyRC.com Follow us on facebook below to get all the latest updates