QUADIFYRC MODS AND REVIEWS
  • RC Cars
  • Car of the Month
  • Quad Reviews
  • Quad Mods
  • COUPONS AND DISCOUNTS
  • Long Range
  • About & Contact

QUADIFYRC RC Car Review and Upgrade Guides

124019 BUDGET setup and tuning guide 2021: Get the most out of your car

29/12/2020

21 Comments

 
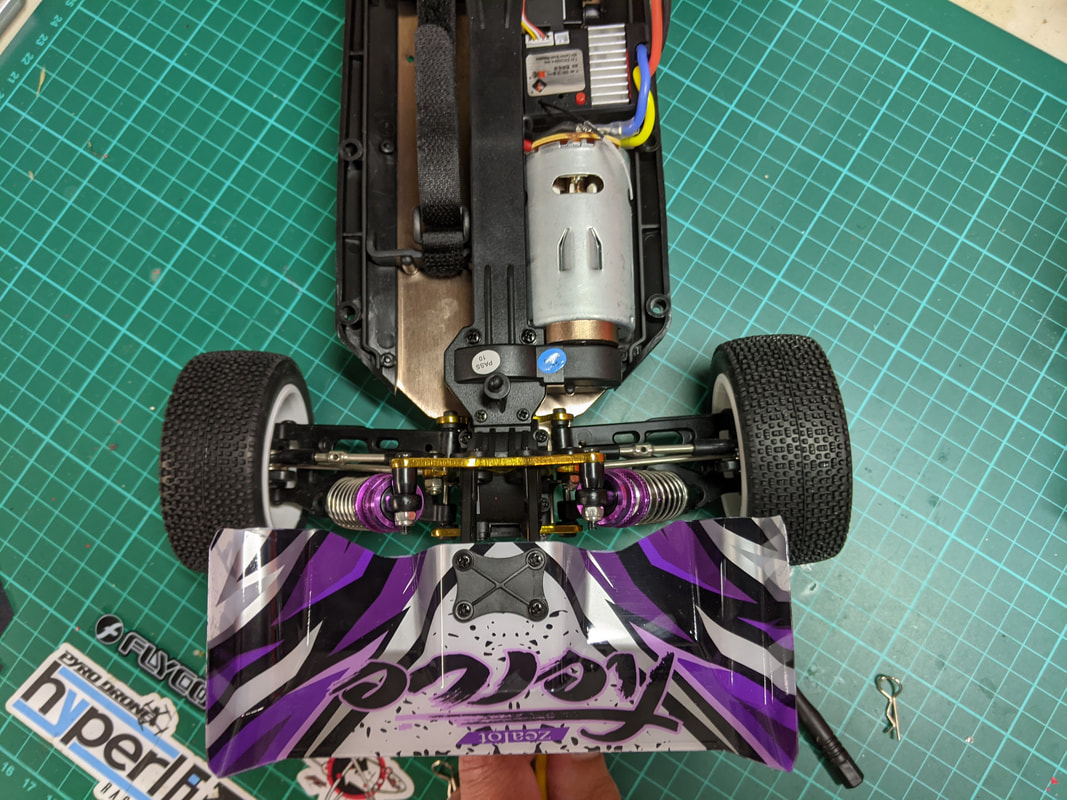
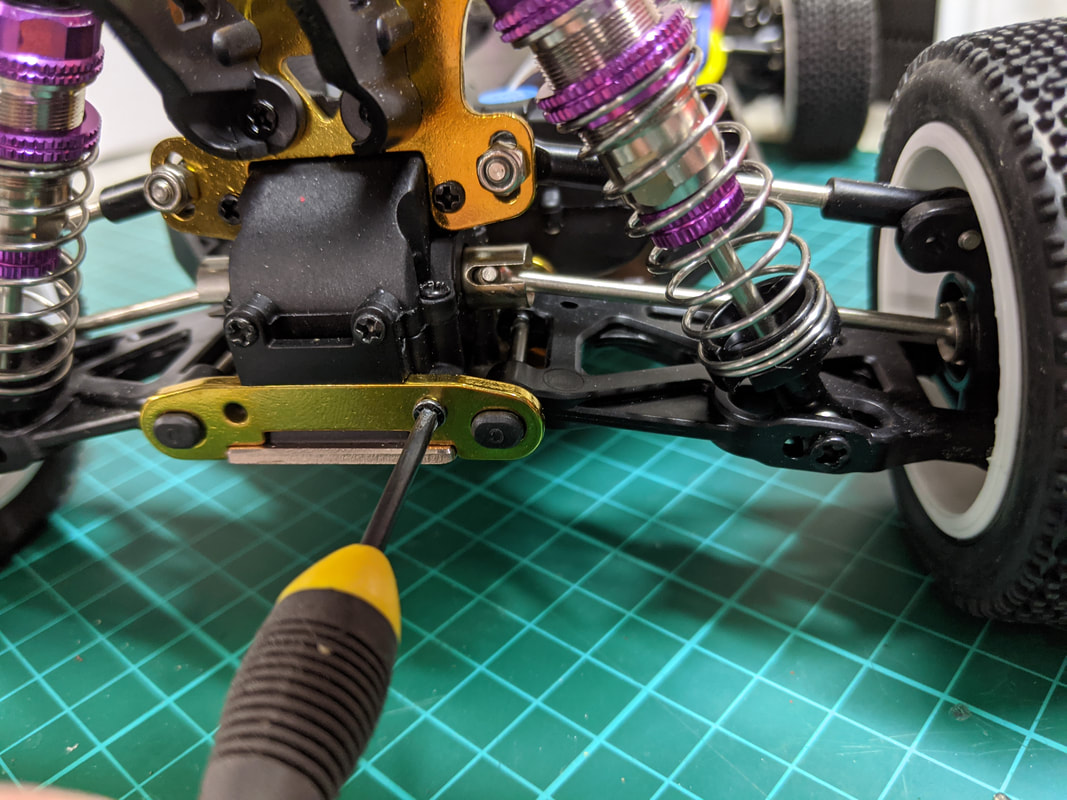
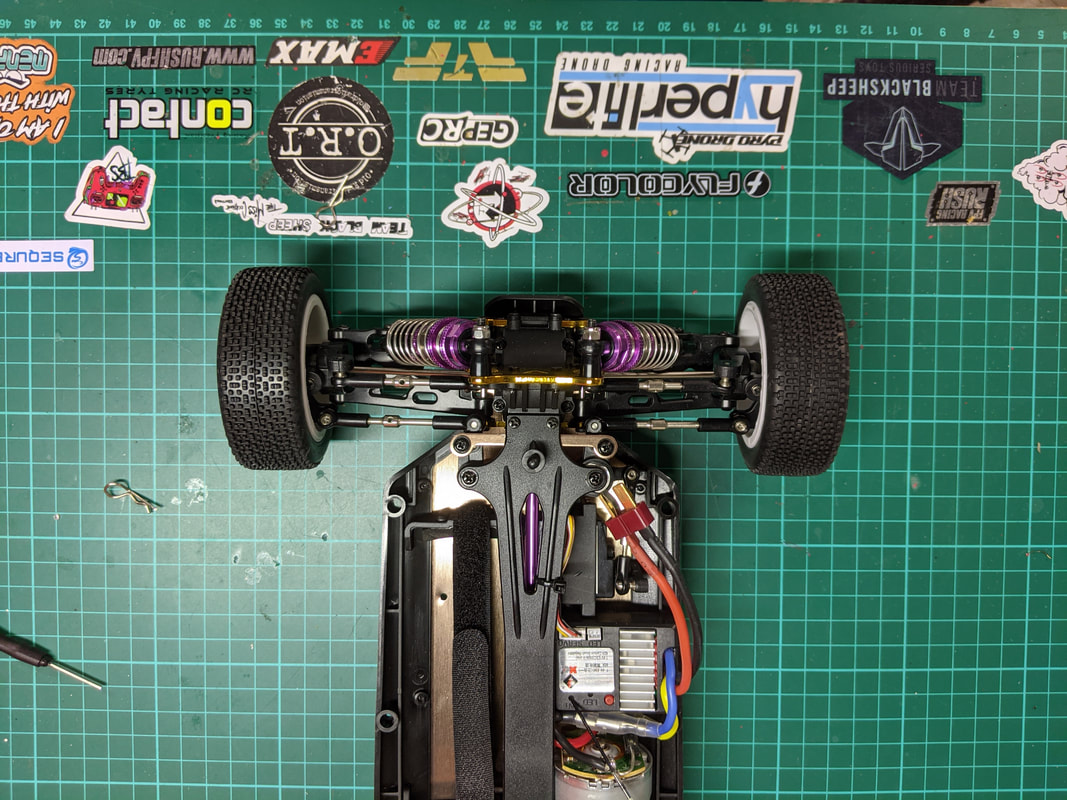
The WL Toys 124019 is a 1/12 scale RC Car released late 2020 by WL toys and is largely identical to the hugely popular WL Toys 144001. Although the 124019 did however have some notable improvements as covered in my review, a bit of simple setup and tuning can improve this much more. In this guide I will cover how to best setup and tune your 124019 to get the best out of it without spending anything on upgrades other than consumable items like grease.
Picture
I've already written over a dozen guides on improving the 144001 here which are applicable to this car as well but I wanted to use this guide to be very specific on the exact improvements I made since the manufacturer has fixed some of the issues mentioned in my 144001 guides here and here.
Reduce rear toe in to a more neutral setting (free)
The 124019 comes from the factory with a lot of rear toe in. This helps stability through cornering (by adding a little understeer) but the effect is small and the counter to this is that straight line speed suffers as a result. The good news is that the rear to in can be easily set to a more neutral setting as below. I strongly recommend doing this because the extended wheelbase of the car is better at improving cornering stability anyway:
Picture
Car has a lot of rear toe in stock
Picture
Remove these two screws
Picture
Pull the rear swing arm mount off. You'll see the little plastic inserts facing out from stock. This gives them the toe out
Picture
Remove the plastic inserts, rotate 180 degrees and place the back in as per above. Reinstall the rear swing arm mount in reverse of how you took it out and not you will have neutral rear to in.
Adjust front toe and camber in to a more neutral setting (free)
Front toe (the angle the wheels point in or out) is poorly adjusted from the factory, just look at the picture below of my car fresh out of the box. However, since this car uses adjustable tie rods it is an easy fix. Adjustable tie rods mean the plastic cups that ultimately bolt to the car have opposite threads - one regular one reverse so that if you twist the shaft with both cup straight the both loosen (get longer) or tighten (get shorter at the same time), the idea being you can lengthen or shorten without moving the cups from the ball joints. Good in theory but poor in execution here - cups are threaded so tightly they pop off the ball mount on the car when you try to rotate the shaft. Regardless here we go...
  1. Centre the steering rack so that it is square as you want this to be your centre reference point.
  2. Install the battery as you car will need to be correctly weighted with shocks loaded up.
  3. Choose a tie-rod you wish to adjust and remove it. You'll see the rod is asymmetrical - the plastic cup closest to the hole is reverse threaded and the one farthest has a regular thread. Use this knowledge to shorten and lengthen as needed. Always try to make sure you adjust both ends by about the same amount
  4. Reinstall, check camber or toe and repeat step 2 as needed.
Picture
Check out this hot mess from the factory. It's a car equivalent of a lazy eye
Picture
Much better!
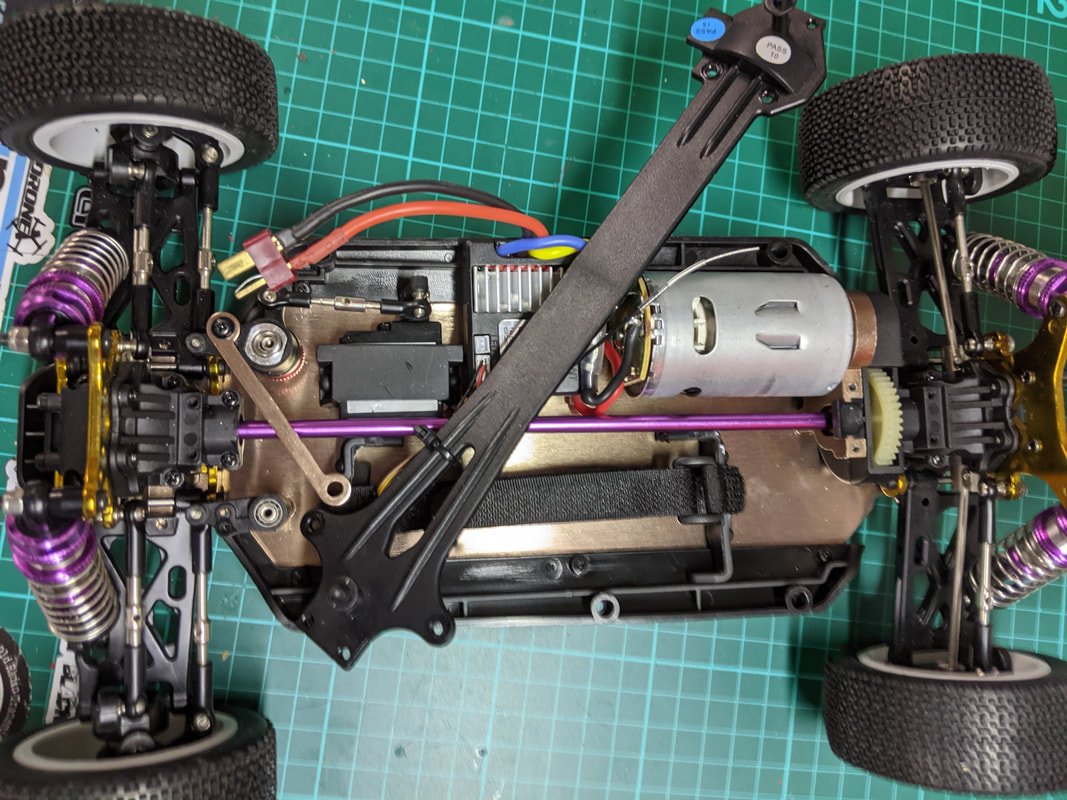
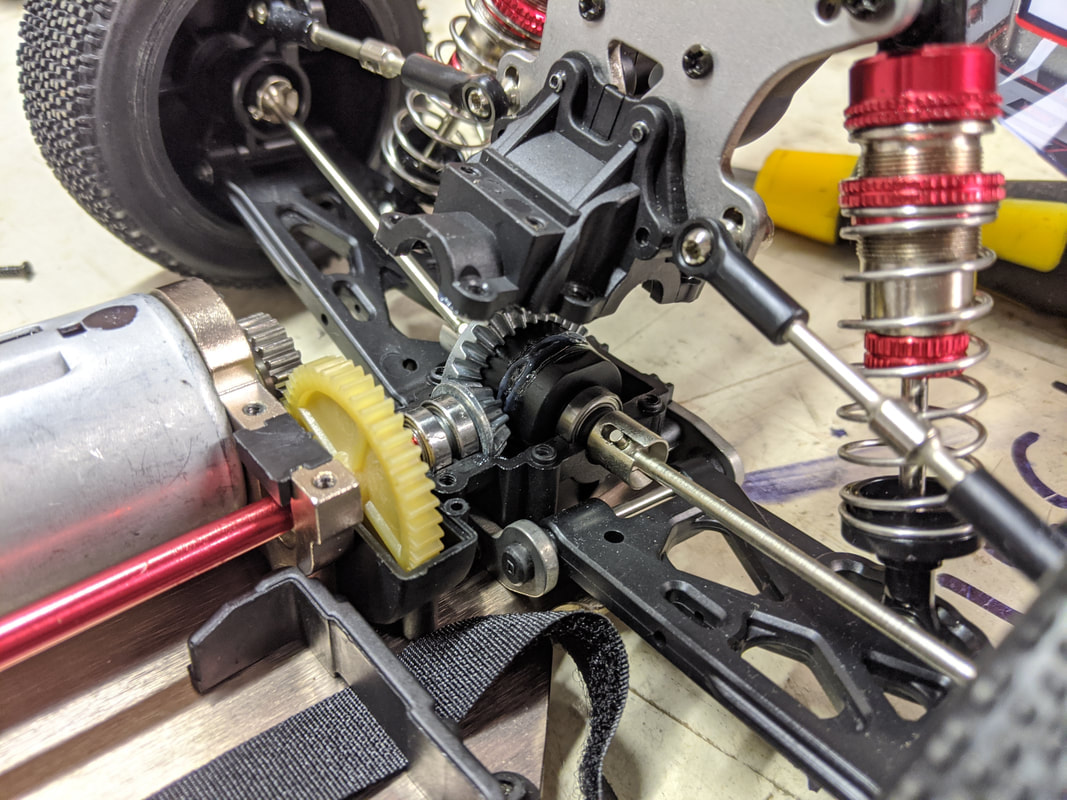
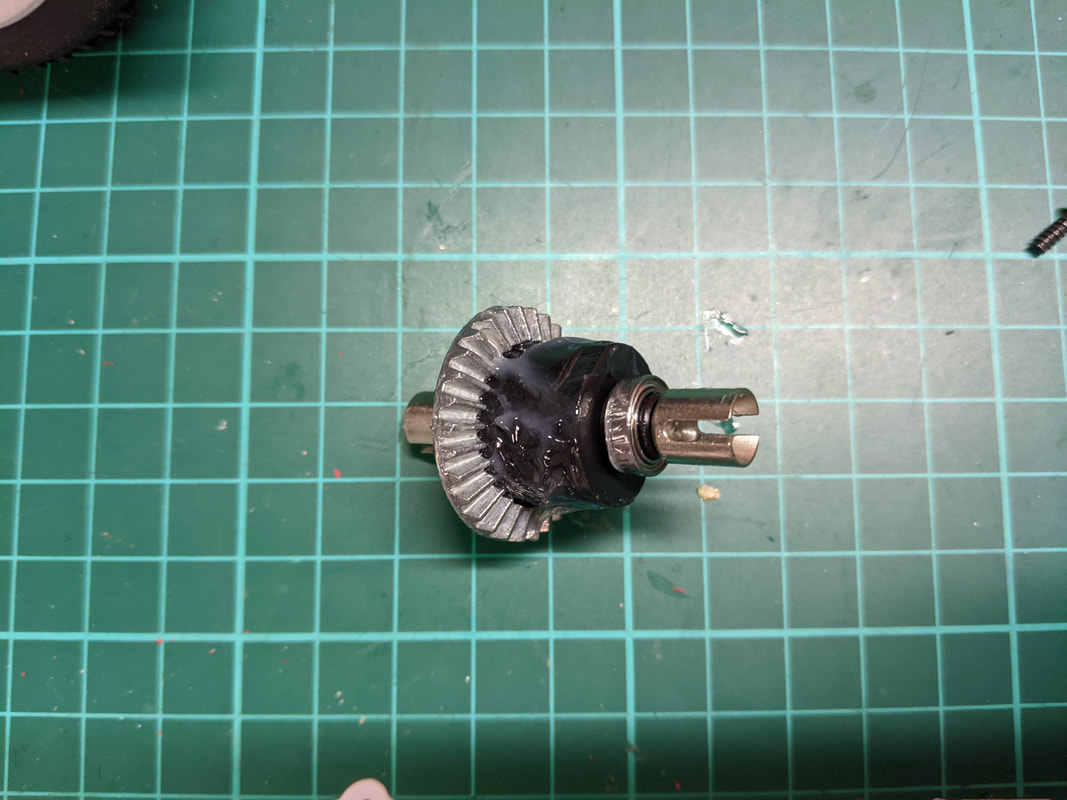
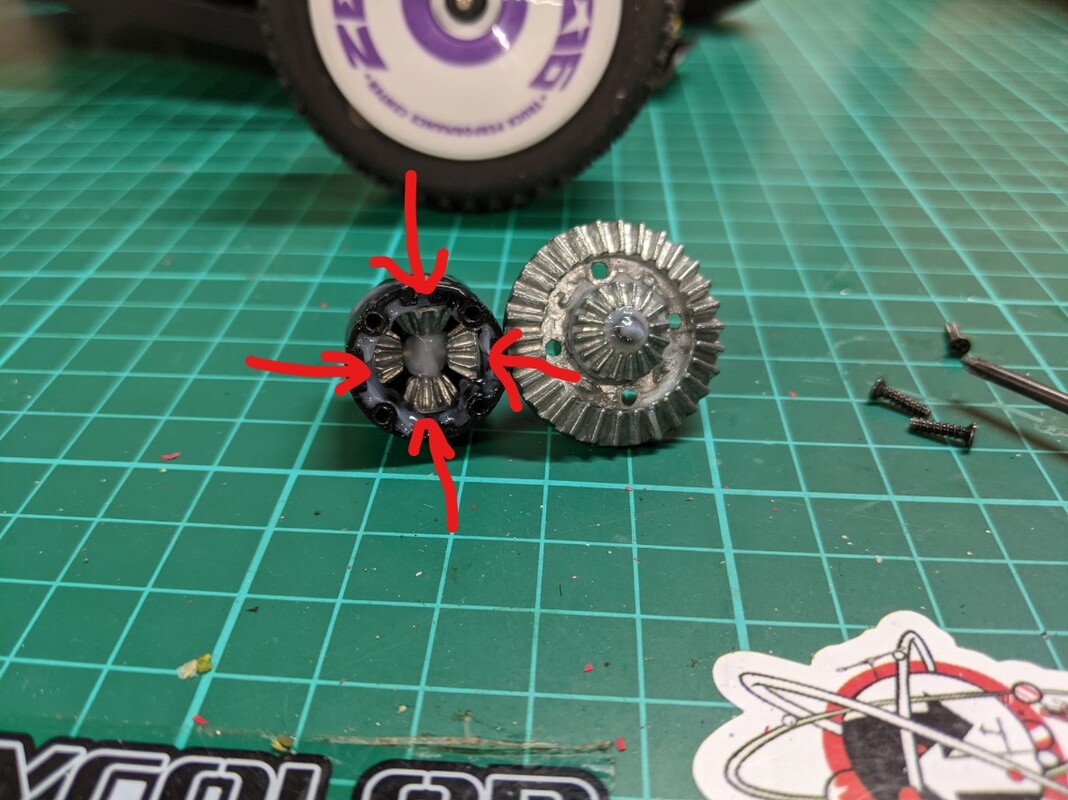
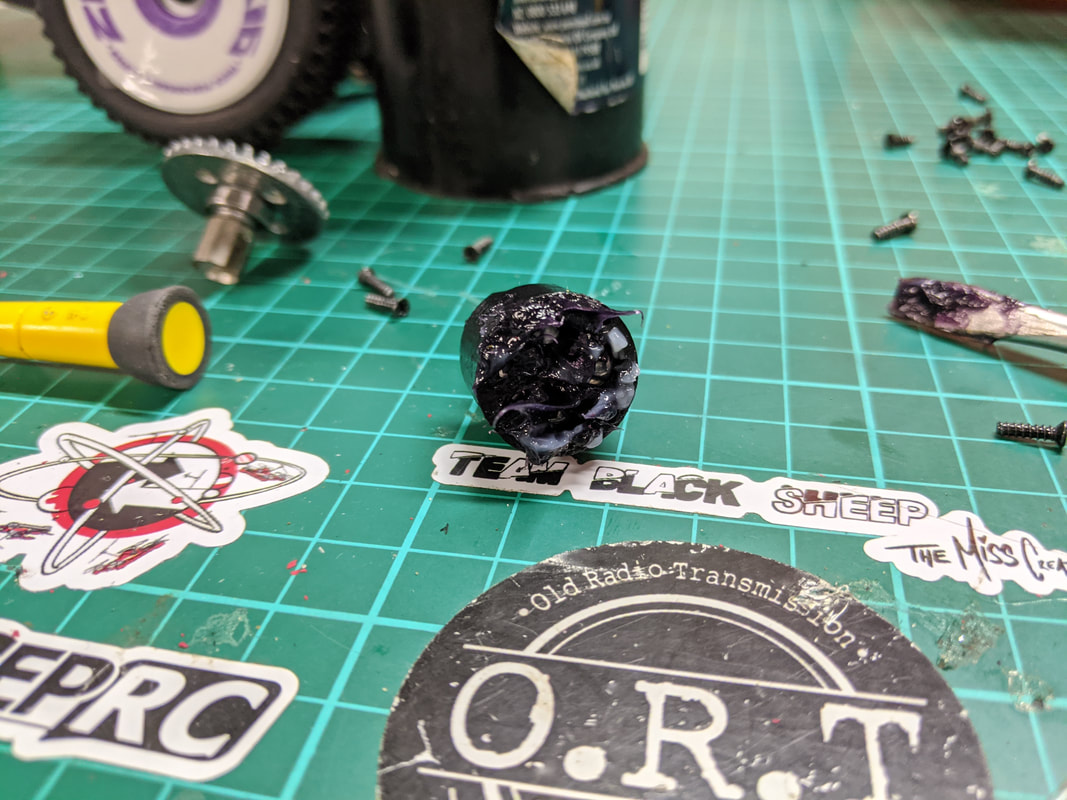
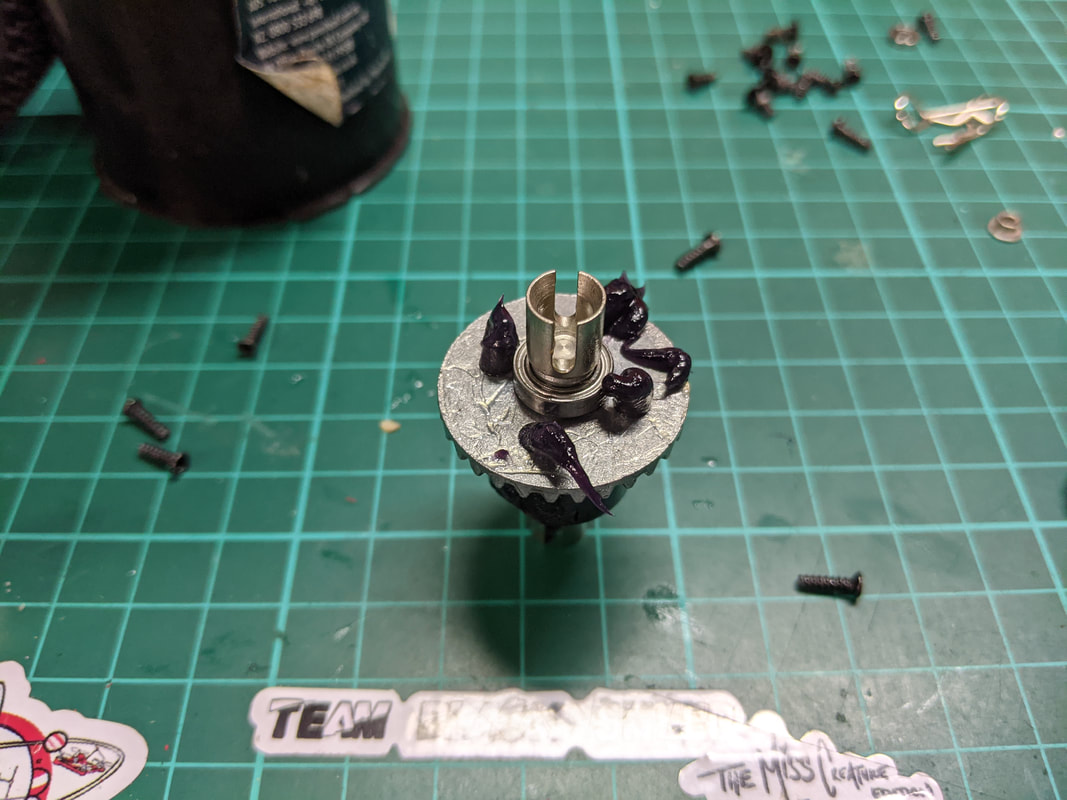
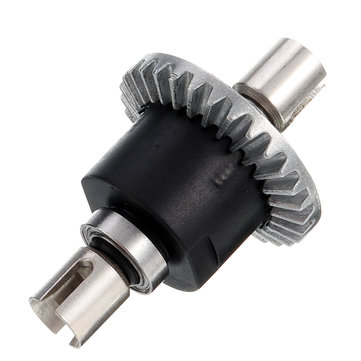
Camber is adjustable front and rear using the uppermost tierods front and rear left and right.  I like a tiny bit of negative camber on the rear (wheels leaning in at top) and none on the front because the caster acts as dynamic camber. These can be adjusted in the same manner as the steering links mentioned above but based on the fixed mount to the shock tower rather than the steering rack.
Grease the diffs for better traction (free if you have grease about otherwise about $5)
As mentioned in the review I was VERY pleased to see that the diffs have been shimmed in the 124019 (and have now confirmed in the 124018). This means the internal gears have much better meshing and will reduce wear and ultimately failure. Thus greasing diffs is no longer quite as important but still worth doing... not so much for the longevity of the diffs but for traction and performance - a freewheeling diff like this one packed with thick grease will stop stop one wheel spinning so wildly on low traction surfaces thereby increasing grip. Follow the steps below to see how:
Picture
​Remove the 6 screws holding down the top deck and rotate out of the way.
Picture
Remove screws holding steering rack (drag link) on so you can access the front diff housing. You'll notice these pics are from my 144001 which are identical for the purpose of this guide.
Picture
Remove front diff housing to access the front diff. Note orientation of drive gear
Picture
Remove the rear diff housing to access the rear diff. Both diffs are identical. Note orientation of drive gear
Picture
This is the actual diff from my 124019. There is a good amount of white grease on the outside
Picture
And on the inside. The read arrows point to where the shims are installed. Load grease up on top of these gears, forcing it into the voids where possible
Picture
It's not pretty but this is how you want it to look
Picture
Line up the screw holes and keyways and push it back together. Grease squirting out of the screws like this is a good sign you had enough in there.
Once the screws have been retightened, check the diff can be spun with your hand as above, If not, it may not have gone back together correctly.
Now, follow these steps in reverse to put the diffs back in their correct orientation, reattach the diff housings, reconnect the steering drag link and reinstall the top plate. It's not a terrible idea getting spare diffs which you can prepare ahead of time. These can be found here:
Picture
124019 Replacement differential. Front and rear are the same, these are only about $6 for an assembled diff.
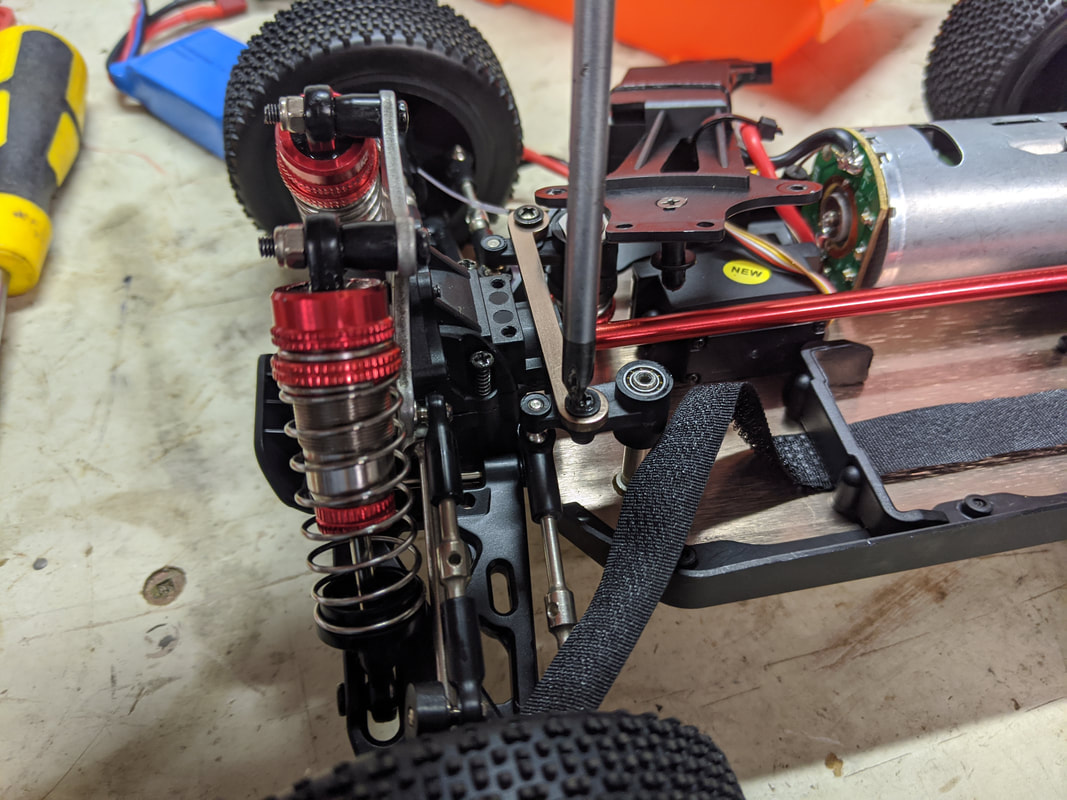
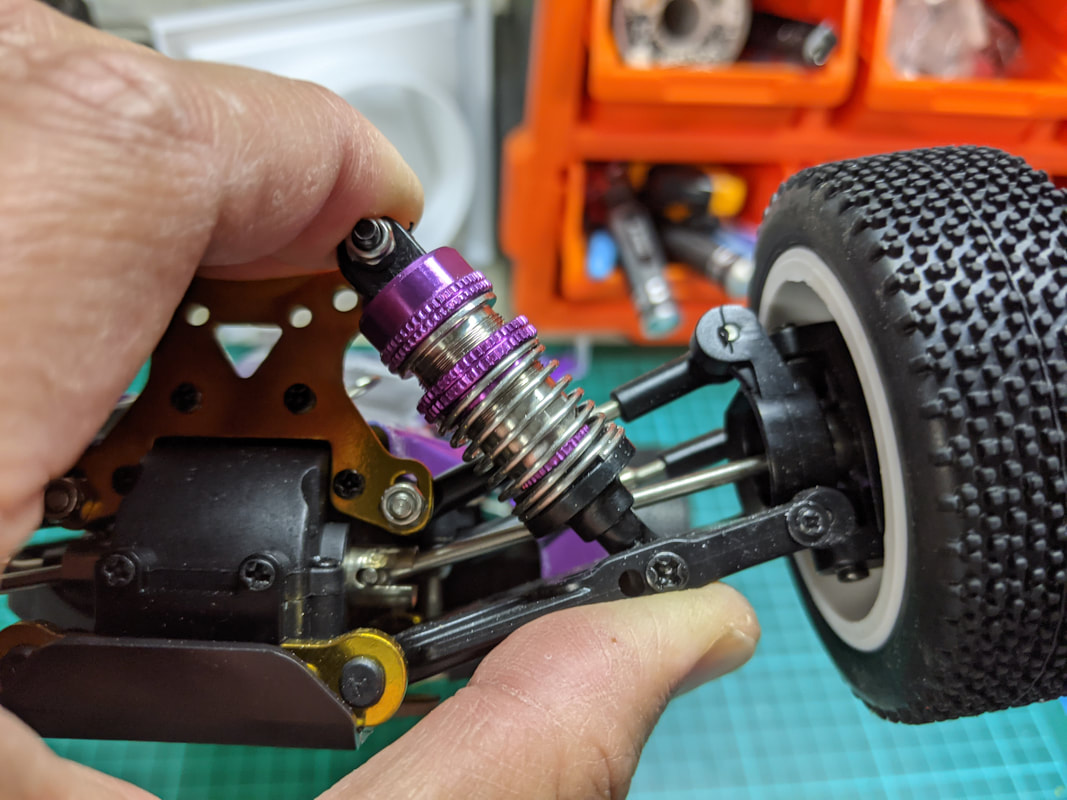
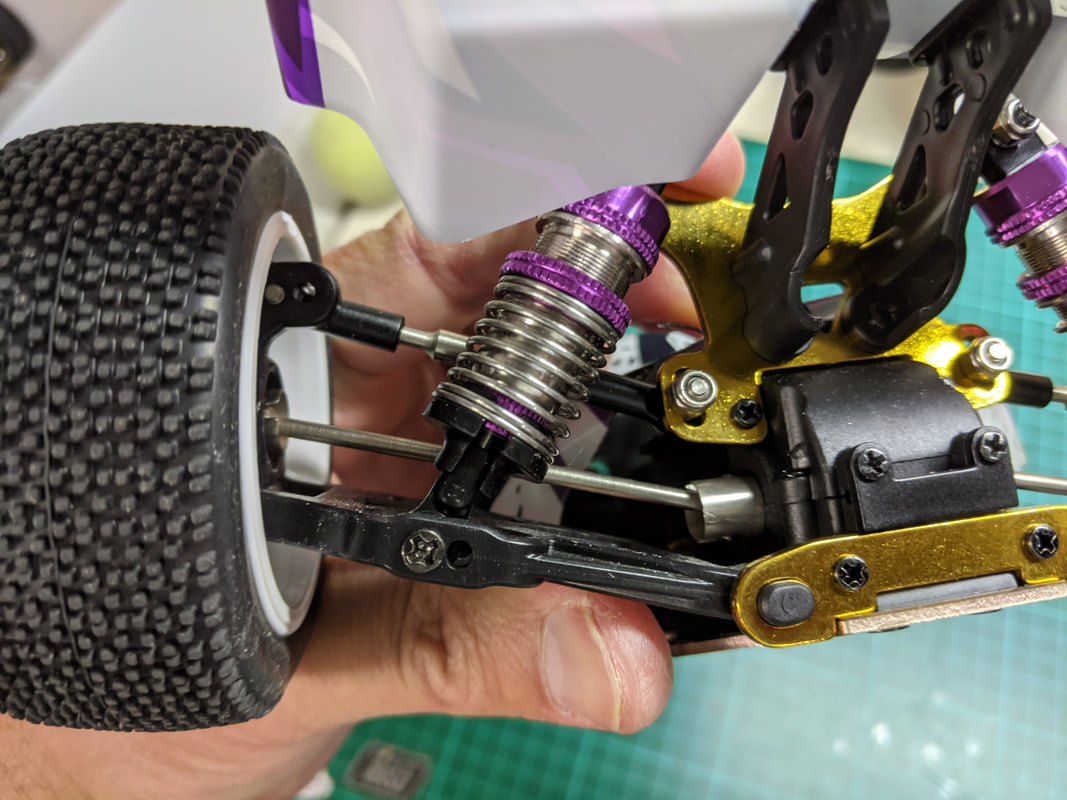
Correct the shock oil level - mine didn't need doing.
The shock fluid level in my 124019 was perfect - a welcome relief after the dangerously overfilled shocks in my 144001 that I remedied in this guide. As you can see from the pictures below I could achieve full compression and not the slightest hint of hydrolock or air bubbles. Well done WL Toys!
Picture
Perfect front suspension compression 👌
Picture
Perfect rear suspension compression 👌
Look after your batteries for best power delivery and longevity
I see an awful lot of questions (more on the 144001 to be fair) about people wanting to upgrade their batteries for more speed/power and battery life. I'm going to take a fairly boring approach here and say that the stock 124019 2s 2200mah lipo battery is actually really well suited to this car - it offers more runtime but not so much that it would increase risk for motor or ESC overheating. Furthermore the maximum continuous current seems to be perfectly fine for the stock setup.
Picture
The stock 2s 2200mah battery is actually pretty good.
One thing you can improve from a battery perspective however is making sure the batteries stay good and there are 3 basic rules for all lipo batteries:
  1. Don't over discharge. The 124019 ESC does have a low Voltage Cutoff (LVC) to protect your battery from catastrophic damage but it is still much lower than I like. I like to set mine at around 3.5v but since the stock ESC cannot be re-programmed then a cheap lipo buzzer is your best friend here. They only cost around $2-4 and can be plugged in to the unused balance plug of your battery when you run. You can set the alarm to come on at 3.5v and below so you know that when the buzzer sound that it is time to stop. The battery will recover to around 3.6-3.8v per cell which is where you want to be for a discharged battery.
  2. Don't over charge. Unfortunately the only real way around this is to buy a better charger but the good news is you can get a very good charger for as little as $25-30 like the ones I've covered in my RC Car charger guide here. For the TLDR version I think the ISDT 608AC is the best value for money and most flexible charger hands down and the full review for this charger is here. Be aware that those USB chargers that come with these cars are notoriously inaccurate making for an undercharged (or worse) overcharged battery. Overcharged batteries deteriorate meaning that their ability to hold and deliver charge goes down hill fairly quickly. Severely overcharged batteries are a genuine fire risk.
  3. Store at correct voltage (storage voltage) when not in use. If you aren't planning to use your battery for a week or more, I strongly recommend charging or discharging to around 3.8v per cell. This will maintain better battery life than storage at lower voltages (particularly less than 3.5v) or at full charge. Do not store batteries at full charge for more than 1 week. You can achieve storage charge by running a battery down with an appropriate lipo buzzer or better yet, use your charger as mentioned above in storage mode. It will charge or discharge you battery - whichever is needed - to exactly the storage voltage of your choosing.
I think that'll about do it for this guide, there is plenty here to keep you busy for now. In return for this work you will get a car that handles better and is more robust against wear and damage. Perhaps more importantly though it will give you a better understanding and knowledge of you car... knowing where to look and how to problem solve if something goes wrong. Good luck and have fun! Coming soon are some new brushless upgrade options but for my current favourite, click here. Please note this guide is relevant to but the 124019 and 124018 cars as below:
Picture
Wltoys 124019 (Race Buggy) rtr 1/12 2.4g 4wd 60km/h metal chassis rc car
Picture
Wltoys 124018 (Desert Buggy) rtr 1/12 2.4g 4wd 60km/h metal chassis rc car
​Thanks for reading, if you found this article useful please feel free to like or share, the facebook links below directly link/like this article. I don't believe in asking for money by patreon nor by paypal but if you do wish to help me, the affiliated links in these articles help me buy the bits and services I need to produce this type of content. If you are looking for RC ​cars, quads or parts check out my coupons and discounts page which I keep updated with only the RC cars, parts and quads I like at a proper discount
21 Comments
Miguel
4/1/2021 03:51:42 am

Hola, quiero empezar en el hobby, pero no sé si comprar el wltoys 144001 (67€) o wltoys 124019 (83€).¿Que me recomienda? Gracias.

Reply
QuadifyRC
4/1/2021 10:09:43 pm

124019

Reply
Juan Valdez
1/2/2021 01:26:32 pm

Great info, just wanted to show y appreciation for the time it took to make it. Thank you Sir 👍

Reply
QuadifyRC
2/2/2021 09:28:06 am

My pleasure Juan! Have fun :)

Reply
Tom
11/2/2021 05:35:04 am

Hello quadifyrc,
I have read both your pages of the 144001 and the 124019 and I was wondering if the upgrade parts from the 144001 fit the 124019 as well.

Reply
QuadifyRC
18/2/2021 04:47:55 pm

Hey Tom. Yes, practically everything is interchangeable except top deck, lower chassis, drive shaft and body.

Reply
Tom
18/2/2021 09:08:12 pm

Ok thank you very much👍

Jonathan
18/2/2021 04:28:56 pm

My 144001 had the same shims in the diff. Maybe they have been taking notes from your blog? My A959-B had no shims in it.

Reply
QuadifyRC
18/2/2021 04:46:59 pm

Perhaps not my blog haha! But they certainly seem to have someone listening in. I just received a new 144001 the other day - diffs feel shimmed but still poorly filled shocks and plastic hex adaptors. Maybe the new guy on that part of the production line? 🤷‍♂️

Reply
Gern Blanston
27/2/2021 11:23:58 am

Thank you for the informative post! I read it a couple of months ago when I first heard about the 124019; now that I have one I used these steps to help correct the exact same list of issues with mine (my shocks were fine as well).

Reply
JC
27/3/2021 01:01:40 pm

Thanks for putting all this information together, i have a 124019 in the mail comming and this helped me understand what i need to do to get it up ready.
Im going to check the site to see if it has information on how to upgrade the buggy to brushles.

Reply
Sam Harkin
11/5/2021 07:52:50 pm

Hey mate is there any spares you recommend to buy with it, common breakages etc?

Reply
QuadifyRC
12/5/2021 09:03:51 am

Hi Sam

That is a tricky one as every drives differently. Front hub carriers seem to be most common if on of the front wheels hit something https://bit.ly/3ax7hTJ

Reply
David Fruehwald
23/5/2021 02:06:36 pm

Thanks for this guide. My 124019 arrived today and the front end was every bit as messed up as your picture, one tire way out of alignment when the other was straight. Thanks to your write up I could easily adjust the error out. I have not checked the differentials yet but will once I get a chance to pickup some grease from the Walmart down the street. I didn't disassemble the shocks since they all seem to work OK and seem pretty consistent.

Reply
QuadifyRC
23/5/2021 09:42:39 pm

Nice one, glad to hear it helped

Reply
Gabriel
15/12/2021 02:58:59 pm

Hi,

Thank you for the detailing here. We’re new in the RC car subject but I got one of those cars to play with my son (Xmas present coming)

I saw I could throttle it down in a bottom on the remote so it’s easier for both of us to start at lower speeds. Said that, is there anyway to adjust the ESC as well so we can reduce the speeds further down?

This might be an uncommon question as everyone tends to want more and more speed, as I noticed on my Google searches.

Thank you

Reply
Marky
21/7/2022 10:09:00 am

I have just bought a 2600kv 2845 motor and the motor mount & lower gearing from the 124017 V2 for my son's 144002 (which he already destroyed the LED wiring on cos he is 3 and love taking things apart).

This mod also needs a new transmitter and receiver + screwdrivers, motor screws, a 3 wire steering servo, brushles ESC and loctite to complete (& possibly a blow torch to remove the old motor)

Should reduce the speed a bit more and increase running time by a noticeable amount.....but it's more work and more money.

The upside is you can then make it much faster by switching to 3s battery if you decide to make it faster later, or just up the motor KV and swap in another $20 motor.

Reply
Ian Bradby
10/2/2022 07:15:07 am

Brilliant article and have made the changes to my 124019.

I've just got a 124018 and am trying to reduce the rear toe in. Unfortuately I'm struggling to figure out how to remove the rear plate, as even after removing the rear bodywork, there is a plastic plate over the top of the metal plate holding the plastic inserts. The exploded diagram supplied with the car is difficult to interpret.

Have you wirtten anything which describes how to remove the additional parts on the 124018 to allow the same mods to be made?

Reply
QuadifyRC
29/7/2022 01:29:05 pm

Here you go, all in here: https://www.quadifyrc.com/rccarreviews/wl-toys-144001-free-or-budget-upgrades-part-2

Reply
Marky
21/7/2022 09:58:46 am

Has anyone managed to upgrade the steering block "hat" bushings to bearings?

I'm trying to remove all steering slop from one of my cars & have bearings in the ackerman(?) Bar already.

Cheers to anyone who replies :)

Reply
Marky
29/7/2022 01:35:07 pm

Hi Marky

You can buy a carbon fibre unit from etsy for the LC racing EMB1 (same size) with insert bearings that reduces slop. Or you can 3d print one and track the bearings down yourself.

Reply


Leave a Reply.

    Archives

    November 2022
    October 2022
    September 2022
    August 2022
    July 2022
    June 2022
    May 2022
    April 2022
    March 2022
    February 2022
    January 2022
    December 2021
    November 2021
    October 2021
    September 2021
    August 2021
    July 2021
    June 2021
    May 2021
    April 2021
    March 2021
    February 2021
    January 2021
    December 2020
    November 2020
    October 2020
    September 2020
    August 2020
    July 2020
    June 2020
    May 2020
    April 2020
    March 2020
    February 2020

    Categories

    All
    104001
    104002
    104009
    104072
    1/10
    124016
    124017
    124018
    124019
    144001
    144002
    144010
    16886
    16889a Pro
    184016
    284131
    4s
    4 Things
    Anti Roll Bars
    Balance
    Basher
    Battery
    Brushless
    C24
    Charging
    Cogging
    Crawler
    D22
    D32
    Diatone
    Diatone Q25
    Drift
    Drop In
    Dumborc
    Eachine EAT14
    Eachine EC30
    Eachine EC30B
    EMB-MT
    Ex07
    Ex16
    Flyhal
    Flysky FS-G7P
    Flysky Noble Pro
    FMS
    FPV Car
    Goolrc
    Guide
    Gyro
    HBX
    Hbx 901a
    HS10422
    K989
    LC12B1
    LC Racing
    Lipo
    Metal Parts
    Micro
    MJX Hyper Go
    Monster Truck
    Mx-07
    Pinion
    Preview
    Program Card
    Project WLCRacing
    Q33
    Racerstar
    Radiolink RC6GS V3
    RC Boat
    Review
    ROCHobby
    Setup
    Sg 1602
    SG 1603
    SG 1604
    Soldering
    Spectre
    Speed Run
    Stance
    Surpass Hobby
    Timing
    Transmitter
    Tuning
    Tyres
    Upgrade
    Vinyl
    Wheels
    WL916
    Wltoys
    WL Toys
    Wpl
    Zd Racing

    RSS Feed

Thanks for visiting QuadifyRC.com Follow us on facebook below to get all the latest updates
  • RC Cars
  • Car of the Month
  • Quad Reviews
  • Quad Mods
  • COUPONS AND DISCOUNTS
  • Long Range
  • About & Contact