QUADIFYRC MODS AND REVIEWS
  • RC Cars
  • Car of the Month
  • Quad Reviews
  • Quad Mods
  • COUPONS AND DISCOUNTS
  • Long Range
  • About & Contact

QUADIFYRC RC Car Review and Upgrade Guides

Fix cogging in your WL Toys 124017, 124016 or Eachine EAT14 for $27 (or as little as $12)

16/5/2022

4 Comments

 
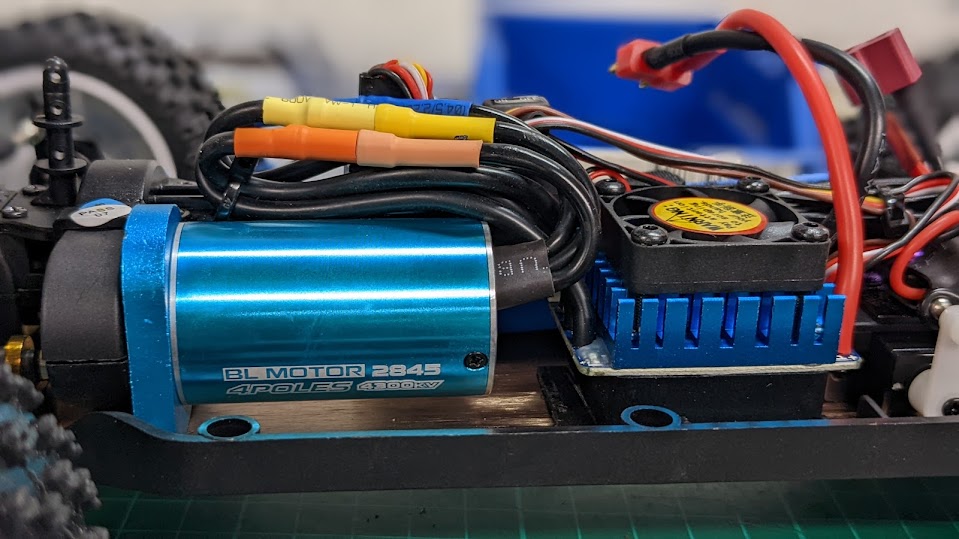
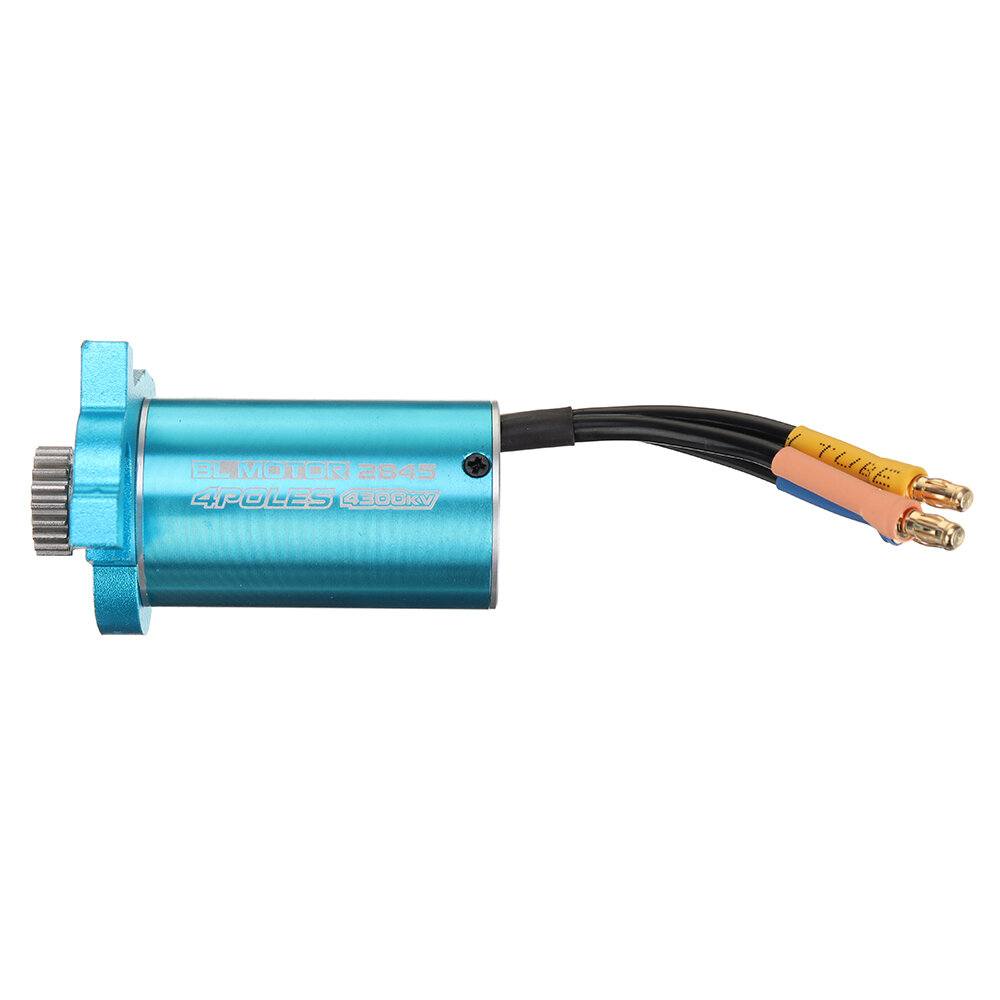
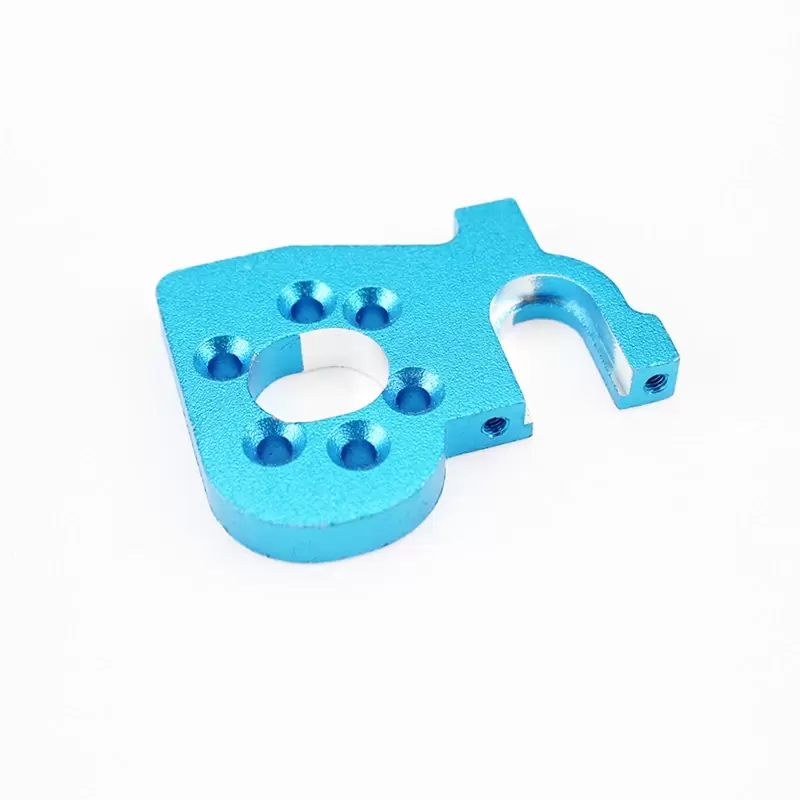
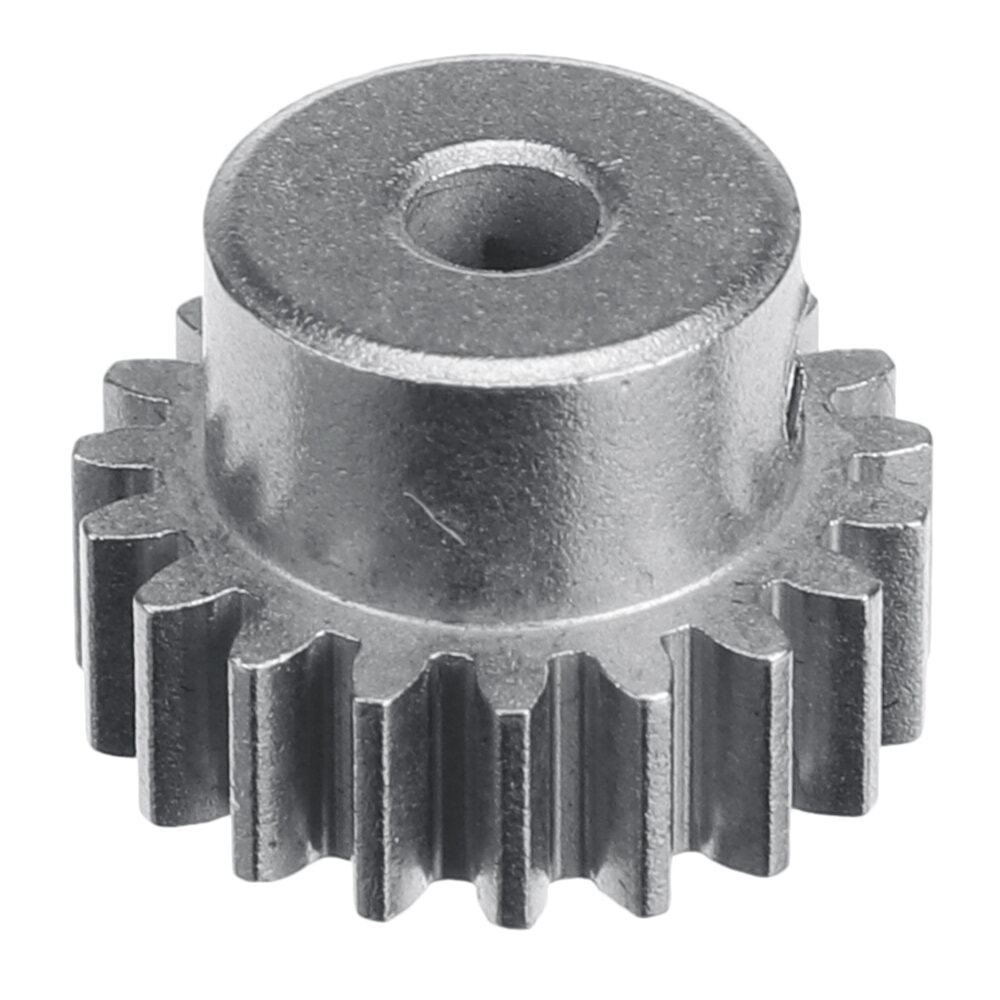
It was an anticlimax to say the least when WL Toys finally launched their first factory brushless cars. Due to the cheap ESC but moreso the tall gearing they were plagued with issues of cogging - the stuttering of the motor as it struggles to move from pole to pole at low speeds and the loss of torque as a result. You can see this issue in my review of the Eachine EAT14 which has the same problem. WL Toys solved this problem with a hasty update to V2 with a shorter gearing and a higher kv motor. Here is the new 124017 V2 and 124016 V2 (it's hard to find the V1 any more)

I've already written this article to show fixes based on parts available at the time but now I have a new fixed based on newly available parts from the V2 that should solve your problem for just $27 (or as cheap as $15 if you reuse your motor) . Read on and follow me as I "fix" my 124017
Picture
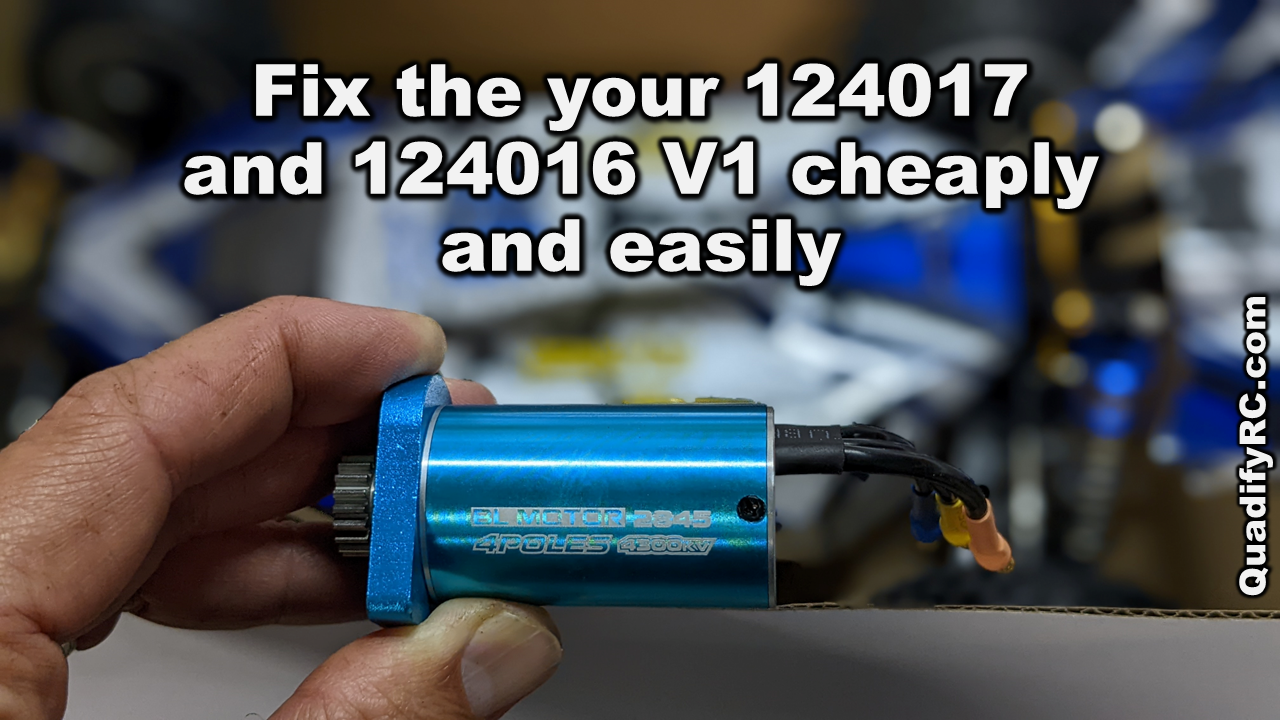
As per this article I have fixes for the cogging in the 124016, 124017 and Eachine EAT14 which have the shorter gearing that I prefer however they are not especially cheap fixes though remain my favourite in terms of performance.

If you want to keep the improvement cheap and quick though there are 2 new options for you:
  1. Buy the 4300kv motor, mount and 19t pinion all from the V2 spec as a preassembled kit here for just $27. This will give you the V2 powertrain with a top speed of 71km/h and zero cogging
  2. Buy just the motor mount and 19t pinion from the V2 and re-use your 3400kv motor. Top speed will be down to around 55km/h but cogging will be gone. I quite like this speed and efficiency if you plan on bashing
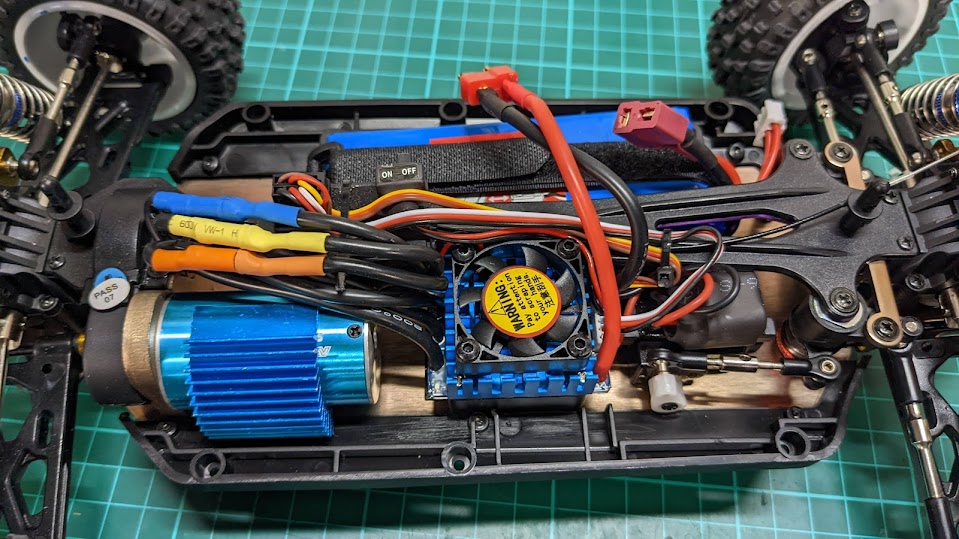
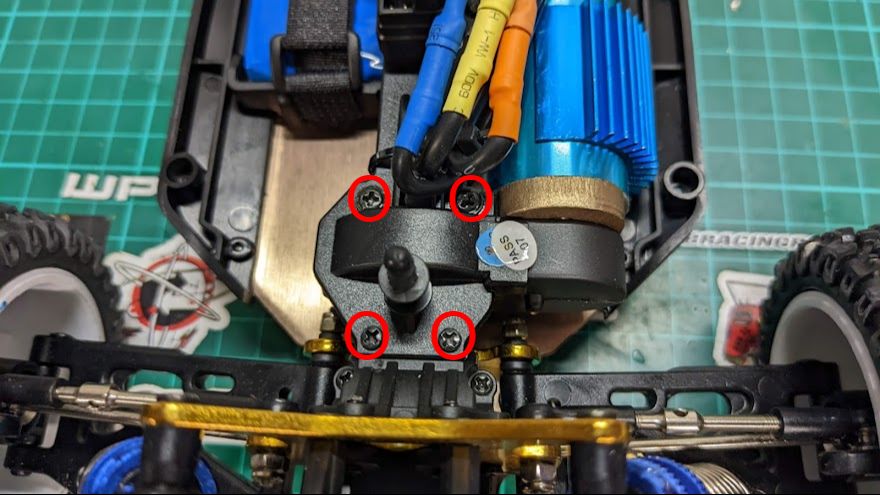
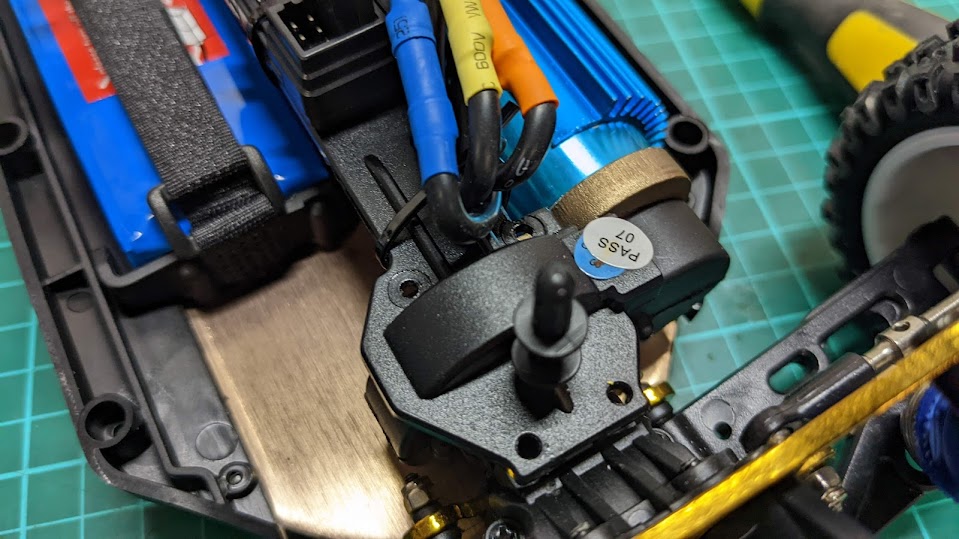
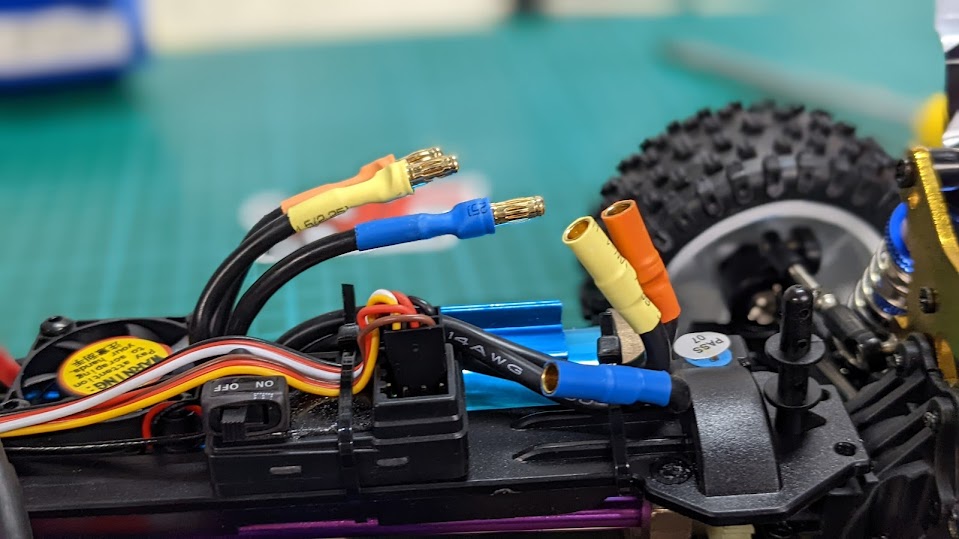
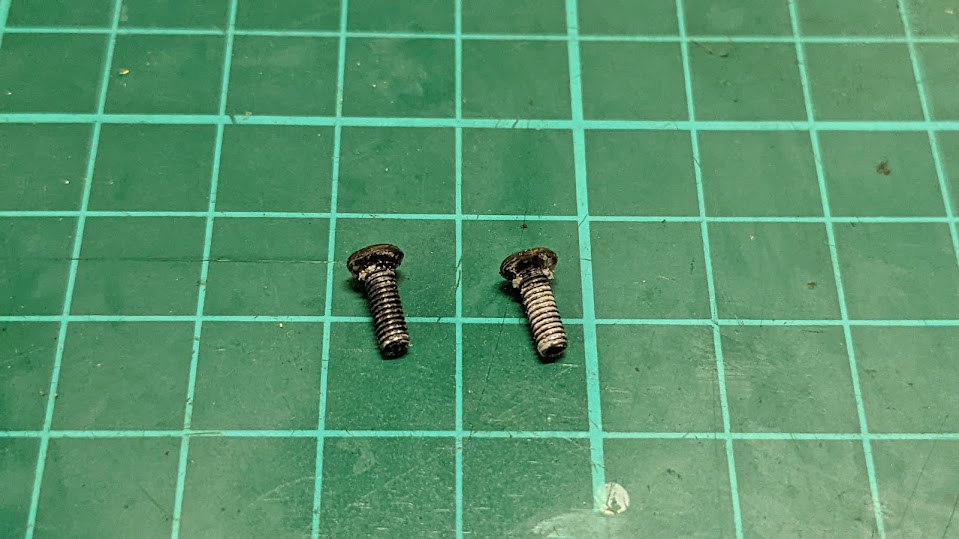
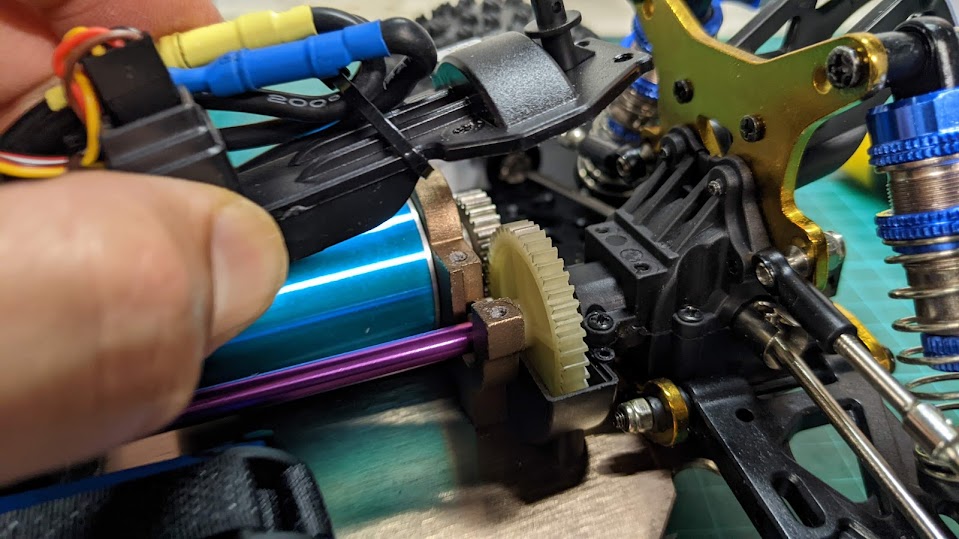
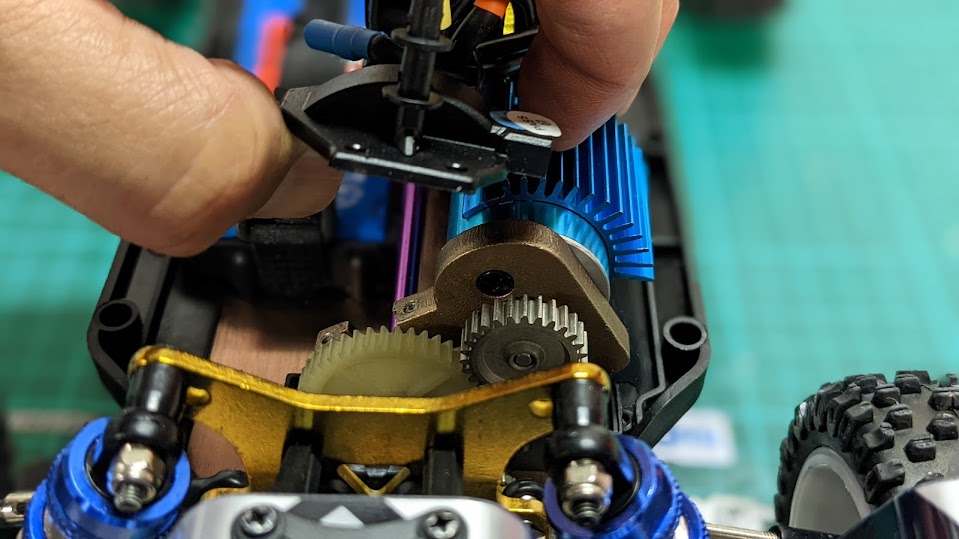
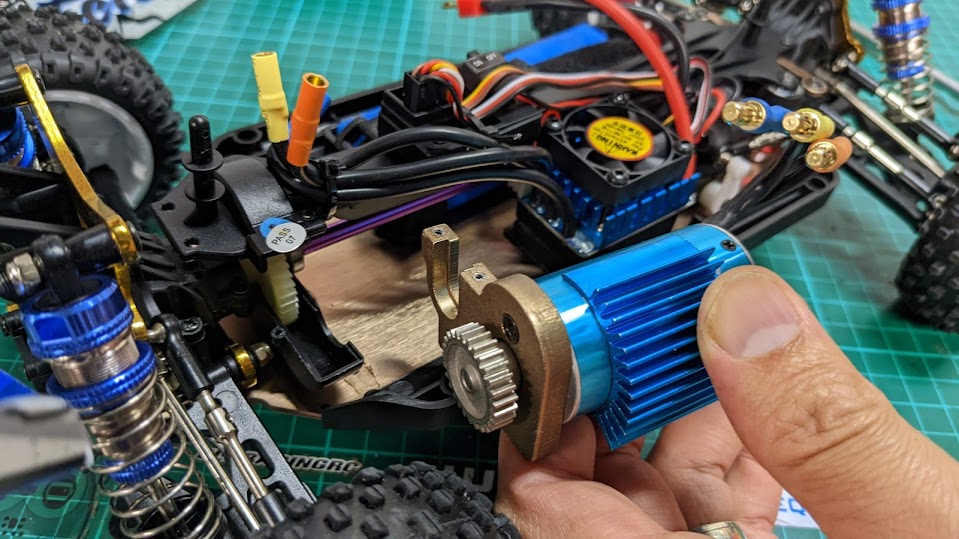
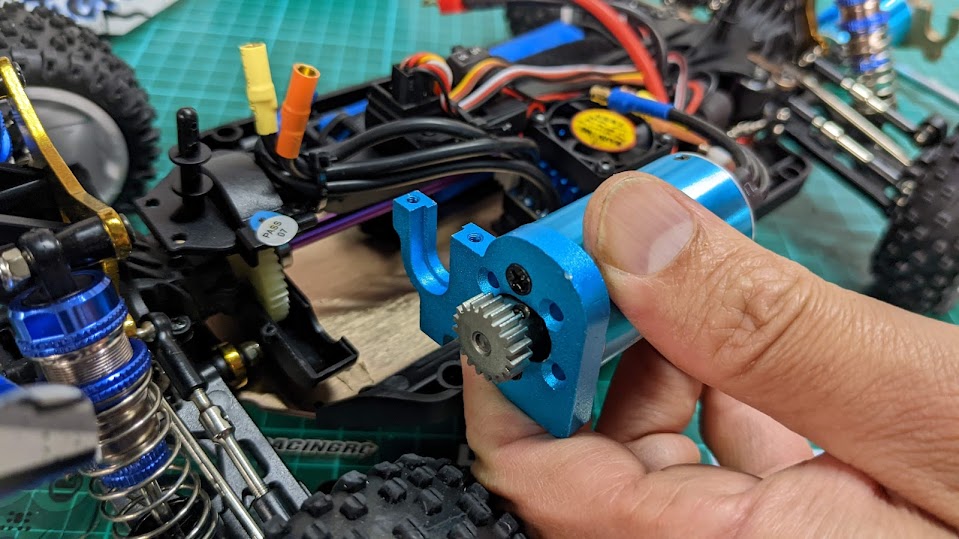
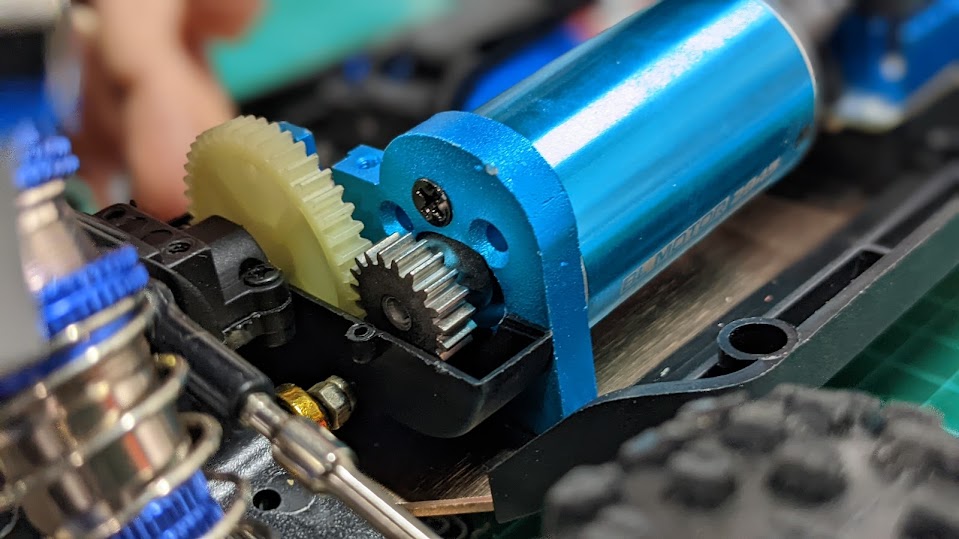
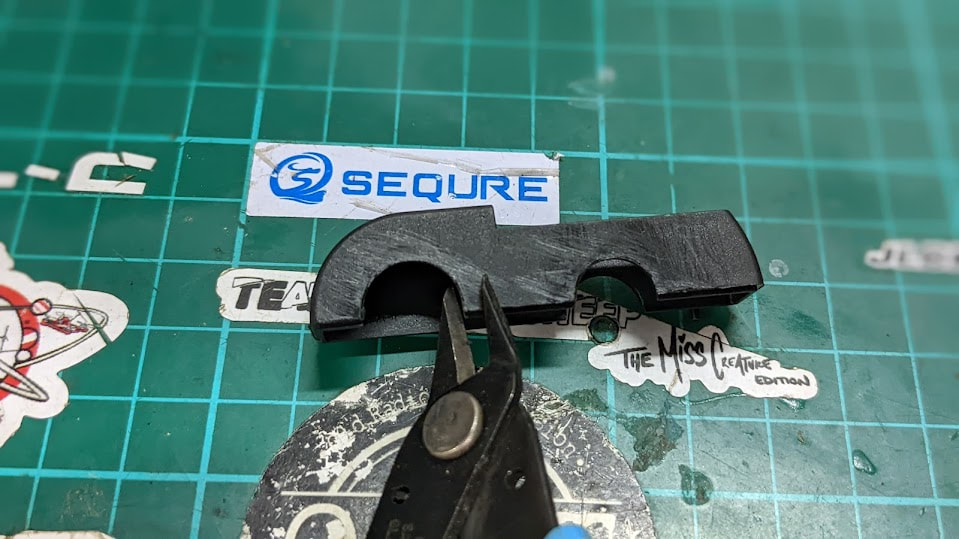
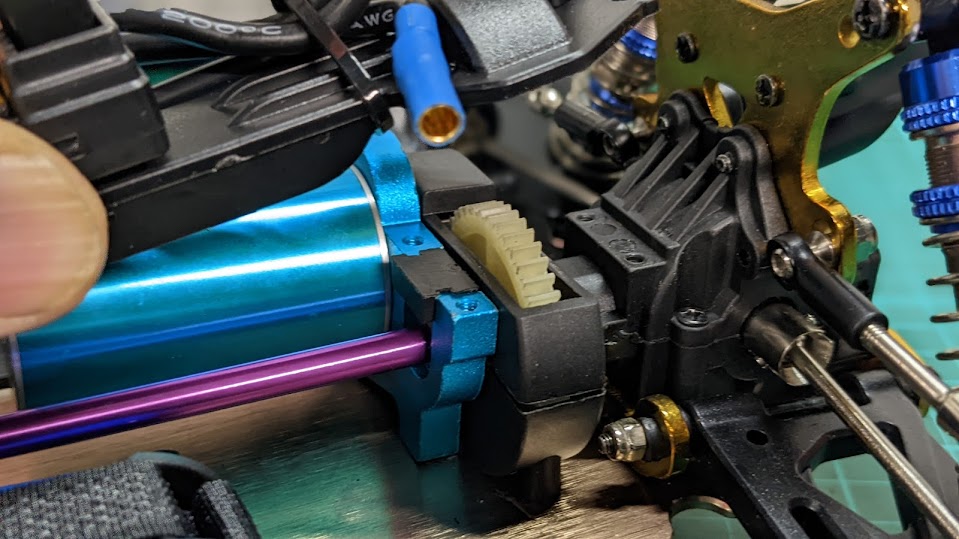
Installation guide
The guide below is for option 2 but if you want to do option 1 you'll need to swap the motor mount and pinion from old to new.
Picture
You can tell the V1 externally by the brown motor mount (although the 144010 uses this colour). A better indication though is the writing on the motor which shows it as 3400kv for V1 and 4300kv for V2
Picture
Remove the 4 screws circled in red. The top 2 can be tight so use a good driver.
Picture
Screws are not out - don't lose them!!
Picture
Un-plug the wires from the motor to the ESC. 
Picture
This is the rear of the car from the underside. You'll need to remove the 2 screws circled above
Picture
I should warn you now that these screws are tight as WL Toys chose to you superglue rather than loctite. A little butane torch like this one is great for melting the glue.
Picture
You'll need to apply heat on the screws like this for about 20 seconds then use a good drive to unscrew. Don't burn yourself!
Picture
Here are the screws after removal. Check out how much glue was used.
Picture
lift up the top deck, you'll need to remove the plastic gear shroud and drive shaft guide
Picture
Here they are with the plastic parts removed
Picture
Next rotate the motor mount about the drive shaft
Picture
And remove the old motor and mount. At this point you can move the heatsink to the new motor or if you are keeping the 3400kv motor, move it to the new mount and 19t pinion. 
Picture
New motor, mount and pinion ready to go in. It's good that this is how the parts arrived (preassembled)
Picture
You'll need to trim the lower shroud a little because the motor now sits closer to centre of the car
Picture
This is how mine looked and can confirm it doesn't foul on the motor
Picture
New motor mount in the opposite way you removed. Gear mesh is perfect and doesn't need adjusting - one advantage of fixed motor mounts.
Picture
Top gear shroud needs trimming similar to the bottom one. I used these side cutters
Picture
Trimmed upper gear shroud is back in and fits cleanly. Don't forget the little black plastic drive shaft guide (I usually do!)
Picture
Upper deck screws back in - M2.5 buttons screws at the front and smaller machine screws at the back
Picture
Screws back in the bottom. I've never bothered with locktite on these but you can use blue if you wish
Picture
Motor plugged back in - keep with the same colours bit if you find it going in reverse swap any two of the the three
Picture
All hooked up and ready to go. I chose not to use the motor heatsink but you can easily change it over
Picture
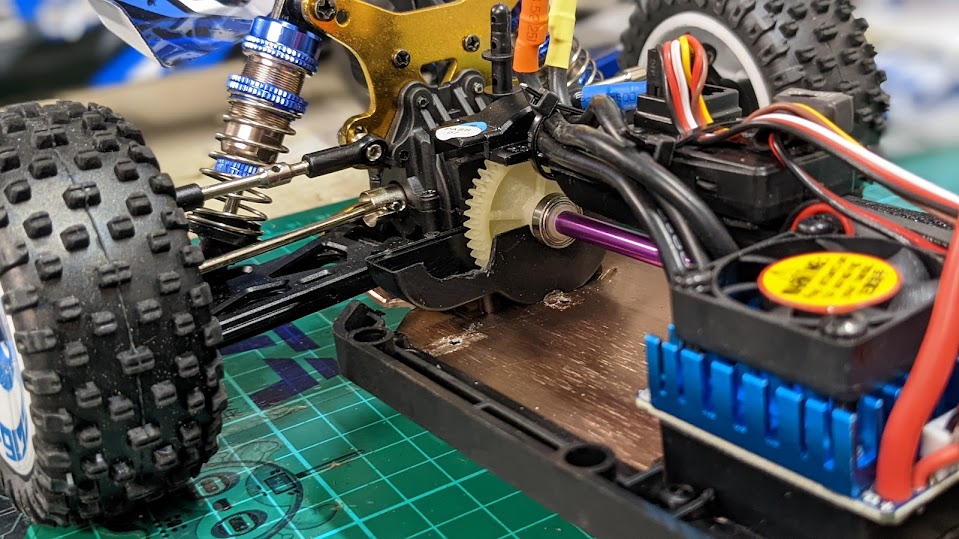
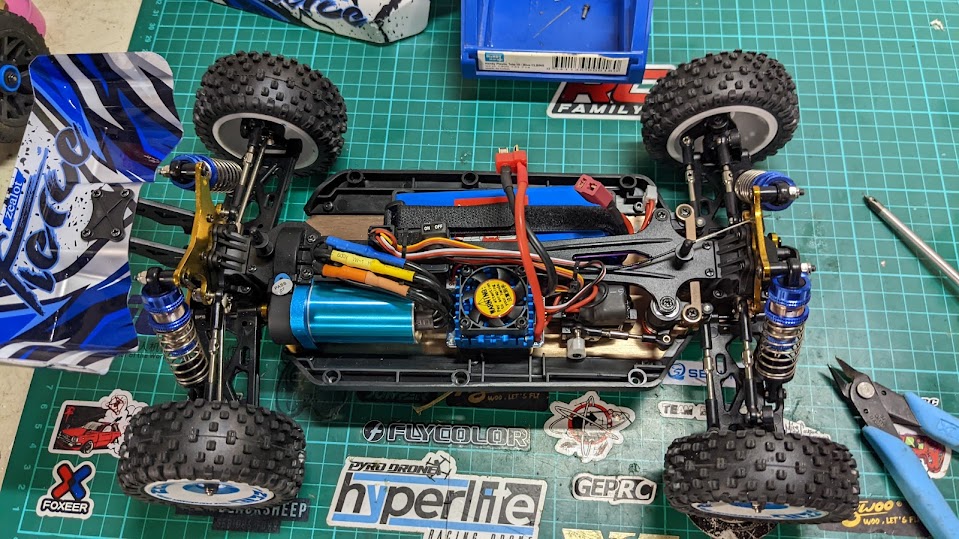
Time for a drive with no cogging and less stress on the electronics
What performance can you expect?
So you've swapped a low KV motor and large pinion for a high kv motor and smaller pinion. Top speed will be very similar - I measured 71km/h with this combo in my WL Toys 144010 review here. Acceleration will be sharper but most importantly the cogging will be gone. If you want to look at other motor and pinion combos I have written a list of alternative options here but nothing beats the V2 swap for simplicity and top speed for stock electronics. If you have a V1 this is a MUST DO mod.
Parts used
Picture
4300kv motor with the 124017 V2 motor mount and 19t pinion. This is all you need if you want the same power train as the V2. Description says ​"Only 2845 4300KV Motor" but I can confirm it includes mount and pinion
Picture
124017 V2 motor mount. You'll need this one as it has the preset holes for the 19t pinion. This vendor from aliexpress shipped really quick ONLY NEEDED IF YOU WANT TO REUSE YOUR MOTOR
Picture
19t pinion from the 124017 V2 ONLY NEEDED IF YOU WANT TO REUSE YOUR MOTOR
If you are looking for a discount on this car, I will post any coupon codes or flash sales for it over here on my coupons and discounts page. Remember buying from any of these links supports my page without any cost to you and is appreciated especially since I don't ask for money via patreon and the like. If you want to get involved in this discussion, feel free to join the QuadifyRC Facebook Group Here or like my page below
4 Comments
Diego
26/5/2022 07:26:28 am

Hi Quad, very nice and useful website. Had to replace motor/mount/pinion on my V1 124017 buggy in order to fix cogging issues. Now I'm experiencing throttle delay on my brand new 144010. No way WLToys could have not detected these issues. It's very disappointing!

Reply
QuadifyRC
28/5/2022 09:19:48 pm

Thanks Diego, I appreciate that. The throttle delay is because they elected to use a cheap ESC which is one of the way to keep the price low. For many users it's fine but when you can feel it, it is annoying.

Reply
Julien
31/5/2022 09:37:24 pm

Hi, I am beginner and I loved your website. After 2 months with my 124018, I am hesitating to convert it to a brushless motor or to buy directly a 124016 V2. Prices between conversion and buy a new one are not so far. This is not the same philosophy, but have you an opinion about that ?

Reply
Jeff
1/6/2022 02:31:26 am

Buy the new one, definitely!
Having two cars is infinitely better, make them specialized for different surfaces and conditions! Fun.

Reply


Leave a Reply.

    Archives

    June 2022
    May 2022
    April 2022
    March 2022
    February 2022
    January 2022
    December 2021
    November 2021
    October 2021
    September 2021
    August 2021
    July 2021
    June 2021
    May 2021
    April 2021
    March 2021
    February 2021
    January 2021
    December 2020
    November 2020
    October 2020
    September 2020
    August 2020
    July 2020
    June 2020
    May 2020
    April 2020
    March 2020
    February 2020

    Categories

    All
    104001
    104009
    1/10
    124016
    124017
    124018
    124019
    144001
    144002
    144010
    16886
    16889a Pro
    284131
    4s
    4 Things
    Anti Roll Bars
    Balance
    Basher
    Battery
    Brushless
    C24
    Charging
    Cogging
    Crawler
    Diatone
    Drift
    Drop In
    Dumborc
    Eachine EAT14
    Eachine EC30
    EMB-MT
    Ex07
    Ex16
    Flyhal
    Flysky Noble Pro
    FMS
    Goolrc
    Guide
    Gyro
    HBX
    Hbx 901a
    HS10422
    K989
    LC12B1
    LC Racing
    Lipo
    Metal Parts
    Micro
    Monster Truck
    Pinion
    Preview
    Program Card
    Project WLCRacing
    Q33
    Racerstar
    Review
    ROCHobby
    Setup
    Sg 1602
    SG 1603
    SG 1604
    Soldering
    Spectre
    Speed Run
    Stance
    Surpass Hobby
    Timing
    Transmitter
    Tuning
    Tyres
    Upgrade
    Vinyl
    Wheels
    Wltoys
    WL Toys
    Wpl
    Zd Racing

    RSS Feed

Thanks for visiting QuadifyRC.com Follow us on facebook below to get all the latest updates
  • RC Cars
  • Car of the Month
  • Quad Reviews
  • Quad Mods
  • COUPONS AND DISCOUNTS
  • Long Range
  • About & Contact