QUADIFYRC MODS AND REVIEWS
  • RC Cars
  • Car of the Month
  • Quad Reviews
  • Quad Mods
  • COUPONS AND DISCOUNTS
  • Long Range
  • About & Contact

QUADIFYRC RC Car Review and Upgrade Guides

Wl TOYS 144001 124018 124019 Custom Driveshaft Upgrade Mod

7/5/2021

11 Comments

 
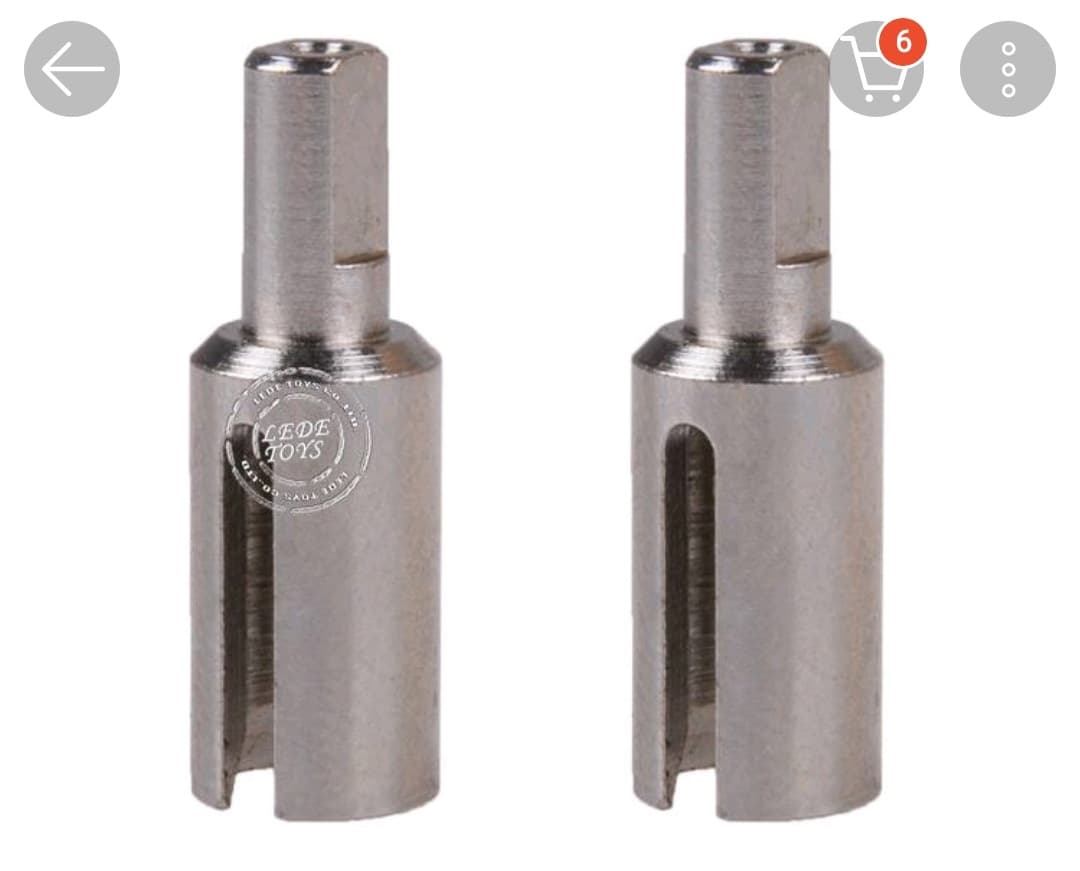
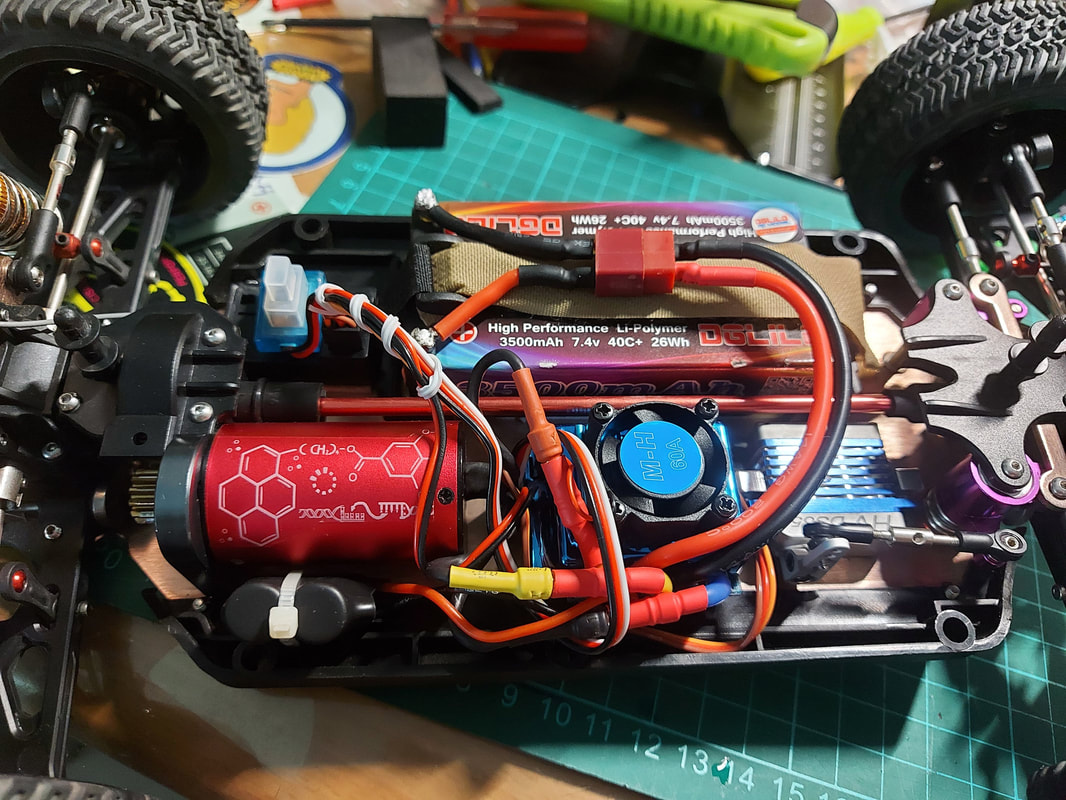
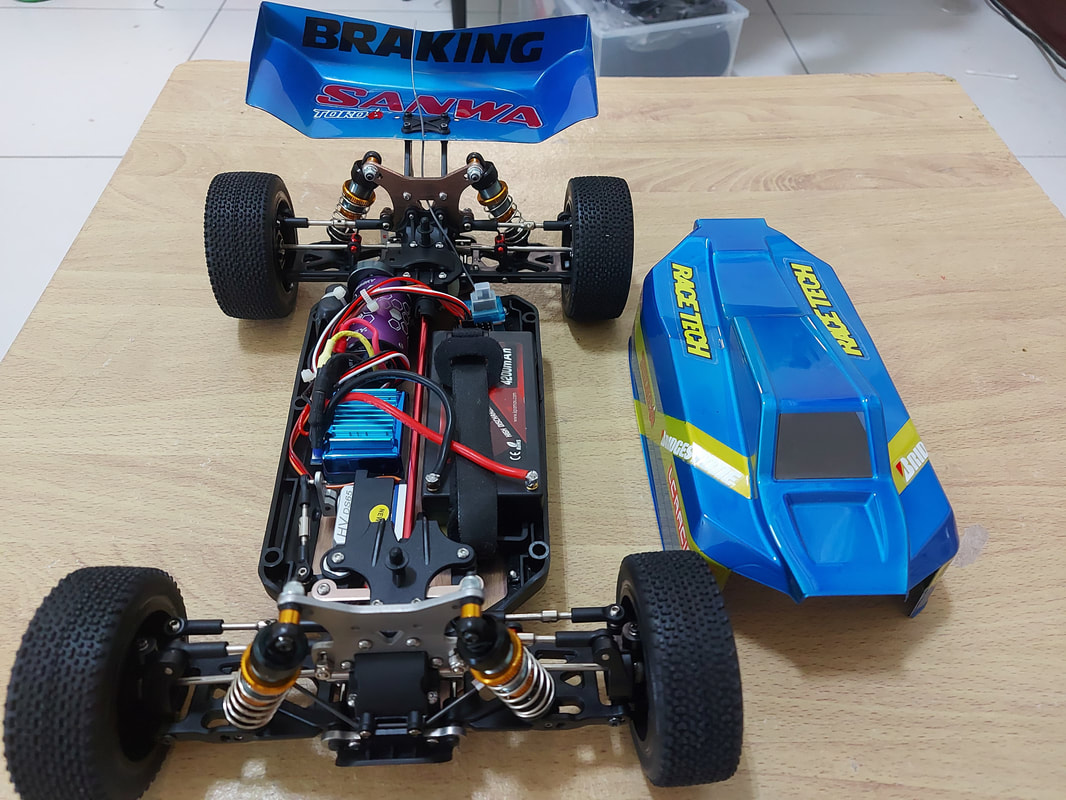
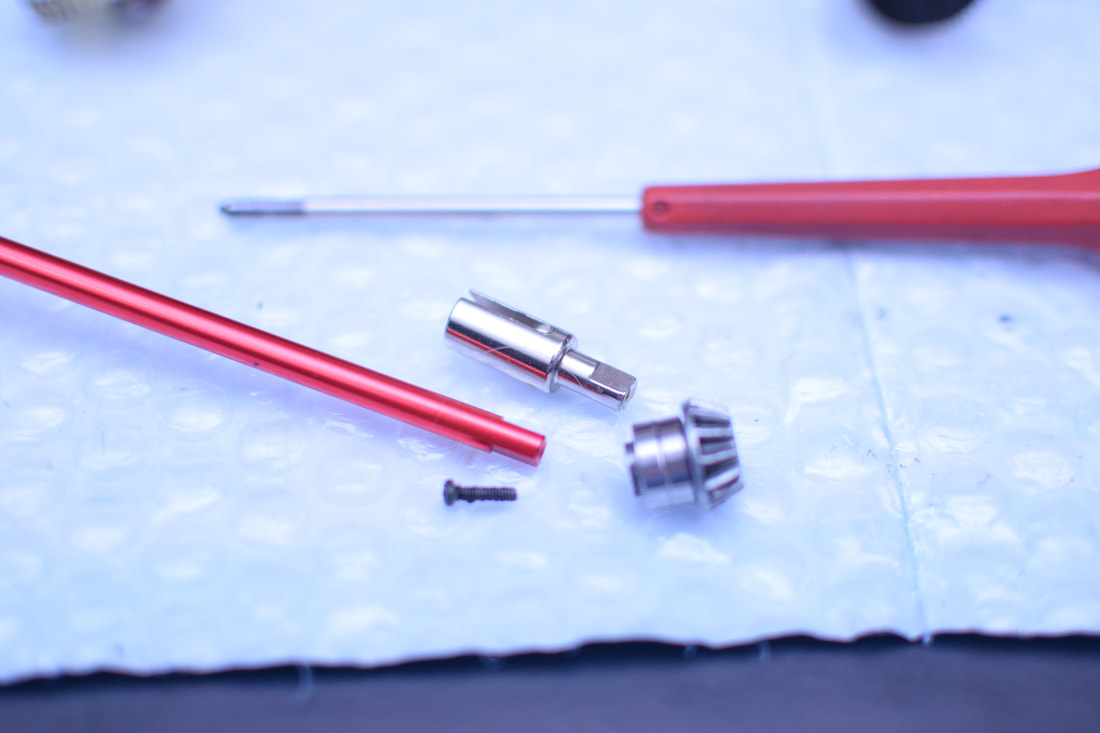
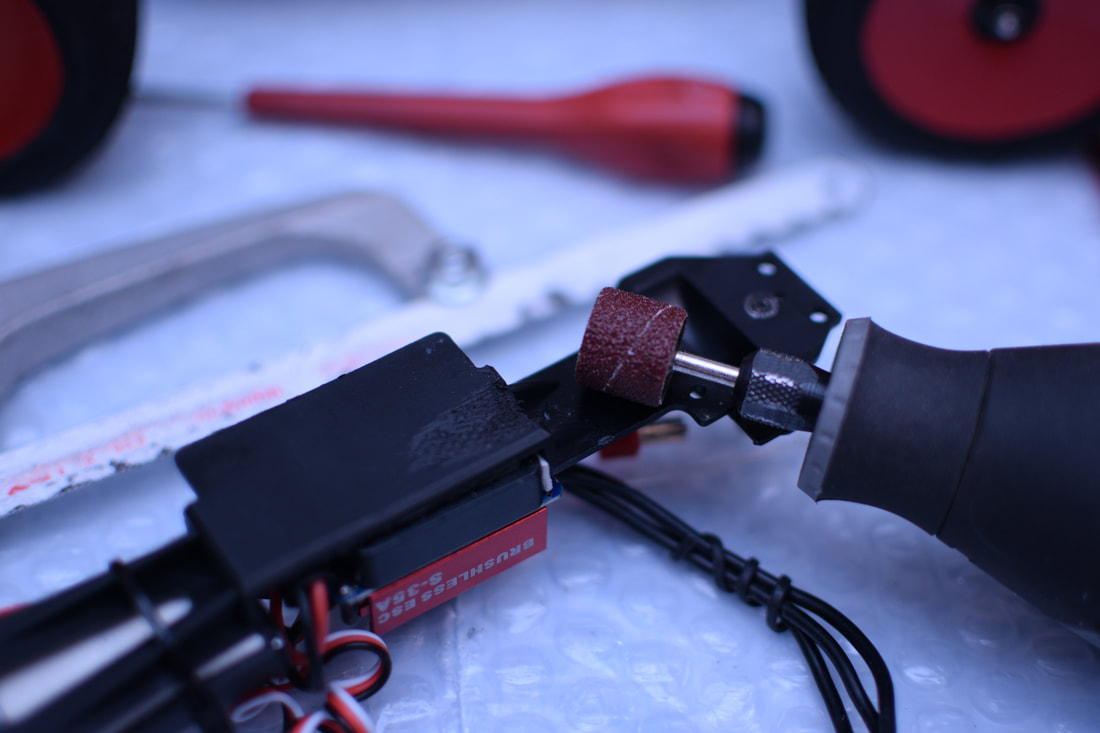
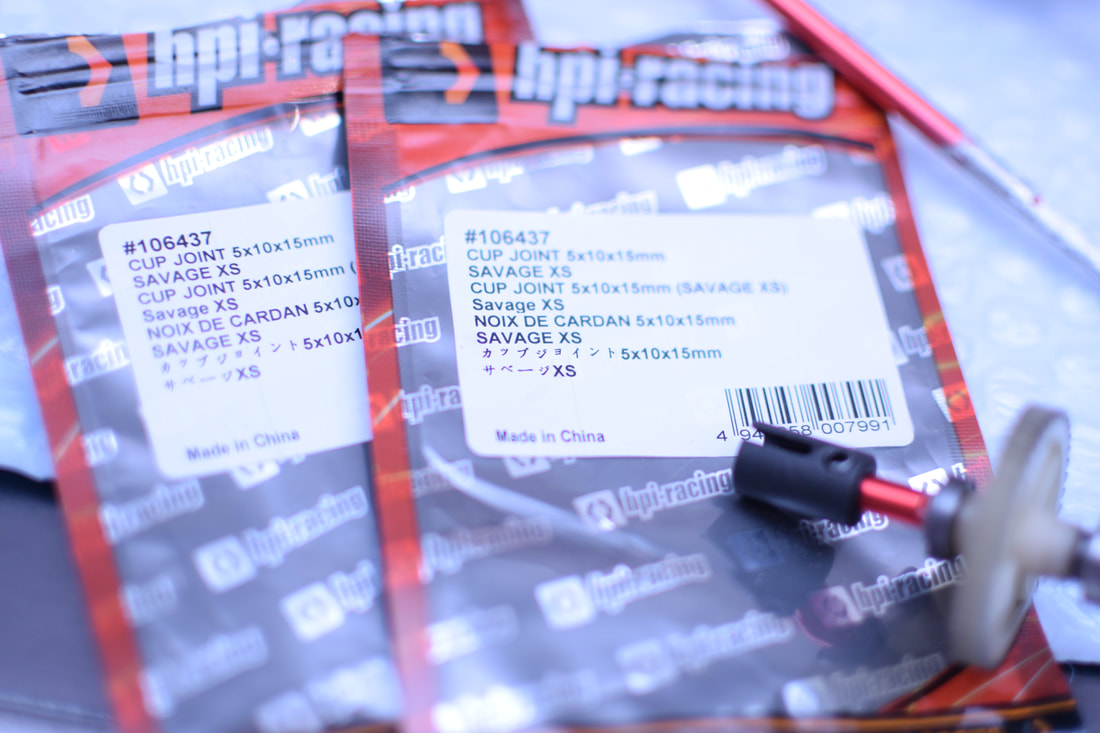
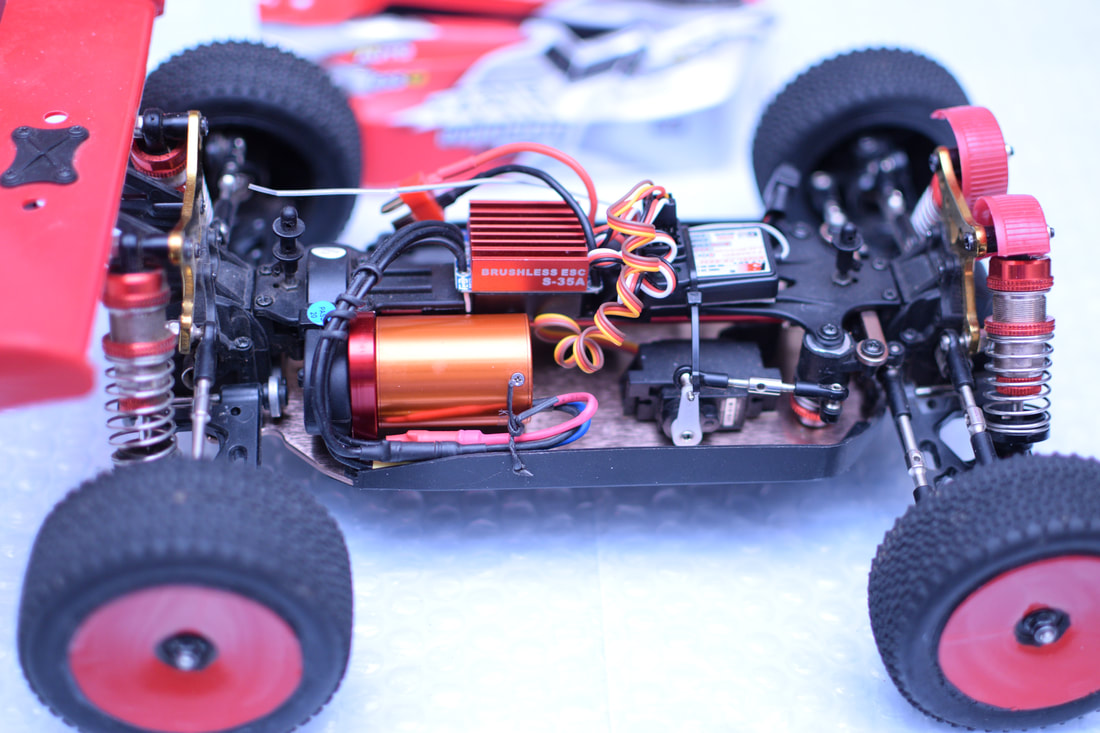
The WL Toys 144001 and 124018 / 124019 are a series of 1/14 and 1/12 scale off RC cars that are not only cheap and cheerful but have proven very popular to modify due to their value and versatility. In this article we look at the upgrade of the driveshaft to a sectional unit that will make it easier to service the car and more durable in crashes.
Picture
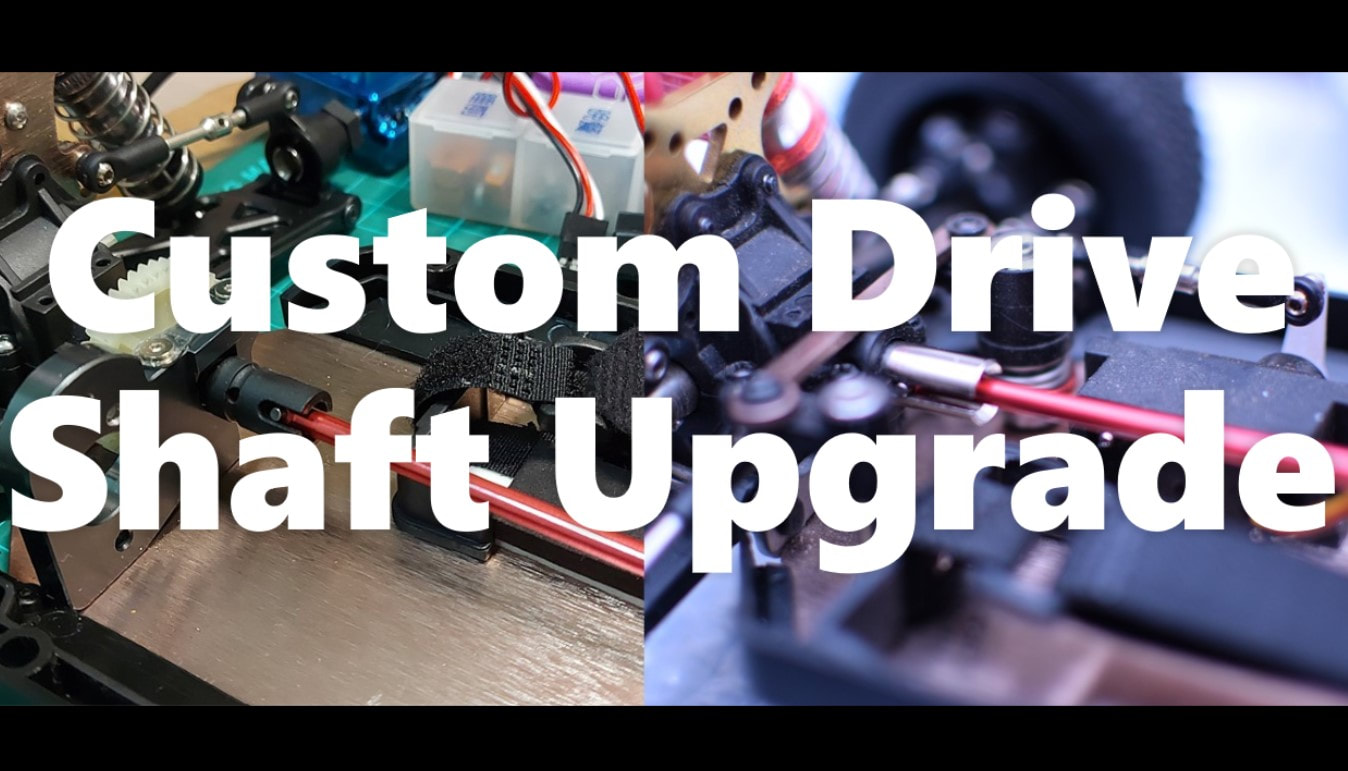
The beauty with the community of modders for the WLToys 144001/124019/124018 is that there’s so much sharing of ideas happening. I find it refreshing how this little platform has brought people together to think of new hacks and mods that wouldn’t have been done otherwise. Here we present the center driveshaft modification to go from a rigid center driveshaft to a floating driveshaft. The first instance of this modification was shared by Scott Dump from Taiwan on his WLToys 124019. This approach and was further refined by Ron Wilson but used on his 144001 and shared with the QuadifyRC 144001 124018 124019 104001 Modders Group. Scott was also generous enough to share the parts he used, a simple step-by-step with several pictures of his version of this modification for the 124019. Ron was kind enough to provide his own write-up for the parts and a step-by-step walk-through for his modified 144001. 

This modification can be done for either WLToys 1/14 or 1/12 platforms by using either the shorter LC Racing EMB-1 driveshaft or longer EMB-T driveshaft. I want to thank Scott and Ron for contributing their mod with the community and letting us share it on this platform. This mod is considered medium skill level, can be done with or without power tools, but power tools will make it easier and a little quicker.
Option 1: Scott Dump’s Floating Driveshaft Modification
Scott’s floating driveshaft mod was the first instance of this kind shared with the WLToys Facebook community. His 124019 is built to race on a dirt track. The move to a floating driveshaft to avoid bending the driveshaft in case of a crash and allowed him to delete part of the top deck to make room for a bigger battery and ESC upgrade.

Parts Required :
  • 1x LC Racing L6037 middle dog bone for EMB-T (for 124018/124019)
  • 1x WLToys 12428 outdrive metal diff cup (0081)
  • 1x Carten 1/10 T410R RC drive cup set (Taiwanese company)
Scott’s original execution for this modification:
Picture
1) Using the outdrive cup from the 12428 to attached directly to the bevel gear, this enables the front section for where the LC Racing L6037 driveshaft can sit.
Picture
2) Using a larger 5mm diameter drive cut set (sourced locally from a Taiwanese brand called Carten) to fit over the stock WLToys driveshaft, this enables the rear section to accommodate the LC Racing driveshaft.
Picture
3) A hole was drilled a hole through the driveshaft to be able to drop a pin to hold the Carten cup in place. 
Picture
4) The assembled unit for the front and rear sections can now be fitted back into the car.
Picture
5) The spur gear assembly can now be placed back in the original position and the LC Racing driveshaft sits in between. 
Picture
6) With the car fully assembled, this mod enables the chassis to flex a bit in the even of an impact and avoids bending the driveshaft.
Picture
7) Ready to race!
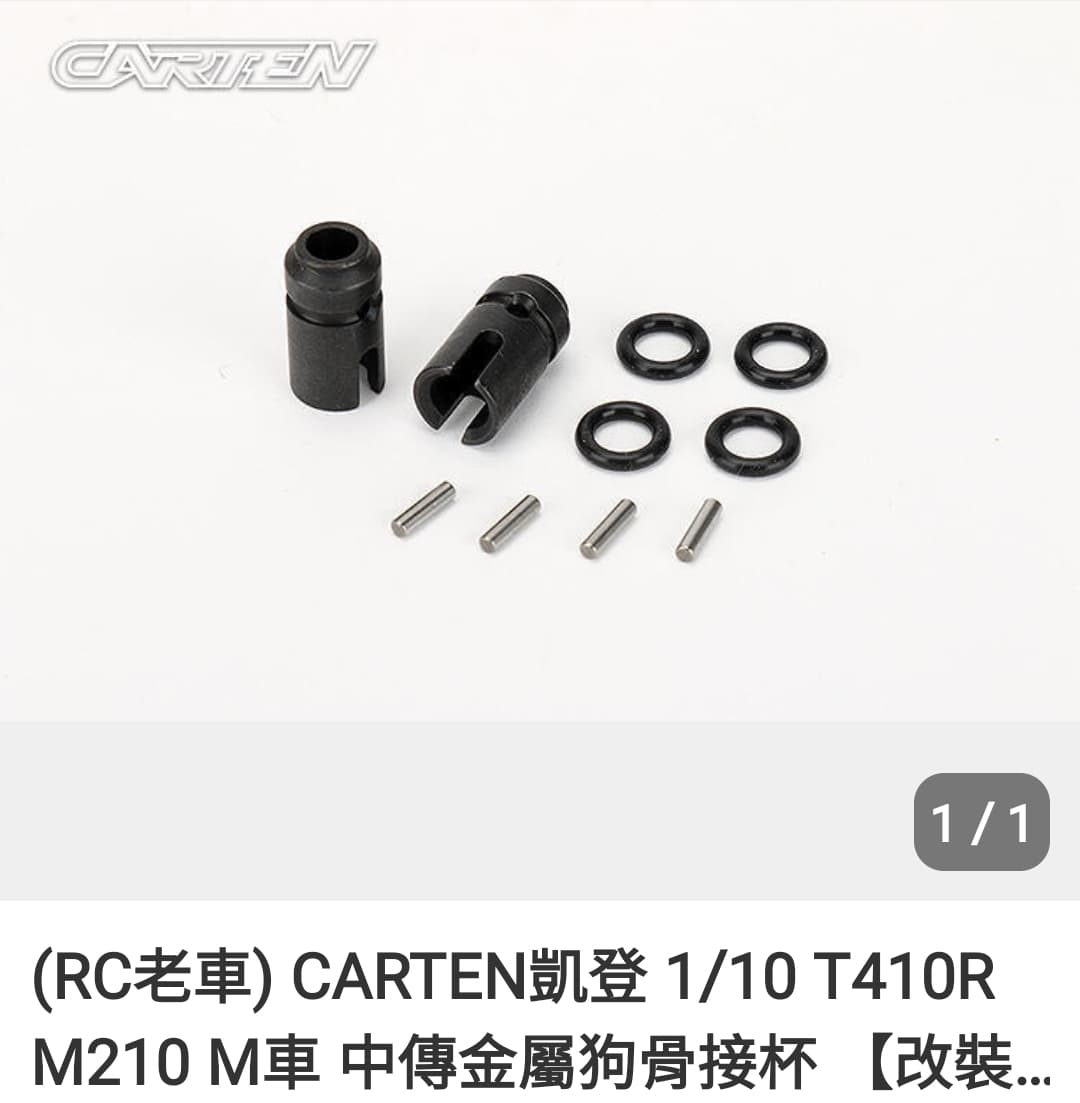
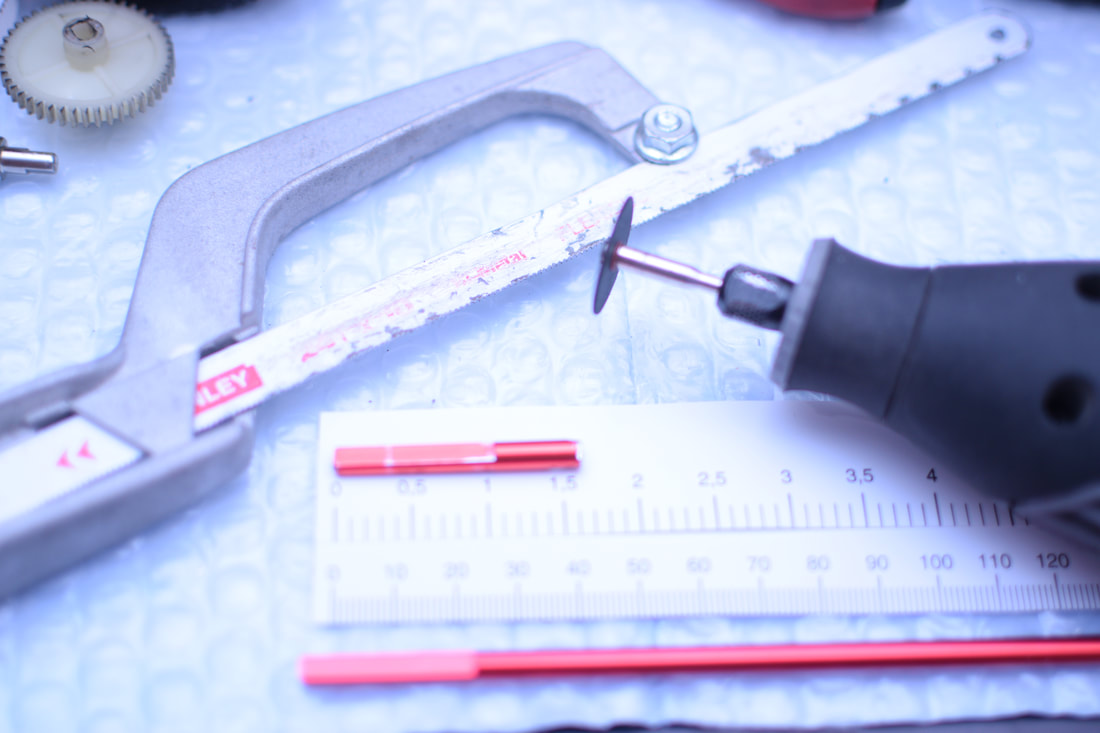
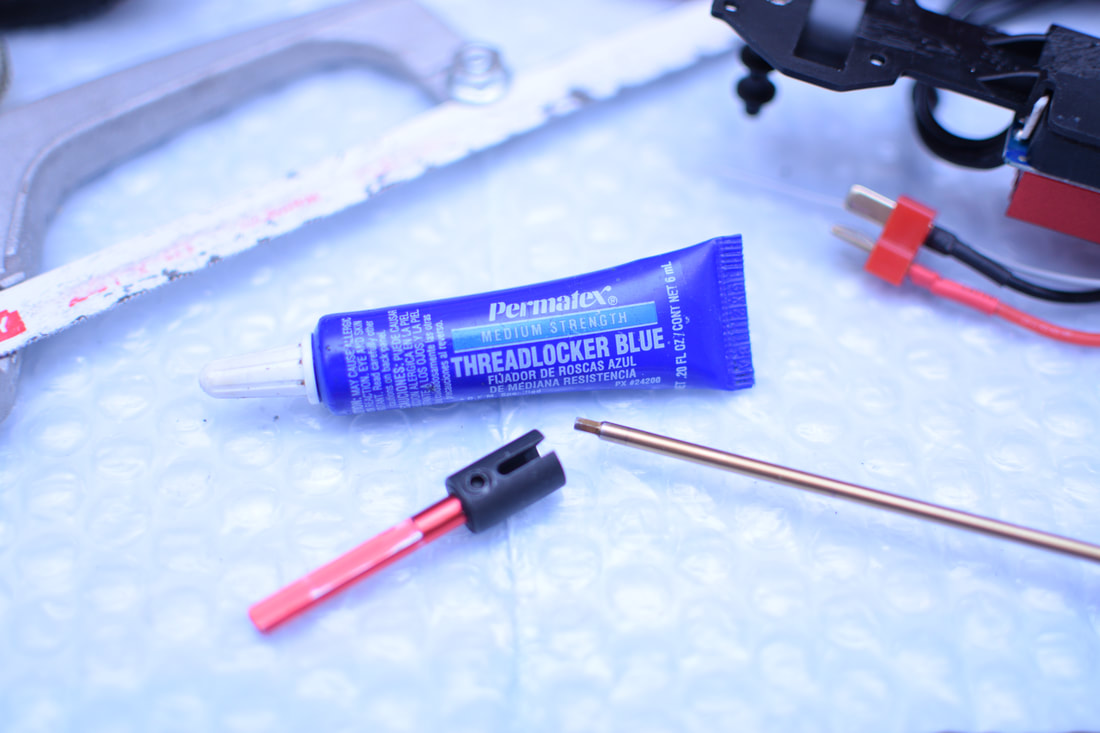
Option 2: Ron Wilson’s Floating Driveshaft Mod
This mod needs 3 additional parts and the rest are reused parts on the car. Total cost about $20-25

Parts Required:
  • 1x 5X10X15mm cup joint HPI for Savage XS 
  • 1x LC Racing L6038 middle dog bone for EMB-1 (for 144001) OR L6037 middle dog bone for EMB-T (for 124018/124019)
  • 1x WLToys 12428 outdrive metal diff cup (0081)

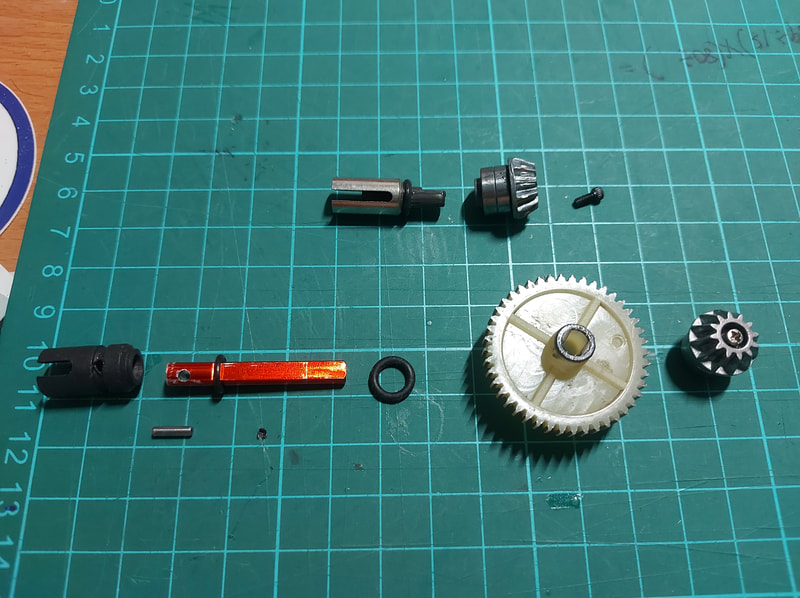
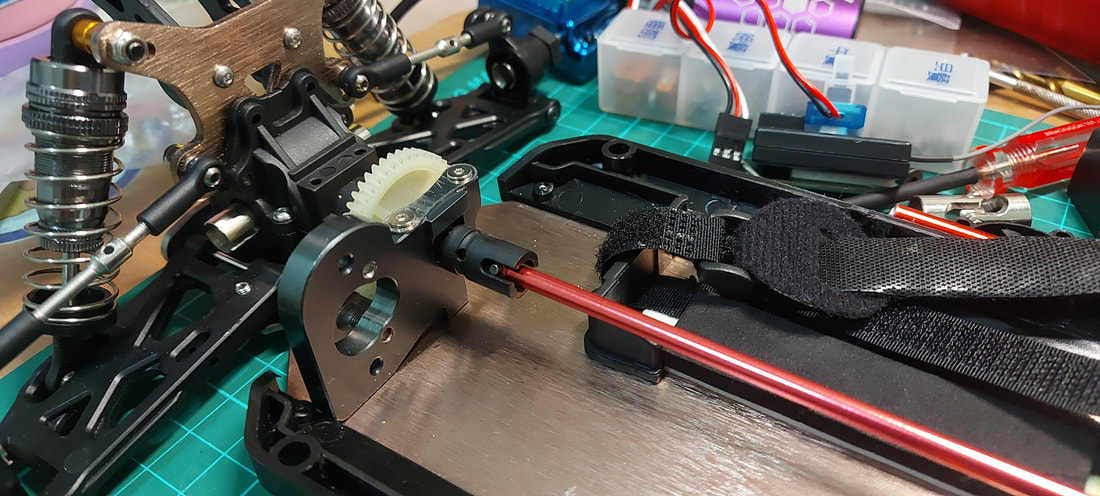
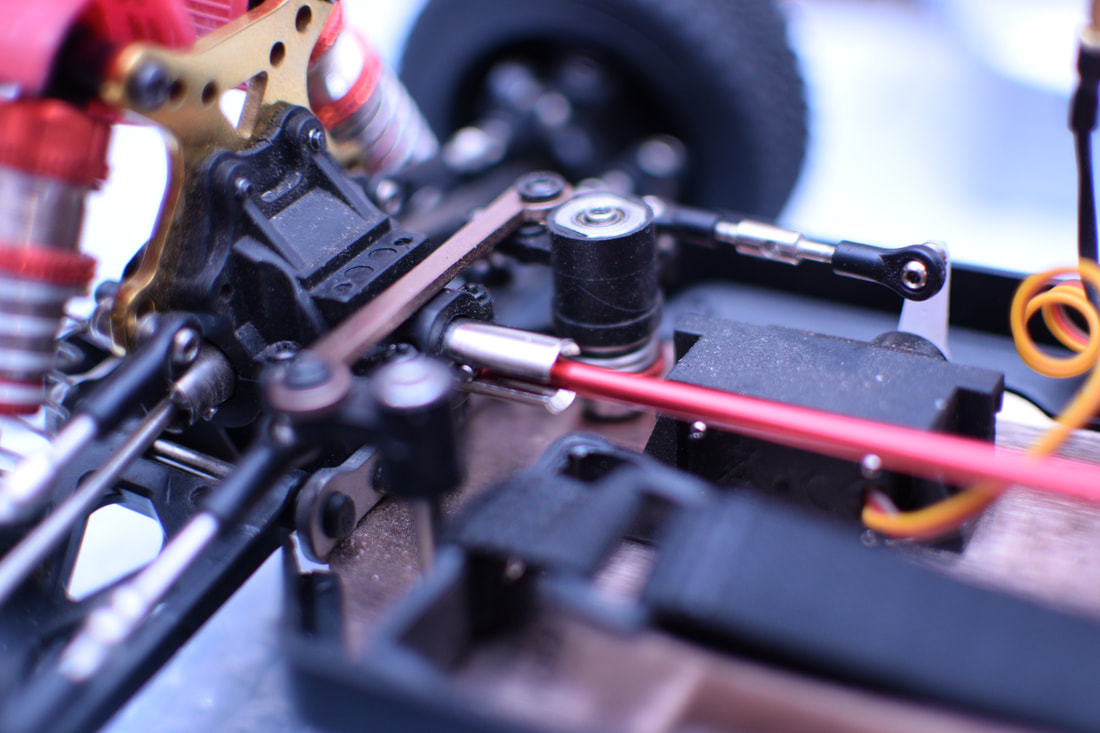
Why do we want to do this mod?
The 144001, 124019 and 124018 cars have a rigid drive shaft. When jumping or in the event of a frontal impact, the chassis can flex and jam the shaft and gear into the diffs with enough force to damage the diff gears as well as bending the center shaft. This is a common issue and this mod will allow the front and rear diffs to sort of float on the chassis and allow it to flex a little and still function smoothly. The original LC Racing EMB cars all have floating dog bones for the center driveshaft, which is what makes this modification possible.

How to:
Picture
First tear down the car and remove the drive shaft, this involves removing the top deck and both diff cases for the car. With the driveshaft removed you need to remove the front bevel gear off the shaft, which may require heating the screw. You will be reusing the screw so be careful not to damage it during removal. If you are heating it with a heat gun or a torch, be sure to slide the bearings away so they are not damaged from the heat.
Picture
​Once you remove the gear off of the center shaft, use Loctite to screw the bevel gear and the 2 bearings to the 12428 cup (0081). This will be the completed front drive cup for driving the front diff.
Picture
With the remaining driveshaft, you will need to cut the it to 43mm long. Before cutting the stock drive shaft, I put the L6038 LC racing dog bone in the front cup assembly and then laid the dog bone in position with the HPI cup joint on the shaft and then slide the HPI cup back until it was where I wanted it to be. 
Picture
The IMPORTANT part of this mod is the dog bone needs to be loose in the 2 cups, the dog bone needs to slide front to back in the cups 2-3mm, 5mm max as this will give some slack for chassis to flex without tearing up the front and rear diff gears and the bending the center shaft. If there isn’t any slack, things will get damaged as if it were the stock center shaft setup. Too much slack the dog bone will fall out, which is something you don’t want when the car is flying down the road at 40mph. If you cut about 43-45mm you can then adjust it if you need once its in place and allow you to move it back and forth. If the dog bone is in and the pins are all the way to the end of the slots, this is to long and you need to cut or grind a little bit away for more clearance.
Picture
For the final steps you can do a few things. You can grind a flat spot in the cut down drive shaft to screw the grub screw or you can drill a little counter sunk hole in the shaft for the grub screw (this was what I did). I used a 1/8" drill bit and just drilled down enough until the grub screw was flush with the outside of the cup. It is important to Loctite the screw in so it does not come loose.
Picture
The last step is needed if you are doing this modification on the 144001 and needs to be done before you put the top deck on. It is necessary to clear away a little bit of the top deck, because of the drop-down section on the back corner of the top plate will rub the rear HPI cup. If the top plate were flat like the LC racing top plate or the 124018/124019, it would not rub. You could use a curved file or a drum sanding bit on a Dremel to remove a little bit off the bottom of the plate. If you leave it, there will be a grinding noise, which would get old pretty quickly. You could also use a fingernail file, sandpaper around a pencil or a hobby knife will also work.
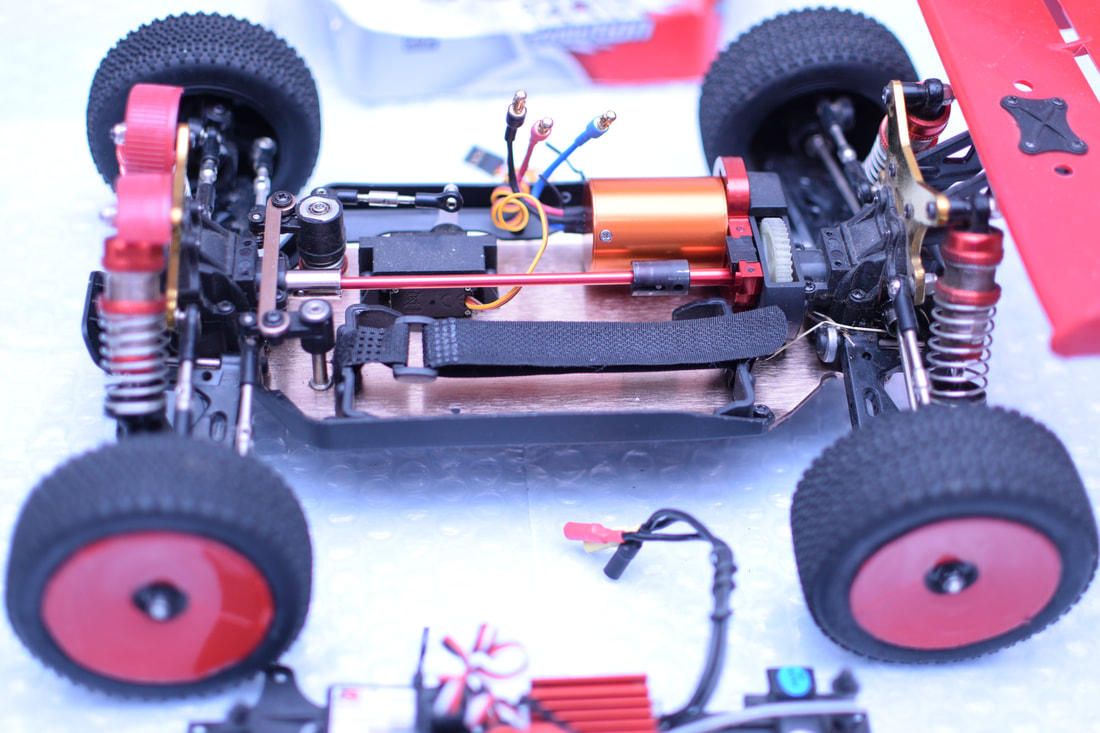
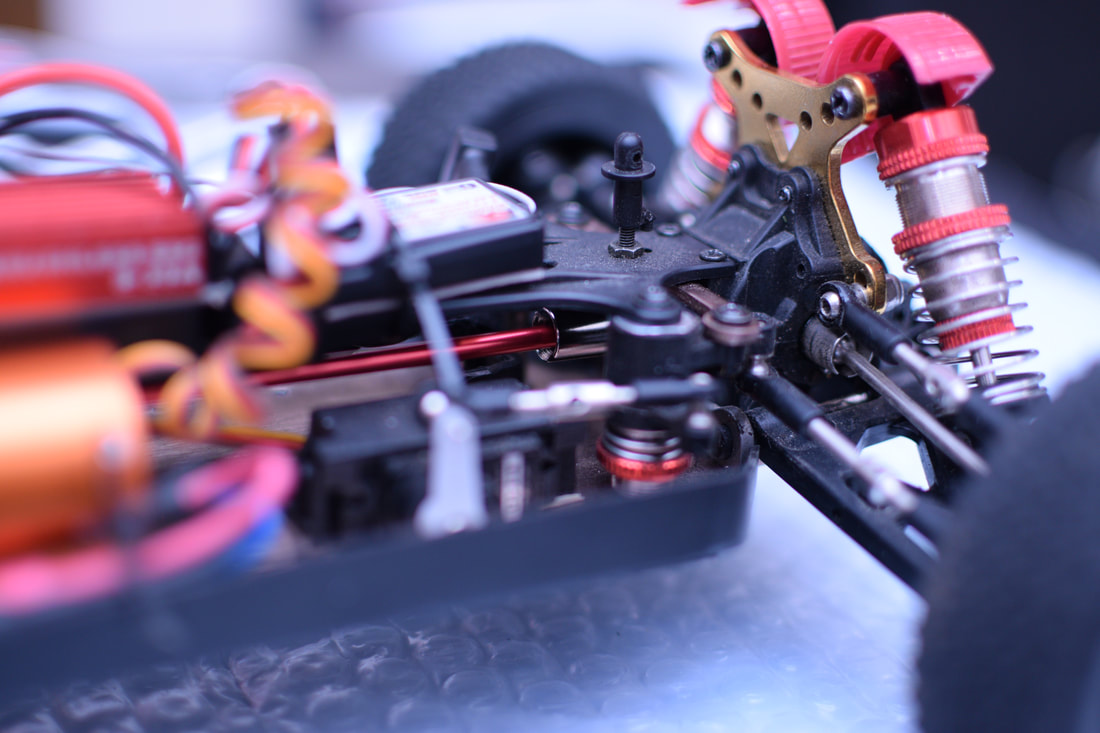
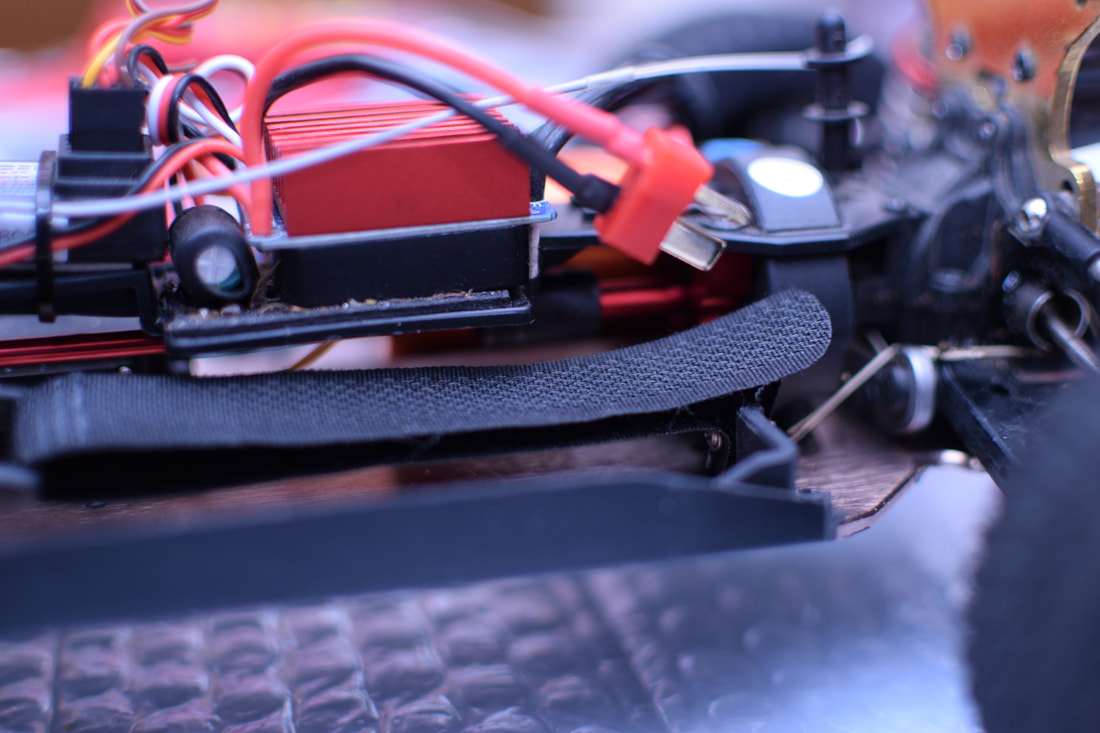
And that is job done. Se below for some more of the pics from Ron's completed build:
Picture
Picture
Picture
Picture
Picture
​Thanks for reading, if you found this article useful please feel free to like or share, the facebook links below directly link/like this article. I don't believe in asking for money by patreon nor by paypal but if you do wish to help me, the affiliated links in these articles help me buy the bits and services I need to produce this type of content. If you are looking for RC ​cars, quads or parts check out my coupons and discounts page which I keep updated with only the RC cars, parts and quads I like at a proper discount
11 Comments
RCFREAK
12/5/2021 11:24:15 am

This is something I will definitely attempt.
I bent my 144001 drive shaft on its first ever run lol. Eeeek, it was a harsh lesson.

Reply
RCFREAK
12/5/2021 11:25:45 am

Probably one of the most expensive parts to replace too!

Reply
QuadifyRC
12/5/2021 11:45:15 am

I've never damaged one but it's becoming clear that I must be a boring driver!

RCFREAK
26/5/2021 10:30:21 am

To be fair, I was quite unlucky. I drove under the bottom of a metal fence just spacious enough to catch the shock plate, bend a cvd and absorber, then snap open the gearbox damaging the diff and bending the drive shaft. Totally my bad, I was driving it around like you'd drive a SG 1602. Didn't think that faster, heavy, equals, less bounce, more snap 😭🤣😁🙄🤔😜

Vailen
8/6/2021 08:28:53 am

What is the length of the L6038 dogbone?

Reply
Kodak_jack link
9/7/2021 02:13:08 am

The upper deck of the latest WLToys vehicles seems to be more of a hope and pray than their previous versions. It just seems weak. Why wouldn't the aluminum version be the way to go? Wouldn't it help eliminate the driveshaft damage? For those racing these cars, how about an RPM bumper, just in case?

Reply
QuadifyRC
16/7/2021 03:29:10 pm

You mean the 124019 and 124018 1/12 scale? I like them a lot actually, they don't have the weak kink like the 144001 and they have a criss cross pattern underneath that makes them stronger. If you are looking for a bumper, the tbone bumper for the LC racing EMB-T is a perfect fit.

Reply
Kodak_jack link
17/7/2021 01:54:08 am

Thanks for that. It seems everything they make is sold out.

Mike
18/7/2021 12:41:47 pm

Thank you for this mod! I am pleased with the results of Ron Wilson's Floating Driveshaft mod on my stock 144001, but I made changes to fix clearance issues:

1. On a stock 144001, the rear cup is very close vertically to the inboard edge of the rear battery retaining bracket, and it can rub on some batteries. The rubbing condition can be much worse if the grub screw protrudes beyond the radius of the cup (I had to grind the supplied grub screw so that it is flush with the cup). To prevent rubbing, I glued a thin strip of plastic vertically to the inside edge of the rear battery bracket, to act as a shield between the cup and the battery.

2. Position the rear cup further rearward, just far enough behind the step in the top deck to make modifying the top deck unnecessary.
CAUTION: Make sure that the driveshaft at either extreme of travel forward or rearward, still contains the dogbone pins engaged in the cups slots, and cannot fall out of either cup.

To keep the driveshaft central in the cups and stop excessive floating front to rear, cut soft foam into two 5mm cubes, and insert one into each cup before installing the driveshaft.

Reply
QuadifyRC
26/7/2021 05:43:04 pm

Excellent feedback Mike, thanks for the tips!

Reply
Steve Smith link
8/2/2023 07:11:11 pm

I like how you mentioned that sharing ideas could help provide information and knowledge. My uncle mentioned last night that he is hoping to find a reliable automotive service because he's not able to use his sprinter because of a driveshaft system issue. He asked if I had any idea what would be the best option for a proper repair. Thanks to this informative driveshaft article. I'll be sure to tell him that he can consult a well-known auto repair service in town as they can provide good quality service.

Reply


Leave a Reply.

    Archives

    November 2022
    October 2022
    September 2022
    August 2022
    July 2022
    June 2022
    May 2022
    April 2022
    March 2022
    February 2022
    January 2022
    December 2021
    November 2021
    October 2021
    September 2021
    August 2021
    July 2021
    June 2021
    May 2021
    April 2021
    March 2021
    February 2021
    January 2021
    December 2020
    November 2020
    October 2020
    September 2020
    August 2020
    July 2020
    June 2020
    May 2020
    April 2020
    March 2020
    February 2020

    Categories

    All
    104001
    104002
    104009
    104072
    1/10
    124016
    124017
    124018
    124019
    144001
    144002
    144010
    16886
    16889a Pro
    184016
    284131
    4s
    4 Things
    Anti Roll Bars
    Balance
    Basher
    Battery
    Brushless
    C24
    Charging
    Cogging
    Crawler
    D22
    D32
    Diatone
    Diatone Q25
    Drift
    Drop In
    Dumborc
    Eachine EAT14
    Eachine EC30
    Eachine EC30B
    EMB-MT
    Ex07
    Ex16
    Flyhal
    Flysky FS-G7P
    Flysky Noble Pro
    FMS
    FPV Car
    Goolrc
    Guide
    Gyro
    HBX
    Hbx 901a
    HS10422
    K989
    LC12B1
    LC Racing
    Lipo
    Metal Parts
    Micro
    MJX Hyper Go
    Monster Truck
    Mx-07
    Pinion
    Preview
    Program Card
    Project WLCRacing
    Q33
    Racerstar
    Radiolink RC6GS V3
    RC Boat
    Review
    ROCHobby
    Setup
    Sg 1602
    SG 1603
    SG 1604
    Soldering
    Spectre
    Speed Run
    Stance
    Surpass Hobby
    Timing
    Transmitter
    Tuning
    Tyres
    Upgrade
    Vinyl
    Wheels
    WL916
    Wltoys
    WL Toys
    Wpl
    Zd Racing

    RSS Feed

Thanks for visiting QuadifyRC.com Follow us on facebook below to get all the latest updates
  • RC Cars
  • Car of the Month
  • Quad Reviews
  • Quad Mods
  • COUPONS AND DISCOUNTS
  • Long Range
  • About & Contact