|
By guest author Geoffrey Chan - one of the super helpful WL Toys RC Car modders in the QuadifyRC 144001 124018 124019 modders group. Thanks for your contribution to the group and the article below 🙏🙏 In this guide Geoffrey has provided a simple, convenient and reversible option to painting your RC car body shell and most importantly has gone in depth on the how to guide with lots of detail around how to get a finish you'll be proud of. 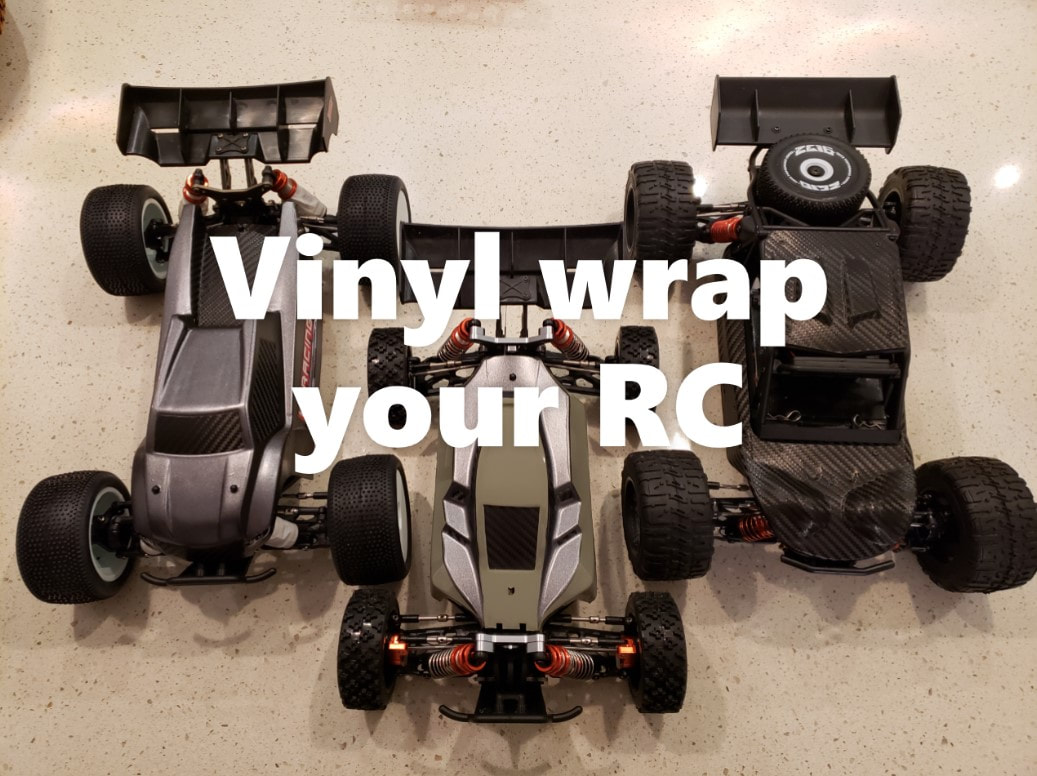 Introduction So you just received your brand new RC car from one of the most popular Chinese manufacturers to have graced us with an affordable entry drug into the world of RC. You open the box and you can’t help but stare at it and admire your new prized possession. Looking over the details like the plush oil shocks, the shiny metal turnbuckles, soft rubber tires, the glistening aluminum chassis, and the bright, colorful graphics on the body. You think to yourself, “Yeah, this is one good looking car.” Your eyes trail across and read the words, “POWERFUL”, “ZEALOT” and “FIERCE” on the side of the car. Yes, that’s right, you now have a Powerful and Fierce Zealot in your hands, and then you think to yourself, WHAT DOES THAT EVEN MEAN??? Not surprising, there is clearly something lost in translation here. This isn’t a new phenomenon. Chinese manufacturers have been misinterpreting the English language for as long as they’ve been the world’s factory. Chinese as a language is actually very meaningful. A single character in Chinese can have many meanings and it can also convey multiple thoughts and ideas. Unfortunately, it doesn’t always translate that well directly in English. I’m sure whoever the well-meaning designer was that decided to print Powerful Fierce Zealot on the side of the WLToys 124019 had no idea that the English translation would result in cringy confusion at best. So can we change this? Well, it’s unlikely because we keep buying the cars and WLToys keeps thinking they’ve scored a homerun with a product that looks amazing and connotes grand inspiration to whomever lays eyes upon it to be the next RC racing champion at their local race track. One fix is to change the body shell completely and start with a custom paint job on a new clear shell, which has been the go to for many people that want the customized look. However, if you don’t want to spend the money for a new body, you could just repaint the original shell. Alternatively, and the less messy option is you could use automotive vinyl and wrap over it! Vinyl wrap as a product has evolved a lot over the last 5 years predominantly due to its adoption in the automotive aesthetics industry. Initially being a niche product with niche appeal to a high-end luxury and sports car owner market, it has become much more mainstream with its popularity exploding because of innovations in material technology. Offering hundreds of color choices and finishes that simply aren’t possible with paint, vinyl wrap has completely changed the game in the aftermarket automotive industry. Whether it’s to add an accent or to cover an entire car, the possibilities are quite endless. The same benefits apply for RC cars and it is a great way to customize your body and add your personal touch. Not to mention, it’s a lot of fun to apply and cut your own design. What you need:
Material Choices Two of the major providers for automotive vinyl wrap are 3M and Avery Dennison. I personally really like the ease of application and durability of 3M products. The adhesive backing doesn’t leave any residues if you decide you want to pull it off. With some heat, it bonds well to the surface and can be removed the same way. With either brand, you can’t go wrong as they are both industry leaders. Some of the more common finishes you see are gloss, matte, mirror, rugged and carbon fibre. Because these materials are engineered to be used on automobiles, they are quite tough and can withstand some abuse. However, it isn’t impervious to cuts and scratches that might occur when an RC car goes flying and lands upside down during a 60mph speed run attempt.
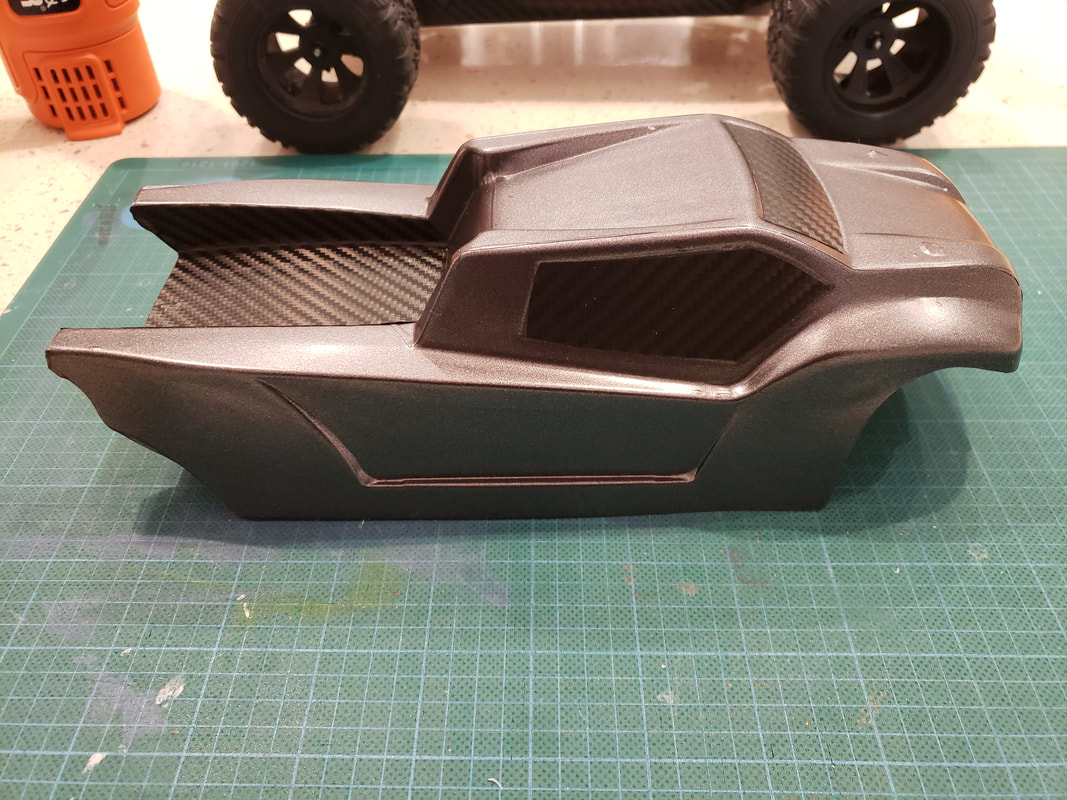
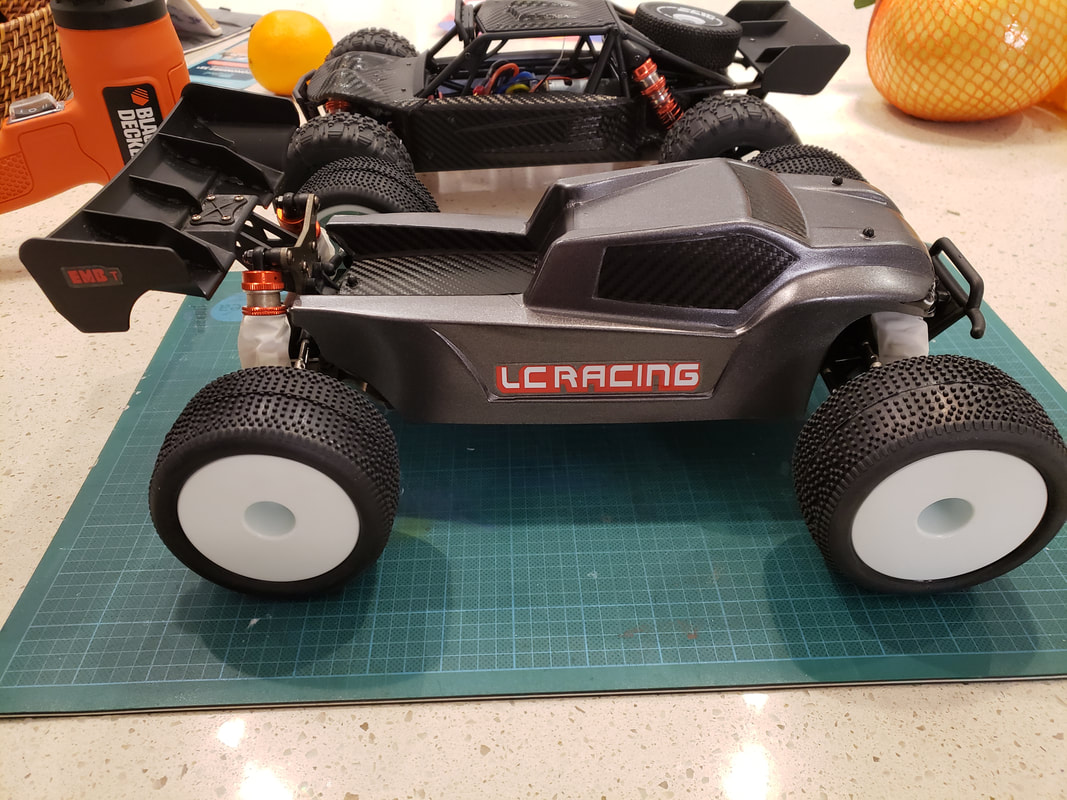
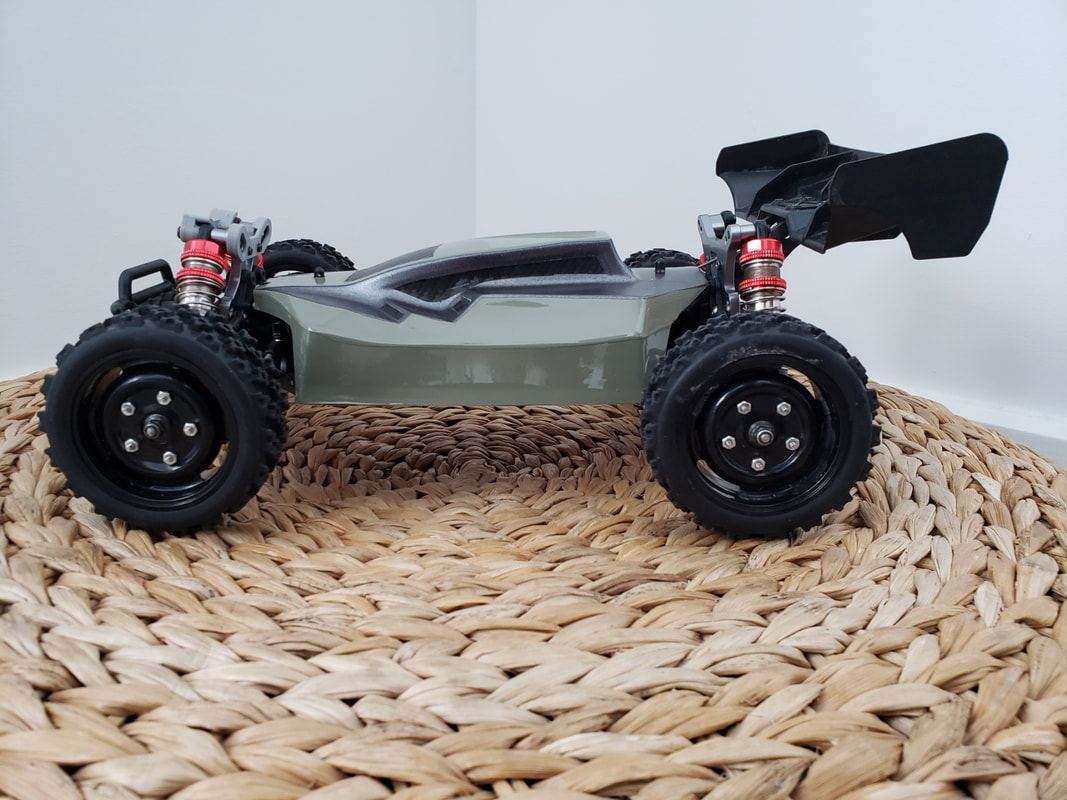
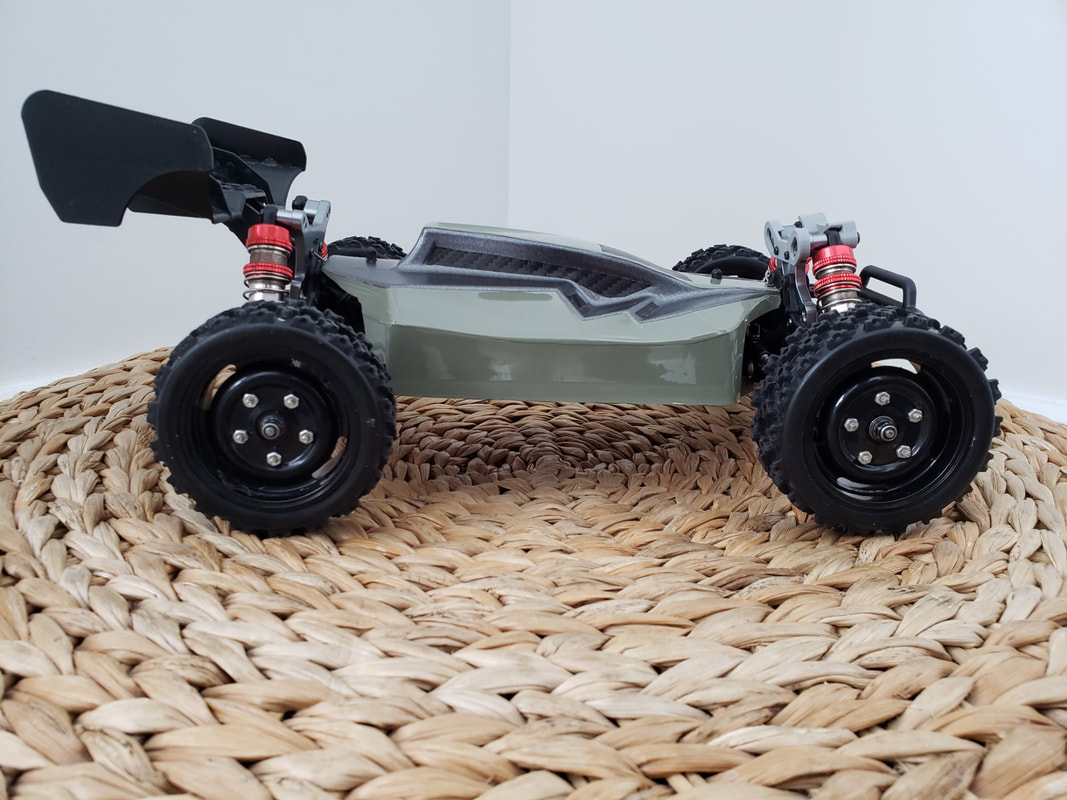
Getting Started The beauty with vinyl wrapping an RC vs. paint is that there’s no major preparation! The first RC car that I wrapped was the 124018 in a full 3M carbon fibre finish. I was so excited about the result that I wanted to do my two other cars. One car being my LC Racing EMB-T RTR that came with the painted body. I was never crazy about the bright pink and purple color scheme and decided to give it a much-needed makeover. As you can see from the pictures, it now looks completely different. The matte grey metallic finish is not something you can get using traditional body shell painting techniques since the paint is applied from underneath vs. vinyl on the surface. 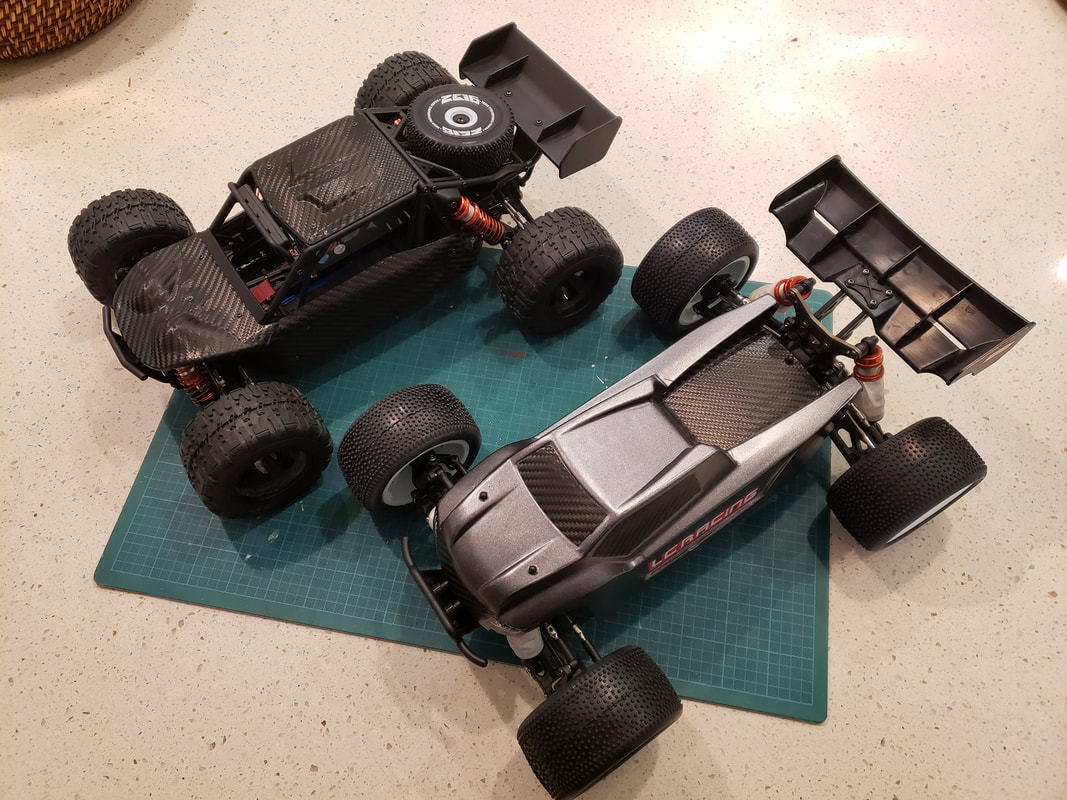 WLToys 124018 in 3M Carbon Fibre Wrap and LC Racing EMB-T in Matte Grey Metallic Wrap
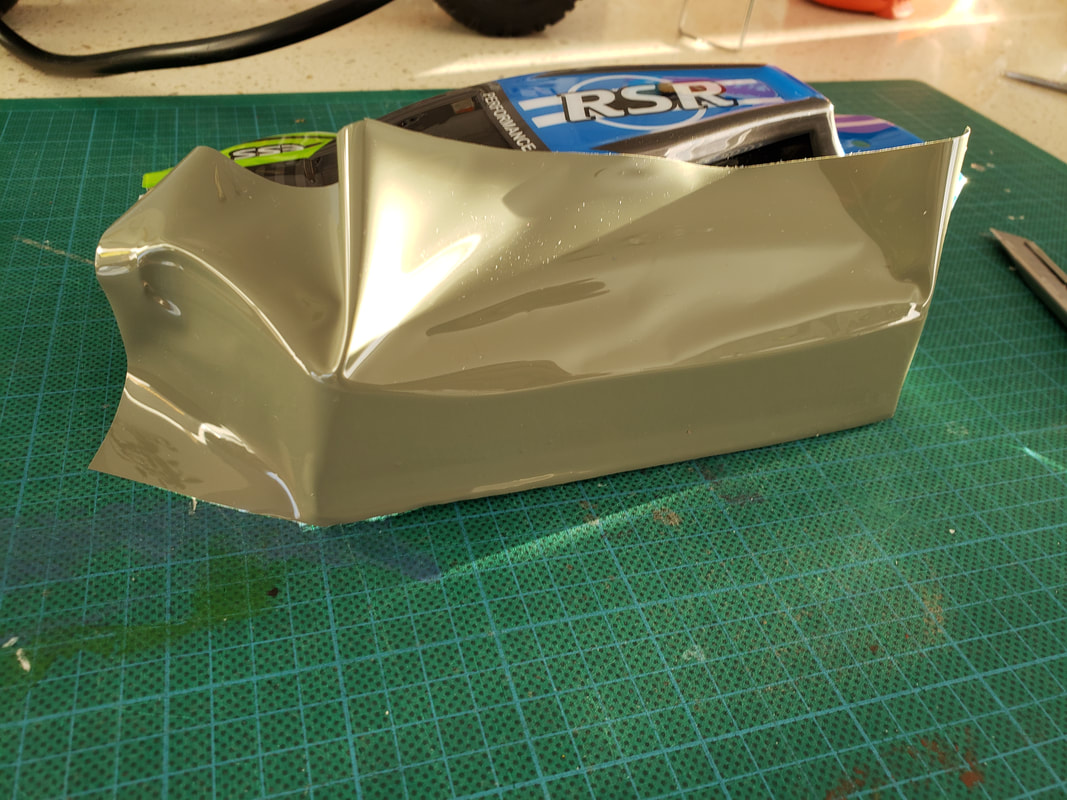
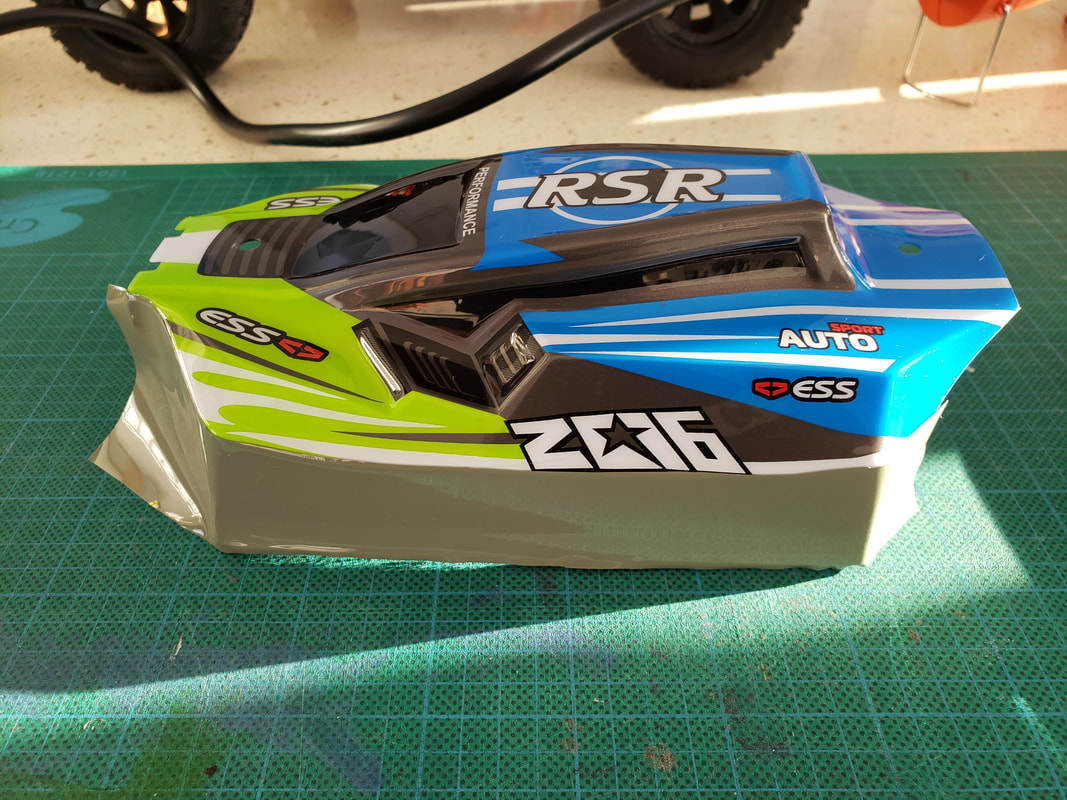
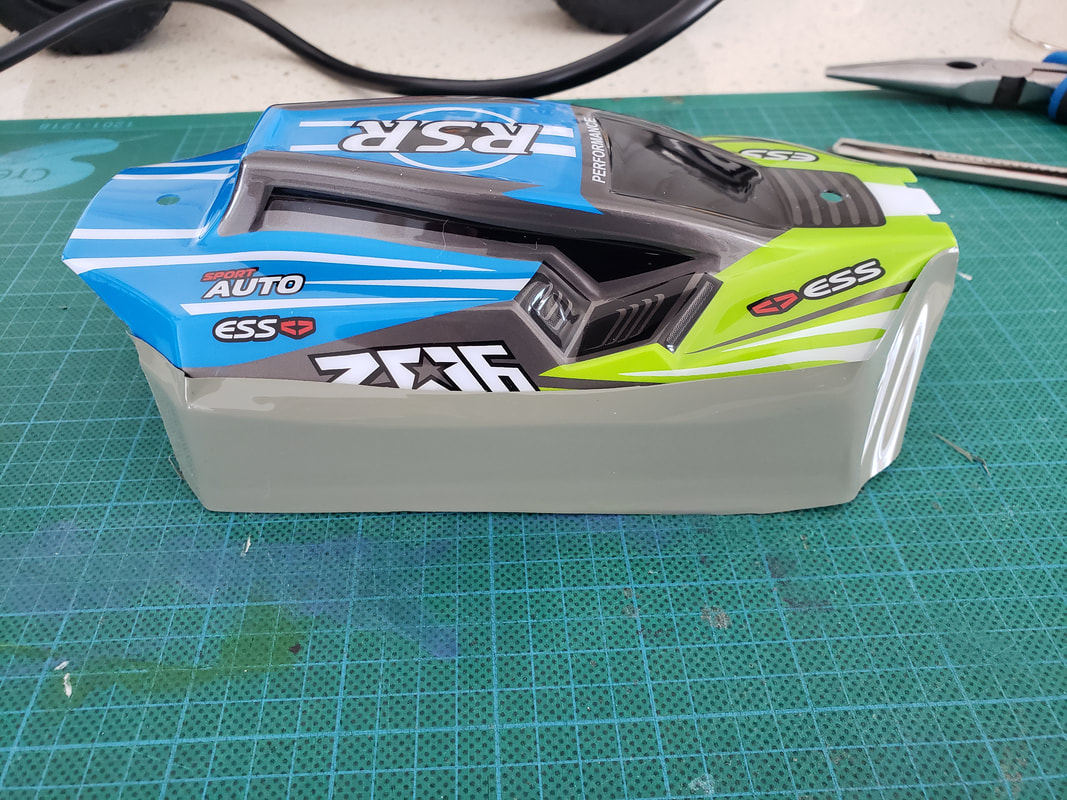
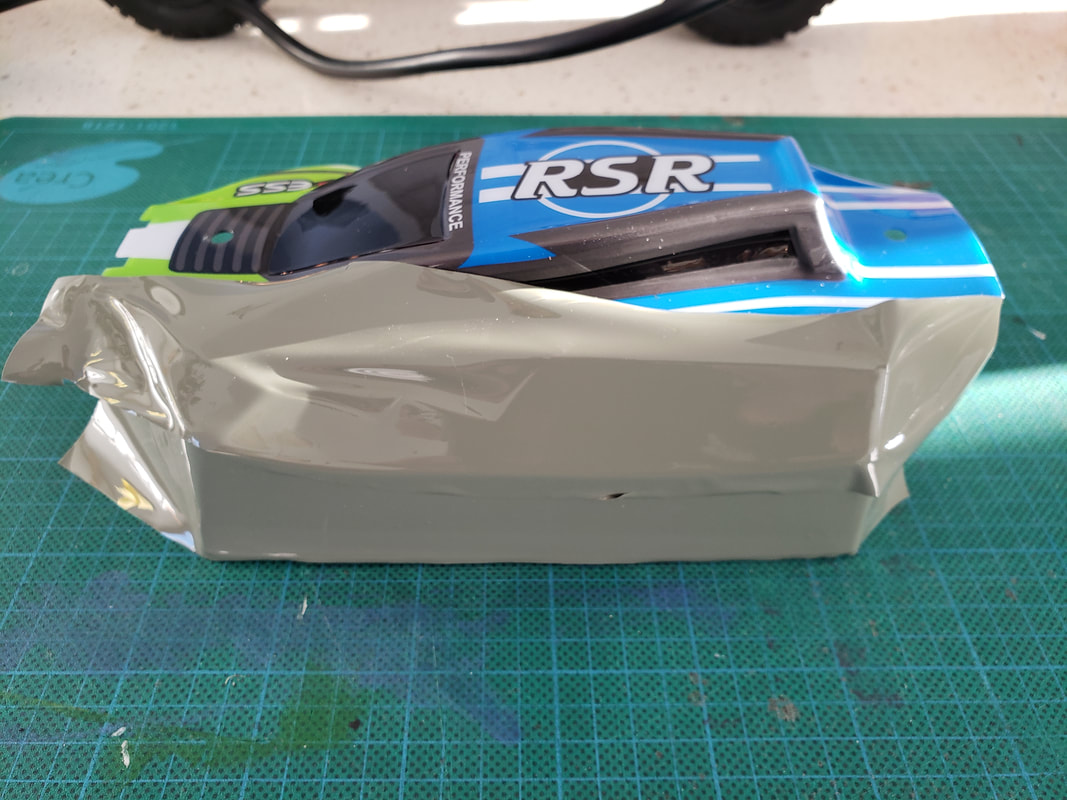
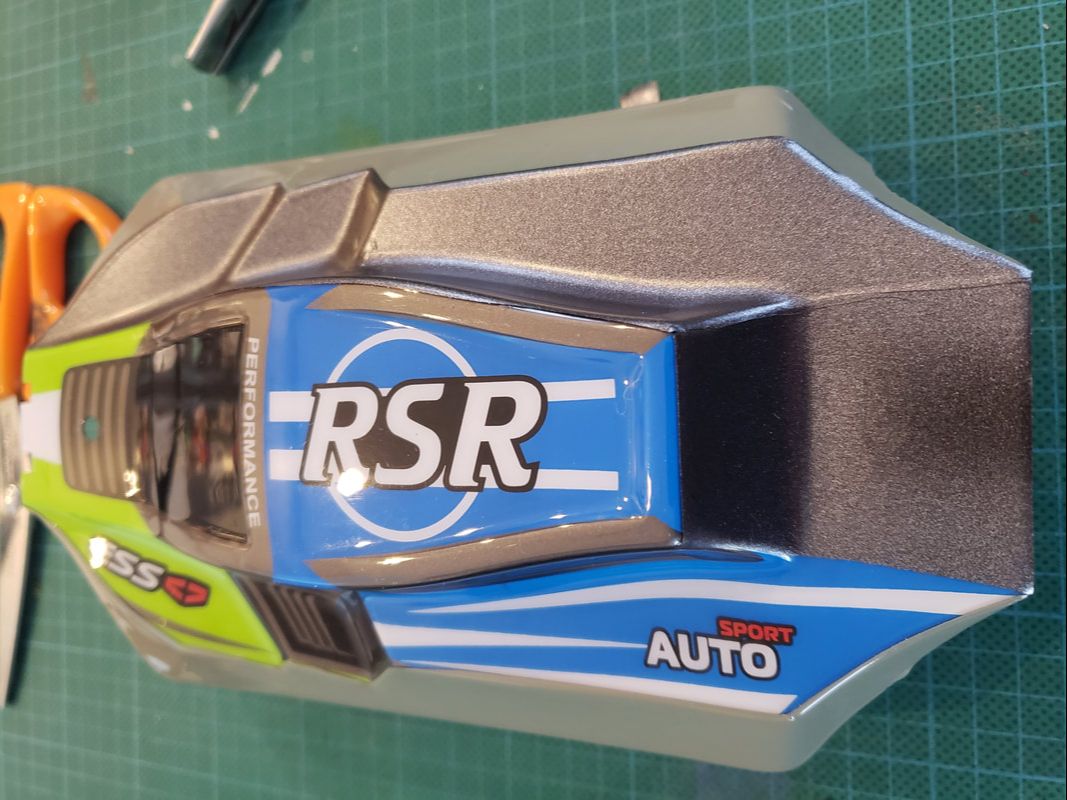
On to the vinyl wrapping guide In this step-by-step example, I will take you through how I applied vinyl wrap to my WLToys 144001. This was my most difficult car to wrap given the unevenly creased body style. Knowing I could always just rip it off and start again really takes any stress out of this. First thing you want to do is clean the exterior shell with some rubbing alcohol to remove any grease or oils that would prevent the vinyl for adhering. The next thing to do is to make a plan on how to lay on the vinyl and this will vary based on the shape of the body. You need a starting point and that again will be based on the body shape. Using the 144001 as an example, I decided to start from the bottom and work my way towards the top in layers. Also, the biggest misconception with applying vinyl is that you must do it all in once piece. There’s no rule that says that! Ideally, to make it easier for yourself, you should find a strategic point to cut the vinyl such as along the edges or corners so when you lay on the next piece, it overlaps slightly but isn’t so obvious.
Conclusion In my opinion, the end product looks pretty sharp and gives the body shell a completely new look and feel. I’m not a big fan of the random nonsense that gets printed on these shells and sometimes the bright graphics distracts from the curves and creases in the body that a solid color helps accentuate. You can revamp an old shell or turn the stock one into something fresh and completely custom to you. The possibilities are endless and if you don’t like it, just apply a bit of heat and you can peel it off and start over again!
*I'm afraid I couldn't quite fit all of the images in so feel free to look at the gallery below for all of the images Geoffrey has shared Thanks for reading, please feel free to check out our other articles and if you are into any of the WL Toys models come visit us at QuadifyRC 144001 124018 124019 (and 104001) modders group on FaceBook - all my articles go here first
|
Categories
All
|


 RSS Feed
Thanks for visiting QuadifyRC.com Follow us on facebook below to get all the latest updates