|
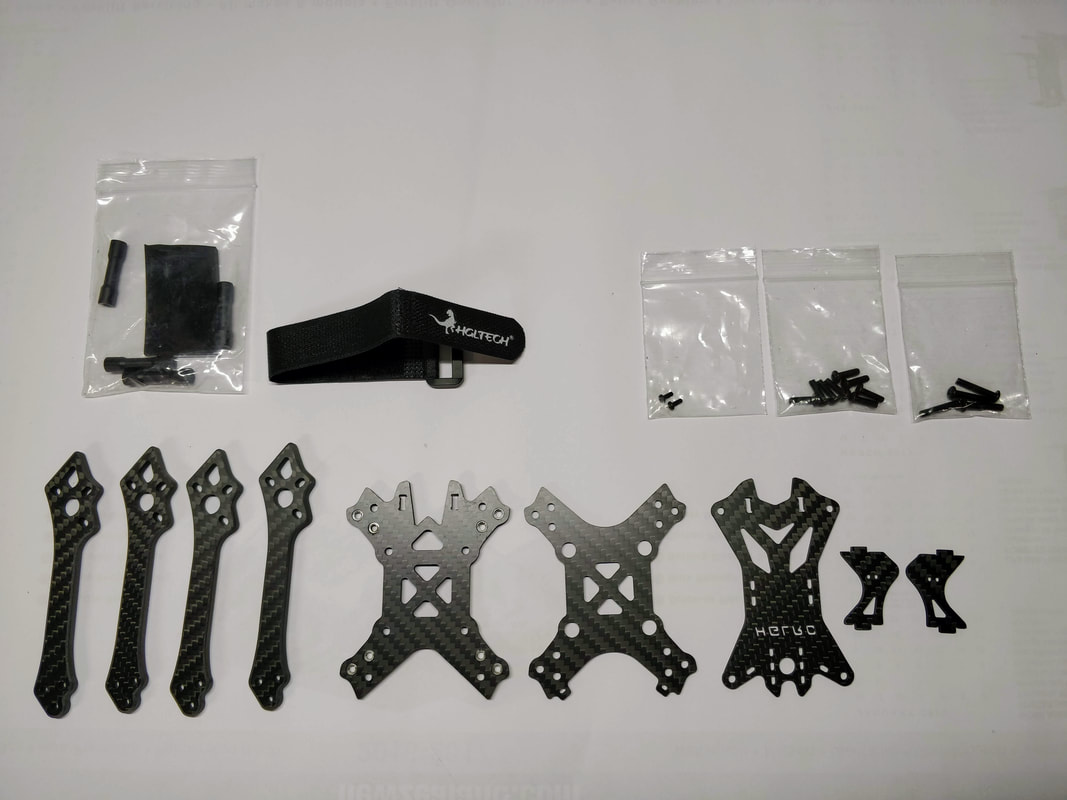
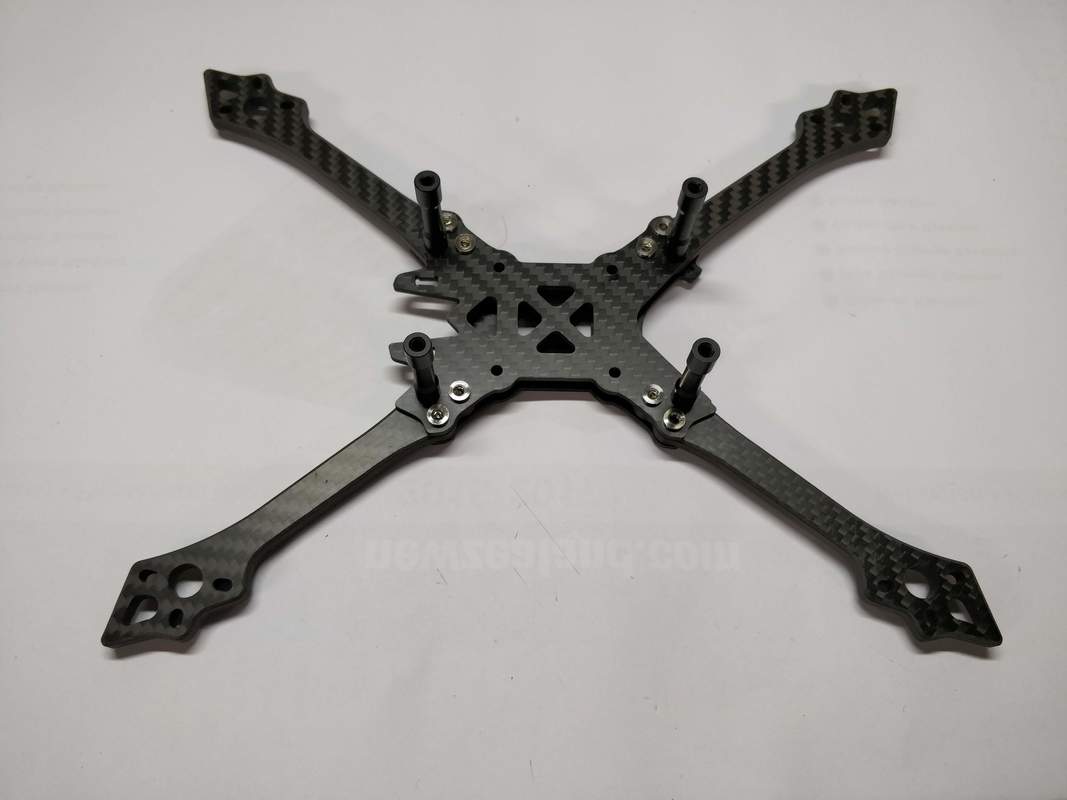
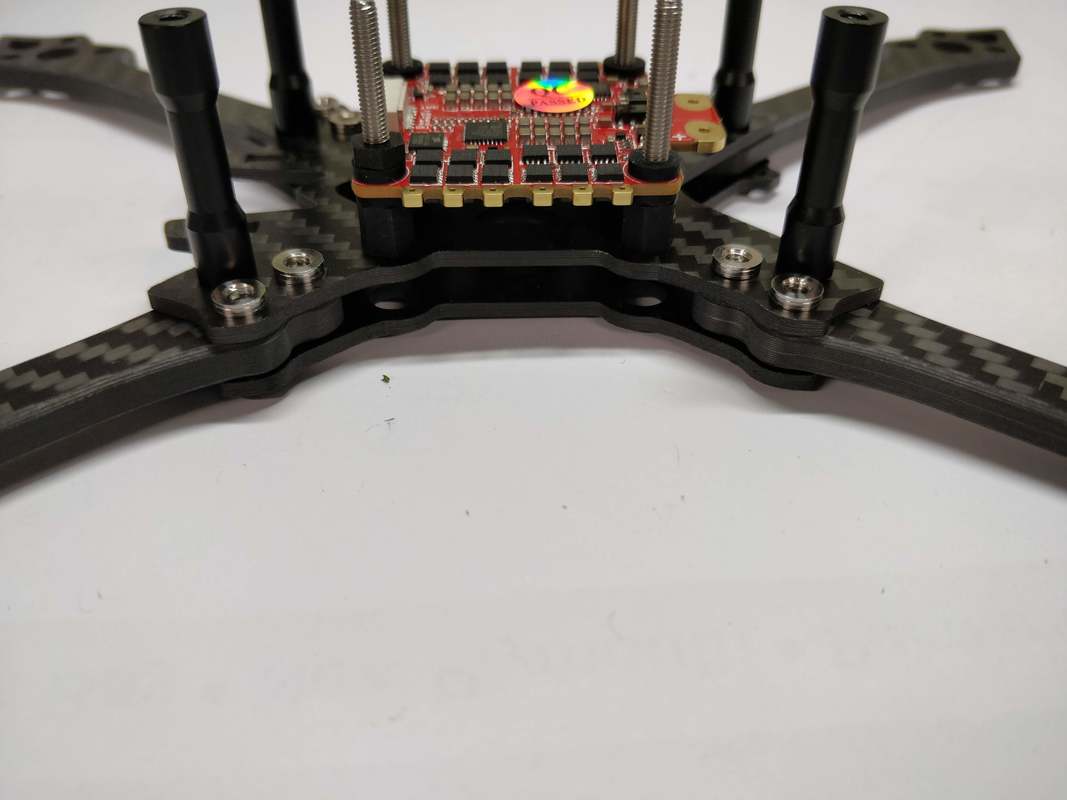
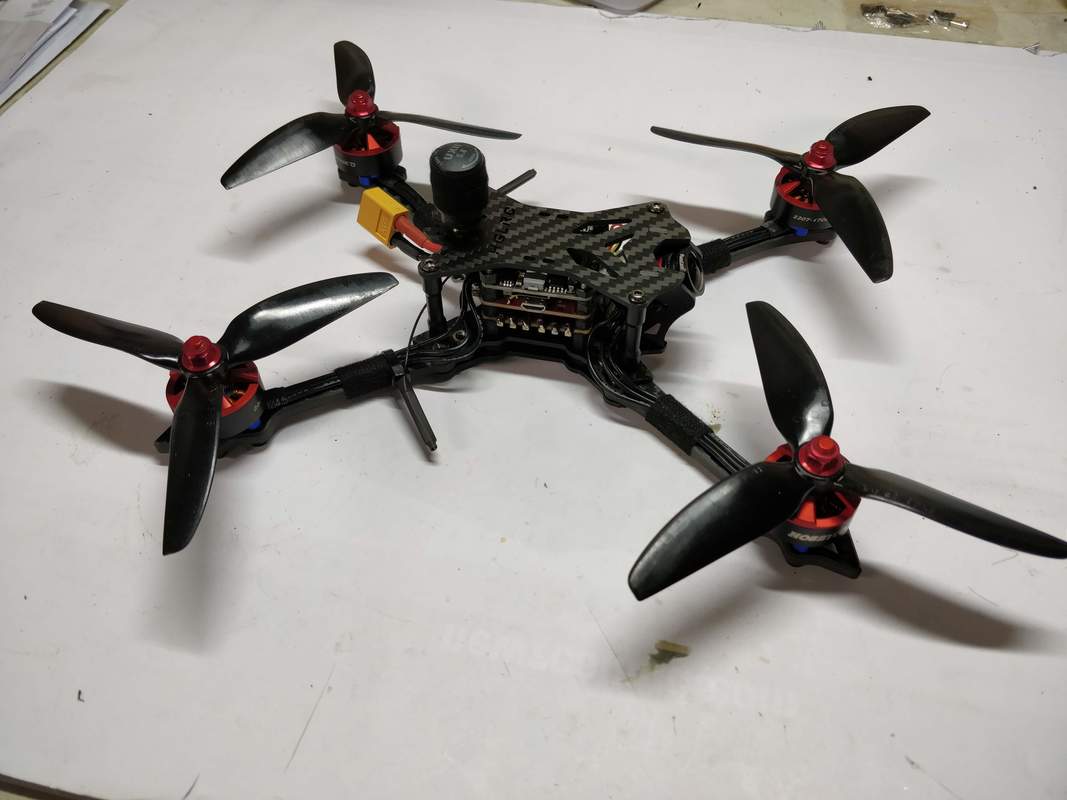
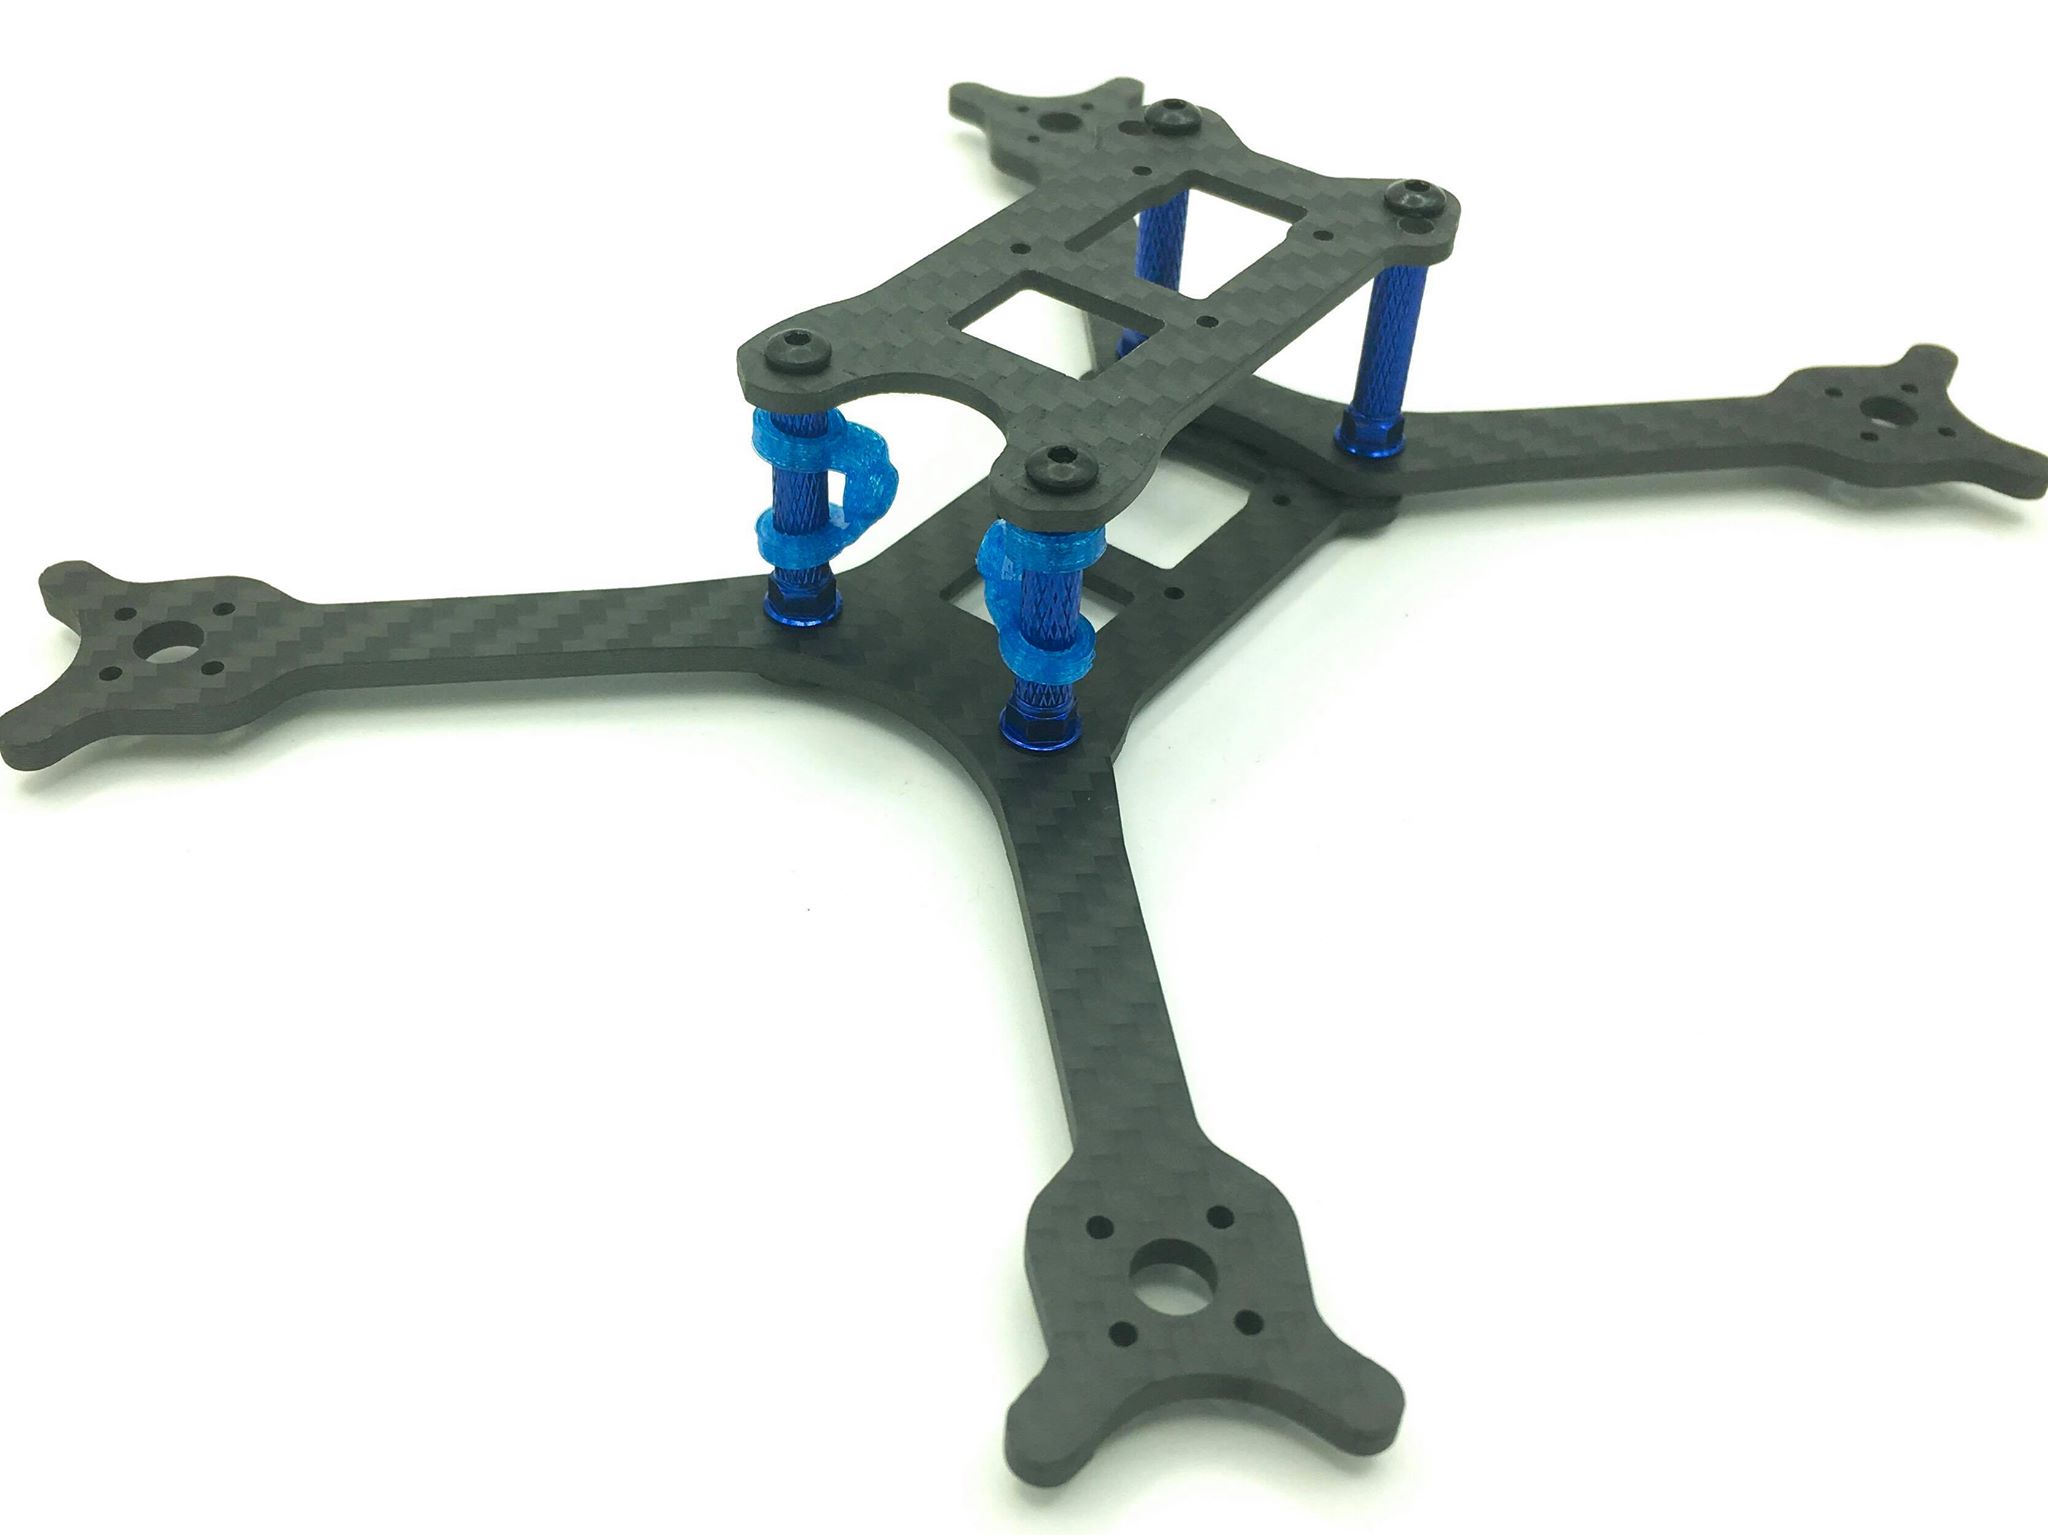
In part 1 of this build I reviewed the components I chose and why. In this blog (part 2) I go through the process of building the quad. 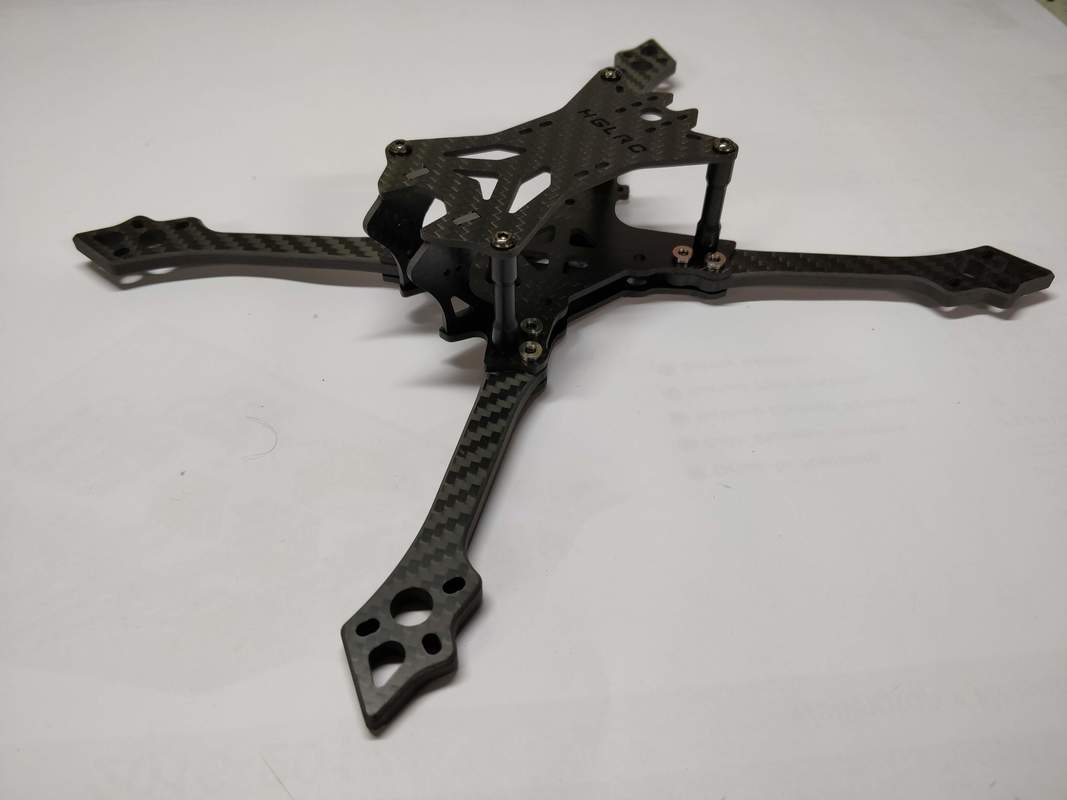 Building the frame (HGLRC BATMAN220 Frame) To recap the HGLRC Batman frame was chosen for strength, weight and price and the frame itseld did not disappoint. Quality carbon fibre looks to have been used and most importantly the weave is aligned with the arm length. There are a number of nice design touches including arm chamfer top and bottom, well considered component mounting and a nice camera mount. See the the captions in the gallery below for full details:
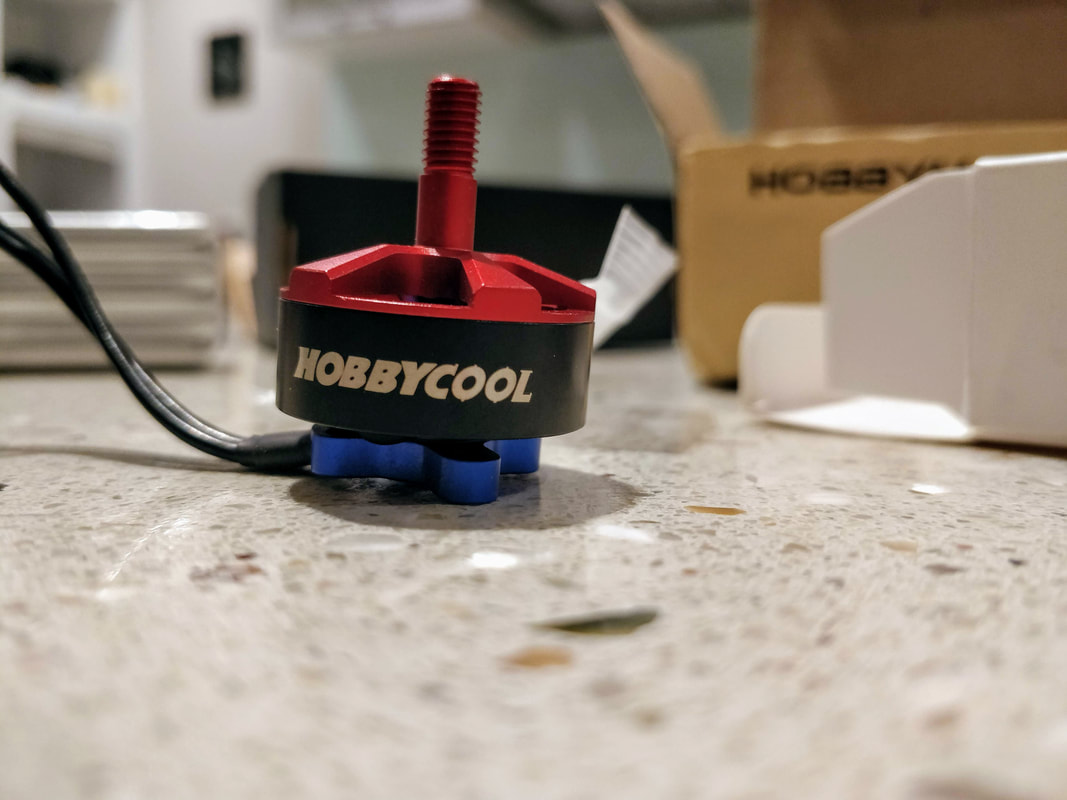
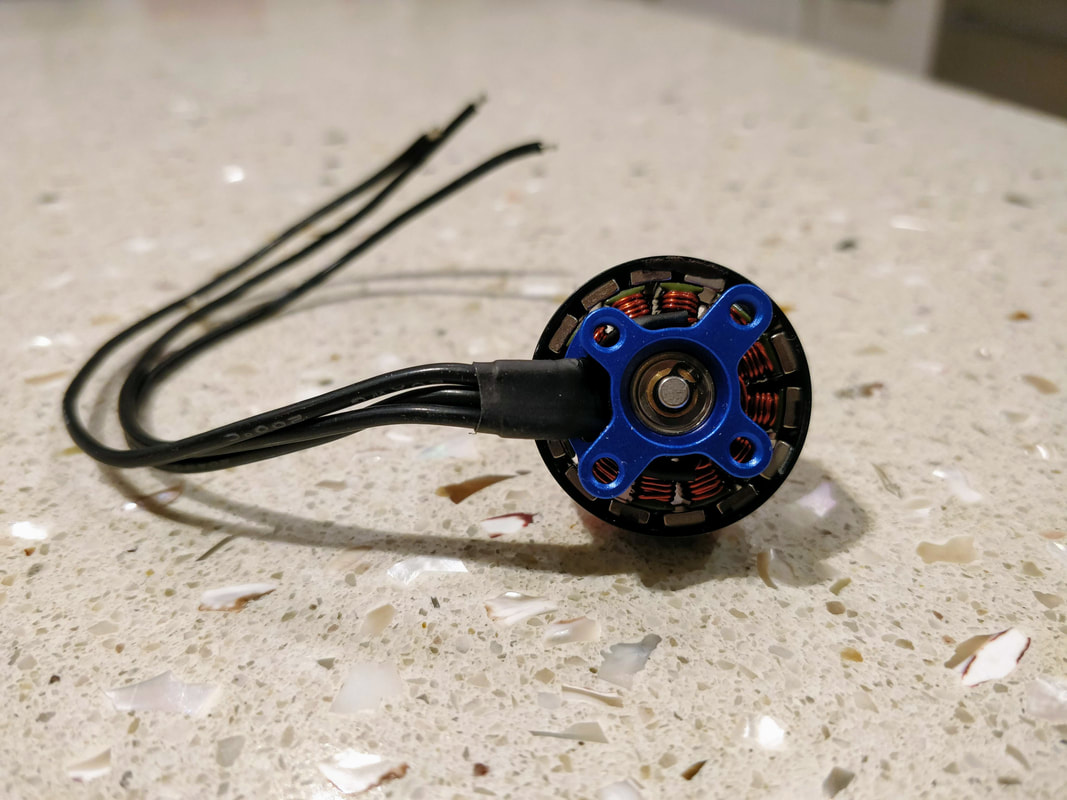
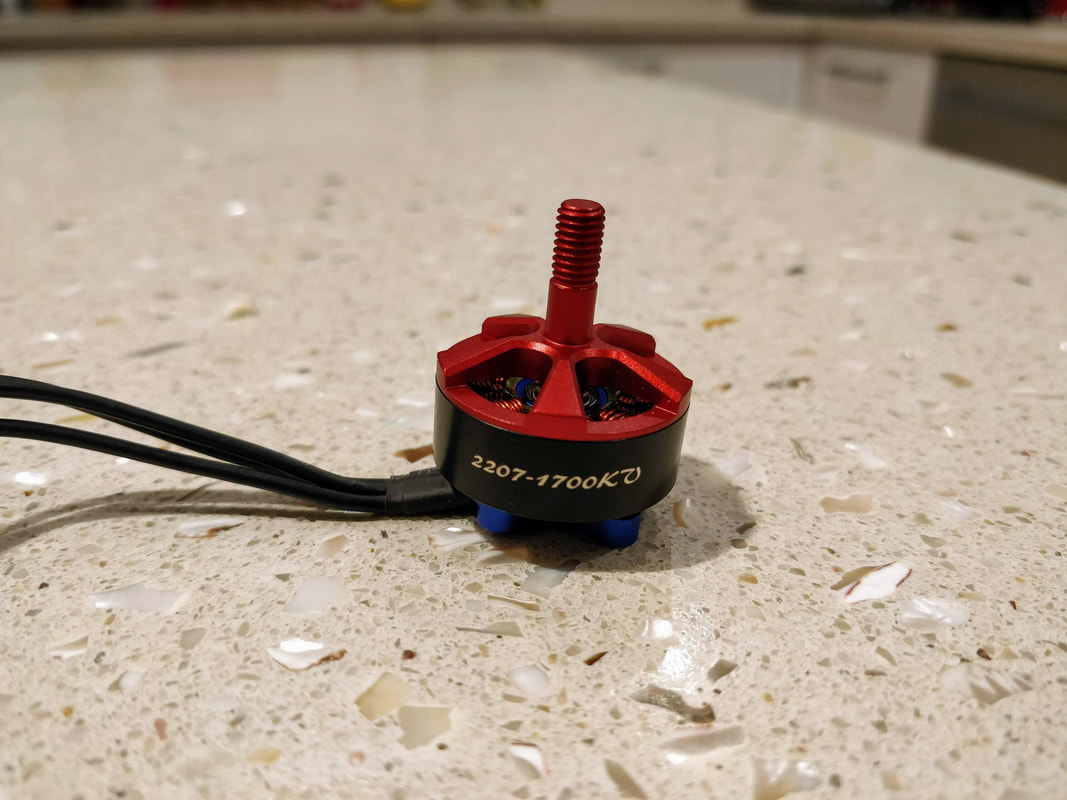
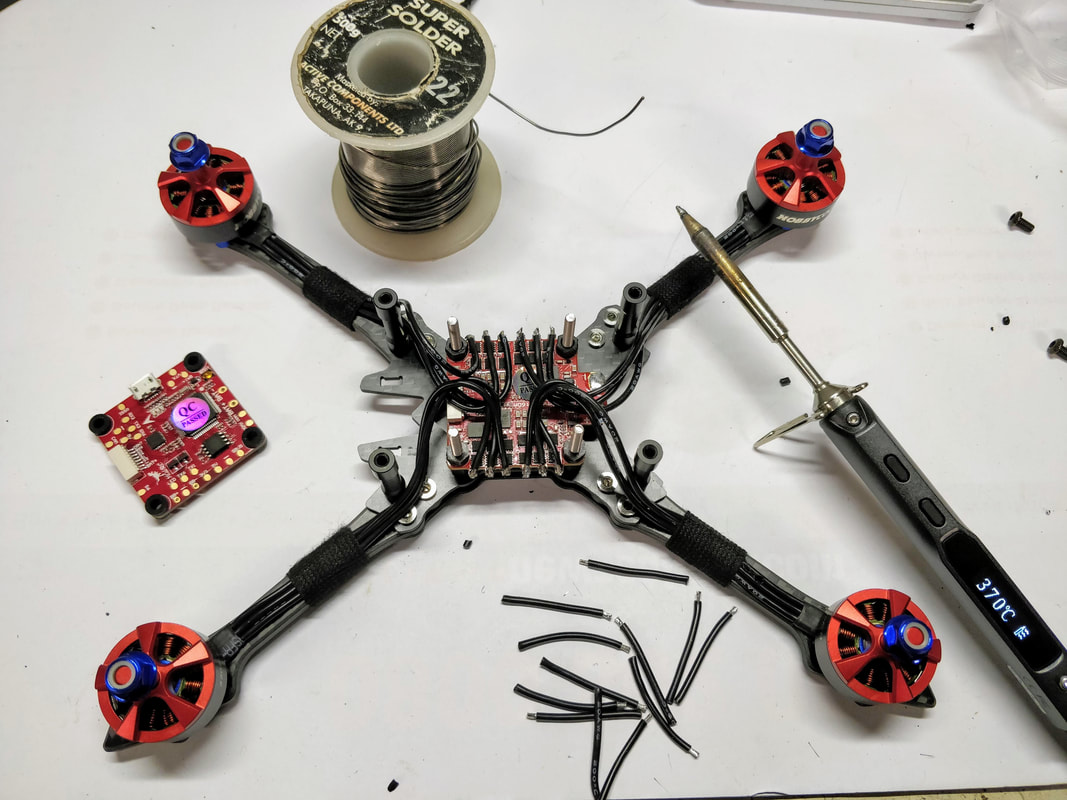
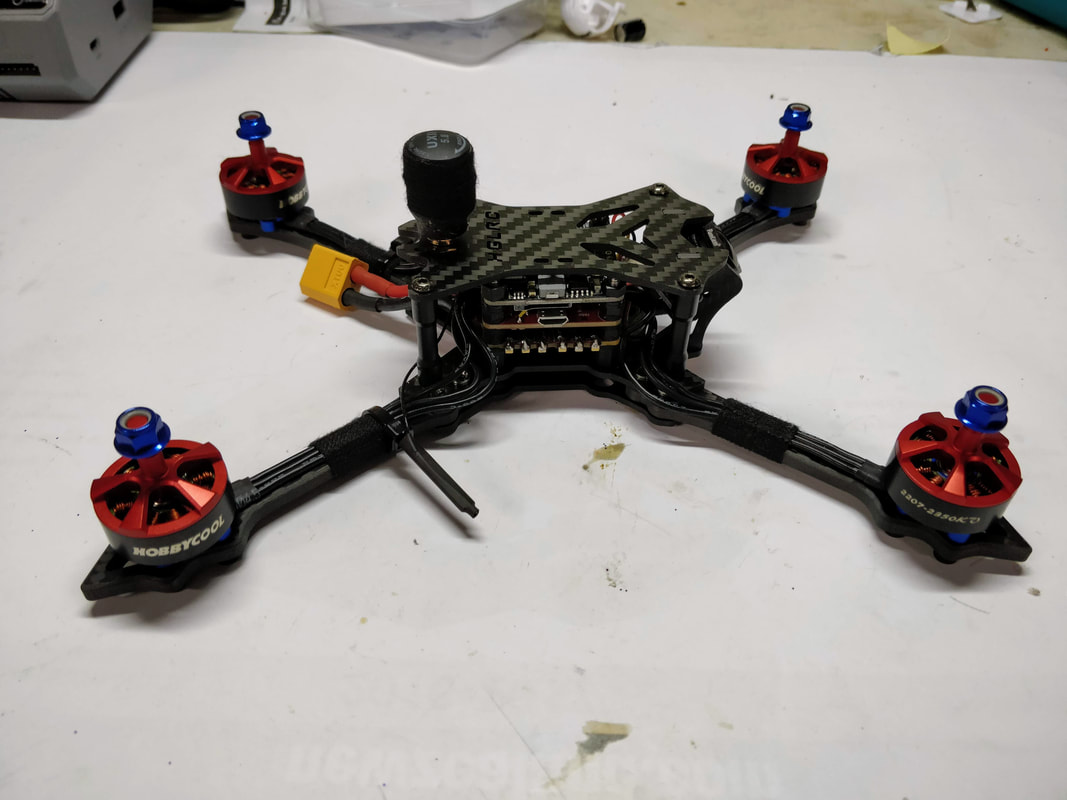
A note on the HobbyCool 2207 Motors Arguably the star of the show, the HobbyCool 2207 1700kV motors are the real thing - Brother Hobby R3 2207 in a 1700kV variant and they are very classy. I've kept the wires long in case 6s is not for me and these make there way into a 7inch build...
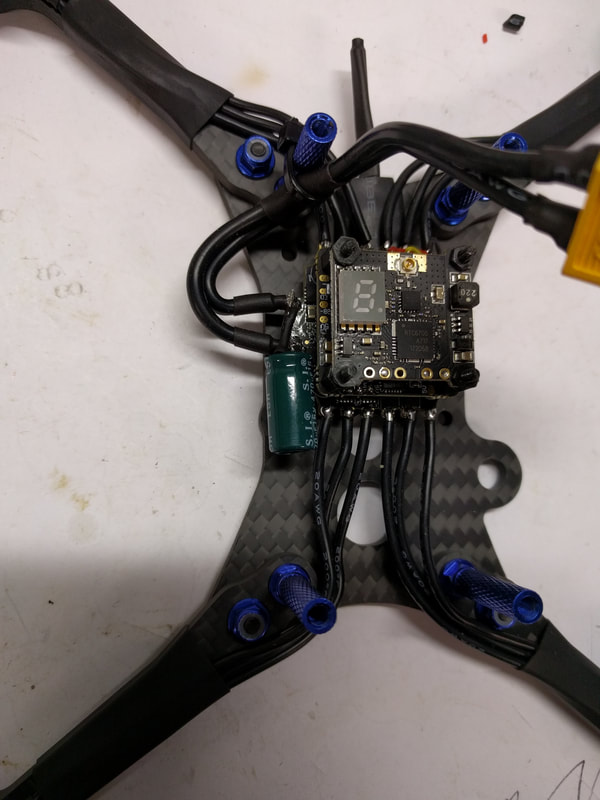
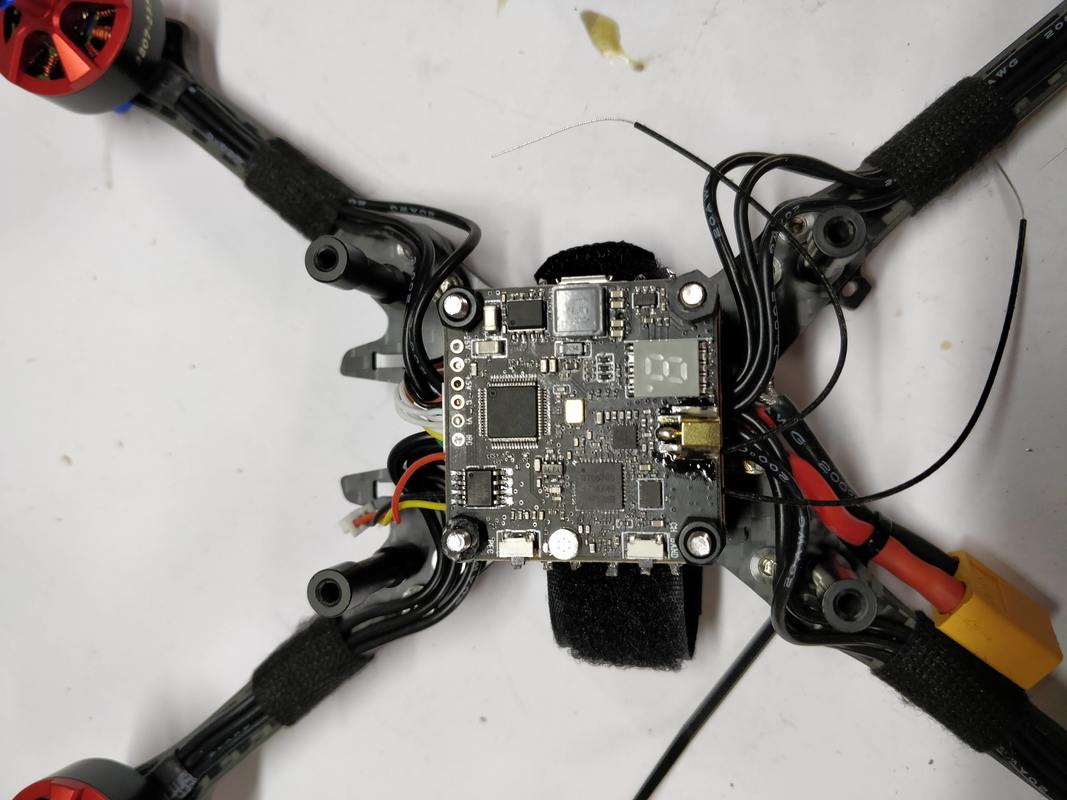
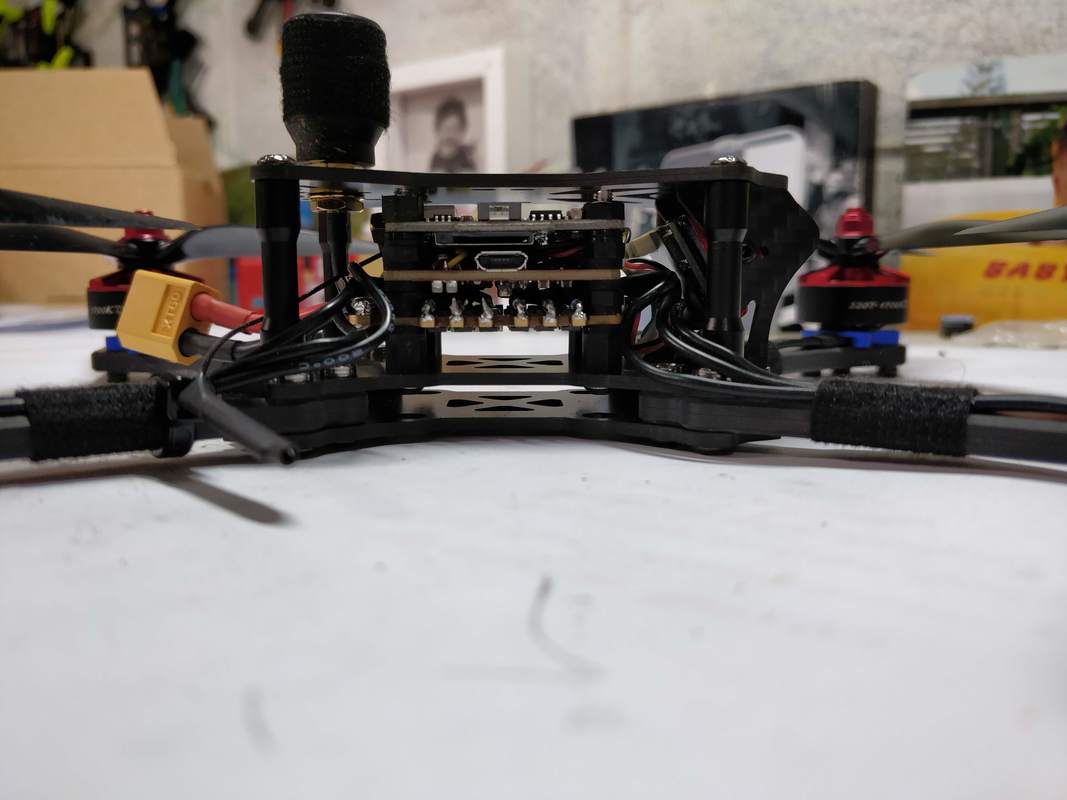
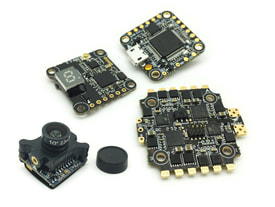
Installing the Flight stack Much has already been said of the HGLRC Titan F460 stack that was chosen here. It is not cheap but it is high quality and the ESC is a BLHeli_32 unit with full telemetry wired in by defaut. I don't like that an XT60 connector is not included (especially since I'd just run out!!) but did like that they did include a 1000 microfarad capacitor and some really nice mounting harware - long stainless steel bolts and threaded spacers rather than the crappy m3 nylon standoffs. Both ESC and FC boards are include rubber grommets so require no further soft mounting. See images below for more comments.
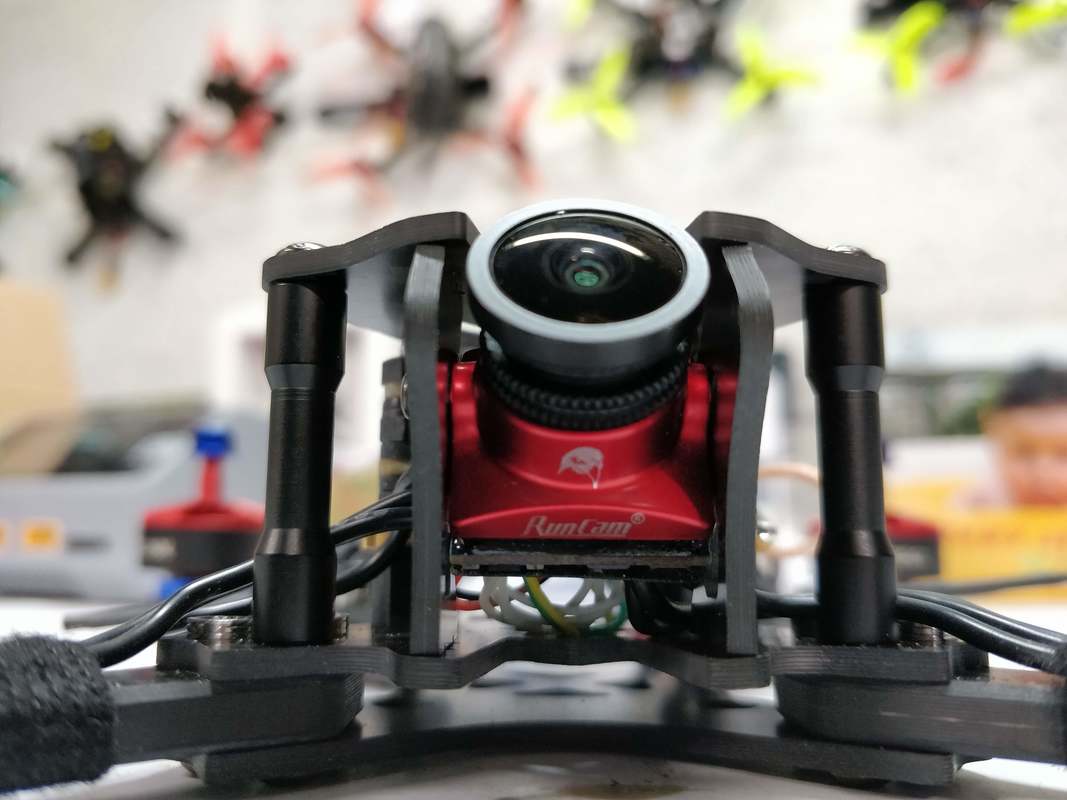
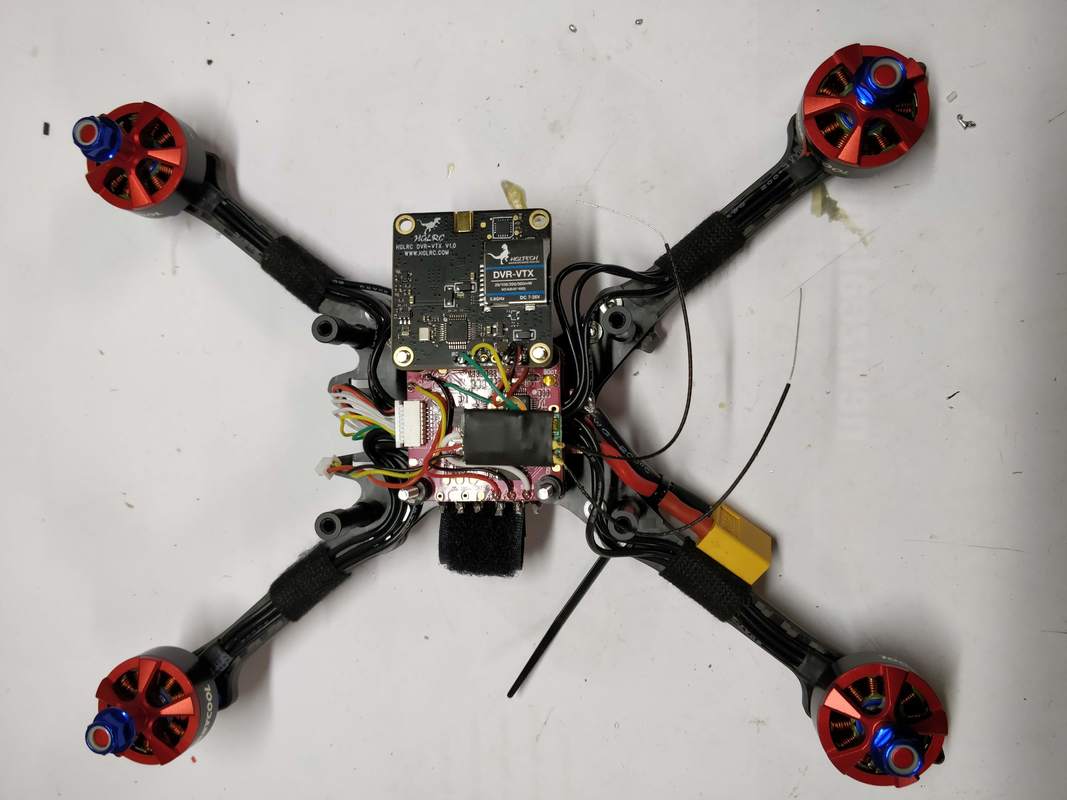
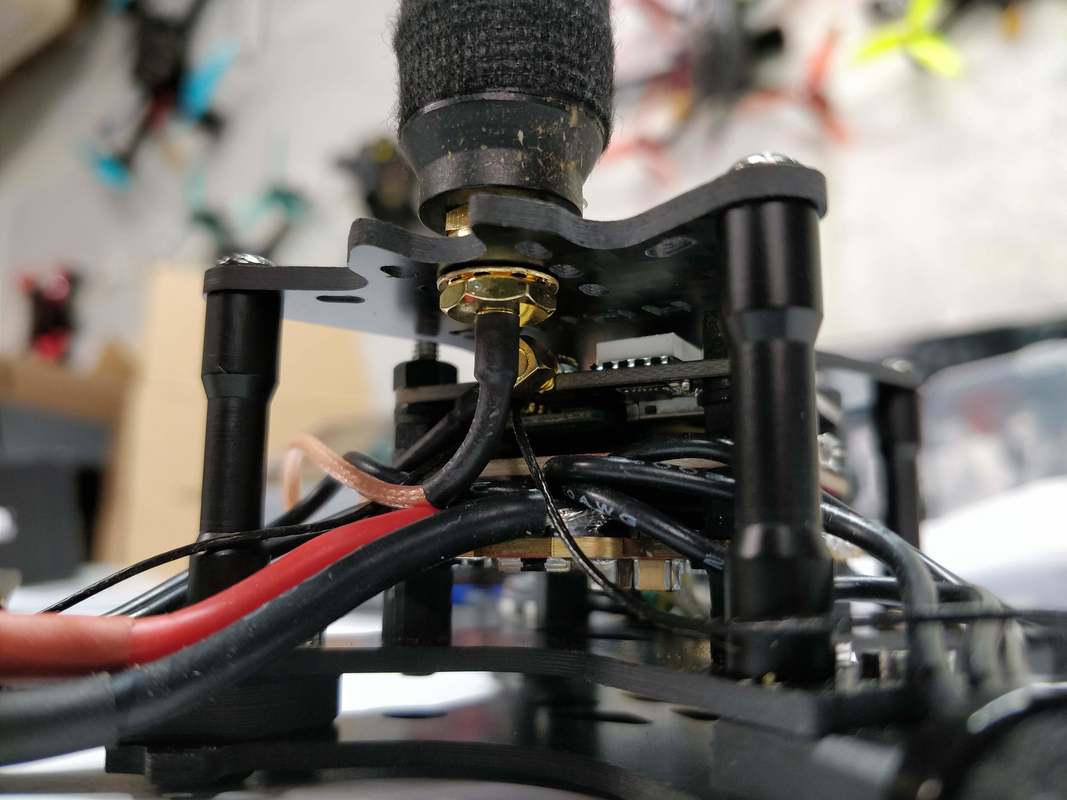
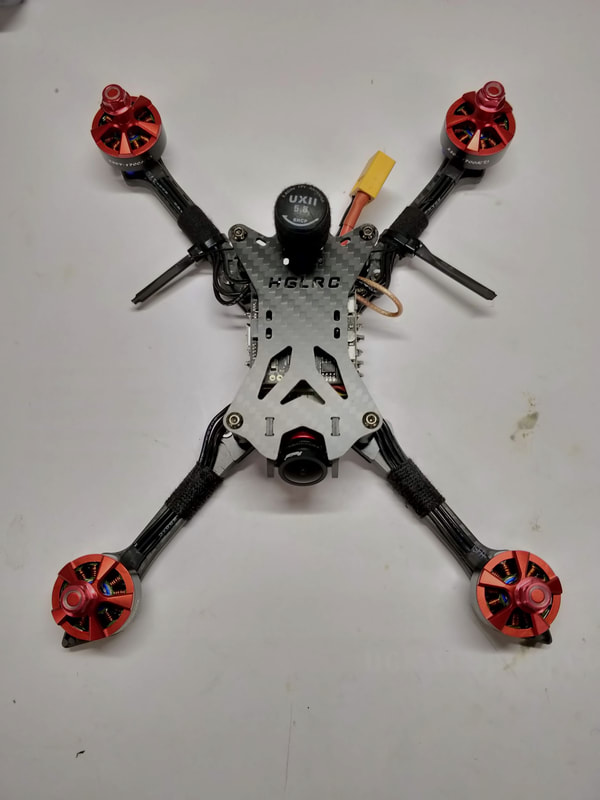
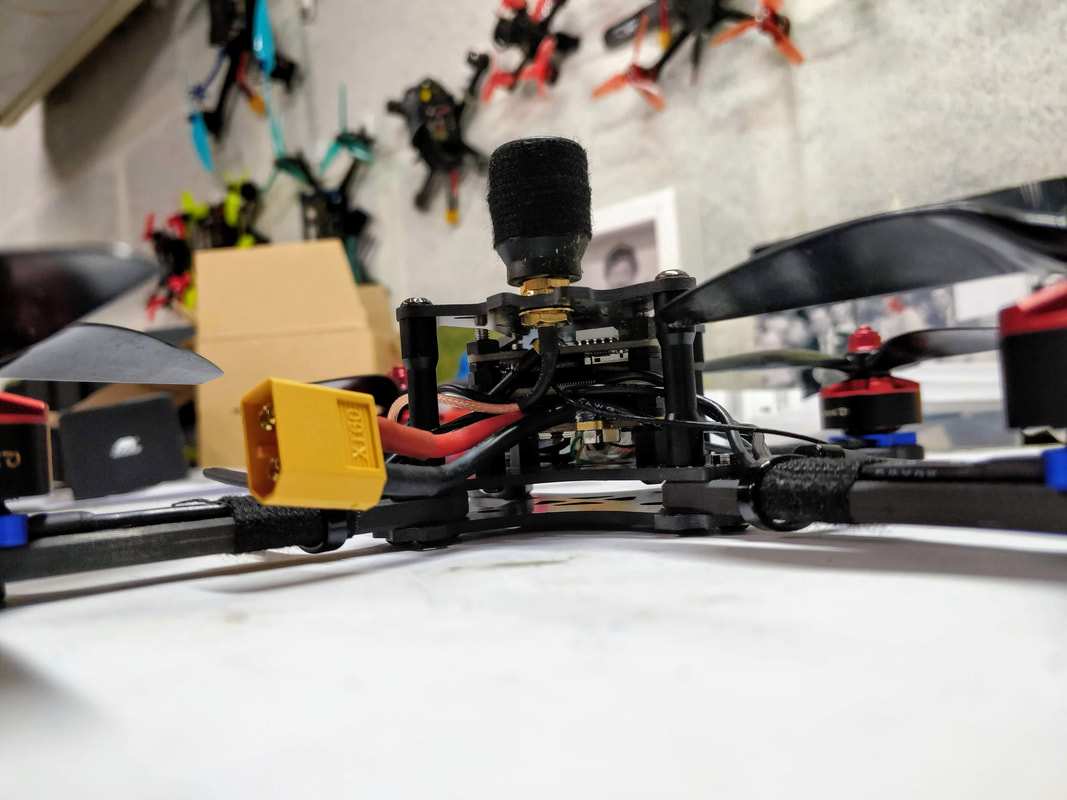
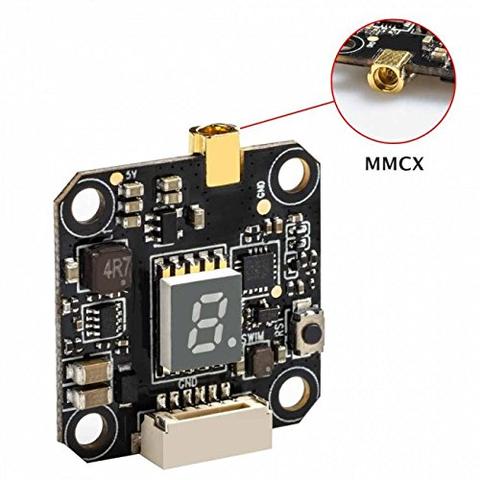
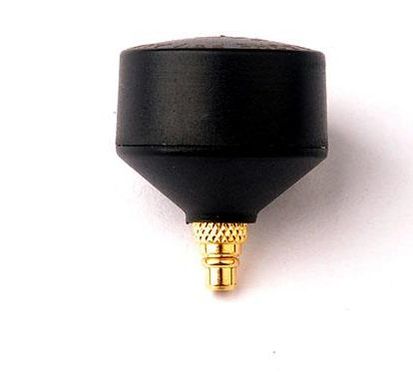
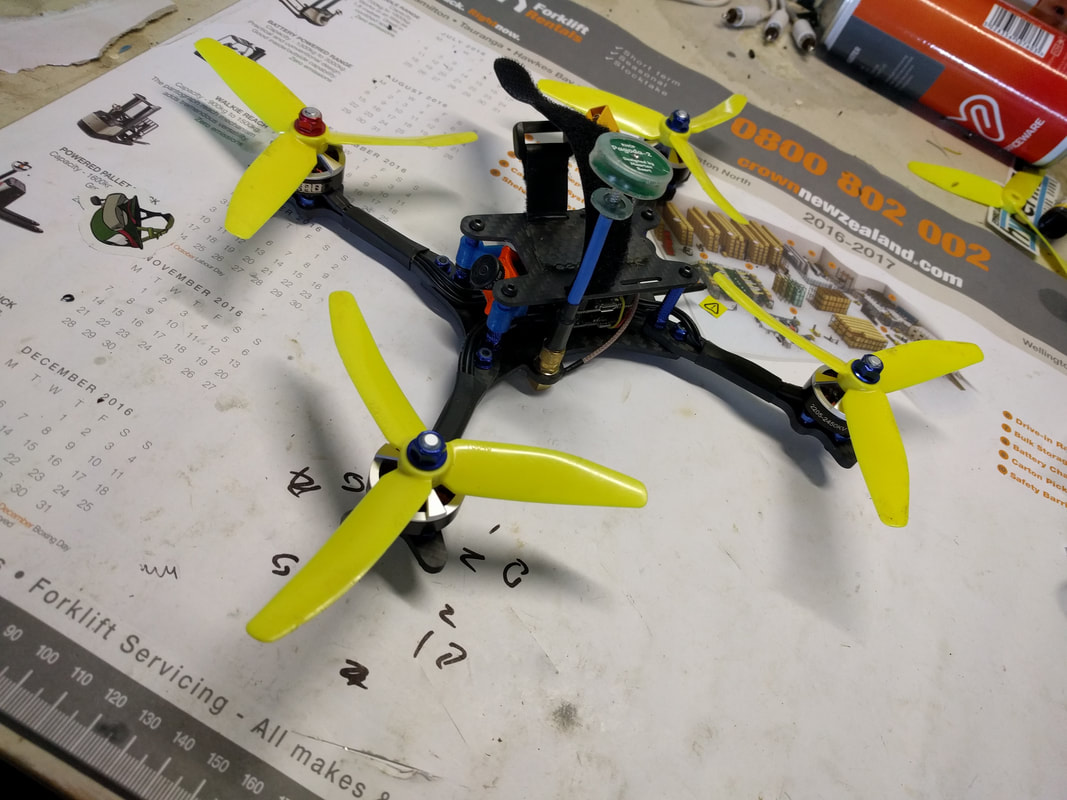
FPV system - Cam and VTX/DVR The Runcam Eagle Micro camera was easy to mount on the carbon fibre plates and I'm please to say where they fit in with cutouts on top any bottom place is smooth with no wiggle. As you can see from the pics the large 12mm lens on the Runcam Eagle Micro Pro *just* fits in, allowing full camera angle adjustment up to about 70° - more if you have a m8 lens. The HGLRC AIO VTX/DVR was no harder to wire in than a reguar VTX and regular solder pads mean you don't need to mess about with a connector. See pics below for more detail. I'm not a big fan of the antenna system at present and is only temporary until I can get a 3d printed option. The reason I don't like it is an antenna mount via SMA perpendicular to the chassis will inevitably get destroyed when 'landing' upside-down. My ideal solution of using the MMCX UXII Antenna (see what I mean in my blog here) unfortunately doesn't work on this frame as it would be too enclosed.
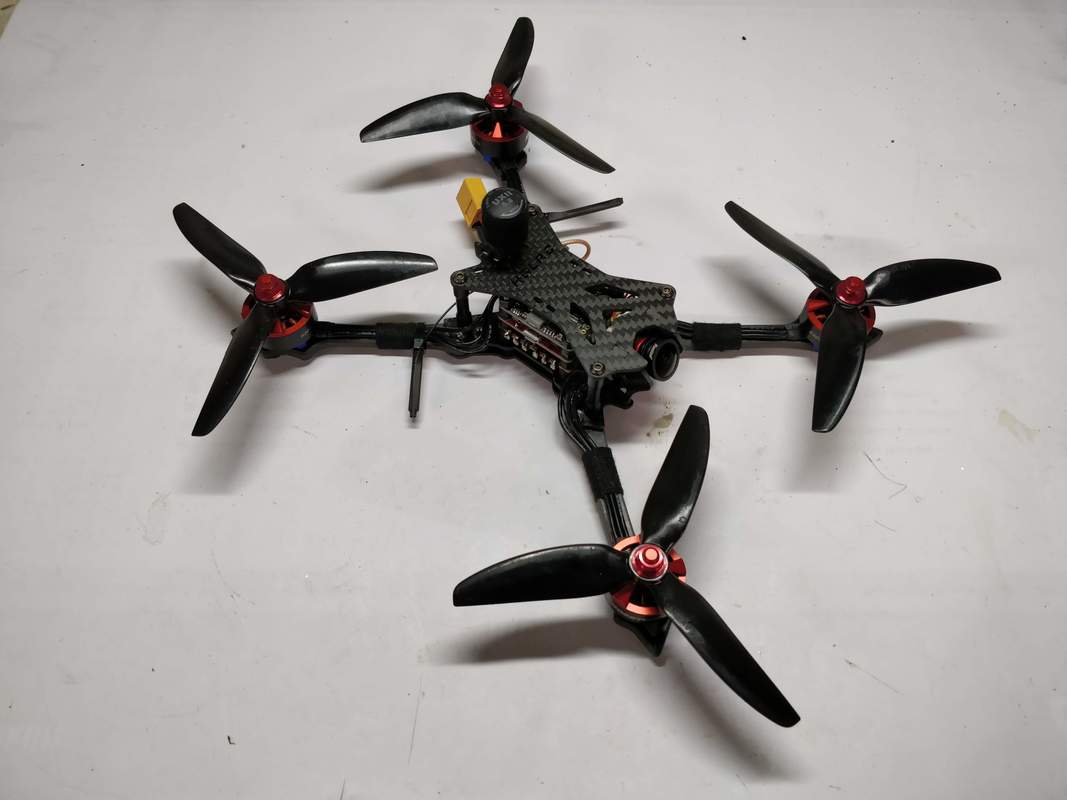
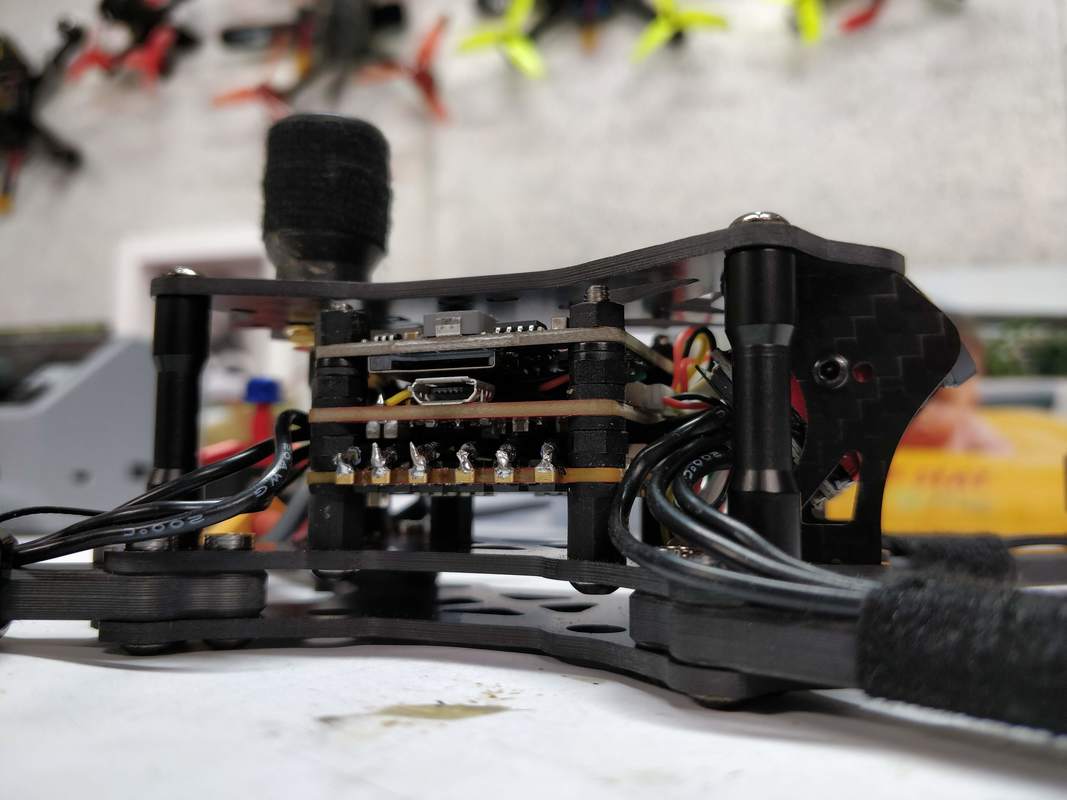
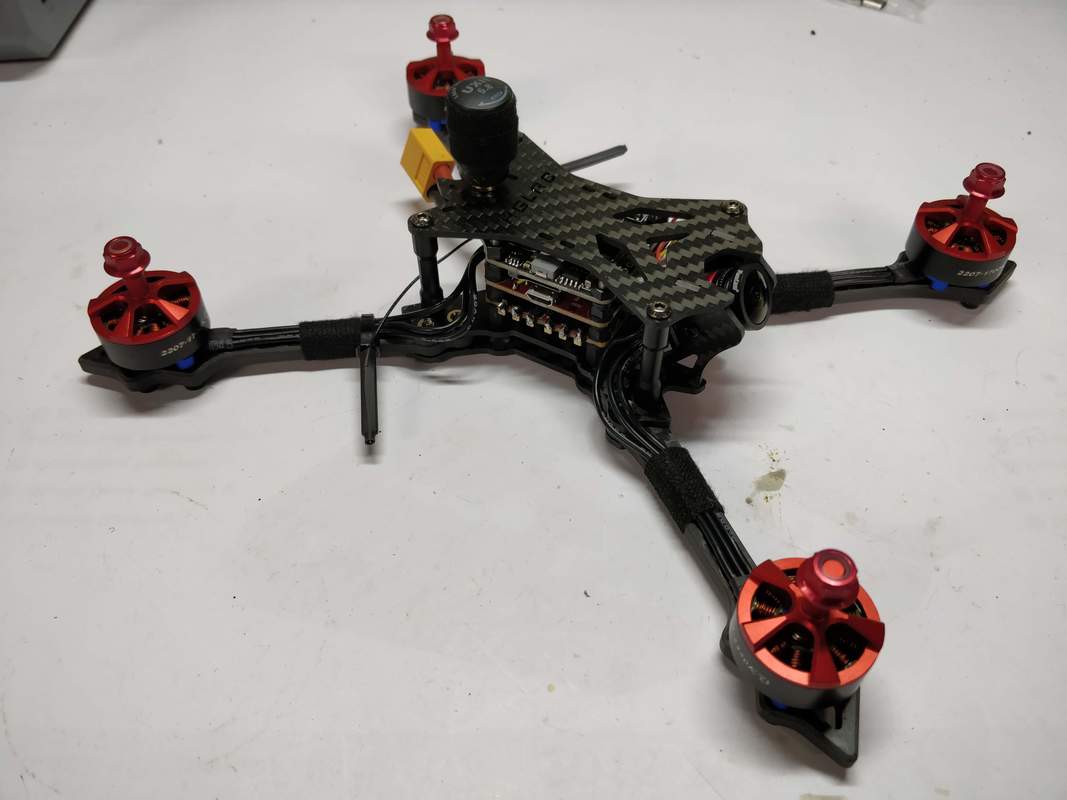
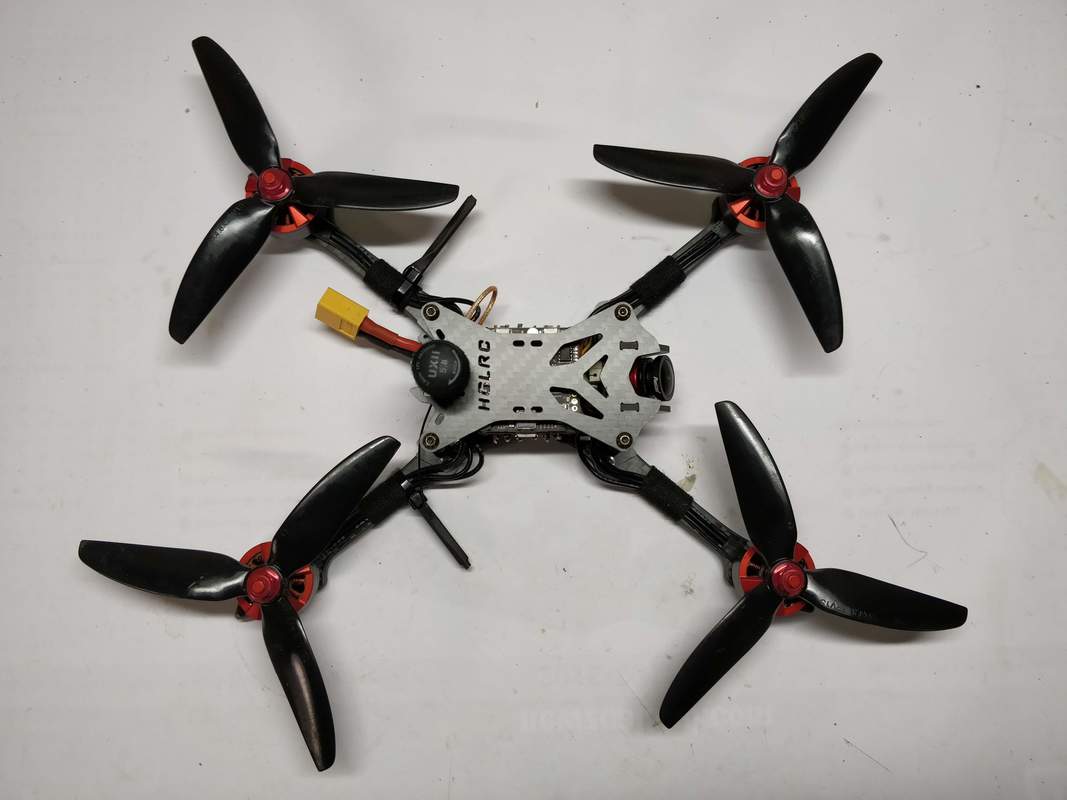
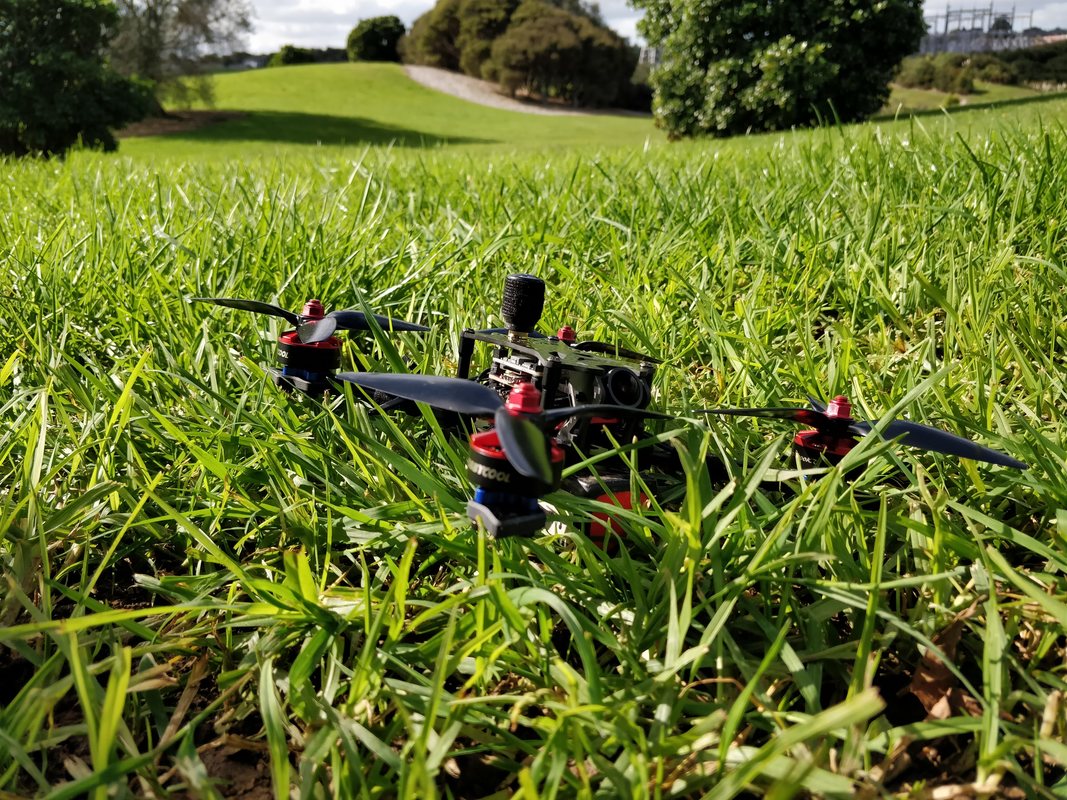
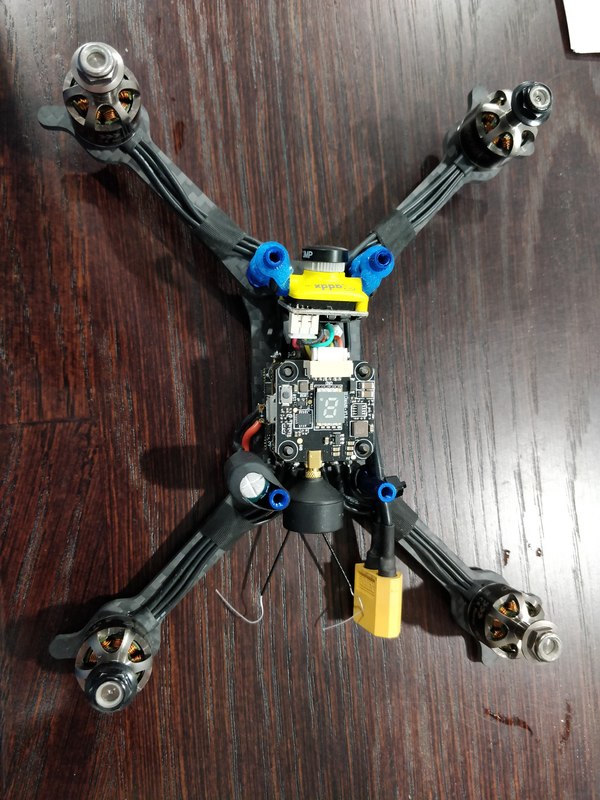
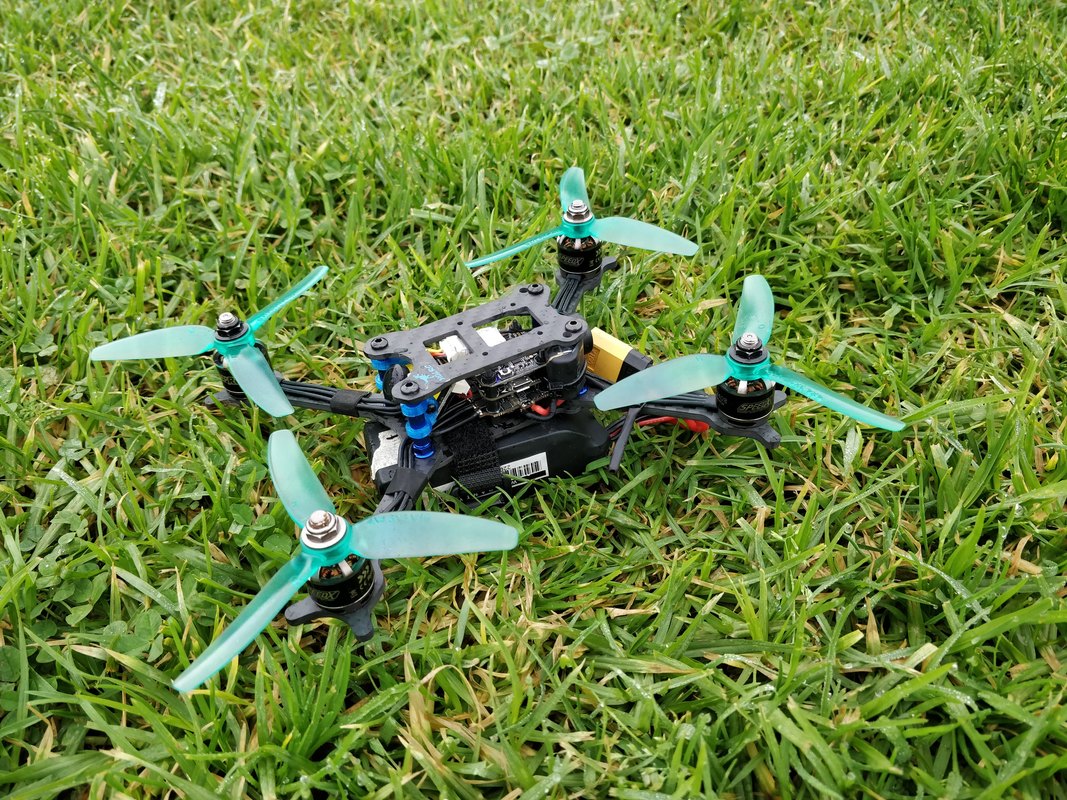
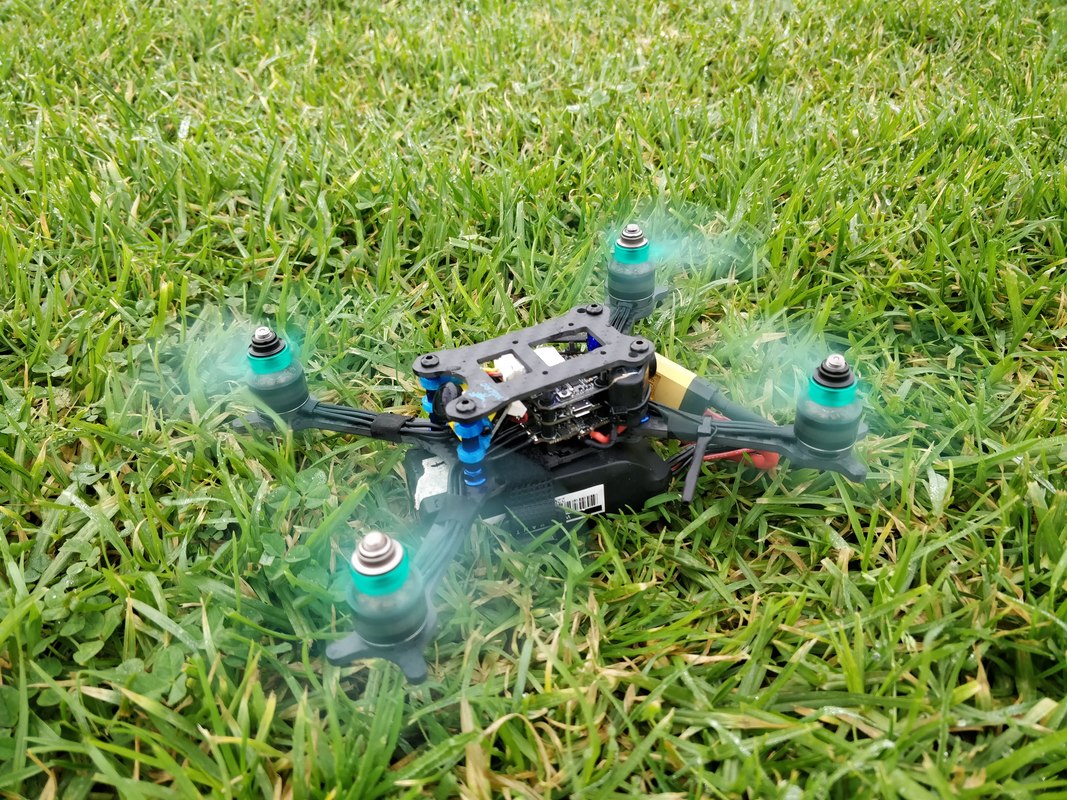
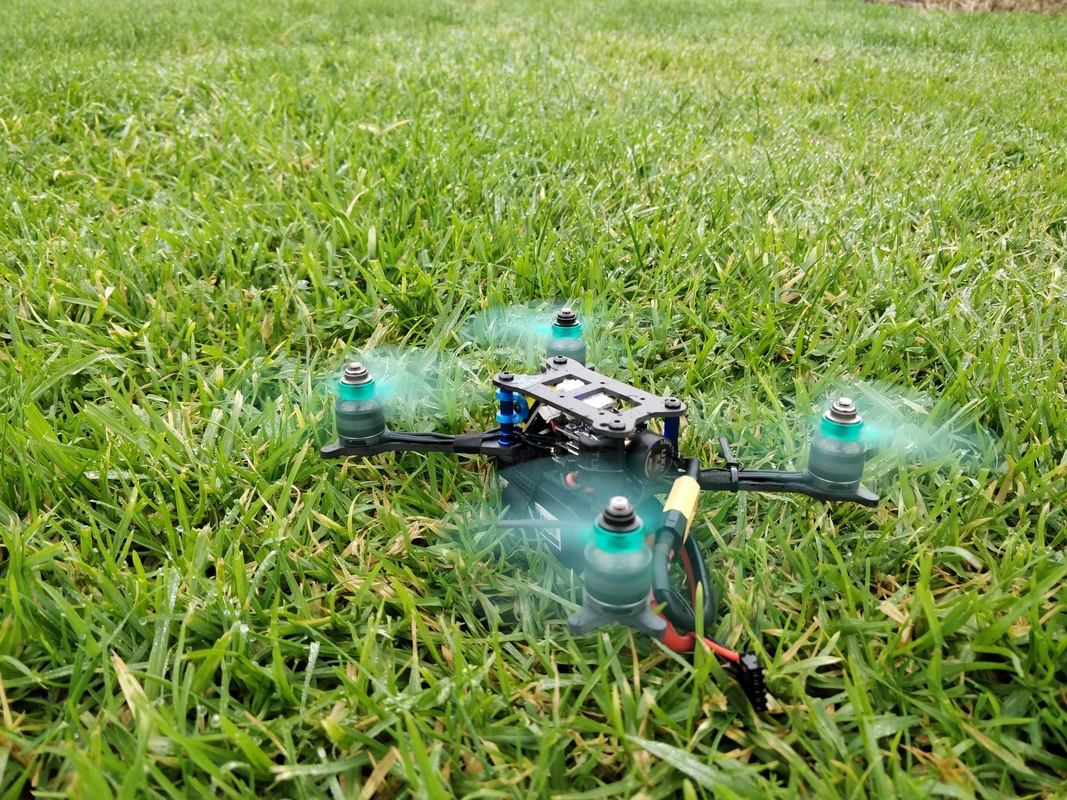
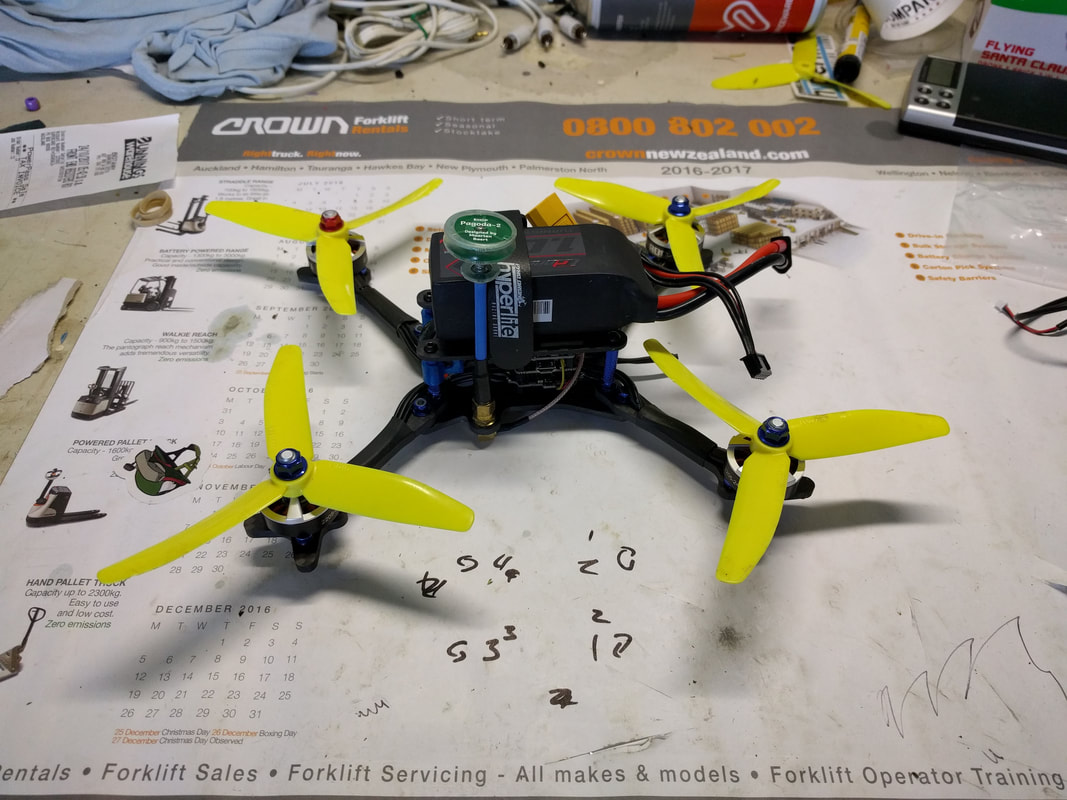
Other build notes Other than the VTX antenna I'm pretty happy with this build. The small body means it is suprisingly compact with 3 full 30.5mm board plus receiver. Speaking of the receiver the antennas are mounted in the now common cable tie / heatshrink method which is robust and compact and offers more than enough range for a race quad. Small holes on the trailing edge of the bottom plates means that strain relief is easily added to the battery connector. When routing the battery strap I chose to go over both sandwich plates (i.e. under the ESC) rather than just the lower sandwich plates as I'd be worried about the force the heavy battery would exert on 1 plate only. 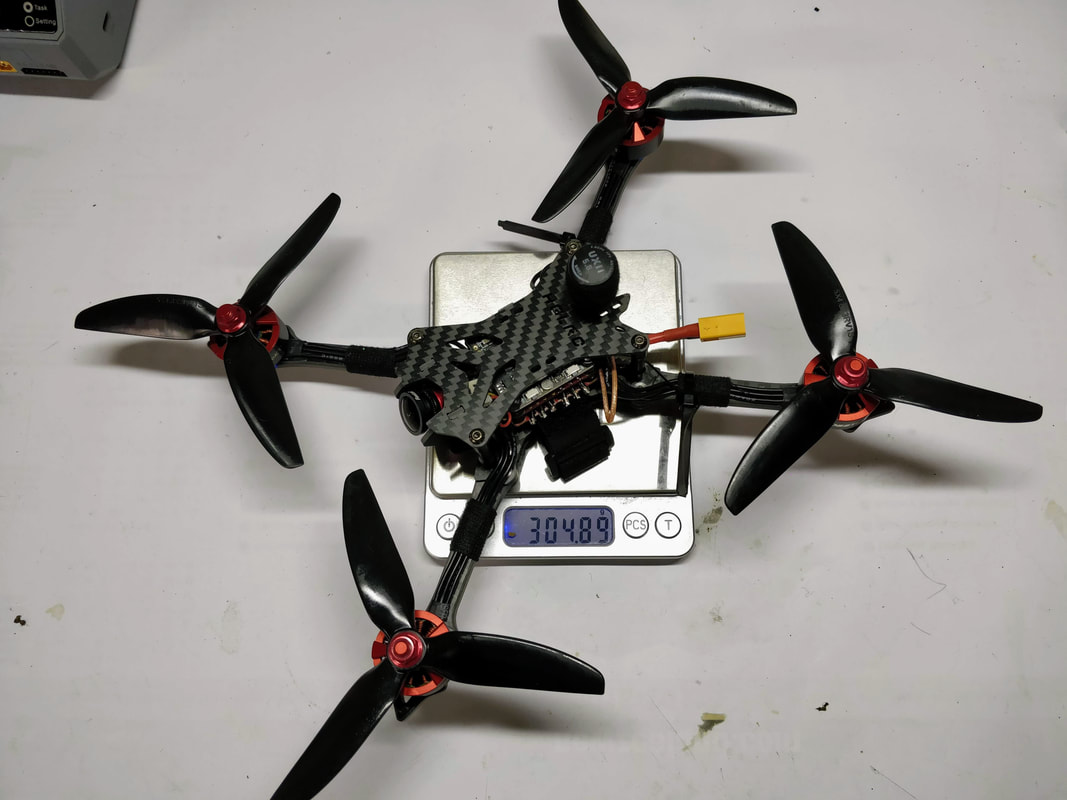 Final weight It's 305 grams ready to fly with everything except the battery. Given the motors are over 30g and hugley powerful each I'm fairly happy with the weight. More pictures are below including one from the maiden which means maiden flight detais will follow soon :)
1 Comment
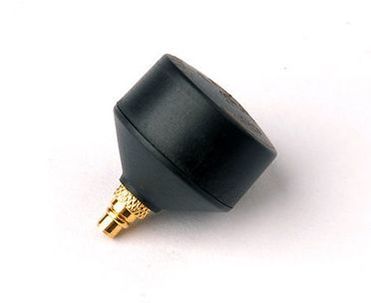
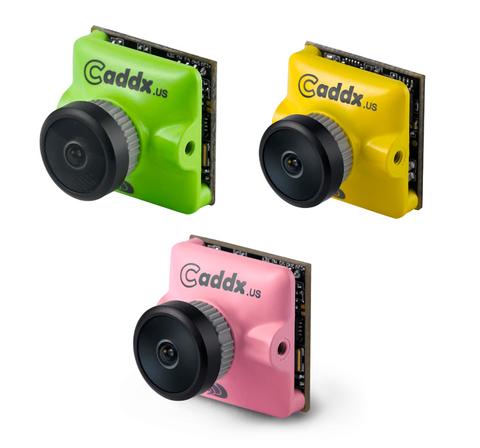
Time to see what all the fuss is about with a 6s low kV rig so I can make my own conclusions. This is the first part in a multi-part blog where I will choose the parts with reasoning plus alternatives I considered and why I landed on what I did. I will follow this up with a build and betaflight settings guide, maiden flight and the finally, long term findings. There are a lot of musings as to the theoretical reasons that 6s may be different to 4s but given this is a very empirical hobby I thought I might see for myself. Below are the parts I have chosen and why. For the record my goal is to make a high-powered and durable build that is easy to setup and service. Light weight is a bonus but comes behind durability and power. For servicability you will see I have chosen mostly recognised brands to ensure they are supported and spares are available in the long term. I have no desire for HD footage but clean DVR is a bonus. 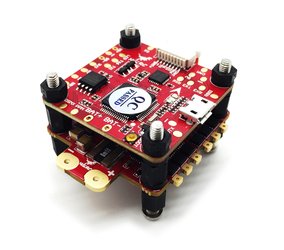 The HGLRC Titan stack is guaranteed to do 6S The HGLRC Titan stack is guaranteed to do 6S FC and ESC I have chosen to go with the HGLRC Titan F4 60A stack here. Click on the link for specs but I have chosen this stack combo because it is guaranteed to do 6s whereas many others are not officially rated above 4s (i.e. not warrantied). Brave testers have however found that others such as the EMAX magnum full size stack and the airbot Ori32 which I have a soft spot for. Another good option is the New Emax Mini f4 stack but until there have been more reviews I like the idea of a larger 4in1 ESC like on the HGLRC titan for better heat dissapation. I did not consider separate components here as there does not yet seem to be a common wiring standard from FC to ESC. A quick note that the titan is rated to 60A per channel on 4s, 50A on 5s and 40A on 6s. I have no issue with this because for a given power, current draw will decrease proportinately with voltage increase i.e. higher voltage, less current for same power. I also like that BLHeli_32 is aready pre-wired into the flight controller via the included wiring loom :) I would recommend buying directly from HGLRC for the best customer support. 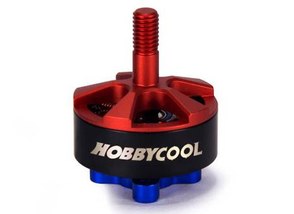 The HobbyCool branded 2207 1700kV is a thinly disguised Brother Hobby Returner R2 2207 for only $17 The HobbyCool branded 2207 1700kV is a thinly disguised Brother Hobby Returner R2 2207 for only $17 Motors To give this a devent go and make it a real powerhouse I've gone with the HobbyCool 2207 1700kV. While this looks like I've gone against known brands they are actually a Brother Hobby R3 2207 OEM available in 1700kV and 2300kV. I've chosen 1700kV since these are the equivalant of 2350kV on 4s. Although this seems like a low-mid kV option I tend to prefer lower kV motors and this seems to be where many motor manufacturers are targeting for 5 inch race quads running 6s. My other key motor consideration here was the Hyperlite 2207 1722kV but this is more expensive and often out of stock. I also considered the Emax LS2207 but have heard questions about durability which I'm not willing to compromise here. A quick note that I've chosen 2207 as a stator size as I perfer the 22mm width and 7mm height is the largest practical height for now. 2306 is a popular size too but has less stator volume than a 2207. These can be bought directly from HobbyCool.com and buying a set of 4 will get you free shipping. 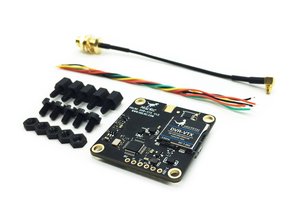 The HGLRC DVR-VTX AIO is the first VTXto integrate a DVR - a great match for components The HGLRC DVR-VTX AIO is the first VTXto integrate a DVR - a great match for components VTX I considered getting the HGLRC GTX585 to go with this (25mW-600mW with MMCX and tramp control) but decided on the HGLRC DVR-VTX AIO instead since it has similar funtionality from a VTX standpoint BUT it has an onboard DVR too - this first time these two components have have been offered in one tidy unit. This unit will can run at 25-100-200-500mW, has MMCX and will accept up to 6s (26v) directly meaning if it is wired to VBAT will put less load on the FCBEC which is important because the DVR will have a reasonable power demand alongside the VTX itself. Like the Titan stack, I would recommend purchasing directly from HGLRC  The Runcam micro eagle has the biggest image sensor of all micro cameras The Runcam micro eagle has the biggest image sensor of all micro cameras FPV Camera Since I went with the onboard DVR I wanted to get the best image currently available. It's not cheap but I decided to go with the Runcam Micro Eagle. It simply has the largest image sensor currently available in a micro cam = more information to generate an image from. My favourite is usually a foxeer micro arrow pro as a good budget option but really wanted to give this a chance to see if the hype is justified. 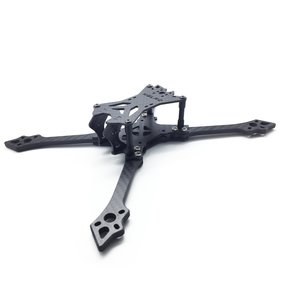 The HGLRC Batman220 is a sub-80g race frame with 5mm thick replaceable arms The HGLRC Batman220 is a sub-80g race frame with 5mm thick replaceable arms Frame This is probably the hardest decision of all. I wanted it to be somewhat lightweight but durable. The first frame that came to mind was the Hyperlite Floss2 and Mode2 Ghost. Both of these frames are super-functional for racing (strong and lightweight) but I already have both in other builds AND I feel they look pedestrian. This was my chance to try something different so ultimately settled on the HGLRC Batman220. My line of thought is that this is a newly released BNF model that looks like it will be very popular and hence well supported with replacement parts and in the open source community with 3d prints etc. The frame has separate arms that are 5mm thick and weights a hair under 80g with all hardware. It has a look that is unique that doesn't look to be a clone and has a nice sturdy FPV cam mount similar to the hawk 5 which I prefer over the TPU mounts that sit on standoffs like the floss and ghost series. It has only 3 motor screw holes which should make the arms stronger at the ends - I have broken Floss 2 arms here before although they were only 4mm. There are 3 screws holding each arm to a sandwich plate so it should have minimal play. Press nuts for quick replacement is a nice touch. This is also one of the cheaper branded frames I've come across at only $36. VTX Antenna This may sound like an odd choice but I've had tremendous success with the RealAcc UXII MMCX. Yes, this series started out as a clone of the TrueRC/Lumineer AXII however so far as I know the direct MMCX connection as pictured is a unique innovation by RealAcc. I'm a little conflicted on this though because RealAcc tends to be the worst offender for cloning. I suppose this way I'm encouraging their innovation rather than cloning. This antenna is small and compact and sacrifices some transimission power for robustness. Being so close to the body of the quad means it is well protected but it can mean the carbon fibre frame can block transmission in some orientations. In fairness though this is a racing rig and racing so their is minimal distance between the vtx antenna and your video receiver. If range is an issue I'd recommend the Emax Pagoda which is a no-nonsense CP antenna that recognises the designer and costs no more than it needs to be with a decent level of quality control. The RealAcc AXII MMCX is available for about $6 and the Emax Pagodas are about $14 per pair.
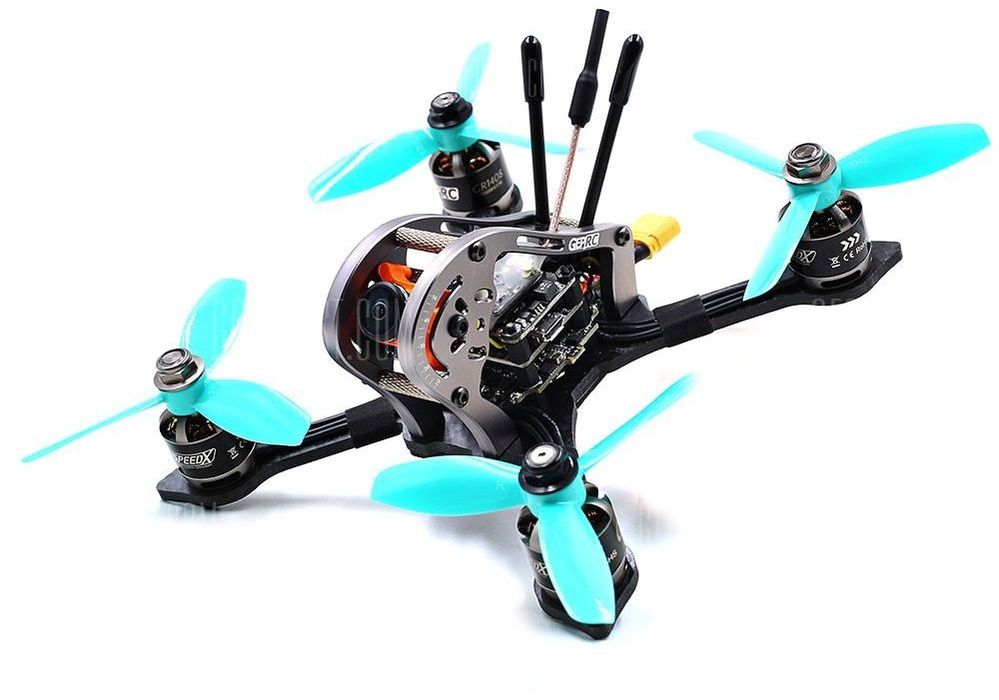
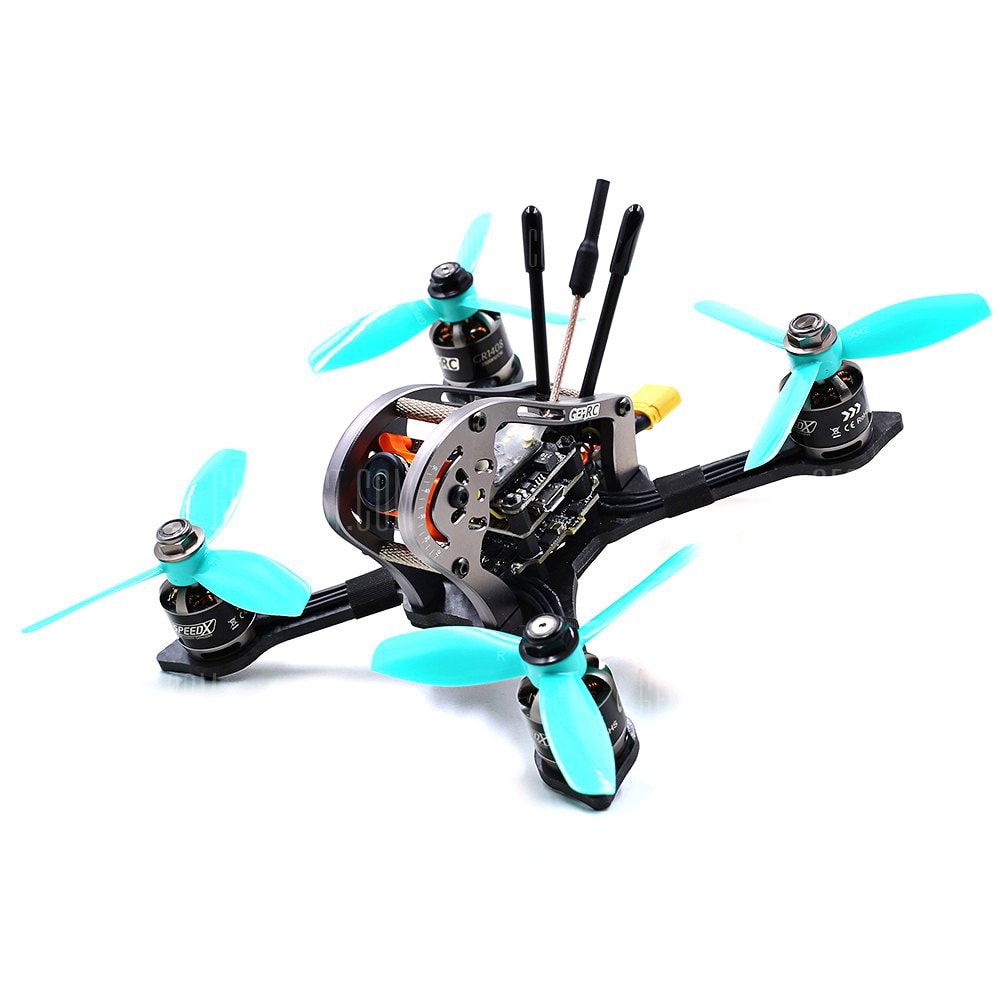
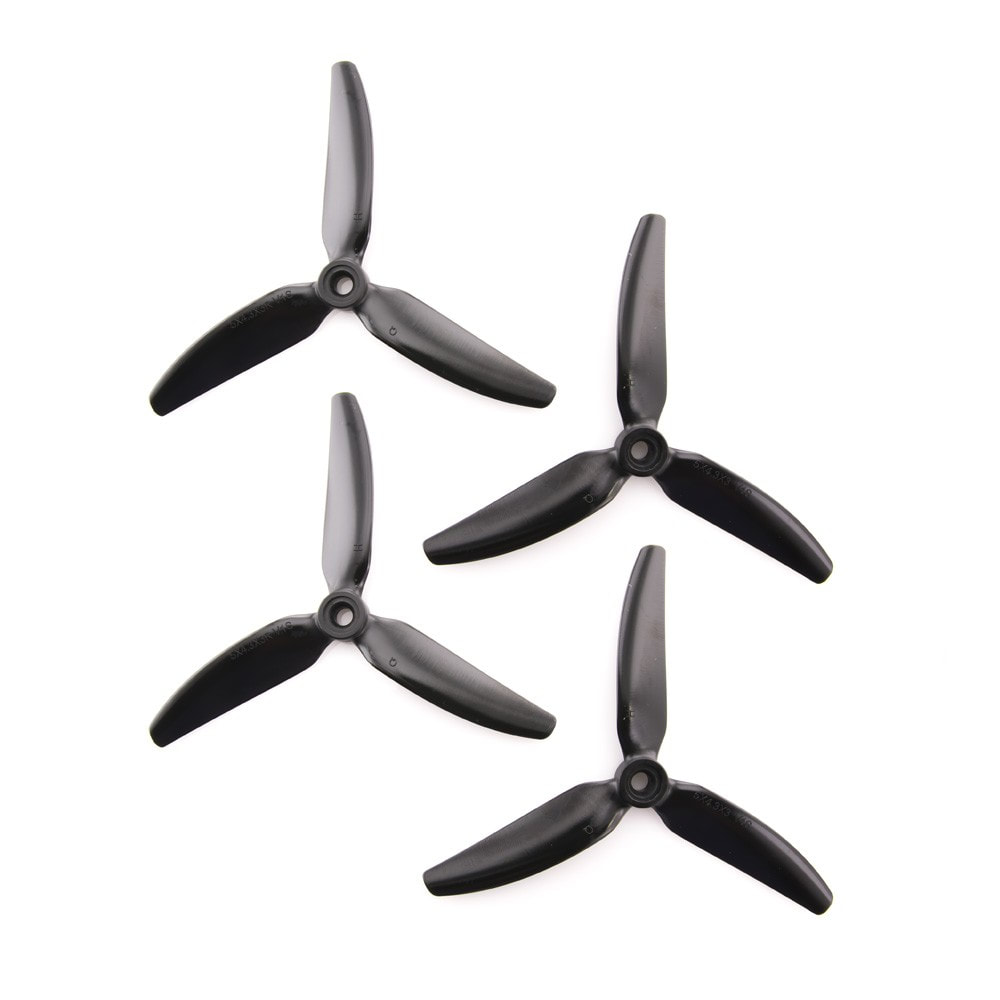
I'm going to leave props out of here on purpose because I want to see what is going to be most suitable out in the field. My best guess is something relatively agressive like the HQ 5x4.8x3 or perhaps the new 5.1x4.6x3 which sounds like a good balance. If they are not durable enough I'll try the Dalprop cyclone T5045c or T5046c. Additionally I'll need to follow up on battery because it will depend on availability as I somewhat geographically isolated and many local carriers are afraid of Lipos. More to follow, I'm hoping I can source something that will be available to most people worldwide. Please look out for the next blog in this series (Part 2) where I'll go through the build. Will link here when available. The GEP RC MX-3 Sparrow was an awesome 3" quadcopter that sadly had little uptake because of it's high price ($249 retail). As at 28 June 2018 Gearbest is clearing them for $149 here which represents great value for money. I've chosen to convert this to a competitive lightweight 4" racer.
I haven't done a formal review on the quad but key features of the MX-3 sparrow but key features were:
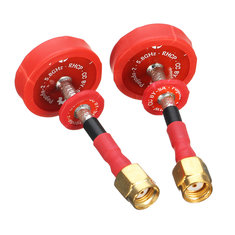
The change was simple, I purchased a lightweight Toothfairy 4" frame from piroflip, some HQ 4x4.3x3 v1s props and transferred. While I was at it I also switched the camera for a Caddx F1 and the stock TX20 vtx for and AKK FX3 with smart audio and up to 600mW power. Since dipoles are frowned upon at my club I've also used a UXII mmcx RHCP antenna. A full list of all components and links are at the bottom of this page. Assembly pictures are below. I'll mention here that it was not until I disassembled the MX-3 sparrow that I realised the design and finish the GEPRC put in are second to none right down to the smallest detail. I was thoroughly impressed and can now see where the cost started to come in. Moving on, build pictures below, this was pretty straightforward. I was really pleased with the finished build but was what was even more pleasing was that the final weight (ready to fly except battery) was pretty much identical to the MX3 sparrow - 150g, even with heavier components like the new VTX and CP antenna. Given this is swinging an inch larger prop I'd expect (and got) much better performance and efficiency.
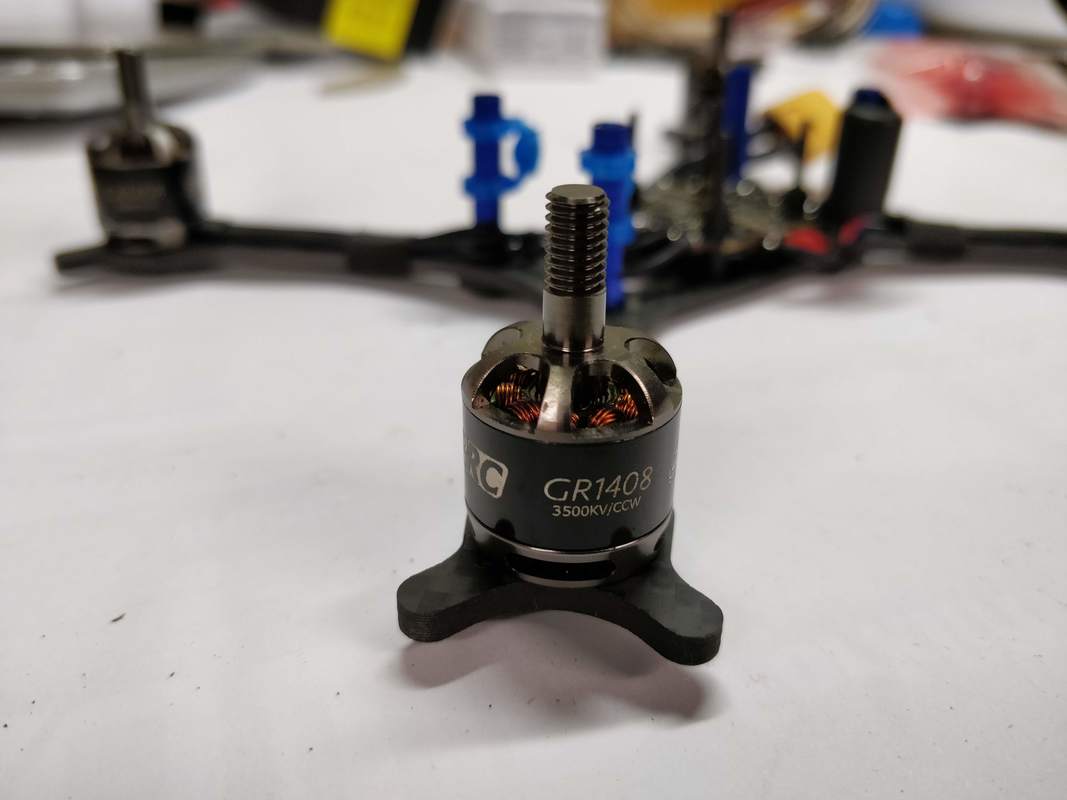
This is now one of my mainstay racers where I can be competive on all but the most open tracks. It can give me a distinct advantage on small to medium size tracks as well where I'm well over 100g lighter than even the lightest 5" racers. I feel the 1408 motors are a much better match for the 4" props and feel like they could manage even more pitch than the 4.3 I'm currently using - I believe HQ are due to release a 5.0 pitch model I'm looking forward to trying soon. If you are like the look of this build you can either strip down the GEP Sparrow like I did (currently on special for $149 at Gearbest or try your luck at Banggood). All other parts below:
LIGHTWEIGHT 5" RACER WITH 20MM X 20MM XJB F428 STACK - PART 3: Initial flights and blue smoke4/11/2017 Sorry this has taken a while to update, had some issues and have been awaiting feedback so I know which direction to head in next. After choosing the parts (part 1) and completing the build (part 2) I've added some extra parts to make this more suitable for racing. Namely a ufl/ipex to right angle sma female connector and a RHCP pagoda antenna. A circular polarised antenna is compulsary for my local multiGP chapter running on 25mW transmit power. This has bought the dry weight up to 250g with the Dalprop t5045c cyclone propellers. Initial flights: So responsive I was hoping to report on my first race but unfortunately bad weather had meant it was cancelled. The weather did clear though and so I got the chance to discharge my batteries the RIGHT way. Quad: 245g dry weigh as per part 2 build plus pagoda antenna, Dal 5040V2 instead of t5045c cyclone Battery: 4s 1000mah Turnigy Graphene 65c 145g
Pids were fine stock and no excessive motor heat from the dynamic filtering with all notch filters off. Went for some slower light props because I was flying in a smaller space. Combined with a 2450kV motor this meant I didn't have a massive amount of top end speed but wow the pick up was obscene. Between the light dry weight, lower capacitor batteries (light) and the light props that are very easy to spin I found it super responsive and so very easy to change direction at pace. My goal is agility and manauverability while I become more familiar with racing and I wasn't let down at all. Robustness I'm really enjoying the lightweight for another reason too. I am using a micro FS82 flysky receiver with no diversity as a placeholder until my new frsky setup arrives. This reciever is fine for a close-range micro quad like the leader 120 but I got carried away with the floss 2 and failsafed about 20m above tarseal. The quad went down and I lost video signal. After trying my hardest not to run over I was surprised to see everything intact. I only lost video because the ufl connector popped off (which I then popped straight back on. There was also a small scratch on the prop nut and a kink in the pagoda antenna - it seems the antenna had taken most of the hit. I was obviously lucky on the angle it landed but think the lack of inertia through lower mass had helped too. Not even a bent prop! Blue smoke I put 7 packs through that day and on the second to last I re-armed after a nothing crash and found motor 1 not idling. I unplugged and re-plugged the battery and got that horrid smell of burnt electrical circuit. I powered down once more, waited 5 minutes and re-powered with a new battery. Got idle this time but when I went to throttle up, it dipped on motor 1 before the flight controller took over and limited power to the other 3 motors in order to maintain attitude. Either the motor or more likely the ESC was sick. Trouble shooting Usually when an ESC goes it is catastrophic and it passes no current whatsoever or if it does, has major desyncs and brownouts. Mine behaved differently. To see that the issue was still present I strapped the quad to the bench with all props free to rotate. I then connected a full battery and betaflight configurator so I could power up 1 motor in isolation at a time. Motors 2, 3, 4 were all able to generate maximum thrust but motor 1 was limited to about 30 or 40%. I then swapped the motors attached to ESC 1 and 3. After repeating the test the issue was ties to ESC1 meaning the fault was with the ESC. Not a great outcome since this is a 4 in 1 esc.  Dealing with HGLTech and looking at other options My first though was that the ESC is just not capable of managing the power for a 5" build. The 20mm x 20mm stacks were originally for micros and although this one is supposedly capable of 28a per esc, the rating may have been overly generous. This got me thinking of expensive replacements like the Asgard V2 and other ESC/FC combos since this FC cannot easily be reused with different ESCs. For the sake of research and seeing it though I got in touch with HGLTech, makers of this unit. They responded the following day recommended that added capacitance should help manage dangerous voltage spikes and reiterated that the ESC should be capable of 28a continuous and 35a burst. After sending pictures of the build (including the capacitor) I came straight out and asked if it was a manufacturing fault and if so, could they send a replacement. To my pleasant surprise, they said yes. Really I should have gone through the retailer (Gearbest) here but really wanted to get the technical explanation more than just the free replacement ESC. Credit to HGLTech, they got me both!  This is the image I got from HGLTech recommending I add capacitance. Next steps
Simple really, I'll wait for the replacement ESC to show up, wire in 2 capacitors this time (with 1000 microfarad total capacitance) and try again. If it fails it is more than coincidence and the technology is not quite there yet. If it succeeds then it supports the seachange of miniaturisation in racing quad electronics. I'll make another part to this blog series once I've had a few packs through the replacement escs and hopefully make it racing. Update Jan 2018 A quick update, since installing the backup 428 esc and external capacitors I have not had another issue. From photos of the damaged ESC it was a FET that had burned out. What I failed to mention here is that the ESC burnt out shortly after I had realised the original capacitor I installed was knocked off in the crash I mentioned. My hypothesis is that due to the small size of this board, there is not a lot of capacitance so voltage spikes likely as a result of regenerative motor breaking are causing the damage - hence why the capacitors help. I still think the this quad is pushing this small stack to it's limit but there are a lot of success stories here: https://www.rcgroups.com/forums/showthread.php?2971570-20mm-x-20mm-FC-ESC-VTX-stack-in-a-5-inch-racing-quad In the meantime HGLRC has since releasted the XJB F440 tower based around a 40a BLHeli32 esc. I've not tried one myself but this would looks like it may be a better candidate for 5". Link to the F440 direct from HGLRC is below: 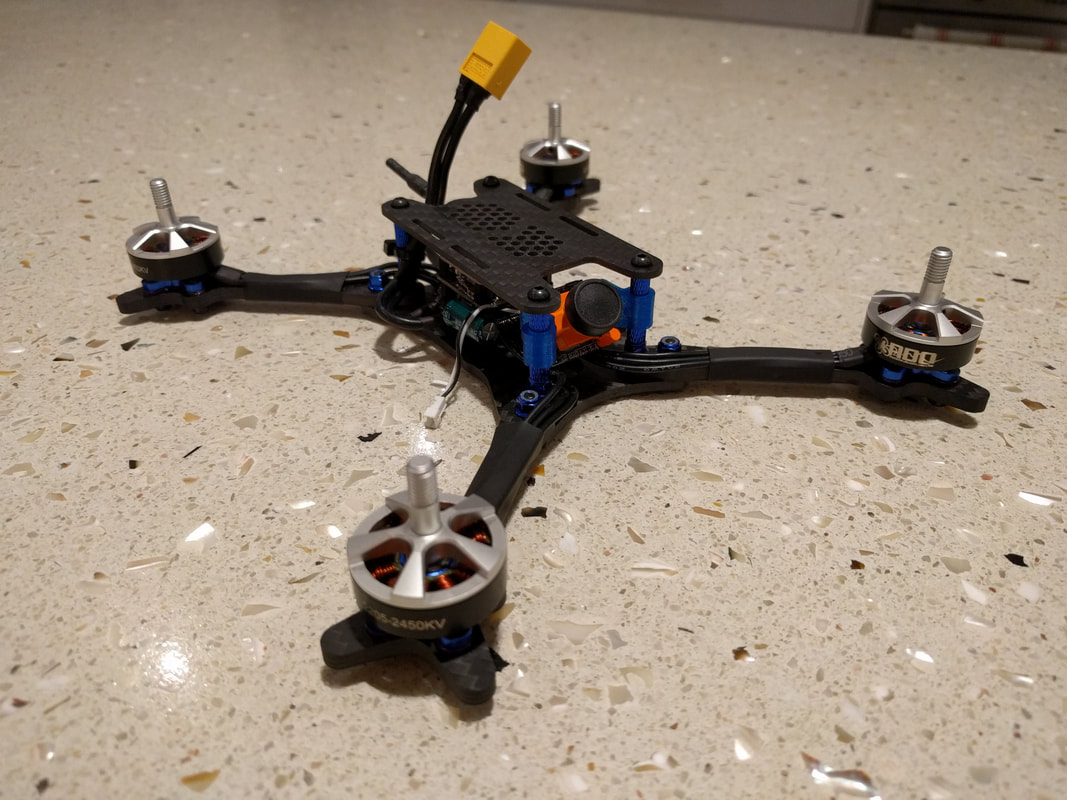 This is the build log for my floss 2 racing 5 inch quad that is based around the HGLRC F428 TX20 Elf 20mm x 20mm electronics. In part 1 I covered the reasoning behind all of the components in the build. Although this kit does include a micro CCD camera, I ended up using it on my Leader 120 since it was slightly lighter. I'll cover the steps that can be seen in each of the photos below. Click on the pictures to embiggen.  Motors and frame. So yeah, skipped a few steps to get to this point but I was a bit excited getting it together: -Raceday quads Returner R2 2450kV motors were attached to arms using screws with loctite. Heat shrink placed over the arms with wires inside for a clean look and to keep wires away from possible prop strike or tangling. -Hyperlite Floss 2 5" frame assembled 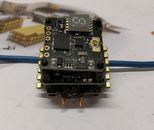 Strengthening the ESC battery pads This part is important. I've seen people mention that earlier reports of other HGLRC ESC have had VBAT pads wripped off when batteries have ejected on crashes. In addition these pads are small and I'd struggle to get a connection even with 16 gauge wire - the minimum I'd want to use on this build. The solution I used was to take some copper strand from the core of home wiring and thread as many as possible through the VBAT holes. Then twist tight and trim to about 4mm long. It's not shown in this image but then tin the pads and wire with a good hot soldering iron - I used 380°C on my TS100 soldering iron. 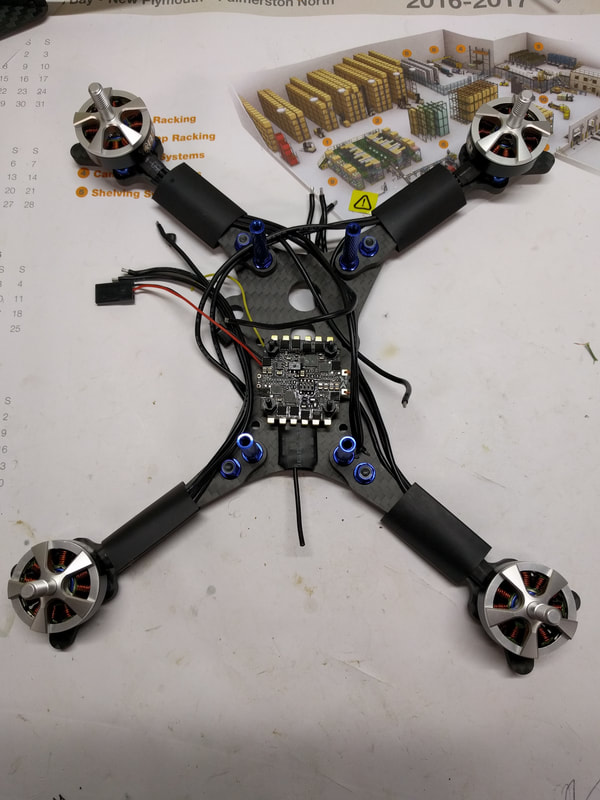 ESC and receiver mounting Here the ESC has been mounted on the supplied m2 nylon standoff which have been attched to the frame with m2 x 6.5 screws. A FS82 flysky receiver that I previously bound was heatshrinked with power and signal wires passing underneast the ESC. I'll replace this later when I upgrade to the FRSKY Taranis Q X7S. Note the orientation of the ESC. Motor pads need to go to front and back as the FC must rotate with ESC due to pin connection. If the pads go side to side then the USB port on the FC becomes inaccessable at the front or back. 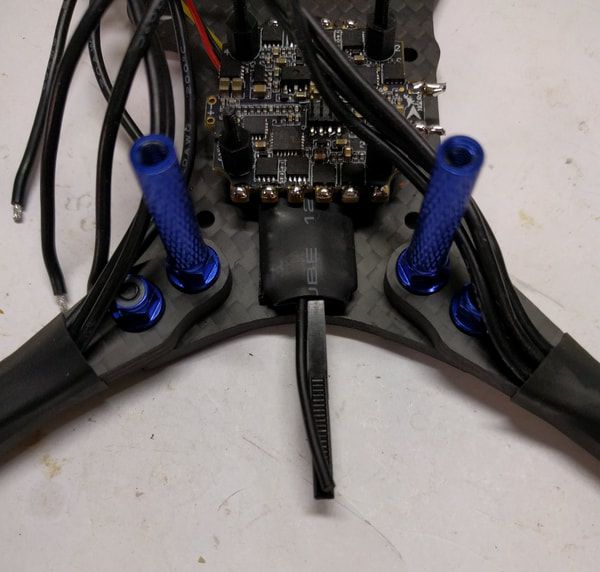 Rx antenna strengthening Shoved the end of a cable tie between reciever and heat shrink here. Added heatshrink on top of this and the monopole antenna to keep it stiff andaway from props. 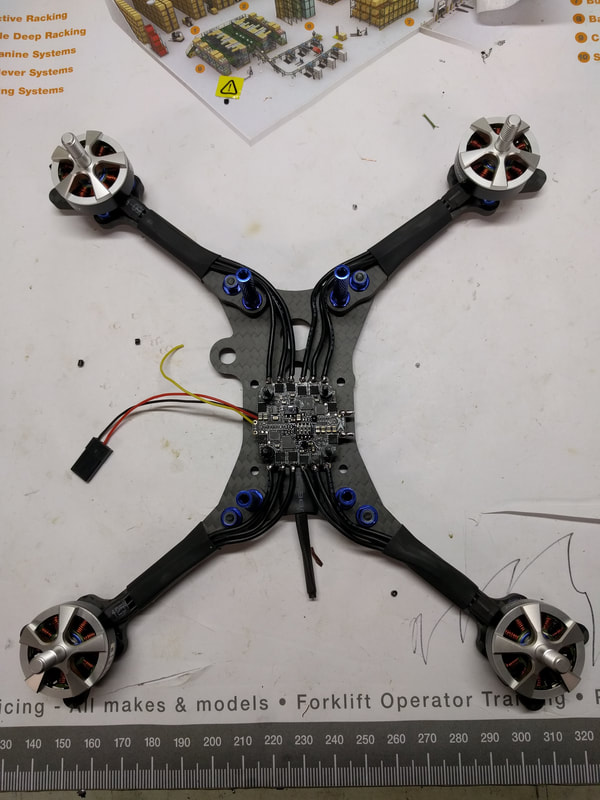 Motor wire connection Motor wires solder up to ESCs. Order is not important as this can all be changed via software in BL Heli and Betaflight.
 VTX wiring and capacitor 5 things in this image: -Flight controller added to stack -XT60 added with cable tie to right rear standoff for strain relief. Wires had extra heat shrink so rubbing doesn't wear the insulation off. -Capacitor added - 25VDC 470 micro farad to supress potential electrical noise -Receiver soldered to the flight controller -VTX wired and added to stack 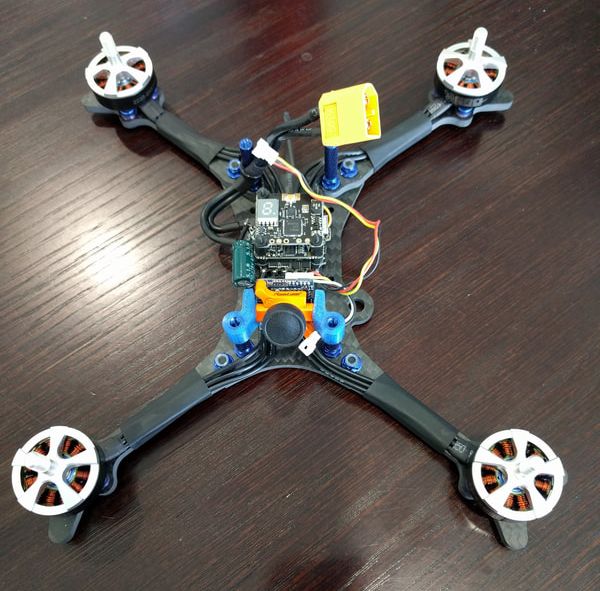 FPV camera mounting Runcam micro swift 2 added to the TPU mounts to check for size. Heaps of room! 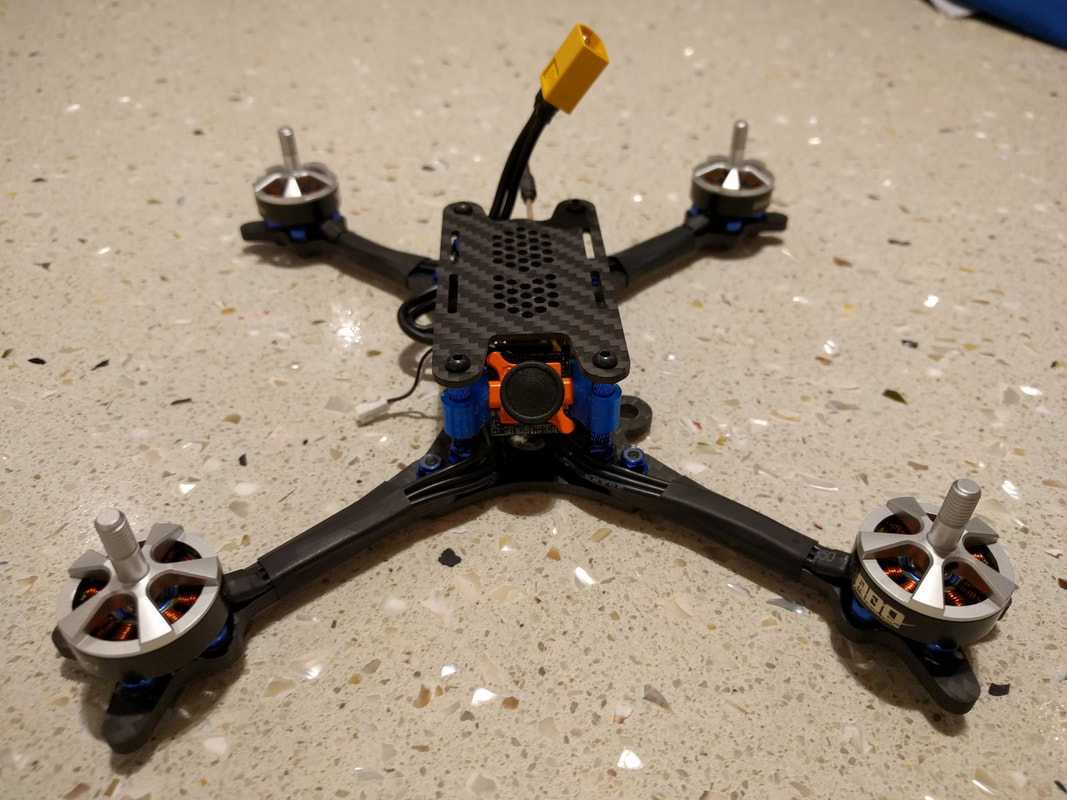 FPV camera wiring to FC Camera has been wired up here with the F428 flight controller having unique pads at the front of the board specific for the camera - 5v/ground/Vin - very clean and easy to wire. 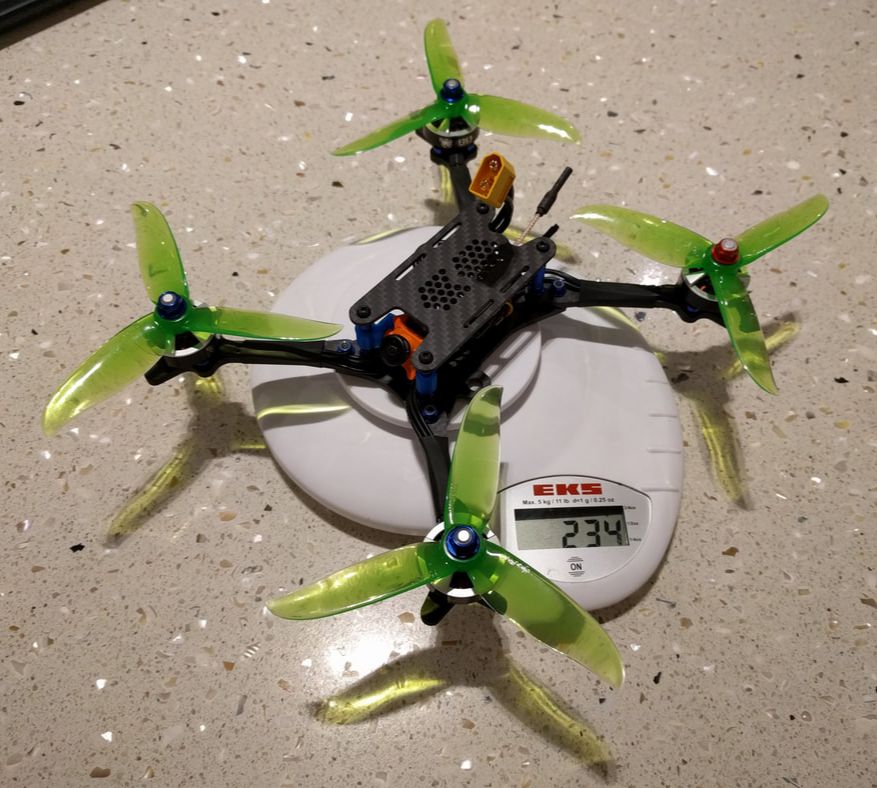 Finishing up and software updates Here is the money shot with all the software updates and changes done: -BL Heli updated to 16.3 with motors running reverse -Betaflight updated to 3.2.1 with Omnibusf4 target -Top plate and props added -OSD turned off in swift micro due to betaflight OSD Summary
In summary this was head and shoulders the easiest build I have done thanks largely to the HGLRC XJB F428 TX-20 Elf electronics. Why? No wires between ESC and FC, all pads for the vtx at the back, all pads for the camera at the front and ESC, FC and VTX fit in a nice small, light stack. The only down size was the small VBat pads which I think I have a good solution for however only time will tell. The build is light and well enclosed so should be strong. Everything fired up perfectly first time with no smoke which is always a bonus. So far as the build is concerned I am very pleased with all the components I've chosen here but I really need to put them to the test in flight to be sure.  This year I have decided to try racing with Multi GP in my local NZ chapter and rather than using my trusty but heavy Martian II, I will be building a new 5" lightweight racer. I've decided to break this into 3 parts to cover in detail what is going on: 1. Parts choice and reasoning 2. The build 3. First flight and performance Build objectiveI find with a new build that sticking with a clear primary objective will help you better choose your compoents. My objective for this build was lightweight and durable, built specifically for multi GP racing rather than a jack of all trades. Durability includes reliability since gear failure is probably the most disappointing way to DNF based on my days racing RC cars. Parts choice and justification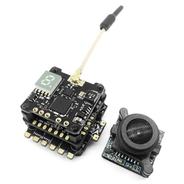 GLRC XJB F428 - TX20 - ELF F4 Flight Control System - As soon as it was announced I new this would be perfect for the floss 2 frame I'd already pre-ordered. Why did I choose this:
My only concerns are: will the VTX signal be clean enough for group racing? Are the ESC VBAT pads too small for a suitable wire size (16AWG)? Can this actually push 2205 or will it go up in flames or less spectacular blue smoke? 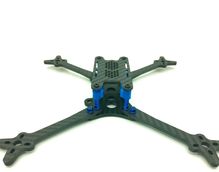 Hyperlite Floss 2 5" frame - The only issue I had in choosing this one was to decide between this and RCAddicts newly designed Mode 2 Ghost frame. Very much neck and neck but the floss 2 was available locally with immediate delivery. Why I chose:
More of an observation than a requirement but the frame is also simple, easy to build and service. 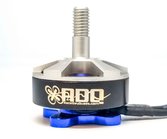 RACEDAYQUADS BADASS 2205 2450KV NAKED BOTTOM RACING MOTORS - I always knew I wanted a mid kV 2205 motor for this build to stay light. I looked at the various returner r2 variants and decided the raceday quads were perfect due to the 7075 aluminium. Notable mention to CATALYST MACHINEWORKS FREEDOM 2205 MOTOR and Returner R2 Ghost Edition 2205 2555kv. Why I chose:
 DALPROP T5045C Cyclone 5 Inch 3 Blade Propeller Props are of course a personal choice but I'll be starting with my favourite brand Dal prop. I chose not to start with the Cyclone 2 5046 to try keep the current draw down a little.
Why I chose:
|
Archives
August 2018
Categories |


 RSS Feed
Thanks for visiting QuadifyRC.com Follow us on facebook below to get all the latest updates