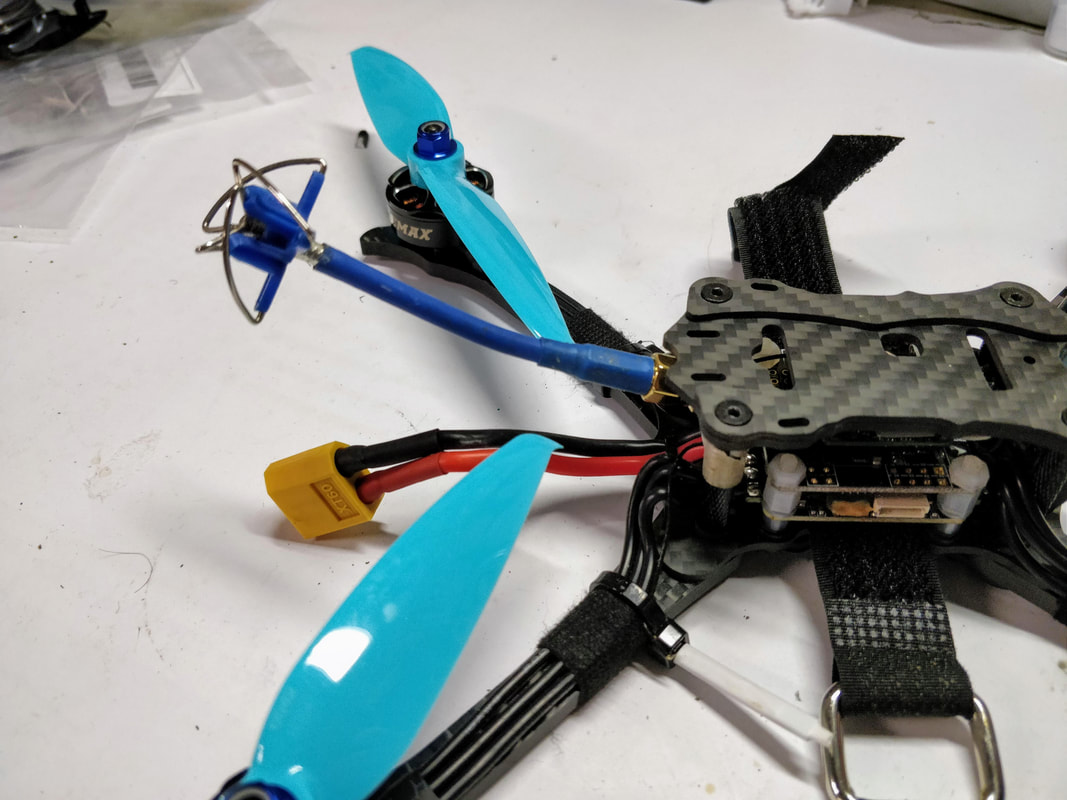
Updating the Leader 120 (or most other micros) with Betaflight 3.5.0 'performance edition'23/8/2018 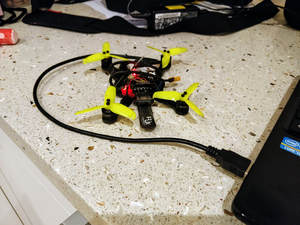 Hopefully you've seen my announcement here about the 'performance edition' of the betaflight target for Onmnbis F3 flight controllers as used in the Leader 120 and pretty much every other micro quad that runs an F3 board with OSD (including the Emax Babyhawk R and MANY others). This differs from the stock version offered bia the betaflight configurator in that it includes the fatastic new features that made betaflight 3.5.0 really shine - iterm relax and rc smoothing in particular plus the return of LED control. These were openly available for betaflight 3.4.0 but not for 3.5.0 until sbstnp kindly re-compiled for the community and shared on RCGroups. Further to this I've installed on my recently revised Leader 120 and confirm that it does indeed allow these important features that were otherwise unavailable - see below.
How to install I'm going to assume that if you are reading this you kinda know how to update betaflight firmware on your quad so will take a few liberties. Firstly, download and unzip the file below to your desktop. Please note this version is only suitable for FRSKY receivers - leave a comment if you want me to link FLYSKY or spectrum too.
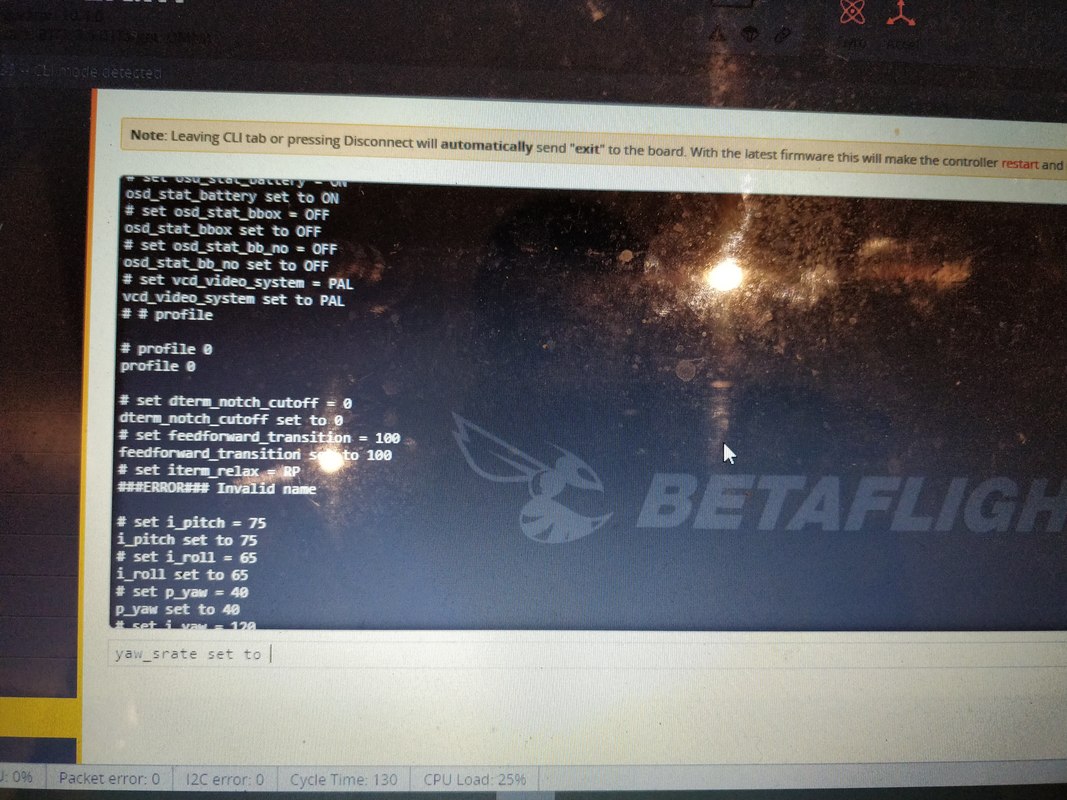
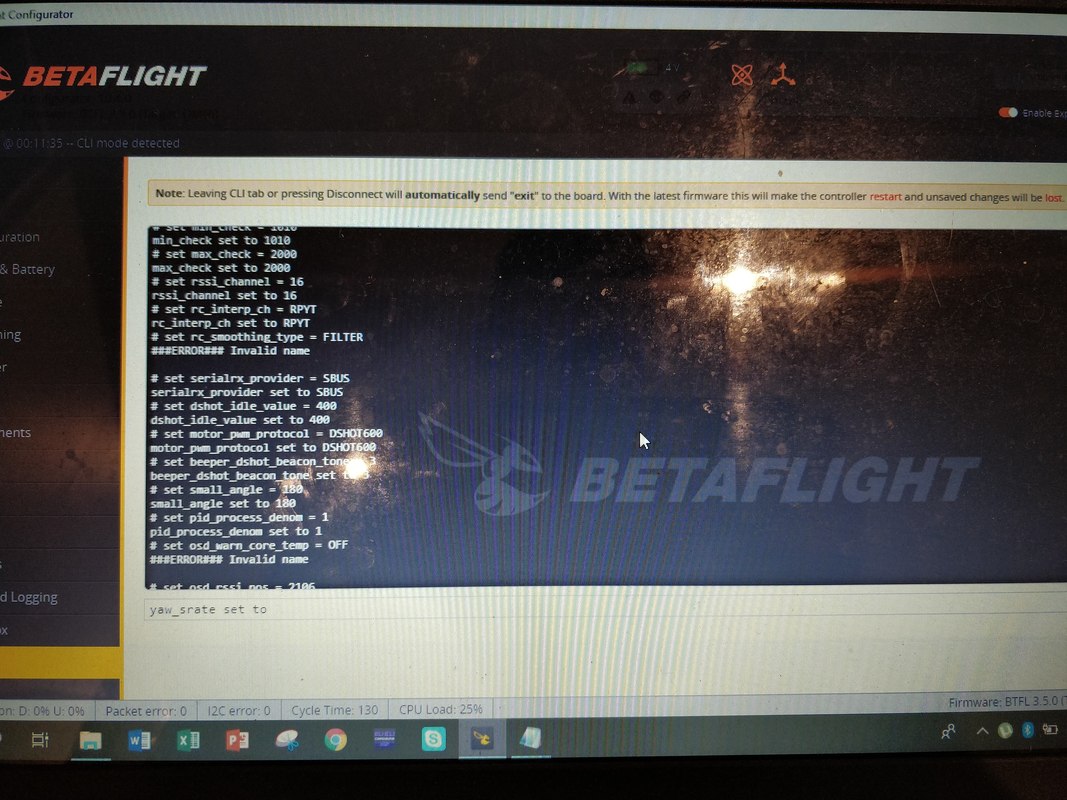
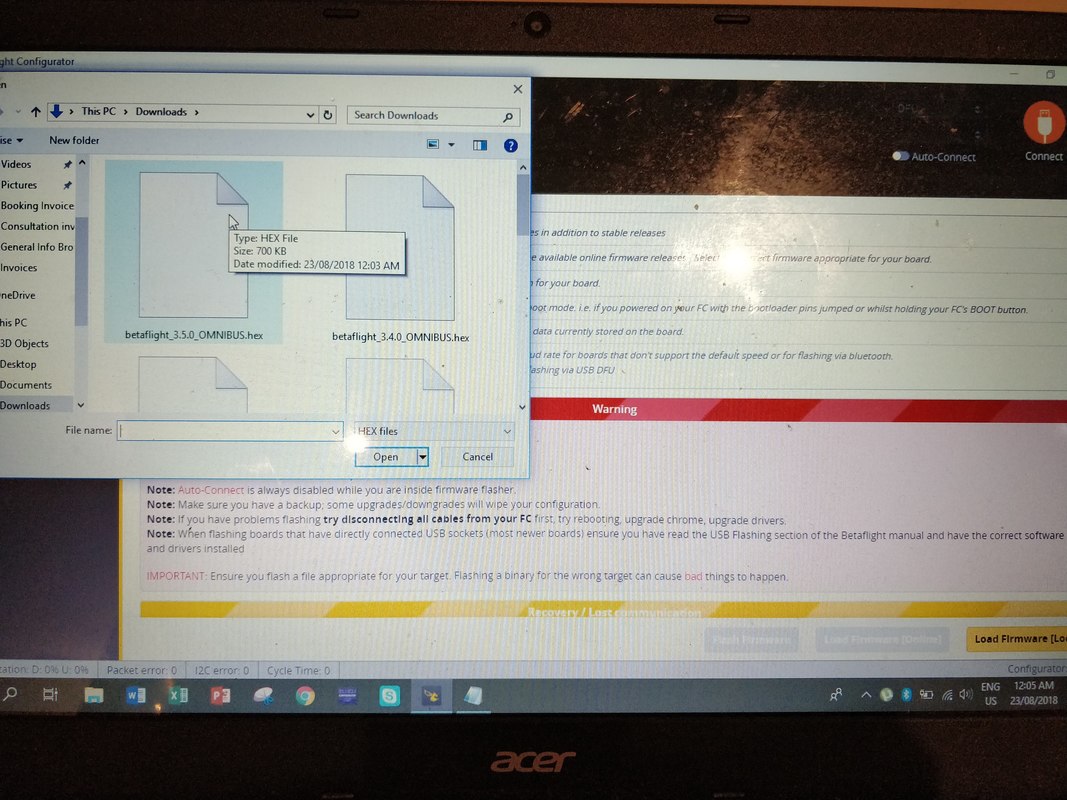
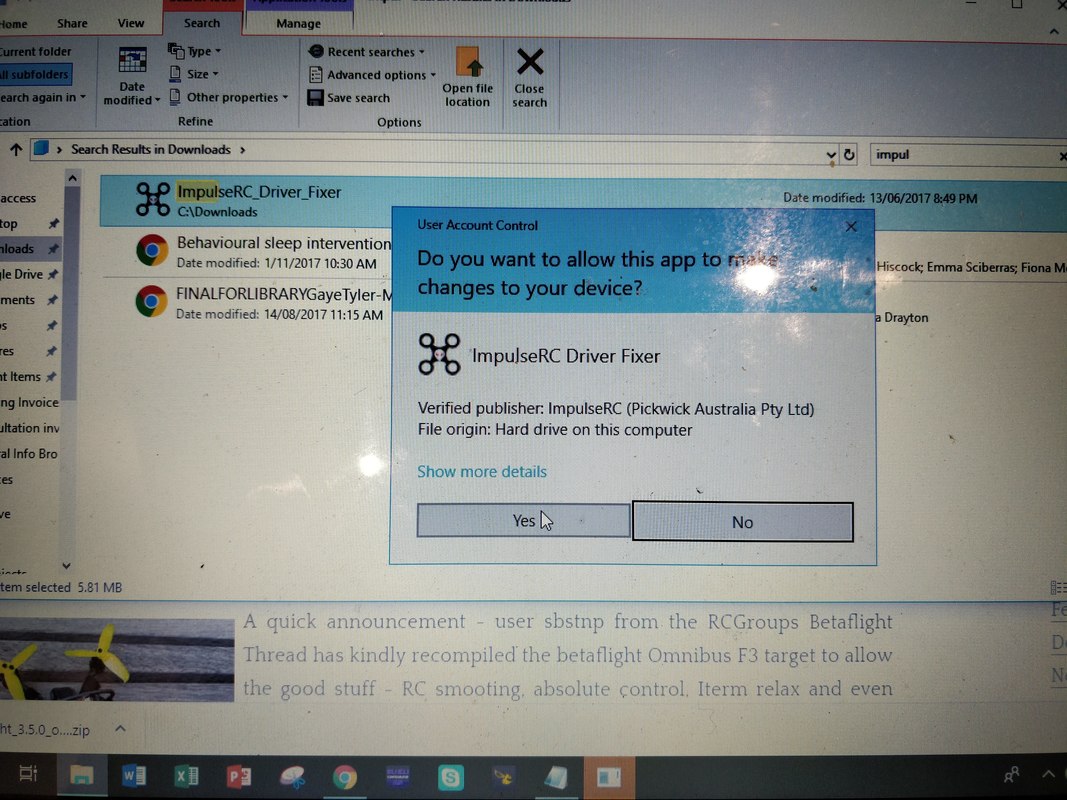
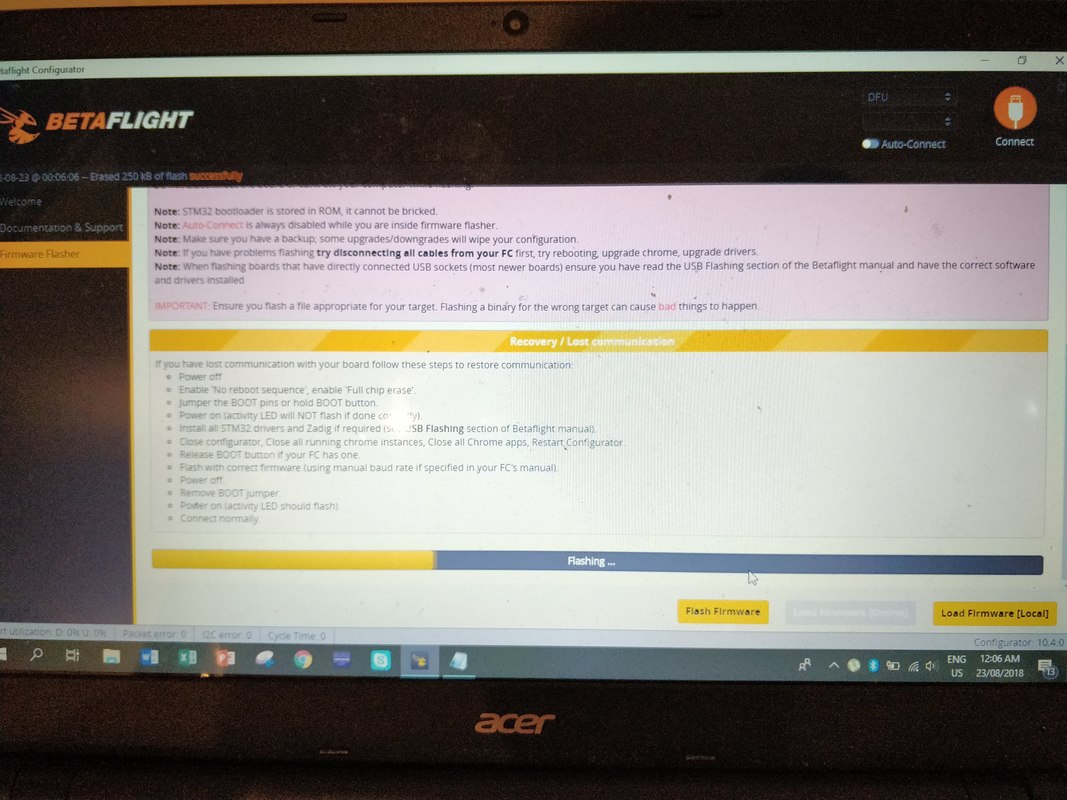
Next, go to the firmware update page in betaflight configurator (preferably configurator 10.4 on) Choose "Load Firmware [local]" and choose the unzipped hex file from the first step. If things grind to a halt here run the Impulse RC Driver Fixer to allow your computer to access your FC DFU
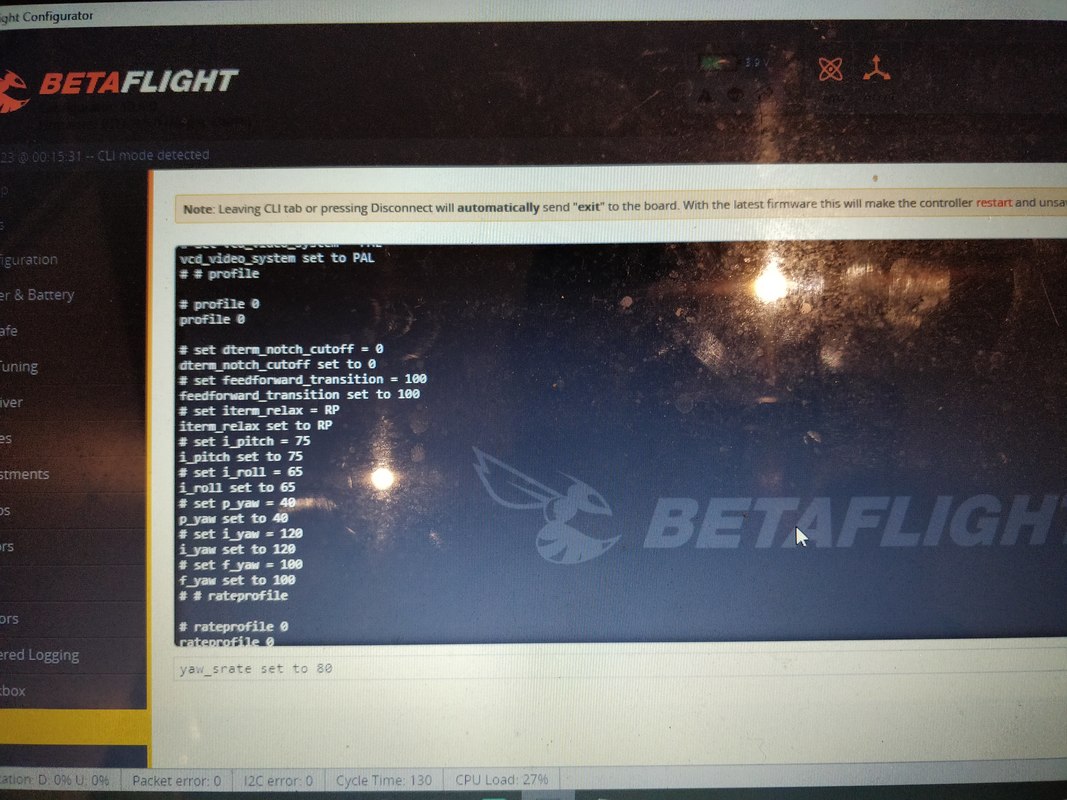
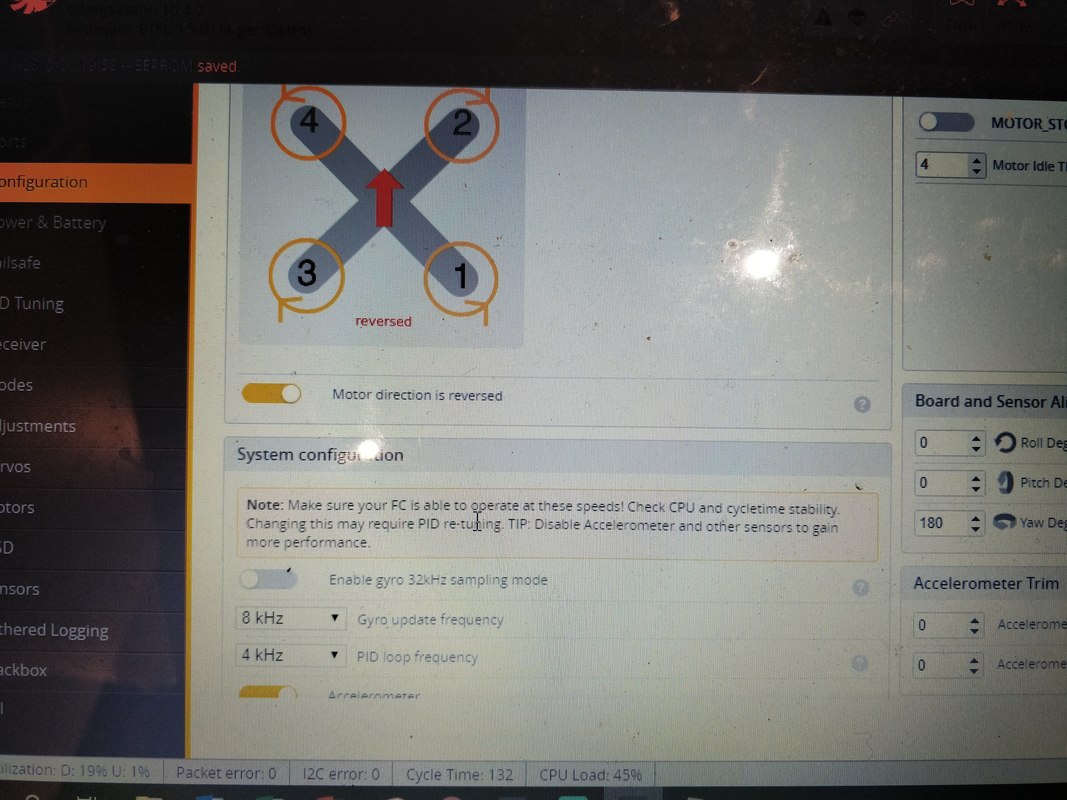
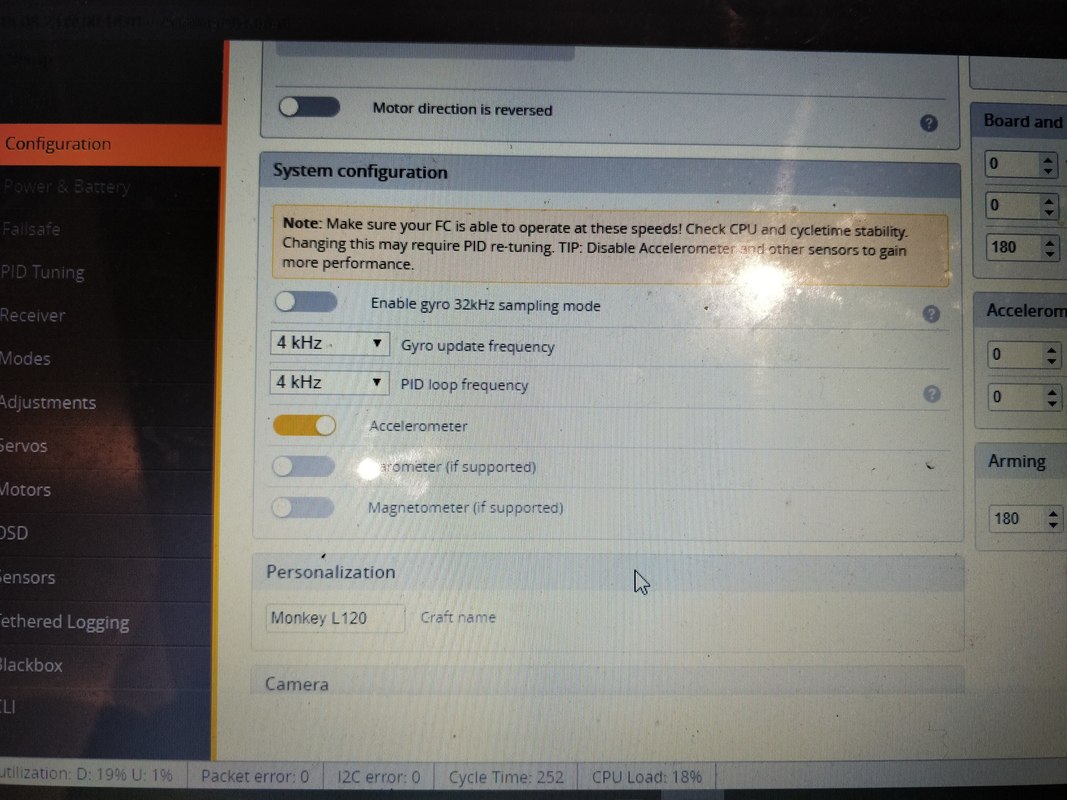
That's kind of it, you're done. Now you can enable all of the options that made 3.4 a real improvement for larger quads plus the improved dynamic filter from 3.5.0 which is more sympathetic to micros and the new feedforward system that allows you to better control the 'feel' of the quad without having to mess with PIDs so much. I'd strongly recommend reading the tuning guide for betaflight 3.4 and the tuning guide for betaflight 3.5 since there are many new features that improve flight performance. Just a quick note you can run Gyro/PID loops at 8k/4k with all new features on at 48% CPU and 4k/4k at <20% CPU as below
Please feel free to browse the rest of my site, I now have almost 100 reviews and tips/tricks blogs as well as a regularly updated specials and discounts page.
17 Comments
 A quick announcement - user sbstnp from the RCGroups Betaflight Thread has kindly recompiled the betaflight Omnibus F3 target to allow the good stuff - RC smooting, absolute control, Iterm relax and even LED Strip. For those of you familar with the 3.4.0 'performance' version this is much the same but for 3.5 If you are not familiar this file will allow you to run all of the great new features of betaflight 3.5.0 that make it more suitable for micros (esp new dynamic filter and feedforward) and the massive improvements from 3.4.0 as above. I strongly recommend this for your leader 120 or any other micro brushless as all tend to run the OMNIBUS (F3) target. Will follow up with install guide in a few days. Full credit goes to sbstnp for this recompile. Hex file can be found here:
For my list of recommended hardware changes please see my blog: My leader120 is a year old! What I've changed in that time
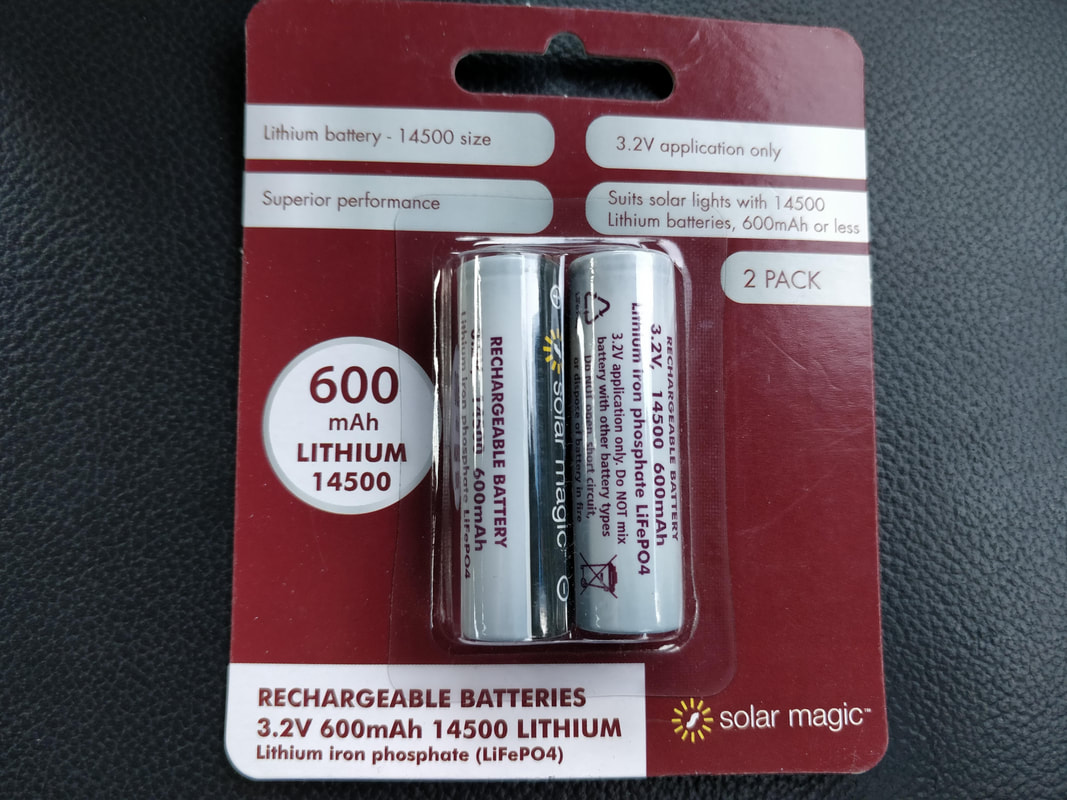
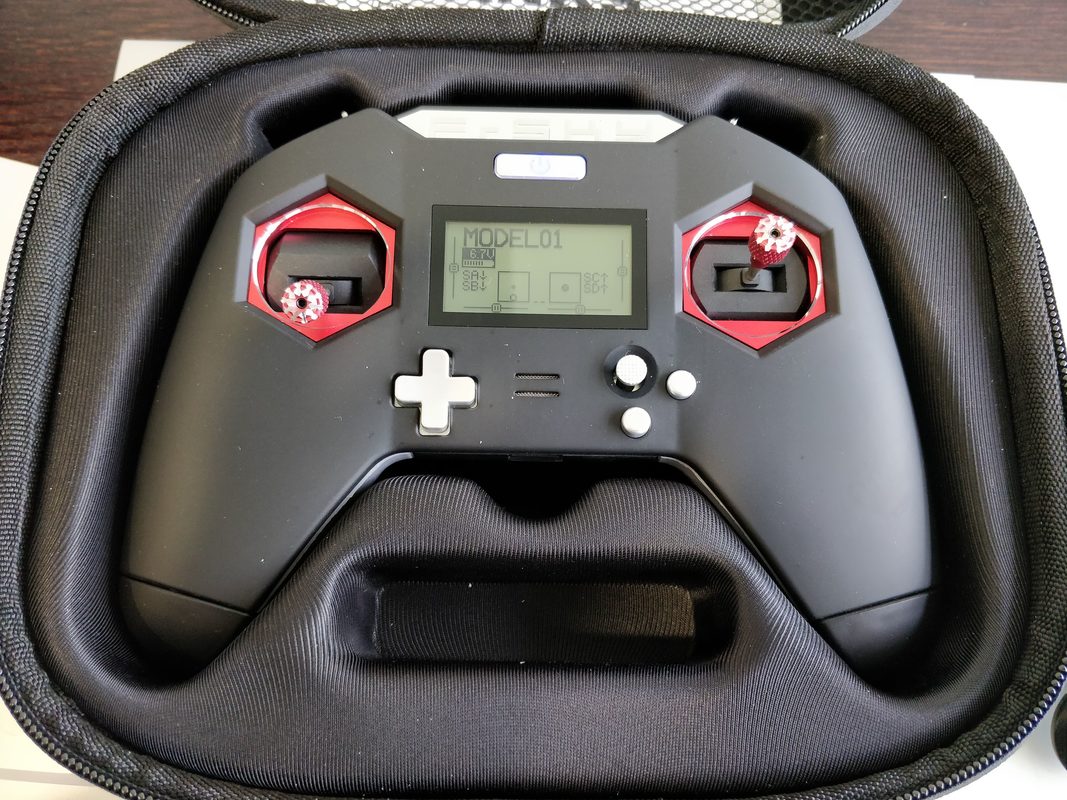
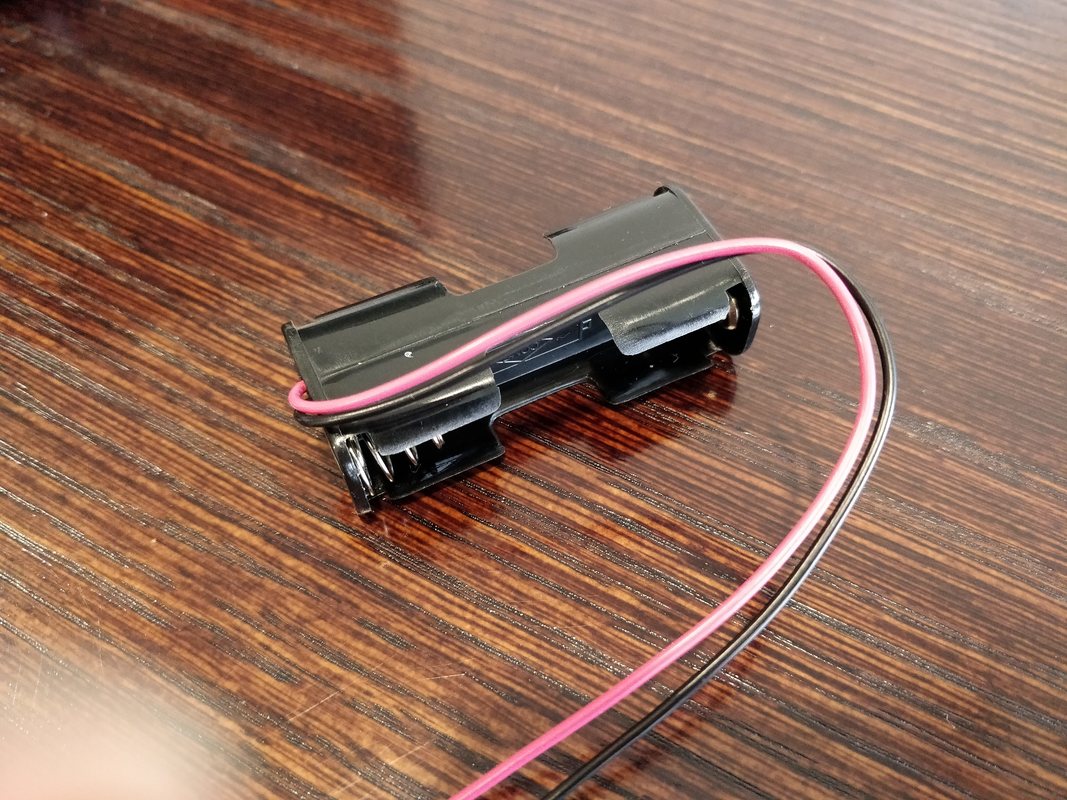
Note: I've now completed my full review of the X-lite which can be found here  The Taranis X-Lite is out and it's great. I have mine and it feels great in the hand, a lot of though has gone into the detail. This is not a review, I'll get to my experiences there soon enough but I want to cover an alternative for the one downside - the uncommon size of battery required to run it. Battery sourcing issues I live in New Zealand and if you think you are having trouble sourcing 18500 batteries where you live then you should try it here. In fairness one of the local quad shops sells the genuine panasonic cells but at $USD25 including delivery it's more than I want to spend. Also being impatient I did some lazy research. The "18" part of the "18500" refers to the 18mm battery diameter (some where between a traditional AA cell and a C cell) whereas the 500 refers to a 50mm length - identical to an AA or C cell. Just for a laugh I tried a NIMH AA cell in either side and you know what? It powered up. Since the AA cells are the right length, there was enogh tension in the springs to make sure they stayed connected and didn't jiggle around. The AA's however are not a viable option since they only provide 2.4 - 3.0v in series. One of the rechargeable lithium battery technologies is clearly needed here in order supply the necessary 6.0 - 8.4v the controller requires. You can use a 14500 battery Based on the above the more common 14500 cell is viable (an AA sized battery with Lithium technology) and these are much more common than the 18500 albeit with a little less capacity. See below for how they fit in the X-Lite: 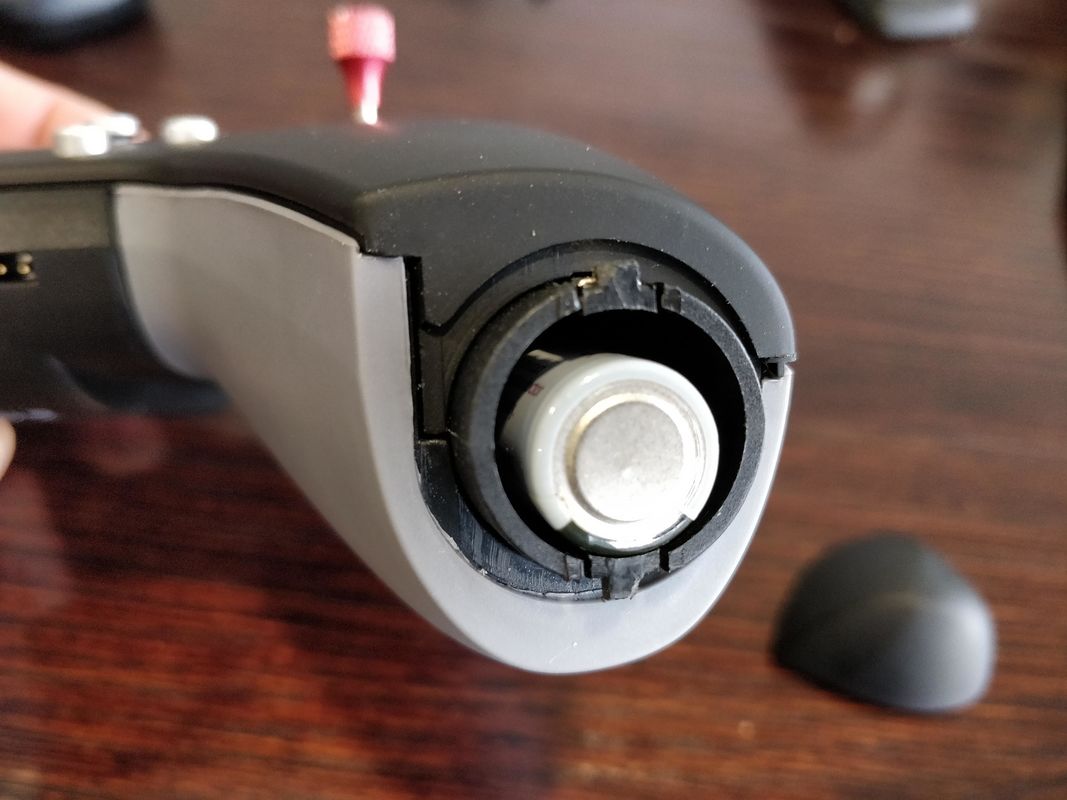 The 14500 'AA' size is does not have enough girth but the correctly length ensures the springs hold it tightly in place Get a pair of batteries for less than USD$8 If you live in Australia or New Zealand the cheapest place you can get a pair of these is actually Bunnings Warehouse - see below for the picture but there are the Solar Magic 3.2V 600mAh 14500 Lithium Batteries 2pk and are only $11.98 in NZ (here) or $9.98 in Aus (here). They are based on LiFePO4 Chemisty meaning they put out 3.2V per cell which is fine for the X-lite. Below is a picture of the battery pack and also a picture of it successfully powering the X-lite:
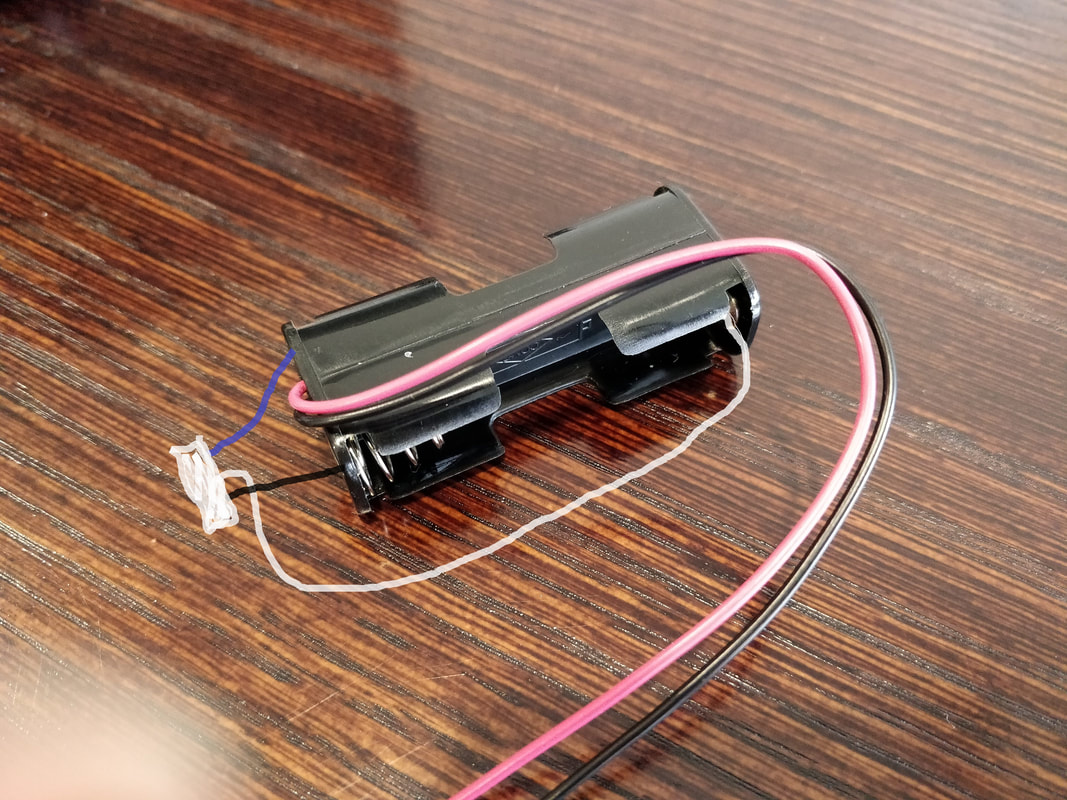
Considerations for LiFePO4 batteries Since the chemisty of these batteries is slightly different to Li-Ion or Li-Po that we are more familiar with, I changed the voltage range from 6.0 - 7.0v with the warning coming on at 6.0v. Charging these at 3.5V will get you to 95% capacity and 3.65v will get you to 100% capacity. Do not charge higher than this!!! I'd recommend charging to 3.5V only for safety. There is a good article here on what to expect with voltages and charging on this type of battery but in short it looks like it is well suited to this application. Charging Continuing with the NZ/Aus theme you can pick up a battery box for only $1.50 from Jaycar here or alternatively you can find one at Banggood here. than can be easily adapted to a balance charger for you to safely charge the batteries on you Lipo charger (don't forget the voltages above). Below is a picture of the battery box and how to adapt for balance leads.
It's early days yet but it's working well in the controller. Not sure about the heritage of these batteries so next time I charge I'll see how much capacity they take. For $10 for 2 batteries I didn't need to wait for though it is a good option. Gearbest were kind enough to provide me this Taranis X-Lite to review so I'd encourage you to purchase from them if you are considering one. It only took 3 days to arrive to me in NZ so not bad with ragard to delivery speed. It is available here in either black or red.
Update! I've just finished writing an extremely detailed walkthrough about how to upgrade the VTX - full blog here  The Hawk 5 ready to fly 5" quadcopter has been out for several months now and has been a real hit for Emax - so much so that it is only widely available from a stock perspective now. I have one which I've reviewed (here) and can quite easily say it is the most well-balanced and complete bind and fly quadcopter I've come across. Gearbest and Banggood currently have this is on special for $209 and $229 respectively (check out my discount page here) My real life work means I'm always looking to improve on systems and it's no different for my quad obsession. So I've made a list of my favourite 'improvements' or probably more accurately personalisations as these are more about changing the feel of the quad to suit my taste rather than the basic operation. I'll also cover off the things I haven't touched because I've not yet thought of a better alternative. 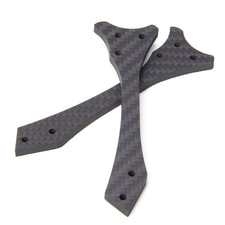 Emax Hawk 5, 6 inch arms Emax Hawk 5, 6 inch arms 6 inch arms The 6 inch arms are available as a direct uprgrade from Emax rather than a third party offering. All four can be had for less than $20 so it's fair to say Emax is looking to expand their ecosystem rather than profit of these in particular. They are very easy to fit since the frame uses captive nuts and arm retention hardware is independent to the stack mounting hardware. This means you can change the arms without pulling anything apart. Arms are sold in pairs and are presently in stock at Banggood for $8.99 per pair.  You can see the 5 inch arm overlaid on the new 6 inch ones You can see the 5 inch arm overlaid on the new 6 inch ones The new arms will push the motors out by 15mm in each direction and the good news is EMax allowed for enough slack in the motor wires so they they don't need to be extended - making the whole process VERY simple. To start I flew with 5" props on the new 6" arms and was suprised to find how much more stable it was in regular flight. I've found examples where several pilots prefer 5" props on a 6" quad for a more stable HD platform (e.g. Gapit) or for improvements to a racing rig (Serge from Piroflip noted that his son Dolma FPV runs a 6" frame with 5" props. KababFPV who works with Piroflip has suggested this is likely due to the lesser amound of turbelent air to each prop given the additional spacing. One potential down size is the additional width but in reality this is only an extra 9mm wide on either side. Theory aside I really liked the feel of stability. The next obvious advantage this gives is the ability to physically use a 6" prop. In most circumstances you'd need to revisit your motor choice (stator size and/or kV) but in this circumstance the seemingly low kV that Emax chose (2300kV) and and reasonable stator size (2206) means that it can swing a 6" prop on 4s with no issue. I chose to use the Gemfan 6042 bi-blade but have heard good things about the 6" LR Avan prop too. Since the quad is light and the 6" adds so much prop area, they have more than enough grip - much more than a 5" tri blade... feels like they stop on a dime. There are a number of good 3 blade 6" props available now from Dalprop and HQ but I feel the extra weight these add is unnecessary because it will take away from the response of the 'just big enough' 2206 motor. In the air hover is achieved on a much lower throttle as is everything else. Most flying is done at low to mid and the sense of control is strong. Full throttle draws a LOT of current: 135A on 6042 vs about 90A on the HQ 5x4.8x3. High throttle is less about more thrust and more about current draw suggesting the motor has probably hit its limit. This would be a great candidate for scaled throttle reduction in betaflight 3.4.0 onwards as per my setup guide. That being said the thrust is immense for such a light quad and actual battery life was somewhat similar to 5" props but so much more variable - it will be way more efficient than 5" at light throttle but way more inefficient at heavy throttle. For the cost of the arms and props and ease of install I'd definitely recommend giving it a try. The video below shows my first flight on 6" props, please turn the sound down. punch outs at 0:23 and 0:40.
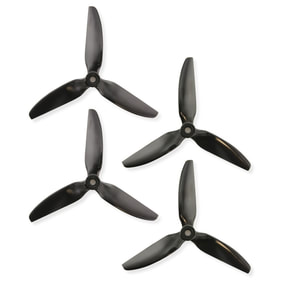 HQ 5 x 4.8 x 3 V1s propellers HQ 5 x 4.8 x 3 V1s propellers Changing the props I love the idea that Emax created the 5" Avan Flow around the Emax LS2206 motor on the Hawk 5 but I just don't like the feel. Don't get me wrong, I love the idea that the weight is kept close to the hub and that it is durable and well balanced but just don't like the way it delivers power. To me the HQ props feel much more familiar and I've found the 5x4.8x3 V1s with it's relatively steep pitch is a good match for the LS2206 2300kV stock on the Hawk 5. The other thing I prefer over the V1s design is efficieny. Top speed 'feels' similar but maximum current draw is only 90A on the HQ 5x4.8x3 but 110A on the Avan Flow using my best batteries. Plenty more props for me to try including the HQ 5.1x5x3 but at this stage I'm really pleased with the 5x4.8x3 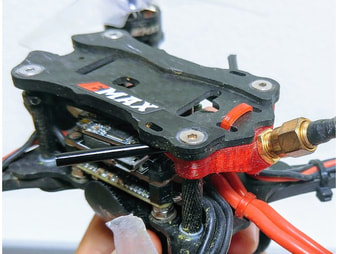 Image from Thingiverse - click to follow Image from Thingiverse - click to follow Antenna mounting I find the video transimission surprisingly good on the Hawk 5 but the antenna solution is a let down. Dipoles are fine for flying alone but the Hawk 5 one is not secure. I did the cable tie/heatshrink trick to secure but still lost it after and upside down landing anyway. I wasn't bothered though, because my race club doesn't allow dipoles as a vtx antenna because of the increased likelihood of bleed over to other channels. Emax were good enough to include a UFL to SMA cable and 2 x excellent Emax Pagoda LHCP antenna but recommend a rubbish way of mounting them with cable ties that is just not secure and risks the antenna getting caught in spinning props. The best solution in my opinion is a 3d printed one. I don't own a 3d printer but a service like 3d hubs means I can download an appropriate file from Thingiverse and have it printed and delivered to me - it was only about $5 for 2 printed mounts. Here is the design I recommend since it elegantly incporated and SMA VTX antenna mount and receiver antenna mount using forever tubes. I had a 3d printed mount from an old floss 2 frame and found the standoff spacing is identical (31mm) so have just used this for now. Here is the link for that design. It's a tidy solution that keeps the antenna safely away from the props and allows a good and for a racing quad that is commonly tilted forward fairly heavily.
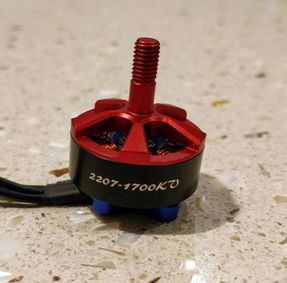 I used the HobbyCool 2207 1700kV on my 6s race build I used the HobbyCool 2207 1700kV on my 6s race build What I haven't changed: Motors. Many (including myself) questioned the choice of 2206 2300kV motors when Emax had the 2207 mid-high kV variants available. I no longer question the stator size or kV as I think both are an excellent match for this quad - the 2206 is plenty for a lightweight build and the 2300kV offers great efficiency and flexibilty as per 6" props whilst still being suprisingly powerful. The only change I would make is going to lower kV IF I decided to run 6s which this stack is apparently capable of - Conrad Miller (Furadi) is an EMax team pilot and has run 6s on a magnum stack with a 1700kV motor. If I did go for a low kV motor the standout option for price/performance in my opinion is a Brother Hobby Returner R3 2207 1700kV which is only $15 under the HobbyCool Logo. I've used these on my 6s race build (blog here) and they are super nice. 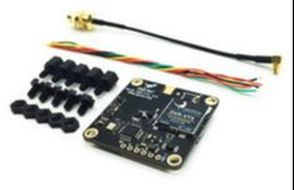 THe HGLRC AIO VTX DVR is an excellent VTX than incorporates a DVR in a single layer 30.5mm board THe HGLRC AIO VTX DVR is an excellent VTX than incorporates a DVR in a single layer 30.5mm board VTX. The included VTX is limited to 200mW and has no smart audio. Many users have reported poor performance or reliability problems although I have found signal and reliability to be just fine. If it were to die I'd probably install the AKK infinity VTX DVR combo or HGLRC AIO VTX DVR (reviewed here). The stock Hawk 5 is too light to carry an HD cam so an onboard DVR would be a satifactory backup. Given the current VTX shares a stack layer with the XM+ receiver this would need rewiring and I can't bring myself to do this on a receiver that is currently working well for me.  The Runcam Micro Eagle is the only camera I'd choose about the Foxeer Micro Arrow Pro The Runcam Micro Eagle is the only camera I'd choose about the Foxeer Micro Arrow Pro Camera. The Foxeer Micro Arrow Pro as on the Hawk 5 is hands down my favourite budget camera. It gives consistent performance regardless of sunny or overcast day unlike many of the new CMOS cameras. An exception to this is the Micro Eagle which is the best camera (IMO) period. It's not cheap though so I can't justify replacing the Arrow pro but this is the only camera I'd uprade to. Conclusion
All of the mods I've included here change the feel of the quad except for the VTX antenna mount which is a MUST HAVE in my opinion. I do like the longer arms with the HQ props and this is what I've settled on but this is a feel thing more than anything else and was not expensive so, why not?! I'll only replace the cam and VTX if mine break down. If I break motors I'll replace like for like unless I change the whole fleet to 6s which is presently unlikely. Please feel free to browse the rest of my site, I now have almost 100 reviews and tips/tricks blogs as well as a regularly updated specials and discounts page. |
Archives
November 2020
Categories
All
 |
||||||||||||||||||||||

 RSS Feed
Thanks for visiting QuadifyRC.com Follow us on facebook below to get all the latest updates