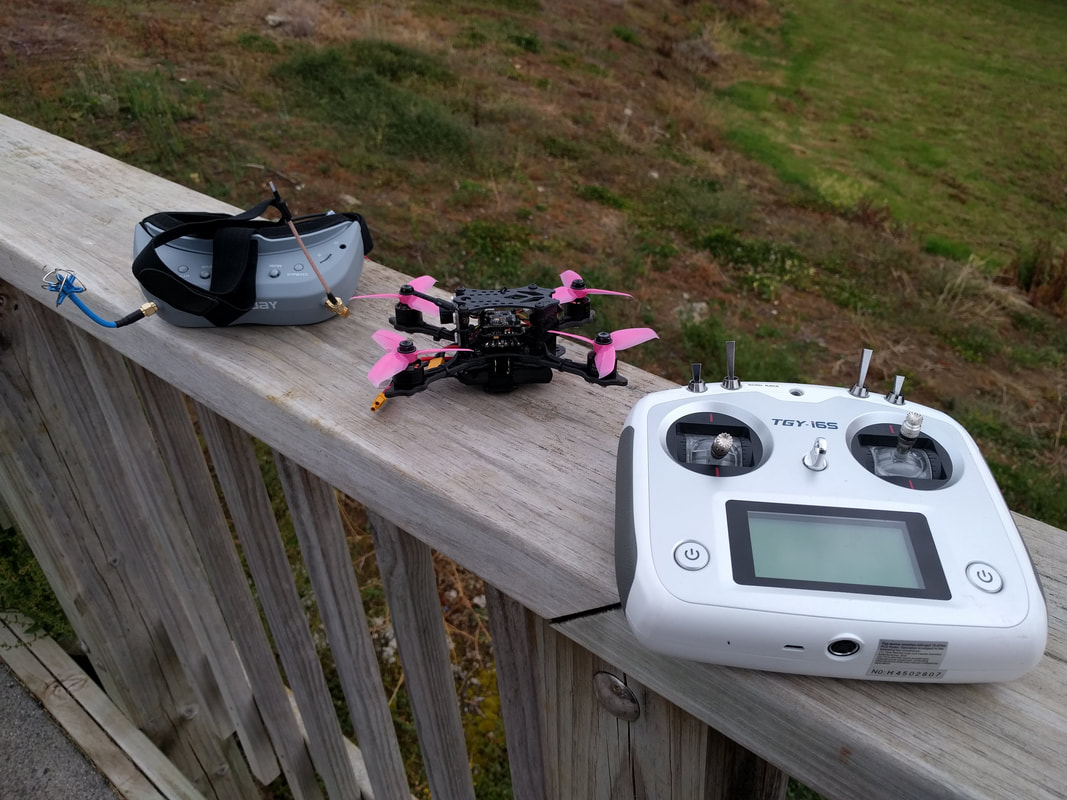
|
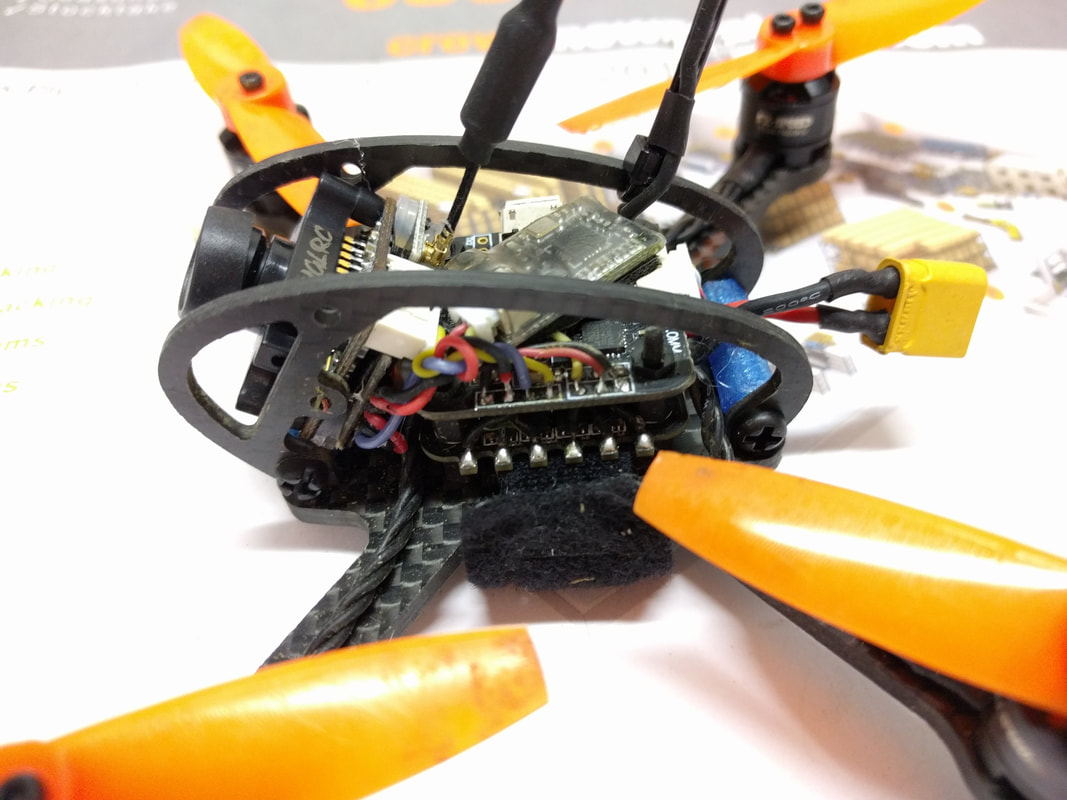
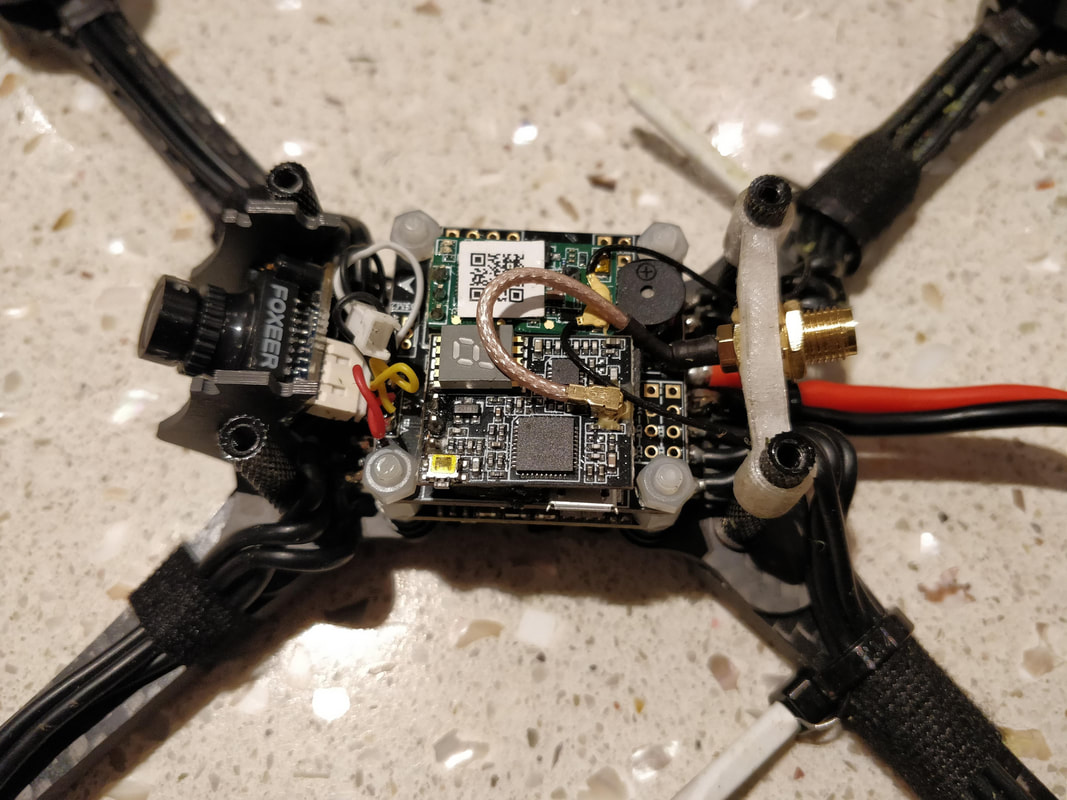
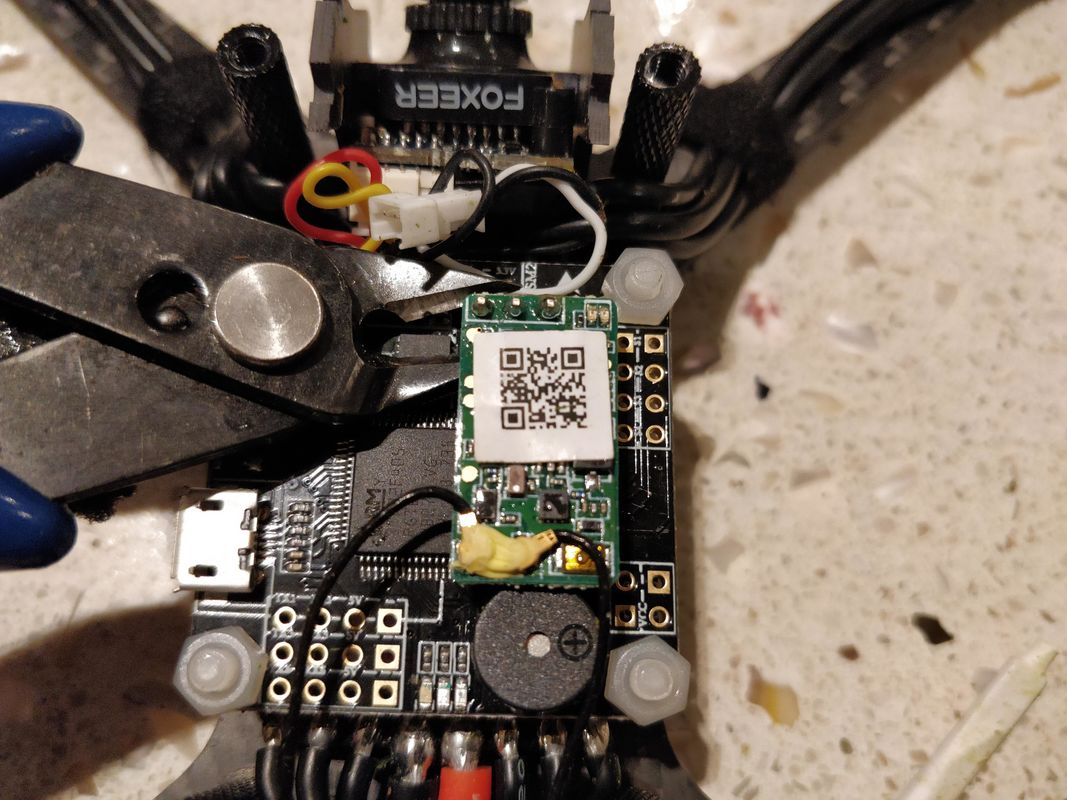
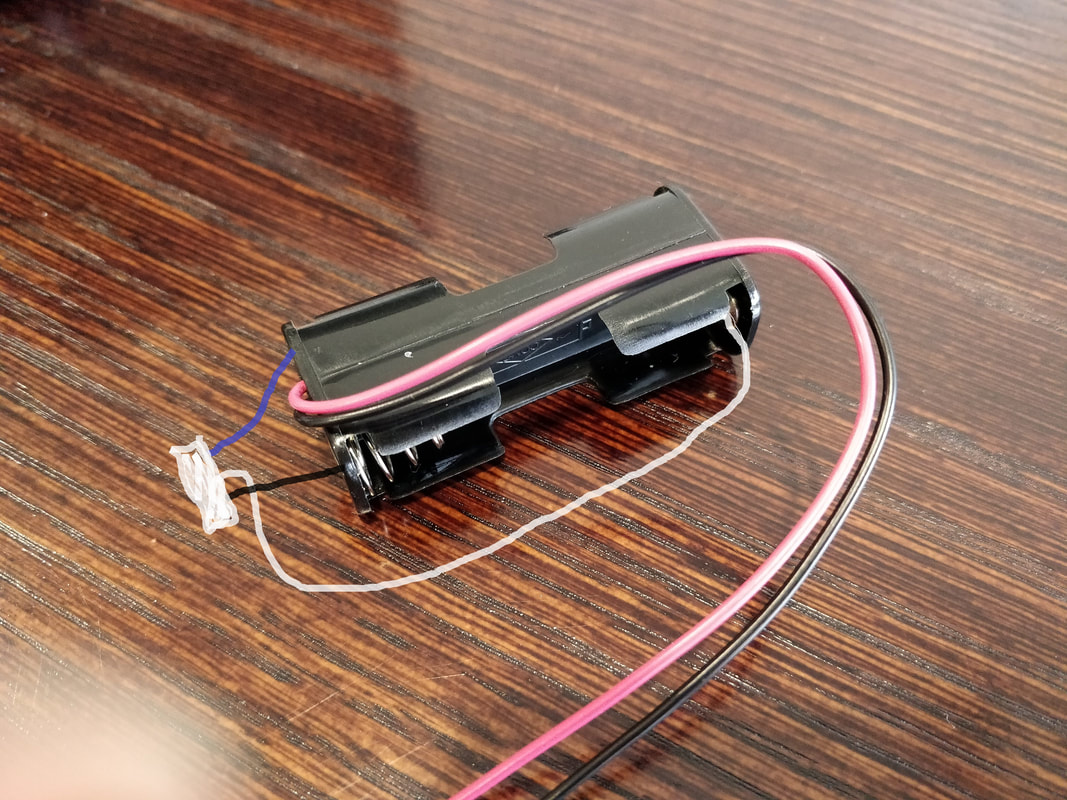
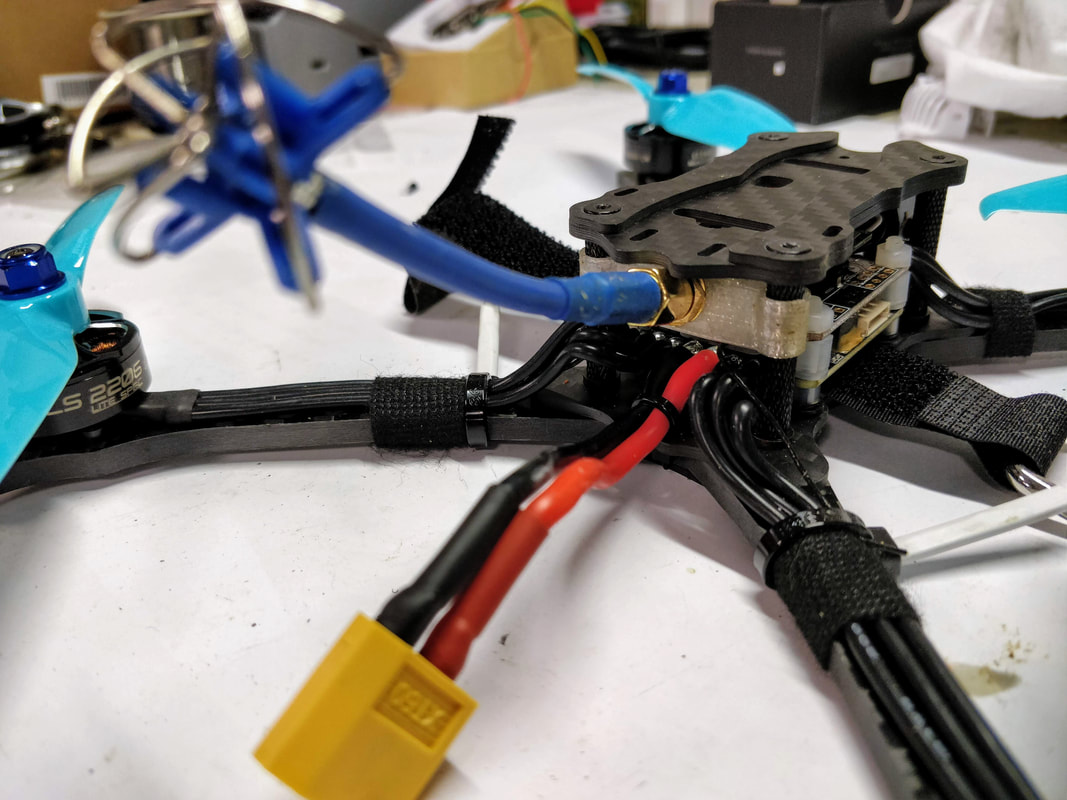
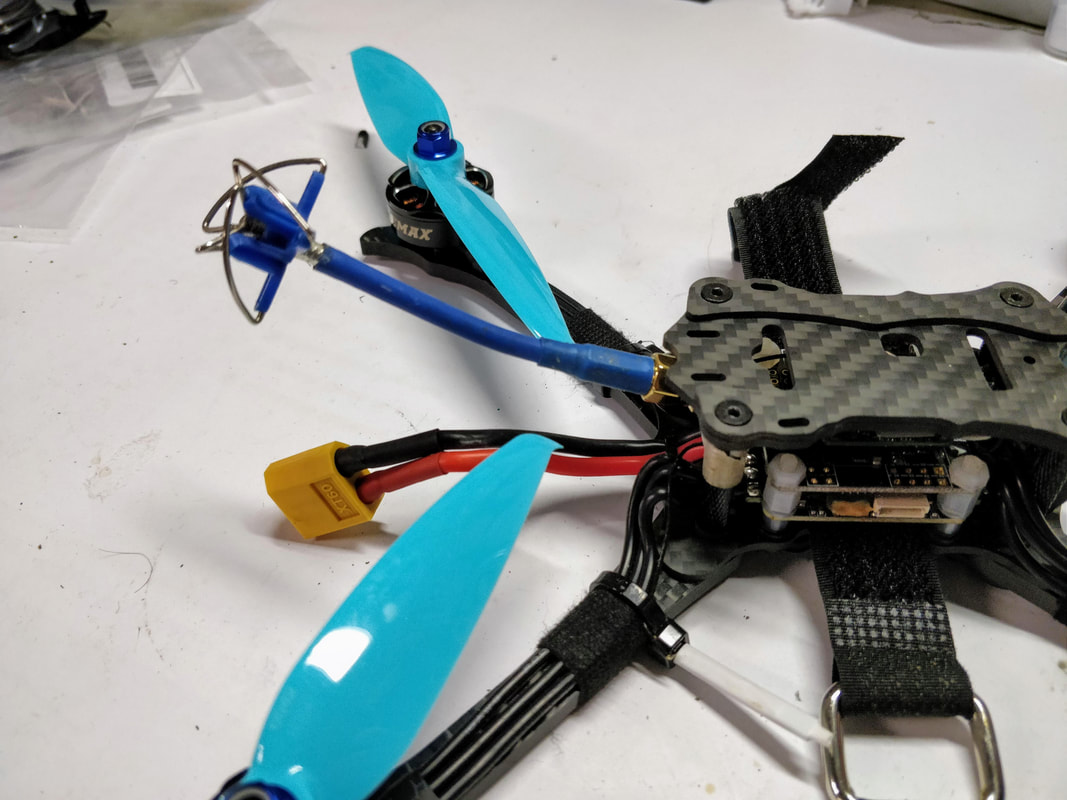
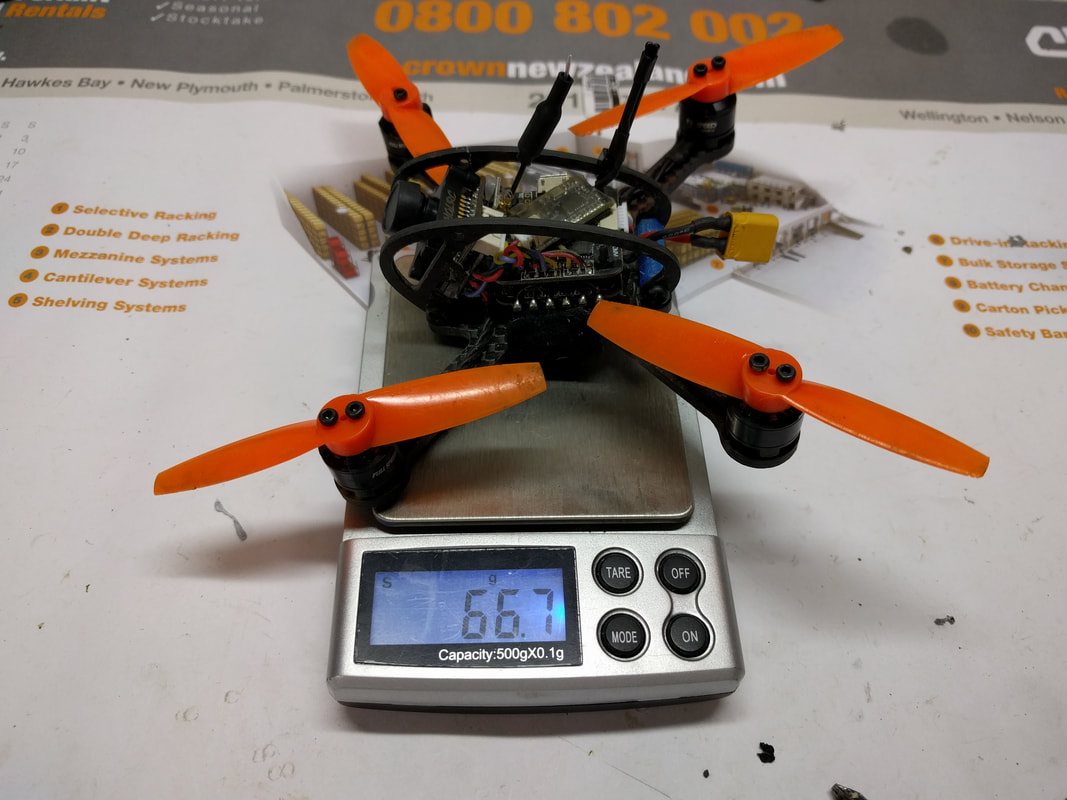
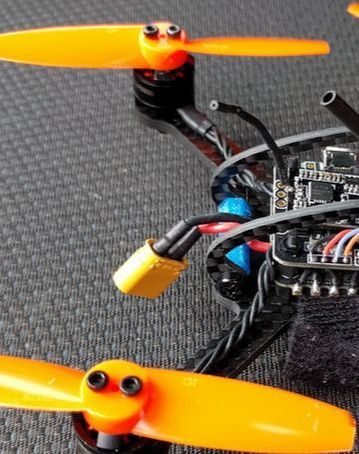
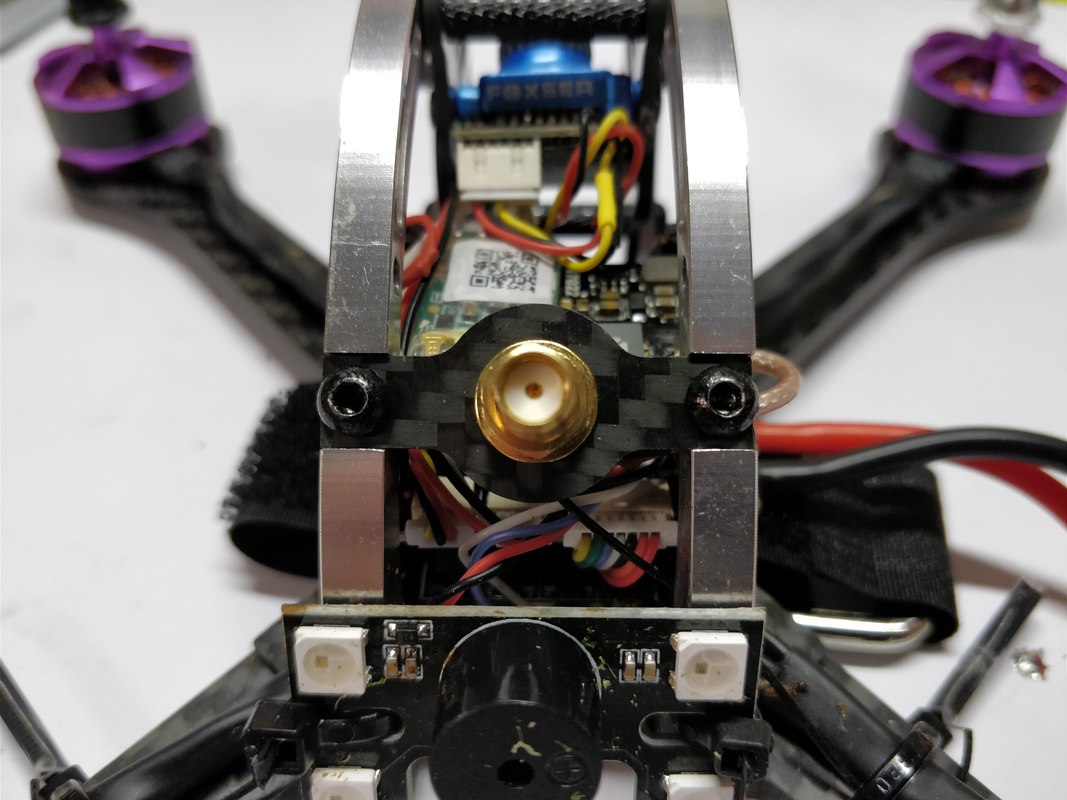
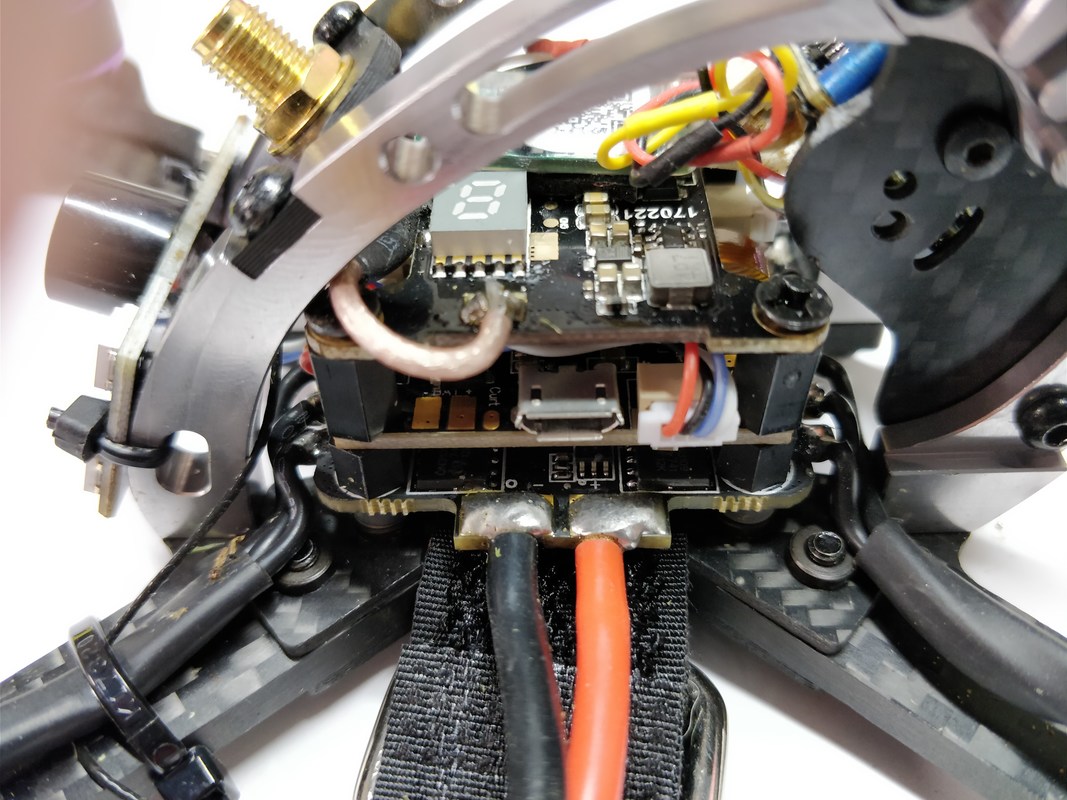
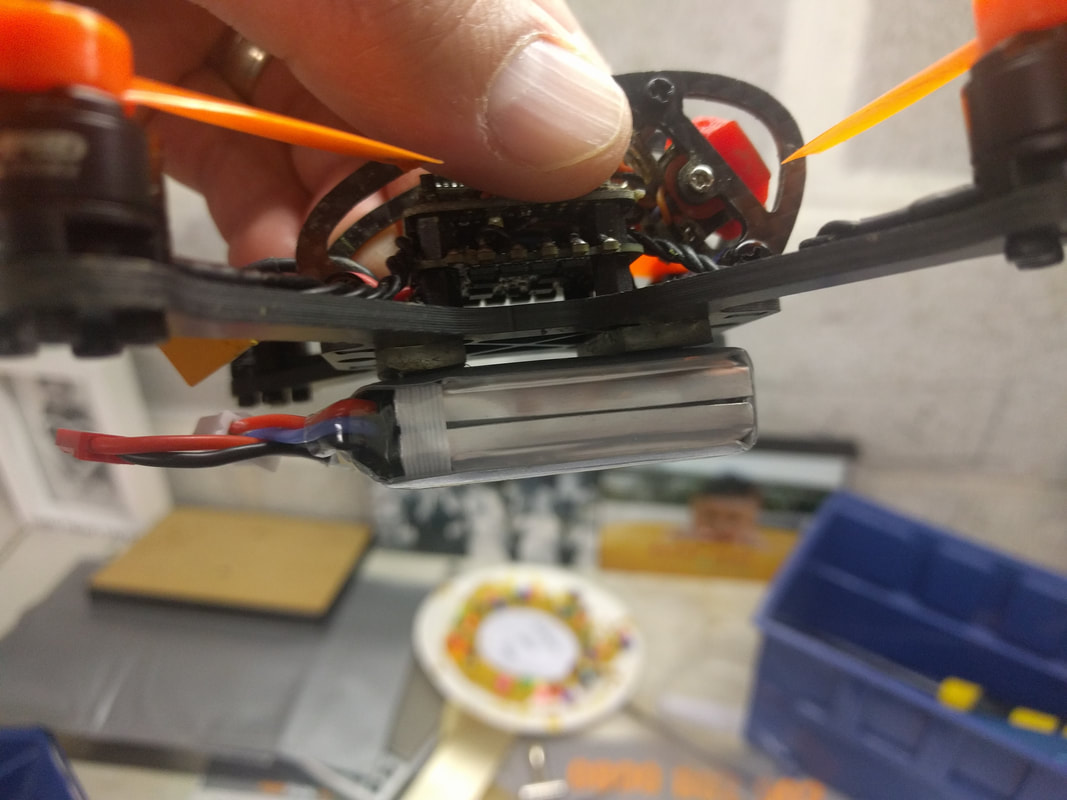
To those of you that choose to upgrade the vtx in your hawk 5, like I did with the AKK infinite VTX/DVR (in this walkthrough here) I've updated my recommendation for the powersupply. Previsouly I relied on the flight controller's 5v BEC circuit that also powers the receiver and of course the board itself. I've now updated this recommendation to use the VBAT (or VCC) power supply instead assuming of course your VTX can take up to 24V as most modern full-sized VTXs can, including the AKK infinite I installed. This is because the BEC struggles at higher output making the video feed noisy. Over the longer term this is likely to irreversible damage the BEC rendering the flight controller pretty well useless but not before having random failures as a result of the compromised BEC. Picture below is using the power supply from the original VTX - the flight controller's 5V BEC:
8 Comments
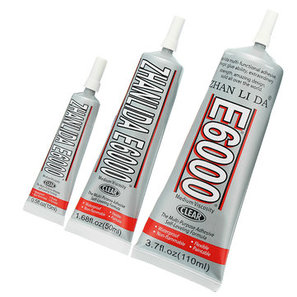 E6000 glue from Banggood is a great option for repairing the Mobula 7 frame E6000 glue from Banggood is a great option for repairing the Mobula 7 frame There is no doubt that the mobula7 as reviewed here is an excellent quadcopter that has redefined what ducted micros can achieve at a fair price but the key flaw in this model (and other ducted quads) is lack of durability in the frame. Frames for the Mobula are not expensive at $4 here but waiting on a frame to be delivered represents downtime.
Welder's glue is often recommended but is not available everywhere and shipping can be precarious on this. I tried the E6000 glue from banggood on a whim and am really please to report it works perfectly, is inexpensive and being available from Banggood, is available worldwide. It comes 15ml, 50ml and 110ml tubes for $3, $4 and $7 repsectively at time of writing. 15ml is plenty for the small amount we need for repairs. It also has a very fine metal nozzle which is just perfect for the fine work we do on repairs. The cap has an integrated pin that sits inside the nozzle for storage so never blocks. 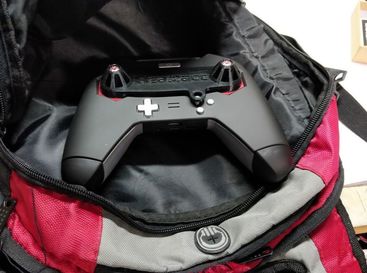 The Taranis X-lite brings a whole new level of portability to FPV transmitters thanks to its compact design and I found this to be one of the most surprisingly useful features of this controller in my review.
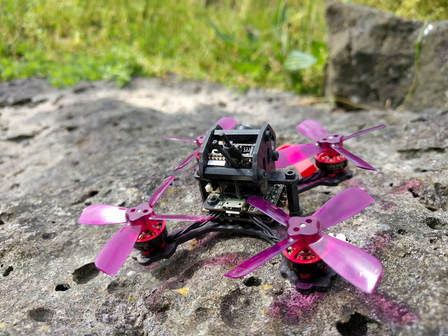
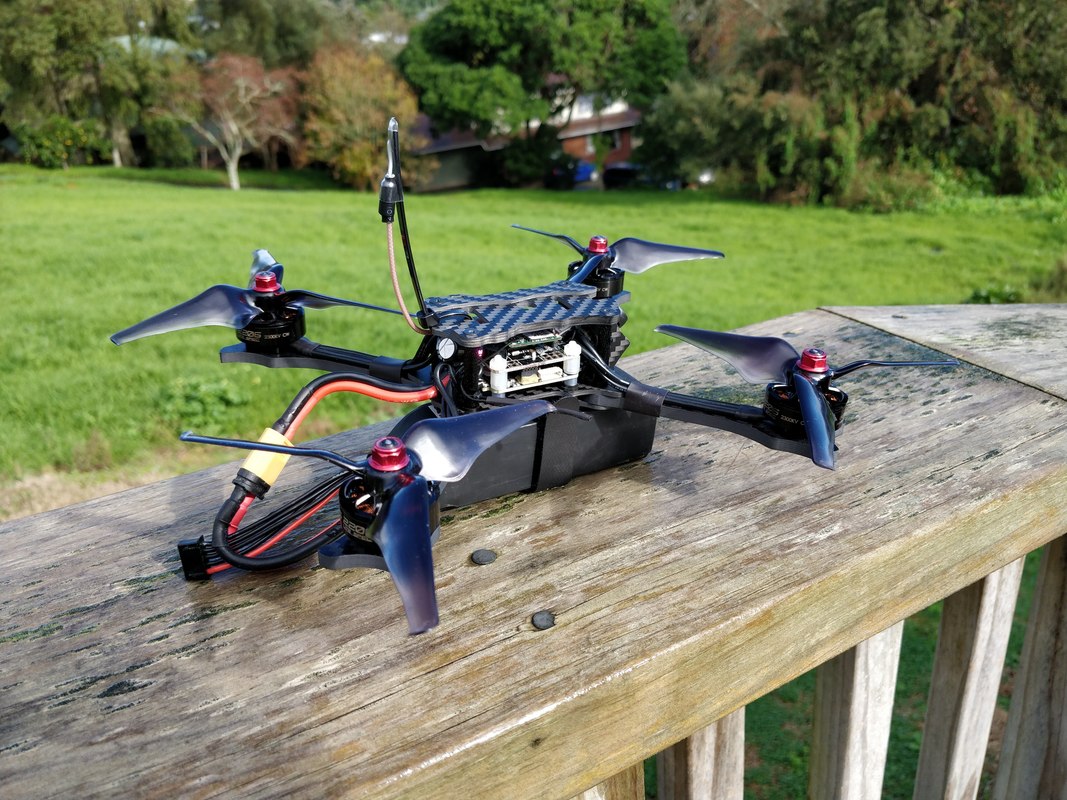
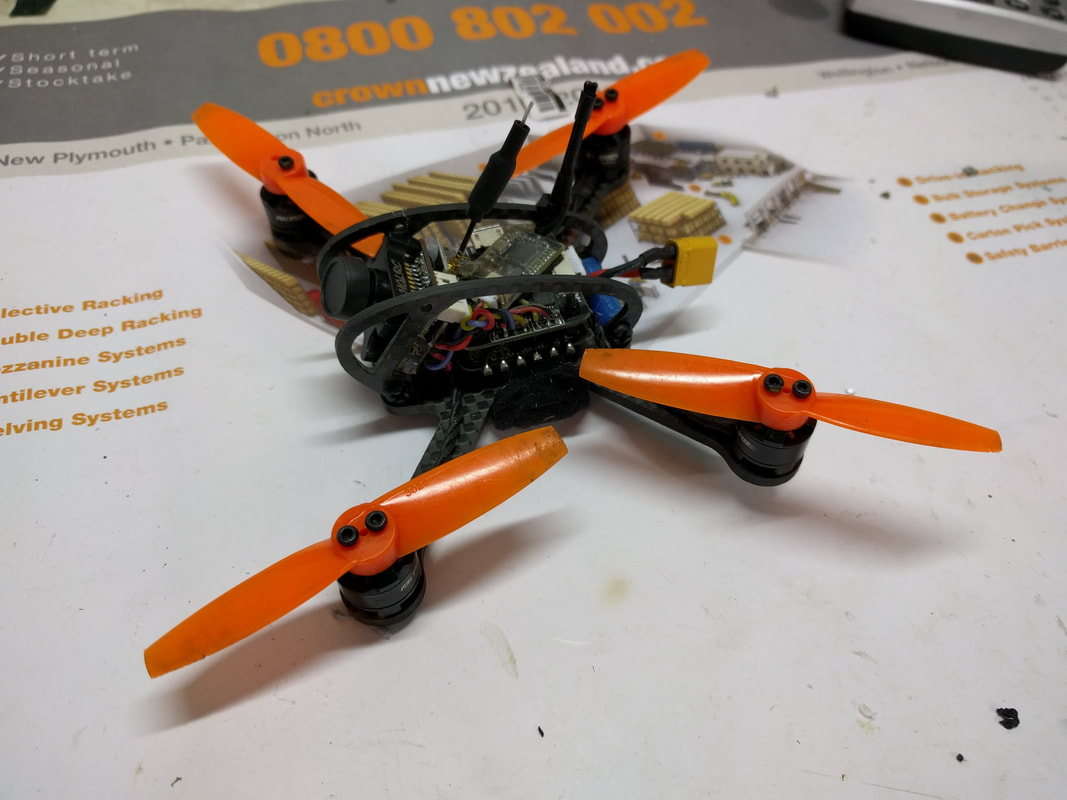
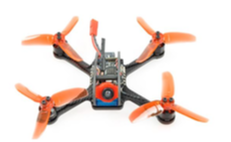
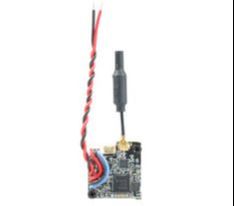
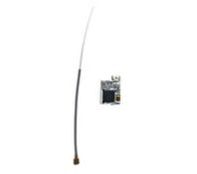
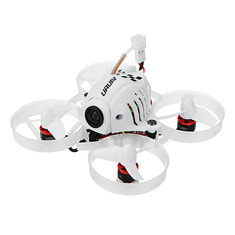
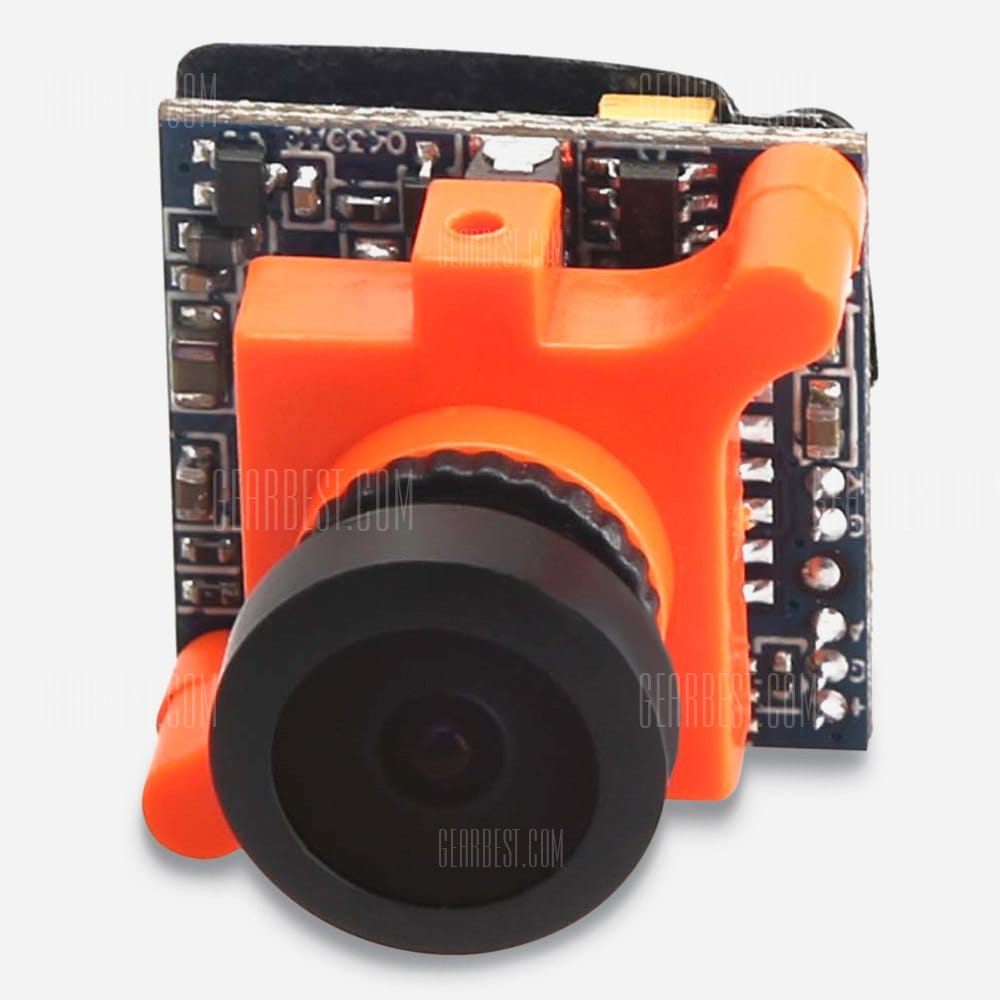
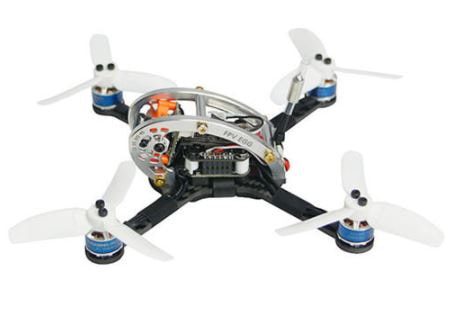
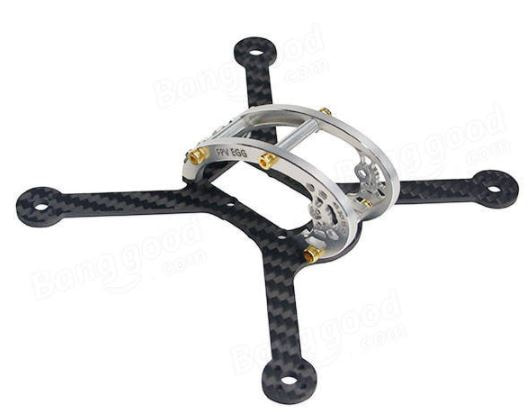
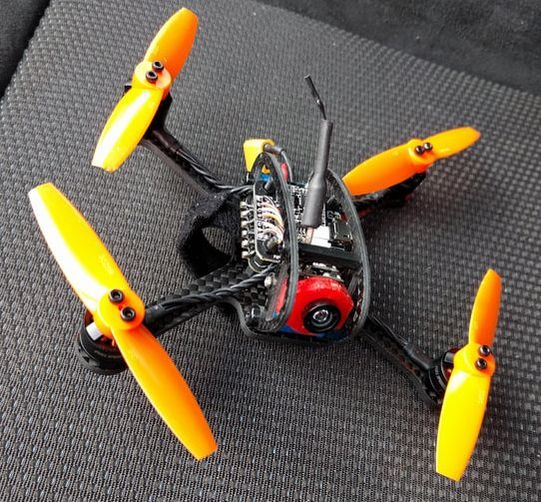
The x-lite comes with a very nice lightweight zipcase as you can see in the picture below which allows you to stow some spare parts too. For quick FPV missions though I find all I need is the controller though but the gimbal protectors that come with the controller are just too loose to stay put if I put the controller in my bag without the case. Hence I've been on www.3dhubs.com/he lookout for some gimbal protectors that not only hold more snugly but also protect the screen. There are a number of designs already avilable on thingiverse if you have a 3d printer or access to 3dhubs but what if you just want to buy a cheap solution that does this for you? 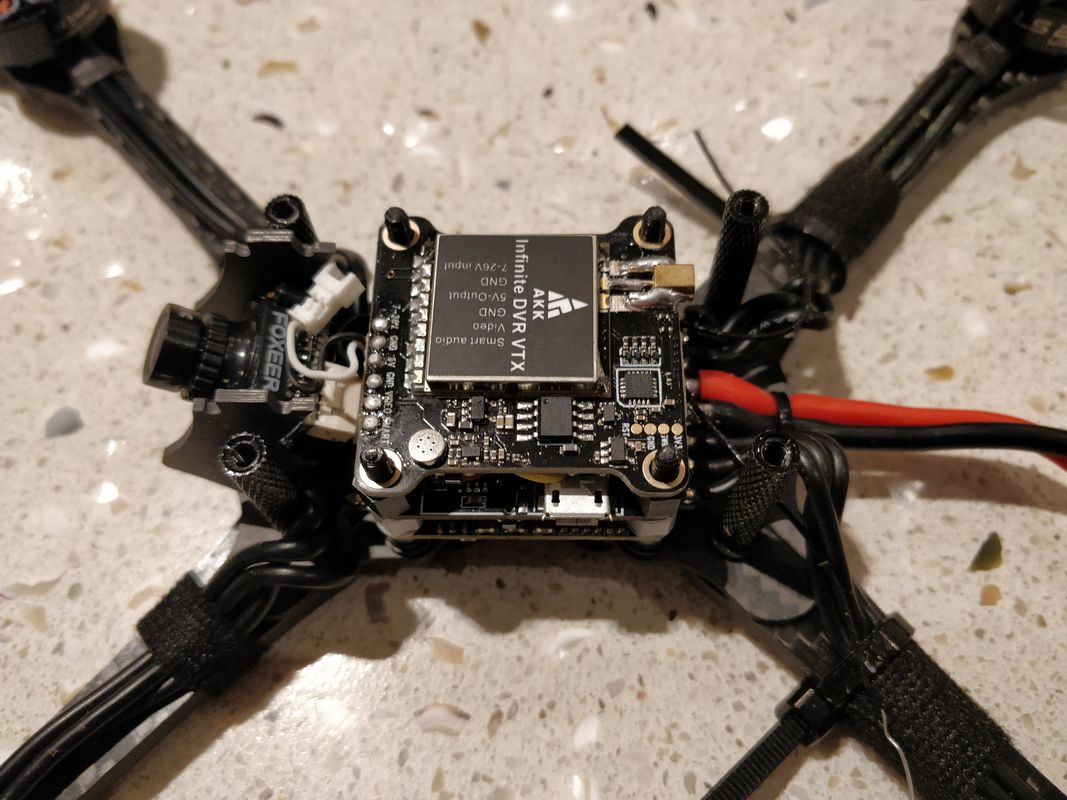 Sneak peak of the finished product Sneak peak of the finished product The Emax Hawk 5 is arguably the best bind and fly quadcopter going as I found in my initial review but can also be greatly improved with a few budget modifications as I wrote about in my blog on bang for buck improvements. I do however see a number of people complain about the stock Emax Hawk 5 vtx however mine has been functioning well. That being said, you cannot adjust setting in betaflight OSD via smart audio or tramp telemetry which is a let down on a 2018 quad. In the interest of sharing I've removed the stock VTX and replaced with one of the larger VTXs currently available (the AKK Infinite VTX/DVR) to prove it can be done. 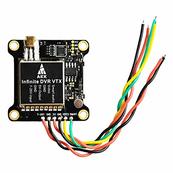 The VTX I chose for this project is the AKK Infinite which incorportates a DVR into the VTX The VTX I chose for this project is the AKK Infinite which incorportates a DVR into the VTX The VTX The VTX I chose is the AKK Infinity DVR VTX. This is very similar to the HGLRC VTX/DVR that was reviewed here. As the name suggests this is a smart audio VTX in 30.5mm VTX with a built in DVR. I chose those for 2 reasons: First it's big. If I can fit this in you can fit anything! Secondly I like the DVR for recording breakup-free footage. For me I like the nimbleness of the Hawk 5 and don't want to weigh it down with a HD Cam. Other key features of the VTX/DVR:
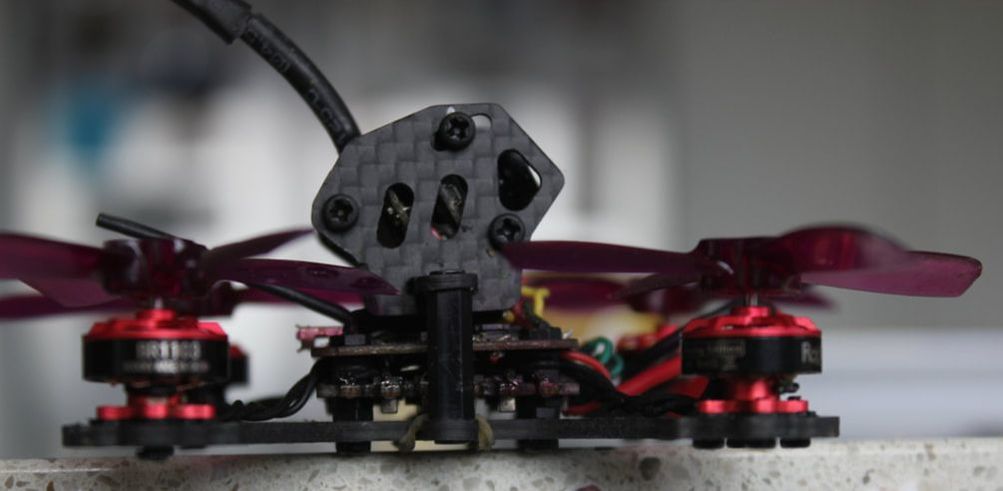
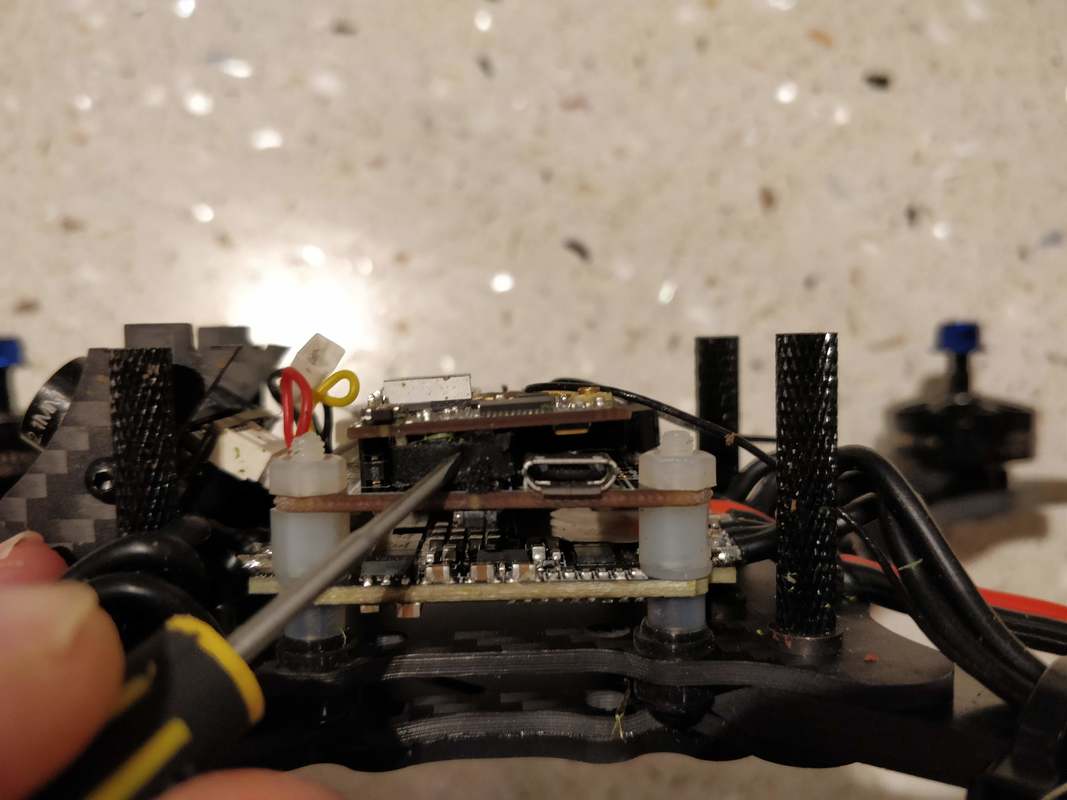
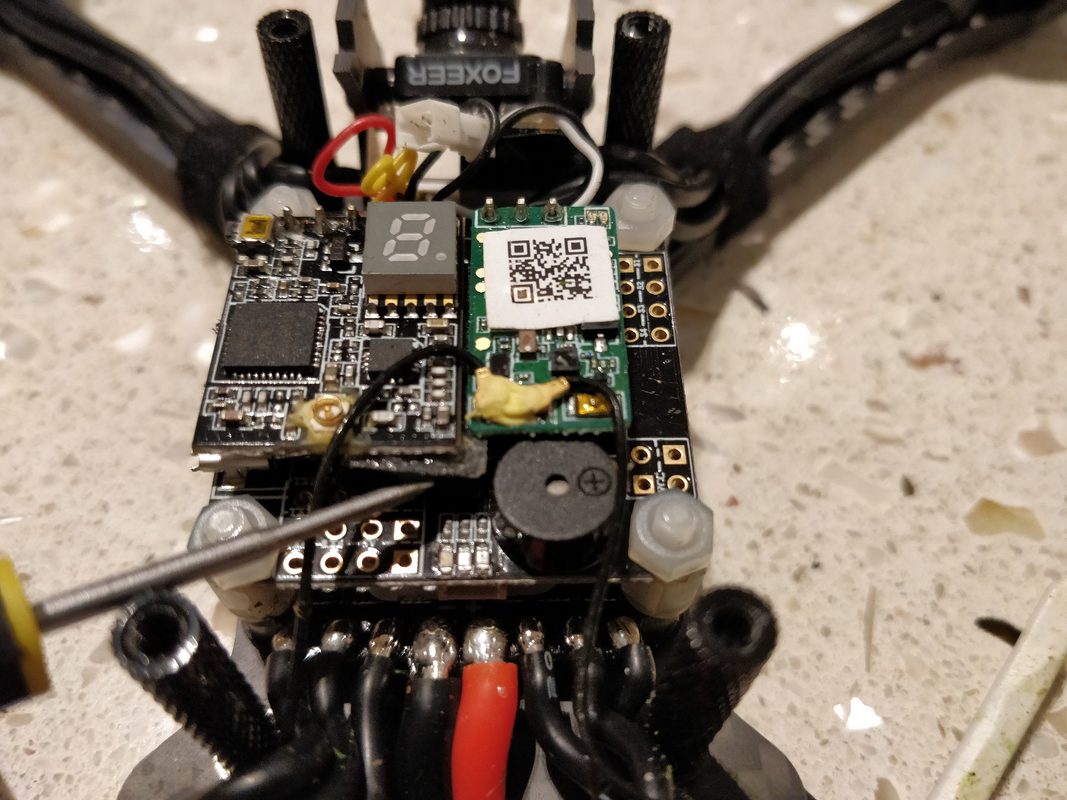
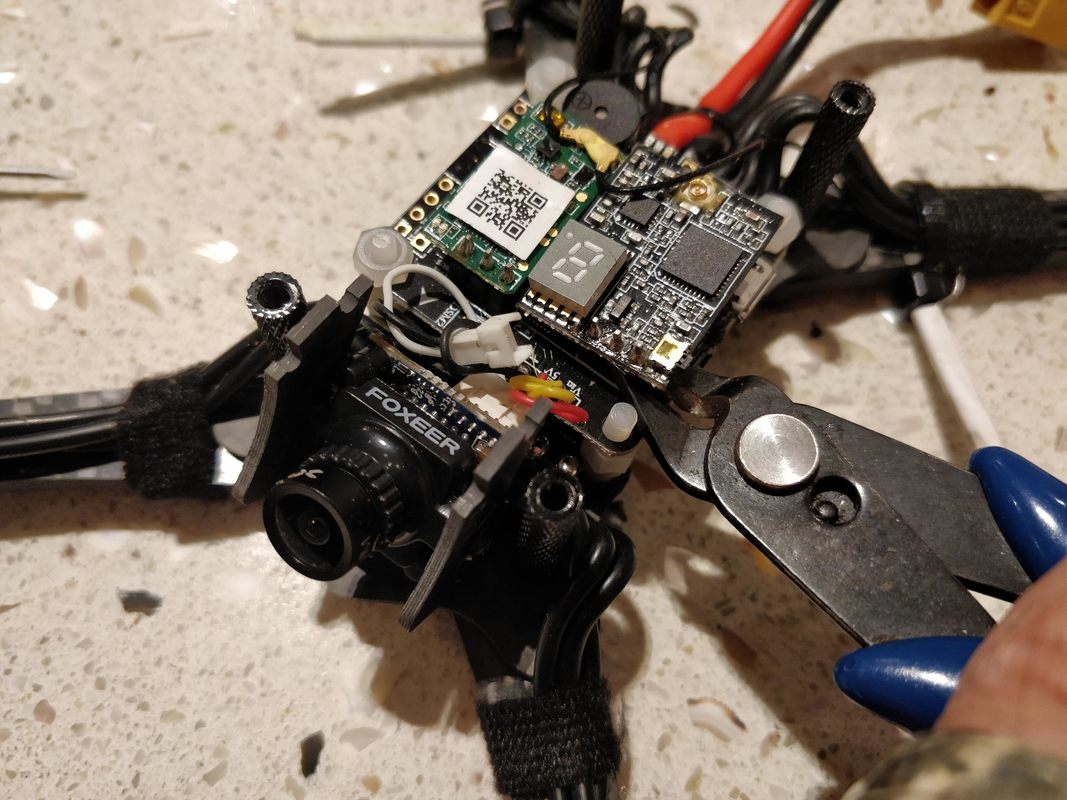
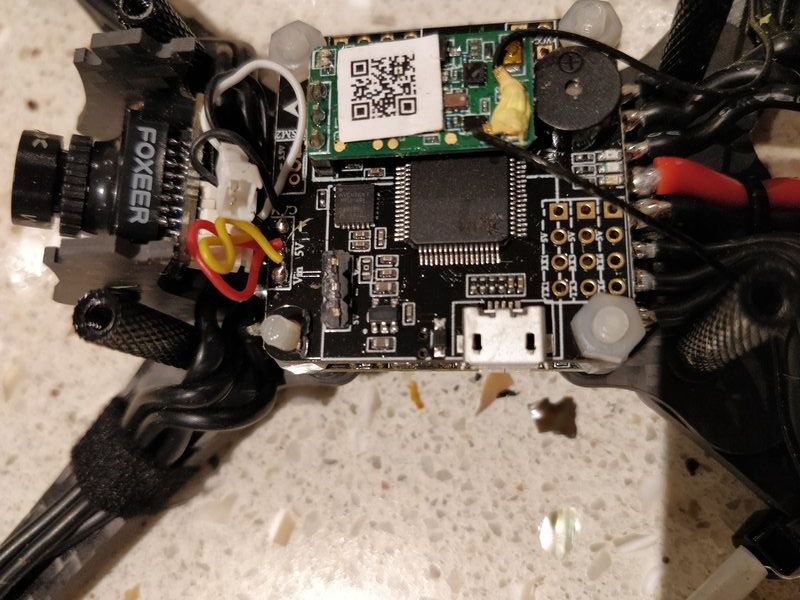
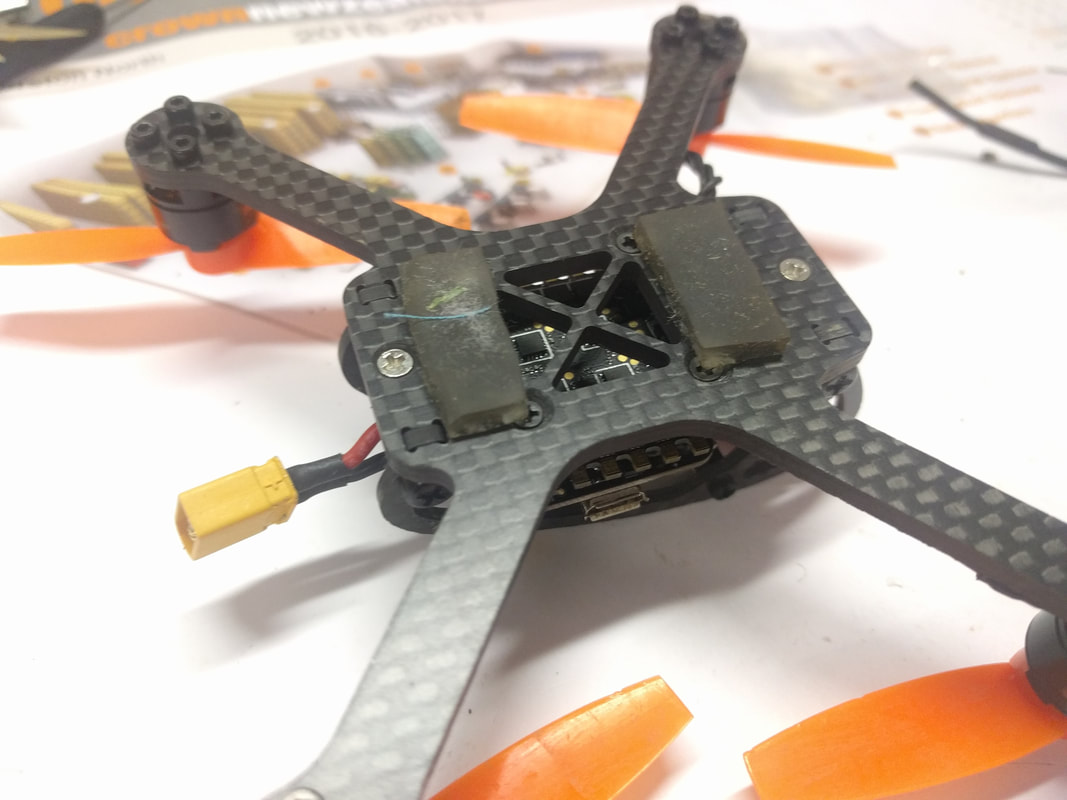
Other parts Just quickly I used the following tools and parts in the instructions below: The install Please note all the pictures below relate to the install of the AKK Infinite but install should be identical or at least nearly the same for others. I had to remove the buzzer and relocate the receiver for this VTX but depending on the size of the VTX you install you may need to do only one or neither. Follow picture left to right then down. All pictures will enlarge if you click on them.
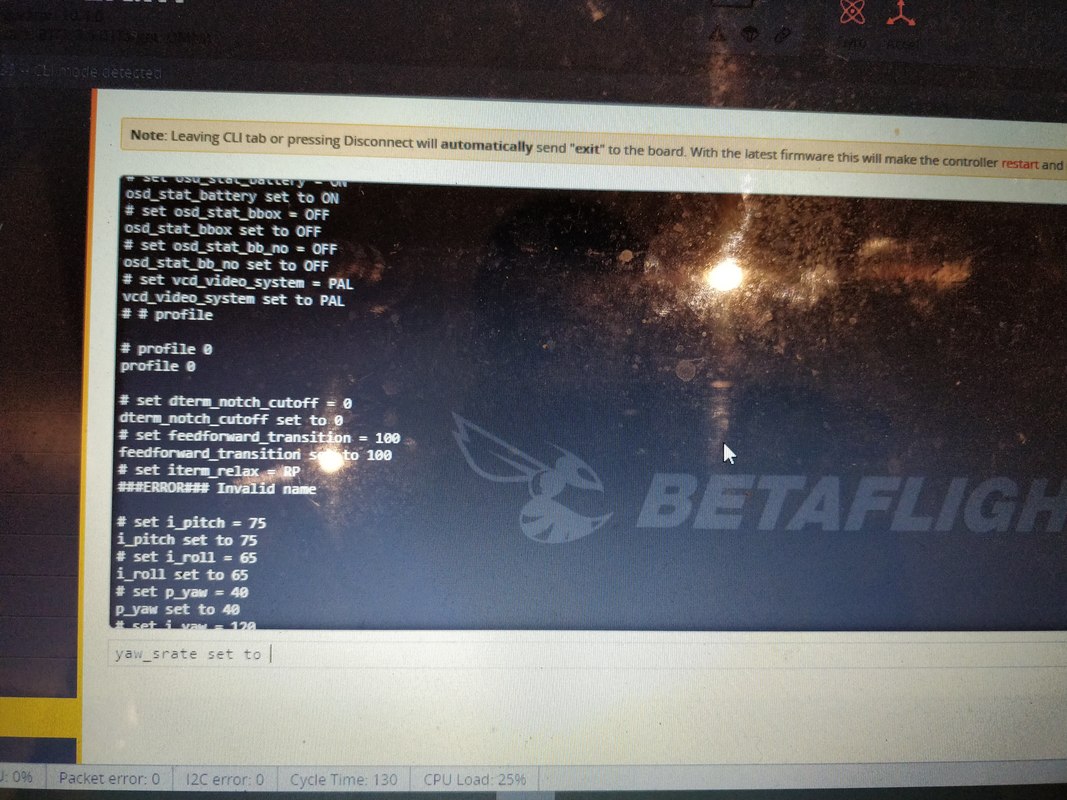
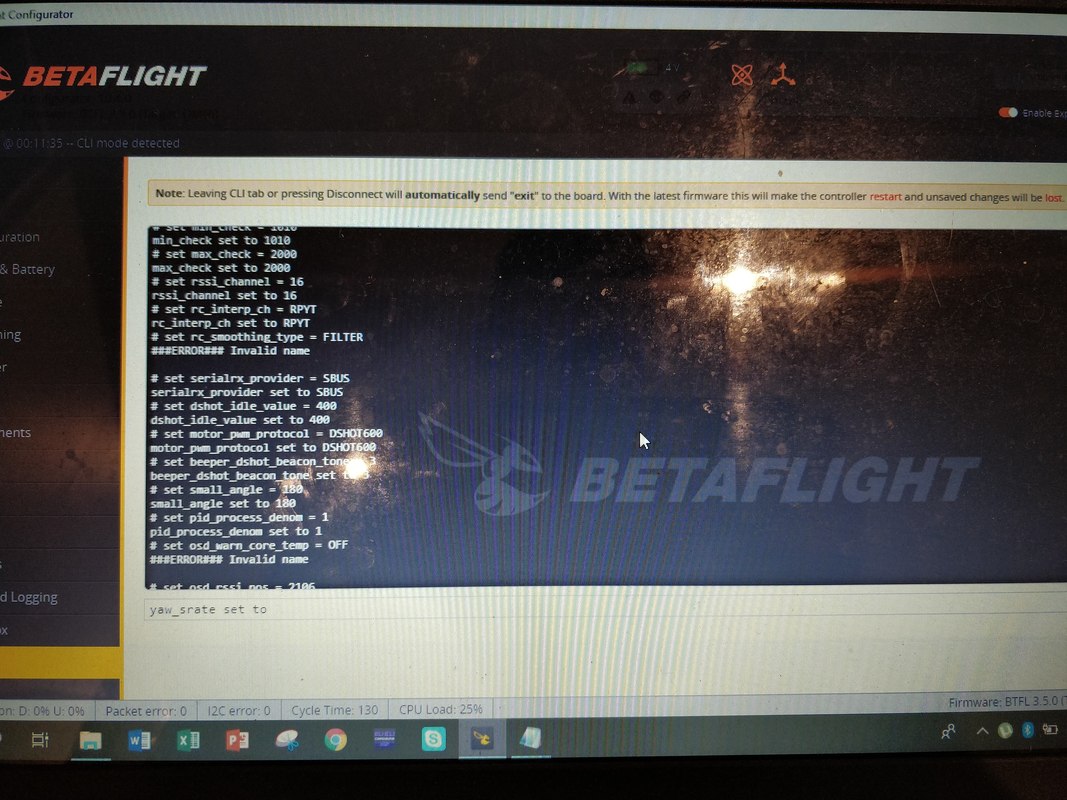
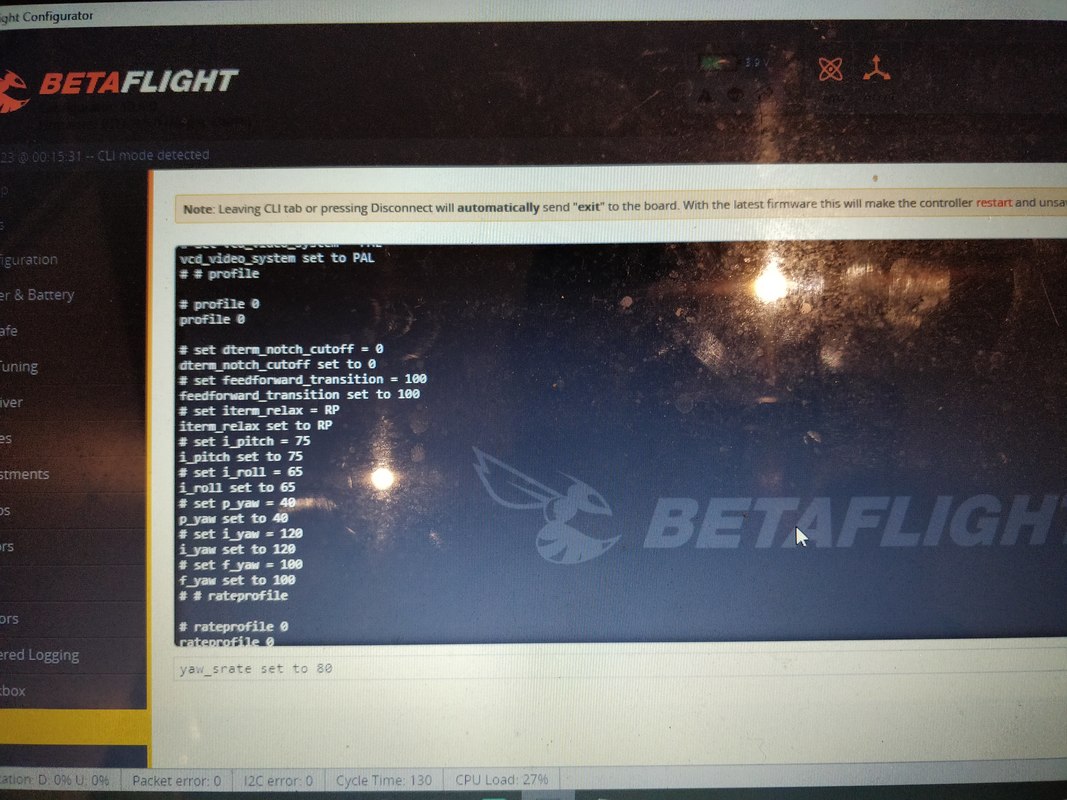
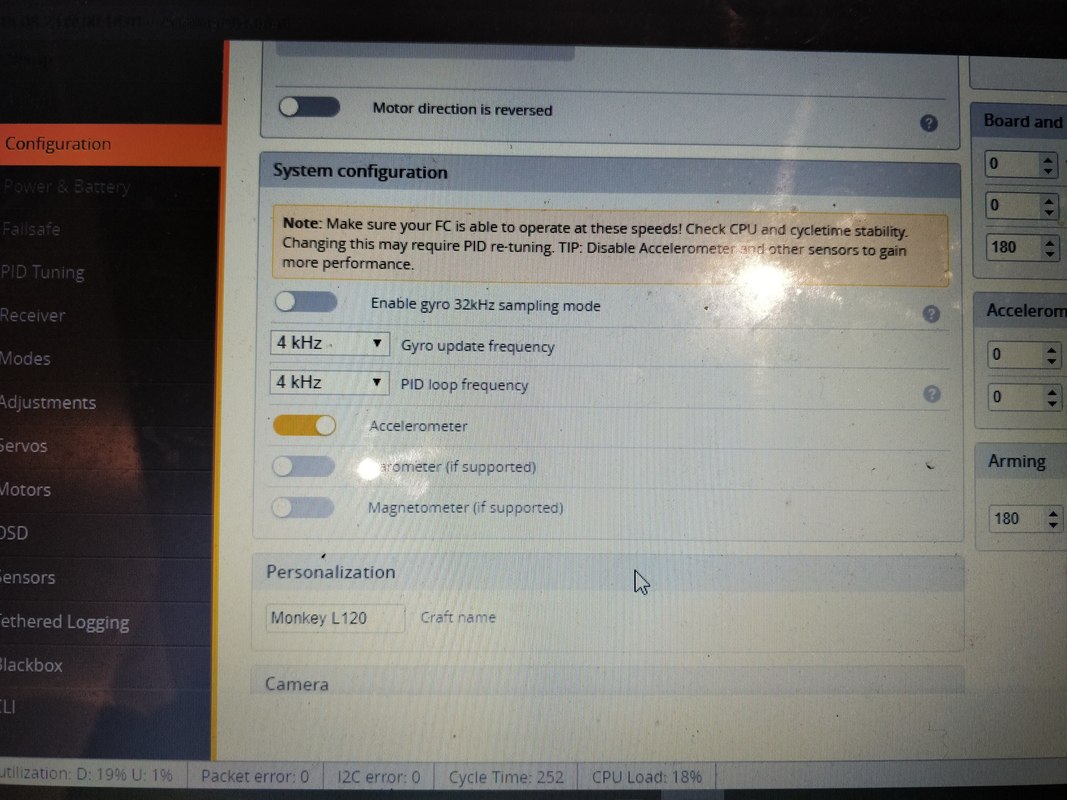
Updating the Leader 120 (or most other micros) with Betaflight 3.5.0 'performance edition'23/8/2018 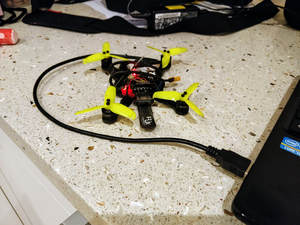 Hopefully you've seen my announcement here about the 'performance edition' of the betaflight target for Onmnbis F3 flight controllers as used in the Leader 120 and pretty much every other micro quad that runs an F3 board with OSD (including the Emax Babyhawk R and MANY others). This differs from the stock version offered bia the betaflight configurator in that it includes the fatastic new features that made betaflight 3.5.0 really shine - iterm relax and rc smoothing in particular plus the return of LED control. These were openly available for betaflight 3.4.0 but not for 3.5.0 until sbstnp kindly re-compiled for the community and shared on RCGroups. Further to this I've installed on my recently revised Leader 120 and confirm that it does indeed allow these important features that were otherwise unavailable - see below.
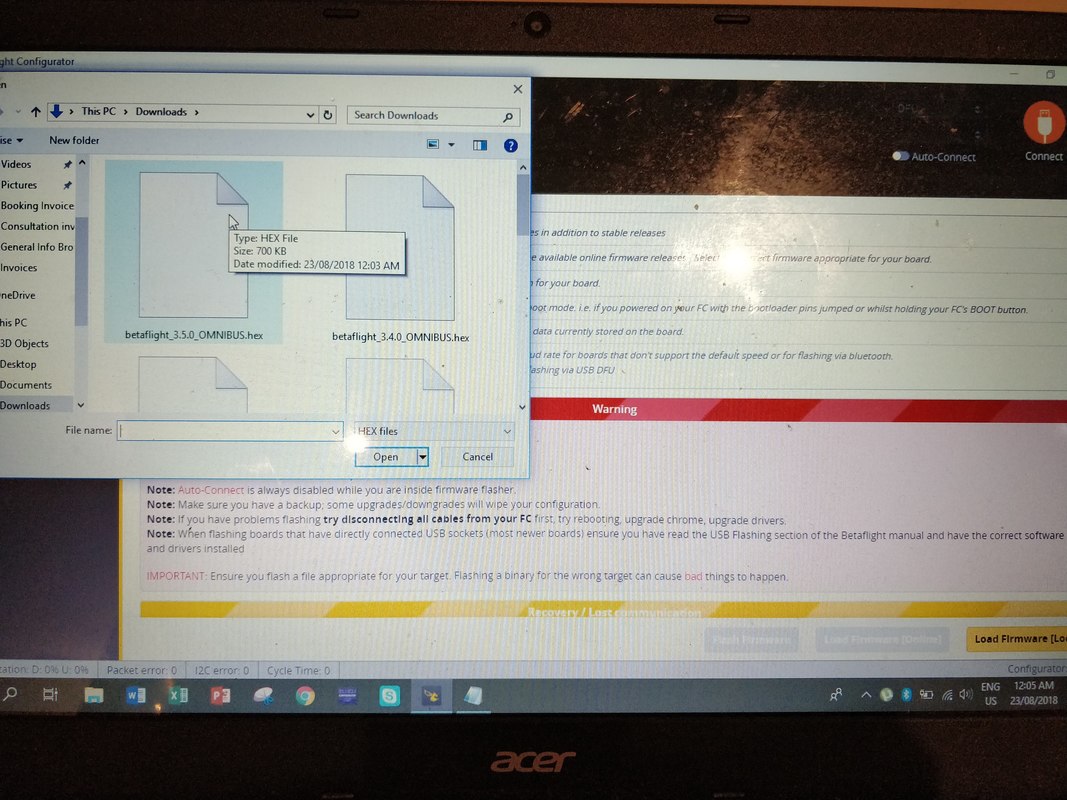
How to install I'm going to assume that if you are reading this you kinda know how to update betaflight firmware on your quad so will take a few liberties. Firstly, download and unzip the file below to your desktop. Please note this version is only suitable for FRSKY receivers - leave a comment if you want me to link FLYSKY or spectrum too.
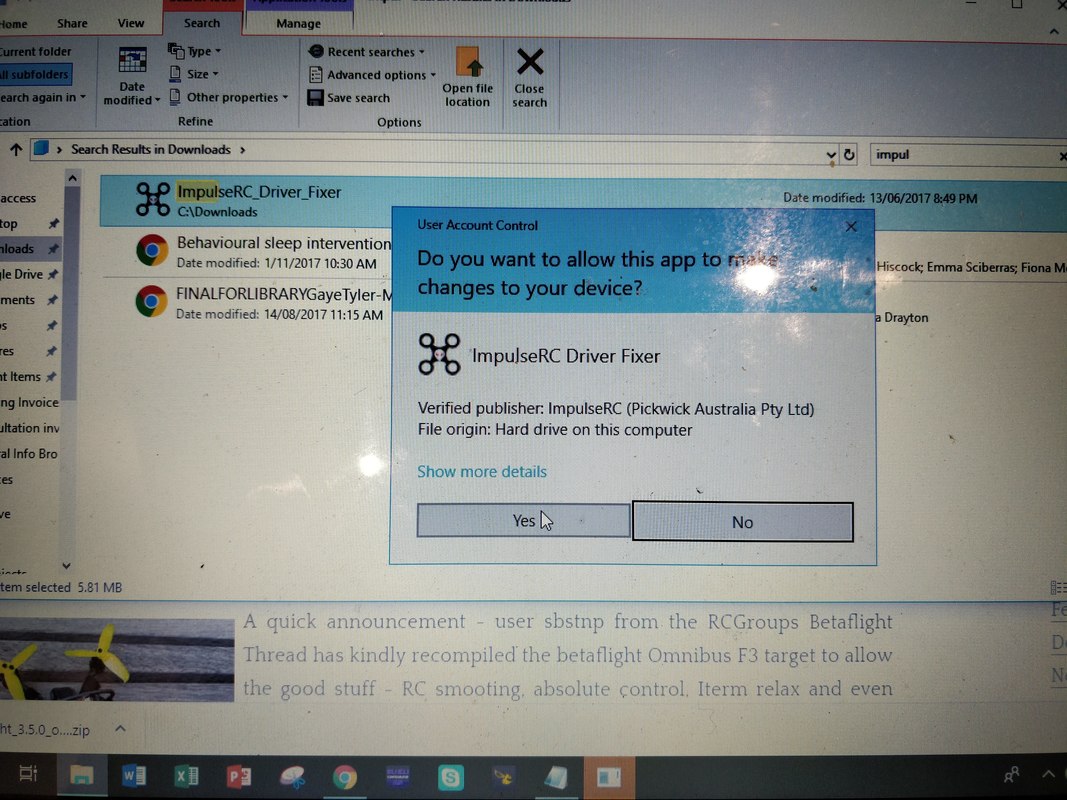
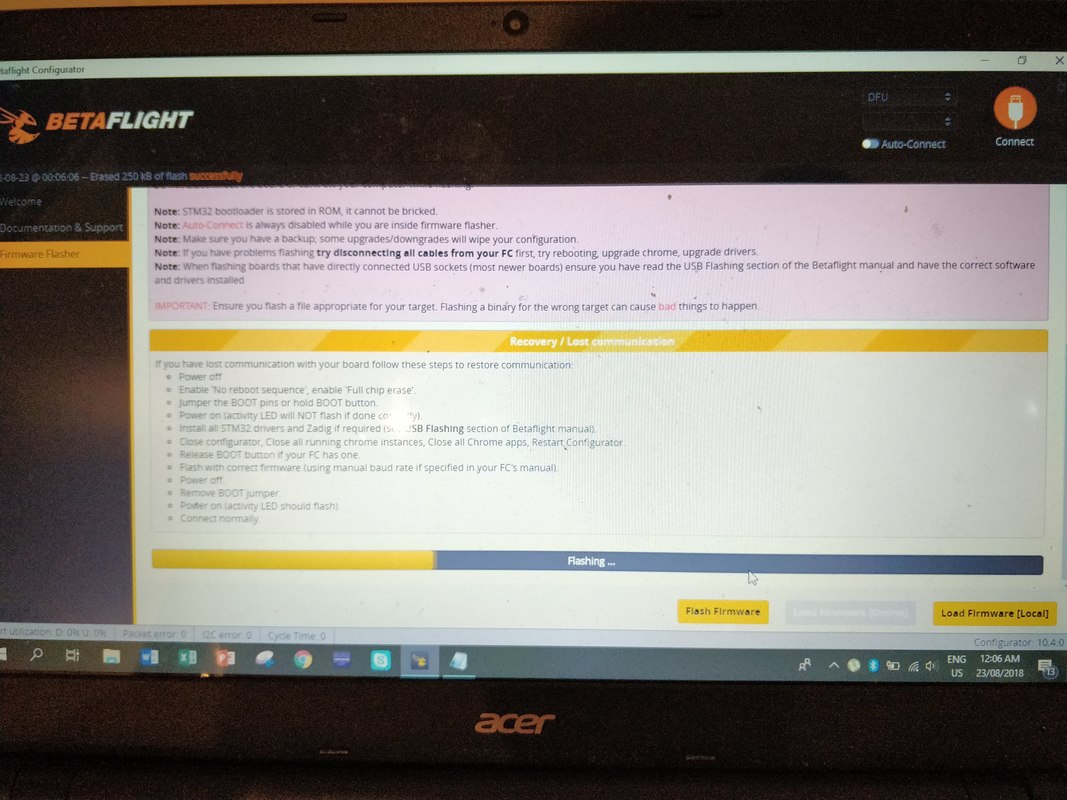
Next, go to the firmware update page in betaflight configurator (preferably configurator 10.4 on) Choose "Load Firmware [local]" and choose the unzipped hex file from the first step. If things grind to a halt here run the Impulse RC Driver Fixer to allow your computer to access your FC DFU
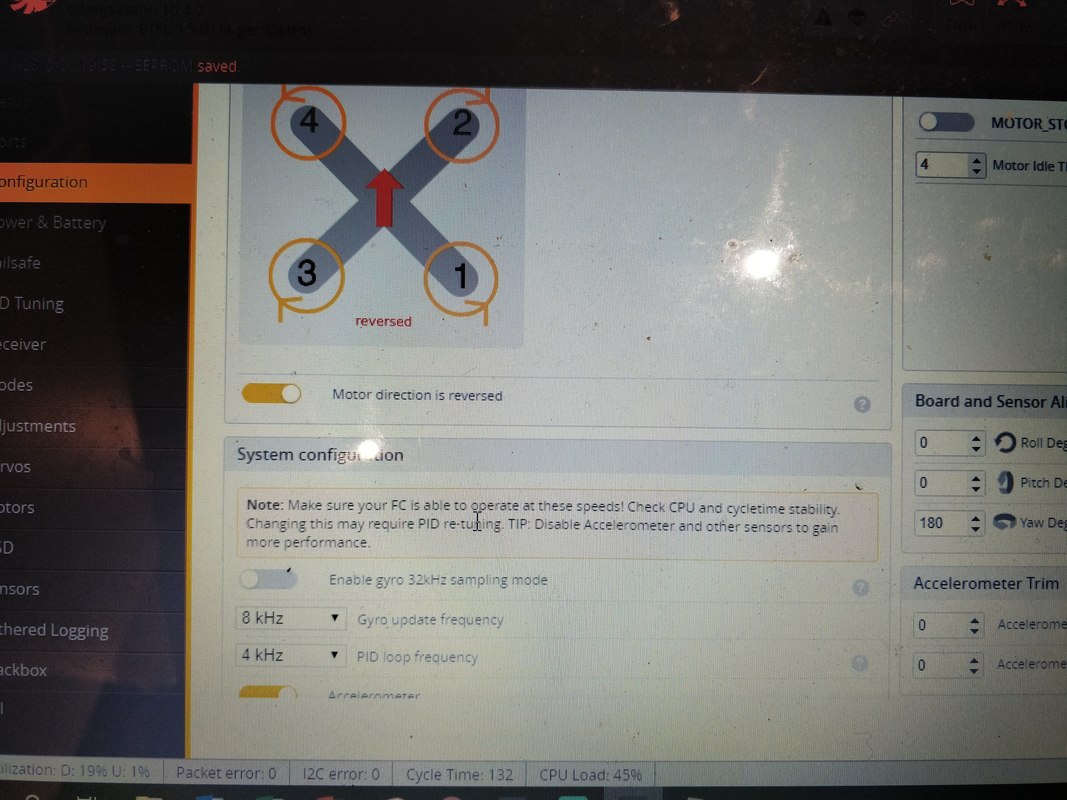
That's kind of it, you're done. Now you can enable all of the options that made 3.4 a real improvement for larger quads plus the improved dynamic filter from 3.5.0 which is more sympathetic to micros and the new feedforward system that allows you to better control the 'feel' of the quad without having to mess with PIDs so much. I'd strongly recommend reading the tuning guide for betaflight 3.4 and the tuning guide for betaflight 3.5 since there are many new features that improve flight performance. Just a quick note you can run Gyro/PID loops at 8k/4k with all new features on at 48% CPU and 4k/4k at <20% CPU as below
Please feel free to browse the rest of my site, I now have almost 100 reviews and tips/tricks blogs as well as a regularly updated specials and discounts page.
 A quick announcement - user sbstnp from the RCGroups Betaflight Thread has kindly recompiled the betaflight Omnibus F3 target to allow the good stuff - RC smooting, absolute control, Iterm relax and even LED Strip. For those of you familar with the 3.4.0 'performance' version this is much the same but for 3.5 If you are not familiar this file will allow you to run all of the great new features of betaflight 3.5.0 that make it more suitable for micros (esp new dynamic filter and feedforward) and the massive improvements from 3.4.0 as above. I strongly recommend this for your leader 120 or any other micro brushless as all tend to run the OMNIBUS (F3) target. Will follow up with install guide in a few days. Full credit goes to sbstnp for this recompile. Hex file can be found here:
For my list of recommended hardware changes please see my blog: My leader120 is a year old! What I've changed in that time
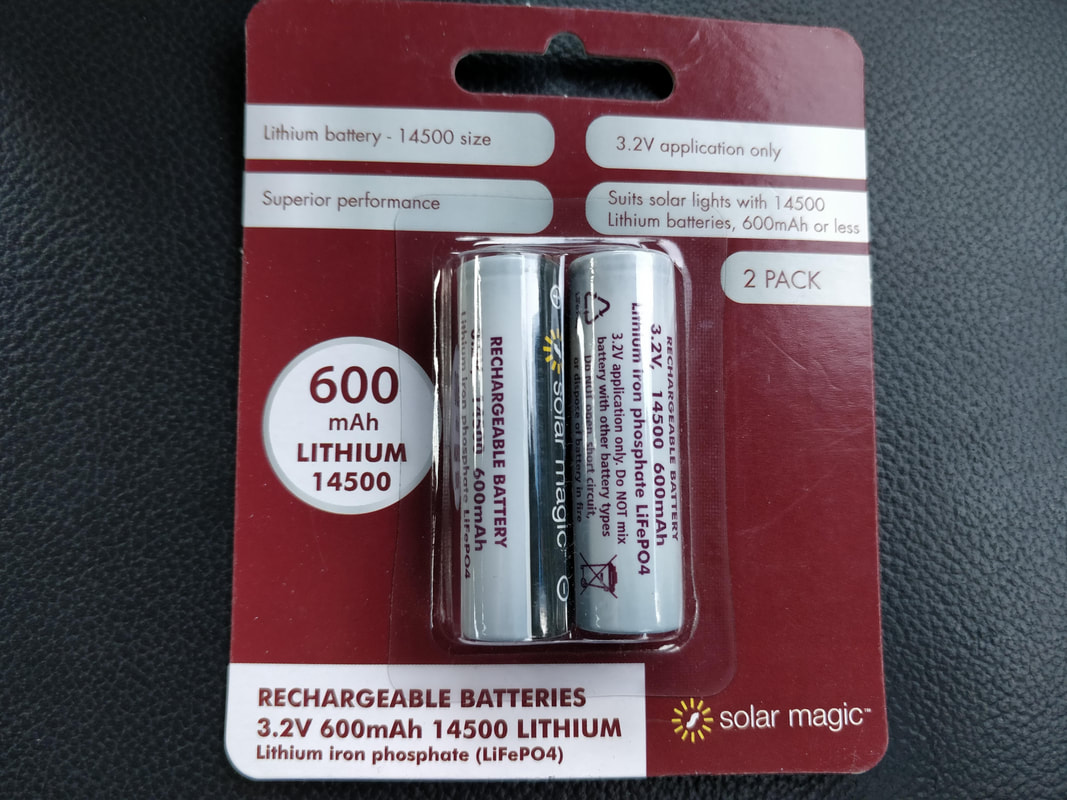
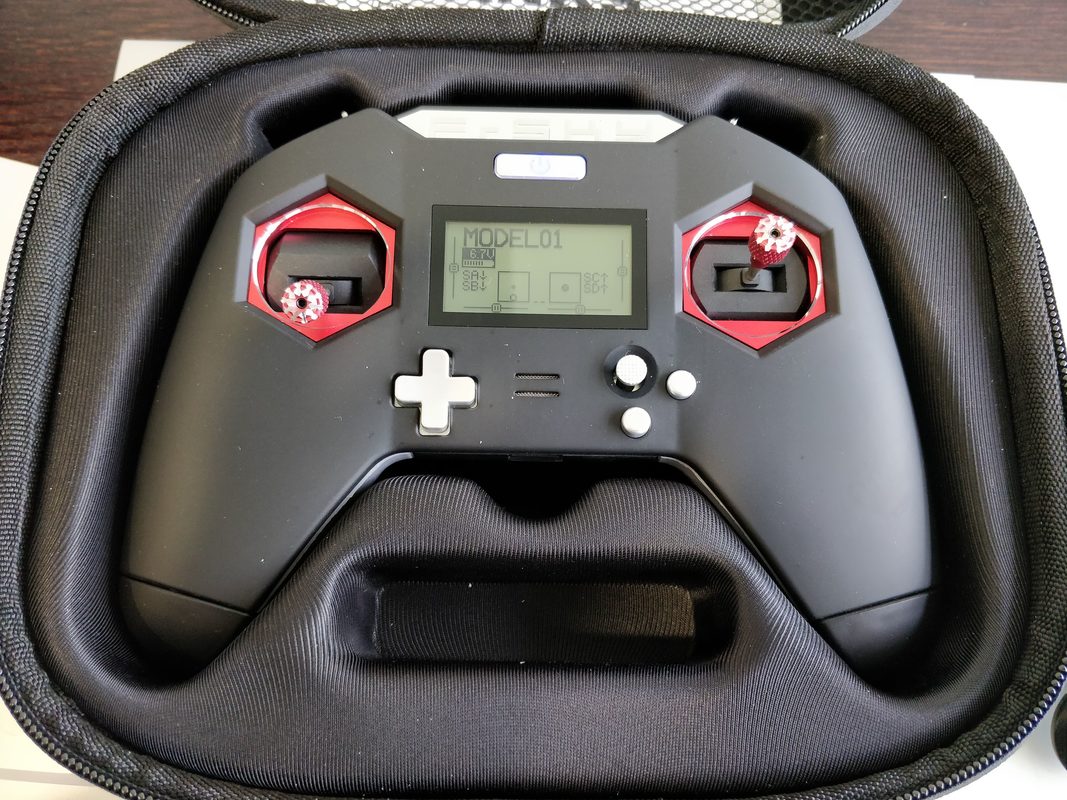
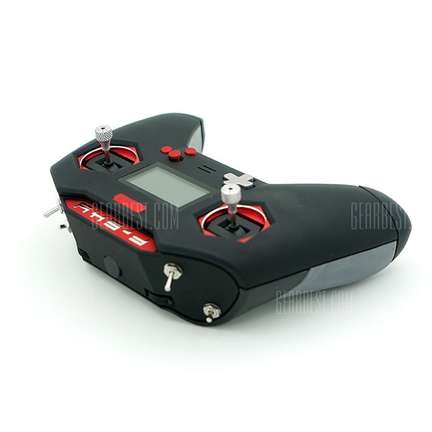
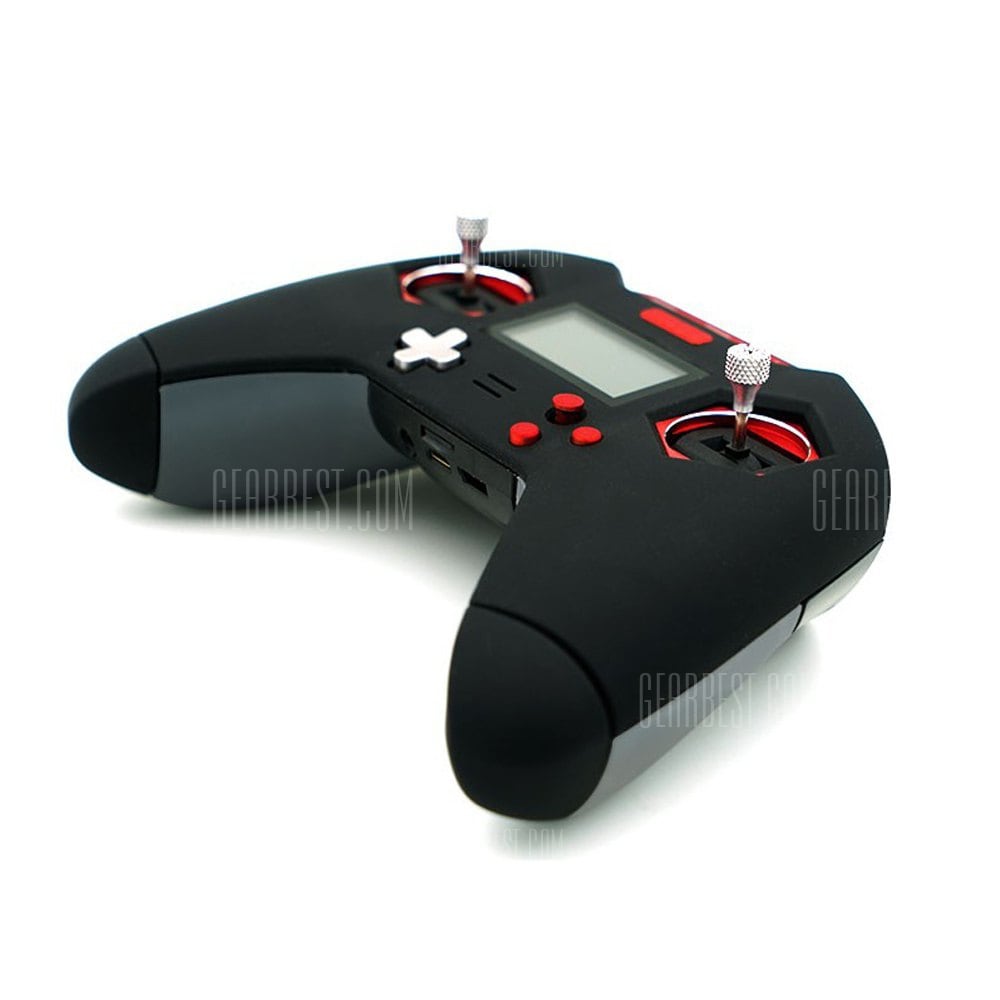
Note: I've now completed my full review of the X-lite which can be found here 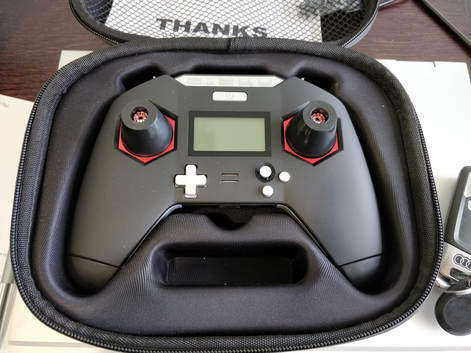 The Taranis X-Lite is out and it's great. I have mine and it feels great in the hand, a lot of though has gone into the detail. This is not a review, I'll get to my experiences there soon enough but I want to cover an alternative for the one downside - the uncommon size of battery required to run it. Battery sourcing issues I live in New Zealand and if you think you are having trouble sourcing 18500 batteries where you live then you should try it here. In fairness one of the local quad shops sells the genuine panasonic cells but at $USD25 including delivery it's more than I want to spend. Also being impatient I did some lazy research. The "18" part of the "18500" refers to the 18mm battery diameter (some where between a traditional AA cell and a C cell) whereas the 500 refers to a 50mm length - identical to an AA or C cell. Just for a laugh I tried a NIMH AA cell in either side and you know what? It powered up. Since the AA cells are the right length, there was enogh tension in the springs to make sure they stayed connected and didn't jiggle around. The AA's however are not a viable option since they only provide 2.4 - 3.0v in series. One of the rechargeable lithium battery technologies is clearly needed here in order supply the necessary 6.0 - 8.4v the controller requires. You can use a 14500 battery Based on the above the more common 14500 cell is viable (an AA sized battery with Lithium technology) and these are much more common than the 18500 albeit with a little less capacity. See below for how they fit in the X-Lite: 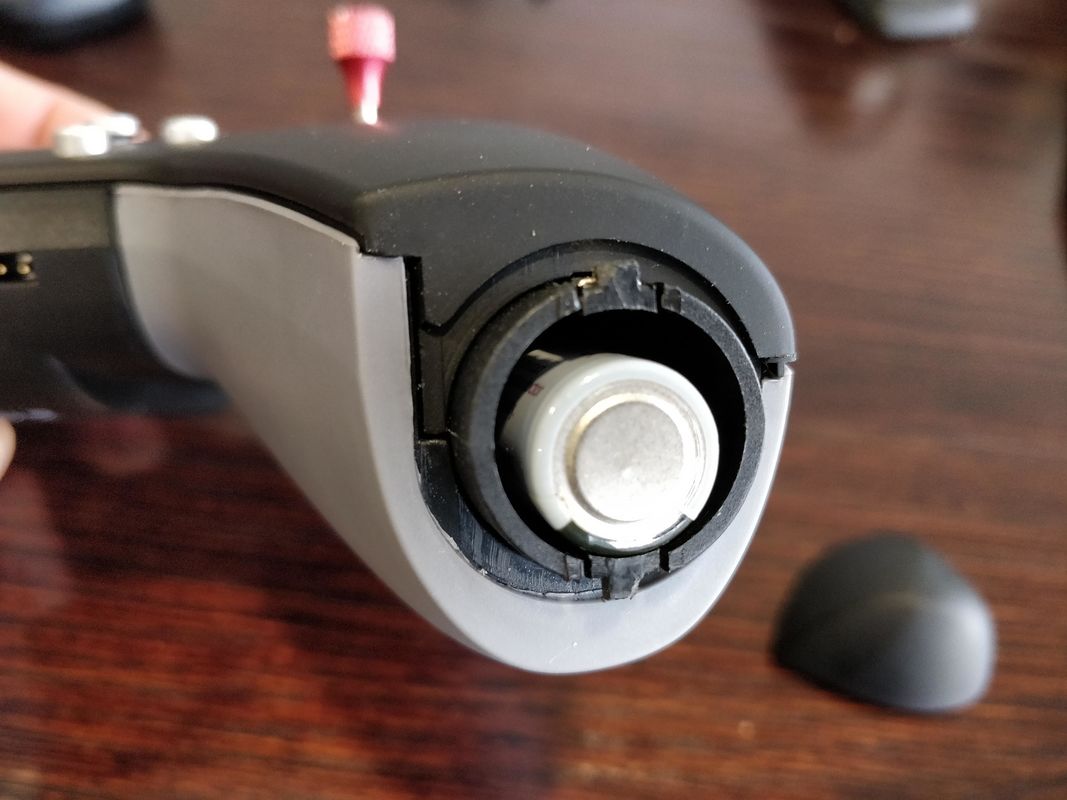 The 14500 'AA' size is does not have enough girth but the correctly length ensures the springs hold it tightly in place Get a pair of batteries for less than USD$8 If you live in Australia or New Zealand the cheapest place you can get a pair of these is actually Bunnings Warehouse - see below for the picture but there are the Solar Magic 3.2V 600mAh 14500 Lithium Batteries 2pk and are only $11.98 in NZ (here) or $9.98 in Aus (here). They are based on LiFePO4 Chemisty meaning they put out 3.2V per cell which is fine for the X-lite. Below is a picture of the battery pack and also a picture of it successfully powering the X-lite:
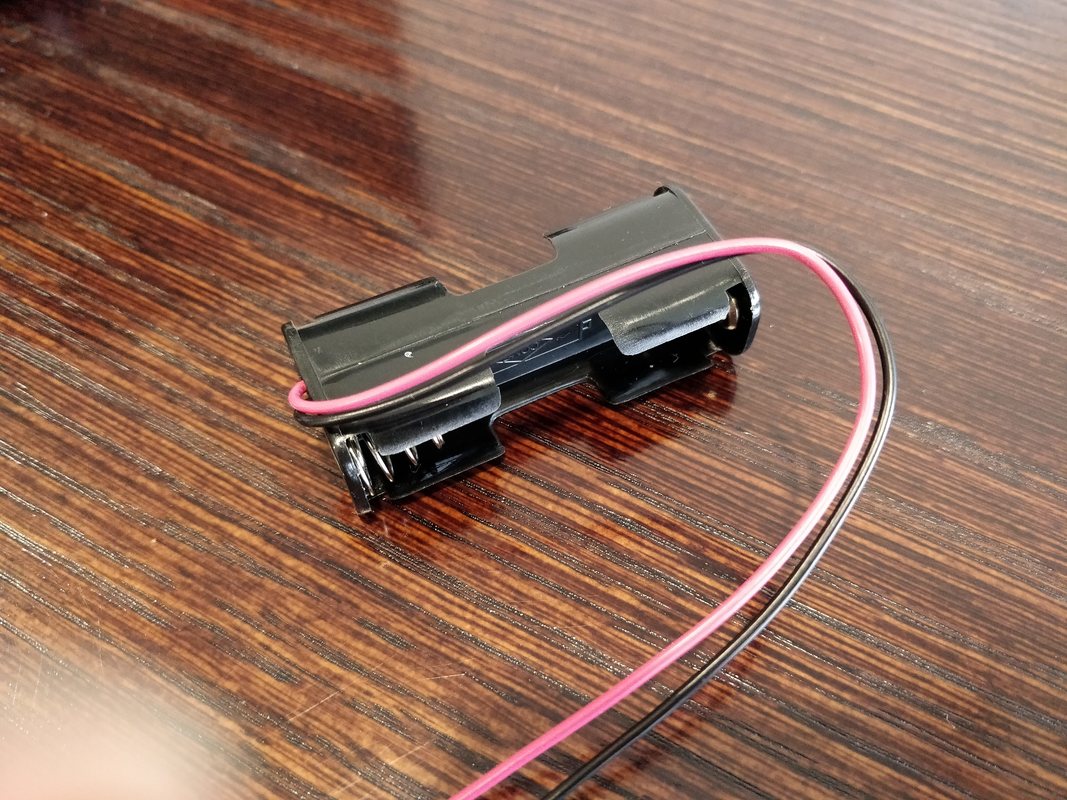
Considerations for LiFePO4 batteries Since the chemisty of these batteries is slightly different to Li-Ion or Li-Po that we are more familiar with, I changed the voltage range from 6.0 - 7.0v with the warning coming on at 6.0v. Charging these at 3.5V will get you to 95% capacity and 3.65v will get you to 100% capacity. Do not charge higher than this!!! I'd recommend charging to 3.5V only for safety. There is a good article here on what to expect with voltages and charging on this type of battery but in short it looks like it is well suited to this application. Charging Continuing with the NZ/Aus theme you can pick up a battery box for only $1.50 from Jaycar here or alternatively you can find one at Banggood here. than can be easily adapted to a balance charger for you to safely charge the batteries on you Lipo charger (don't forget the voltages above). Below is a picture of the battery box and how to adapt for balance leads.
It's early days yet but it's working well in the controller. Not sure about the heritage of these batteries so next time I charge I'll see how much capacity they take. For $10 for 2 batteries I didn't need to wait for though it is a good option. Gearbest were kind enough to provide me this Taranis X-Lite to review so I'd encourage you to purchase from them if you are considering one. It only took 3 days to arrive to me in NZ so not bad with ragard to delivery speed. It is available here in either black or red.
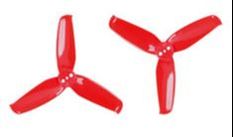
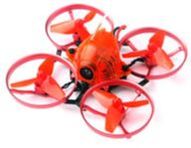
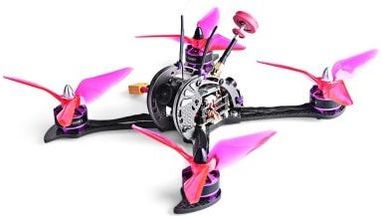
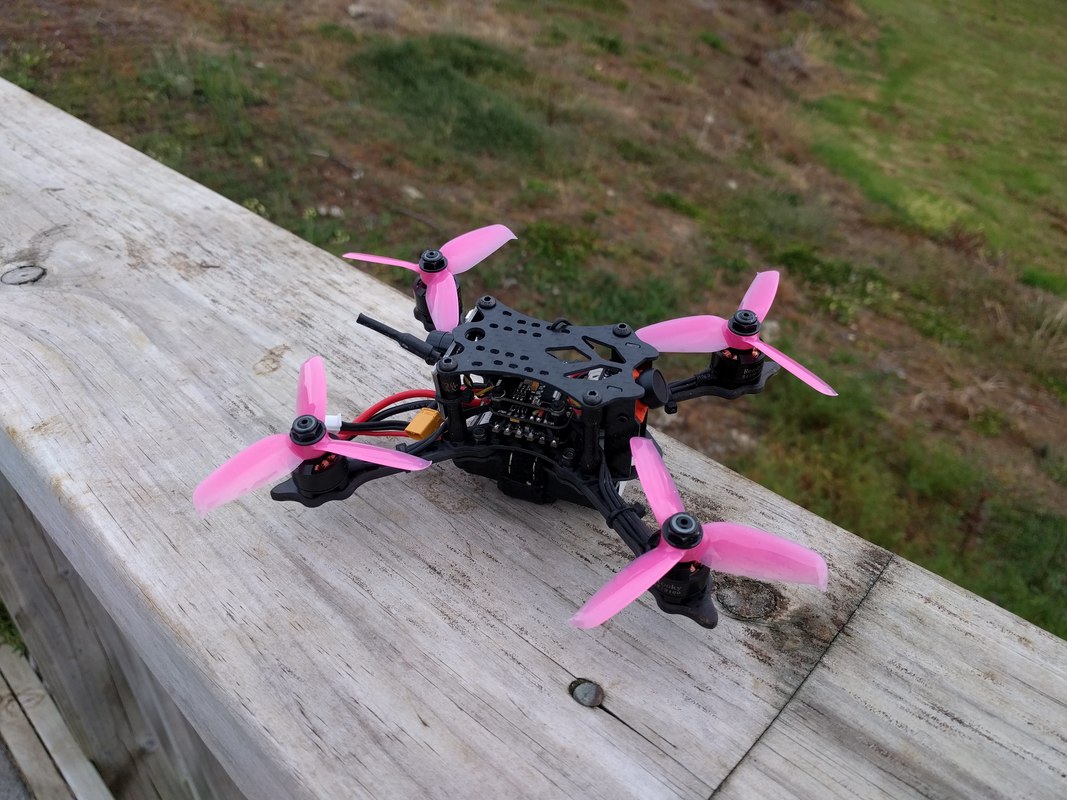
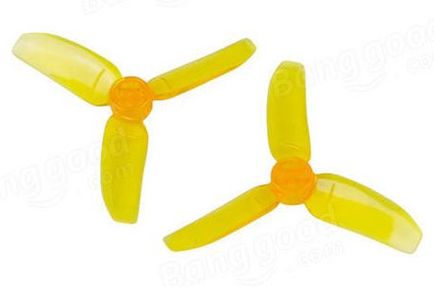
Update! I've just finished writing an extremely detailed walkthrough about how to upgrade the VTX - full blog here  The Hawk 5 ready to fly 5" quadcopter has been out for several months now and has been a real hit for Emax - so much so that it is only widely available from a stock perspective now. I have one which I've reviewed (here) and can quite easily say it is the most well-balanced and complete bind and fly quadcopter I've come across. Gearbest and Banggood currently have this is on special for $209 and $229 respectively (check out my discount page here) My real life work means I'm always looking to improve on systems and it's no different for my quad obsession. So I've made a list of my favourite 'improvements' or probably more accurately personalisations as these are more about changing the feel of the quad to suit my taste rather than the basic operation. I'll also cover off the things I haven't touched because I've not yet thought of a better alternative. 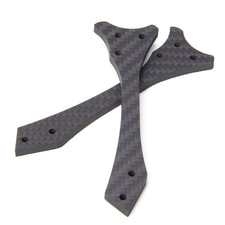 Emax Hawk 5, 6 inch arms Emax Hawk 5, 6 inch arms 6 inch arms The 6 inch arms are available as a direct uprgrade from Emax rather than a third party offering. All four can be had for less than $20 so it's fair to say Emax is looking to expand their ecosystem rather than profit of these in particular. They are very easy to fit since the frame uses captive nuts and arm retention hardware is independent to the stack mounting hardware. This means you can change the arms without pulling anything apart. Arms are sold in pairs and are presently in stock at Banggood for $8.99 per pair.  You can see the 5 inch arm overlaid on the new 6 inch ones You can see the 5 inch arm overlaid on the new 6 inch ones The new arms will push the motors out by 15mm in each direction and the good news is EMax allowed for enough slack in the motor wires so they they don't need to be extended - making the whole process VERY simple. To start I flew with 5" props on the new 6" arms and was suprised to find how much more stable it was in regular flight. I've found examples where several pilots prefer 5" props on a 6" quad for a more stable HD platform (e.g. Gapit) or for improvements to a racing rig (Serge from Piroflip noted that his son Dolma FPV runs a 6" frame with 5" props. KababFPV who works with Piroflip has suggested this is likely due to the lesser amound of turbelent air to each prop given the additional spacing. One potential down size is the additional width but in reality this is only an extra 9mm wide on either side. Theory aside I really liked the feel of stability. The next obvious advantage this gives is the ability to physically use a 6" prop. In most circumstances you'd need to revisit your motor choice (stator size and/or kV) but in this circumstance the seemingly low kV that Emax chose (2300kV) and and reasonable stator size (2206) means that it can swing a 6" prop on 4s with no issue. I chose to use the Gemfan 6042 bi-blade but have heard good things about the 6" LR Avan prop too. Since the quad is light and the 6" adds so much prop area, they have more than enough grip - much more than a 5" tri blade... feels like they stop on a dime. There are a number of good 3 blade 6" props available now from Dalprop and HQ but I feel the extra weight these add is unnecessary because it will take away from the response of the 'just big enough' 2206 motor. In the air hover is achieved on a much lower throttle as is everything else. Most flying is done at low to mid and the sense of control is strong. Full throttle draws a LOT of current: 135A on 6042 vs about 90A on the HQ 5x4.8x3. High throttle is less about more thrust and more about current draw suggesting the motor has probably hit its limit. This would be a great candidate for scaled throttle reduction in betaflight 3.4.0 onwards as per my setup guide. That being said the thrust is immense for such a light quad and actual battery life was somewhat similar to 5" props but so much more variable - it will be way more efficient than 5" at light throttle but way more inefficient at heavy throttle. For the cost of the arms and props and ease of install I'd definitely recommend giving it a try. The video below shows my first flight on 6" props, please turn the sound down. punch outs at 0:23 and 0:40.
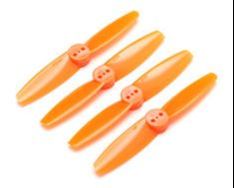
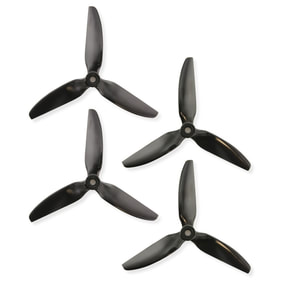 HQ 5 x 4.8 x 3 V1s propellers HQ 5 x 4.8 x 3 V1s propellers Changing the props I love the idea that Emax created the 5" Avan Flow around the Emax LS2206 motor on the Hawk 5 but I just don't like the feel. Don't get me wrong, I love the idea that the weight is kept close to the hub and that it is durable and well balanced but just don't like the way it delivers power. To me the HQ props feel much more familiar and I've found the 5x4.8x3 V1s with it's relatively steep pitch is a good match for the LS2206 2300kV stock on the Hawk 5. The other thing I prefer over the V1s design is efficieny. Top speed 'feels' similar but maximum current draw is only 90A on the HQ 5x4.8x3 but 110A on the Avan Flow using my best batteries. Plenty more props for me to try including the HQ 5.1x5x3 but at this stage I'm really pleased with the 5x4.8x3 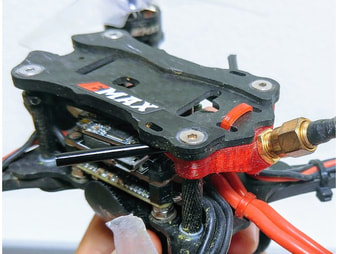 Image from Thingiverse - click to follow Image from Thingiverse - click to follow Antenna mounting I find the video transimission surprisingly good on the Hawk 5 but the antenna solution is a let down. Dipoles are fine for flying alone but the Hawk 5 one is not secure. I did the cable tie/heatshrink trick to secure but still lost it after and upside down landing anyway. I wasn't bothered though, because my race club doesn't allow dipoles as a vtx antenna because of the increased likelihood of bleed over to other channels. Emax were good enough to include a UFL to SMA cable and 2 x excellent Emax Pagoda LHCP antenna but recommend a rubbish way of mounting them with cable ties that is just not secure and risks the antenna getting caught in spinning props. The best solution in my opinion is a 3d printed one. I don't own a 3d printer but a service like 3d hubs means I can download an appropriate file from Thingiverse and have it printed and delivered to me - it was only about $5 for 2 printed mounts. Here is the design I recommend since it elegantly incporated and SMA VTX antenna mount and receiver antenna mount using forever tubes. I had a 3d printed mount from an old floss 2 frame and found the standoff spacing is identical (31mm) so have just used this for now. Here is the link for that design. It's a tidy solution that keeps the antenna safely away from the props and allows a good and for a racing quad that is commonly tilted forward fairly heavily.
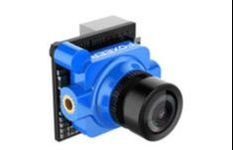
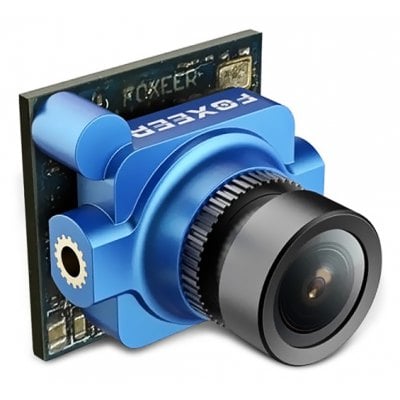
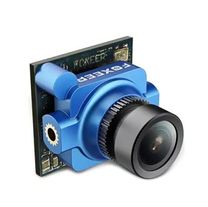
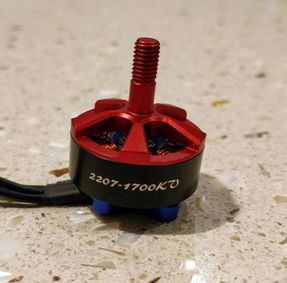 I used the HobbyCool 2207 1700kV on my 6s race build I used the HobbyCool 2207 1700kV on my 6s race build What I haven't changed: Motors. Many (including myself) questioned the choice of 2206 2300kV motors when Emax had the 2207 mid-high kV variants available. I no longer question the stator size or kV as I think both are an excellent match for this quad - the 2206 is plenty for a lightweight build and the 2300kV offers great efficiency and flexibilty as per 6" props whilst still being suprisingly powerful. The only change I would make is going to lower kV IF I decided to run 6s which this stack is apparently capable of - Conrad Miller (Furadi) is an EMax team pilot and has run 6s on a magnum stack with a 1700kV motor. If I did go for a low kV motor the standout option for price/performance in my opinion is a Brother Hobby Returner R3 2207 1700kV which is only $15 under the HobbyCool Logo. I've used these on my 6s race build (blog here) and they are super nice. 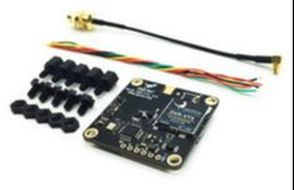 THe HGLRC AIO VTX DVR is an excellent VTX than incorporates a DVR in a single layer 30.5mm board THe HGLRC AIO VTX DVR is an excellent VTX than incorporates a DVR in a single layer 30.5mm board VTX. The included VTX is limited to 200mW and has no smart audio. Many users have reported poor performance or reliability problems although I have found signal and reliability to be just fine. If it were to die I'd probably install the AKK infinity VTX DVR combo or HGLRC AIO VTX DVR (reviewed here). The stock Hawk 5 is too light to carry an HD cam so an onboard DVR would be a satifactory backup. Given the current VTX shares a stack layer with the XM+ receiver this would need rewiring and I can't bring myself to do this on a receiver that is currently working well for me. 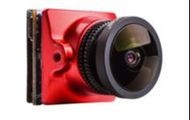 The Runcam Micro Eagle is the only camera I'd choose about the Foxeer Micro Arrow Pro The Runcam Micro Eagle is the only camera I'd choose about the Foxeer Micro Arrow Pro Camera. The Foxeer Micro Arrow Pro as on the Hawk 5 is hands down my favourite budget camera. It gives consistent performance regardless of sunny or overcast day unlike many of the new CMOS cameras. An exception to this is the Micro Eagle which is the best camera (IMO) period. It's not cheap though so I can't justify replacing the Arrow pro but this is the only camera I'd uprade to. Conclusion
All of the mods I've included here change the feel of the quad except for the VTX antenna mount which is a MUST HAVE in my opinion. I do like the longer arms with the HQ props and this is what I've settled on but this is a feel thing more than anything else and was not expensive so, why not?! I'll only replace the cam and VTX if mine break down. If I break motors I'll replace like for like unless I change the whole fleet to 6s which is presently unlikely. Please feel free to browse the rest of my site, I now have almost 100 reviews and tips/tricks blogs as well as a regularly updated specials and discounts page.  Throttle limiting is useful in this 1103 powered quad which uses very cheap motors. Click to see ultralight 2" brusless build Throttle limiting is useful in this 1103 powered quad which uses very cheap motors. Click to see ultralight 2" brusless build Introduction Update: This is relevant for all versions of betaflight 3.4.0 and up. One of the new "minor features" in betaflight that I'm very excited about is throttle limit. Previously throttle limit could only be done through your transmitter software and is a pig to set up and even if you could set up it is difficult to flick between option. For the first time this can be set up in Betaflight with the release of 3.4.0. I'll cover only one type of throttle limit here that will most commonly be used and how to assign varying limits and rates to a transmitter switch. I've put this tutorial together because the throttle limit feature must be accessed through the command line interface (CLI) rather than the graphical user interface (GUI) Firstly if you have played with rate profiles in betaflight before, this is what your the throttle limits are tied to. You can cycle through these with the betaflight OSD when disarmed or if you assign to switches you can change mid flight. Why would I want to limit throttle?: There are a few reasons that are all based around the fact that lmiting throttle will limit current drawn and so limit max RPM and thrust.
It's important to note that your flight controller still has full access to 100% of your throttle meaning that there will be overhead to speed up motors to perform maneouvres and corrections rather than slowing down saturated motors. How do I do it? Easy. First, choose the rate profile you'd like to limit throttle on, up to 6 are available in betaflight now but I only use 3 since I map to a 3 way switch on my transmitter. In the example below I have my 'race rates' on profile 1 and 2 which are identical and use profile 2 for limiting throttle. FYI profile 3 is my freestyle rates. Make sure you press 'save'.  Next go into the CLI mode. type or copy and paste as below: set throttle_limit_type = scale set throttle_limit_percent = 85 save In this example the throttle _limit_type is scale where it creates a linnear throttle curve up to the throttle_limit_percent value. In this case the throttle will linnearly increase to 85% at max throttle on your transmitter. If you wish to turn throttle limiting off again, use: set throttle_limit_type = off save Lastly there is a second throttle limit type "clip" which simply makes the throttle stick have no impact over a set percentage. I think it will only be exceptional case where someone might use this, particularly playing practical jokes on your mates when you have access to their quad. To confirm that your throttle limit settings have stuck you can see in you CLI "diff" as below: 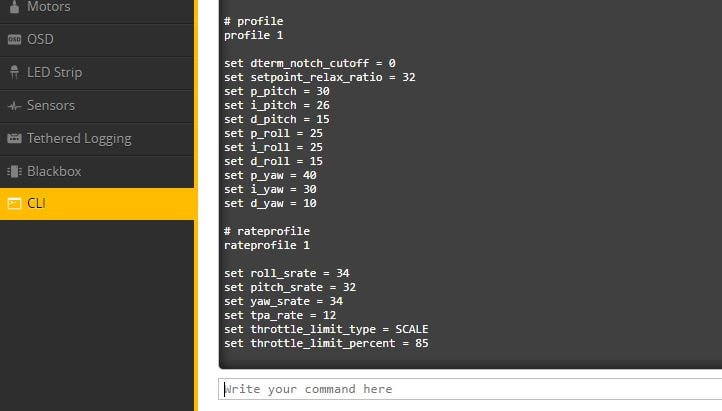 As per the example I used, my rate profile 2 (shown here as rate profile 1 since betaflight uses n-1 naming) has throttle limiting as scale limited to 85% maximum. Setting it to a switch The real usefulness comes in when you set to a switch so I've taken a screen grab to best illustrate - click to embidden. In this same example
Flick the 3 way aux switch will have rate profile 1 in the 'up' positiion, 2 in the 'mid' position and 3 in the 'low' position. I use this across ALL of my brushless quads: 2", 2.5", 3", 4", 5", 6". Now that betaflight has 6 profiles you can get creative and map to a potentiometer or whatever else smokes your tyres.  Conclusion In practice this works well for me on quads with older motors that either vibrate or prop/motor combinations that don't practically put out any more thrust after a certain amount of throttle, rather they just draw more current. I do really like the new filtering of the newly released 3.4.0 but for me throttle limiting is one of the most underated features in this release which I expect to see in all subsequent releases too. Reference: The original betaflight throttle limit pull request can be found here: https://github.com/betaflight/betaflight/pull/5608  The ultimate park quad? The ultimate park quad? I've now had my FullSpeed RC Leader 120 for 1 year and have completed a bench review and flight review. After hundreds packs and many replacement props I thought it would be good to look back at what I've changed to keep this up to date and fun because at it's core, the Leader 120 is still an excellent quad and sits in a class of it's own as a ready to fly 2.5 inch quadcopter. The core of the quadcopter remains the same - original ESC, original flight controller, original 1104 7500kv motors. The bearings on the motors are a little noisy now but no detriment to flight. especially with the modern filtering available on beta and butterflight. My original review quad was kindly provided by Gearbest but is also available now from Full Speed RC's own website. Full Speed is a little more expensive but offers an excellent customisation service. Speaking of Full Speed the proprieters are pilots and test their products a lot before release - it's no accident they have good products. The Leader 120 is available at Gearbest here and FullSpeed RC here. It sells for anywhere between $100 and $130 depending on sales, discounts. So what have I changed in the last year? FPV system The Leader 120 ships with a VM2751 CMOS AIO cam and while ok for a whoop I don't think it does the Leader 120 justice given the speeds you can move at. I cannot emphasise enough how much an improvement the FPV system makes. Choose any camera you like, mine happens to have an HGLRC elf as that is what I had available at the time. Now there are many options, my personaly favourite is the Arrow Micro Pro - a 4:3 CCD cam which has an excellend image and can often be had for $20. For the VTX I personally use the Fullspeed FSD-TX200. This has proven to be an excellent long term reliable vtx that mounts easily to the back of the camera. There is no smart audio but then again you can get it for only $11. If smart audio is a must for you I'd recommend FullSpeed's new FSD-TX600 or the AKK FX3 ultimate. I've made a full article on the install here but with one recent change that has made this much more robust (see picture below).
Receiver You may have a receiver already but if not I'd recommend the Fullspeed model. They are less than $10 each and are available in DSM or FRSKY. More importantly they weigh less than 1g so help preserve the lightweight aspect of the Leader. Another thing I really like about the Fullspeed nano v2 receiver compared to the FRSKY XM is the fact that RSSI (control link strength) is enabled on aux 5 by default for immediate use in betaflight OSD. Frsky XM and XM+ receivers need to be flashed for this functionality. The Fullspeed FRSKY Nano V2 is available from Fullspeed RC, Banggood or Gearbest.
Propellers This is a personal choice. The stock 2.8" Kingkong 2840 props are fine but power hungry due to weight and pitch on 2s and almost unusable on 3s. Probably the best alround props is the Gemfan 2540 (@Bangood, @Gearbest) which offers the benefit of grip as in the stock props but at a much better efficiency with marginally more noise as reviewed here. Another option is the Gemfan 3025 twin blade (@Bangood) trimmed down as detailed here. These offer better efficieny again with but with less top speed. I got 9 minutes of flight when using a new 950mah 2s on these props... full review here.
Software Now running betaflight 3.4.0 which is release candidate at time of writing. Best features for me? Improved filters and much wider PID tuning window. I especially like the throttle limit options that are tied to rates as I think all I get between 90-100% throttle on 3s is noise with more current draw and very little increase in power. I believe my leader originally came with 3.1.7 Low pass and dynamic filtering has improved dramatically since then. Conclusion 1 year on the Leader120 is surprisingly relevant with a few minor mods. Don't forget that Fullspeed have made minor tweaks throughout the life of this quad - 20a esc upgraded to 28a, FC upgraded with better board layout, UART access and improved BEC. No one has really got a comparable lightweight 2.5" ready to fly that compares - the shift to 1105, 1106, 1107 and even 1108 motors on 2.5" have changed flight characteristics and durability for the worse. Even the Skystars Bolt 120 which looked like Heir to the throne with 4s capbility felt like a porker to fly. Enjoy this quad if you have it and upgrade at you leisure or not at all. Plenty of options on this community favourite. Parts mentioned here:
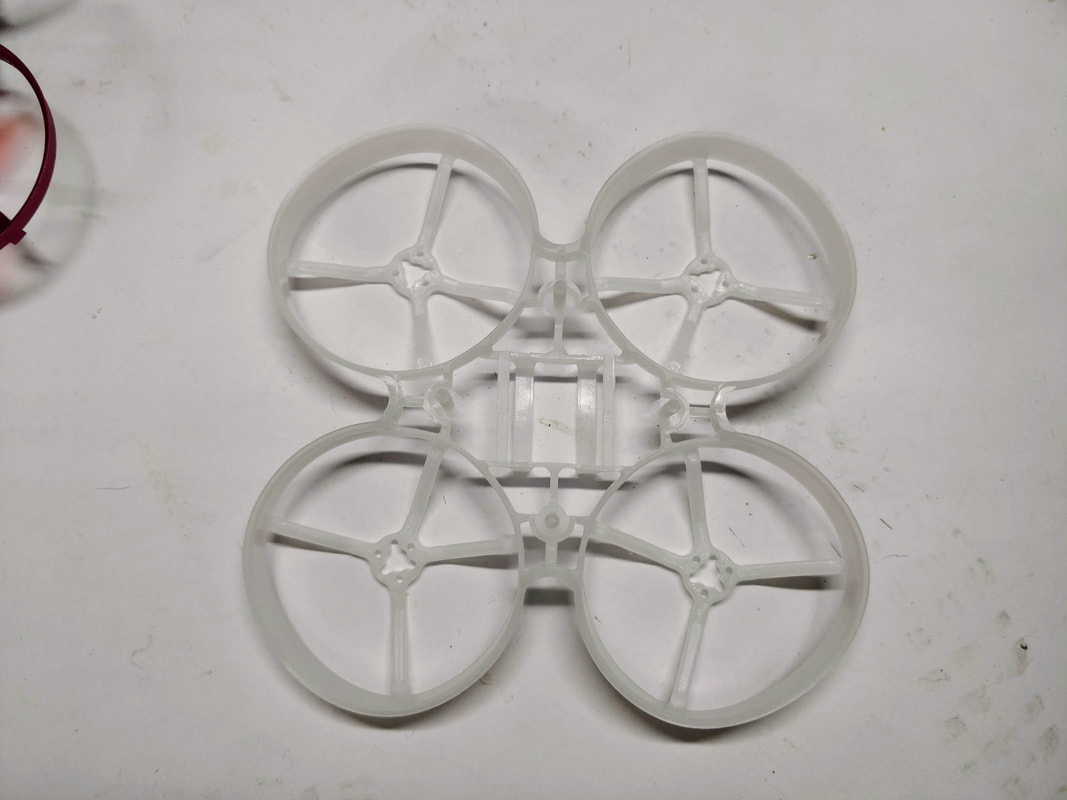
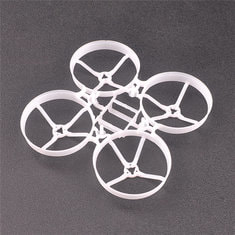
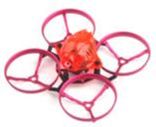
 Snapper7 on a BWhoop75 frame Snapper7 on a BWhoop75 frame The Happymodel snapper7 is an excellent brushless whoop, certainly the favourite I've come across as you'll see in my review. However since URUAV UR65 was released I have lightweight envy - it's no secret that I love lightweight quads for increased agility and longer flightimes e.g. lightweight 5" floss 2 racer, lightweight komori 3", lightweight leader 2.5", lightweight 2" 2s etc. It's good then that there is a new frame available called the BWhoop75 from Bangood. It's less than $4 and weighs 4g less than the standard snapper7 frame. Additionally it is made out of a flexible plastic that should hopefully be more robust - I have heard complaints of people bending aluminium prop gaurds. You can just buy the UR65 frame which is 1g lighter than the BWhoop frame again but I prefer the 40mm props of the 75 frame over the 31mm props on the 65mm frame. It was a bit disappointing when the frame turned up a bit deformed from damage in transit but with a heatgun it was easy to get the shape back. It's still a pretty marginal frame (check out the prop duct strut orientation below - not even) but I was determined to go ahead.
The swap over was really simple given the awesome AIO crazybee board and plug in motors. It was certainly relieving finding out that the frame was branded HappyModel as well so everything is a perfect fit. See my gallery below for pics during install. The only hardware I needed that was not included was 2 self tapping screws that are typically used to hold the main board down in a chinese whoop clone. These were used to hold the canopy down after giving it a minor trim (again, see below). For final weight you can see I was able to drop nearly 4g which is huge on these tiny quads with a relatively low power to weight ratio. No it's not as light as the UR65 but it does have higher kV motors (19000kV vs 17000kV) and larger props which make for better performance. It seems to be standing up to crashed pretty well so far but I will report back on longer term performance. I can still fly outdoors on a reasonably calm day but with the lighter frame it feels more responsive with more pop and can get around corners more quickly without blowing out. A definite improvement and a great upgrade so far for only $4.
Parts mentioned in this build:
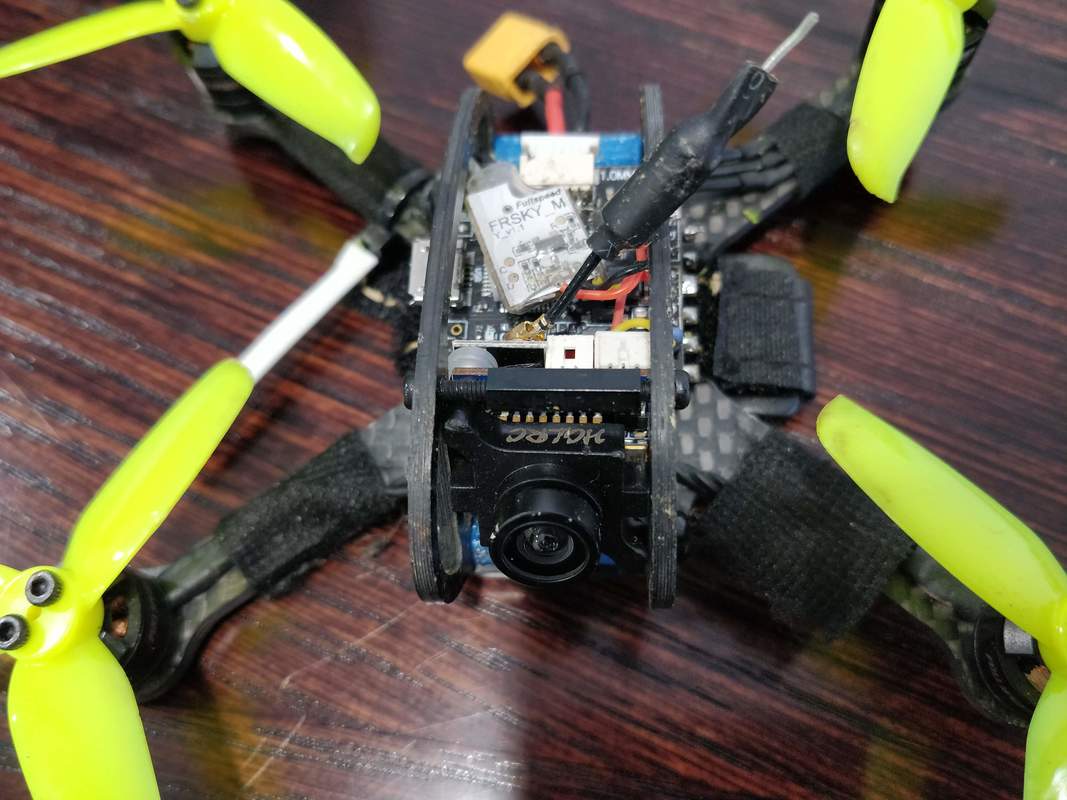
Why I used a Micro Camera The obvious trick would be to replace the existing camera with a standard or 'mini' sized camera which would be a direct swap however I had a spare micro sized camera kicking around so wanted to use that. Also note that micros are much more common now than mini or standard to there is a wider range AND they are cheaper. I used the Foxeer Arrow Micro V2 (below) but would recommend the Micro Arrow Pro as the RRP is lower and has better default settings. Lastly a micro camera saves you almonst 10g over this full sized one.
Parts Needed It took me a while to figure out how to install cleanly but was able to do so cleanly in the end with a minimum of parts and tools:
How to install Here are the steps youl need to take to replace the camera:
Results Needless to say a night and day difference, so muck more confident now I have this better camera. I'm not at a level that I can tell but the new micro cameras have a lot less latency than the last generation CMOS as comes stock with the X215. Before I fired up the camera I though for sure I'd have the frame in view but to my pleasant suprised it was a completed unobstructed view with a very well recessed lense. Given the strength of this frame I don't think I'll ever have to worry about damage to the camera. Conclusion I've always liked the way this quad flies but now that it has a camera that is good rather substandard I find myselt wanting to fly it much more. It's amazing how much the FPV system affects your enjoyment of flying when I know personally that I get carried away with motor specs and props or 4s vs 6s etc... A properly functioning camera and video transmission system a real world difference that you can immediately tell. Links Furibee X215: https://www.gearbest.com/brushless-fpv-racer/pp_708202.html Foxeer Arrow Micro: https://www.gearbest.com/camera/pp_650430.html 20mm Standoffs: https://www.banggood.com/Suleve-M3AS11-10Pcs-M3-20mm-Aluminum-Alloy-Standoff-Spacer-Round-Column-MultiColor-Smooth-Surface-p-1290426.html  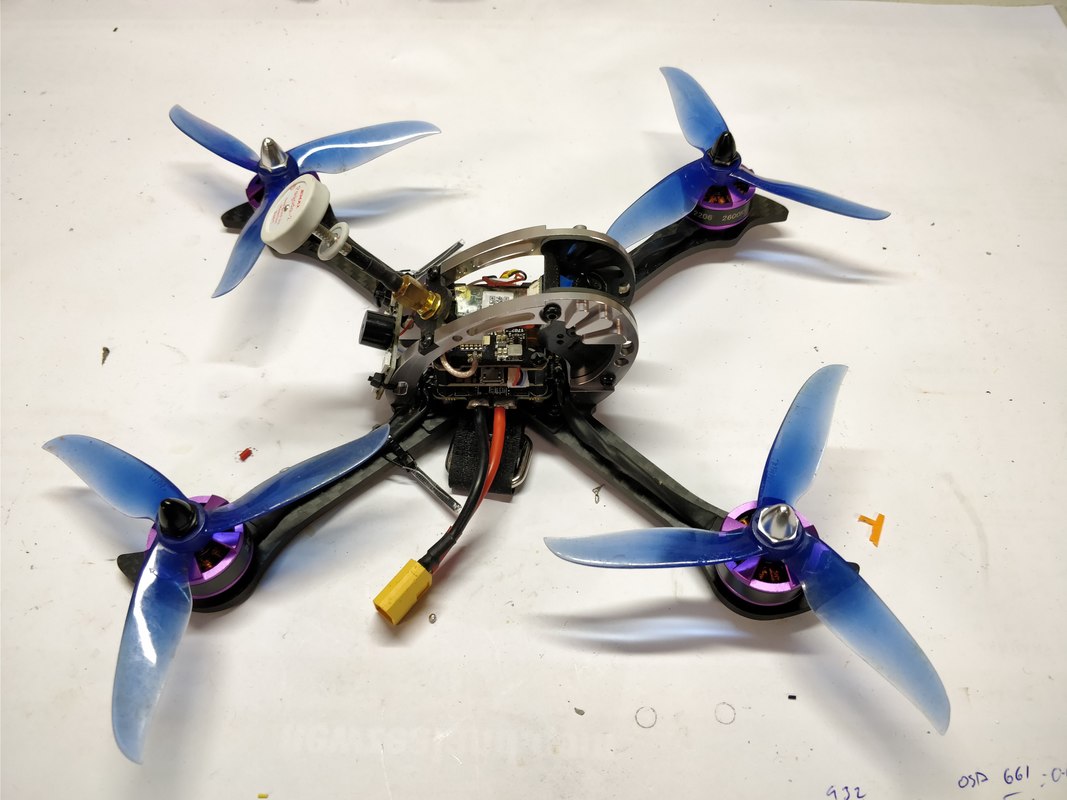 Chances are when you start out in quadcopters you have tools left over from another hobby. If you came from other RC you'll probably have most of the small tools needed to continue into quads without much issue. If you came from something like automotive or motorcycle as a hobby your tools will likely be too big and if you came from sports or video games you'll have nothing. I think guide I list my best value tool and will break down whether this should go into your home quadcopter toolkit or as part of a portable toolkit to take with you when you head out flying. I've gone with parts that are available worldwide to make it as simple as possible. When I mean portable I mean super portable since my flights are done at the drop of the hat without a lot of organisation ahead of time. Also I've marked if I consider this an essential item in a portable toolkit. 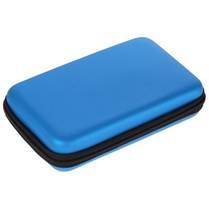 Toolcase. I use this budget one from Gearbest that is designed to fit a Nintendo 3DXL portable gaming system. High-quality EVA Skin Carry Hard Case for about $4. As a minimum I carry the following toos here: 1.5mm and 2.0mm hexdriver, prop removal tool, side cutters, cable ties, double sided tape, electrical tape and a retractable knife. 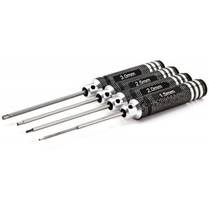 Hex Drivers. I use a combination of 1.5mm, 2.0mm and 2.5mm. Do yourself a favour and grab a set like the ones in the image because you will use them a LOT. 4PCS Hex Screwdriver Tool 1.5 / 2.0 / 2.5 / 3.0mm Titanium Nitride TiNi Hex Driver for about $8 Essential Item. 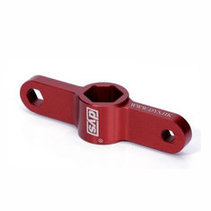 Prop removal tool. If you have a 3" or bigger quad please just get one of these, they take up so space, make prop removal easy and stop you over-torquing your prop nuts. Plus they are only $3. DYS RTM10 Motor Bullet Cap Aluminum Quick Release Wrench Tool Essential Item 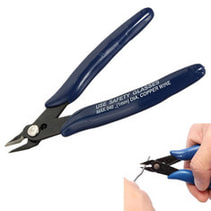 Side cutters. Unless you already have small side cutters from other electrical work, grab these ones for only $3. The quality is good enough and you'll be cutting and snipping lots of wires (and cable ties and heatshrink). DANIU Electrical Cutting Plier Wire Cable Cutter Side Snips Essential Item 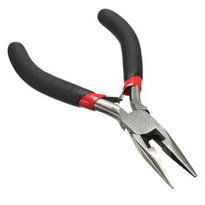 Long/needle nosed pliers. I've not tried these since I had some of my own already but the ones linked are just $2 - you don't need an expensive pair just for quads. 127mm Long Needle Nose Plier for Beading Jewellery Making 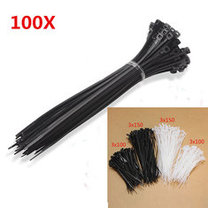 Cable ties. I just bought some from my local hardware store since they're pretty much a commodity but the ones linked are from Banggood and are in the small size that you need and are only $2 for 100. Suleve™ ZT05 100pcs Nylon Plastic Zip Trim Wrap Cable Loop Ties Essential Item. 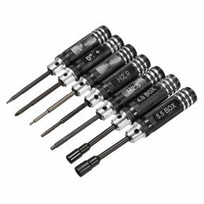 Screwdrivers. You'll want a small posi and flat blade screw driver. You won't use as often as a hex driver but will still need them. Quite a cool set linked in the picture that includes all the hex drivers you'll need, a posi and flat screwdriver plus a socket driver suitable for prop nuts, only $8 at time of writing. 7pcs 1.5/2/2.5/3/4/5.5mm Hexagonal Screwdriver Tool Set For RC Model 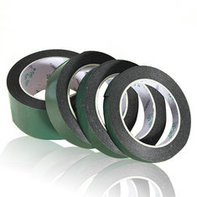 Double sided tape. 3M VHB is the gold standard for double sided tape but is not cheap. Scotch outdoor mounting tape is almost as good for quads and is available most places too. If you want to order online and want it cheap and 'good enough', try the one in the image for only $2. 5m Strong Waterproof Adhesive Double Sided Foam Tape Essential Item 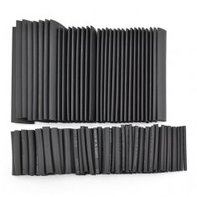 Heat Shrink. In most other other hobbies when joining wires and connections you can get away with using electrical tape to insulate signal or power wires, the silicon wires we use are smaller and more flexible so are not completely suitable. The kit linked from Banggood is $3 and about 1/5th of the price I can buy locally. So yeah, just get it. DANIU 127pcs 7Sizes Polyolefin Halogen-Free Heat Shrink Tubing Tube Sleeving Kit 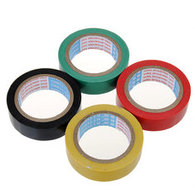 Electrical tape. You should be able to get this at you local hardware store for less than $2 but if not I've linked some from Banggood. This tape is actually more useful for strapping in FPV than insulating - for example strapping motor wires or individual escs to your quadcopters arms. 10M Electrical Insulating Tape Household Electrical Adhesive Tape Essential Item 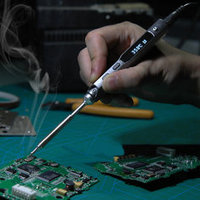 Soldering Iron. You need to have a soldering iron if you are going to get into quads. This is the one place I'd recommend splashing our as good elextrical and signal connections are so importantant to the robustness and reliability of your quad. The TS100 is an excellent excellent soldering iron. I bought as a portable option but it is my first choice at home and the field. Full programmable, outstanding temperature control for $46. MINI TS100 Digital OLED Programable Interface DC5525 Soldering Iron Station Built-in STM32 Chip 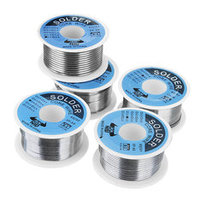 Solder. You need solder to solder with. I already had some from other projects but the one linked is suitable for our application and is only $3. DANIU 100g 63/37 Tin Lead Rosin Core 0.5-2mm 2% Flux Reel Welding Line Solder Wire 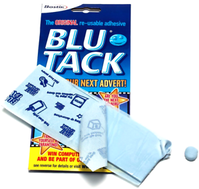 Helping hands. Personally I don't use them. I'm cheap and use Blue Tack to hold wires while I tin and connect. It's about 1/10th of the price of
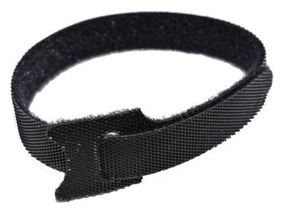
I'm yet to find a decent battery strap for a micro. So far I've been making do with the crappy velcro ones with come standard like in the picture below along with the nice silicon pads I've already reviewed. On tough crashes though I still get ejections which makes we worry about lifting a battery pad off the ESC.
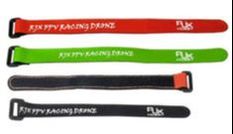
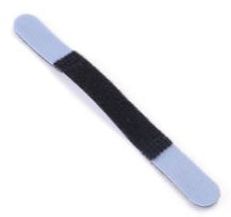
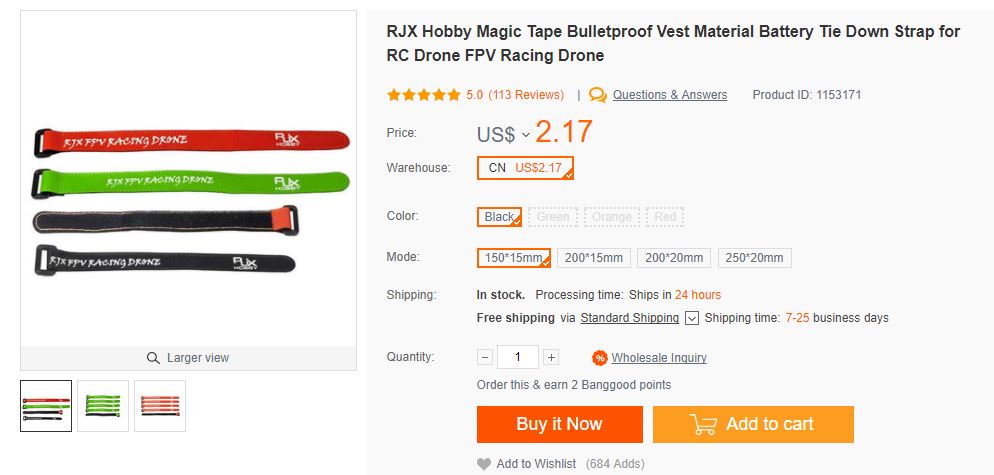
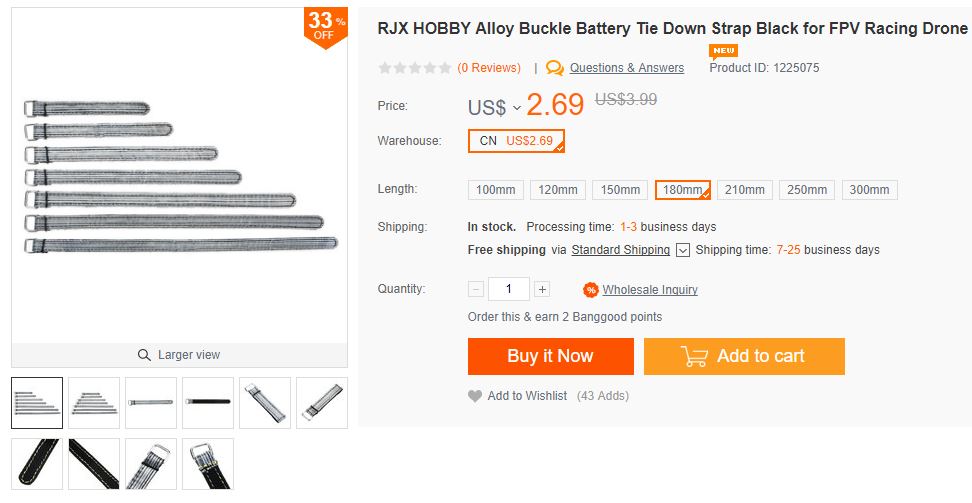
The problem with micros through is you need a skinny strap that will fit between the standoffs underneath a 20 x 20mm esc AND a plastic or metal return feed clip that really allow you to tighten the strap down. The stock one for the baby hawk works but only for very small batteries - 2s 300mah and smaller. The standard 20mm wide ones I use on my 5 inch quads and have heaps of are just too wide (and heavy). Another option is to use a rubber band like Albert Kim which is lighter but doesn't have the security of a good strap. Other than a few boutique options like the airblade UAV strap that Nick Burns has a bulk supply of, there is very little available, especially outside of the US. Thank goodness there are a range available now supplied by RJX hobby in varying material such as nylon, nylon with metal strap and Kevlar. Most importantly these are available in 15mm wide variants which is perfect for quads that are 3 inches and smaller. The best all round one I have found that is also the cheapest is the 15mm wide x 150mm long one here. This fits on both my leader 120 and Furibee X140 and will accept down to 2s 300mah and up to 4s 850mah. The nylon version is currently available for just $2.17 on Bangood. If you are one of the high-roller types you can also also get an alloy-buckled 12mm wide version for an eye-watering $2.69. There are a range of lengths available so order several or just measure first but make sure you get the 12mm or 15mm wide variants as listed here.
These straps won't make your quad faster or give you a better FPV feed but will give you greater peace of mind knowing that in a crash you are much less likely to eject your battery and potentially damage your sensitive electronics or even lose your battery. Get them here: 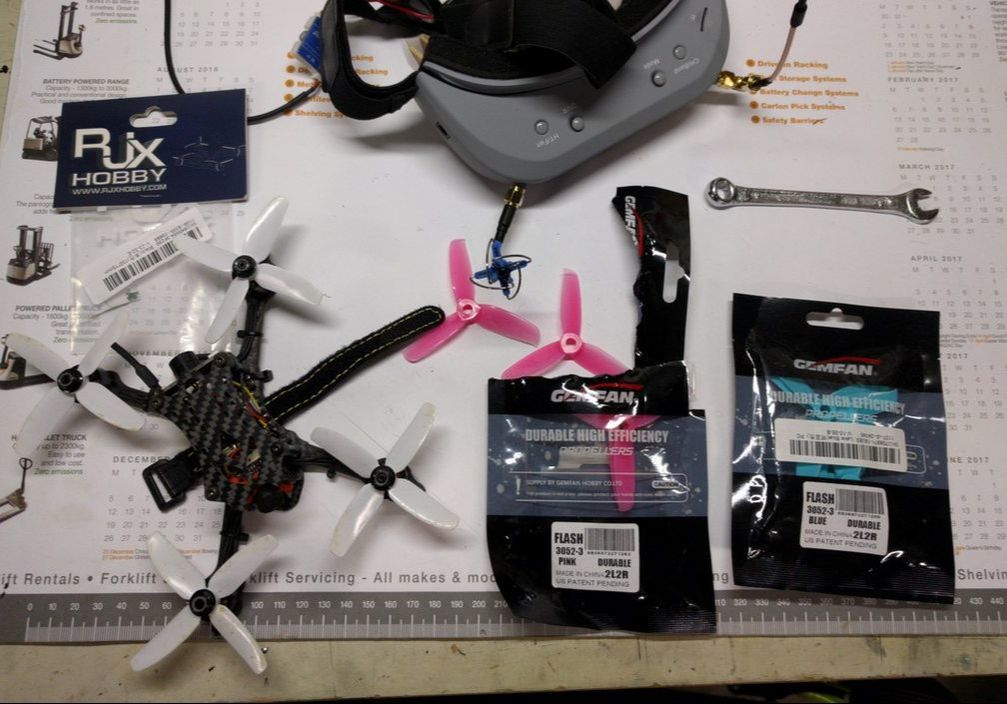 That strap tho! 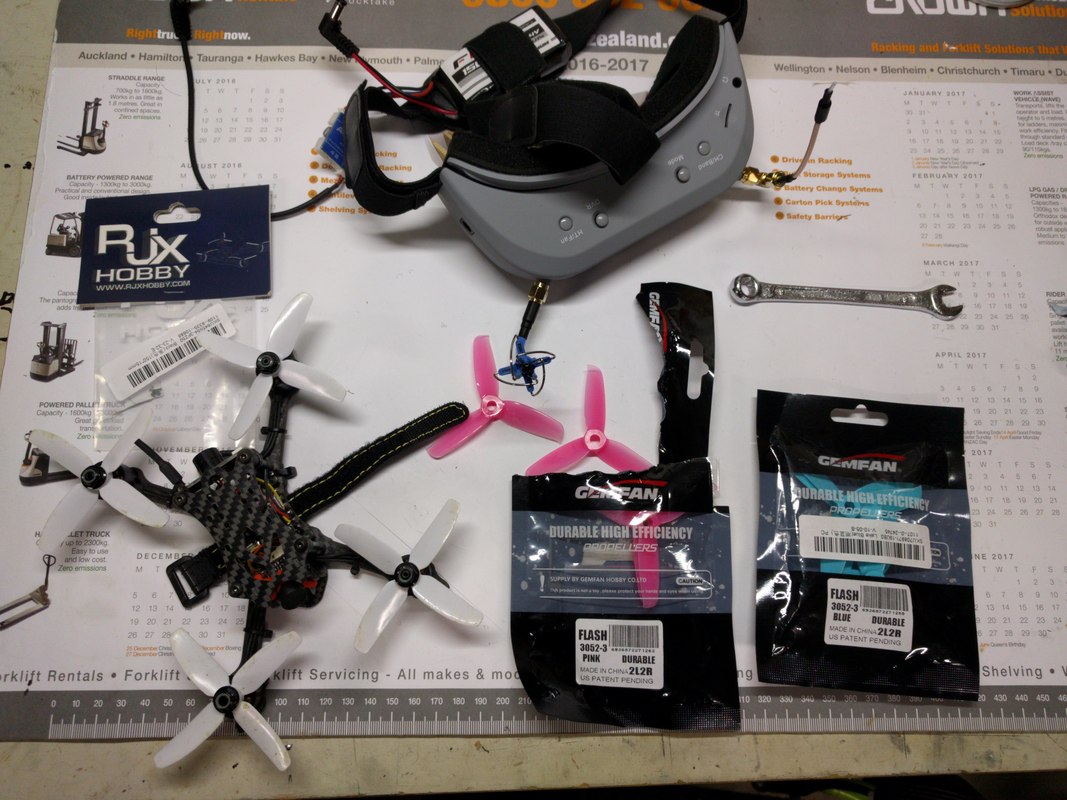 The Furibee X140 is a popular 3" quad for good reason as I've covered in part 1 (bench) part 2 (initial flight) and part 3 (long term use) of a review. It does however feel underpropped with the stock 3030 4 bladed props and on 3s felt sluggish with my biggest complaint being dulled recovery from freestyle manuevres like power loops and split S's. Upgrading the prop is the most cost effective upgrade I've found and something you'll need to do in the future anyway once you've destroyed the stock props that come with it.
Noise The gemfan 3052 is very quiet - even more so than the stock 4 bladed props. This is actually very important for quads 3 inches and under since a large part of the appeal is the ability to fly them in smaller areas with more soft targets - much less intimidating to by-standers.
Power and efficiency A small but noticable difference here that is probably coming from the increase in pitch, fewer blades and probably a more modern aerodynamic design. I found I was able to recover better from power-loops and split s manuevres in particular, with confidence to come on the throttle stronger and later to catch myself - probably 10-20% improvement at a guess. Punch outs although still not massively fast on 3s were improved. Efficiency as measured by flight time was pretty similar - there was definitely more voltage sag on punch outs but at low to mid speeds I did not require as much throttle as I did on the stock props. Net net the battery life was similar (4:00 approx. on a 450mah 3s) but able to choose more where I put the power with a larger stick resolution between low throttle hover and maximum power. Durability I've only had one or 2 crashes worth noting so far. Both have caused the prop to bend near the hub but it was easy to bend back to true without any signs of stress to the plastic. I'll report back here once I've put more packs through. I can say they definitely seem more durable that the gemfan 2040 Hulkie props (review here) and this seems to be more through design rather than material since the plastic feels very similar.
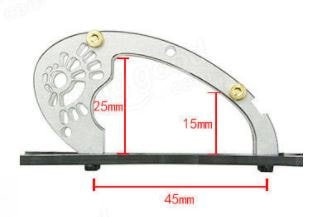
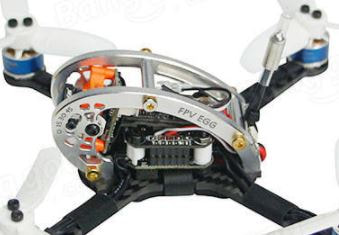
Conclusions Other than stressing the battery a little more on full throttle punch outs, I found these props better than the stock items in every way - especially in that they were quieter and had more power. I can't yet draw a firm conclusion on which is more durable because the stock props are tough and about 10 packs in I haven't had a really bad crash yet. One thing I haven't mentioned so far is that they look *great* colours are rich and the design looks cool with the wingtips but that is largely subjective. I've named this article 'No-brainer' because at somepoint you are going to need new props. In my opinion these are the ones to get. Both suppliers listed below ship worldwide. Buy them from gearbest (try code RC18off) Buy them from banggood (try code toysho) 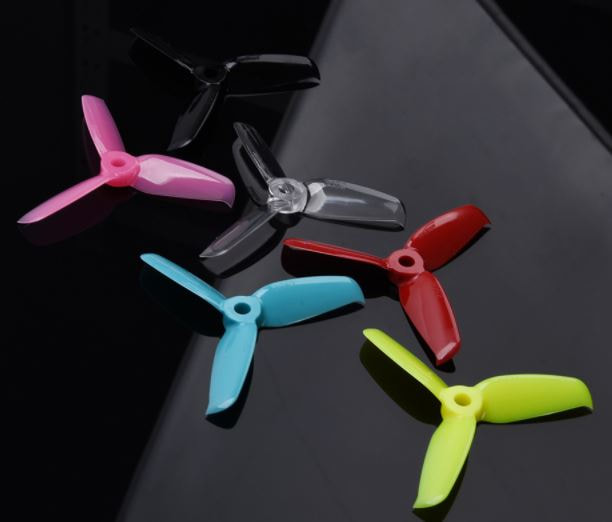  A quick article here to stop the beeping of your battery alarm on punch outs all the time - especially micros where you tend to get a reasonable amount of battery sag. The battery voltage monitor on betaflight is probably one of the key pieces of information conveyed by the OSD or buzzer but is really annoying when it goes off all the time on punch outs when the battery immediately recovers afterwards. That's because the flight controller samples the battery voltage very frequently and will report on even the most minor dips below set value (0.1V by default). A really useful tool is to use vbat_hysteresis in the CLI section of betaflight. By default vbat_hysteresis is set 1, which is 0.1V (i.e. alarms if 0.1V less than warning/critical values that you set). I found that by setting this value 3 (i.e. 0.3v) I didn't have the unneccessary warning on punchouts now did I have to compromise the actual settings I like my warning and critical values set at - 3.5 and 3.3V for the record. For those have not use the CLI in betaflight yet, simply go to CLI on the bottom tab in betaflight configurator. Type "set vbat_hysteresis = 3" <Enter> "save" <enter>, Job done! If you want to revert to default, use "set vbat_hysteresis = 1" <enter> "save" <enter>  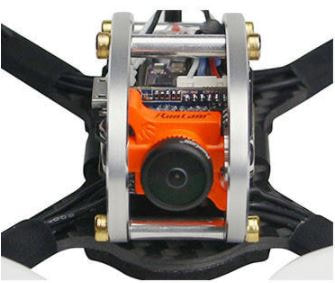 The Fly Egg 100 and 130 are 2 popular micro quads although like many other micros they have only have a cheap CMOS camera for FPV. The Swift and Arrow micros have been simply fantastic as an upgrade for micros like the leader 120 and I've covered that upgrade recently for that model. It's much harder with the fly egg series though because there is only 15mm between the sideplates of the frame where the camera sits which is too narrow for the width of 19mm micro cameras. Modding is near impossible because the frame cannot be drilled for a wider mount and it is too far for the side plates to stretch to accomodate. Now there is a new solution. King Kong have just released the FPV Egg 136 which is 4mm wider to allow for the micro swift. Although the complete frame is available for $23, I believe you can just get away with purchasing the new 136mm bottom plate only for $8.63 (less than $8 if you use the code "toysho"). This way you can recycle most of the parts from your fly egg 130 or 100. There are some caveats however.
Considering how compex the previous solutions were though, this will be a breeze or you could just take the path of getting the new frame with all the correct hardware. The good news is that since the fly egg comes with a good variable power VTX that is not piggy-backed to the CMOS, it will easy to re-use with the new camera. Also good is that the Micro Swift 2 and Foxeer Arrow 2 have a basic VBAT OSD and this will be a huge improvement to the OSD-less fly egg 100/130. I have a new 136mm bottom plate on order and will update here when I've mounted the micro swift 2. Here are the parts I've discussed in the article, click on the image to take you to the product:
 The Leader 120 is my favourite micro quad but manufacturing to a price point has meant that although not uncommon, the camera and VTX leaves something to be desired. I found that although it handles light well for an AIO camera, it is poor compared to a CCD camera meaning flying in an out of dark areas can be challenging. Additionally the VTX is limited to 25mW so total distance before video breakup is not fantastic, especially around trees or other obstacles. I used a micro CCD camera (in this case the camera from the HGLRC XJB F428 Elf) and the new Full Speed TX200 VTX as a way to replace the AIO camera/VTX supplied as standard. A full review of this setup is here so that I can use this blog to give details of the install specific to the Leader 120. Update: Gearbest sell a clone of the micro swift which is identical to the HGLRC Elf - the Furibee 1672. This performs just the same as the other micro CCD cameras - micro swift, arrow, HGLRC elf. Update 2018: The foxeer micro arrow pro is now the best value and performance micro CCD camera at around $20 For my first attempt at the install please see the captioned pictures below: Unfortunately with this setup I had digonal lines in the video feed that were made worse when the quad was armed with increasing breakup when throttle was increased. Since this VTX will happily accept 5-17v I supplied power from VBAT rather than using the 5v BEC circuit on the flight controller. This immediately fixed the issue for the minor inconviniece of having to solder additional wires to the VBAT pads. This did however offer the advantage of less stress on the BEC circuit and less risk of brownouts as a result, especially when running on 200mW transmitting power. You can read my conclusion in the review but to summarise a micro CCD is a must have on the Leader 120. Having to use Vbat due to noise on the flight controller 5v circuit is a minor inconvience but the improvement on signal compared to the AIO camera, even on 25mW is really impressive and running on 200mW opens a whole lot more flying opportunites with much better penetration though trees for example. The additional depth the VTX adds to the camera (meaning the top standoff cannot be fitted) is mildly annoying for the leader 120 but realistic. I thought it would be hard to top the Eachine VTX03 but the tidyness in piggybacking to the camera and ability to do it's own 5v regulation wins it for the TX200. Parts mentioned: Update 2018: I forgot to mention this does rely on being held in by wedging the camera between the sideplates but since then I've found a better free solution below:  I trimmed a standoff by approximately 5mm and used longer screws to torque the frame together. This is much stronger and more secure than my previous install. Note: the caddx cameras are a different shape and you may be able to install without trimming that standoff
 On my lightweight x2 EYAS (updated build link here) build I use an Eachine TX01 All In One (AIO) Camera/VTX. Stock, these come with a basic Circular Polarised (CP) antenna that works well but is heavy and more importantly: not very durable. This is because the antennas are left fairly exposed on micro quads. More often now, AIO camera/VTX modules have linnear whip antennas that are much more durable, lighter and still get you about 90% of the performance of the CP antenna - much more practical in the real world for micro. Linnear whip antennas are actually a sleeved dipole where the outside sheild of the co-axial cable is grounded. The exposed centre transmitting signal is then exposed for a VERY specific length that should be tuned to 5.8GHz which in most cases is 12.9mm for a 1/4 wavelength of 5.8GHz. Albert Kim did an excellent video here and found that most whip antennas have the wrong length. Great! Easy to cut if they are too long, hard to fix if they were too short. Well the 10 spares I had were too short!! To fix this I tried the trick that my flysky FS82 and RX2a pro receivers use - a basic monopole antenna. This is a simple 28AWG wire (or any other small gauge wire) soldered directly to the signal line of the VTX with nothing on the ground pad. The wire is then cut to precisely 12.9mm, then heat shrunk over the top to relieve stress from the joint. Result:
What I see now is that the main reason for a dipole whip is to elevate the signal out of the frame where the AIO camera/vtx is enclosed. However, when the camera is mounted high like on my EYAS X2, it does not give any benefit and so the ghetto monopole antenna works just as well. Relevant parts:
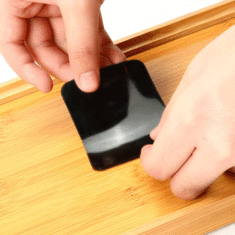
Quick follow up 10 months later and this continues to work well. I've now done the conversion to 4 AIO cameras with no ill effects. I've even done this on a FullSpeed tx200 piggyback vtx (review here) that is attached to the back of a runcam swift and no longer snag and lose the dipole. A really useful mod that has stood the test of time  Obviously you'll want to use a strap too! Obviously you'll want to use a strap too! I've tried all sorts of methods to stop my battery sliding around, especially on micro quads where we are limited to particularly crap battery straps like this. Velcro or even duralock was the defacto standard but maintaining these for every battery can be a pain in the arse (IMO) and they wear out. I've found a great (and inexpensive) alternative - the horribly named Honana HN-CH014 Sticky Gel Cell Pad Anti Slip Phone Pads Kitchen Bathroom House Car Holder This is a soft gel-like plastic that does not use adhesive tape to stick but it's own tackiness. It leaves no residue and wiping with a damp cloth completely "resets" it to it's original tackiness. This is very similar to the pad that Joshua Bardwell discusses here (kyosho zeal vibration absorption) but this kyosho product is approximately $US13 whereas the one mentioned here is around $US2 at the time of writing. Check out the pics below to see how well it works.
As you can see on the picture at the left, it's easy enough to cut small pieces off as you don't need a lot to do the job and can keep the weight to a minimum. You'll still need a strap or band to hold the battery against it but since I started using this I've had no battery ejections. Not exciting but useful I thought.
Check out this cheap non-slip battery pad for yourself.  The Leader 120 is a very well thought out and put together micro quadcopter that I have reviewed on the bench here and after initial flights here. Flight time is good, especially compared to the quads with the smaller 2" blades. The standard King Kong 2840 3 blade props are strong and well balanced but also fairly agressive that can cause weaker batteries to sag on punch outs. Since this quad has a lot of blade area for a light weight, I tried the twin blade Gemfan 3025 propellers that have one less blade and a more gentle pitch. Unfortunately the just fould on the frame so had to be trimmed by about 1-2mm to fit. For this job I 3d printed the flexRC jig from thingiverse which can also be bought directly from flexRC. To this you mount a standard nail clipper and can gaurantee the props will be even and balance. So how do they fly? Excellent. They are slightly louder since they are now essentially bull-nosed but they were well balanced with similar performance to the 2840s although slightly less floaty. Nominal diameter is about 74mm compared to 70mm on the 2840s. But wow the efficiency! On a turnigy 2s 25c 950mah I got over 10 minutes of flight. On a 460mah 3s that is not is good shape I got 4.5minutes of hard flying. Battery sag was MUCH less and the roll dip that occured on a 3s punch out due to the ESC not keeping up was gone! I have a large pack of the 2840s to use up but am thinking of shelving them for the 3025 props. They seem less durable but have still not broken one after about 6 packs - some minor chips only that doesn't seem to have affected performance. I'm amazed that more performance can be wrung out of this very good micro quad so I'll keep fixing it until it is broken! The gemfan 3025 props can be purchased here The KK 2840 stock props (still good) can be purchased here The Leader 120 can be purchased here (use code HarvestRCnew7 to get this for $US93.99 until end September 2017) Please comment here if you want to see flight times with the stock battery which has been given a new life!
 Problem: a standard FC/ESC stack is too tall and heavy.
A 20 mm x 20mm 4 in 1 ESC and flight controller is the backbone of most micro quadcopter builds. They are usually joined together by m2 nylon standoffs in the middle and bottom that are about 6mm tall each. This can be too high for some builds but there is an easy fix that can even include some basic softmounts. Here are the parts you'll need. They are not expensive and can be used for several builds:
To make the low profile soft mounted stack:
Voila! now you have a low profile stack that is lighter and soft-mounted. After a big crash recently I find it is much stronger too as it relies on the tension of nylon rather than shear. |
Archives
November 2020
Categories
All
 |
|||||||||||||||||||||||||||||||||||||||||||||||||||||||||||||||||||||||||||||||||||||||||||||||||||||||||||||||||||


 RSS Feed
Thanks for visiting QuadifyRC.com Follow us on facebook below to get all the latest updates