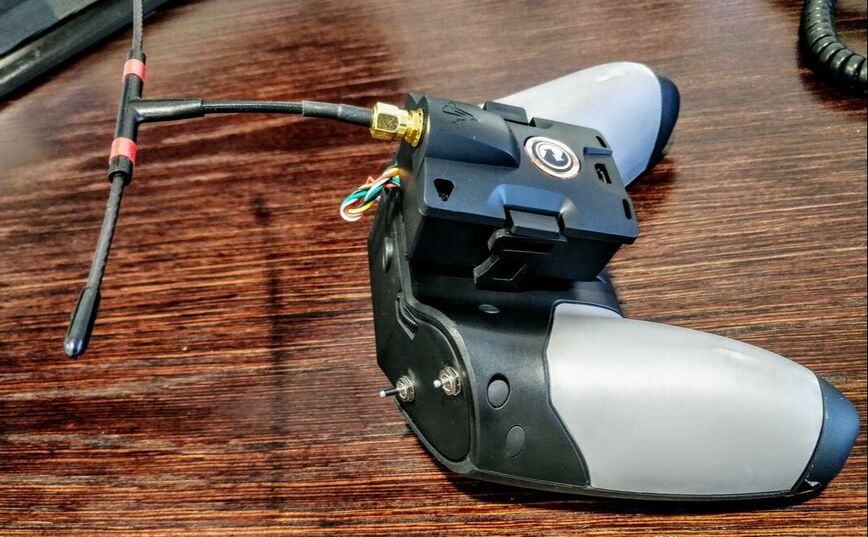
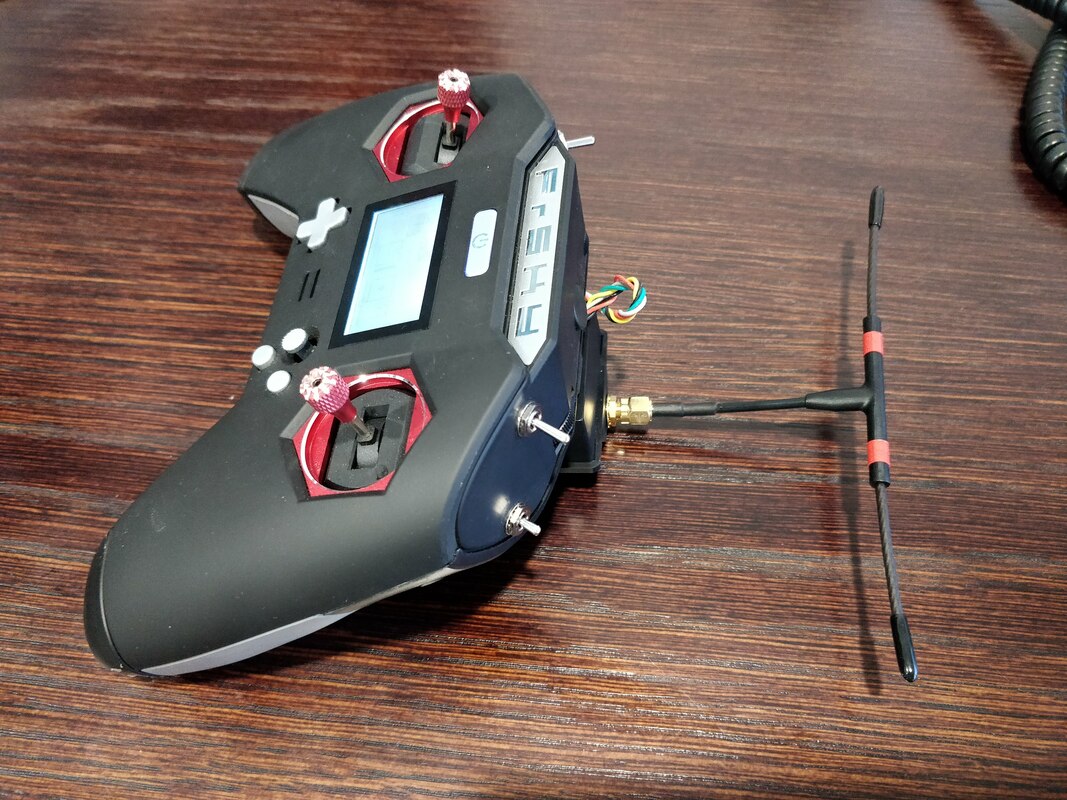
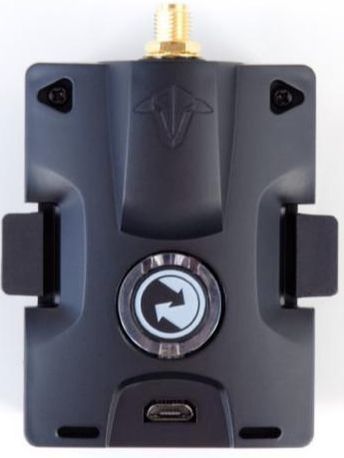
QUADIFYRC.COM
  • RC Cars
  • Car of the Month
  • Quad Reviews
  • COUPONS AND DISCOUNTS
  • About & Contact

Long Range Quads

lONG rANGE bUILD - gps, tbs cROSSFIRE AND bETAFLIGHT SETUP

29/1/2019

3 Comments

 
Introduction
​So now that that physical build is complete (minus the GPS) It's time to start setting everything up. I'll focus only on the elements unique to long range build beacuse I'll assume that anyone building a long range build is capable of setting up betaflight and BL Heli to their liking for basic quadcopter flight.
Crossfire and the X-lite
TBS Crossfire is new to me and was more of a learning curve than I was expecting having started with Flysky then moving to FRSKY a little over a year ago. My current transmitter is the TaranisX-Lite which I've reviewed here. In order to run crossfire on this I needed to purchase and adaptor that allowed the module to physically fit on the back of the x-lite and interfact electronically. This was easier than expected using a JR port adapter which I reviewed and streamlined in this blog. 
Picture
Picture
Picture
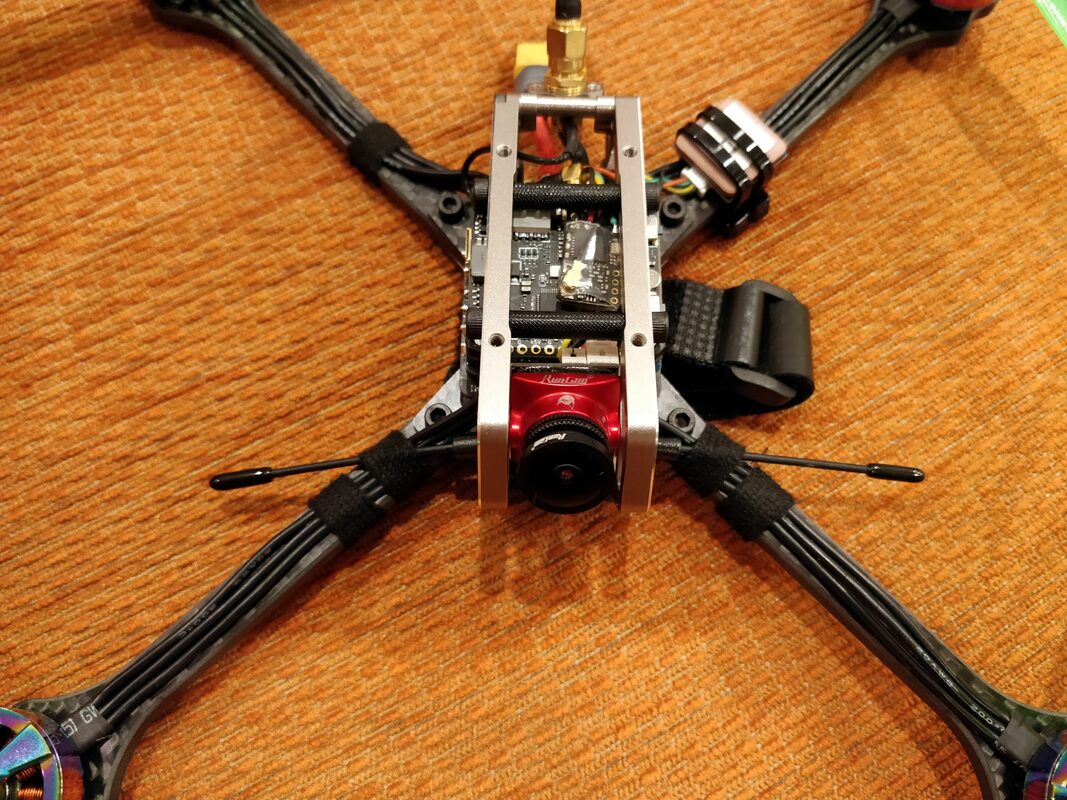
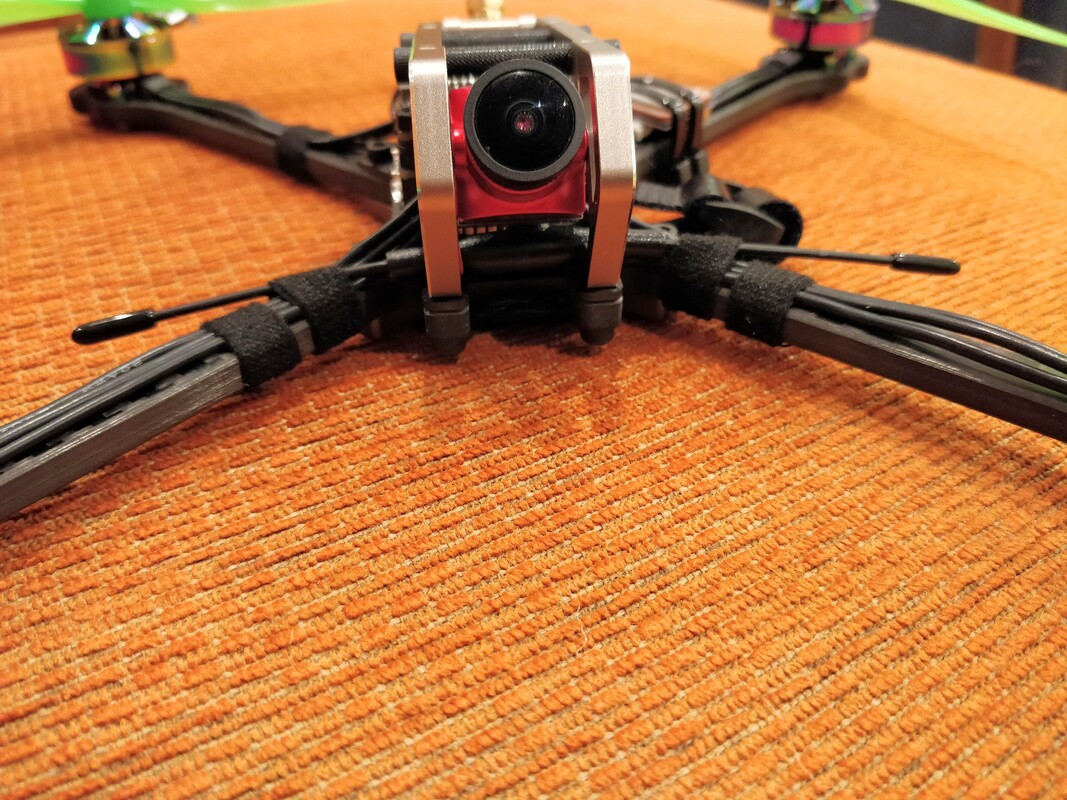
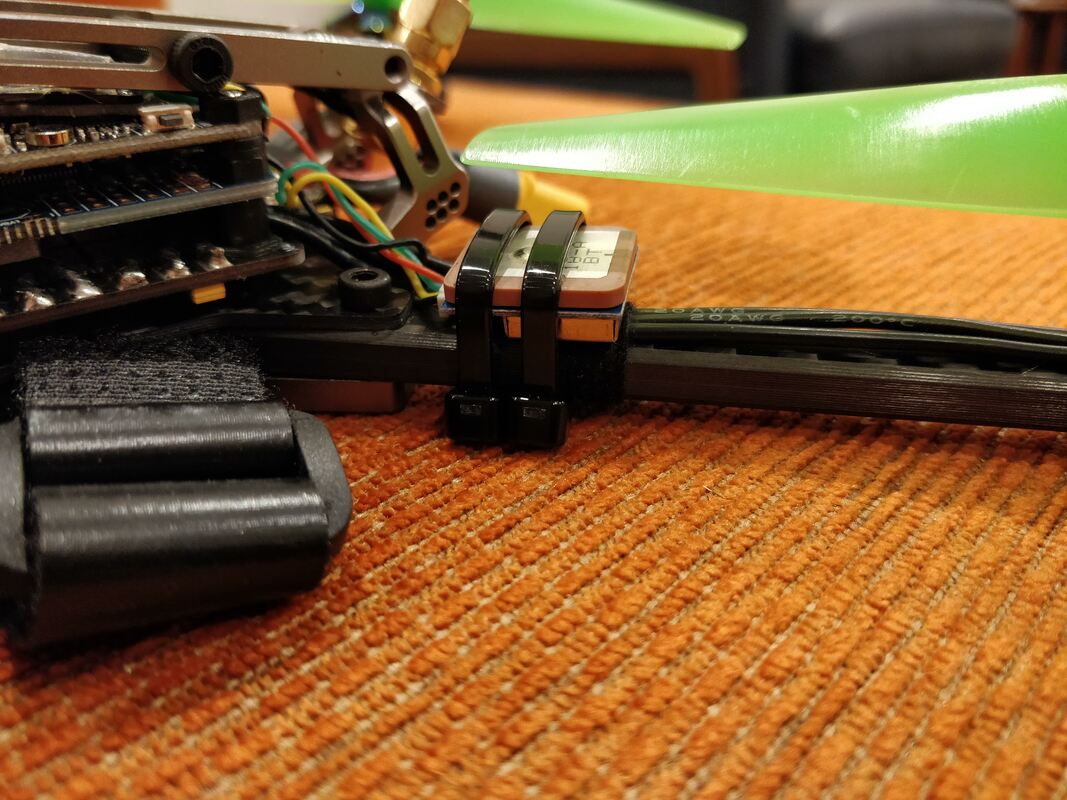
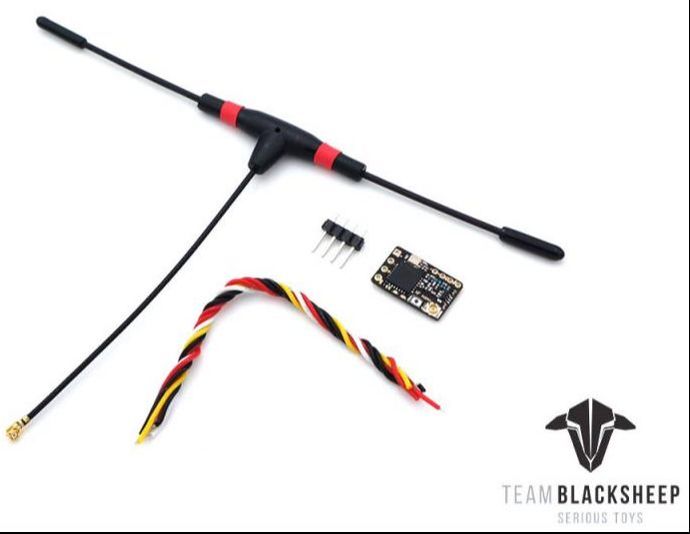
Easy to connect crossfire to the x-lite with this adapter. Check out my review here
Crossfire firmware update
Once connected, I set up a new model that disable the internal antenna (i.e. FRSKY protocol) and enable the crossfire module in the external module. Before anything else I used the TBS agent to update the crossfire micro transmitter module to the very latest firmware which allows it to run up to 250mW of power. This is a very worthy upgrade given this was only just bumped up from 50mW. TBS agent can be found here and is very easy to use:


http://www.team-blacksheep.com/corepro/agent
Picture
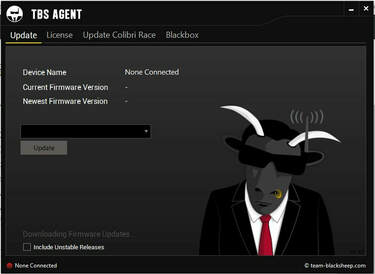
Crossfire transmitter and receiver setup
Once updated, power on your module and bind to you receiver (crossfire nano receiver for me). To do this follow the instructions below:

https://www.team-blacksheep.com/tbs-crossfire-micro-tx-quickstart.pdf

Once bound, your crossfire transmitter will update you receiver to the latest software automatically using the telemetry function. Very nice and a much better option that flashing physically like with frsky receivers!
By now you should be able to set the ideal settings using the crossfire lua script. Basic settings are: Use 868MHz if in Europe, 915MHz everywhere else; CRSF TX on output 1, CRSF RX on output 2. Your preference on maximum output power and whether dynamic power is on but I chose a fixed power of 100mW for stable and consistent link
Crossfire Betaflight Setup
Setup of in betaflight is simple - toggle serial RX on for the UART you wired the RX and TX wires into and then choose CRSF protocol as the serial based receiver type. Make sure you turn telemetry on as all crossfire receivers and transmitters support this function.
Crossfire antenna mounting
In terms of mounting your antenna the easiest option is the mount along the underside of an arm such that the elements on you immortal T antenna run perpindicular to the arm, parallel with the prop line. I chose my location as much for aesthetics as anything else.
Picture
Picture
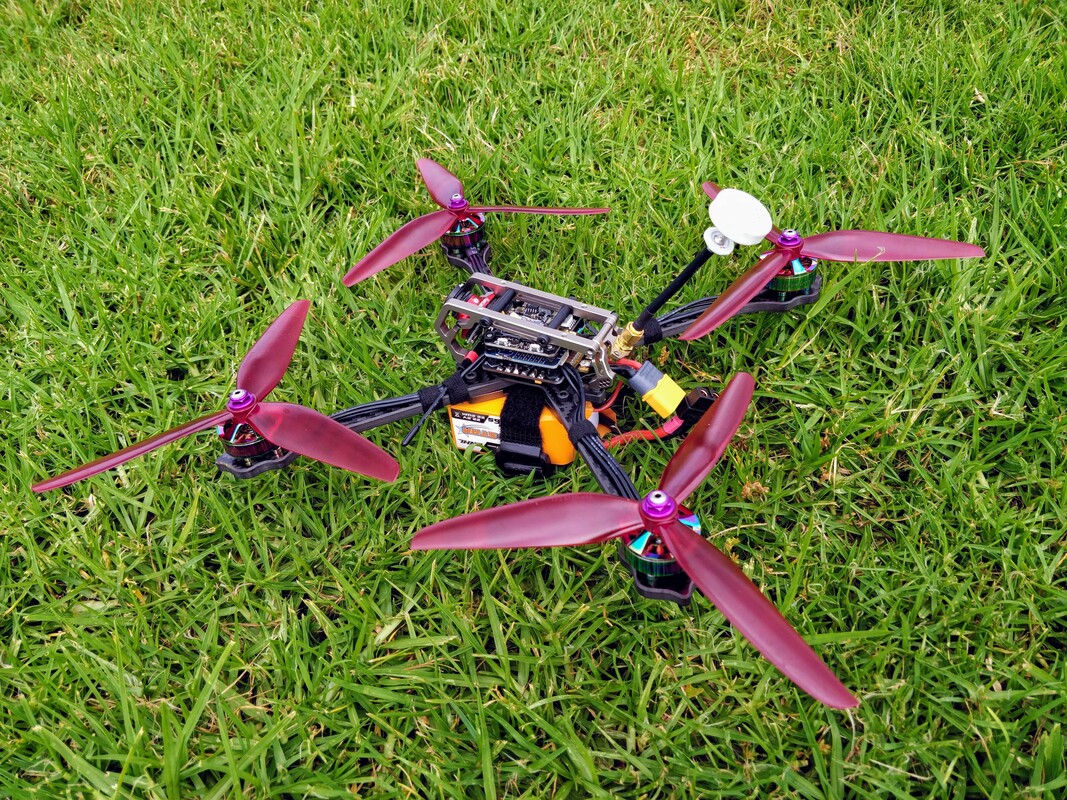
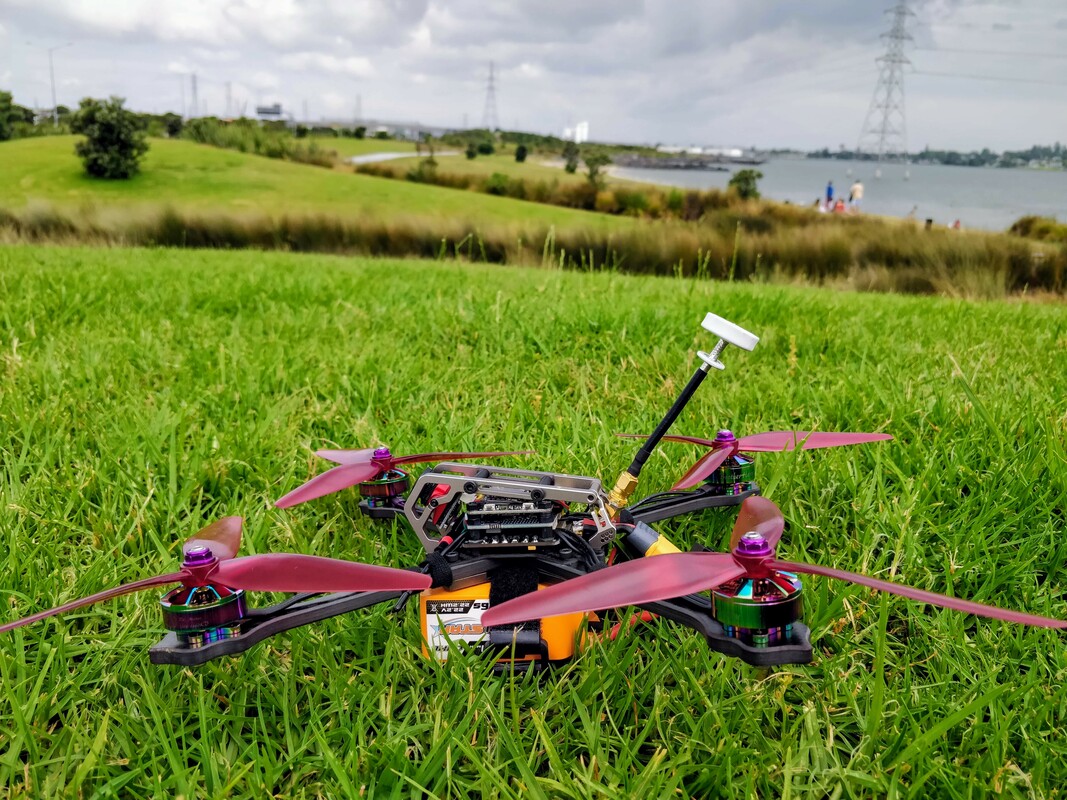
I'm quite happy that this location keeps the antenna away from harm but does a reasonable job of keeping the active elements away from the frame - good enough for what I'm after.
GPS connection and mouning
Luckily for me GPS setup was mostly a simply excercise I chose the Betian BN-180 GPS unit which is cheap and runs the popular GLONASS protocol. Connect the RX and TX ports on the GPS to the TX and RX ports respectively of a spare UART (of which the Omnibus V6 has 5!) and then ground and 5v power from your FC. Mount the GPS 'upside down' so that the ceramic encase antenna is facing upwards towards GPS satelites in Earth orbit. MAKE SURE THE ANTENNA IS COMPLETELY IN THE OPEN. This was my biggest mistake on this build. I found a spot on top of the quad between the aluminium cage sides where there was good visibility from above but didn't realise the sides of the GPS antenna also need to be exposed. As soon as I figured this out I started getting satellite lock. It's now on an uglier but altogether more functional spot on the rear left arm. Of course it's easy writing about this now but being my first install it took me a good fewhours of troubleshooting! Other clever locations I've seen is the top of a go-pro mount or on top of a battery strap if a top-mount battery is used.
Picture
Picture
Top of the arm is a good location regardless of whether battery is top or bottom mount
GPS Betaflight setup
Setup on betaflight 3.5.3 (and later) was a dream - and I'll assume that you are using and F4 or greater processor in your flight controller because betaflight no longer has GPS support for F3 and older processors. Moving on, here are the step to set up GPS in betaflight:
  1. In the betaflight ports tab under the column heading 'sensor input' choose GPS from the dropdown box in the UART you wire the GPS to.
  2. In the configuration tab turn on the toggle switch for GPS, choose 'UBLOX' protocol and leave the rest as is.
  3. Now you will find a new GPS tab in betaflight where if you wait long enough and are not too far from outdoors, you see connections to GPS satellites within about 2 minutes. Once you have enough satellites to get a fully triangulated 3d lock it'll show your location on a map
GPS OSD options
With GPS now set up, you'll probably want to enable the features in betaflight OSD. personally I've used:
  • GPS Coordinates latitude and longitude. This means my DVR will show the last known location of the quad if it goes down
  • Home direction. Really useful for long range if you become disoriented. It's a small arrow that point bac to the location that your quad was armed - i.e. where you took off.
  • Speed. Just because it's awesome! And it's good for comparing to current draw to figure out the most efficient cruising speed for your quad.
  • Distance from home - Tells you how far you are out from where your quad was armed.
One thing to bear in mind is that with GPS enabled you now have a new flag for arming - GPS 3d lock. This means your quad CANNOT ARM without GPS lock. This can take up to about 1 minute from a cold start or less than 10-20 seconds if it was on recently. This is key for setting launch location for flight and cannot be bypassed. Easiest trick is the just change you powerup order so that your quad goes on first.
Given the extra data that is provided by GPS I'm tempted to pick up some more units for all my 5" and larger quads.
GPS rescue mode
One of the latest and greatest features of betaflight 3.5and up is GPS rescue mode where the quad will climb to a set altitude, yaw towards the home locations and then fly at a set angle towards home when you are more than 100m out. This is a great panic function if you are a long way out and suddenly loose video or something. Note, it won't get you home by itself but it will automatically get you back to a closey location where you may be able to recover video feed and then take back manual control. I'd recommend the official betaflight guide to GPS recue here to set this up.
Conclusion
Unfortunately this is probably the most boring but conversely hopefully the most useful section of my long range build series because I know it was certainly the most time consuming for me because I learnt as I went. Hopefully what this does mean though it that I've shared as I've learnt meaning it should be able to help someone in the same position as me. Obviously with the machine now set up I've been flying this big quad with a screen full of OSD and it's quite a unique experience - I've had up to 8 minutes flight on a 6s 1000mah battery. I've only been about 600m out so far but I plan to push it as time and space allows. Once I've pushed out further I plan to wrap up my build series with a reiview covering the performance of the quad and my findings.
If you found this article useful or helpful please feel free to like or share using the Facebook buttons below.
Picture
Picture
3 Comments

Long range build - parts selection

11/12/2018

0 Comments

 
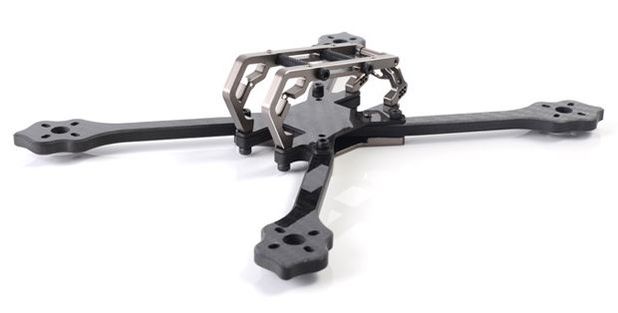
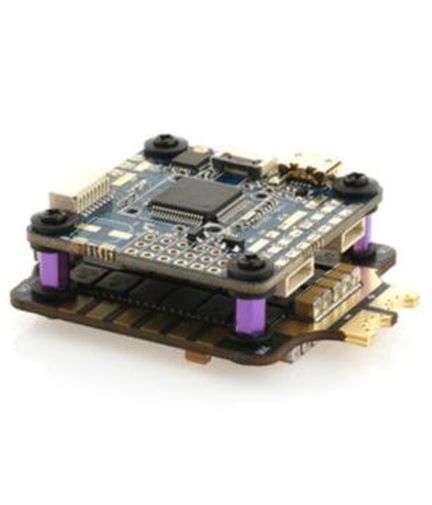
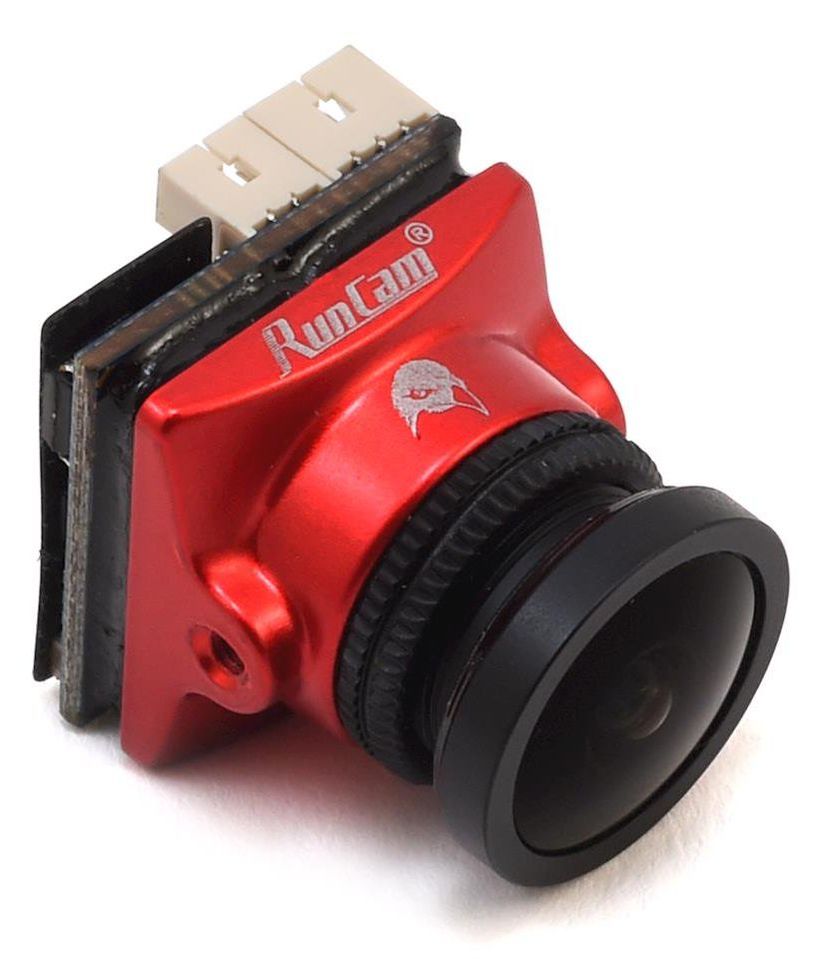
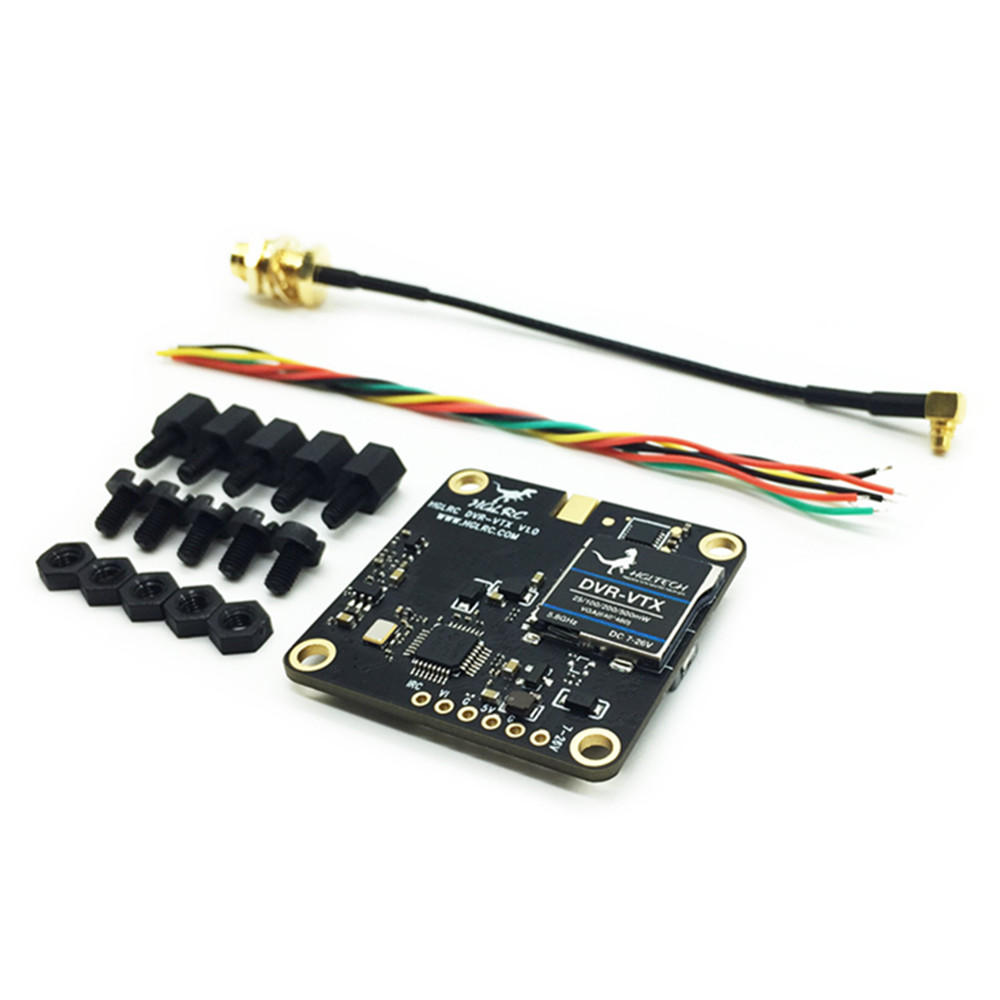
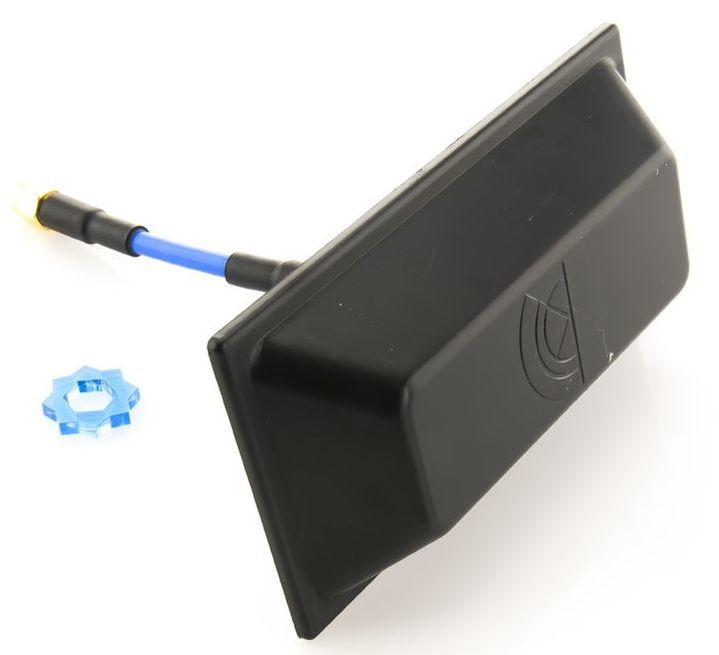
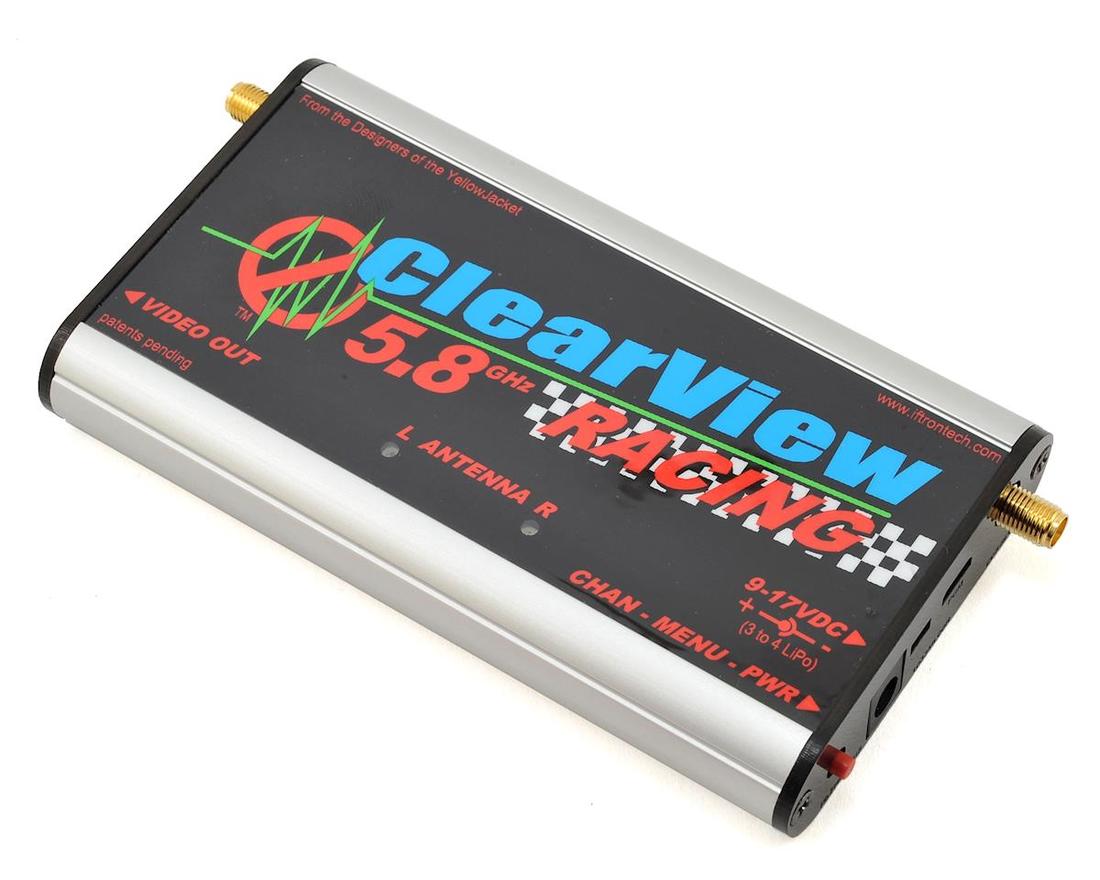
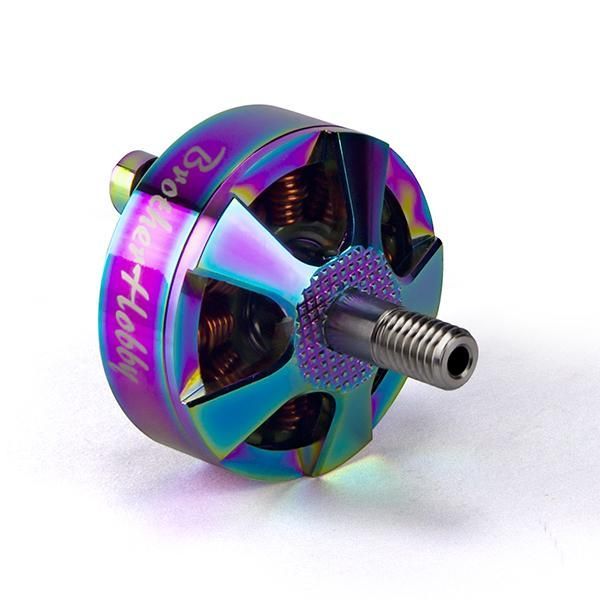
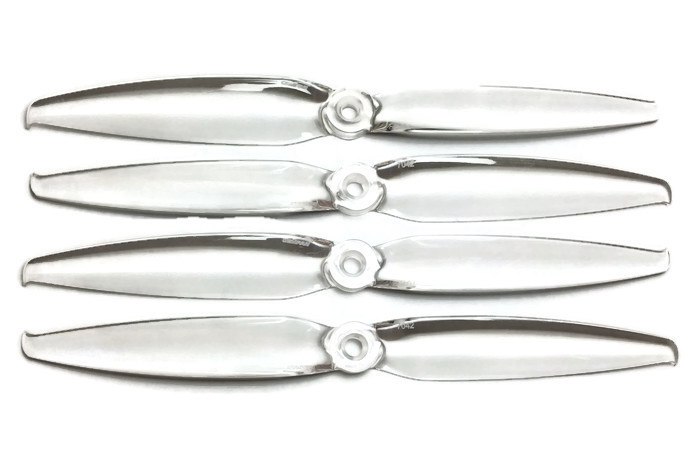
Introduction
I'll try to keep the intro quick. I've been into FPV quads for nearly 2 years now and in that time have tried racing, micros, whoops and now freestyle. One thing I've always been curious on is long range given I live in a country with amazing landscape and scenery that is not heavily populated. It's not something to go into lightly - these rigs can often be more expensive with larger motors, batteries and electronics but the risk of losing them premanently increases exponentially through lost control or video link or mechanical or electrical fault - none of which mean you will lose a freestyle or racing quad given the proximity.

Sourcing parts
I make no apologies in buying from gearbest, banggood and hobbycool because they deliver internationally. However there are some premium products I want for my long range build that are just not available there. Based on this I've decided to get most of my parts from Amain Hobbies who have been based in California since 2004 with distribution and retail centres. I used to buy RC car parts from them years ago so it is nice to reacquaint myself with them now. They offer all of the premium brands I've been looking for with my longrange build, namely TBS for the radiolink, Video Aerials Systems (VAS) by Alex Greve and Brother Hobby for the motors and Diatone for the frame. Recently a number of their staff were affected by the 2018 wildfires and lost their homes and possessions so it's nice to be able to support the business that supports them.
Build Objective
The objective of this build is to get a range of approximately 3km maximum in clear air although in reality most of my flights will be 1-2km. I don't want to go far for the sake of going far, rather explore interesting places I wouldn't normally access by foot. Also I wanted to maximise flight time but not at the expense of power if needed. This meant the build needed to be as light as practical meanin I could use a typical 5" quad battery if not going to far or spend my weight on a really big battery for longer distances. Based on the above I settled on 7" propellers since there are a number of readily available well regarded options like dalprop, HQ and gemfan but I can still step down to 6" if required. I've also chosen to stick with 5.8GHz but have beefed up my receiving ability sbstantially to compromise. Radio link I went with the TBS crossfire, more details on everything below.
The parts.
Picture
TBS Crossfire Micro transmitter module. This was the easy part. Although I run the FrSky Taranis X-Lite (reviewed here) which doesn't support it physically, there is a simple JR port adaptor on banggood which I previewed here to run it. The reason I chose the Crossfire system over FrSky's own R9 slim (which fits natively and is much cheaper) is the supposed ease of use. I may have been able to squeeze the range out of an XM+ but the crossfire system should allow me to just forget about radiolink altogether - one less thing to think about. Notable mention goes to R9 slim as an alternative. The TBS Crossfire micro is available from Amain Hobbies here.
Picture
TBS Crossfire Nano Receiver. I've opted for the nano receiver because it does everything I need it to do in a tight build without excess weight. This was the only real option on the table for me with the Crossfire micro transmitter module in hand. The TBS Crossfire Nano receiver is available from Amain Hobbies here
Picture
Diatone GT-M7 Normal X Frame Although there aren't as many 7" frame options this is still a hard (and personal) choice. I ultimately went with the Diatone GT M7 (normal X) because this is relatively light at 120g AND it is extremely stong with it's 6mm thick individual arms and aluminium frame. I went back and forth over whether I wanted top or bottom mount but ultimately went with bottom because I prefer the stability of the battery there as I don't plan to do all the flippy flops. The GT M7 comes in stretched and normal x. Normal x is to try keep as much prop out of view as possible. Even though this has a tight stack requirement, the hinging frame mechanism makes this easy to access and work on. I was very close to getting the I-flight XL7 lowrider at around the same weight but with 5mm arms or TBS source one with 7" arms which also has 6mm thick arms but is well over 160g. The Diatone GT-M7 normal x frame is available from Amain Hobbies here
Picture
Airbot Omnibus F4 V6 Flight Controller and Typhoon V2.3 ESC Rather than separate these out I wanted to use a stack for simplicity. A long range build is more demanding on the flight control (and ESC) specs than a racing quad due to the need for extra peripherals like GPS and telemetry for receivers and ESC. For this reason I chose the Airbot Omnibus F4 v6 which has 5 full UARTS plus a very clean 8v BEC just for the VTX. In addition this flight controller also has a fairly accurate barometer which I intend to use for the betaflight rescue mode should things go pear-shaped in flight. For the ESC I matched this with the Airbot Typhoon V2.3 BLHeli32 4in1 ESC which is 6s capable and has all telemetry functions enabled. I've already used these components sucessfully in my HobbyMate Comet racing quad which I reviewed here. There are so many other good options available but the featureset, price and the fact that I've already used these with great success has meant I've gone back to these.
Picture
Runcam Eagle Micro FPV Camera. I've chosen the runcam micro eagle here. For me it has the best image and light handling of any camera I've used and it is amazing in low light should I get caught out. I also considered the foxeer micro arrow pro simply because it has amazing performance for a sub-$25 camera but in this instance I wanted the best possible image regardess of cost. I also considered the Runcam split 2s here but ultimately decided against it due to the poor FPV image quality. The Runcam micro eagle camera is available at Amain Hobbies here.
Picture
HGLRC AIO VTX/DVR If I already had a go pro I might have chosen differently but have chosen the go with the a VTX/DVR combo so I can record flights without static. There are only 3 options here which are all similarly specced: the AKK infinite (which I installed in my Hawk 5), the HGLRC VTX/DVR (which I installed in my HGLRC batman) and the Speedybee which I suspect comes for the same factory as one of the others. I've chosen the HGLRC model for this build as it fits nicely on the 30.5mm stack, has up to 500mW available, has betaflight OSD control and of course has the DVR. I also considered the AKK FX2 ultimate mini and of course the TBS Unify HV. Just a quick note that I've chosen not to go crazy on transmit power because I've focused instead on the receiving end.
Picture
Picture
Clearview Video Receiver and VAS Pepperbox 5.8GHz antenna. I've been very lucky to come across a second hand clearview module (full sized) at great price so will definitely be using this. I know the technology is more suited to eliminating multipathing but havind the receiver on a stationary ground station as opposed to my Aomway Commander goggles will improve reception regardless. I've paired this up with a VAS pepperbox LHCP antenna as I've heard very good things about this model and have been following IB Crazy (Alex Greves) for some time. On the other antenna I'll probably use either an Emax Pagoda 2 antenna (LHCP) or MenaceRC invader patch depdending on how directional my flying is. I also plan to start with a long Emax Pagoda 2 LHCP on the quadcopter to start. In terms of other long range patch antennas I also considered the TrueRC X2 air and the VAS crosshair although the crosshair doesn't have quite the same gain and is less directional. The VAS pepperbox antenna is available from Amain Hobbies here.
Picture
Brother Hobby Returner R6 2306 1660kV motors. This was probably the hardest choice of all. My objective was to run primarly 4s as a cruise but allow up to 6s so wanted to stick around 1600kV-1900kV given I was running 7" props. I wanted to go wider than 22mm stator size to improve efficiency at lower rpm but not hugely so. Stator height I wanted at least 6mm. Oscar Liang has a good discussion of 2306 vs 2207 here. I eventually with with Brother Hobby's newest R6 motor, specifically the 2306 1660kV because I've had good experiences with brother hobby motors before in terms of effciency and performance (like on my floss and HGLRC builds) but the primary reason for the R6 was the 9mm bearings which should have a much longer service life and be more durable than the more common 8mm bearings. I also liked the new propeller 'grip' pads mean I should not have to worry about the props coming loose which I'll admit to being nervous about given the larger lever effect of a 7 inch propeller. There are many notable alternatives including: T-Motor F80 (KV a little too high for me), Emax RS2 2306 1600kV (8mm bearing), 3BR 2407 in 1700kV (not available at the time), 3BT 2306 training 1700kv (these are super value but couldn't find anywhere in stock). The Brother Hobby Returner R6 2306 1660kv motors are available from Amain hobbies here.
Picture
Gemfan 7042 Propellers. So far as I know there are only 4 modern options at present for plastic propellers. There are the Gemfan 7042 bi-blade, the HQ Props 7x3.5x3 and 7x4.5x3 and the Dalprop 7056. I intend to try them all but will start with the Gemfan 7042 as these were more readily available. Update: local suppllier has HQ 7x3.5x3 so I've bought some of them to try as well.
So that about wraps it up for this blog, I'll be back soon with details of the build and of course the review with flight footage. Links will be here as soon as the new article is active. If you found this or any article here useful, please use the like or share button below. All new links to the build will be updated here and on my facebook page: www.facebook.com/QuadifyRC
0 Comments

    Archives

    January 2019
    December 2018

    Categories

    All
    7 Inch
    Airbot
    Amain Hobbies
    Brother Hobby
    Clearview
    Crossfire
    Diatone
    Gemfan
    GPS
    HGLRC
    Iftron
    Parts List
    Rescue Mode
    Setup
    TBS
    VAS

    RSS Feed

Thanks for visiting QuadifyRC.com Follow us on facebook below to get all the latest updates
  • RC Cars
  • Car of the Month
  • Quad Reviews
  • COUPONS AND DISCOUNTS
  • About & Contact